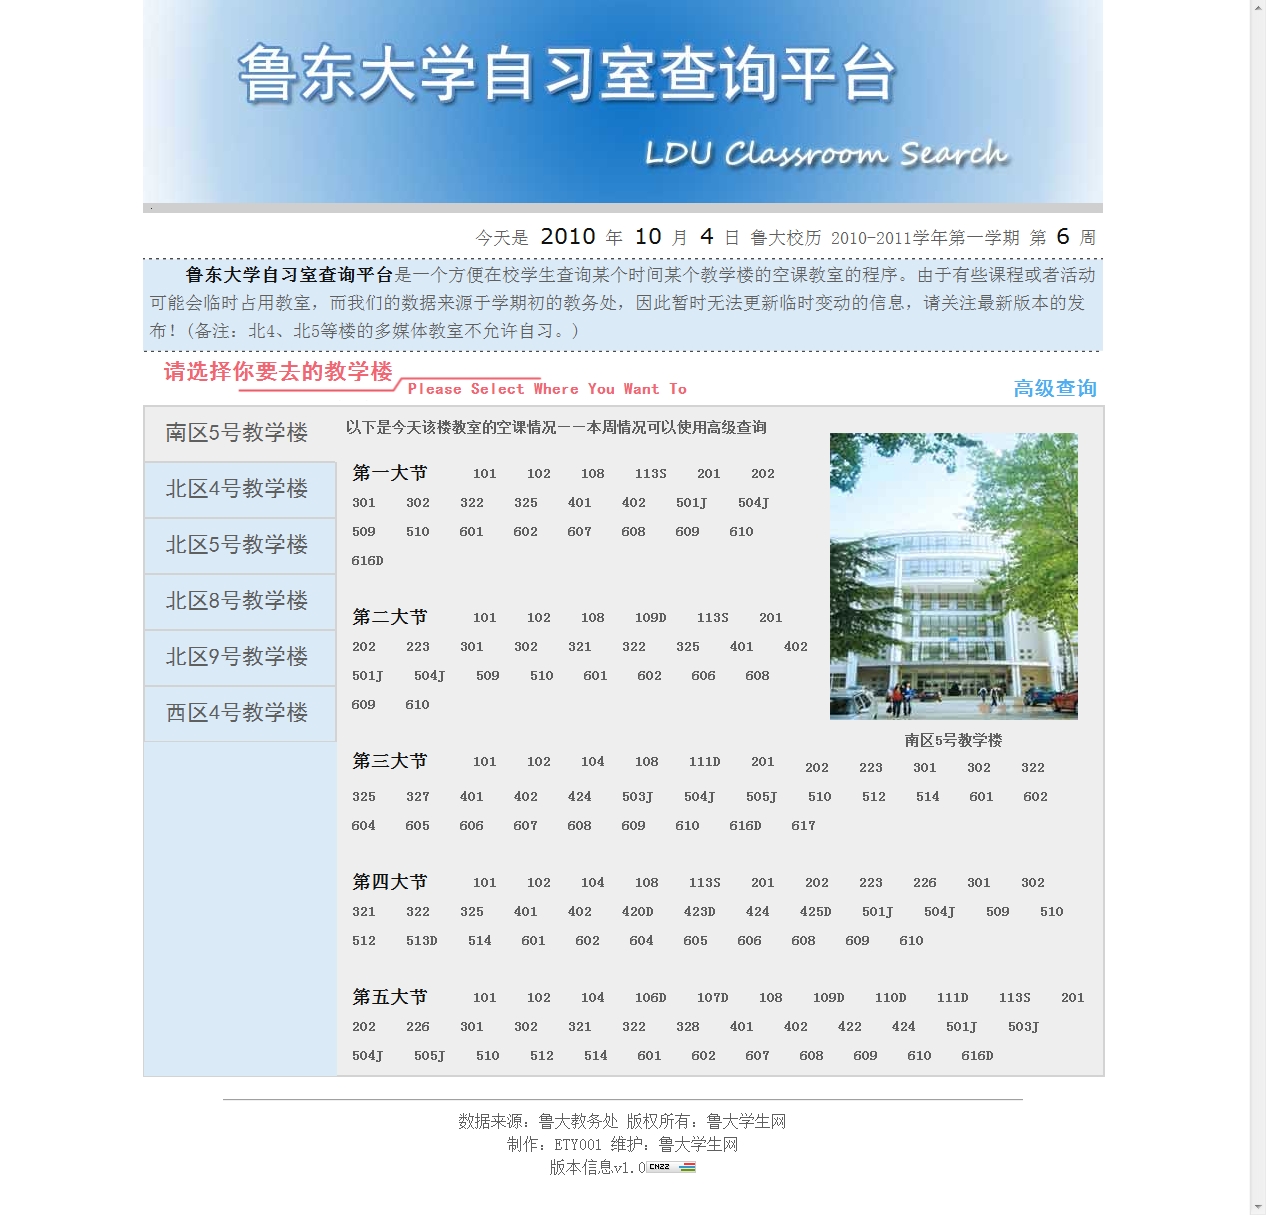
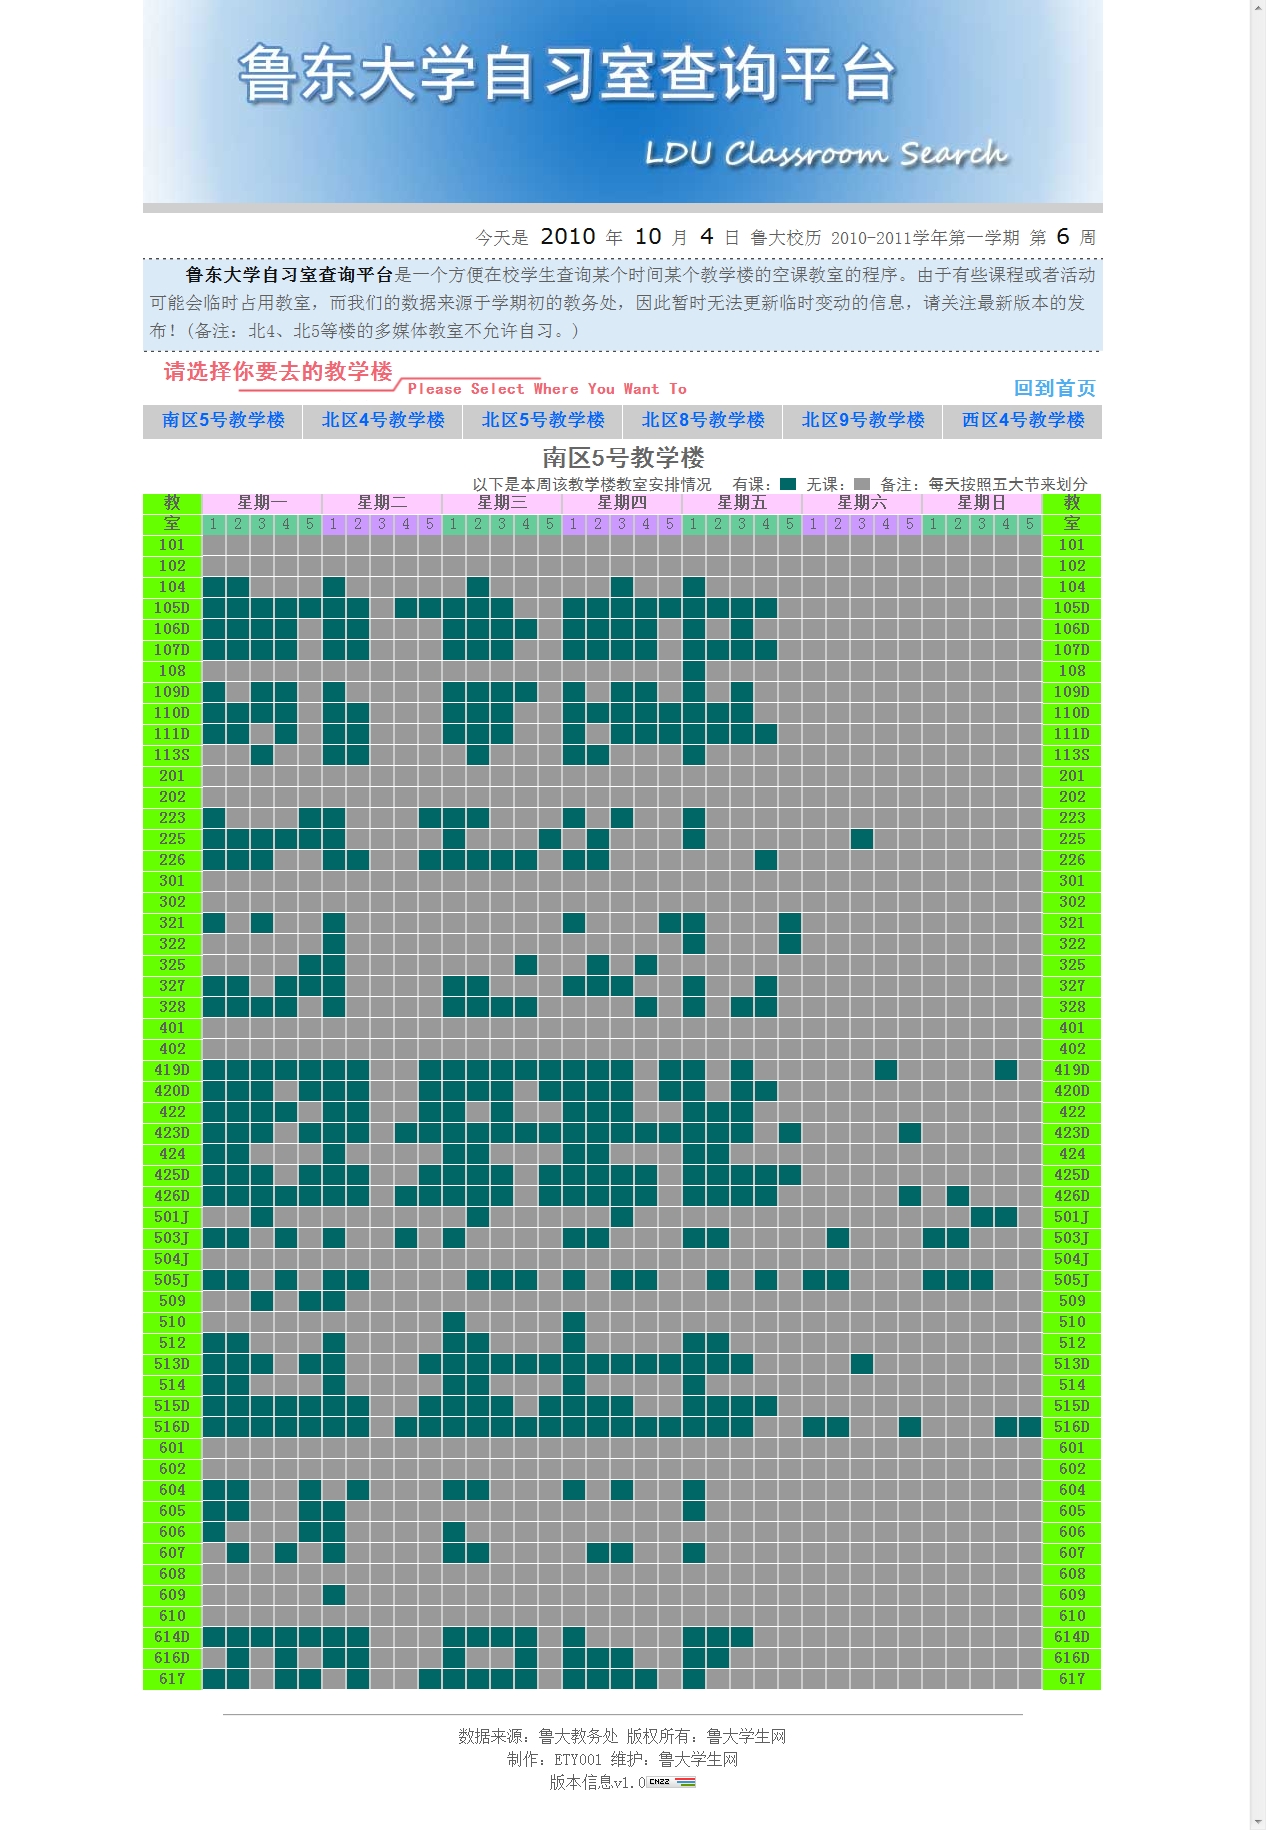
<?xml version="1.0" encoding="utf-8"?>
<search>
  <entry>
    <title>鲁东大学自习室查询平台（由于学校原因，停运）</title>
    <url>/2010/10/04/the-classroom-search-engine-of-ludong-university.html</url>
    <content><![CDATA[<p>程序地址：<a href="http://www.tw.ldu.edu.cn/st/xsh/new/class/">http://www.tw.ldu.edu.cn/st/xsh/new/class/</a>（当前需要手工生成数据）</p>
<p>简单介绍：方便大家查询某个时间段有哪些教室不被使用的网站程序。</p>
<p>有待开发的功能：手机查询，后台管理，加强XML数据。</p>
<p>其他：由于学校教室管理比较松散，导致无法有效更新数据，因此，现在已经停止开发进度。</p>
<p>截图：</p>
<p><img src="/img/3123.jpg" alt="自习室查询平台首页"></p>
<p><img src="/img/3d123.jpg" alt="自习室查询平台高级查询"></p>
]]></content>
      <tags>
        <tag>DM实验室</tag>
      </tags>
  </entry>
  <entry>
    <title>单链表的基本操作</title>
    <url>/2010/10/07/single-list-structure-base-operation.html</url>
    <content><![CDATA[<p>对于已建立的链表，通过头指针可访问整个链表，输出链表中所有结点，统计链表结点个数及插入、删除结点。</p>
<p>下面以刚才建立的单链表为例进行分析，给出相应操作的实现函数。</p>
<pre><code>注意两点：
(1)将链表传递进函数，只需将链表头指针传递进函数。函数的形参对应实参头指针。
(2)对链表的访问用条件循环控制，循环的条件是结点的指针域非空。
</code></pre>
<p>1．<strong>输出链表中所有结点</strong></p>
<figure class="highlight plaintext"><table><tr><td class="code"><pre><span class="line">void print(struct linklist*head)/*输出链表所有结点*/</span><br><span class="line">&#123;</span><br><span class="line">    struct linklist*P;</span><br><span class="line">    p=head;/*P指向链表第一个结点*/</span><br><span class="line">    while(p!=NULL)</span><br><span class="line">    &#123;</span><br><span class="line">        printf(&quot;％d&quot;, p--&gt;data);</span><br><span class="line">        p=p-&gt;next</span><br><span class="line">    &#125;/*P指向下一个结点*/</span><br><span class="line">&#125;</span><br></pre></td></tr></table></figure>

<p>2．<strong>统计链表中结点个数</strong></p>
<p>只需将上述输出结点改成计数即可。</p>
<figure class="highlight plaintext"><table><tr><td class="code"><pre><span class="line">int count(struct linklist*head)/*统计链表中结点个数*/</span><br><span class="line">&#123;</span><br><span class="line">    int n=0;</span><br><span class="line">    struct linklist*P;</span><br><span class="line">    p=head;</span><br><span class="line">    while(p!=NULL)</span><br><span class="line">    &#123;</span><br><span class="line">        n++;</span><br><span class="line">        P=P-&gt;nextl;</span><br><span class="line">    &#125;</span><br><span class="line">    return(n);</span><br><span class="line">&#125;</span><br></pre></td></tr></table></figure>

<p>3．<strong>插入操作</strong></p>
<p>仅讨论将X插入到第i个结点之后的情况，其它情形请读者分析。</p>
<p>先找到第i个结点，然后为插入数据申请一个存储单元，并将插入结点链接在第i个结点后，再将原第i+1个结点链接在插入结点后，完成插入操作。</p>
<figure class="highlight plaintext"><table><tr><td class="code"><pre><span class="line">void ins(struct linklist*head，int i，int x)/*插入结点*/</span><br><span class="line">&#123;</span><br><span class="line">    int j;</span><br><span class="line">    struct linklist*P, *q;</span><br><span class="line">    p=head;</span><br><span class="line">    j=1;</span><br><span class="line">    while( (pj=NULL) &amp;&amp; (j &lt; i) )/*找插入位置*/</span><br><span class="line">    &#123;</span><br><span class="line">        P=p-&gt;next;</span><br><span class="line">        j++;</span><br><span class="line">    &#125;</span><br><span class="line">    q=(struet linklist*)malloc(sizeof(struet linklist));/*产生插入结点*/</span><br><span class="line">    q-&gt;data=x;</span><br><span class="line">    q-&gt;next=p-&gt;next;/’q插入P之后*/</span><br><span class="line">    p-&gt;next=q;</span><br><span class="line">&#125;</span><br></pre></td></tr></table></figure>

<p>本函数可作一些修改，插入成功返回函数值1，插入不成功返回函数值0。</p>
<p>4．<strong>删除操作</strong></p>
<p>假设删除链表中第i个结点，先找到第i—1个结点和第i个结点，然后将第i+1个结点链接在第i一1个结点后，再释放第i个结点所占空间，完成删除操作。</p>
<figure class="highlight plaintext"><table><tr><td class="code"><pre><span class="line">void del(struct linklist*head, int i)/*删除结点*/</span><br><span class="line">&#123;</span><br><span class="line">    int j;</span><br><span class="line">    struct linklist*P, *q;</span><br><span class="line">    P=head;</span><br><span class="line">    j=1;</span><br><span class="line">    while((p != NULL)&amp;&amp; (j &lt; i))/*找第i-1个结点和第i个结点指针q、P*/</span><br><span class="line">    &#123;</span><br><span class="line">        q=p;</span><br><span class="line">        p=p-&gt;next;</span><br><span class="line">        j++;</span><br><span class="line">    &#125;</span><br><span class="line">    if(p==NULL)printf(”找不到结点!”)；</span><br><span class="line">    else</span><br><span class="line">    &#123;</span><br><span class="line">        q-&gt;next=p-&gt;next;/*删除第i个结点*/</span><br><span class="line">        free(p);</span><br><span class="line">    &#125;</span><br><span class="line">&#125;</span><br></pre></td></tr></table></figure>

<p>双链表有两个指针域，一个指针指向左边结点，一个指针指向右边结点，用头指针表示开始结点，用尾指针表示结尾结点。例如：</p>
<figure class="highlight plaintext"><table><tr><td class="code"><pre><span class="line">struct linklist</span><br><span class="line">&#123;</span><br><span class="line">    int data;</span><br><span class="line">    struct linklist*Uink，*rlink;</span><br><span class="line">&#125;;</span><br><span class="line">struct linklist*head *rear;</span><br></pre></td></tr></table></figure>

]]></content>
      <tags>
        <tag>编程语言</tag>
        <tag>后端</tag>
      </tags>
  </entry>
  <entry>
    <title>需要了解的一些文学常识</title>
    <url>/2010/10/05/some-literature-knowledge-you-should-know.html</url>
    <content><![CDATA[<ol>
<li><p>第一位女诗人是：蔡琰（文姬）</p>
</li>
<li><p>第一部纪传体通史：史记</p>
</li>
<li><p>第一部词典是：尔雅</p>
</li>
<li><p>第一部大百科全书是：永乐大典</p>
</li>
<li><p>第一部诗歌总集是：诗经</p>
</li>
<li><p>第一部文选：昭明文选</p>
</li>
<li><p>第一部字典：说文解字</p>
</li>
<li><p>第一部神话集：山海经</p>
</li>
<li><p>第一部文言志人小说集：世说新语</p>
</li>
<li><p>第一部文言志怪小说集：搜神记</p>
</li>
<li><p>第一部语录体著作：论语</p>
</li>
<li><p>第一部编年体史书是：春秋</p>
</li>
<li><p>第一部断代史：汉书</p>
</li>
<li><p>第一部兵书：孙子兵法</p>
</li>
<li><p>文章西汉两司马：司马迁。司马相如</p>
</li>
<li><p>乐府双璧：木兰词 孔雀东南飞，加上《秦妇吟》为乐府三绝</p>
</li>
<li><p>史学双璧：史记 资治通鉴</p>
</li>
<li><p>二拍：初刻拍案惊奇 二刻拍案惊奇 （凌蒙初）</p>
</li>
<li><p>大李杜：李白 杜甫 小李杜：李商隐 杜牧</p>
</li>
<li><p>中国现代文坛的双子星座：鲁迅 郭沫若</p>
</li>
<li><p>三不朽：立德 立功 立言</p>
</li>
<li><p>三代：夏 商 周</p>
</li>
<li><p>《春秋》三传：左传 公羊传 谷梁��</p>
</li>
<li><p>三王：夏禹 商汤 周公</p>
</li>
<li><p>三山：蓬莱 方丈 瀛洲</p>
</li>
<li><p>三教：儒 释 道</p>
</li>
<li><p>三公：周时，司马 司徒 司空    西汉，丞相 太尉 御史大夫     清明，太师 太傅 太保</p>
</li>
<li><p>三曹：曹操 曹丕 曹植</p>
</li>
<li><p>公安三袁：袁宗道 袁宏道 袁中道</p>
</li>
<li><p>江南三大古楼：湖南岳阳楼 武昌黄鹤楼 南昌滕王阁</p>
</li>
<li><p>岁寒三友：松 竹 梅</p>
</li>
<li><p>三辅：左冯翊 右扶风 京兆尹</p>
</li>
<li><p>科考三元：乡试，会试，殿试和自的第一名（解元，会元，状元）</p>
</li>
<li><p>殿试三鼎甲：状元 榜眼 探花</p>
</li>
<li><p>中国三大国粹：京剧 中医 中国画</p>
</li>
<li><p>三言：喻世明言 警世通言 醒世恒言（冯梦龙）</p>
</li>
<li><p>儒家经典三礼：周礼 仪礼 礼记</p>
</li>
<li><p>三吏：新安吏 石壕吏 潼关吏</p>
</li>
<li><p>三别：新婚别 垂老别 无家别</p>
</li>
<li><p>郭沫若 “女神”三部曲：女神之再生 湘果 棠棣之花</p>
</li>
<li><p>茅盾“蚀”三部曲：幻灭 动摇 追求  农村三部曲：春蚕 秋收 残冬</p>
</li>
<li><p>巴金“爱情”三部曲：雾 雨 电  “激流”三部曲：家 春 秋</p>
</li>
<li><p>第一部国别史：国语</p>
</li>
<li><p>第一部记录谋臣策士门客言行的专集：国策 战国策</p>
</li>
<li><p>第一部专记个人言行的历史散文：晏子春秋</p>
</li>
<li><p>第一位伟大的爱国诗人：屈原</p>
</li>
<li><p>第一首长篇叙事诗：孔雀东南飞（357句，1785字）</p>
</li>
<li><p>第一部文学批评专著：《典论·论文》（曹丕）</p>
</li>
<li><p>第一位田园诗人：东晋，陶渊明</p>
</li>
<li><p>第一部文学理论和评论专著：南北朝梁人刘勰的《文心雕龙》</p>
</li>
<li><p>第一部诗歌理论和评论专著：南北朝梁人钟嵘的《诗品》</p>
</li>
<li><p>第一部科普作品，以笔记体写成的综合性学术著作：北宋的沈括的《梦溪笔谈》</p>
</li>
<li><p>第一部日记体游记：明代的徐宏祖的《徐霞客游记》</p>
</li>
<li><p>第一位女词人，亦称“一代词宗”：李清照**</p>
</li>
<li><p>我国第一部长篇讽刺小说：儒林外史</p>
</li>
<li><p>我国第一部介绍进化论的译作：严复译的赫胥黎的《天演论》，他是一个由不懂外，却成了翻译家的人。</p>
</li>
<li><p>我国第一部个人创作的文言短篇小说集：聊斋志异</p>
</li>
<li><p>我国新文学史上第一篇短篇小说是：狂人日记</p>
</li>
<li><p>第一位开拓“童话园地”的作家是：叶圣陶</p>
</li>
<li><p>我国第一部浪漫主义神话小说：西游记</p>
</li>
<li><p>第一篇报告文学作品是：（夏衍）包身工</p>
</li>
<li><p>新中国第一位获得“人民艺术家”称号的作家：老舍 .其作品是； 龙须沟</p>
</li>
<li><p>先秦时期的两大显学是：儒 墨</p>
</li>
<li><p>儒家两大代表人物是：孔丘和孟子，分别被尊至圣和亚圣。</p>
</li>
<li><p>唐代开元，天宝年间，有两大词派，：以高适，岑参为代表的边塞诗 以王维，孟在为代表的其风格，前者雄浑豪，后者恬淡疏朴</p>
</li>
<li><p>常把宋词分为豪放，婉约两派。前者以苏轼，辛弃疾为代表，后者以柳永，周邦彦，李清照为代表。</p>
</li>
<li><p>“五四”新文化运动高举的两面大旗：反对旧礼教，提倡新道德，反对旧文学，提倡新文学</p>
</li>
<li><p>两篇《狂人日记&gt;&gt;的作者分别是：俄罗斯的果戈里 我国的鲁迅</p>
</li>
<li><p>世界文学中有两大史诗：伊利亚特 奥德赛</p>
</li>
<li><p>佛教三宝是：佛（大知大觉的） 法（佛所说的教义）僧（继承或宣扬教义的人）</p>
</li>
<li><p>三从四德中三从：未嫁从父 既嫁从夫 夫死从子  四德：妇德 妇言 妇容 妇功&#x2F;品德 辞令 仪态 女工</p>
</li>
<li><p>初伏，中伏，末伏统称三伏。夏至节的第三个庚日为初伏的第一天，第四个庚日为中伏的第一天，立秋节后的第一个庚日是末伏的第一天。初伏，末伏后十天，中伏十天或二十天。</p>
</li>
<li><p>三纲五常：三纲：父为子纲 群为臣纲 夫为妻纲  五常：仁 义 礼 智 信</p>
</li>
<li><p>三姑六婆：三姑：尼姑 道姑 卦姑  六婆：媒婆 师婆（巫婆） 牙婆 虔婆 药婆 接生婆</p>
</li>
<li><p>三皇五帝：三皇：伏羲 燧人 神农  五帝：黄帝 颛琐 帝喾 尧 舜</p>
</li>
<li><p>三教九流：三教：儒 道 释  九流：儒家 道家 阴阳 法 名 墨 纵横 杂 农</p>
</li>
<li><p>三山五岳：东海里的三座仙山：瀛洲、蓬莱、方丈；  五岳：东岳泰山 南岳衡山 西岳华山 北岳恒山 中岳嵩山</p>
</li>
<li><p>三性：祭祀用的牛羊猪（太牢）（无牛为少牢）</p>
</li>
<li><p>三一律：欧洲古典广义戏剧理论家所制定的戏剧创作原则，就是地点一致，时间一致，情节一致。</p>
</li>
<li><p>佛教三昧：止息杂虑，心专注于一境。（修行方法之一）</p>
</li>
<li><p>佛教三藏：总说根本教义为经，述说戒律为律，阐发教义为论（通晓三藏的叫三藏法师）</p>
</li>
<li><p>三省六部：三省：中书省（决策）门下省（审议）尚书省（执行）  六部：吏 户 礼 兵 刑 工</p>
</li>
<li><p>三苏：苏洵 苏轼 苏辙 三军：上中下&#x2F;左中右&#x2F;海陆空</p>
</li>
<li><p>三吴：吴郡 吴兴 会稽（丹阳） 三国：魏 蜀 吴</p>
</li>
<li><p>三秦：雍王（西） 塞王（东） 瞿王（陕西北）</p>
</li>
<li><p>三楚：港陵－南楚 吴－东楚 彭城－西楚</p>
</li>
<li><p>三原色：红 绿 蓝</p>
</li>
<li><p>三坟五典：三坟：伏羲 神农 黄帝  五典：少昊 颛顼 高辛 唐尧 虞 舜</p>
</li>
<li><p>三体石经：尚书 春秋 左传&#x2F;古文 小篆 汉隶三种字体书写</p>
</li>
<li><p>经典四书：大学 中庸 孟子 论语</p>
</li>
<li><p>四大类书：太平御览 册府元龟 文苑英华 全语文</p>
</li>
<li><p>战国四君：齐国的孟尝君 赵国的平原君 楚国的春申君 魏国的信陵君</p>
</li>
<li><p>初唐四杰：王勃 杨炯 卢照邻 骆宾王</p>
</li>
<li><p>北宋文坛四大家：王安石 欧阳修 苏轼 黄庭坚</p>
</li>
<li><p>元曲四大家：关汉卿 马致远 白朴 郑光祖</p>
</li>
<li><p>明代江南四大才子：唐伯虎 祝枝山 文徵明 周文宾</p>
</li>
<li><p>北宋四大书法家：苏轼 黄庭坚 米芾 蔡襄</p>
</li>
<li><p>楷书四大家：唐－颜真卿 柳公权 欧阳洵 元－赵孟頫</p>
</li>
<li><p>书法四体：真（楷） 草 隶 篆</p>
</li>
<li><p>文房四宝：湖笔 微墨 宣纸 端砚</p>
</li>
<li><p>中国四大藏书阁：北京的文渊阁 沈阳文溯阁 承德文津阁 杭州文澜阁</p>
</li>
<li><p>古代秀才四艺（文人雅趣）：琴 棋 书 画</p>
</li>
<li><p>国画四君子：梅 兰 竹 菊</p>
</li>
<li><p>书四库：经 史 子 集</p>
</li>
<li><p>兄弟四排行：伯（孟） 仲 叔 季</p>
</li>
<li><p>五胡：匈奴 鲜卑 羯 氐 羌</p>
</li>
<li><p>五花：金菊花－卖花女 木棉花－街上为人治病的郎中 水仙花－酒楼上的歌女 火辣花－玩杂耍的 土牛花－某些挑夫</p>
</li>
<li><p>八门：巾－算命占卦的 皮－卖草药的 彩－变戏法的 挂－江湖卖艺的 平－说书评弹的 团－街头卖唱的 洞－搭蓬扎纸的 聊－高台唱戏的</p>
</li>
<li><p>竹林七贤：嵇康 阮籍 山涛 向秀 阮咸 王戎 刘伶</p>
</li>
<li><p>建安七子：孔融 陈琳 王粲 徐千 阮瑀 应瑒 刘桢</p>
</li>
<li><p>七政（七纬）：日 月 金 木 水 火 土</p>
</li>
<li><p>战国七雄：赵 魏 韩 齐 秦 楚 燕</p>
</li>
<li><p>七情：喜 怒 哀 惧 爱 恶 欲</p>
</li>
<li><p>七大古都：北京 西安 洛阳 开封 南京 杭州 安阳</p>
</li>
<li><p>神话八仙：铁拐李 汉钟离 张果老 何仙姑 蓝采和 吕洞宾 韩湘子 曹国舅</p>
</li>
<li><p>唐宋散文八大家：韩愈 柳宗元 欧阳修 苏洵 苏轼 苏辙 王安石 曾巩</p>
</li>
<li><p>文起八代之衰中的八代：东汉 魏 宋 晋 齐 梁 陈 隋</p>
</li>
<li><p>四时八节中的八节指：立春 春分 立夏 夏至 立秋 秋分 立冬 冬至</p>
</li>
<li><p>八卦：乾 坤 震 巽 坎 离 艮 兑分别象征天 地 雷 风 水 火 山 泽</p>
</li>
<li><p>八股文中的八股：破题 承题 起讲 入手 起股 中股 后股 束股</p>
</li>
<li><p>扬州八怪指；汪士慎 李鳝 金农 黄慎 高翔 郑燮 罗聘</p>
</li>
<li><p>九州指：冀 兖 青 荆 扬 梁 雍 徐 豫</p>
</li>
<li><p>九族指：高祖 曾祖 祖父 父 本身 子 孙 曾孙 玄孙</p>
</li>
<li><p>九章指：惜诵 涉江 哀郢 抽思 怀沙 思美人 惜往日 橘颂 悲回风</p>
</li>
<li><p>九歌指：东皇太一 云中君 湘君 湘夫人 大司命 少司命 东君 河伯 山鬼国殇 礼魂</p>
</li>
<li><p>十家指；九流加上小说家</p>
</li>
<li><p>中国历史上十女诗人指：班婕妤（班固之祖姑） 蔡琰 左芬（左思之妹） 苏惠谢道韫 鲍令晖（鲍照之妹） 薛涛 李清照 朱淑贞 秋瑾</p>
</li>
<li><p>中国十大古典悲剧：《窦娥冤》 《赵氏孤儿》 《精忠旗》 《清忠谱》 《桃花扇》《汉宫秋》《琵琶记》《娇红记》《长生殿》《雷峰塔》</p>
</li>
<li><p>中国十大古典喜戏：《救风尘》《玉簪记》《西厢记》《看钱奴》《墙头马上》《李逵负荆》《幽阁记》《中山狼》《风筝误》</p>
</li>
<li><p>十天干：甲 乙 丙 丁 戊 己 庚 辛 壬 癸</p>
</li>
<li><p>中国十部著名歌剧：《白毛女》《王贵和李香香》《小二黑结婚》《刘胡兰》《洪湖赤卫队》《草原之歌》《红霞》《刘三姐》《红珊瑚》《江姐 》</p>
</li>
<li><p>十二地支：子 丑 寅 卯 辰 巳 午 未 申 酉 戌 亥</p>
</li>
<li><p>十二生肖：鼠 牛 虎 兔 龙 蛇 马 羊 猴 鸡 犬 猪</p>
</li>
<li><p>十二时：夜半 鸡鸣 平旦 日出 食时 隅中 日中 日昳 脯时 日入 黄昏 人定</p>
</li>
<li><p>十二律：黄钟 大吕 太簇 夹钟 姑洗 仲吕 蕤宾 林钟 夷则 南吕 无射 应钟</p>
</li>
<li><p>十三经：《易经》《尚书》《诗经》《周礼》《仪礼》《左传》《礼记》《公羊传》《谷梁传》《论语》《孟子》《孝经》《尔雅》</p>
</li>
<li><p>七夕指：七月七日</p>
</li>
<li><p>十恶不赦中的十恶指：谋反 谋大逆 谋叛 恶逆 大道 大不敬 不孝 不睦 不义 内乱</p>
</li>
<li><p>佛教四大名山：五台山 峨眉山 普陀山 九华山</p>
</li>
<li><p>中国四大发明：指南针 造纸术 印刷术 ****</p>
</li>
<li><p>中医四诊：望 闻 问 切</p>
</li>
<li><p>戏曲四行当：生 旦 净 丑</p>
</li>
<li><p>道教四大名山：湖北武当山 江西龙虎山 四川青城山 安徽齐云山</p>
</li>
<li><p>四大石窟：云冈石窟 龙门石窟 麦积山石窟 敦煌莫高窟</p>
</li>
<li><p>黄山四绝：奇松 怪石 云海 温泉</p>
</li>
<li><p>泰山四大奇观：旭日东升 晚霞反照 黄河金带 云海玉盘</p>
</li>
<li><p>中国四大名楼；岳阳楼 黄鹤楼 腾王阁 太白楼</p>
</li>
<li><p>四大古典小说：《三国演义》 水浒传 西游记 红楼梦</p>
</li>
<li><p>四大谴责小说：官场现形记（李宝嘉） 二年目睹之怪现状（吴研人） 老残游记（刘鄂） 孽海花（曾朴）</p>
</li>
<li><p>民间四大传说：牛郎织女 孟姜女寻夫 梁山伯与祝英台 白蛇与许仙</p>
</li>
<li><p>古代四美女：西施（沉鱼） 王昭君（落雁）貂禅（闭月） 杨玉环（羞花）</p>
</li>
<li><p>古代四美：音乐 珍味 文章 言谈&#x2F; &#x2F; 良晨 美景 赏心 乐事</p>
</li>
<li><p>苏门四学士：黄庭坚 秦观 曾补之 张来</p>
</li>
<li><p>四史：史记 汉书 君汉书 三国志</p>
</li>
<li><p>历史上四大书院：庐山白鹿洞 长沙岳麓 衡阳石鼓</p>
</li>
<li><p>商丘应天府</p>
</li>
<li><p>古代祥瑞四灵：龙 凤 麒麟 龟</p>
</li>
<li><p>宋中兴四诗人：陆游 杨万里 范大成 尤袤</p>
</li>
<li><p>科考四级及录取者称谓：院试－秀才 乡试－举人 会试－贡生 殿士－进士</p>
</li>
<li><p>千古文章四大家：韩愈 柳宗元 欧阳修 苏洵 苏轼</p>
</li>
<li><p>有很高史学和文学价值的三史：史记 汉书 后汉书</p>
</li>
<li><p>三班父子：班彪 班固 班昭</p>
</li>
<li><p>三书指：魏书 蜀书 吴书 后人将其合为一本称三国志。</p>
</li>
<li><p>左思的三都赋指：蜀都赋（成都） 吴都赋（南京） 魏都赋（邺）</p>
</li>
<li><p>南朝三谢：谢灵运 谢惠连 谢眺</p>
</li>
<li><p>三瘦词人指：李清照 三个名句是：</p>
</li>
<li><p>莫道不销魂，帘卷西风，人比黄花瘦。</p>
</li>
<li><p>知否，知否？应是肥红瘦。</p>
</li>
<li><p>新来瘦，非千病酒，不是悲秋。</p>
</li>
<li><p>旧书塾使用的三种教本简称为三百千指：三字经 百家姓 千字文</p>
</li>
<li><p>郑板桥（郑燮）的三绝指：绘画 诗作 书法</p>
</li>
<li><p>鲁迅的三部短篇小说集：《呐喊》 《彷徨》 《故事新编》</p>
</li>
<li><p>我国当代文学史上的三大散文作家是：刘白羽 杨朔 秦牧</p>
</li>
<li><p>高尔其的自传体三部曲是：《童年》 《在人间》 《我的大学》</p>
</li>
<li><p>世界作品中三大吝啬鬼指：老葛朗台 夏洛克 泼留希金</p>
</li>
<li><p>老舍小说《四世同堂》也是三部曲指：《惶惑》 《偷生》 《饥荒》</p>
</li>
<li><p>我国古代有四个大城市称四京：东京－汴梁 西京－长安 南京－金陵 北京－顺天</p>
</li>
<li><p>汉字的字音的四种音调叫四声指：平 上 去 入 现代则分为：阴平 阳平 上声 去声</p>
</li>
<li><p>元末明初吴中四杰：高启 杨基 张羽 徐贲</p>
</li>
<li><p>元杂剧的四大爱情剧：《荆钗记》 《白兔记》 《拜月亭》 《杀狗记》</p>
</li>
<li><p>英国莎士比亚的四大悲剧：《哈姆雷特》《李尔王》《奥赛罗》《麦克佩斯》</p>
</li>
<li><p>四言诗是：我国汉代以前最通行的诗歌形式，通章或通篇每句四字。</p>
</li>
<li><p>四体不勤中的四体指：人的四肢</p>
</li>
<li><p>四大皆空是指：（佛语）地水火风组成的宇宙四种元��</p>
</li>
<li><p>管仲把礼义廉耻四道德看作治国的四个纲。</p>
</li>
<li><p>四六文指；骈文的一种，全篇多以四字或六字相间为句，盛行于南朝。</p>
</li>
<li><p>春秋五霸指：齐桓公 晋文公 楚庄公 秦穆公 宋襄公</p>
</li>
<li><p>五等爵位指：公爵 候爵 伯爵 子爵 男爵</p>
</li>
<li><p>五经：诗 书 礼 易 春秋</p>
</li>
<li><p>五行：金 木 水 火 土 &#x2F;仁 义 礼 智 信</p>
</li>
<li><p>五常（五伦）：君臣 父子 兄弟 夫妇 朋友</p>
</li>
<li><p>五教：父义 母慈 兄友 弟恭 子孝</p>
</li>
<li><p>五音：宫 商 角 徵 羽</p>
</li>
<li><p>五刑：（隋前）墨 劓 刖 宫 大辟（隋后）笞 杖 徒 流 死</p>
</li>
<li><p>死的五称：天子－崩 诸候－薨 大夫－卒 士－不禄 平民－死</p>
</li>
<li><p>唐代五大书法家：柳公权 颜真卿 欧阳洵 褚遂良 张旭</p>
</li>
<li><p>五大奇书：《三国演义》《水浒传》《本游记》《红楼梦》《金瓶梅》</p>
</li>
<li><p>五谷：稻 麦 黍 菽 麻</p>
</li>
<li><p>五彩：青 黄 红 白 黑</p>
</li>
<li><p>唐代以后的五代指：后梁 后唐 后晋 后汉 后周</p>
</li>
<li><p>五帝：黄帝 颛顼 帝喾 唐尧 虞舜</p>
</li>
<li><p>五毒：蝎 蛇 蜈蚣 壁虎 蟾蜍</p>
</li>
<li><p>五更与时钟的对应是：一更（19－21） 二更（21－23） 三更（23－1） 四更（1－3） 五更（3－5）</p>
</li>
<li><p>五官：耳 目 口 鼻 身</p>
</li>
<li><p>新中国五位语言大师：郭沫若 茅盾 巴金 老舍 赵树理</p>
</li>
<li><p>五荤：（佛语）大蒜 韭菜 薤 葱 兴��</p>
</li>
<li><p>五岭：越城岭 都庞岭 萌渚岭 骑田岭 大庾岭</p>
</li>
<li><p>五味：甜 酸 苦 辣 咸</p>
</li>
<li><p>五香：花椒 八角 桂皮 丁香花蕾 茴香子</p>
</li>
<li><p>五脏：心 肝 脾 肺 肾</p>
</li>
<li><p>五陵：高祖长陵 惠祖安陵 景帝阳陵 武帝茂陵 昭帝平陵</p>
</li>
<li><p>五湖：洞庭湖 鄱阳湖 太湖 巢湖 洪泽湖</p>
</li>
<li><p>四大洋：太平洋 大西洋 印度洋 北冰洋</p>
</li>
<li><p>六艺经传指：诗 书 礼 易 乐 春秋</p>
</li>
<li><p>通五经贯六艺中的六艺指：礼 乐 书 数 射 御</p>
</li>
<li><p>造字六书：象形 指示 会意 形声 转注 假借</p>
</li>
<li><p>诗经六义措：风 雅 颂 赋 比 兴</p>
</li>
<li><p>六部；户部 吏部 礼部 兵部 刑部 工部</p>
</li>
<li><p>六亲；父 母 兄 弟 妻 子</p>
</li>
<li><p>古代婚嫁六礼：纳采 问名 纳吉 纳徵 清期 亲迎</p>
</li>
<li><p>六朝；吴 东晋 宋 齐 梁 陈都建都建康，史称六朝。</p>
</li>
<li><p>六畜：马 牛 羊 狗 猪 鸡</p>
</li>
<li><p>苏门六君子：黄庭坚 秦观 晁补之 张来 陈师道 李麃</p>
</li>
<li><p>六甲：六十甲子&#x2F;甲子 甲寅 甲辰 甲午 甲申 甲戌&#x2F;妇女怀孕</p>
</li>
<li><p>六尘佛教名词）声 色 香 味 触 法六种境界</p>
</li>
<li><p>六合：天 地 （上下） 东 西 南 北</p>
</li>
<li><p>佛教六根（佛教名词）眼 耳 鼻 舌 身 意**** **</p>
</li>
</ol>
]]></content>
      <tags>
        <tag>杂七杂八</tag>
      </tags>
  </entry>
  <entry>
    <title>今天第一次在猪八戒做任务~留日志纪念一下</title>
    <url>/2010/10/09/first-time-in-zhubajie.html</url>
    <content><![CDATA[<p>今天第一次在猪八戒做任务~留日志纪念一下，不管是否最后能被使用，但这意味着我开始了在威客网做任务的旅程。</p>
<p>下面的就是任务地址啦，也希望各位有账号的同志能去帮忙投个票~</p>
<p><a href="http://www.zhubajie.com/tl_detail-456886-0-0-0-0-1.html">http://www.zhubajie.com/tl_detail-456886-0-0-0-0-1.html</a></p>
]]></content>
      <tags>
        <tag>杂七杂八</tag>
      </tags>
  </entry>
  <entry>
    <title>终于找到了解决编码问题的方案了</title>
    <url>/2010/10/12/encode-bug-resolve.html</url>
    <content><![CDATA[<p>今天终于研究出来了编码问题的解决方案了。</p>
<p>网上多数地方只说了要在UTF-8的文件头加上</p>
<figure class="highlight plaintext"><table><tr><td class="code"><pre><span class="line">&lt;%@LANGUAGE=&quot;VBSCRIPT&quot;   CODEPAGE=&quot;65001%&gt;</span><br></pre></td></tr></table></figure>

<p>在GB2312的文件头加上</p>
<figure class="highlight plaintext"><table><tr><td class="code"><pre><span class="line">&lt;%@LANGUAGE=&quot;VBSCRIPT&quot;   CODEPAGE=&quot;936&quot;%&gt;</span><br></pre></td></tr></table></figure>

<p>以上两种针对ASP页面，其实还有一点都忽略了，就是文件内容本身。</p>
<p>也就是说，如果你一开始是按照UTF-8 来进行的文件编写，那么如果想换成GB2312的话，<br>只是加上<code>&lt;%@LANGUAGE=&quot;VBSCRIPT&quot;   CODEPAGE=&quot;936&quot;%&gt;</code> 是不够的，还需要彻底的把已经编过的文档转换编码才行。<br>如果你仔细观察的话，在DW的源码区中，UTF-8状态下编写的注释符是英文半角状态的单撇，而在GB2312状态下编写的注释符<br>是一个类似中文状态的逗号，并且还有一点，在UTF-8状态中，你会发现源代码中的汉字与英文状态的半角标点的相对位置看上去<br>很别扭，不像是平时书写的样子，比如说逗号都在文字的中间线上，而在GB2312状态下就能正常显示。</p>
<p>另外，转换的方法就是用记事本打开待转化的文件，选择另存为，在最下面选择编码，ANSI是GB2312，UTF-8就不用说了。</p>
]]></content>
      <tags>
        <tag>编程语言</tag>
      </tags>
  </entry>
  <entry>
    <title>关于CSS中的兼容性一句话小结</title>
    <url>/2010/10/12/css-hack-simple-conclusion.html</url>
    <content><![CDATA[<p>很多时候可能是IE与FireFox对于同一个元素的初定义不同造成的成兼容性问题。</p>
<p>解决方案：把元素的margin和padding都设为0。</p>
<p>到目前为止，我所发现出现这种问题的元素有：ul、标题元素（h1、h2等）。</p>
]]></content>
      <tags>
        <tag>前端</tag>
      </tags>
  </entry>
  <entry>
    <title>WordPress搬家折腾记（又：个人建站经验分享~）</title>
    <url>/2010/10/11/wordpress-move-to-new-space.html</url>
    <content><![CDATA[<p>本人这是第一次花钱买空间买域名建立自己的小窝，中间走了太多弯路，现在拿出来和各位分享一下。</p>
<p>起初是在百度上搜索了很多虚拟服务器和域名的信息，最后锁定了红网（<a href="http://www.red.cc/">www.red.cc</a>）的空间，但是由于我自己的一时疏忽，导致了在买空间的时候，买成了国内空间（杯具，当我登录到控制面板时，看到上海服务器时，我满脸黑线啊……），这意味着我如果想绑定我自己买的一级域名就需要去备那个狗屁案。</p>
<p>思考良久，决定再找一个便宜的美国空间，于是乎，在花了280大洋后，又出了100大洋去购买了一个美国空间，可杯具又发生了，空间实际情况和注册的时候是有区别的，简单的说就是我被骗了，这个空间不提供MySql数据库空间，除非自己另外购买（继续黑线）。心想：要不就把博客建设在国内空间里，然后在美国的那个空间里放一个index.html文件，里面用一个<iframe>嵌套一下国内的空间，临时先用着，等一年后，重新买一个好一些的美国空间，然后再转移。</p>
<p>又是一番折腾，弄好了。一切貌似挺顺利，安安稳稳的过了一个星期。说安稳也不算是太安稳，因为在这一个星期的填充博客的过程中发现seo方面的事情几乎都没法进行（虽然我刚开始接触seo，懂得很少，但是动不动就要一级域名确实是很拿人的事情）。另外，在这一个星期中，偶尔美国空间会访问不了（看来便宜没好货，好货不便宜啊）。</p>
<p>就在前天导火索出现了，美国空间彻底登不上去了，联系客服，客服说是因为服务器遭受攻击所以停止了，需要一天左右的时间进行调整。我靠！这是受不鸟了。客服还说，你可以再补个差价升级成高级用户就没事了。我合计了半天，心想既然事已至此，都已经上了贼船了，就再付200升级吧，反正就用这一年，麻烦就麻烦吧，谁让这都是自己找的呢。</p>
<p>这次升级后分配了一个100M的MySql数据库空间。我心想，既然这样我现在就转移个人博客吧。遂在百度上先看看怎么转移WordPress。整个流程还是很简单的，只要把网站备份一下，下载下备份包，然后再进后台，修改设置里的那个域名为新的域名，然后，进入虚拟机控制面板的数据库管理，把数据库打包下载（设置里的那个域名设置存储在数据库的wp_options表中）。从下载下来的网站文件包中把配置文件wp-config.php抠出来，打开，修改里面的数据库信息为新服务器的信息，然后再覆盖进刚才的压缩包。一切准备就绪后，上传网站文件压缩包到服务器解压缩，然后恢复sql文件到数据库，基本上就顺利搞定了。</p>
<p>理论上讲就是这么个顺序，很简单，但是在昨天12个小时的操作中可谓是一波三折，弄得我是心力憔悴啊，最可恶的是还没有成功！下面就细细的讲一讲。</p>
<p>备份文件修改文件都不是问题，很快就搞定了，红网的虚拟机控制面板还是非常好用的。出现的第一个问题就是美国的那个服务器速度超慢，用ftp几乎就上传不动（我的备份压缩包40M左右），上传到1%就出错了。尝试了n种方法后，未果。于是就先看看怎么回复数据库吧。结果跌破眼镜的事情是居然不提供数据库管理！我狂晕！！！联系技术客服，技术客服说自己安装phpMyAdmin或者用Navicat。我下载了一个Navicat，界面感觉上还不错，但是由于服务器速度太慢，导致总是连接不上，就是连上了，也运行sql导入不成功。。。。。。3个多小时过去后，还是不成功，绝望中……突然想到可以用分卷压缩的方式，于是把网站文件重新打包成500KB每个的小包，重新上传。功夫不负有心人，终于开始了上传旅程，每秒不到20kb的速度（黑线啊）……又是很长时间的等待，终于搞定了，用控制面板解压，终于先搞定了网站文件，这个时候，貌似老天终于开眼了（我估计是时差的问题，因为我这里和那个美国服务器大约差14个时区，当时我下午2点左右操作的时候估计美国那边是0点左右，网站流量应该还是比较大的，最主要的问题还是服务器限制速度啊……），数据库终于可以顺利打开并且导入原来的数据了。就在一切看似美好的气氛下，偶激动地输入了<a href="http://www.domyself.me/">www.domyself.me</a>，结果一片空白，状态栏提示完成，查看源文件，显示<html><head></head><body></body></html>。我又尝试后台，这个倒是能顺利进来。结果进入一看，原来安装的插件和外观主题全部没有了，在ftp下看了看，存放插件和主题的文件夹都只有默认安装时的那些文件，迷茫，不知为何？不过这一点说明了为什么主页打不开了，因为我使用的主题不存在。于是，用ftp上传那两个文件夹，可是怎么上传总是有几个文件不成功，此时北京时间已经0：30了，估计是服务器访问量升上去了（时区问题在服务器很烂的情况下反应的很明显啊5555……），睡觉的zzzzzzzz</p>
<p>今天晚饭后，重新开始昨天的工作，结果杯具又一次降临。FTP上不去了，网站也上不去了，结果一问客服，人家说IP地址换了，我无语……重新对域名的解析进行了设置，ftp的信息也修改了一下，剩下的终于很顺利的都搞定了（发现今天改了IP后，貌似上传速度有所提高）。现在终于搞定everything，不过空间的访问速度还是比较慢的，只能忍了，明年一定要买个好空间。</p>
<p>罗里罗嗦写了这么多，希望能对各位新手和菜鸟有帮助~~~如果哪位大仙有好的美国空间，也可以留个言，大家分享一下啊~(<em>^__^</em>) 嘻嘻……</p>
]]></content>
      <tags>
        <tag>网站日志</tag>
      </tags>
  </entry>
  <entry>
    <title>ASP+Access如何判断一个表是否存在</title>
    <url>/2010/10/12/how-to-estimate-a-table-existed-in-access-by-asp.html</url>
    <content><![CDATA[<p>如何准确判断conn1里面有没有名为name1的表？ <br> <br>—————————————————————  </p>
<figure class="highlight plaintext"><table><tr><td class="code"><pre><span class="line">变通办法  </span><br><span class="line">on  error  resume  next  </span><br><span class="line">rs.open  &quot;name1&quot;,conn1  </span><br><span class="line"> </span><br><span class="line">if  not  err.number=0  then  </span><br><span class="line"> Err.Clear      &#x27;清除该错误  </span><br><span class="line">‘这里添加表不存在的处理  </span><br><span class="line">end  if</span><br></pre></td></tr></table></figure>

]]></content>
      <tags>
        <tag>编程语言</tag>
      </tags>
  </entry>
  <entry>
    <title>Asp读取access数据库生成XML文件(gb2312 总穆修正版)</title>
    <url>/2010/10/12/generate-a-xml-file-by-asp.html</url>
    <content><![CDATA[<figure class="highlight plaintext"><table><tr><td class="code"><pre><span class="line">&lt;%@LANGUAGE=&quot;VBSCRIPT&quot; CODEPAGE=&quot;936&quot;%&gt;</span><br><span class="line">&lt;!--Asp读取access数据库生成XML文件(gb2312 总穆修正版) 程序修改自网络 仅帮助新手入门 Zongmu--&gt;</span><br><span class="line">&lt;%</span><br><span class="line">dim conn,connstr,rs,sql</span><br><span class="line">    connstr=&quot;provider=Microsoft.Jet.OLEDB.4.0;data source=&quot;&amp;Server.MapPath(&quot;zongmu_db/zongmu_km.mdb&quot;)&amp;&quot;;&quot;</span><br><span class="line">set conn=Server.CreateObject(&quot;ADODB.Connection&quot;)</span><br><span class="line">set rs=Server.CreateObject(&quot;ADODB.RecordSet&quot;)</span><br><span class="line">    conn.open connstr</span><br><span class="line">%&gt;</span><br><span class="line"></span><br><span class="line">&lt;!-- more --&gt;</span><br><span class="line">&lt;%</span><br><span class="line">if request(&quot;action&quot;)=&quot;zongmu_shengcheng&quot; then</span><br><span class="line"></span><br><span class="line">set conn=Server.CreateObject(&quot;ADODB.Connection&quot;)</span><br><span class="line">set rs=Server.CreateObject(&quot;ADODB.RecordSet&quot;)</span><br><span class="line">    conn.open connstr</span><br><span class="line">sql=&quot;select * from content order by id desc&quot;</span><br><span class="line">    rs.open sql,conn,1,1</span><br><span class="line">xmlfile=Server.MapPath(&quot;test.xml&quot;)</span><br><span class="line">Set fso = CreateObject(&quot;Scripting.FileSystemObject&quot;)</span><br><span class="line">Set MyFile = fso.CreateTextFile(xmlfile,True)</span><br><span class="line"></span><br><span class="line">MyFile.WriteLine(&quot;&lt;?xml version=&quot;&quot;1.0&quot;&quot; encoding=&quot;&quot;gb2312&quot;&quot;?&gt;&quot;)</span><br><span class="line">MyFile.WriteLine(&quot;&lt;config&gt;&quot;)</span><br><span class="line"></span><br><span class="line">do while not rs.eof</span><br><span class="line">MyFile.WriteLine&quot;&lt;item&gt;&quot;</span><br><span class="line">MyFile.WriteLine&quot;&lt;Id&gt;&quot;&amp;rs(&quot;title&quot;)&amp;&quot;&lt;/Id&gt;&quot;</span><br><span class="line">MyFile.WriteLine&quot;&lt;name&gt;&quot;&amp;rs(&quot;name&quot;)&amp;&quot;&lt;/name&gt;&quot;</span><br><span class="line">MyFile.WriteLine&quot;&lt;client&gt;&quot;&amp;rs(&quot;client&quot;)&amp;&quot;&lt;/client&gt;&quot;</span><br><span class="line">MyFile.WriteLine&quot;&lt;url&gt;&quot;&amp;rs(&quot;url&quot;)&amp;&quot;&lt;/url&gt;&quot;</span><br><span class="line">MyFile.WriteLine&quot;&lt;markUp1 href=&quot;&quot;#&quot;&quot;&gt;&quot;&amp;rs(&quot;markUp1&quot;)&amp;&quot;&lt;/markUp1&gt;&quot;</span><br><span class="line">MyFile.WriteLine&quot;&lt;markUp2 href=&quot;&quot;#&quot;&quot;&gt;&quot;&amp;rs(&quot;markUp2&quot;)&amp;&quot;&lt;/markUp2&gt;&quot;</span><br><span class="line">MyFile.WriteLine&quot;&lt;markUp3 href=&quot;&quot;#&quot;&quot;&gt;&quot;&amp;rs(&quot;markUp3&quot;)&amp;&quot;&lt;/markUp3&gt;&quot;</span><br><span class="line">MyFile.WriteLine&quot;&lt;markUp4 href=&quot;&quot;#&quot;&quot;&gt;&quot;&amp;rs(&quot;markUp4&quot;)&amp;&quot;&lt;/markUp4&gt;&quot;</span><br><span class="line">MyFile.WriteLine&quot;&lt;image&gt;&quot;&amp;rs(&quot;image&quot;)&amp;&quot;&lt;/image&gt;&quot;</span><br><span class="line">MyFile.WriteLine&quot;&lt;imgAlt&gt;&quot;&amp;rs(&quot;imgAlt&quot;)&amp;&quot;&lt;/imgAlt&gt;&quot;</span><br><span class="line">MyFile.WriteLine&quot;&lt;content&gt;&quot;&amp;rs(&quot;content&quot;)&amp;&quot;&lt;/content&gt;&quot;</span><br><span class="line">MyFile.WriteLine&quot;&lt;className&gt;&quot;&amp;rs(&quot;className&quot;)&amp;&quot;&lt;/className&gt;&quot;</span><br><span class="line">MyFile.WriteLine(&quot;&lt;/item&gt;&quot;)</span><br><span class="line"></span><br><span class="line">rs.movenext</span><br><span class="line">loop</span><br><span class="line"></span><br><span class="line">MyFile.WriteLine(&quot;&lt;/config&gt;&quot;)</span><br><span class="line"></span><br><span class="line">MyFile.Close</span><br><span class="line"></span><br><span class="line">rs.close</span><br><span class="line">conn.close</span><br><span class="line">set rs=nothing</span><br><span class="line">set conn=nothing</span><br><span class="line">end if</span><br><span class="line">%&gt;</span><br><span class="line"></span><br><span class="line">&lt;!--网页显示部分 并显示XML文件的链接--&gt;</span><br><span class="line">&lt;p&gt;　&lt;/p&gt;</span><br><span class="line">&lt;script language=&quot;javascript&quot;&gt;</span><br><span class="line">&lt;!--</span><br><span class="line"></span><br><span class="line">function ConfirmDel()</span><br><span class="line">&#123;</span><br><span class="line">   if(confirm(&quot;确定要更新XML数据吗? 一旦更新将不能恢复!&quot;))</span><br><span class="line">     return true;</span><br><span class="line">   else</span><br><span class="line">     return false;�</span><br><span class="line">&#125;</span><br><span class="line"></span><br><span class="line">--&gt;</span><br><span class="line">&lt;/script&gt;</span><br><span class="line">&lt;form name=&quot;zongmu&quot; method=&quot;post&quot; action=&quot;?action=zongmu_shengcheng&quot;&gt;&lt;input type=&quot;submit&quot; name=&quot;Submit&quot; value=&quot;更新XML数据为最新&quot; onClick=&quot;return ConfirmDel();&quot;&gt;&lt;/form&gt;</span><br><span class="line">&lt;p&gt;　&lt;/p&gt;</span><br><span class="line">&lt;p&gt;&lt;a href=&quot;test.xml&quot;&gt;查看XML文件内容&lt;/a&gt;&lt;/p&gt;</span><br></pre></td></tr></table></figure>

]]></content>
      <tags>
        <tag>编程语言</tag>
      </tags>
  </entry>
  <entry>
    <title>一个SEO初学者的初学总结</title>
    <url>/2010/10/13/a-conclusion-of-seo-by-newer.html</url>
    <content><![CDATA[<p>最近刚刚搭建起属于自己的博客，心情无比激动，可是一直博客不被各个搜索引擎所索引，甚是头疼。想想在网易、百度这样的网站下面建立个自己的博客，虽然限制很多，但是也是有好处的，好处就是你发表的博文会很快被人搜索到，我想这也跟他们的网站热度有关吧，尽管用户获得的是2级或者3级域名。</p>
<p>于是乎，开始转入SEO的学习。我对这个活现在的理解是，这就是一个细致活，非常考验思考细节的能力和你的耐心。就现在接触的这点内容，我稍作了总结，总结如下：</p>
<pre><code>1. 加强关键字工作，最初级的工作就是如何利用meta标签来开始宣传。以WordPress为例，安装All in one SEO插件就可以很好的解决这个问题。在该插件的设置中，可以对&lt;title&gt;、keyword、description等进行设置，这样就非常的方便了。
2. 加强网站内网页之间的必要联系。这个主要是通过把在文章中的本站标签做成超链接，连接到以该标签分类的页面上的功能，以及边栏或低栏中的最热文章、最新评论等功能，还有文章最后的相关链接来增加网站访问者在该网站的逗留时间，也提高了网站的访问深度。如果你是用的WordPress，你可以尝试安装Keyword Link Plugin插件。
3. 合理的安排布局一些广告或者友情链接，通过他人来提升网站。
4. 最后一条，也是最重要的一条，心无SEO胜似有SEO。什么意思呢？这就是说，作为站长，你的精力应该更多的放在如何增强用户访问你网站的体验上，以及你的网站有多少内容对于大多数人来说有价值，而不是每天总想着应该采取什么措施来提高网站人气。有料才是提升网站人气的关键，SEO只是辅助工作，他只是让用户更容易从你这里找到自己需要的东西。
</code></pre>
<p>以上就是我想和大家分享的一点点SEO心得，还请路过的高人能指点一二。</p>
]]></content>
      <tags>
        <tag>SEO</tag>
      </tags>
  </entry>
  <entry>
    <title>学会理解并编辑fstab  附:my fstab &amp;mbr备份（转载）</title>
    <url>/2010/10/13/learn-how-to-edit-the-fstab.html</url>
    <content><![CDATA[<p>转自：<a href="http://blog.chinaunix.net/u1/39544/showart_308078.html">http://blog.chinaunix.net/u1/39544/showart_308078.html</a></p>
<p>可能玩Linux的朋友都知道fstab这个文件，如果要用好linux，熟悉linux的一些核心配置文件是必要的，而fstab则是其中之一。这个文件描述系统中各种文件系统的信息，应用程序读取这个文件，然后根据其内容进行自动挂载的工作。因此，我们需要理解其中的内容，了解它如何与mount命令配合工作，并能够针对自己的情况进行修改。</p>
<p>作为系统配置文件，fstab通常都位于&#x2F;etc目录下，它包括了所有分区和存储设备的信息，以及它们应该挂载到哪里，以什么样子的方式挂载。如果遇到一些类似于无法挂载你的windows分区阿，无法使用你的光驱阿，无法对某个分区进行写入操作阿什么的，那么基本上可以断定，你的fstab内容有问题了。也就是说，你可以通过修改它来搞定这些问题，而不用去论坛冰天雪地裸体跪求答案了。</p>
<p>说了半天，&#x2F;etc&#x2F;fstab其实就是一个文本文件，用gedit或者vi都可以打开，当然，前提是root权限。在这个文件中，每个文件系统（包括分区或者设备）用一行来描述，在每一行中，用空格或TAB符号来分隔各个字段，文件中以*开头的行是注释信息。Fstab文件中的纪录的排序十分重要。因为 fsck，mount或umount等程序在做它们的工作时会按此顺序进行本。下面进行详细的讲解，本文假设读者已经有挂载文件系统和分区的基础知识。</p>
<p>Table of Contents</p>
<pre><code>1. 第一、二列：设备和默认挂载点
2. 第三列：文件系统类型
3. 第四列：挂载选项
4. 第五、六列：dump和fsck选项
</code></pre>
<p>在讲解之前要说一下，每个人所使用的系统情况都是不同的，包括硬件种类，所用系统等，因此fstab文件肯定是有所差异的。但是其基本结构，如上所述，都不会变。所以我们先以一个fstab内容作为模板进行讲解。</p>
<p>首先请看下面这个例子：</p>
<pre><code>/dev/hda2	/	ext2	defaults	1 1
/dev/hdb1	/home	ext2	defaults	1 2
/dev/cdrom	/media/cdrom	auto	ro,noauto,user,exec	0 0
/dev/fd0	/media/floppy	auto	rw,noauto,user,sync	0 0
proc	/proc	proc	defaults	0 0
/dev/hda1	swap	swap	pri=42	0 0
</code></pre>
<p>这些看起来毫无意义的字符代表了什么？在对应相应分区或者存储设备信息的每一行中，每一列又是什么意思？先大体讲一下，第一列表示设备的名称，第二列表示该设备的挂载点，第三列是文件系统，第四列是挂载选项，第五列是dump选项（用一个数字表示），第六列（接下来的数字）表示文件系统检查选项。好了，接下来，就要详细介绍这些参数的具体含义了。</p>
<p>第一、二列：设备和默认挂载点说实话，第一列和第二列的内容是最简单最直接的，它们的作用就是告诉mount命令，我想挂载什么分区或者什么设备，以及我所希望的挂载点在哪里。在fstab中为某一个设备指定的挂载点是其默认挂载点，也就是当你在挂载目录的时候没有手工指定其他目录的话，系统就将该设备挂载到这个目录。大多数Linux发行版都会为挂载点创建专门的目录，大多数是在&#x2F;mnt下，但是一些发行版（比如SUSE或者ubuntu）是在 &#x2F;media下。笔者使用的是ubuntu，所以示例信息中也是用的&#x2F;media目录。</p>
<p>按照我们给出的fstab示例，如果你敲入命令</p>
<pre><code>$ mount /dev/fd0
</code></pre>
<p>你的软驱就将挂载到&#x2F;media&#x2F;floppy，因为这是你告诉系统的软驱默认挂载点。如果没有这个信息，当你敲入mount命令时，mount会感到很困惑：该死的，你想让我把这玩意挂载到哪里去呢？当然，如果你看fstab中发行版给你指定的默认挂载点不顺眼，也可以自由修改它，修改成任何一个你希望的目录都可以。如果还不存在，就首先创建这个目录。要知道，fstab是不会把所有工作都给你包干的哦。</p>
<p>另外，有一些分区和存储设备是在Linux系统启动的时候就自动挂载的，比如，让我们看看刚才列出来的fstab示例信息，有两行是这样的：</p>
<pre><code>/dev/hda2	/	ext2	defaults	1 1
/dev/hdb1	/home	ext2	defaults	1 2
</code></pre>
<p>正如刚才我们讲到的那样，这两行表示&#x2F;dev&#x2F;hda2默认挂载到&#x2F;根目录，而&#x2F;dev&#x2F;hdb1则默认挂载到&#x2F;home目录，。这些工作在你Linux系统启动的时候就会通过读取fstab自动完成，否则的话……想象你会遭受什么样的折磨吧，所有的程序都在&#x2F;根目录下，而你却无法使用，因为你没有挂载&#x2F;根目录！恩，我保证，这将是一次让人沮丧的系统使用经历。</p>
<p>除了显示的使用设备名，你可以使用设备的UUID或设备的卷标签，例如，你可以在这个字段写成<code>“LABAL=root”</code>或<code>“UUID=3e6be9de- 8139-11d1-9106-a43f08d823a6”</code>，这将使系统更具伸缩性。例如，如果你的系统添加或移除了一个SCSI硬盘，这有可以改变你的设备名，但它不会修改你的卷标签。</p>
<p>对于NFS mount操作，这个字段应该包含host:dir格式的信息，例如:knuth.aeb.nl:&#x2F;，对于进程文件系统procfs，使用proc。</p>
<p>第三列：文件系统类型fstab中的第三列指示了设备或者分区的文件系统类型。它支持很多种类的文件系统，我们在这里只介绍最为常用的。如果想了解你的 kernel目前支持哪些文件系统，可以查看&#x2F;proc&#x2F;filesystems的内容。如果这个字段定义为swap，这条纪录将关联到一个用于交换目的的文件或分区。如果这个字段定义为ignored，这行将被忽略。这对于显示目前没有使用的分区非常有用。</p>
<p>ext2 和 ext3： Linux下的Ext2文件系统，是 GNU&#x2F;Linux系统中标准的文件系统，其特点为存取文件的性能极好，对于中小型的文件更显示出优势，这主要得利于其簇快取层的优良设计。至于Ext3 文件系统，它属于一种日志文件系统，是对ext2系统的扩展。日志式文件系统的优越性在于，它会将整个磁盘的写入动作完整记录在磁盘的某个区域上，以便有需要时可以回朔追踪。由于详细纪录了每个细节，故当在某个过程中被中断时，系统可以根据这些记录直接回朔并重整被中断的部分，而不必花时间去检查其他的部分，故文件系统检测不一致时，重整的工作速度相当快，几乎不需要花时间。</p>
<p>reiserfs：ReiserFS是一个非常优秀的文件系统。也是最早用于Linux的日志文件系统之一，其机制比Ext3要先进得多，风雷小弟一直使用的就是它，很多发行版现在也把它作为默认文件系统了。可惜其作者前段时间出事了……具体情况就不说了，也不知道下一代reiserfs4还能不能出来，因为ext4都有了。</p>
<p>swap： Swap，即交换区，把它想象成虚拟内存就行了。</p>
<p>vfat 和 ntfs：一看就知道是Windows分区格式了，呵呵。98，me等系统都是使用的vfat，也就是最流行的fat32格式，而NT系列则多使用 NTFS，当然也不是固定的，因此2000或者XP系统要具体情况具体分析。当初Linux对NTFS的写入支持不好，所以大多数资料都建议用户使用 vfat格式，但是现在支持已经很好了，即使不重新编译内核，也可以通过ntfs-3g来进行写入支持（具体方法请参考这篇文章），因此不用太在意这个了。</p>
<p>auto：当然，这不是一个文件系统类型。auto只是表示，文件系统的类型将被自动检测。在上面的示例中，你会发现软驱和光驱的文件系统类型都是 auto，为什么呢？因为它们的文件系统类型随时都可能改变，比如软驱，优盘这种设备，可能今天是vfat格式，明天你就把它格式化成了ntfs，因此，最明智的做法就是告诉系统，我没法确定这东西的当前类型，还是你自己检测吧。</p>
<p>udf： 由于刻录光驱越来越流行，现在很多发行版自带的fstab中，光驱的文件格式类型是UDF，UDF是Universal DiscFormat的缩写，与ISO 9660格式相容。它采用标准的封装写入技术（PW，PacketWriting）将CD-R&#x2F;CD-RW当作硬盘使用，用户可以在光盘上修改和删除文件。利用UDF格式进行刻录时，刻录软件将数据打包，并在内存中临时建立一个特殊文件目录表，同时接管系统对光盘的访问。</p>
<p>iso9660： 很多光驱也使用的这个选项。ISO9660是一种描述适合CD盘片的电脑文件结构的国际标准。采用此标准的盘片可以在不同的操作系统上使用，如MAC和Windows。</p>
<p>第四列：挂载选项fstab中的第四列表示设备或者分区所需要的挂载选项。这一列也是fstab中最复杂最容易出错的一列，当然，只要你能知道一些最常用的选项是什么意思，就可以让你从头疼中解脱出来。如果要把可用的选项一项一项介绍……恩，我估计我会写到明天，所以，我还是只是分析最常用的一些选项，如果你想知道更多的东西，还是求助于man吧。</p>
<p>auto 和 noauto： 这是控制设备是否自动挂载的选项。auto是默认选择的选项，这样，设备会在启动或者你使用mount-a命令时按照fstab的内容自动挂载。如果你不希望这样，就使用noauto选项，如果这样的话，你就只能明确地通过手工来挂载设备。</p>
<p>user 和 nouser：这是一个非常有用的选项，user选项允许普通用户也能挂载设备，而nouser则只允许root用户挂载。nouser是默认选项，这也是让很多Linux新手头疼的东西，因为他们发现没有办法正常挂载光驱，Windows分区等。如果你作为普通身份用户遇到类似问题，或者别的其他问题，就请把user属性增加到fstab中。</p>
<p>exec 和 noexec：exec允许你执行对应分区中的可执行二进制程序，同理，noexec的作用刚好相反。如果你拥有一个分区，分区上有一些可执行程序，而恰好你又不愿意，或者不能在你的系统中执行他们，就可以使用noexec属性。这种情况多发生于挂载Windows分区时。exec是默认选项，理由很简单，如果noexec变成了你&#x2F;根分区的默认选项的话……</p>
<p>ro： 以只读来挂载文件系统。<br>rw： 以可读可写的属性来挂载系统。</p>
<p>sync 和 async：对于该文件系统的输入输出应该以什么方式完成。sync的意思就是同步完成，通俗点讲，就是当你拷贝一个东西到设备或者分区中时，所有的写入变化将在你输入cp命令后立即生效，这个东西应该立马就开始往设备或者分区里面拷贝了。而如果是async，也就是输入输出异步完成的话，当你拷贝一个东西到设备或者分区中时，可能在你敲击cp命令后很久，实际的写入操作才会执行，换句话说，就是进行了缓冲处理。</p>
<p>有时候这种机制蛮不错的，因为sync会影响你系统的运行速度，但是这也会带来一些问题。想一想，当你希望将一个文件拷贝到u盘上时，你执行了cp命令，却忘记执行umount命令（它会强行将缓冲区内容写入），那么你拷贝的文件实际上并没有在u盘上面。如果你是使用的mv命令，而你又很快将u盘拔出…… 恭喜你，文件会从这个星球上消失的。因此，虽然async是默认属性，但是对于u盘，移动硬盘这种可移动存储设备，最好还是让他们使用sync选项。</p>
<p>defaults： 所有选项全部使用默认配置，包括rw, suid, dev, exec, auto, nouser, 和 async。<br>一般用户没有特殊需求，直接使用defaults就可以了。看完介绍，我们再回过头去看看前面的示例内容，以光驱为例，主要关注挂载选项这里，可以看到，光驱和其他分区设备的不同是ro，因为普通光驱是只读的。而exec则让你可以从光驱上直接执行某些程序。</p>
<p>第五、六列：dump和fsck选项Dump和fsck？这是什么东西？恩，dump是一个备份工具，而fsck是一个文件系统扫描检查工具。我不会在这里详细介绍它们，因为用man或者google都可以获得更加详细的信息。</p>
<p>fstab的第五列是表示dump选项，dump工具通过这个选项位置上的数字来决定文件系统是否需要备份。如果是0，dump就会被忽略，事实上，大多数的dump设置都是0。而第六列是fsck选项，fsck命令通过检测该字段来决定文件系统通过什么顺序来扫描检查，根文件系统&#x2F;对应该字段的值应该为 1，其他文件系统应该为2。若文件系统无需在启动时扫描检查，则设置该字段为0。</p>
<p>我的 fstab:</p>
<pre><code>/dev/hdc /media/cdrom0 udf,iso9660 user,utf8 0 0

/dev/sdb /media/sdb vfat rw,user,utf8,noauto,sync,umask=0 0 0

/dev/sdb1 /media/sdb1 vfat rw,user,utf8,noauto,sync,umask=0 0 0

/dev/sdc /media/sdc vfat rw,user,utf8,noauto,sync,umask=0 0 0

#LABEL=USB-FAT /media/USB-FAT vfat rw,user,utf8,auto,sync,umask=0 0 0

#LABEL=USB-EXT3 /media/USB-EXT3 ext3 rw,user,auto,sync 0 0

# windows

/dev/sda1 /media/c ntfs-3g silent,umask=0,locale=zh_CN.utf8 0 0

/dev/sda5 /media/d vfat auto,user,utf8,umask=0 0 0

/dev/sda6 /media/e ntfs-3g silent,umask=0,locale=zh_CN.utf8 0 0

/dev/sda7 /media/f ntfs-3g silent,umask=0,locale=zh_CN.utf8 0 0
</code></pre>
<p>附mbr备份命令：</p>
<p>如果你的是IDE硬盘代码:</p>
<pre><code>sudo dd if=/dev/hda of=~/linux.bin bs=512 count=1
</code></pre>
<p>如果你硬盘的被识别为sda 代码:</p>
<pre><code>sudo dd if=/dev/sda of=~/linux.bin bs=512 count=1
</code></pre>
]]></content>
      <tags>
        <tag>Server&amp;OS</tag>
      </tags>
  </entry>
  <entry>
    <title>TCP三次握手/四次挥手详解</title>
    <url>/2010/10/16/tcp-shake-hands.html</url>
    <content><![CDATA[<ol>
<li><p>建立连接协议（三次握手）</p>
<p> （1）客户端发送一个带SYN标志的TCP报文到服务器。这是三次握手过程中的报文1。<br> （2） 服务器端回应客户端的，这是三次握手中的第2个报文，这个报文同时带ACK标志和SYN标志。因此它表示对刚才客户端SYN报文的回应；同时又标志SYN给客户端，询问客户端是否准备好进行数据通讯。<br> （3） 客户必须再次回应服务段一个ACK报文，这是报文段3。</p>
</li>
<li><p>连接终止协议（四次挥手）</p>
</li>
</ol>
<p>由于TCP连接是全双工的，因此每个方向都必须单独进行关闭。这原则是当一方完成它的数据发送任务后就能发送一个FIN来终止这个方向的连接。收到一个 FIN只意味着这一方向上没有数据流动，一个TCP连接在收到一个FIN后仍能发送数据。首先进行关闭的一方将执行主动关闭，而另一方执行被动关闭。</p>
<pre><code>（1） TCP客户端发送一个FIN，用来关闭客户到服务器的数据传送（报文段4）。
（2） 服务器收到这个FIN，它发回一个ACK，确认序号为收到的序号加1（报文段5）。和SYN一样，一个FIN将占用一个序号。
（3） 服务器关闭客户端的连接，发送一个FIN给客户端（报文段6）。
（4） 客户段发回ACK报文确认，并将确认序号设置为收到序号加1（报文段7）。
</code></pre>
<p>CLOSED: 这个没什么好说的了，表示初始状态。</p>
<p>LISTEN: 这个也是非常容易理解的一个状态，表示服务器端的某个SOCKET处于监听状态，可以接受连接了。</p>
<p>SYN_RCVD: 这个状态表示接受到了SYN报文，在正常情况下，这个状态是服务器端的SOCKET在建立TCP连接时的三次握手会话过程中的一个中间状态，很短暂，基本上用netstat你是很难看到这种状态的，除非你特意写了一个客户端测试程序，故意将三次TCP握手过程中最后一个ACK报文不予发送。因此这种状态时，当收到客户端的ACK报文后，它会进入到ESTABLISHED状态。</p>
<p>SYN_SENT: 这个状态与SYN_RCVD遥想呼应，当客户端SOCKET执行CONNECT连接时，它首先发送SYN报文，因此也随即它会进入到了SYN_SENT状态，并等待服务端的发送三次握手中的第2个报文。SYN_SENT状态表示客户端已发送SYN报文。</p>
<p>ESTABLISHED：这个容易理解了，表示连接已经建立了。</p>
<p>FIN_WAIT_1: 这个状态要好好解释一下，其实FIN_WAIT_1和FIN_WAIT_2状态的真正含义都是表示等待对方的FIN报文。而这两种状态的区别是：FIN_WAIT_1状态实际上是当SOCKET在ESTABLISHED状态时，它想主动关闭连接，向对方发送了FIN报文，此时该SOCKET即进入到FIN_WAIT_1状态。而当对方回应ACK报文后，则进入到FIN_WAIT_2状态，当然在实际的正常情况下，无论对方何种情况下，都应该马上回应ACK报文，所以FIN_WAIT_1状态一般是比较难见到的，而FIN_WAIT_2状态还有时常常可以用netstat看到。</p>
<p>FIN_WAIT_2：上面已经详细解释了这种状态，实际上FIN_WAIT_2状态下的SOCKET，表示半连接，也即有一方要求close连接，但另外还告诉对方，我暂时还有点数据需要传送给你，稍后再关闭连接。</p>
<p>TIME_WAIT: 表示收到了对方的FIN报文，并发送出了ACK报文，就等2MSL后即可回到CLOSED可用状态了。如果FIN_WAIT_1状态下，收到了对方同时带 FIN标志和ACK标志的报文时，可以直接进入到TIME_WAIT状态，而无须经过FIN_WAIT_2状态。</p>
<p>CLOSING: 这种状态比较特殊，实际情况中应该是很少见，属于一种比较罕见的例外状态。正常情况下，当你发送FIN报文后，按理来说是应该先收到（或同时收到）对方的 ACK报文，再收到对方的FIN报文。但是CLOSING状态表示你发送FIN报文后，并没有收到对方的ACK报文，反而却也收到了对方的FIN报文。什么情况下会出现此种情况呢？其实细想一下，也不难得出结论：那就是如果双方几乎在同时close一个SOCKET的话，那么就出现了双方同时发送FIN报文的情况，也即会出现CLOSING状态，表示双方都正在关闭SOCKET连接。</p>
<p>CLOSE_WAIT: 这种状态的含义其实是表示在等待关闭。怎么理解呢？当对方close一个SOCKET后发送FIN报文给自己，你系统毫无疑问地会回应一个ACK报文给对方，此时则进入到CLOSE_WAIT状态。接下来呢，实际上你真正需要考虑的事情是察看你是否还有数据发送给对方，如果没有的话，那么你也就可以 close这个SOCKET，发送FIN报文给对方，也即关闭连接。所以你在CLOSE_WAIT状态下，需要完成的事情是等待你去关闭连接。</p>
<p>LAST_ACK: 这个状态还是比较容易好理解的，它是被动关闭一方在发送FIN报文后，最后等待对方的ACK报文。当收到ACK报文后，也即可以进入到CLOSED可用状态了。</p>
<p>最后有2个问题的回答，我自己分析后的结论（不一定保证100%正确）</p>
<p>1、 为什么建立连接协议是三次握手，而关闭连接却是四次握手呢？</p>
<p>这是因为服务端的LISTEN状态下的SOCKET当收到SYN报文的建连请求后，它可以把ACK和SYN（ACK起应答作用，而SYN起同步作用）放在一个报文里来发送。但关闭连接时，当收到对方的FIN报文通知时，它仅仅表示对方没有数据发送给你了；但未必你所有的数据都全部发送给对方了，所以你可以未必会马上会关闭SOCKET,也即你可能还需要发送一些数据给对方之后，再发送FIN报文给对方来表示你同意现在可以关闭连接了，所以它这里的ACK报文和FIN报文多数情况下都是分开发送的。</p>
<p>2、 为什么TIME_WAIT状态还需要等2MSL后才能返回到CLOSED状态？</p>
<p>这是因为：虽然双方都同意关闭连接了，而且握手的4个报文也都协调和发送完毕，按理可以直接回到CLOSED状态（就好比从SYN_SEND状态到 ESTABLISH状态那样）；但是因为我们必须要假想网络是不可靠的，你无法保证你最后发送的ACK报文会一定被对方收到，因此对方处于 LAST_ACK状态下的SOCKET可能会因为超时未收到ACK报文，而重发FIN报文，所以这个TIME_WAIT状态的作用就是用来重发可能丢失的 ACK报文。</p>
]]></content>
      <tags>
        <tag>理论</tag>
      </tags>
  </entry>
  <entry>
    <title>图的深度遍历源代码</title>
    <url>/2010/10/16/traversal-code-of-graph-depth.html</url>
    <content><![CDATA[<p>对于图的深度遍历相信学过数据结构的人都不会陌生吧，有时间，所以写了个图的深度遍历源代码，拿出来给大家分享一下。</p>
<figure class="highlight plaintext"><table><tr><td class="code"><pre><span class="line">#include &lt;stdio.h&gt;</span><br><span class="line">#include &lt;malloc.h&gt;</span><br><span class="line">#define INFINITY 32767</span><br><span class="line">#define MAX_VEX 20 //最大顶点个数</span><br><span class="line">bool *visited;  //访问标志数组</span><br><span class="line"></span><br><span class="line">//图的邻接矩阵存储结构</span><br><span class="line">typedef struct&#123;</span><br><span class="line">  char *vexs; //顶点向量</span><br><span class="line">  int arcs[MAX_VEX][MAX_VEX]; //邻接矩阵</span><br><span class="line">  int vexnum,arcnum; //图的当前顶点数和弧数</span><br><span class="line">&#125;Graph;</span><br><span class="line"></span><br><span class="line">//图G中&lt;!-- more --&gt;查找元素c的位置</span><br><span class="line">int Locate(Graph G,char c)&#123;</span><br><span class="line">  for(int i=0;i&lt;G.vexnum;i++)</span><br><span class="line">  if(G.vexs[i]==c) return i;</span><br><span class="line">  return -1;</span><br><span class="line">&#125;</span><br><span class="line"></span><br><span class="line">//创建无向网</span><br><span class="line"></span><br><span class="line">void CreateUDN(Graph &amp;G)&#123;</span><br><span class="line">  int i,j,w,s1,s2;</span><br><span class="line">  char a,b,temp;</span><br><span class="line">  printf(&quot;输入顶点数和弧数:&quot;);</span><br><span class="line">  scanf(&quot;%d%d&quot;,&amp;G.vexnum,&amp;G.arcnum);</span><br><span class="line">  temp=getchar(); //接收回车</span><br><span class="line">  G.vexs=(char *)malloc(G.vexnum*sizeof(char)); //分配顶点数目</span><br><span class="line">  printf(&quot;输入%d个顶点.\n&quot;,G.vexnum);</span><br><span class="line">  for(i=0;i&lt;G.vexnum;i++)&#123; //初始化顶点</span><br><span class="line">    printf(&quot;输入顶点%d:&quot;,i);</span><br><span class="line">    scanf(&quot;%c&quot;,&amp;G.vexs[i]);</span><br><span class="line">    temp=getchar(); //接收回车 </span><br><span class="line">  &#125;</span><br><span class="line"></span><br><span class="line">  for(i=0;i&lt;G.vexnum;i++) //初始化邻接矩阵</span><br><span class="line">    for(j=0;j&lt;G.vexnum;j++)</span><br><span class="line">      G.arcs[i][j]=INFINITY;</span><br><span class="line"></span><br><span class="line">  printf(&quot;输入%d条弧.\n&quot;,G.arcnum);</span><br><span class="line">  for(i=0;i&lt;G.arcnum;i++)&#123; //初始化弧</span><br><span class="line">    printf(&quot;输入弧%d:&quot;,i);</span><br><span class="line">    scanf(&quot;%c %c %d&quot;,&amp;a,&amp;b,&amp;w); //输入一条边依附的顶点和权值</span><br><span class="line">    temp=getchar(); //接收回车</span><br><span class="line">    s1=Locate(G,a);</span><br><span class="line">    s2=Locate(G,b);</span><br><span class="line">    G.arcs[s1][s2]=G.arcs[s2][s1]=w;</span><br><span class="line">  &#125;</span><br><span class="line">&#125;</span><br><span class="line"></span><br><span class="line">//图G中顶点k的第一个邻接顶点</span><br><span class="line">int FirstVex(Graph G,int k)&#123;</span><br><span class="line">  if(k&gt;=0 &amp;&amp; k&lt;G.vexnum)&#123; //k合理</span><br><span class="line">    for(int i=0;i&lt;G.vexnum;i++)</span><br><span class="line">      if(G.arcs[k][i]!=INFINITY) return i;</span><br><span class="line">  &#125;</span><br><span class="line">  return -1;</span><br><span class="line">&#125;</span><br><span class="line"></span><br><span class="line">//图G中顶点i的第j个邻接顶点的下一个邻接顶点</span><br><span class="line">int NextVex(Graph G,int i,int j)&#123;</span><br><span class="line">  if(i&gt;=0 &amp;&amp; i&lt;G.vexnum &amp;&amp; j&gt;=0 &amp;&amp; j&lt;G.vexnum)&#123; //i,j合理</span><br><span class="line">    for(int k=j+1;k&lt;G.vexnum;k++)</span><br><span class="line">      if(G.arcs[i][k]!=INFINITY) return k;</span><br><span class="line">  &#125;</span><br><span class="line">  return -1;</span><br><span class="line">&#125;</span><br><span class="line"></span><br><span class="line">//深度优先遍历</span><br><span class="line">void DFS(Graph G,int k)&#123;</span><br><span class="line">  int i;</span><br><span class="line">  if(k==-1)&#123; //第一次执行DFS时,k为-1</span><br><span class="line">    for(i=0;i&lt;G.vexnum;i++)</span><br><span class="line">      if(!visited[i]) DFS(G,i); //对尚未访问的顶点调用DFS</span><br><span class="line">  &#125;</span><br><span class="line">  else&#123; </span><br><span class="line">    visited[k]=true;</span><br><span class="line">    printf(&quot;%c &quot;,G.vexs[k]); //访问第k个顶点</span><br><span class="line">    for(i=FirstVex(G,k);i&gt;=0;i=NextVex(G,k,i))</span><br><span class="line">      if(!visited[i]) DFS(G,i); //对k的尚未访问的邻接顶点i递归调用DFS</span><br><span class="line">  &#125;</span><br><span class="line">&#125;</span><br><span class="line"></span><br><span class="line">//主函数</span><br><span class="line">void main()&#123;</span><br><span class="line">  int i;</span><br><span class="line">  Graph G;</span><br><span class="line">  CreateUDN(G);</span><br><span class="line">  visited=(bool *)malloc(G.vexnum*sizeof(bool)); </span><br><span class="line">  printf(&quot;\n深度优先遍历: &quot;);</span><br><span class="line">  for(i=0;i&lt;G.vexnum;i++)</span><br><span class="line">  visited[i]=false;</span><br><span class="line">  DFS(G,-1);</span><br><span class="line">  printf(&quot;\n程序结束.\n&quot;);</span><br><span class="line">&#125;</span><br></pre></td></tr></table></figure>

<p>输出结果为（红色为键盘输入的数据，权值都置为1）：</p>
<figure class="highlight plaintext"><table><tr><td class="code"><pre><span class="line">输入顶点数和弧数:8 9</span><br><span class="line"></span><br><span class="line">输入8个顶点.</span><br><span class="line"></span><br><span class="line">输入顶点0:a</span><br><span class="line"></span><br><span class="line">输入顶点1:b</span><br><span class="line"></span><br><span class="line">输入顶点2:c</span><br><span class="line"></span><br><span class="line">输入顶点3:d</span><br><span class="line"></span><br><span class="line">输入顶点4:e</span><br><span class="line"></span><br><span class="line">输入顶点5:f</span><br><span class="line"></span><br><span class="line">输入顶点6:g</span><br><span class="line"></span><br><span class="line">输入顶点7:h</span><br><span class="line"></span><br><span class="line">输入9条弧.</span><br><span class="line"></span><br><span class="line">输入弧0:a b 1</span><br><span class="line"></span><br><span class="line">输入弧1:b d 1</span><br><span class="line"></span><br><span class="line">输入弧2:b e 1</span><br><span class="line"></span><br><span class="line">输入弧3:d h 1</span><br><span class="line"></span><br><span class="line">输入弧4:e h 1</span><br><span class="line"></span><br><span class="line">输入弧5:a c 1</span><br><span class="line"></span><br><span class="line">输入弧6:c f 1</span><br><span class="line"></span><br><span class="line">输入弧7:c g 1</span><br><span class="line"></span><br><span class="line">输入弧8:f g 1</span><br><span class="line"></span><br><span class="line">深度优先遍历: a b d h e c f g </span><br><span class="line"></span><br><span class="line">程序结束.</span><br></pre></td></tr></table></figure>

]]></content>
      <tags>
        <tag>编程语言</tag>
      </tags>
  </entry>
  <entry>
    <title>如何经营英文站群 并且将网站收益最大化（转）</title>
    <url>/2010/10/18/how-to-manage-english-website-group.html</url>
    <content><![CDATA[<p>中国人太辛苦，拼死拼活也挣不了几个钱，想想一个点击2毛钱还算不错吧，而国外CPC单价普遍比中国高，即使一样的话也是0.2美金，6.7倍的关系，同时以美国为代表的西方国家，网络已经深入百姓家庭，CPA，CPS等广告模式深入人心，很容易推广，我们不妨把眼光放宽一点，在国内网络管理日趋严厉的形式下，可以尝试做一些英文站，在这里，结合我做英文的小小经历，共同探讨一下做英文站特别是站群的赚钱模式。</p>
<p><strong>一、空间和域名选择</strong></p>
<p>做英文站，就千万不要指望国内的IP，国内的IP在英文网站上质量非常低，转化率简直就是零，既然做了英文站，就要把欧美人的IP给吸引过来，那么在选择空间时，尽量选用美国空间，美国空间速度快，价格便宜，IP超多。做英文垃圾站特别是站群时，一定要采用独立IP，有可能的话一个站一个IP，如果做到200个以上的站群时，可以1个IP下放4~5个网站，但这些站千万不能互连。</p>
<p>对于域名，做站群的话，域名的注册信息要不一样，域名注册信息包括所有人名称，邮箱，联系，地址等等，越不一样越好。任何一样的信息都会被搜索引擎知道，也会因此造成域名关联。</p>
<span id="more"></span>

<p><strong>二、程序选择</strong></p>
<p>做英文站，作为小站长，根本不用考虑，程序就用WORDPRESS博客程序，简单好用，模板超多，特别是各种插件，千奇百怪的都有，适合做各种形式的站点，当然，我们说了做垃圾站，也没有必要去选择我们不熟悉的国外CMS，简单的WP就是我们的首选。</p>
<p><strong>三、网站内容</strong></p>
<p>这个是我们头疼的内容，可能很多人说我的E文一窍不通，看见ABC就犯怵，确实不错，但我们可以借助工具呀。比如我们做一个weight loss关键词的站，你可以到GOOGLE（做英文站就不能依赖BAIDU了）搜索FREE ARTICLES（免费文章），出来的结果就是国外一些免费文章站，这些站的文章都是一些软文行家写的，其实说白了就像A5，CHINAZ的文章，到这些文章站搜索关于WEIGHT LOSS的文章，出来一大把，没关系，看都不用看，直接COPY下来，这时候就要技巧了，不是COPY下来就直接发到你的博客里，这样抄袭的文章没有一点价值的，我们需要做的是伪原创，怎么伪原创呢，下面是一些简单方法：</p>
<p>1、用工具：THE BEST SPINNER很好用，国外软件，最好是花钱买一个，不管你怎么弄到手吧，反正这个软件是专门的英文伪原创工具，怎么用自己慢慢搜索吧，我只是给一些提示。</p>
<p>2、用GOOGLE翻译功能：找到一篇文章，然后放到google中翻译成德文，地址：<a href="http://translate.google.com/%EF%BC%8C%E7%84%B6%E5%90%8E%E5%86%8D%E6%8A%8A%E7%BF%BB%E8%AF%91%E7%9A%84%E6%96%87%E7%AB%A0%E9%80%9A%E8%BF%87bing%E5%86%8D%E7%BF%BB%E8%AF%91%E6%88%90%E8%8B%B1%E6%96%87%EF%BC%8C%E5%9C%B0%E5%9D%80%EF%BC%9Ahttp://www.microsofttranslator.com/%EF%BC%8C%E4%B8%BA%E4%BA%86%E8%BF%BD%E6%B1%82%E6%9C%80%E5%A4%A7%E5%8C%96%E7%9A%84%E4%BC%AA%E5%8E%9F%E5%88%9B%EF%BC%8C%E4%BD%A0%E5%8F%AF%E4%BB%A5%E5%A4%9A%E6%9D%A5%E5%87%A0%E6%AC%A1%EF%BC%8C%E5%85%88%E7%BF%BB%E8%AF%91%E6%88%90%E5%BE%B7%E8%AF%AD%EF%BC%8C%E5%86%8D%E7%BF%BB%E8%AF%91%E6%88%90%E6%B3%95%E8%AF%AD%EF%BC%8C%E8%A5%BF%E7%8F%AD%E7%89%99%E8%AF%AD%EF%BC%8C%E6%9C%80%E5%90%8E%E6%8A%98%E8%85%BE%E6%88%90%E8%8B%B1%E6%96%87%EF%BC%8C%E4%B8%8D%E8%BF%87%E6%B3%A8%E6%84%8F%E5%88%AB%E6%90%9E%E4%BB%80%E4%B9%88%E4%BF%84%E8%AF%AD%E3%80%81%E5%8D%B0%E5%B0%BC%E8%AF%AD%E8%BF%99%E4%BA%9B%E8%AF%AD%E7%A7%8D%EF%BC%8C%E8%BF%99%E4%BA%9B%E7%BF%BB%E8%AF%91%E5%90%8E%E5%B0%B1%E8%AF%BB%E4%B8%8D%E4%BA%86%E7%9A%84%E3%80%82">http://translate.google.com/，然后再把翻译的文章通过bing再翻译成英文，地址：http://www.microsofttranslator.com/，为了追求最大化的伪原创，你可以多来几次，先翻译成德语，再翻译成法语，西班牙语，最后折腾成英文，不过注意别搞什么俄语、印尼语这些语种，这些翻译后就读不了的。</a></p>
<p>3、在线伪原创：（国外就是好，什么资源都有）网站地址：<a href="http://articlequeen.com/%EF%BC%8C%E5%8F%AF%E4%BB%A5%E5%9C%A8%E7%BA%BF%E7%94%9F%E6%88%90%E4%BC%AA%E5%8E%9F%E5%88%9B%E6%96%87%E7%AB%A0%EF%BC%8C%E5%80%9F%E5%8A%A9%E5%9C%A8%E7%BA%BF%E7%BF%BB%E8%AF%91%E4%BD%A0%E5%BE%88%E5%BF%AB%E5%B0%B1%E7%9F%A5%E9%81%93%E6%80%8E%E4%B9%88%E5%81%9A%EF%BC%8C%E6%88%91%E5%B0%B1%E4%B8%8D%E5%95%B0%E5%97%A6%E4%BA%86%EF%BC%8C%E5%A4%A7%E6%A6%82%E5%B0%B1%E6%98%AF%E5%85%88%E6%89%BE%E5%87%BA%E6%96%87%E7%AB%A0%E4%B8%AD%E5%90%84%E4%B8%AA%E5%8D%95%E8%AF%8D%E7%9A%84%E5%90%8C%E4%B9%89%E8%AF%8D%EF%BC%8C%E7%84%B6%E5%90%8E%E8%BF%9B%E8%A1%8C%E6%9B%BF%E6%8D%A2%EF%BC%8C%E6%88%91%E4%BB%AC%E9%83%BD%E7%9F%A5%E9%81%93%EF%BC%8C%E8%8B%B1%E6%96%87%E5%8D%95%E8%AF%8D%E7%9A%84%E5%90%8C%E4%B9%89%E8%AF%8D%E5%A4%AA%E5%A4%9A%E4%BA%86%EF%BC%8C%E8%BF%99%E6%A0%B7%E4%B9%9F%E5%B0%B1%E5%8F%AF%E4%BB%A5%E4%BA%A7%E7%94%9F%E5%BE%88%E5%A4%9A%E4%B8%8D%E5%90%8C%E7%9A%84%E5%8E%9F%E5%88%9B%E6%96%87%E7%AB%A0%E6%9D%A5%E3%80%82">http://articlequeen.com/，可以在线生成伪原创文章，借助在线翻译你很快就知道怎么做，我就不啰嗦了，大概就是先找出文章中各个单词的同义词，然后进行替换，我们都知道，英文单词的同义词太多了，这样也就可以产生很多不同的原创文章来。</a></p>
<p>4、直接优质文章的购买，如果你有钱，可以这样做，直接到出售文章的地方购买，一般也不贵，如果你做的站是垃圾站的话，那肯定不建议你去买，如果收益比较好，并且有一定高度的，强烈建议买的文章。</p>
<p>最后你可以到<a href="http://www.copyscape.com/%E4%B8%AD%E7%9C%8B%E4%B8%8B%E8%87%AA%E5%B7%B1%E4%BC%AA%E5%8E%9F%E5%88%9B%E5%90%8E%E7%9A%84%E6%96%87%E7%AB%A0%E7%9B%B8%E4%BC%BC%E6%80%A7%E3%80%82%E4%B9%9F%E5%B9%B6%E4%B8%8D%E6%98%AF%E9%9D%A2%E7%9B%AE%E5%85%A8%E9%9D%9E%E5%B0%B1%E6%9C%80%E5%A5%BD%EF%BC%8C%E6%9C%89%E5%87%A0%E4%B8%AA%E7%9B%B8%E4%BC%BC%E7%9A%84%E6%89%8D%E8%83%BD%E8%AF%B4%E6%98%8E%E6%96%87%E7%AB%A0%E8%BE%83%E5%A5%BD%EF%BC%8C%E6%85%A2%E6%85%A2%E4%BD%93%E9%AA%8C%EF%BC%8C%E6%97%B6%E9%97%B4%E9%95%BF%E4%BA%86%E5%B0%B1%E6%9C%89%E7%BB%8F%E9%AA%8C%E4%BA%86%E3%80%82">http://www.copyscape.com/中看下自己伪原创后的文章相似性。也并不是面目全非就最好，有几个相似的才能说明文章较好，慢慢体验，时间长了就有经验了。</a></p>
<p>（小小提示，你自己去研究）工具THE BEST SPINNER配合SENUKE可以使一篇文章千变万化，做成N篇原创发到多个博客。</p>
<p><strong>四、文章发布</strong></p>
<p>文章发布，我们还是推荐手动发布，WP内置的发布功能就很强大，如果站群实在太多，推荐一个软件吧：LinkFarmEvolution （LFE），其实就是国外的一个博客群发软件，这样就更方便管理多个博客站点了。一般每天发布3<del>5篇伪原创文章到每个站上去就行了，如果站群大，可以一篇伪原创文章发布到4</del>5个不同的博客上。</p>
<p><strong>五、做外链，等待收录</strong></p>
<p>提交GG，RSS FEED和BOOK MARK，国外的免费书签很多，现在中国人做英文站连接业务的也很多，我就不多讲了，其实做英文站GG收录还是挺容易的，收录后，要注意网站持续不断的更新和伪原创，还要注意SEO，WP关于SEO的插件也很多，一般做一个WP博客都会用到以下插件：Google XML Sitemaps；All in One SEO Pack；WP Super Cache；WP Keyword Link。做外链无非就那么几种方法：</p>
<ol>
<li><p>书签网站提交：现在最基本的英文SEO获取外链的方法。</p>
</li>
<li><p>英文文章提交：高质量外链的方法之一，就是英文的软文，难度有点大。</p>
</li>
<li><p>友情链接：最有效并且最容易控制的方法。</p>
</li>
<li><p>论坛留言和签名：最原始也是比较有效的方法，但就是容易被人当做spam删除了，如果做好这一点是最关键的。</p>
</li>
<li><p>Blog评论：英文网站推广比较有效和流行的方法，缺点同上。还有就是找do-follow blog比较难。</p>
</li>
<li><p>买高质量链接：当然有MONEY是前提。</p>
</li>
<li><p>新闻源提交：如果你有新闻来源，这个方法相当强悍。当然难度也是相当的。</p>
</li>
<li><p>网站目录提交：效果已经不是很好，提交到一些质量高的列表或相关的列表就足够了。</p>
</li>
<li><p>制作一些程序的插件或模板（例如Wordpress的）：有能力的可以去试试。</p>
</li>
<li><p>要想省事，还是黑帽吧，这些软件xrumer，senuke，sb都非常不错，但都很贵，并且用好也有一定的难度，需要不断的摸索，掌握了这几个软件的人，非常舒服的坐在家里数钱了！</p>
</li>
</ol>
<p>做好站后，当然是挂GG广告了，另外国外的联盟很多，CJ，CB都是非常著名的公司，信誉好，收益也都不错。</p>
<p>其实，以上介绍的方法还不能说是真正意义上的垃圾站群，这些方法完全可以用心做好几个站，当然也可以做站群，主要是我们运用得当，举一反三，如果彻底的垃圾站，那就完全用AUTOBLOG插件了，其实就是自动采集英文文章，自动发布的那种无人值守网站，但这种站容易被K，但如果你有成千上万的AUTOBLOG就不怕被K几个，这种方法网上很多，自己搜索一下尝试吧！</p>
<p>做站其实都很累，但累的同时希望有所收益，并且将收益最大化，如果做中文站山穷水尽了，就尝试着做英文站吧，如果你想成为专家，经常到BHW论坛溜达溜达吧。多一条路就多一个机会，说不定成功就在眼前！</p>
<p>写得好辛苦，希望有那么一点点启发。</p>
]]></content>
      <tags>
        <tag>SEO</tag>
      </tags>
  </entry>
  <entry>
    <title>初探垃圾站群（转载）</title>
    <url>/2010/10/18/the-group-of-rubbish-websites.html</url>
    <content><![CDATA[<p>垃圾站群是近几年发展起来的一 种盈利模式。我接触站群也纯属意外，当初的想法也很单纯，就是为了自己在操作SEO项目的时候能有更多的外链资源。但慢慢了解到个人站长做站群，也不失为一条较好的出路。下面是我做 站群半年来总结出的一些经验：　　</p>
<p>一、前期的准备以及注意事项</p>
<p>　　1、批量注册域名</p>
<p> 　　一次性注册好域名，这里推 荐使用Godaddy的7元info或.tk免费域名。(如何注册、申请去百度找找教程)做站群成本一定要控制好，前期最好投入的不要太大，投入太大相对压力越大，很多人往往就坚持不下。如果大家担心info、tk域名影响收录大家可以去百度 site:.info site:.tk 当然如果你资金充裕也可以选择com、org域名，但这大大提高了建站成本。</p>
<p>　　2、批量安装好网站程序</p>
<p> 　　这一步往往很多人执行不起 来，很多人在空间、程序上面要花掉大量的时间。有资金的建议购买服务器或者VPS，不该省的不能省，别相信国外的那些美名其曰的无限空间，速度慢、宕机不说，几乎所有空间商都有文件数量限制，这样的空间不适合站群。另外没条件的可以使用Godaddy注册Info域名送的免费空间，虽然有广告，但成本大大降低。然后就是批量安装好网站程序，推荐使用DEDE、帝国、Z-blog等，程序、模板设置的不要过单一。</p>
<p>　　3、选择点站类型</p>
<p> 　　不要选择一些太热的行业， 网站的定位要精准，别老想把垃圾站建成门户。大家可以去慧聪、阿里巴巴找找，比如烫画机、热风机这类完全可以做成独立站点。小领域，大市场，这句话到哪都受用，我们要清楚认清形势，网站定位一定要精准。　　</p>
<p>        4、网站内容</p>
<p> 　　网上有很多站群类软件、工 具，都能非常好的实现网站内容、内部链接，这里我就不多说了，免AD之嫌。</p>
<p>　　5、注意事项</p>
<p> 　　要清楚的认识到你做的是垃 圾站，别在一个站点上花太多时间，别把时间浪费在找程序、改模板上面。别想着你能做成行业巨头，那不是我们想的事情。如何利用现有的资源做到效率最高、风险最小、利润最大才是我们需要思考的问题。不要太在意单个站点被搜索引擎处罚(采集站都会有被K的一天)，同一IP下站点之间不要互相链接，以免K站的时候殃及。新站在百度至少2个月才有点权重，往往很多人都坚持不住，做站群之前最好学习下SEO入门知识。</p>
<p>　　二、站群的盈利模式</p>
<p> 　　6个月时间，通过软件我已 建立了300多个垃圾站，保守的按照一个站100pv，那么100个站也有1万的pv而我选择的都是行业站，adsense的单价也高，按照1%的点击率、0.1美元的单价算，一万pv每天就能为我带来10美元的收入,300个站每天也有30美元的收入。当然实际收入绝不止这些，点击率、流量这些完全可以大幅度提高，另外还可以通过弹窗、淘宝客等把利益最大化。如果有自己产品，通过站群来实现品牌推广、营销也是再好不过了。有人说无图无真相，要看收入截图，我要说的是，是否能成功完全取决个人能力、执行力，同样的事情不同人做就会有不同的结果，如果一味的怀疑别人、依赖于别人能给你多大的帮助，这样的人不管做什么事都不能成功。所以个人能力、执行力跟盈利也是相辅相成的。</p>
<p>　　三、发展前景</p>
<p> 　　这个我不敢断言，本来站群 模式就属于黑帽行为，我们要做的就是如何在搜索引擎大规模处罚之前，最大化的获取利益。最好是利用现在的站群资源，主推自己主站，用心经营，任何站都有出头之日。</p>
<p>　　讲到这里基本就说完了.</p>
]]></content>
      <tags>
        <tag>SEO</tag>
      </tags>
  </entry>
  <entry>
    <title>Google Dance的秘密</title>
    <url>/2010/10/19/google-dancee79a84e7a798e5af86.html</url>
    <content><![CDATA[<p>经常关注网站排名的朋友可能有过这样的经历，突然有一天发现自己网站在GOOGLE上的排名直线下降，甚至于消失——这就有可能是Google Dance。</p>
<p>我们先来了解什么是Google Dance？</p>
<p>Google Dance其实就是指Google重新安排它的搜索结果的排名的过程。通常用于描述Google搜索引擎数据库每月一次的大规模升级，定期更新其索引的活动。<br>我们把这种现象称为Google幽灵现象，由于Google一般每个月对其搜索数据库进行一次更新，在三到五天的Google Dance时期，Google的搜索结果会有大幅度的波动，几乎每一分钟都会有变化。反应在排名结果上，就是就是关键词排名忽上忽下，忽隐忽现，就像是跳舞一样，因此称之为Google Dance</p>
<p>如何判断是否处于Google Dance期？</p>
<p>我们知道Google有很多服务器（<a href="http://www.google.com,www2.google.com,www3.google.com,这是google的三个主要服务器),在更新过程中,所有的服务器都要接受新的索引,但是并非一次性全盘接受,毕竟google拥有8/">www.google.com，www2.google.com，www3.google.com，这是Google的三个主要服务器），在更新过程中，所有的服务器都要接受新的索引，但是并非一次性全盘接受，毕竟Google拥有8</a> 个数据中心，共享着成千上万个网络服务器。因此在这个期间（Dance一般持续三五天的时间，Google Dance通常在月末的那周开始，新结果在月初几天可以看到，大概是每36天一次或者一年10次。<br>所以我们如何判断是否处于Google Dance期，一般只要在不同的服务器查询同样的关键词，如果获得不同特别是较大差距的查询结果数量，一般就可以断定Google正在更新中。当搜索结果数量和排名顺序都相同的话，就表明Google的更新过程已经完成。</p>
<p>SEOer 怎么利用 Google Dance？</p>
<p>Google Dance更新期间，可能同时也会有算法的改变或调整。Google一直为反作弊而努力，一直在不断改进自己的算法。在Google Dance 结束后，站长应该针对排名升降结果和竞争对手的排名情况调整自己的优化策略，作弊并不能取得长久效果，只有认真对待网站优化的每个细节，正规合理地优化，才能无惧于Google每次的Dance调整，才能长期从Google那获得较好的排名。<br>另外，在Google Dance期间，新网站被收录的机会大大增加，SEOer完全可以在此期间提交新的网站以及加大网站的更新力度，为网站能获得更好的排名做准备。</p>
<p>Google Dance查询工具：</p>
<p><a href="http://www.google-dance-tool.com/">http://www.google-dance-tool.com/</a></p>
]]></content>
      <tags>
        <tag>SEO</tag>
      </tags>
  </entry>
  <entry>
    <title>SEO入门书籍推荐</title>
    <url>/2010/10/19/seo-tutorial-books.html</url>
    <content><![CDATA[<h1 id="SEO入门书籍推荐"><a href="#SEO入门书籍推荐" class="headerlink" title="SEO入门书籍推荐"></a>SEO入门书籍推荐</h1><h2 id="《搜索引擎优化-SEO-知识完全手册》"><a href="#《搜索引擎优化-SEO-知识完全手册》" class="headerlink" title="《搜索引擎优化(SEO)知识完全手册》"></a>《搜索引擎优化(SEO)知识完全手册》</h2><p>相对下面一本更系统一些，而且只有50页，字很大，一会就能看完。<br>介绍页面：<a href="http://www.jingzhengli.cn/sixiangku/ebook/2005_hbj_seo.htm">http://www.jingzhengli.cn/sixiangku/ebook/2005_hbj_seo.htm</a><br>下载地址：<a href="http://www.jingzhengli.cn/sixiangku/ebook/2005_hbj_seo.pdf">http://www.jingzhengli.cn/sixiangku/ebook/2005_hbj_seo.pdf</a></p>
<h2 id="《GOOGLE排名秘笈》"><a href="#《GOOGLE排名秘笈》" class="headerlink" title="《GOOGLE排名秘笈》"></a>《GOOGLE排名秘笈》</h2><p>此书售价1200元，但我感觉没有上面这本好。下面是破解版。<br>下载地址：<a href="http://www.chinaseo.org.cn/down/view_106.html">http://www.chinaseo.org.cn/down/view_106.html</a></p>
<p>Kyw强烈建议想SEO入门的朋友，看这2本书，而不是在网上找零散的教程。</p>
<p><strong>更多SEO入门书籍</strong>：<br><a href="http://zhidao.baidu.com/question/22985230.html?si=1">http://zhidao.baidu.com/question/22985230.html?si=1</a><br><a href="http://www.seotest.cn/BLOG/SEO2007-download.html">http://www.seotest.cn/BLOG/SEO2007-download.html</a></p>
]]></content>
      <tags>
        <tag>SEO</tag>
      </tags>
  </entry>
  <entry>
    <title>Web3.0=Web2.0? Web3.0=Web2.0！</title>
    <url>/2010/10/22/web3-0web2-0.html</url>
    <content><![CDATA[<p>今天用手机在网上闲逛的时候，看了一篇关于介绍Web3.0的文章，感觉很神奇。Web2.0的时代才刚刚开始，就要马上迎来Web2.0？回到电脑前的第一件事就是搜索一下Web3.0的相关内容看看。不过看后，我个人觉得其实Web3.0是基本上可以和Web2.0划等号的。</p>
<p>首先来看看我从网上找到的关于web3.0的一些内容。</p>
<h2 id="什么是Web3-0？"><a href="#什么是Web3-0？" class="headerlink" title="什么是Web3.0？"></a>什么是Web3.0？</h2><p>假如说web1.0的本质是联合，那么web2.0的本质就是互动，它让网民更多地参与信息产品的创造、传播和分享，而这个过程是有价值的。web2.0的缺点是没有体现出网民劳动的价值，所以2.0很脆弱，缺乏商业价值。web2.0是脆弱的，纯粹的2.0 会在商业模式上遭遇重大挑战，需要跟具体的产业结合起来才会获得巨大的商业价值和商业成功。web3.0是在web2.0的基础上发展起来的能够更好地体现网民的劳动价值，并且能够实现价值均衡分配的一种互联网方式。</p>
<h2 id="Web3-0到来的前提"><a href="#Web3-0到来的前提" class="headerlink" title="Web3.0到来的前提"></a>Web3.0到来的前提</h2><p>web3.0到来的三个前提：1、博客技术为代表，围绕网民互动及个性体验的互联网应用技术的完善和发展。2、虚拟货币的普及和普遍，以及虚拟货币的兑换成为现实。3、大家对网络财富的认同，以及网络财务安全的解决方案。</p>
<p>web3.0跟web2.0一样，仍然不是技术的创新，而是思想的创新，进而指导技术的发展和应用。web3.0之后将催生新的王国，这个王国不再以地域和疆界进行划分，而是以兴趣、语言、主题、职业、专业进行聚集和管理的王国。到时候真可谓是“皇帝轮流做，明年到我家”，你有机会打造出一个新的互联网王国而成为一个国王，也有可能会在互联网王国的民主竞选中成为总统，到时，你将拥有来自地球各个角落的网络公民。</p>
<h2 id="我的想法"><a href="#我的想法" class="headerlink" title="我的想法"></a>我的想法</h2><p>就像我开头说的，Web3.0是可以和Web2.0划等号的。Web3.0不过是在思想理念上对Web2.0这个大的框架进行了完善，使Web2.0现有的功能更加方便和强大。可能最不同的一点就是你需要拥有一个更加完美的浏览器来做你想做的事情，因为Web3.0中，程序将会进一步网络化。会有越来越多的程序是运行在网页中的，依托于网路而存在。有的资料中讲到Web3.0的互联网将自身转化为一个泛型数据库，里面将会存有各种各样的信息，比如个人信息，公司企业信息等一系列跟生活工作有关的信息，甚至是刚刚说到的那些网络化的应用程序。</p>
<p>我突然想起来了最近腾迅开始测试的新WebQQ，集成了腾迅众多的服务，在网页中提供了类似桌面的操作环境，这似乎有些Web3.0的感觉。<strong>Web3.0给我的感觉是互联网就像是一锅正在熬制的八宝粥，一切提供服务的机构或者个人就像是其中的各种各样的料，综合在一起相互之间既提供自己的味道给别人又把别人的味道揉入自己，最后把成品八宝粥提供给用户。</strong></p>
<p>Web3.0由于比Web2.0更加依赖网络，因此将会具备跨平台、跨硬件的优势，这将更有助于把各个提供服务的个体聚合在一起，为用户提供更加稳定优秀的服务，这将使人们有更加不错的上网冲浪体验。</p>
<p>对于这样一个新奇的概念，我的展望是，个人博客是必不可少的，甚至每个个人博客都将成为那碗八宝粥的一个个米粒，服务商、大的门户网站的信息交互是必不可少的，这种交互将会在Web3.0中更加频繁与重要。</p>
<p>但是细想一下，Web3.0并没有比Web2.0多出什么东西，而仅仅是对Web2.0进行了一定的完善。总之，无论是Web2.0还是Web3.0都很让人憧憬以后的互联网生活的绚丽多彩。</p>
<p>原创博文，转载请附带原文地址，谢谢！</p>
]]></content>
      <tags>
        <tag>杂七杂八</tag>
      </tags>
  </entry>
  <entry>
    <title>近期我的SEO小结</title>
    <url>/2010/10/19/my-conclusion-of-seo.html</url>
    <content><![CDATA[<p>网站运行了一段时间了，百度貌似现在还基本上没开始收录我的DoMyself站的文章，而对于谷歌，由于我使用网站管理员工具提交了站点地图，所以已经收了十多篇文章了，小有成效。</p>
<p>通过这段时间观察统计数据发现，网站流量主要来自与人人网，这跟我使用bShare有很大的关系。并且一篇分享到人人网上的日志被一个访问量高的用户分享后，给我的小站带来的流量是相当可观的。这也许就是为什么大家都在寻找高质量的外链的缘故吧。</p>
<p>但是我发现了一点问题，就是<strong>人均浏览次数</strong>很低，也就刚刚1出头。经过分析，发现有两个问题，一是站内链接做的太少了，二是貌似通过人人进到网站来的用户对于其他的日志不敢兴趣。由于这两点原因，导致了PV很低。今晚在百度上搜索了一下，找了些资料，现在已经实现的是，把长文章进行了分页，加强了站内的标签链接。</p>
<p>首先来说一下文章分页。文章长度大于2000建议分页，否则分页的话效果不好，另外，对于图片日志最好是一张图片一页。这样PV值就明显上去了。</p>
<p>再就是站内标签链接。主要是安装一个WordPress插件，然后设置好后，以后文章中出现相应的词，都会显示为超链接，连接到相应的标签页面。</p>
<p>暂且先写这么多，以后随学随补充。</p>
]]></content>
      <tags>
        <tag>SEO</tag>
      </tags>
  </entry>
  <entry>
    <title>error C2143: 语法错误 : 缺少“;”(在“类型”的前面)</title>
    <url>/2010/10/21/error-c2143.html</url>
    <content><![CDATA[<p>error C2143: 语法错误 : 缺少“;”(在“类型”的前面)</p>
<p>如果习惯了不区分C&#x2F;C++，那么在VS里面编译C的时候遇到这种问题会感到很棘手。</p>
<p>明明是写好的，为什么就会出现这种情况呢？如果用Cpp扩展名就不会出现问题。</p>
<p>写C时，遵循一下两个原则就可以解决上述问题：</p>
<ol>
<li><p>定义结构体变量时前面要加上struct。</p>
</li>
<li><p>变量定义要全部放在最前面，不支持在文件中间定义临时变量。</p>
</li>
</ol>
]]></content>
      <tags>
        <tag>编程语言</tag>
      </tags>
  </entry>
  <entry>
    <title>如何打造一支成熟的业余球队</title>
    <url>/2010/11/01/how-to-build-a-amateur-soccer-team.html</url>
    <content><![CDATA[<p>    1、第一个原则：位置感原则——每一个场上队员时刻提醒自己不能把自己的位置丢了。清楚认识到“在其位谋其政”，队长安排你打什么位置就要履行该位置的进攻以及防守职责。助攻也好，跑位也罢，在进攻中失误被断球对方反击，应第一时间立即就地反抢，延缓对方进攻时间，给队友回撤的机会。一抢不成不可恋战，可迅速回到自己位置上再歇，除非你抽筋受伤倒地。没有体能，再怎么累至少回追三秒。给自己数数：一，二，三秒！如果不是有伤病，一丢球就泄气原地叉腰，慢慢走回来，这种态度坚决杜绝。<br>（个人体会：水平可以锻炼，态度决定一切，进球的不是一个人的功劳，丢球也绝对不是一个人的失误）</p>
<p>   2、第二个原则：重心移动原则——球在左边，球队整体重心移到左边；球在右边整体重心移动到右边。防守的时候边前卫和边后卫往内收缩，进攻的时候往边扩散，充分利用球场宽度。只有全队一起移动，才能形成局部的以多打少。整体补位有多个好处，节省体力，易对敌人形成围抢，局域形成多打少的可能。就算对方控球，也是无效控球，没有形成威胁。</p>
<p> <br>   3、第三个原则：跑动接应原则——所有队员都需要无球跑动起来。踢球最基本的接应意识就是迎球接应，其实，对于任何一个球员，迎球不等球，其实是一个最基本要求，这是意识问题，不是灵感，所以，是可以培养和积累的。接应的要点就在于跑动，三角进攻，三角接应，一个人拿球，相邻位置的三个人必须跑动起来接应。应轮番有一人回撤接应，做成一个动态三角形结构。必须明白：有时候，我们的接应，扯动未必是要球，而是为了给队友创造空挡和机会。<br>（个人体会：队友接应了并形成更加合理的机会，但是却没有及时分球，是对队友的不信任，是对队友不惜力跑动的不尊重，也会影响队友对你的信任，也许从此你就少了一个接应点）<br> <br>   4、战术要点之一：三角攻防——不同的进攻或防守的情况下，都要将双三角的站位进转化。一个原则，临近补位，整体移动。这样下来，攻防为整体化变动，千万不要认为，球离我很远，我不用留意它，到了临近队友时我再补位，往往这个时候已经来不及了，因为队友去补位了，而你没有跟上，形成了空位，会导致全军覆没的。</p>
<p>   5、战术要点之二：套边和反插——当边前卫拿球，边后卫从其身后插上，是一个标准的边后卫套边；后腰拿球，前腰回撤接应，前锋前插，边前卫迅速绕到边路前插，也是一个标准的边前卫套边战术。套边和反插是足球比赛里面边路进攻最常用的战术。反插要求配合的球员只有两个人，套边则要求整体的协调跑位，不是一个人的套边，一次成功的套边战术需要队友配合。套边和反插的目的一个是为了插到对方空挡地区接球并借此扯开对方防线，另一个原因是为了纯属战术的扯动要求，目的是为了吸引对方防守人员，为队友拉出空挡。<br>     <br>   6、 战术要点之三：局部更多的2打1，2打2，直传斜插，斜传直插。局部的配合可以在任何两个相邻近位置的队员之间使用。局部的小配合＋大范围的转移，是每个成熟球队的基本功。<br>   <br>   7、 守门员：拿到球，你就是进攻的发起者，立即跑向大禁区角，两边的边后卫第一时间拉边，同时，后腰前腰开始迅速跑位接应。<br>（个人体会：每个人都应该主动的去做守门员，尝试用门将的眼神看待场上的变化，有利团队，有利个人）    <br>   8、中后卫：一个盯（顶）人，另一个清道夫。两人要互相配合，有人冲上去阻杀，另一个人负责清扫。盯人中卫不要害怕身体对抗和扑球，看准时机出脚要狠，及时封堵。清道夫要留意场上的形势，一旦出现漏洞第一时间反应做出补位。中后卫防守站位原则:1站在内侧，一防一的时候，应站在对方前锋与球门的直线中间；2距离保持在既能够靠近盯住防守对象,又能够首先从防守对象身后得球；3. 要抢断或者绕前防守所有传球不准和传球速度慢的来球；4.如果不能够抢断球,则要努力封堵逼抢球;5.如果不可能封堵逼抢,则要边退缩边防守延缓对手进攻,回撤并站位于对手与本方球门之间的空当. 6.出脚抢球的最好时机是当进攻者试图转身,即半转身的一刹那.此时进攻者既不能很好地用身体掩护球,同时身体重心又处于不稳定之中。</p>
<p>   9、边后卫：边后卫防守的主要职能是：盯住进入本防区的进攻队员，不让对手个人运球突破或通过配合突破，保护中路防区。当球在异侧活动并且中卫队员靠向异侧时，及时向中路靠拢；当中路被突破时迅速补位，同其他后卫队员保持默契联系；当拖后中卫制造越位时，应同步行动。在对方边路进攻时要站在对方球员和球门的连线，防止对方球员远射。对方突破时要卡住内线的身位，将其迫向角旗区。对方反击时，不要轻易上扑。注意和中后相互补位。<br>（个人体会：边后卫有很多的机会参与第一波的进攻转化，无论自己的攻击性有多强，自己的本职还是后卫，队伍的荣誉和每个人都是密不可分的，优秀不一定体现在进球）      <br>   10、单后腰，双后腰：如果是单后腰，防守的时候与前腰平行站位，进攻时主要时固守中间枢纽地带。双后腰时呈左右平行站位，但二者要有分工，可以灵活换位，在边路出现空档的时候及时移动补位，但一定要保证有一个后腰在中间作为中卫前的屏障，避免对方球员直接面对中后卫。后腰要控制整个球队的攻防节奏，不能只会往前传，而要更多的跟后场和边前卫做呼应及配合。<br>（个人体会：球队的灵魂、屏障，球队攻防的指挥官）    <br>      <br>   11、 边前卫：在防守上必须具备以下能力： ①个人抢断和与同伴夹击、围抢的能力。 ②在整体和局部防守意识支配下的保护与补位能力，诸如前卫间的相互补位，与后卫间的保护与补位等。 ③迅速转入防守或进攻的往返奔跑体力和意识。阵地防守中，职责应该是盯防对方边卫压上助攻。并封堵其向心脏地带传球得线路。进攻时，可以区分两个体系： A&#x2F;反击时，此时对方防守体系空隙大，应迅速前插占领无人空白地带。在对手不及回防时给予其致命一击，强调的是时间差。持球者分球要果断，避免前插者越位。前插人选不要拘泥于前后场之分，任何最接近对方危险地带队员，都可迅速前插跑位以争取时间。<br>   B&#x2F;阵地进攻，应尽量利用场地宽度横向扯动，跑出持球队友可以传出球的线路。中锋和边锋不要在一条线路上重叠，应有意识地错位跑动，必要时相互换位。但是三个人的位置不要都急于顶上去，以至于形成一条直线，这样会造成前后脱节。应轮番有一人回撤接应，做成一个动态三角形结构。<br> <br> <br>   12、单前锋：单前锋战术里面的前锋的职责不是为了进球，而是起到更多的是做球和牵引对方中后卫的作用，为前腰和别的前插队员制造杀机，通常需要背对球门接球，而防守方只求破坏，且正对来球。因此进攻队员（尤其是策应型中锋）更需要有一个迎球的意识，无论是背对球门还是侧身。所以这个时候他作为一个前锋的回做球再反插就很重要。当由攻转守时，作为第一道防线，中锋应积极干扰破坏对方的进攻。如果对手进攻发动于自身附近，中锋应迅速跟上延缓时方推进速度，防止对方发动快速反击或见机行事，积极干扰和拼抢。一以迫使持球者无法组织进攻。双前锋：不能离得太远。两个前锋经常要做相互间的配合，才能有威胁。双前锋的职责还需要有时候往边路扯动，充当一个边锋的位置。防守的时候卡住对方两个后腰的传球路线。<br>   <br>   13、前锋的跑位：优秀的前锋经常会用横向扯动，突然前插的方法来摆脱后防线。接应边路传中，尽量抢前点。接球尽量往中路停球（这个很重要，一个优秀的前锋，他的每一次停球都是有目的的，停球往中路，为了争取更大的射门角度）。</p>
]]></content>
      <tags>
        <tag>杂七杂八</tag>
      </tags>
  </entry>
  <entry>
    <title>今天正式更换网站主题</title>
    <url>/2010/11/09/today-change-my-blog-theme.html</url>
    <content><![CDATA[<p>由于之前采用的主题真的是烂到家了，尤其是对于第一次访问网站的人来说非常的不友好，所以不得不对主题进行更换。希望更换网站主题后，能带给各位看官以清新的感觉。</p>
<p>这两天宿舍网到期了，所以博客的更新就受到了影响。不过我也正好利用这个时间回顾一下建站两个月来的经历，总结一下经验，毕竟网站建站两个月经历了太多的事情，而现在网站的访问量也上不去，当前的网站存在问题。我初步思考结果应该是网站的定位貌似出现了一些问题。这个问题可能会在近期进行处理。这些事情都会在宿舍网正常后，写文章说明的。</p>
<p>大家可以在本页留言，提出建议~</p>
]]></content>
      <tags>
        <tag>网站日志</tag>
      </tags>
  </entry>
  <entry>
    <title>Just a Dream - Jason Chen/Joseph Vincent Cover</title>
    <url>/2010/11/17/just-a-dream-jason-chen-joseph-vincent-cover.html</url>
    <content><![CDATA[<h3 id="Just-a-Dream-Jason-Chen-Joseph-Vincent-Cover"><a href="#Just-a-Dream-Jason-Chen-Joseph-Vincent-Cover" class="headerlink" title="Just a Dream - Jason Chen Joseph Vincent Cover"></a>Just a Dream - Jason Chen Joseph Vincent Cover</h3><p>最近一直在听这首歌，我感觉比原唱更有感觉。尤其是在自己家能够搭建一个录音棚，一直都是我的梦想，更何况还有一个圈子里的好友一起来做大家都感兴趣的事情，这一点很炫。之前还看到过像耶鲁男的一些翻唱作品，比如翻唱Own City的《<a href="http://v.youku.com/v_show/id_XMTkwNjQ2NjMy.html">Fireflies</a>》。都是一些国外大学的爱好音乐创作的大学生利用课余时间打造出来的，而反观国内虽然也有很不错的作品，但是看上去总是有很远的差距。我觉得这主要就是跟中国当前的教育大环境有关，错误的人才选拔方式导致了错误的价值观，进而就导致了错误的成功观。什么才是成功？我想这个问题更应该引起中国的大学生的反思。</p>
]]></content>
      <tags>
        <tag>杂七杂八</tag>
      </tags>
  </entry>
  <entry>
    <title>关于IP地址计算方法</title>
    <url>/2010/11/18/ip-address-caculating-way.html</url>
    <content><![CDATA[<p>以3707788881为例</p>
<p>首先换算成2进制数字11011101000000000101111001010001</p>
<p>然后平均分成4组.11011101.0000000.01011110.01010001</p>
<p>每组换算成10进制数字221.0.94.81</p>
<p>221.0.94.81这个就是IP。</p>
<p>要是知道IP地址又怎么算回到这个数字？</p>
<p>先把所有IP算成2进制数字。然后把32个连接起来，再换算成10进制。</p>
]]></content>
      <tags>
        <tag>理论</tag>
      </tags>
  </entry>
  <entry>
    <title>我的个人博客终于恢复正常了</title>
    <url>/2010/12/25/my-blog-has-recovery.html</url>
    <content><![CDATA[<p>网站终于恢复正常了，这一两个多月实在是太忙了，先是一直与校团委老师协商网络部的去留问题，然后再是成立了一个民间组织LDUUG（鲁大ubuntu用户群），最近这两三个星期在忙碌着搭建鲁大学生网及其子应用121部落。由于是太忙了，实在是抽不出时间来打点自己的博客，导致博客自从服务器宕机后，就一直不能被正常访问。就这次事情，我总结了一下：</p>
<p>首先就是网站备份的问题。由于12月3号的备份包出现了问题，导致了服务器出现问题更换服务器后，网站只能从11月中旬的备份包恢复，而又赶上wordpress升级到3.0.3， 很荣幸，我自动升级完后，博客首页就打不开了……各种无语和无奈外加上一直在忙，所以就暂时放弃了博客的恢复。所以以后对于备份包要认真的检查一下。</p>
<p>其次就是万幸的事情了，那就是我的日志都在火烧网上有，因为当时绑定了，所以我之前发的日志在火烧网我的页面上都有，于是我欣喜若狂，把丢失的那部分日志都补了回来，真的是万幸。</p>
<p>最后要说的就是，期末考试马上就要开始了，估计又要近一个月不能更新博客了。</p>
]]></content>
      <tags>
        <tag>网站日志</tag>
      </tags>
  </entry>
  <entry>
    <title>16天记住7000考研词汇,背短句记单词~</title>
    <url>/2010/11/19/16-days-remember-7000-words.html</url>
    <content><![CDATA[<p><strong>背单词的最好办法就是在语境中记忆，这些短句会帮助你记住应该会的单词。</strong></p>
<p><strong>16天记住7000考研词汇（第一天）</strong></p>
<ol>
<li><p>With my own ears I clearly heard the heart beat of the nuclear bomb.<br>我亲耳清楚地听到原子弹的心脏的跳动。</p>
</li>
<li><p>Next year the bearded bear will bear a dear baby in the rear.<br>明年,长胡子的熊将在后方产一头可爱的小崽.</p>
</li>
<li><p>Early I searched through the earth for earth ware so as to research in earthquake.<br>早先我在泥土中搜寻陶器以研究地震.</p>
</li>
<li><p>I learn that learned earnest men earn much by learning.<br>我得知有学问而认真的人靠学问挣很多钱.</p>
</li>
<li><p>She swears to wear the pearls that appear to be pears.<br>她发誓要戴那些看起来像梨子的珍珠。</p>
</li>
<li><p>I nearly fear to tear the tearful girl’s test paper.<br>我几乎害怕撕那个泪流满面的女孩的试卷.</p>
</li>
<li><p>The bold folk fold up the gold and hold it in hand.<br>大胆的人们将黄金折叠起来拿在手里。</p>
</li>
<li><p>The customers are accustomed to the disgusting custom.<br>顾客们习惯了令人讨厌的风俗.</p>
</li>
<li><p>The dust in the industrial zone frustrated the industrious man.<br>工业区里的灰尘使勤勉的人灰心.</p>
</li>
<li><p>The just budget judge just justifies the adjustment of justice.<br>公正的预算法官只不过为司法调整辩护而已。</p>
</li>
<li><p>I used to abuse the unusual usage, but now I’m not used to doing so.<br>我过去常滥用这个不寻常的用法,但我现在不习惯这样做。</p>
</li>
<li><p>The lace placed in the palace is replaced first, and displaced later.<br>放在皇宫的带子先被替换，后来被转移。</p>
</li>
<li><p>I paced in the peaceful spacecraft.<br>我在宁静的宇宙飞船里踱步.<span id="more"></span></p>
</li>
<li><p>Sir, your bird stirred my girlfriend’s birthday party.<br>先生,你的鸟搅了我女友的生日聚会。</p>
</li>
<li><p>The waterproof material is suitable for the aerial used near the waterfall.<br>这种耐水材料适合用在瀑布附近的天线.</p>
</li>
<li><p>I hint that the faint saint painted the printer with a pint of paint.<br>我暗示说虚弱的圣徒用了一品脱油漆涂印刷机.</p>
</li>
<li><p>At any rate, the separation ratio is accurate.<br>无论如何,这个分离比是精确的.</p>
</li>
<li><p>The boundary around the round ground separates us from the surroundings.<br>围绕着圆形场地的边界将我们同四周隔开.</p>
</li>
<li><p>The blunder made the underground instrument undergo an undermining of the thunderbolt.<br>这个失策让地下仪器经受了一次雷电的破坏。</p>
</li>
<li><p>The tilted salt filters halt alternately for altering.<br>倾斜的盐过滤器交替地停下以便改造.</p>
</li>
<li><p>The wandering band abandoned her bandaged husband on Swan Island.<br>流浪的乐队把她那位打着绷带的丈夫遗弃在天鹅岛上.</p>
</li>
<li><p>The manly Roman woman manager by the banner had man’s manner.<br>军旗旁那位有男子气概的古罗马女经理具有男子风度.</p>
</li>
<li><p>In the lane the planer saw a planet airplane under the crane.<br>在巷道里,刨工看见了起重机下的行星飞机.</p>
</li>
<li><p>The wet pet in the net hasn’t got on the jet plane yet.<br>网中的湿宠物还没有登上喷气飞机.</p>
</li>
<li><p>After maintenance the main remains and remainders are left on the domain.<br>维修之后,主要遗骸和剩余物留在了领地上.</p>
</li>
<li><p>The grandson branded the brandy randomly.<br>孙子给白兰地随机地打上烙印。</p>
</li>
<li><p>The landlord’s land on the highland of the mainland expanded a lot.<br>地主在大陆高原上的土地扩张了很多.</p>
</li>
<li><p>Utilize the fertilizer to keep the land fertile.<br>利用化肥保持土地肥沃.</p>
</li>
<li><p>The grand commander demands thousands of sandy sandwiches.<br>大司令官要成千个沙色三明治。</p>
</li>
<li><p>I infer that he is indifferent to differentiating the offers in different conferences.<br>我推断他对区分不同会谈中的报价漠不关心.</p>
</li>
<li><p>The maximum plus or minus the minimum makes minute difference.<br>最大值加上或者减去最小值只产生极小的差异.</p>
</li>
<li><p>The witty witness withdraws his words within minutes without any reason.<br>诙谐的证人在几分钟之内无故地收回了他说的话.</p>
</li>
<li><p>The cake maker shakes a naked snake with the quaking rake without sake.<br>蛋糕制造者无缘无故地用抖动的耙子摇一条赤裸的蛇.</p>
</li>
<li><p>By the crook, the cook looked through a cookbook before making hooked cookies.<br>在溪边，厨子在做钩形饼干之前查阅了一本食谱。</p>
</li>
<li><p>The writer writes the white book quite quietly in quilt.<br>作家在被子里十分平静地写白皮书。</p>
</li>
<li><p>On the chilly hillside, he is unwilling to write his will on the ten-shilling bill.<br>在寒冷的山坡上,他不愿意将遗嘱写在十先令的账单上.</p>
</li>
<li><p>The weaver will leave for the heavy heaven.<br>那位纺织工将要到阴沉的天国里去.</p>
</li>
<li><p>The handy left-hander left a handsome handkerchief on the handle of the handbag.<br>手巧的左撇子把一方漂亮手帕留在手提包的提手上。</p>
</li>
<li><p>The thief chief achieved the theft of a handkerchief for mischief.<br>贼首领完成了偷手帕的恶作剧.</p>
</li>
<li><p>I believe my brief words will relieve her grief.<br>我相信我简短的话会减轻她的悲痛.</p>
</li>
<li><p>At the dock I’m shocked to see the pocket rocket made of a block of rock.<br>在码头看到一块岩石做的小巧火箭,我感到震惊.</p>
</li>
<li><p>Standing under the outstanding rock I misunderstood his standard standpoint.<br>站在突出的岩石下,我误解了他的标准立场。</p>
</li>
<li><p>The substantial part of the constitution about the institution of institutes is substituted.<br>宪法中有关设立协会的实质性部分被替换.</p>
</li>
<li><p>Spell smell! Very well, the well-being for human being will swell.<br>拼写气味(一词)!很好,人类的福利将会膨胀.</p>
</li>
<li><p>Once none of you is here, the man in throne will live alone in the lonely zone.<br>一旦你们没有人在此,王位上的人就要孤独地生活在这个孤寂的地带。</p>
</li>
<li><p>Nowadays the once unknown snowy hill is well-known for snowstorm.<br>如今那座曾经不出名的多雪小山因暴风雪而出名.</p>
</li>
<li><p>For instance, I can instantly know the constant distance.<br>例如,我可以即刻知道该恒定距离。</p>
</li>
<li><p>The man beyond the bond is fond of the second wonderful diamond.<br>那位不受约束的人喜欢第二颗奇异的钻石。</p>
</li>
<li><p>While sinking into thinking, the shrinking linkman drank the pink ink sprinkled on the wrinkly paper.<br>陷入沉思时,退缩的联络员喝掉了洒在皱纹纸上的粉红色墨水。</p>
</li>
<li><p>The contribution distributor thinks the microcomputer pollution is absolutely beyond dispute.<br>捐款分配者认为微机污染是绝对不容置疑的.</p>
</li>
</ol>
<p><strong>16天记住7000考研词汇的文本（第二天）</strong></p>
<ol start="51">
<li>He repeatedly repeats, “Eat meat.”<br>他再三重复说:”吃肉.”</li>
<li>Having canceled X-ray scan, the cancerous candidate on the canvas ate the idle candles in the candy can.<br>取消X线扫描后，帆布上的癌症候选人吃了糖果罐里的闲置蜡烛。</li>
<li>The dominant candidate is nominally nominated for president.<br>占优势的候选人名义上被任命为总统.</li>
<li>The extravagant savage made the interior and exterior criteria of deterioration.<br>奢侈的野蛮人制定了腐败的内外标准.</li>
<li>No, nobody’s body is noble, nor is his.<br>不,没有任何人的躯体是高贵的,他的也不是.</li>
<li>Axe the tax on taxis. Wax may relax the body.<br>削减出租车的税费。蜂蜡可以使身体放松.</li>
<li>The man in mask asked me for a task; I let him put the basket on the desk in the dusk.<br>戴面具的人向我要任务,我让他在黄昏时把篮子放到桌子上.</li>
<li>The lump jumped off the pump and bumped on the trumpet in the dump.<br>傻大个跳下水泵撞到垃圾堆里的喇叭上。</li>
<li>On my request the conqueror questioned the man who jumped the queue.<br>根据我的请求,征服者质问了插队者.</li>
<li>They are arguing about the document of the monumental instrument.<br>他们在辩论关于那件不朽乐器的文献.</li>
<li>However, Lever never fevers; nevertheless, he is clever forever.<br>无论如何,杠杆从未发烧;尽管如此,他始终机灵。</li>
<li>I never mind your unkind reminding that my grindstone hinders your cylinder.<br>我决不介意你不友善的提醒说我的磨刀石妨碍了你的汽缸。</li>
<li>I feed the food to the bleeding man in the flood.<br>我把食品喂给洪水中的那个流血的人.</li>
<li>It’s a treason terror of the seasonal oversea seafood is reasonable.<br>认为季节性的海外海鲜的价格是合理的就是背叛。</li>
<li>The veteran in velvet found that the diameter of the thermometer was one metre.<br>穿天鹅绒的老兵发现温度计的直径为一米.</li>
<li>The cube in the tubular cup occupies one cubic meter.<br>筒状杯中的立方体占有一个立方米(的体积).</li>
<li>Put the spotless potatoes, tomatoes and tobacco atoms into the hot pot.<br>把无斑点的土豆、番茄和烟草微粒放进热锅里。</li>
<li>The preacher preached to the teacher’s teacup.<br>传教士对着老师的茶杯说教.</li>
<li>“My behavior is on behalf of half zebras,” the algebra teacher said.<br>“我的行为代表了一半斑马的利益,”代数老师说.</li>
<li>Unlike my uncle, I likely like that bike (bicycle).<br>我不像叔叔,我很可能喜欢那辆自行车.</li>
<li>She likes nothing but things of clothing and cloth.<br>除了衣物和布料之类的东西外,她什么也不喜欢.</li>
<li>The doctor’s doctrine undid one dollar and a dozen of collars.<br>博士的学说毁掉了一美元和一打衣领。</li>
<li>On the bus the busy businessman did a business with the buyer.<br>在公共汽车上,忙碌的商人与买主做了一笔生意.</li>
<li>Vegetables and tablets on the stably established table show no instability.<br>放在稳定设置的桌子上的蔬菜和药片没有显示不稳定性。</li>
<li>Primarily, the prime criminal’s crime has nothing to do with lime and overtime.<br>首犯的犯罪基本上与石灰和加班无关.</li>
<li>The ring on the spring string rings during springtime.<br>弹簧弦上的环在春天鸣响。</li>
<li>Shut in the hut, I’m puzzled how to cut down the output of nuts.<br>关在茅棚里,我为削减坚果的产量犯难。</li>
<li>It’s better to put letters at the inlet and outlet.<br>最好在进口和出口处标上字母.</li>
<li>During this serious period, the superierrorries of questions about the supermarket.<br>在这段严肃时间内,上级问了下级一连串有关超级市场的问题。</li>
<li>I tuned the tone of the stone phone with a bone.<br>我用骨头调整了石质耳机的音调.</li>
<li>On Revenue avenue, the grave traveler jumped the gravestone bravely.<br>在税收大道上,严肃的旅行者勇敢地跳过墓碑.</li>
<li>The slave safely saved the sharp shavers in a cave nearby the cafeteria.<br>奴隶将锋利的剃刀安全地保存在自助餐厅附近的洞穴里.</li>
<li>Most hosts are hostile to the foremost ghost hostage almost to the utmost.<br>大多数主人对最前面的幽灵人质的敌对态度几乎到了极顶.</li>
<li>The mapper trapped in the gap tapped the tap wrapper with strap.<br>陷在缝中的制图者用皮带轻击塞子套.</li>
<li>The scout with shoulder-straps shouted on the outermost route as a routine.<br>戴肩章的侦察员照例在最外围的路线上叫喊.</li>
<li>The reproached coach unloaded the loaves to the approachable roadside.<br>遭到责备的教练把面包卸到可接近的路旁.</li>
<li>The news about the broadened breadth is broadcast abroad.<br>宽度加宽的消息被广播到国外.</li>
<li>The motive of the emotional movie is to move the removed men.<br>那部情感电影的动机在于感动被开除的人。</li>
<li>Otherwise, mother will go to another movie together with brother.</li>
<li><pre><code>   不然,妈妈就和弟弟一起去看另一场电影。
</code></pre>
</li>
<li>Furthermore, we gathered leather and feather for the future colder weather.<br>而且,我们收集了皮革和羽毛以应付将来更冷的天气。</li>
<li>Before the premier, the old soldier scolds the cold weather.<br>老兵当着首相的面咒骂寒冷的天气。</li>
<li>Whether the weather is good or bad, neither father nor I am going to the gathering.<br>无论天气是好是坏,父亲和我都不去参加那个聚会。</li>
<li>The Particle party’s partner participated in the particular Parliament.<br>粒子党的合伙人参与了特别议会.</li>
<li>For convenience of intensive study, he has an intense intention of making friend with me.<br>为便于强化学习，他有和我交朋友的强烈意向。</li>
<li>The virtueless girl’s duty is to wash the dirty shirts and skirts in the outskirts.<br>无美德女孩的职责就是在郊区洗脏衬衣和裙子.</li>
<li>I glimpsed the dancer balancing herself on the ambulance by chance.<br>我碰巧瞥见舞蹈者在救护车上使自己保持平衡。</li>
<li>Balloon, baseball, basketball, football and volleyball all dance ballet on the volcano.<br>气球、棒球、篮球、足球和排球都在火山上跳芭蕾舞。</li>
<li>A gallon of gasoline and the nylon overalls fall into the valley.<br>一加仑汽油和尼龙工作裤落进了山谷。</li>
<li>Palm calmly recalled the so-called caller.<br>“手掌”平静地回忆了那个所谓的拜访者.</li>
<li>In the hall, the shallow challenger shall be allowed to swallow the swallows.<br>在大厅里,肤浅的挑战者将被允许吞下燕子.</li>
</ol>
<p><strong>16天记住7000考研词汇（第三天）</strong></p>
<ol start="101">
<li>The tall man installed a small wallet on the wall.<br>高个男子把一小钱包安放到墙上.</li>
<li>Except dishonest ones, anyone who is honest can get honey, everyone thinks so.<br>除了不诚实的人外,任何诚实的人都能得到蜂蜜,人人都这么想。</li>
<li>The exhausted man and the trustful guy thrust a knife into the rusty crust.<br>精疲力竭的男子和深信不疑的家伙将一把刀子刺向生锈的外壳。</li>
<li>I finally find that the financial findings are binding.<br>我终于发现财经调查结果具有约束力。</li>
<li>At the windy window, the widow finds a blind snake winding.<br>在当风的窗口,寡妇发现有条瞎眼蛇在游动。</li>
<li>I refuse to accuse Fuse of diffusing confusion.<br>我拒绝控告导火索散播混乱。</li>
<li>He had an amusing excuse for executing the executive.<br>对于处决决策人,他有一个可笑的理由.</li>
<li>At the dawn on the lawn the yawning drowned man began to frown.<br>拂晓时在草坪上，打呵欠的溺水者开始皱眉头.</li>
<li>Mr. Brown owns the brown towels in the downtown tower.<br>布朗先生拥有闹市区塔里的棕色毛巾。</li>
<li>Lots of pilots plot to dot the rotten robot.<br>大批领航员策划给腐烂的机器人打点.</li>
<li>In the hot hotel the devoted voter did not notice the noticeable notebook.<br>在炎热的旅馆里,热心的投票者没有注意到显而易见的笔记本。</li>
<li>The notorious man’s noted notation denotes a notable secret.<br>那个臭名昭著的男子的著名符号代表一个值得关注的秘密.</li>
<li>Yes, yesterday was the my pay-day; I pay you the payment today.<br>是的,昨天是我的发薪日,我今天付给你报酬.</li>
<li>Lay a layer of clay on the displayed layout before the relay race.<br>接力赛之前在展示的陈设上铺一层黏土.</li>
<li>“The gay mayor maybe lay in the hay by the Baby bay,” he says in dismay.<br>他沮丧地说:”快活的市长大概躺在婴儿湾边上的干草中。”</li>
<li>The delayed player delegation stay on the playground.<br>被耽搁的运动员代表团停留在操场上。</li>
<li>The X-rayed prayer preyed a gray tray.<br>照过X光的祈祷者捕获了一个灰色盘子。</li>
<li>Anyway, the prayer swayed by me always goes away by subway.<br>不管怎样,受我支配的祈祷者总是从地铁走向远方。</li>
<li>The chocolates on the plate stimulated my son to calculate.<br>盘子里的巧克力鼓励了儿子进行计算.</li>
<li>One of my relatives, a late translator, translated a book relating to public relations.<br>我的一位亲戚,一个已故翻译,翻译了一本有关公共关系的书。</li>
<li>He relates that he is isolated from his relatives.<br>他叙述说他与亲戚们隔离开了.</li>
<li>The educator located the local location allocated to him.<br>教育家定出了分配给他的局部的位置.</li>
<li>Comply with the compatible rule of complement when using compliments.<br>使用问候语时遵守补语的相容规则.</li>
<li>The complicated indicator is dedicated to the delicate delicious machine.<br>这个复杂的指示器被奉献给精密而美妙的机器.</li>
<li>Likewise, my bike gave a striking strike to the two men alike.<br>同样,我的自行车给那两个相象的人惊人的打击.</li>
<li>The smoke choked the joking stroker at one stroke.<br>烟一下呛住了开玩笑的抚摩者.</li>
<li>Somewhere somebody sometimes does something good.<br>在某处某人有时做某些好事。</li>
<li>Wherever I go, nowhere I like; I dislike everywhere.<br>无论我到哪里,没有哪里为我喜欢,我讨厌每一个地方.</li>
<li>Therefore, the atmosphere is merely a sphere.<br>因此大气层只不过是一个球体。</li>
<li>The funny cunning runner uses his gum gun before sunrise or after sunset.<br>滑稽乖巧的赛跑者在日出之前或日落之后使用胶皮枪。</li>
<li>The applause paused because of the cause caused by a cautious plausible clause.<br>掌声停了是因为一条谨慎的似乎有理的条款引起的原因。</li>
<li>The county councilor encountered the accountant at the counter of a countryside shop.<br>县委委员在一乡村商店的柜台边碰到了会计师。</li>
<li>I mounted the mountain and found a fountain with large amount of water.<br>我登上那座山发现一个水量很大的喷泉。</li>
<li>Step by step, the sleepy creeper crawled into my sleeve to sleep.<br>昏昏欲睡的爬虫一步一步爬进我的袖子里睡觉.</li>
<li>After a deep sleep, the weeping sweeper keeps on peeping the sheep on the steep.<br>酣睡之后,哭泣的清扫者继续窥视峭壁上的羊。</li>
<li>The vice-adviser advised the reviser to devise a device for getting rid of vice.<br>代理顾问建议校订者想出一个根除恶习的计策.</li>
<li>The wise man used his wisdom in the vertical advertisement device.<br>聪明人把智慧用在垂直的 广告装置上。</li>
<li>With rhythm, the arithmetic teacher put the artist’s artificial articles on the vehicle.<br>算术老师把艺术家的人造物品有节奏地放到运载工具里.</li>
<li>The smart star starts to make cart chart for the commencement.<br>精明的明星开始制作授学位典礼用的马车图表。</li>
<li>The lady is glad to give the salad to the sad lad on the ladder.<br>女士乐意把色拉送给梯子上的那位悲哀的小伙子.</li>
<li>You mad madam, my dad doesn’t like the bad badminton pad.<br>你这个疯太太,我爸爸不喜欢这种坏羽毛球垫.</li>
<li>The one-legged beggar begins to beg eggs illegally.<br>独腿乞丐开始非法讨蛋。</li>
<li>The promoter promptly made a quotation for the remote control motors.<br>发起人立刻制了一份遥控马达的报价单。</li>
<li>Each pea and peach on the beach can be reached by the peacock.<br>海滩上的每一颗豌豆和桃子孔雀都能触及.</li>
<li>Although the plan was thorough, it was not carried through.<br>尽管计划很周详，但是没有得到贯彻。</li>
<li>Thoughtful men ought not to be thoughtless about the drought.<br>体贴的人不应该对干旱考虑不周。</li>
<li>“Rough cough is tough enough,” Bough said while touching the torch.<br>“剧烈咳嗽是够难以对付的,”大树枝在触摸手电筒时说道.</li>
<li>The football team stopped the steam stream with beams.<br>足球队用横杆堵住了蒸汽流.</li>
<li>“Ice-cream!” he screamed in dream.<br>“冰淇淋!”他在梦中惊叫道.</li>
<li>For example, this simple sample similar to his can be exemplified.<br>例如,这件与他的相似的简单样品可以作为例证。</li>
</ol>
<p>16天记住7000考研单词（第四天）</p>
<ol start="151">
<li>The spy is shy of taking shelter on the shelf of the shell-like shed.<br>间谍怕在壳子一样的棚里的架子上栖身。</li>
<li>The optional helicopter is adopted to help the optimistic helpless in the hell.<br>可选用的直升飞机被用来帮助地狱里那些乐观的无助者.</li>
<li>The cell seller seldom sees the bell belt melt.<br>小单间的卖主很少见到铃铛带子融化。</li>
<li>The costly post was postponed because of the frost.<br>那件昂贵的邮件由于霜的缘故而延搁。</li>
<li>Srain brain on the train is restrained.<br>在列车上过度用脑受到约束.</li>
<li>The gained grain drained away with the rain, all the pains were in vain again.<br>收获的谷物随雨水流失了,所有辛劳又白费.</li>
<li>Cousin saw a group of couples in cloaks soak their souls in the soapy soup.<br>表哥看见一群穿着斗篷的夫妇在肥皂汤里浸泡灵魂.</li>
<li>The wounded founder bought a pound of compound.<br>受伤的奠基人买了一磅化合物.</li>
<li>It’s easy and feasible to control the disease after cease-fire.<br>停火之后控制这种病很容易也可行。</li>
<li>After a decrease, the price of the grease increases increasingly.<br>下跌过一次之后，润滑脂的价格日益上涨。</li>
<li>Please release that pleasant peasant teaser who brings us plenty of pleasure.<br>请释放那个带给我们巨大快乐的友好的农民逗趣者。</li>
<li>In the canal, the Canadian analyzed the bananas.<br> 在运河里,那个加拿大人化验了香蕉.</li>
<li>I pointed out the joint on the coin at the disappointing appointment.<br>在令人失望的约会上,我指出了硬币上的接头.</li>
<li>His parents apparently stare at the transparent cigarettes.<br>他父母显然凝视着透明香烟.</li>
<li>The careful man is scarcely scared by the scarce parcel.<br>细心男子勉强被罕见的包裹吓了一下.</li>
<li>I’m rarely aware that the square area is bare.<br>我很少觉察到那个正方形区域是光秃秃的.</li>
<li>“Beware the software in the warhouse during the warfare,” hare said glaring at me.<br>兔子怒视着我说:“战争期间当心仓库里的软件。”</li>
<li>I daren’t declare that the shares are my spare fare and welfare on the farewell party.<br>在告别会上,我不敢宣称这些股票是我的备用车费和福利。</li>
<li>The external and internal interference interrupts my interpretation at short intervals.<br>内部和外部干涉以很短的间隔打扰我翻译.</li>
<li>The form of the former formula is formally formulated.<br>前一个分子式的形式得到正式表述.</li>
<li>The performer reformed the performance of the transferred transformer.<br>表演者改良了转让的变压器的性能.</li>
<li>Normally, enormous deformation is abnormal.<br>通常，巨大的变形是不正常的。</li>
<li>The bookworm in uniform is informed of the storm.<br>穿制服的书呆子得到暴风雨的消息。</li>
<li>The story about the six-storeyed dormitory tells a glorious history.<br>关于六层楼宿舍的故事讲述一段光荣历史。</li>
<li>The perfume consumer presumably assumes that the volume is resumed.<br>香水消费者假定地设想音量已恢复.</li>
<li>The voluntary revolutionaries revolted like the outbreak of volcano.<br>志愿革命者们象火山爆发一样起义了.</li>
<li>It’s resolved by resolution that the solution will be used to solve the involved problem.<br>决议决定用这个办法解决那个复杂的问题。</li>
<li>The generous general’s genuine genius is in making generators.<br>那位慷慨将军的真正天才在于制造发电机.</li>
<li>Several severe federal generals drank the mineral water on the miner’s funeral.<br>好几个严厉的联邦将军在矿工的葬礼上喝了矿泉水。</li>
<li>The lean man leans on the clean bean plant to read a leaf leaflet.<br>瘦人斜靠在干净的豆科植物上读叶片传单.</li>
<li>I mean he used mean means in the meantime on the ocean.<br>我的意思是其间在海洋上他用了卑鄙手法.</li>
<li>The honorable journalist spent an hour on the journey of tour.<br>可敬的新闻记者在观光旅程上花了一个小时.</li>
<li>The sour vapour pours into the flourishing flour factory. It’s the source of resources.<br>酸蒸汽涌进兴旺的面粉厂.这是资源的源泉.</li>
<li>Of course the man’s courage encouraged the discouraged tourists in the courtyard.<br>自然那个勇敢男子的勇气鼓舞了院子里泄气的游客们。</li>
<li>The zealous dealer has an ideal idea of dealing with the meal.<br>热心的商人有一个处理膳食的理想主意.</li>
<li>He conceals the fact that he is jealous of my seal and wants to steal it.<br>他隐瞒了他嫉妒我的印章并想偷的事实.</li>
<li>I really realized that a realm came into reality.<br>我真地认识到一个王国已变成现实.</li>
<li>The healer reveals an appealing fact that health is great wealth to the commonwealth.<br>医治者揭示一个吸引人的事实:健康是联邦的巨大财富。</li>
<li>The absent-minded student consents to the sentence in the presence of me.<br>心不在焉的学生在我面前同意这份判决.</li>
<li>Presently the present is presented to the representative.<br>现在这份礼物已呈现在代表面前。</li>
<li>Not for a moment has the comment on commercial phenomenon been mentioned.<br>那个关于商业现象的评论从未被提及过。</li>
<li>The mental patient thinks the cement is the elementary element of the ornament.<br>精神病人认为水泥是装饰品的基本成分.</li>
<li>As an exception I accept all his concepts and conceptions except one.<br>作为例外,我接受他所有的概念和构想,只有一个除外。</li>
<li>I perceived that the veil clung on the ceiling of the clinic was deceit.<br>我觉察到粘附在诊所天花板上的幔子是个骗局.</li>
<li>The receptionist received a receipt from the receiver.<br>接待员收到一份来自接收者的收据。</li>
<li>The reaper leaped over a heap of cheap weapons.<br>收割者跃过一堆廉价的武器。</li>
<li>The newly imprisoned prisoners poisoned poisonous moisture are hoisted out from the prison.<br>中了有毒湿气毒的新近关押的囚犯被从监狱吊出.</li>
<li>The gross grocer crossed his legs before the boss.<br>粗鄙的杂货商在老板面前叉起腿子.</li>
<li>The lost Bible is possibly the biggest loss of my possessions.<br>丢失的圣经可能是我最大的财产损失。</li>
<li>A dose of poison made the noisy man’s nose rosy.<br>一剂毒药使得吵闹的男子的鼻子变成玫瑰色.</li>
</ol>
<h2 id="16天记住7000考研单词（第五天）"><a href="#16天记住7000考研单词（第五天）" class="headerlink" title="16天记住7000考研单词（第五天）"></a>16天记住7000考研单词（第五天）</h2><ol start="201">
<li>The loser closely enclosed himself in the closet.<br>  那个失败者把自己严密地封闭在小室内。</li>
<li>The composer was proposed to decompose his composition into components.<br>  作曲家被建议将著作分解成单元。?</li>
<li>Suppose you were exposed in the opposite position by your opponent, …<br>  假设你被对手暴露在相反的位置，。。。</li>
<li>The depositor positively positioned the preposition in that position on<br>purpose.<br>  储户有意确信地介词放置在那个位置。?</li>
<li>In church the nurse cursed the people pursuing the purple purse.<br>  在教堂里，护士诅咒了追求紫色钱包的 人们。?</li>
<li>The faculty for agricultural culture isn’t difficult to cultivate.<br>  农业栽培能力不难培养。</li>
<li>The reservoir in the reserved preserve is an obstacle to the obstinate<br>observer.<br>  预留保护区内的水库对固执的观察者是一个障碍。</li>
<li>The desert deserves the nervous servants to observe.<br>  那个沙漠值得神经紧张的公务员们去观察。</li>
<li>The bulk of the ruby rubbish on the pebble bubbles when stirred by<br>bulbed rubber club.<br>  小卵石上的大部分红宝石废料在用有球状突起的橡胶短棍搅动是会起泡。</li>
<li>The adjective injected new meaning into the objected objective object.<br>  这个形容词给受到反对的客观物体注入了新的意义。</li>
<li>The projector is subject to rejection and may be ejected from the<br>project.<br>  投影机有遭到否决的倾向并可能被逐出工程。 ?</li>
<li>A day goes through daybreak, morning, noon, afternoon, evening and<br>midnight.<br>一天经过坲晓，上午，正文，下午，傍晚和午夜。?</li>
<li>His affection for the defects is affected by the infectious perfect<br>effect.<br>  他对缺点的钟爱受到具有感染力的完美效果的影响。?</li>
<li>The critic’s criticism is critical to the crisis.<br>???评论家的批评对这场危机至关重要。?</li>
<li>The director’s indirect direction led to the incorrect erection of the<br>rectifier.<br>  指导者间接的指导导致整流器的错误安装。</li>
<li>The prospective inspector prospected his prospect with his own<br>perspective.<br>?   未来的检查员用自己的观点勘察的他的前景。</li>
<li>Two suspicious aspects are suspected respectively.<br>  两个可疑的方面分别受到怀疑。</li>
<li>This section about insects is written by a respectable specialist.<br>  关于昆虫的这一节是由一位可敬的专家撰写的。</li>
<li>I assure the injured jury that a sure insurance is ensured.<br>  我让受伤的陪审团确信一笔有把握的保险得到的确保。</li>
<li>My durable endurance made me endure the injury during insurance.<br>我持久的忍耐力使我忍受了保险期间的伤害。?</li>
<li>I can’t endure the leisured man’s measures for the treasures in the<br>treasury.<br>.   我不能容忍那个悠闲男子对金库财宝采取的措施。</li>
<li>In the exchange the oranges are arranged into strange ranges.<br>  在交易所里橙子被排成奇怪的行。</li>
<li>The ashtray, splashed with ash, crashed with a clash in a flash while<br>being washed.<br>  那个溅有灰尘的烟灰盘在清洗时咣当一声一下子摔碎了。</li>
<li>He dashed to smash the fashionable ashtray with cash.<br>  他猛冲过去用现金砸那个过时的烟灰盘。</li>
<li>I feel a bit of bitterness for his ambitious exhibition.<br>  我为他雄心勃勃的展览感到一点点触痛。</li>
<li>On the orbit, the rabbits habitually inherited the merits of the<br>inhabitants.<br>?   在轨道上，兔子习惯性地继承了居民们的优点。</li>
<li>Her rejoicing voice is void of something avoidable.<br>  她那令人高兴的声音缺少某种可避免的东西。</li>
<li>I prefer the preferable preference you referred to in the reference<br>books.<br>?   我更喜欢你在参考书中提到的那个更可取的优先权。</li>
<li>The specialist specifically specified a special pacific means especially.<br>  专家特地明确指定了一种和解的特殊方法。</li>
<li>The speculator specifically specified the specification of this species<br>specimen.   投机者特地指定了这种物种标本的规范。<br>231 I’m to be punished for publishing his bad reputation to the public of the<br>republic.<br>  我因将他的坏名声公布给共和国的公众将受到惩罚。</li>
<li>The drug trafficker is concerned about the condition of the traditional<br>concert.<br>  毒品贩子担心传统音乐会的状况。</li>
<li>It’s a fable that the cable enables the disabled man to be able to walk.<br>  电缆使得残疾人能够行走是天方夜谭。</li>
<li>The problem is that those who are out of jobs probably rob.<br>  问题是那些失业者们可能行劫。?</li>
<li>His wicked trick is to get the kids to kick bricks and lick the cricket<br>ticket.<br>  他的缺德恶作剧是让孩子们踢砖和添板球门。?</li>
<li>The thin sick chicken picks the thick sticky stick quickly.<br>  瘦病鸡快速地啄粘乎乎的粗棍。</li>
<li>The animals unanimously vanished from the mammal’s room furnished with<br>Spanish furniture.<br>  动物一齐从配备有西班牙家具的哺乳动物的房间消失。?</li>
<li>The loosened goose chooses the cheese to eat.<br>  被解开的鹅挑选奶酪吃。</li>
<li>By policy, the police impolitely sliced the politician’s politics books.<br>   根据政策，警方不客气的把政客的政治书籍切成了薄片。</li>
<li>At the neck of the wrecked deck, the reckoner checked the opaque cheque.<br> ?在遭破坏的甲板的颈部，计算者检查了这张不透明支票。</li>
<li>The scholar foolishly took the school cooling pool for swimming pool.<br>  学者愚蠢的把学校的冷却池当成游泳池。</li>
<li>Having played golf, the wolf in wool rested on the tool stool in the zoo.<br>  打过高尔夫球之后，穿羊毛衣的狼歇在动物园里的工具登上。</li>
<li>Citizens in the city’s civil buildings are all civilized.<br>  城市名用建筑内的市民全都得到教化。  </li>
<li>The pious man is dubious about the vicious civilian’s vivid description<br>of his vicinity to his wife.<br>?? 虔诚的男子对邪恶的平民生动的描述他与其妻子的密切（关系）半信半疑。245. The corps’ corn in the corner is scorned by the stubborn corporation.<br>军团种在角落里的玉米遭到顽固公司的蔑视。</li>
<li>The attorney’s horn lies horizontally in the thorns.<br>?代理律师的号角水平地躺在荆棘中。</li>
<li>I seem to deem his foreseeing of that the man will seek seeds in the<br>weed.<br>.   我似乎相信他的预见，他预见那个人将在杂草中寻找种子。</li>
<li>The agreement disagrees in the degree of agreeable freedom.<br>  协议在使人愉快的自由程度上存在分歧。</li>
<li>In the freezing breeze, the breeder greedily squeezed oil from the seeds.<br>  在冰冷的微风中，饲养员贪婪地从种子中榨油。</li>
<li>We need reed needles to speed the deed indeed.<br>  我们确实需要一些芦苇针来加快行动。</li>
</ol>
<h2 id="16天记住7000考研单词（第六天）"><a href="#16天记住7000考研单词（第六天）" class="headerlink" title="16天记住7000考研单词（第六天）"></a>16天记住7000考研单词（第六天）</h2><ol start="251">
<li>The accessory successor never made concessions to difficulties, so he succeeded in accessing successive successes.<br>附属继承人从未向困难妥协，因此在走向连续的成功之路上成功了.</li>
<li>I exceed the excellent student who has excessive excellence.<br>我胜过那个有过多优点的优秀学生.</li>
<li>During the procession, the microprocessor finished the processing procedure.<br>在队伍行进时,微处理器完成了加工过程.</li>
<li>The chess professor confessed his professional blessing in the confession.<br>象棋教授在供状中承认了其职业福气.</li>
<li>The progressive congressman dressed in black stressed his distress.<br>穿着黑色衣服的进步国会议员强调了他的不幸.</li>
<li>The man depressed by the pressure from the press expressed the impression on him.<br>那个受到来自新闻界压力压抑的人表达了他的印象.</li>
<li>Initially I kept silent to the essential essay.<br>起初我对这个重要的短评保持沉默。</li>
<li>The enforced law reinforced that forced divorce is forbidden.<br>实施的法律强化了禁止强迫离婚.</li>
<li>In the cork workshop, the workers fork the pork.<br>在软木车间,工人们用叉子叉猪肉.</li>
<li>That person personally persuaded the personnel with persuasive words.<br>那个人用有说服力的话亲自说服了人事部门。</li>
<li>The dull bull fully fulfilled pulling the bulletproof bulletin board.<br>迟钝的公牛充分履行了拖防弹公告牌(的职责)。</li>
<li>The lucky duck tucked in truck suddenly sucked the gas from the bucket.<br>塞在卡车里的幸运鸭子突然从桶里吸汽油.</li>
<li>Boil the oil soiled by the coil in the toilet lest it spoil.<br>把被盥洗室里的线圈弄脏的油煮开,免得它变质.</li>
<li>The selfish man put himself on the shelf.<br>那个自私的人把自己束之高阁。</li>
<li>In this climate, the climber climbed up the cliff with his stiff limbs.<br>在这种气候下,攀登者用僵硬的四肢爬上悬崖.</li>
<li>The puffy staff’s stuffy chests are stuffed with sufficient suffering.<br>喘气的职员们闷热的胸中填满了足够的痛苦.</li>
<li>The member of good memory remembers to commemorate his friend with memorials.<br>那位记性好的成员记得用纪念品纪念他的朋友。</li>
<li>The room is lumbered with numerous cucumbers.<br>房间里乱堆着大量黄瓜。</li>
<li>The poet’s toes get out of his shoes. Here heroes are zeros.<br>诗人的脚趾露出了鞋子。在这里英雄无足轻重。</li>
<li>In the library, arbitrary the librarian wrote the auxiliary diary about military literature.<br>在图书馆,武断的图书管理员写下了有关军事文学的辅助日记。</li>
<li>The royal destroyer employs lots of loyal employees.<br>皇家驱逐舰雇佣了很多忠心的雇员.</li>
<li>On the voyage, the enjoyable toy brought me joy and annoyance.<br>在航行中,使人愉快的玩具给我带来快乐和烦恼.</li>
<li>Her boyfriend fed a box of oxygen and hydrogen to the ox and fox.<br>她男朋友给牛和狐狸喂了一盒子氧和氢.</li>
<li>The instructor struggled to say, “The structure of the construction led to the destruction.”<br>教师挣扎着说:”建筑物的构造导致这场毁灭.”</li>
<li>I debated that the debtor was doubtless in double troubles.<br>我争论说债务人很可能处在双重困境中。</li>
<li>With a dim triumph, she trims the swimming-suit rim at the swimming-pool brim.<br>她带着暗淡的喜悦在泳池边整理泳装的边缘.</li>
<li>Twice the twin king wins the winter swinging under the wing of the plane.<br>孪生国王两次赢得冬季机翼下的荡秋千赛。</li>
<li>Having piled miles of files, the compiler smiled a while at the profile.<br>堆了几英里长的文件之后,编辑对着侧面笑了一会.</li>
<li>By the spoon you’ll soon see the smooth tooth of the moon above the booth.<br>借助勺子你可以立刻看到电话亭上方月亮的光滑牙齿.</li>
<li>She met me in the Fleet Street and greeted me with a sweet smile.<br>她在舰队街上遇见我,并对我致以甜甜的一笑.</li>
<li>The conductor is reluctant to reduce the conductivity of the semiconductor.<br>导演不情愿降低半导体的导电率.</li>
<li>The producer introduced a productive technological product into production.<br>制造者把一项多产的技术成果引进到生产中.</li>
<li>The anxious man is unconscious of my anxiety.<br>那个不安的人没有觉察到我的忧虑.</li>
<li>Previously he was obviously envious of my success.<br>先前他明显地嫉妒我的成功.</li>
<li>I highly appreciate the preceding man’s precious precise exercise.<br>我高度欣赏前面那个人可贵的精确演练.</li>
<li>The miracle mirrors a horrible error made by the terrorists in the terrible territory.<br>这件奇事反映了恐怖分子在这一可怕地区犯的可怕错误.</li>
<li>I hurt my tongue when I hurried to eat cherry and strawberry merrily.<br>我匆忙快活地吃樱桃和草莓时伤了舌头.</li>
<li>The man proclaimed in exclamation that he aimed to reclaim the aimless claim.<br>那个人呼喊着声明说他打算索回无目标的索赔.</li>
<li>In no circumstances can the bicycle in the circle of the circus be a focus.<br>马戏表演圈子中的自行车决不会成为焦点.</li>
<li>I’m busy unless I’m blessed with less lesson.<br>我很忙,除非我很幸运只有少量功课.</li>
<li>How to pronounce the noun “ounce” in the announcement?<br>布告中的名词”盎司”怎样发音?</li>
<li>It’s incredible that the editor’s editorial in this edition is edible.<br>本版中的编辑社论可以食用让人难以置信。</li>
<li>The whistler whispered, “Which is rich?”<br>鸣笛者低语道:”哪一个富有?”</li>
<li>Which method of making the metal helmet is more economical in total?<br>生产这种金属头盔的方法哪一种总体上更节约?</li>
<li>The diligent teller told a tedious story about the intelligent satellite.<br>勤奋的出纳讲述了一个关于智能卫星的乏味故事.</li>
<li>The soda made the goddess nod by the fishing rod.<br>苏打使女神在钓竿旁打盹.</li>
<li>The modest man moderately modified the model in this mode.<br>谦虚者适度地用这种方式修改了模型。</li>
<li>The humorous rumour has something to do with human humanity and vanity.<br>那个幽默传闻与人类的仁慈和虚荣心有关。</li>
<li>The wakened cake baker awakes to that he has to brake by the lake.<br>被唤醒的蛋糕师傅醒悟到他必须在湖边刹车。</li>
<li>I overtake the undertaker who takes my stake by mistake.<br>我追上那个误拿我赌注的承办人</li>
</ol>
<p>16天记住7000考研单词（第七天）</p>
<ol start="301">
<li>The crying boy tries to fry the dry crystal.<br>哭喊的男孩试图用油炸干晶体.</li>
<li>In the chimney the donkey and monkey found the key to the money monitor.<br>猴和驴在烟囱里找到了货币监视器的钥匙.</li>
<li>At the edge of the wedged hedge, I acknowledged the knowledgeable man.<br>在楔形篱笆的边缘上,我向那位博识的人致谢.</li>
<li>The shark’s remark on the marble mark in the market is remarkable.<br>骗子关于市场上大理石标记的评论值得关注.</li>
<li>In the sparking park, the darling dark dog barked at the embarked larks.<br>在闪着火花的公园里,可爱的深色狗对着装载于船云雀吠叫.</li>
<li>The drifter swiftly shifted the gift to the left of the lift.<br>那个漂泊者敏捷地将礼物换到电梯的左边.</li>
<li>The rival’s arrival gives him a forgivable chance.<br>对手的到来给他一个可原谅的机会。</li>
<li>From the fact, the shivering driver derives that the diver may thrive on river.<br>发抖的司机从这个事实得出结论说跳水员可以靠河流繁荣.</li>
<li>The striver contrives to derive that privacy can’t be deprived.<br>奋斗者想方设法推导得出隐私(权)不可剥夺.</li>
<li>The lively survivor surveyed the conveyer.<br>活泼的幸存者考察了输送装置.</li>
<li>The living olive keeps the deliverer’s liver alive.<br>活橄榄使发货人的肝脏继续存活.</li>
<li>With a knife the knitter ends his wife’s life in the lifeboat.<br>在救生艇上编织者用小刀结束了他妻子的性命。</li>
<li>Who made a whole hole in the holy holiday?<br>谁在神圣的假日里打了一个完整的孔?</li>
<li>The man who broke the sole solid lid is solemnly condemned.<br>打破这个仅有的实心盖子的人受到庄严谴责.</li>
<li>By the ruler’s schedule, the molecule capsules will play an important role in the roller.<br>根据统治者的时间表，这种分子胶囊将在滚筒上起重要作用.</li>
<li>I deliberately liberated the man who was in despair and desperately struggled for liberation and liberty.<br>我有意解放了那个拼命地争取解放和自由的绝望者。</li>
<li>At the outset this set of setting settled the offset problem of the kettle.<br>在开始，这一套设置解决了水壶的弥补问题.</li>
<li>I bet that he forgot the forged alphabetical targets.<br>我打赌他忘记了按字母顺序排列的锻造靶子.</li>
<li>The draft for aircraft is sent to the airline by airmail.<br>订购航空器的汇票用航空邮件寄给了航空公司.</li>
<li>On the impaired dairy the chairman lay in a pair of repaired chairs for haircut.<br>在遭到损害的牛奶场,主席躺在一对修理过的椅子上理发.</li>
<li>I met a fairly unfair affair upstairs.<br>我在楼上遇到一件颇不公平的事.</li>
<li>At the breakfast, the steak leaked from the break.<br>早餐时,肉片从缺口处漏出来。</li>
<li>The weak speaker made a speech on the bleak peak.<br>虚弱的讲话者在荒凉的山峰上发表了演说。</li>
<li>The mouse’s tearing the blouse and trousers aroused the housewife’s anger.<br>老鼠撕咬短衫和裤子激起了主妇的怒火。</li>
<li>We beat (defeated) the cheat who heated the wheat.<br>我们打败了给小麦加热的骗子。</li>
<li>He created the great creature with concrete for recreation.<br>他用混凝土创造了这个伟大的创造物作消遣.</li>
<li>In the theater I threatened to treat the treaty with retreat.<br>在剧院里,我威胁要以退却来对待条约.</li>
<li>The man in neat sweaty sweater seated himself in the rear.<br>穿整洁的汗湿毛衣的男子在后面就坐.</li>
<li>The lagging man tagged the bags among the luggage with small flags.<br>落伍者给行李中的袋子加上小旗标签.</li>
<li>The ragged man drags a waggon of rag fragments.<br>那个衣衫褴褛的人拉着一货车破布碎片.</li>
<li>The lawyer’s son-in-law likes hawk’s claws and jaws.<br>律师的女婿喜欢鹰爪和下颌.</li>
<li>The drawer put the strawberries and raw paws into a drawer in the saw-mill.<br>绘图者把草莓和生熊掌放进锯板厂的抽屉里。</li>
<li>I had appetite for inviting the man who bit me despite I had spite against him.<br>我有意邀请咬我的人,尽管我怨恨他.</li>
<li>On the exciting kite site, the excited reciter cited my verse.<br>在激动人心的风筝现场，激动的朗诵者应用了我的诗句。</li>
<li>The photographer put the graph in the paragraph on geographical geometry.<br>摄影师将图表插到论述地理几何学的段落.</li>
<li>The telegram says that the diagrams show the grammar of the program.<br>电报说图表表示程序的语法.</li>
<li>With gratitude he congratulated me on the celebration.<br>他怀着感激向我祝贺庆典.</li>
<li>The rational operator started a new era of opera cooperation in AD 2000.<br> 理性的操作者在公元2000年开创了一个歌剧合作的新时代.</li>
<li>I can’t tolerate the acceleration in decorating the refrigerator.<br>我不能容忍对冷库装饰的加速.</li>
<li>The fateful up-to-date data of the gate have a fatal error.<br>大门的决定性最新数据有一个致命错误.</li>
<li>I’ve hatred for the hateful man’s skates bought with prior private privilege.<br>我对那个可恶男子用优先个人特权购买的冰鞋感到厌恶.</li>
<li>With one penny I had this peculiar pen opened.<br>我花了一便士让人把这支奇特的钢笔打开了。</li>
<li>I lowered flowing flowers below the table.<br>我把飘垂的花降低到桌子之下.</li>
<li>The plowman slowly blows at the glowing globe.<br>犁地者对着发红的球体慢慢吹气.</li>
<li>The fellow’s yellow pillow is hollowed by his follower.<br>那个家伙的黄色枕头被他的跟随者掏空了.</li>
<li>The junior and senior of the senate all have driver’s licenses.<br>参议院的年长者和年少者都有驾驶执照.</li>
<li>The immense expense in condensing the steam made me tense.<br>凝结蒸汽的巨大开支使我感到紧张.</li>
<li>A sensible man’s sensor is sensitive to nonsense on census.<br>明智者的传感器对人口调查废话敏感.</li>
<li>The offensive offender defended himself with the fence.<br>那个讨厌的触犯者用篱笆自卫.</li>
<li>The dependent dependant can’t live independently.<br>依靠别人的被赡养者不能独立生活.</li>
</ol>
<h2 id="16天记住7000考研单词（第八天）"><a href="#16天记住7000考研单词（第八天）" class="headerlink" title="16天记住7000考研单词（第八天）"></a>16天记住7000考研单词（第八天）</h2><ol start="351">
<li>The attendants attend the meeting and pretend to be attentive.<br>侍从们出席会议并装出专注的样子。</li>
<li>The tenderer surrendered her tremendously slender tender fingers.<br>投标者交出了她异常纤细娇嫩的手指.</li>
<li>The tension tends to extend to a more extensive extent.<br>紧张倾向于向更广泛的程度扩展。</li>
<li>I spend money on expensive things endlessly; so the expenditure trends up.<br>我无休止地花钱买昂贵的东西,所以开支趋向上升。</li>
<li>I send him the blend calendar and the splendid bent lens he lent to me.<br>我把他借给我的混合日历和绝妙的弯曲透镜送给他.</li>
<li>The goodness of the wooden goods gives me good mood.<br>木制商品的精华给我一个好心情.</li>
<li>The teenagers in the canteen are keen to see the queen sitting between the green screens in the greenhouse.<br>食堂里的少年们巴望见到坐在温室里的绿色屏风间的女王。</li>
<li>From the tiny tin pin, the spinner pinched off an inch.<br>纺纱工从小锡别针上掐掉一英寸。</li>
<li>In my opinion, only the onion can grow in the iron environment.<br>据我看,只有洋葱能在铁质环境中生长。</li>
<li>The crazy jazzman gazed at the blaze on the razor with amazement.<br>疯狂的爵士音乐演奏者惊愕地盯着剃刀上的白斑.</li>
<li>The illustration illuminates the demonstrating Democrat’s penetrating strategy.<br>图解阐明了正在示威的民主党党员的渗透策略.</li>
<li>The cat catches a fat rat and scatters the others under the mat.<br>猫抓了一只肥鼠并驱散了席子下面的其它老鼠。</li>
<li>On the flat platform the bat will pat whatever hat it likes.<br>在平坦的站台上,蝙蝠会拍打它喜欢的任何帽子.</li>
<li>Hence the hen cries whenever it sees a chicken.<br>从此每当那只母鸡看见小鸡时就叫.</li>
<li>The driller filled the grill with brilliant film.<br>钻孔者在烤架上填满辉煌的胶片.</li>
<li>The ill man had a pill and sat on the pillar in stillness until now.<br>那个坏人吃了一颗药丸后静止不动地坐在柱子上直到现在.</li>
<li>The skilful miller killed millions of lions with his ski.<br>技术娴熟的磨坊主用雪橇杀死了上百万头狮子。</li>
<li>The silly spilled the milk on the silver silk.<br>傻子把牛奶溅到银白色的丝绸上。</li>
<li>On the far farm the army’s arms are kept warm by a swarm of bees.<br>在远方的农场上,陆军的武器被一群蜜蜂保暖.</li>
<li>The alarm harmed the charming harmony of the ceremony.<br>警报声损害了典礼迷人的和谐.</li>
<li>Squirrel inquired an acquaintance and acquired the requirements.<br>松鼠询问了一位熟人,得知了那些要求.</li>
<li>A title is entitled to the retired worker who repaired the entire tire tirelessly.<br>那个不倦地修理了整个轮胎的退休工人被授予了一个头衔.</li>
<li>The hired admirer inspired his desire for the wire.<br>雇佣钦佩者激发了他对铁丝的渴望.</li>
<li>The firm fireman first overcame thirst desire.<br>坚定的消防员首先克服口渴欲望。</li>
<li>The tiresome pirate sounded siren and let off fireworks.<br>讨厌的海盗鸣汽笛放焰火.</li>
<li>The career carpenter put the cargo on the carbon carpet.<br>职业木匠把货物放到碳质地毯上.</li>
<li>The married man carried the scarred car and carriage onto the carrier.<br>已婚男子把有疤痕的汽车和马车带到了航母上。</li>
<li>Apart from that apartment, the departed department leader was partly partial to this one.<br>除了那套公寓外,已故系领导还有点偏爱这一套.</li>
<li>I can hardly pardon his discarding the hardware and cardboard in the harbour.<br>我简直不能原谅他在港口丢弃五金和硬纸板.</li>
<li>The guard guards the guarantee in the garden regardless of the hazard.<br>卫兵不顾危险看守着花园里的抵押品。</li>
<li>I packed the jackets and rackets into packets with the sacks.<br>我们用袋子将夹克和球拍打成小包。</li>
<li>The bachelor is detached to attach tags to the yacht.<br>学士被派遣去给游艇贴标签。</li>
<li>The attacker cracked the racks and stacked them on the track.<br>攻击者打裂搁板并把它们堆在跑道上.</li>
<li>The backward man lacks black background.<br>落后的男子缺少黑色背景.</li>
<li>The awfully awkward warship is warned not to be awarded war reward.<br>那艘非常拙劣的军舰受到不给予战争报酬的警告。</li>
<li>Afterwards, I went toward the yard and looked upward, downward, inward, outward, forward and backward.<br>后来我走向院子,向上下内外前后看.</li>
<li>The bright fighter is frightened and flies upright in straight line from the right.<br>那架明亮的战斗机受到惊吓后呈直线地从右边垂直飞起来.</li>
<li>I slightly delight in flight in the sunlight and lightning.<br>我有点喜欢在阳光和闪电中飞行.</li>
<li>Money will be tight overnight after tonight’s midnight.银根将在今晚午夜之后一下紧缩.</li>
<li>The sightseer speaks highly of the highway with sigh.<br>观光者叹息着盛赞这条公路.</li>
<li>At the agency, the aged agent is urgently urged to go for surgery by the gentle surgeon.<br>在办事处,温和的外科医生急切地催促年老的代理商做外科手术。</li>
<li>If you carry the cabinet of cabbage garbage to the garage, you’ll get an average wage.<br>如果你把这橱柜包菜垃圾扛进了汽车库,你将获得一份平均工资.</li>
<li>The villagers in rage caused a tragedy on the cage-like stage.<br>狂怒的村民在笼子形的舞台上制造了一场悲剧.</li>
<li>It is imaginable that breaking the engagement will damage his image.<br>可以想象,违反婚约将损害他的形象。</li>
<li>The extra theme of the supreme scheme is an extreme secret.<br>至高无上的计划的额外主题是个极端机密.</li>
<li>No extraordinary disorder happens on the orderly border.<br>在有序的边界上没有发生不寻常的混乱.</li>
<li>The wordy lord left his sword on the world.<br>多话的君主把他的剑留在了世界上.</li>
<li>According to the record, the cord was the oldest recorder the people could afford.<br>据记载,绳子是人们用得起的最古老的记录器.</li>
<li>Moreover, the new government overlooked the governor over the oven.<br>而且,新政府忽视了炉子上方的州长.</li>
<li>In the discussion I discovered that the lost cover was recovered.<br>在讨论中我发现盖子失而复得.</li>
</ol>
<p>16天记住7000考研单词（第九天）</p>
<ol start="401">
<li>The beloved novelist put her lovely gloves above the stove.<br>敬爱的小说家把她美丽的手套放在火炉上方。</li>
<li>It’s proved that the approver improved waterproof roof.<br>经证实,赞同者改善了防水屋顶.</li>
<li>In the reaction, the fraction acts as an agent.<br>在反应中,这些碎片起一种媒剂的作用.</li>
<li>Actually the actor and actress reacted actively to the activity.<br>实际上男演员和女演员对这个活动作出了积极的反应。</li>
<li>In the racial horse-race, the white racer’s race-horse won.<br>在种族赛马运动中,白人赛手的马获胜.</li>
<li>I feel a trace of disgrace for the gracious man’s embracing her bracelet.<br>我对仁慈男子拥抱她的手镯感到一丝耻辱.</li>
<li>The preface is written on the surface of the furnace that faces the space facilities.<br>序言写在面对太空设施的火炉表面.</li>
<li>“In fact, some factors are unsatisfactory to the factory,” the dissatisfied manager said.<br>“事实上有些因素对工厂来说不是满意的。”不满的经理说。</li>
<li>The manufacturer manually manufactured many machines for the manufactory.<br>制造商为工厂手工制造了很多机器。</li>
<li>The exact contact with practice has practical impact on me.<br>同实践的密切接触对我有实际的影响.</li>
<li>To make the contract attractive, the contractor subtracted a tractor from it.<br>为了使合同有吸引力,承包商从中减去了一台拖拉机。</li>
<li>In this chapter, the capture characterized the characteristics of the characters.<br>俘虏在本章描述了字符的特性.</li>
<li>The captive captivated by the apt adaptation rapped the cavity with rapture.<br>被灵巧的改编迷住了的被捕者着迷地敲打空腔.</li>
<li>I’m in charge of discharging a large amount of charcoal and coal at the coal mine.<br>我负责在煤矿卸一大堆木炭和煤。</li>
<li>With shortcomings overcome, the outcome become welcome.<br>随着缺点被克服,结果变得受欢迎.</li>
<li>At the station the statesman hesitates to state the status of the statue.<br>在车站政治家不愿陈述雕像的状况。</li>
<li>The limitation on the imitations is preliminarily eliminated.<br>对模仿的限制初步被消除.</li>
<li>The unconventional convention put many people to inconvenience.<br>那个不合惯例的大会使很多人感到不便.</li>
<li>The ventilator inventor’s adventure prevented him from venturing revenge.<br>通风机发明家的奇遇阻止了他冒险复仇.</li>
<li>Even the evening event couldn’t eventually spoil the joy of the New Year’s Eve.<br>即便是傍晚的事件最终也无损除夕的欢乐.</li>
<li>After an explosion the explorer restored the storage of the explosive in the exploiter’s storehouse.<br>爆炸过后勘探者恢复了剥削者的仓库里炸药的储量.</li>
<li>The sore is orally ignored by the ignorant immoral man.<br>疮痛被无知的不道德者口头忽视了.</li>
<li>The boring boy bored ashore for ore core at the score.<br>讨厌的男孩在海岸上的刻线处钻探矿核.</li>
<li>In the famine I got familiar with this famous family name&#x2F;surname.<br>在饥荒中,我熟悉了这个有名的姓。</li>
<li>The tame tigers play the same game on the frame.<br>温顺的老虎在框架上玩同一游戏.</li>
<li>The shameless lame man is to blame for the flaming frame.<br>无耻的跛子应为燃烧的框架负责。</li>
<li>The plain woman explained to me why she complained about the chain.<br>长相平平的女人向我解释她为什么抱怨那条链子。</li>
<li>After the entertainment the captain obtained an entrance fee.<br>娱乐表演之后,船长获得了一笔入场费.</li>
<li>It’s acertained that the certificate is behind the curtain of the stainless steel container.<br>经查实证书在不锈钢容器的帘子后面.</li>
<li>In the building, the wild child hurt his mild chin on the china.<br>在大楼里,那个粗野的孩子在瓷器上弄伤了温柔的下巴。</li>
<li>The feeble man feels an ache on his heels and knees when he kneels on the steel steering wheel.<br>当虚弱男子跪在钢舵轮上时他的脚跟和双膝感到疼痛.</li>
<li>The bee paid the fee of coffee, beef and beer for the cheerful deer.<br>蜜蜂为欢快的鹿付了咖啡、牛肉和啤酒的费用.</li>
<li>To the ants, the infant elephant is a giant in the plantation.<br>对蚂蚁们来说,幼小的大象是种植园里的庞然大物.</li>
<li>The merciful merchant wants to grant some merchandise to the panting immigrants.<br>仁慈的商人要给喘气的移民们一些商品.</li>
<li>The lengthened long fishing rod alongside the lake belongs to me.<br>靠在湖边的加长长钓竿属于我.</li>
<li>The strong man among us strongly hates the wrongdoing.<br>我们当中的壮汉强烈憎恶这件坏事.</li>
<li>In occasional case the phrase emphasizes the importance of the phase to the laser.<br>在偶然情况下该短句强调了相位对于激光的重要性.</li>
<li>Based on the basic case, the purchaser found the vase in the basin in the basement.<br>根据这个基本情况,购买者在地下室的盆子里找到了花瓶.</li>
<li>On the camp of the campus the campaign champion put the camera on the camel.<br>在校园的营地上运动冠军将摄影机放在骆驼上.</li>
<li>He stamped on the stamps and slammed the lamp on the damp dam.<br>他用脚踩邮票并将灯砰地摔在潮湿的坝上.</li>
<li>When the boat floats through the throat, the goat in overcoat goes to the goal.<br>当船漂过狭口时,穿大衣的山羊朝目标走去.</li>
<li>The competitor is compelled to complete the competition.<br>竞争者被迫完成了比赛.</li>
<li>I’m perplexed by the flexible complex index of sex and age.<br>我被灵活复杂的性别与年龄索引迷惑住了。</li>
<li>Since then the sincere princess has known the principal principle.<br>从那时起诚实的公主就知道该主要原理。</li>
<li>The bead is put on the forehead of the dead shepherd ahead of the herd.<br>珠子被戴在牧群前面的死牧羊人的前额上.</li>
<li>The misleader let me use the lead instead of the unsteady metal.<br>误导者让我用铅代替不稳定的金属.</li>
<li>The reader already readily spread the thread on the ready-made bread.<br>那位读者已经欣然将丝线铺散在现成的面包上。</li>
<li>“Ten percent of the cents are made in recent centuries,” he said with strong accent.<br>“百分之十的分币是最近几个世纪制造的,”他带着浓重的口音说.</li>
<li>The neutral scent of kerosene is concentrated in the center of the scene.<br>煤油的中性气味在场景中心被浓缩.</li>
<li>Those innocent adolescents ascending the hill are the tribe’s descendants of decent descent.<br>这些爬山的天真青少年是这个部落具有正派血统的后代.</li>
</ol>
<p>16天记住7000考研单词（第十天）</p>
<ol start="451">
<li>The tenant is discontented with the content of the agreement for renting the tennis tent.<br>租户用于租这座网球帐篷对协议的内容不满。</li>
<li>The current occurrence of torrent spurs him to buy fur and sulfur.<br>急流的当今的事件激励他买毛皮和硫。</li>
<li>I’m confident that the dentist will deny the confidential accidental incident.<br>我自信牙科医生将否认秘密的偶然的事件。</li>
<li>The student identified the identical idiom on the identity cards.<br>学生鉴定关于身份证的相同的习语。</li>
<li>The stupid student rapidly studied the accident in the studio.<br>愚蠢的学生在工作室迅速学习事故。</li>
<li>Considering considerable spiders outside, I stay in the president’s residence.<br>在外面考虑到相当多的蜘蛛，我呆在总统官邸。</li>
<li>Besides this side, I considered both the inside and outside.<br>除这边以外，我考虑两在内部和外部。</li>
<li>It’s evident that the evil devil inevitably goes to ruin.<br>很显然邪恶魔鬼不可避免去找毁坏。</li>
<li>In the company my companion accompanied me until I accomplished polishing the shoes.<br>在公司我的同伴陪我，直到我完成擦亮那些鞋。</li>
<li>I prepare to compare the two comparable parallel companies.<br>我准备比较两家可比较的平行的公司。</li>
<li>My neighbor knows the height and weight of the highjacked freight.<br>我的邻居知道被抢劫的货运的高度和重量。</li>
<li>The rebels labeled the labor laboring in the laboratory and lavatory.<br>那些叛乱者给在实验室和洗手间劳动的劳动贴标签。</li>
<li>At 8 o’clock the clerk locked the flock of cocks in the room.<br>在8点办事员在房间里锁住这群公鸡。</li>
<li>The mocker knocked the stock with the knots on the stocking and sock.<br>嘲笑者撞股票有结在长袜和短袜上。</li>
<li>I’m determined to permit the permanent term on detergent.<br>我决定在洗涤剂上允许永久的时期。</li>
<li>The committee admits it committed an omission in commissioning the mission.<br>委员会承认一委托任务的省略犯。</li>
<li>The odd man added an additional riddle to the middle of the saddle.<br>古怪的人给这个鞍的中间添加一个另外的谜。</li>
<li>The insult to the adult consulter results in multiplication of the faulty faucets.<br>对成年人的商议者的侮辱导致有故障的水龙头的乘法。</li>
<li>The detective detected that the arch was under the marching Arctic architects’ protection.<br>侦探发现拱在前进的北极的建筑师的保护下。</li>
<li>In the college, I alleged that I recollected the dialog in dialect about the dial collection.<br>在学院，我声称我关于表盘收集用方言回忆对话。</li>
<li>In the selection the lecturer neglected the negligible negative reflection on the election.<br>在选择过程中讲演者关于选举忽视可以忽视的负的反射。</li>
<li>The electrical connection in the photoelectric elevator involves electronics.<br>在光电的升降机里的电气装线与电子有关。</li>
<li>The rising risk arises from the surprised fund raiser’s praise of the appraisal.<br>提高的风险起因于惊讶的专款筹资者的评价的赞扬。</li>
<li>The efficient ancient scientist had conscience in science.<br>有效率的古代科学家在科学方面有良心。</li>
<li>The eagle is eager to anger the tiger in danger.<br>鹰渴望处境危险激怒虎。</li>
<li>The language angel hanged up the gang and banged them at the angle of the triangle.<br>语言天使抵押那伙人并且在三角形的立场猛击他们。</li>
<li>equal, equator, equation, equivalent, quiver<br>等于，赤道，方程式，相等，轻微的颤动</li>
<li>Qualified quality and adequate quantity are equally important.<br>使有资格的质量和足够的数量同样重要。</li>
<li>Televisions and telescopes give the visitors visual ability to see the casual casualty.<br>电视和望远镜给那些参观者看偶然的伤亡的视觉能力。</li>
<li>The grown-up growled at a crowd of crows.<br>成人对着一群乌鸦咆哮。</li>
<li>I threw a row of arrows, which narrowly passed the narrow-minded man’s eyebrows.<br>我投一排箭，这勉强通过心胸狭窄的人的眉。</li>
<li>“Sorry, I’ll borrow the lorry tomorrow,” the sorrowful man said with worry in the corridor.<br>“抱歉，我明天将借运货汽车”，悲哀的人在走廊里用担心说。</li>
<li>The signalman’s signature sign is significant to the vacant vacation.<br>通信工作人员的签名签字随着空的假期相当多。</li>
<li>The resigned designer is designated to an assignment of reigning the foreigners.<br>辞职的设计者被指定到统治那些外国人的任务。</li>
<li>Because of the temperature tempo, I temporarily lost temper to my contemporary in the temple.<br>因为温度速度，我在庙里临时对我的同时代的人失去脾气。</li>
<li>The empty empire’s emperor made an attempt to tempt the contemptuous man.<br>空的帝国的皇帝诱导轻视的人的尝试。</li>
<li>The one-eyed man obeyed the obedient audience’s order.<br>独眼的人服从孝顺的观众的命令。</li>
<li>The patriot’s radar made the radical patient impatient.<br>爱国者的雷达使激进的病人不耐烦。</li>
<li>From the experiment the experienced expert gained an unexpected expertise.<br>从实验中有经验的专家获得想不到的专门技能。</li>
<li>Details about the tailor’s tail are available from the prevailing dailies.<br>关于裁缝的尾巴的细节可以从流行的日报中获得。</li>
<li>The sailor was nailed on the rail for he failed to trail the mail.<br>海员在因为他不能痕迹邮件的横栏上钉。</li>
<li>The frank man put the first-rank blank blanket into the tan tank.<br>坦率的人把这条第一个繁茂的空白的毯子放进褐色油箱。</li>
<li>Thanks to the bankrupt banker, my ankle avoided an injury.<br>感谢破产的银行家，我的脚踝避免了受伤。</li>
<li>After a shot the foot began to root and shoot in the boot.<br>在枪之后脚对根开始并且穿靴子掠过。</li>
<li>The academic topic is why the blade of the spade is still sharp after decades’ decay.<br>学术题目是铁铲的刀刃在十年的腐坏之后仍然是锋利的的原因。</li>
<li>The invader saw the shadow of the lampshade fade away.<br>入侵者看见这个灯罩的阴影逐渐消失。</li>
<li>The graduated comrade gradually graded the trademarks after the parade.<br>毕业的同志在检阅之后逐渐将商标分级。</li>
<li>Both the math pathfinders bathed in the bathtub.<br>两个数学空降导航人员在这个澡盆里游泳。</li>
<li>In the thesis the synthetic symbol symbolizes sympathy.<br>在论文里合成符号体现同情。</li>
<li>For unity the units united into a unique union.<br>对团结来说单位合并成一个独特的协会。</li>
</ol>
<h2 id="16天记住7000考研单词（第十一天）"><a href="#16天记住7000考研单词（第十一天）" class="headerlink" title="16天记住7000考研单词（第十一天）"></a>16天记住7000考研单词（第十一天）</h2><p>16天记住7000考研单词（第十一天）</p>
<ol start="501">
<li>The commonsense commonwealth government no longer uses the uncommon commonplace.<br>有常识的联邦政府不再使用不寻常的陈腐之言。</li>
<li>The communist communicated communism to this municipal community.<br>那个共产党员把共产主义传入该市立社区.</li>
<li>In the bar the barber bargained for a jar of jam, then got over the barrier of barrels.<br>在酒吧里理发师为一罐果酱讲了价然后越过桶作的屏障.</li>
<li>The quarrelsome general quarreled about a quarter quart of oil in the headquarters.<br>好争吵的将军在司令部为四分之一夸脱油而争吵.</li>
<li>On the wedding I saw blooms embeded in the bed of the bedroom.<br>在婚礼上,我看见卧室的床上镶嵌着花朵.</li>
<li>The fisherman wishes to finish the dish of reddish fish.<br>渔夫希望做完那盘略带红色的鱼。</li>
<li>On the Christmas the Christian’s assistant fisted Pistol Piston and twisted his wrist.<br>在圣诞节,基督徒的助手拳击了“手枪活塞”并扭了他的手腕.</li>
<li>My sister insists consistently on persistent resistance to transistor radios.<br>妹妹一贯坚决主张持久抵制晶体管收音机。<br>509.The chemist and the mistress insist that the mist consists of several chemicals.</li>
</ol>
<p>　　化学家和女教师坚持认为薄雾由几种化学物品构成.</p>
<p>　　510. My nephew found a few dewdrops on the Jewish jeweler’ s jewel.</p>
<p>　　侄儿发现犹太珠宝商的珠宝上有几滴露珠.</p>
<p>　　511. The crew unscrewed the screws from the sewing-machine and chewed them.</p>
<p>　　船员们从缝纫机上旋下螺钉并咀嚼它们.</p>
<p>　　512. The interviewer reviewed the newspaper and renewed his viewpoint on the news.</p>
<p>　　采访者再次查看了报纸并更新了他对该新闻的看法.</p>
<p>　　513. The refiner defined a definite confine with her fine finger.</p>
<p>　　提炼者用她精细的手指定义了一个明确的界限.</p>
<p>　　514. The sugared vinegar is refined from the sugarcane and pine.</p>
<p>　　加糖的醋是从甘蔗和松木中精炼出来的.</p>
<p>　　515. We are dined and wined in the inner dining-room of the inn.</p>
<p>　　在旅店的内部餐厅,我们受到了酒宴款待.</p>
<p>　　516. I’ m inclined to underline these disciplines in the outline written on linen.</p>
<p>　　我倾向于给写在亚麻布上的大纲中的这些学科划下画线.</p>
<p>　　517. The engineer examined the engine of the mining machine for stomach.</p>
<p>　　工程师检查采矿机的发动机是否有肚子痛。</p>
<p>　　518. The submitted submarine on the magic magazine is shining and magnificent.</p>
<p>　　魔术杂志上那艘提交的潜艇闪亮而壮观。</p>
<p>　　519. Thus the enthusiastic dumb man thumbed the humble man’ s umbrella.</p>
<p>　　于是热情的哑巴用拇指拨弄谦卑男子的伞.</p>
<p>　　520. The trembles of the umbrella assembly lines have resemblances.</p>
<p>　　这些雨伞装配线的抖动有相似之处。</p>
<p>　　521. I’ m interested in why he is arrested while resting in aural restaurant in the forest.</p>
<p>　　我对他为何在森林里的香味餐馆歇息的时候被捕感兴趣。</p>
<p>　　522. I guess the guest’ s gesture suggested that he could not digest well.</p>
<p>　　我猜想客人的手势暗示了他消化不良.</p>
<p>　　523. The pretty priest protested the contest of protein test.</p>
<p>　　漂亮牧师抗议蛋白质化验赛.</p>
<p>　　524. “What a marvelous carving!” the starving harvester in vest said.</p>
<p>　　“好一件神奇的雕刻!”挨饿的穿着背心的收割者说.</p>
<p>　　525. During the festival the investor investigated his ancestor.</p>
<p>　　节日期间投资者调查了他的祖宗.</p>
<p>　　526. Subsequently the eloquent man frequently asked the consequence of quenching in sequence.</p>
<p>　　其后雄辩者频繁地询问顺序灭火的结果.</p>
<p>　　527. In this semester the westerner thinks Chest Orchestra is the best.</p>
<p>　　这学期西方人认为箱子乐队是最好的乐队.</p>
<p>　　528. Henceforth, the north wind is worthless to the northerners.</p>
<p>　　从今以后，北风对北方人没有益处。</p>
<p>　　529. On the eastern Easter feast, at least one beast’ s breasts were tested with yeast.</p>
<p>　　在东部复活节宴会上,至少有一头牲畜的乳房被用酵母做了试验.</p>
<p>　　530. The young youths lounged in the south mouth of the cave for one month.</p>
<p>　　无经验的青年们在南洞口闲荡了一个月.</p>
<p>　　531. The bird nests only in northeast, northwest, southeast and southwest lest it be found.</p>
<p>　　此鸟只在东北、西北、东南和西南筑巢,以免被发现.</p>
<p>　　532. The airport and seaport are important to import and export of portable goods.</p>
<p>　　机场和海港对于进口和出口轻便商品很重要.</p>
<p>　　533. On the porter’ s passport a portion of the portrait isn’t proportional.</p>
<p>　　在搬运工的护照上,部分肖像不成比例.</p>
<p>　　534. With the reporter’ s support, the sportsmen are transported to the airport.</p>
<p>　　在记者的支持下,运动员们被运送到了机场.</p>
<p>　　535. After a fortnight’ s torture, the unfortunate man got an opportunity to escape the misfortune.</p>
<p>　　经过两星期的拷打后那个不幸的人得到了逃脱不幸的机会.</p>
<p>　　536. I got this sort of comfortable soft shorts with no efforts.</p>
<p>　　我不费吹灰之力弄到了这种柔软舒适的短裤。</p>
<p>　　537. The forecaster contrasted the cast castle with the vast desert.</p>
<p>　　预言者将铸造的城堡与广阔的沙漠作了对比。</p>
<p>　　538. I tasted the paste in haste and cast it on the waste plaster.</p>
<p>　　我匆忙品尝了浆糊然后将其丢在废泥灰上。</p>
<p>　　539. The astronaut, an astronomy fan, is astonished at the gymnastics show in the gymnasium.</p>
<p>　　宇航员(一位天文学迷)对体育馆里的体操表演感到惊骇.</p>
<p>　　540. The master’ s masterpiece caused a disaster to headmaster.</p>
<p>　　主人的杰作给校长造成灾难.</p>
<p>　　541. After the blast the plastics show everlasting elasticity.</p>
<p>　　爆炸过后,塑胶显示出永久的弹性.</p>
<p>　　542. The pitch made me itch. I pitched the switch into the ditch around the kitchen.</p>
<p>　　沥青使我发痒.我把开关抛进围绕厨房的水沟里.</p>
<p>　　543. I scratched a match and saw my watch catching a patch.</p>
<p>　　我划了一根火柴发现我的手表钩着了一块补丁。</p>
<p>　　544. With time elapsing, the flaps collapse up on his clapper’s lap.</p>
<p>　　随着时间流逝，袋盖在拍手者的膝上堆叠起来。</p>
<p>　　545. The incapable man in cap went into the hospitable capital hospital.</p>
<p>　　戴帽的无能男子走进热情好客的首都医院.</p>
<p>　　546. I gripped the striped strip that tripped me over on the ship.</p>
<p>　　我握着那条在船上将我绊倒的带条纹的带子。</p>
<p>　　547. With his lips the sly fly clipped the slippery slipper that eclipsed his sight.</p>
<p>　　狡猾的苍蝇用嘴唇夹住遮挡他视线的滑拖鞋。</p>
<p>　　548. The button utters in mutter, “The butterfly likes the buttered earthnut&#x2F;peanut.”</p>
<p>　　按钮咕哝着发出声音说:”蝴蝶喜欢涂了奶油的花生.”</p>
<p>　　549. The scraped escapee taped the grapes into various shapes.</p>
<p>　　擦伤的逃犯用带子把葡萄扎成各种形状。</p>
<p>　　550. In the past the compass could pass passion to the passive man having pastime on the pasture.</p>
<p>　　在过去,指南针可以将激情传递给在牧场上消遣的被动之人</p>
<p><strong>16天记住7000考研词汇(第十二天)</strong></p>
<ol start="551">
<li>In the passage the passenger passed a cassette of message to messenger.<br>在过道里,乘客给信差传递了一盒带信息。</li>
<li>It was not the aluminum but the massive brass and bronze on the grass that embarrassed me.<br>让我为难的不是铝而是草地上厚重的黄铜和青铜.</li>
<li>From the classical class, the classmate with glasses knows the classification of classics.<br>戴眼镜的同学从古典文学课上知道了古典名著的分类.</li>
<li>The hungry drunk plunged a trunk of lungs into the tunnel under the channel.<br>饥饿的醉汉把一大箱肺投进了水渠下面的隧道.</li>
<li>I bundled a bunch of branches and anchored it on the punching bench.<br>我捆起一簇树枝,将它栓在冲压工作台上.</li>
<li>The fundamental fund functions punctually in conjunction with abundant capital.<br>这笔重要基金与充裕的资本一起准时发挥作用.</li>
<li>Uncle and aunt launched a laundry with the blunt hunter.<br>伯伯和伯母与直率的猎人创办了一家洗衣店.</li>
<li>The upset supplement supplier went up with the puppet to the upper room for supper.<br>心烦意乱的增刊供给者与傀儡一起到上面的房间吃晚餐.</li>
<li>I’m liable to give reliable reply to the application for supply of apples.<br>我有责任对申请供应苹果给予可靠答复.</li>
<li>Salaries vary with various jobs.<br>薪水随各种各样的工作而异。</li>
<li>I didn’t evaluate the blue glue due to the vague plague.<br>因为不明确的瘟疫,我没有对蓝色胶水估价。</li>
<li>The flu influenced the influential speaker’s fluency of speech.<br>流感影响了那个有影响的讲话者讲话的流畅.</li>
<li>I have association with the socialists of the society.<br>我与协会内的社会主义者有交往.</li>
<li>In the cinema the medicine immediately remedied the medium.<br>在电影院里这种药立刻拯救了中间人.</li>
<li>I use the ripe recipe to wipe the pipeline.<br>我用成熟的配方来擦拭管道.</li>
<li>The boastful toaster roasts himself on the coast in the sunshine.<br>好说大话的祝酒者在海岸上晒太阳.</li>
<li>It was true that the rescued cruel man let fuel oil issue from the tissue.<br>获救的无情男子真的任凭燃油从薄纱中流出.</li>
<li>The furious obscure curer is curious to secure the curly-curved mercury curiosity.<br>盛怒的不出名治疗者渴望弄到这种带卷曲曲线的水银珍品。</li>
<li>The dictator predicted the contradiction in the dictionary.<br>独裁者预言了字典中的矛盾.</li>
<li>In the fiction, the victim of the conflict pictured the picnic after victory.<br>在小说中,冲突中的受害者描绘了胜利后的野餐.</li>
<li>The pupils will fix with a mixture the fixed figure in the future.<br>学生们将来要用一种混合物整修固定轮廓。</li>
<li>The impure mixture with impurity is purified.<br>含杂质的不纯混合物被提纯。</li>
<li>The native has no nationality; he is an international man.<br> 这个土著没有国籍,他是一个国际人.</li>
<li>In the rural the naturally matured tomatoes have this nature.<br>在乡下自然成熟的番茄具有这种性质.</li>
<li>The worshiper thinks that the worst is the insufficient horsepower.<br>崇拜者认为最坏的事是马力不足.</li>
<li>A year ago I could go without the foregoing favorite flavor.<br>一年前没有先前最喜爱的风味我也能过.</li>
<li>The fresh flesh on the mesh refreshed the dog.<br>网格上的新鲜肉使狗恢复了体力.</li>
<li>In the autumn the authorities automatically authorize me to buy highly mobile automobiles.<br>秋天,当权者自动授权我买高机动性的汽车.</li>
<li>The columnist holds the colorful column of the colonial newspaper.<br>那位专栏作家主持殖民地报纸的多彩专栏.</li>
<li>In the beautiful bureau my daughter’s laughter served for the sauce of the sausage.<br>在漂亮的办公署,女儿的笑声充当了香肠的调料。</li>
<li>The mechanical mechanic knows the technique and technology of the echo mechanism.<br>呆板的机修工知道共鸣装置的技术和工艺.</li>
<li>The ugly druggist gauged the huge plug in the refugee’s rug.<br>丑陋的药剂师测量了难民毛毯中的巨大插头.</li>
<li>I hope to make copper copies of the telescope and microscope for hobby in the lobby.<br>我希望制作望远镜和显微镜的铜质复制品.</li>
<li>The sloped envelope indicates the development velocity of printing.<br>那个倾斜的信封显示了印刷的发展速度。</li>
<li>The rope is proper property to the prospering rope maker.<br>绳子对成功的制绳者来说是真正的财产.</li>
<li>It’s a pity that the spitbox in the pit was hit and split.<br>遗憾的是坑内的痰盂被打裂.</li>
<li>The situation is fit for profiting and beneficial to the shops situated nearby.<br>这种形势适于获利且对坐落在附近的商铺有益。</li>
<li>The fanciful panda fan panics over the span of the pan-like panel.<br>爱幻想的熊猫迷对盆状仪表板的全长感到恐慌.</li>
<li>The advanced van has disadvantages as well as advantages.<br>这辆先进的篷车有优点也有缺点.</li>
<li>The original Organ Organization was originated with an original man.<br>最初的风琴组织是由一个有创见的人发起的。</li>
<li>The pale salesman wholesales scales on a large scale.<br>面色苍白的推销员大规模批发比例尺(天平,鱼鳞).</li>
<li>The males think the females have talent for telling stale tales.<br>男人认为女人有讲陈腐故事的才能。</li>
<li>Beneath (Underneath) the wreath the deaf man near death is out of breath.<br>花环下面那个快要死的聋子喘不过气来。</li>
<li>The conclusion includes my attitude toward his rudeness.<br>结论包含了我对他的粗鲁所持的态度.</li>
<li>In the pond the sponsor responded to the correspondent’s corresponding responsibility.<br>在池塘里主办者对通讯员的相应责任作出了回应.</li>
<li>In this version, some conversions are made to the verbs and adverbs in the conversation.<br>该版本中,会话中的动词和副词作了一些转换.</li>
<li>The cosmic verse on the reverse of the paper is very welcome in Universe University.<br>纸张背面的宇宙韵文在宇宙大学很受欢迎。</li>
<li>The dismissed Swiss miss kissed the once missing missile and scissors.<br>被解雇的瑞士小妞吻了一度失踪的导弹和剪刀。</li>
<li>The comb is combined with a bomb in the tomb.<br>梳子和坟墓里的炸弹结合在一起。</li>
<li>The sum of the hammers is made in the summer summary.<br>锤子总额在夏季总结里作了统计。</li>
</ol>
<p><strong>16天记住7000考研词汇(第十三天)</strong></p>
<ol start="601">
<li>Last summer the drummer became an amateur dramatist dramatically.<br>去年夏天,鼓手戏剧性地变成了业余剧作家.</li>
<li>Long Tongue League’s colleagues are fatigued with cataloguing.<br>长舌联合会的同僚们编目录编累了。</li>
<li>The bottle is hidden in the bottom of a ton of cotton the cottage.<br>瓶子被藏在农舍里一吨棉花的底部.</li>
<li>The pattern of the battery doesn’t matter to the battle against the little brittle cattle.<br>电池的式样对与脆小牛作战无关要紧。</li>
<li>By the biography, the biologist’s playing the violet violin violently violated rules.<br>据传记记载，生物学家猛奏紫罗兰色的小提琴违犯了规矩.</li>
<li>In the faithful waiter’s waist exists a list of the ten listeners.<br>在忠实的侍者的腰里存有那十位听众的名单。</li>
<li>The typist plays Typhoon on the piano in a typical style.<br>打字员以典型的风格在钢琴上演奏“台风”。</li>
<li>I pushed aside the crushed cushion in a rush and saw a bushy brush.<br>我急忙推开压皱的软垫子,看见一把浓密的刷子。</li>
<li>Riding on the ridge of the bridge, the proud bride shouts loudly to the cloud.<br>骄傲的新娘骑在桥脊上对着云大声喊.</li>
<li>The decisive decimal point made the acid man decide to suicide.<br>决定性的小数点使刻薄之人决定自杀。</li>
<li>I’m convinced that the provincial government will provide provisional provisions.<br>我深信地方政府将提供临时供应品。</li>
<li>The hidden division is subdivided into individuals.<br>隐藏的师被细分为个体.</li>
<li>The tides slide on the tidy wide beach and collide each other.<br>海潮在整洁宽阔的海滩上滑行并相互碰撞。</li>
<li>The briber described the tribe head’s bribery.<br>行贿者描述了部落首领的受贿行为.</li>
<li>The ribbon of the rifle is fabricated with fibre.<br>来复枪的带子是用纤维制作的.</li>
<li>The continent continues to control the import of petrol and petroleum.<br>大陆方面继续控制汽油和石油进口。</li>
<li>They returned in turn to bury the luxuries burnt in the burst.<br>他们依次返回来埋藏在爆炸中烧毁的奢侈品。</li>
<li>Banned murders in the suburb bring turbulent disturbance and burden to the urban turbine works.<br>在郊区被禁止的谋杀给都市透平工厂带来汹涌骚乱和重负.</li>
<li>A nice price of the iced rice is offered to the officer.<br>军官得到了冰冻米的好价钱。</li>
<li>The poor man in poverty sleeps on the floor at the doorway.<br>那个贫困的可怜人睡在门口的地板上。</li>
<li>In the log lodge he said some illogical apologies.<br>在木屋里他说了些不合逻辑的道歉话.</li>
<li>The slogan crier saw the dog and frog jump to and fro in the fog.<br>呼口号者看见狗和青蛙在雾中来回跳.</li>
<li>I recognized the large-sized prize and seized it.<br>我认出了大号奖品并将它占有。</li>
<li>The lying liar lied to the dying diet maker that the tie was dyed blue.<br>躺着的说谎者对临死的食疗制作者谎称带子染成了蓝色.</li>
<li>The unyielding man fiercely pierced the shield in the field.<br>那个不屈的人凶猛地刺穿田野里的盾牌.</li>
<li>Perhaps something happy will happen to the unhappy man.<br>或许那个不高兴的人将要碰上某件快乐的事。</li>
<li>The Greek checked his cheeks on the weekend.<br>希腊人在周末检查了他的面颊。</li>
<li>The troop’s stoop on the loop became the top topic at the bus stop.<br>部队在环行道上的屈服在公共汽车站成了头等话题。</li>
<li>The chop shopkeeper let the blood drip to the crops.<br>排骨店老板让血滴到庄稼上。</li>
<li>The pop song is popular in the populous city.<br>这首流行歌曲在人口稠密的城市流行.</li>
<li>Regretfully, we can’t regulate the irregular liner on the gulf.<br>遗憾的是我们不能调整海湾上不定期的班船。</li>
<li>The pig is obliged to dig a big pit for the pigeon.<br>猪被迫为鸽子掘一个大坑。</li>
<li>In this district I can strictly distinguish the distinct distinctions of bees’ stings by instinct.<br>在该地区我能靠直觉严格分辨蜜蜂刺的明显特征。</li>
<li>In the Administration, this minister is in charge of registering regional religions.<br>在内阁中这个部长负责登记区域宗教。</li>
<li>The energetic enemy submerged in the water on the verge of the emergency.<br>在紧急情况快要发生时精力充沛的敌军沉入水中.</li>
<li>The muscular musician found the bud in the mud in the museum.<br>肌肉发达的音乐家在博物馆里的泥巴中发现了嫩芽。</li>
<li>I also heard of the false pulses elsewhere.<br>我在别处也听说过这些虚假脉冲.</li>
<li>The kid kidnapper can’t get rid of a ridiculous kidney disease.<br>绑架小孩的家伙无法摆脱荒谬的肾病。</li>
<li>My niece sacredly sacrificed a piece of pie to the God.<br>侄女郑重地给神供上一块馅饼.</li>
<li>The sinful single singer’s finger skin is singular.<br>有罪的单身歌手的手指皮肤独特。</li>
<li>“The enterprise will be supervised by a group comprising prominent men,” the despising chairman said concisely with no<br>compromise.<br>“企业将由杰出人员构成的小组来监管,”轻蔑的主席毫不妥协简明地说。</li>
<li>The promising singer underwent mysterious misery.<br>那位有前途的歌手遭受了神秘的痛苦.</li>
<li>The physician made a physical examination to the sophisticated philosopher and physicist.<br>医生给世故的哲学家和物理学家作了体检。</li>
<li>Bowing its elbow, the owl sows in the bowl.<br>猫头鹰弯着肘在碗中播种。</li>
<li>The cowardly cow vows not to tow vowels.<br>胆怯的母牛发誓不拖元音字母。</li>
<li>The answer is: Owing to a shower, the powerful powder is no longer on show.<br>答案是：由于一场阵雨,这种强有力的火药不再展览了。</li>
<li>The biscuit compels the mosquitoes quit the equipment.<br>这种饼干迫使蚊子离开设备.</li>
<li>What a nuisance, the suit is ruined due to the unsuitable style.<br>真糟,这套服装由于款式不合适而毁了.</li>
<li>The judge has prejudice to the juicy fruit.<br>法官对这种多汁水果怀有偏见。</li>
<li>The guide disguised his guilty of mixing the liquor with a liter of liquid.<br>导游把酒与一公升液体混合的罪过掩饰起来</li>
</ol>
<p><strong>16天记住7000考研词汇(第十四天)</strong></p>
<ol start="651">
<li>When I fetched the sketch on the stretcher I found the secretary’s secret.<br>当我拿来担架上的素描时我发现了秘书的秘密.</li>
<li>The mutual spirits inspired us to reach the annual aim.<br>相互的精神鼓舞了我们达到年度目标.</li>
<li>The roaring oar hit the coarse keyboard on the cupboard aboard the boat.<br>轰鸣的桨击中了船上碗柜上的粗糙键盘.</li>
<li>My intimate mate’s ultimate estimate approximates the appropriate value.<br>我亲密伙伴的最终估计接近恰当的值.</li>
<li>In case of necessity, necessary session can be held on the vessel.<br>必要时,必需的开庭可在船舶上进行.</li>
<li>By the navigation of microwave, the navy paved a pavement on the wavy sea.<br>借助微波导航，海军在多浪的大海上铺了一条路。</li>
<li>The minority of us are confronted with difficulty in the frontier of the major.<br>我们少数人在该专业尖端领域面临困难.</li>
<li>From the context of the text, I find the next pretext for selling the textile.<br>我从课文的前后关系中找到卖纺织品的下一个借口.</li>
<li>The systematic items stem from the walker’s talk about the chalk.<br>这些系统的条款来源于步行者关于粉笔的谈话.</li>
<li>Theoretically, their heir’s theory of meteorology can explain the meteor.<br>从理论上讲，他们的继承人的气象理论能解释这种大气现象。</li>
<li>I affirmatively confirmed the conformity of the theory with practice.<br>我断然确认了理论与实践相符.</li>
<li>The subordinate coordinates are in accordance with that set by the cordial chorus.<br>从属坐标与热心的合唱团的设定值一致。</li>
<li>The transactor thinks activating the atomic interaction in the intact reactor is practicable.<br>办理人认为激活未受影响的反应堆内原子的相互作用是种可行的.</li>
<li>The distracted reader can’t be absorbed in the abstract extract.<br>心神纷乱的读者无法专心于抽象的节录.</li>
<li>The compact faction fractured because of friction.<br>紧密小宗派由于摩擦破裂了.</li>
<li>Under the guideline, the output of streamlined seamless liners declines linearly.<br>在该方针的指引下,流线型无缝班机的产量直线下降.</li>
<li>The dreadful tread on the meadow broke the deadly deadlock.<br>草场上可怕的践踏声打破了致命的僵局.</li>
<li>The heading is “Headline of Headlong Pleadings”.<br>标题为“仓促答辩状的摘要”.</li>
<li>I overhear that the hearty man heartily yearns for my harness in the barn.<br>我无意中听说那个热忱的人十分向往我的牲口棚中的马具.</li>
<li>After the rehearsal, the weary mechanic repaired the gears with shears and spear.<br>排练完后，疲倦的机修工用剪刀和矛修理了齿轮装置.</li>
<li>Having checked the parameters of the apparatus, the paralysed parasite went to the paradise by parachute.<br>检查过仪器的参数后,瘫痪的寄生虫乘降落伞到天堂去了.</li>
<li>In the compartment, the impartial participant told me his counterpart’s departure.<br>在隔间里,公正的参与者把其对等人物的离世告诉了我.</li>
<li>The articulate man’s artistic cartoon startled the charterer.<br>发音清晰者的艺术卡通使包租人大吃一惊.</li>
<li>The guardian found a quarterly quart of quartz in the safeguard.<br>监护人在安全装置内找到了四分之一夸脱石英.</li>
<li>The immortal man’s mortgage can be a shortcut to resolve the food shortage.<br>不朽之人的抵押可以作为解决食品短缺的捷径.</li>
<li>The escort resorted to the orthodox paradox to retort his distortion.<br>陪护者借助正统悖论反驳他的歪曲.</li>
<li>The oppressor suppressed his aggressive opinion about compressor.<br>压制者制止了他的有关压缩机的挑衅性观点.</li>
<li>The senseless senator’s pretense of consensus caused a sensation.<br>愚蠢参议员的舆论借口引起了轰动.</li>
<li>The conspicuous suspicious pension is in suspension.<br>那笔引人注目的可疑养老金被暂停发放.</li>
<li>He repents having compensated the dispensable pesion for fear of penalty.<br>他后悔因害怕处罚而补偿了不必要的养老金.</li>
<li>Abundance doesn’t mean redundance. The hound found a profound book on the roundabout.<br>充裕并不意味多余.猎犬在旋转木马上找到一本深奥的书.</li>
<li>By courtesy of the mourner, he endeavours to devour the nourishing odour.<br>承蒙哀悼者同意，他努力吞食滋养气味.</li>
<li>The thermal therapy terminated after the terminal germ seminar.<br>热疗在期末细菌研讨会后终止了.</li>
<li>The terraced terrain near the Mediterranean ferry is terrific.<br> 地中海渡口附近的台地地形好极了.</li>
<li>The consul’s consultant hauled out the assaulter from the vault.<br>领事的顾问把袭击者从地窖中拖了出来.</li>
<li>The nitrogen atoms combine instantaneously, simultaneously and spontaneously.<br>氮原子瞬间同时自动化合.</li>
<li>The respectful spectator gave the prospective president a retrospect of the spectacular spectrum.<br>恭敬的旁观者对未来的总统回顾了壮观的光谱(景象).</li>
<li>The suicides in adjacent area are incidental coincidence.<br>邻近区域内的自杀是偶然巧合.</li>
<li>His ignorance of her dignity ignited her indignation.<br>他对她的高贵的无知点燃了她的愤怒(之火).</li>
<li>The man tackling the drawback of the brackets runs a slack snack business.<br>那个解决支架缺点的人经营着萧条的小吃生意。</li>
<li>At the turning the turtle met a turkey and made a turnover on the turnips.<br>在拐弯处海龟遇见了火鸡，在萝卜上翻了个身.</li>
<li>The overthrown president is overwhelmed by the controversy.<br>被推翻的总统被辩论降服.</li>
<li>The handicapped man got a second-hand handout of shorthand handbook beforehand.<br>残疾人事先得到了一本二手速记手册施舍品.</li>
<li>Hitherto the withering flowers can’t withstand the sunshine notwithstanding my care.<br>尽管有我的呵护,这些凋谢的花至今仍经不起阳光.</li>
<li>I averted my eyes from the diverse advertisements for the invert converter.<br>我把目光从花样繁多的倒置转换器广告上移开.</li>
<li>It’s deduced that the induced fluctuation does no good to the reproducing productivity.<br>据推断，诱导波动对复制生产率没有好处.</li>
<li>In the Catholic cathedral the athlete shouted out his wrath in the athletic oath.<br>在天主教大教堂,选手在体育誓言中喊出了他义愤.</li>
<li>The destiny of the pest in chestnut is not known before reaching the destination.<br>栗子中害虫的命运在到达目的地之前是未知的。</li>
<li>The wrestler’s testimony manifests that he has large estates.<br>角力者的证言表明他有大量房地产.</li>
<li>Having attained the entertaining center, the retained man was detained and sustained pain.<br>到达娱乐中心后，聘请的男子遭到拘留并经受到痛苦</li>
</ol>
<p><strong>16天记住7000考研词汇(第十五天)</strong></p>
<ol start="701">
<li>The assessor asserts that he inserted the deserted desserts in the<br>desert with alert.<br>估价人认定他用警惕把被抛弃的甜点心插入沙漠中。</li>
<li>The abrupt corrupt man had the Xeroxed code corroded in the erosion episode.<br>突然的腐败的人让人在腐蚀插曲过程中腐蚀被影印的代码。</li>
<li>The enlightened man highlighted his mighty insight into the fright.<br>开明的人强调他的强大的对惊悸了解。</li>
<li>I would rather withhold than uphold you unfold the gold foil on the threshold.<br>我宁愿扣留而不支持你展开黄金箔在门槛上。</li>
<li>The imposing man posed as a man of good disposition and disposed of the rubbish.<br>给人印象深刻的人冒充一个好安排的人并且处理垃圾。</li>
<li>The prose author’s diagnosis discloses that the hose is damaged.<br>散文作者的诊断透露软管被损坏。</li>
<li>The limping shrimp impulsively implemented the compulsory duty.<br>跛行的虾冲动实现强制的职责。</li>
<li>The implicit implication about the deficit is not explicit.<br>关于赤字的暗示的暗示不明确。</li>
<li>The degeneration of regenerative gene is exaggerated.<br>更新基因的退步夸大了。</li>
<li>The competent petitioner thinks the perpetual impetus is petty.<br>有能力的请愿者认为永久的动力是可爱的。</li>
<li>The superstitious man put the priority on the superficial supersonic superiority.<br>迷信的人把优先权放在表面的超音速的优良上。</li>
<li>The traitor in strait straight forwardly told me the traits of the bait.<br>在向前直的海峡里的卖国贼告诉我饵的特性。</li>
<li>The Oriental is proficient in the ingredients.<br>东方人对成分熟练。</li>
<li>The recipe recipient transiently made the conscientious alien client unconscious.<br>烹饪法接受者瞬变使有责任心的外国人客户无意识。</li>
<li>The rotary agitator irrigated him.<br>旋转的鼓动者可灌溉的他。</li>
<li>The counselor bounced up to denounce discount.<br>顾问上升蹦跳指责折扣。</li>
<li>The degraded undergraduate upgraded the underlying virus program.<br>被降职的大学生升级基础的病毒计划。</li>
<li>Jail life made the frail retailer avail every snail in the pail.<br>监狱生命使脆弱的零售商在桶里有益于每只蜗牛。</li>
<li>Deviation in aviation is dangerous. Writing is alleviated via bias on abbreviation.<br>在航空过程中的不符合是危险的。 写被关于缩写通过偏见减轻。</li>
<li>On the anniversary the versatile poet wrote an adverse verse Virtue versus Evil.<br>在周年纪念日上，多用途诗人写信告诉不利的句美德对邪恶。</li>
<li>The recruit made the current circulate in the circuit on the<br>circumference.<br>新兵使电流在周长上在电路内循环。</li>
<li>In the suitcase, the guitar tutor found the tuition by intuition.<br>在小提箱里，吉他导师以直觉发现学费。</li>
<li>The watchful snatcher dispatched a batch of combatants to the hatch.<br>密切注意的绑架者发送一批战士到舱口盖。</li>
<li>The wretched butcher clutched the needle and stitched it clumsily.<br>可怜的屠夫抓针并且笨拙缝它。</li>
<li>The peer’s queer peering is a sheer sneer.<br>贵族的奇怪盯着看是完全讽笑。</li>
<li>The currency curriculum made the excursionist incur loss of time and money.<br>货币课程使短途旅游者招致时间和钱的损失。</li>
<li>The stray betrayer arrayed the sprayers on the road.<br>偶然的背信者在道路上排列喷雾器。</li>
<li>Dust accumulated on the insulated simulator in the desolate lab.<br>灰尘在孤独的实验室在被隔离的模拟器上堆积。</li>
<li>The inflated balloon indicates a latent inflation on the plateau.<br>膨胀的气球对高原指示潜在的通货膨胀。</li>
<li>Trivial tributes constitute the attribute of constituent’s report.<br>琐屑的颂词形成选民的报告的属性。</li>
<li>I acutely and resolutely refuted the brutal persecution of mute commuter.<br>我尖锐而坚决反驳默默的通勤者的野蛮的迫害。</li>
<li>This measure may preclude the exclusive agency from selling crucial crude oil.<br>这个措施可以使专有的代理不能出售决定性的原油。</li>
<li>He depicted the conviction that contradicted the verdict.<br>他描绘反驳裁决的定罪。</li>
<li>Magnify the magnitude of the magnetism.<br>放大磁性的大小。</li>
<li>The deputy chairman of the charity clarified the importance of clarity and purity.<br>慈善的副会长验证明了和纯洁的重要性。</li>
<li>The tramp from the tram swamped the ham hamburger with shampoo.<br>来自有轨电车的流浪者用洗发水淹没火腿汉堡。</li>
<li>According to the pamphlet, the current in the amplifier can be amplified to 3 amperes.<br>根据小册子，在放大器里的电流可以被放大到3安培。</li>
<li>Prolong the sponge along the longitude and latitude at an altitude.<br>沿着经度和纬度在一高度延长海绵。</li>
<li>The conservative man made a reservation in the observatory.<br>保守的人在天文台的保留。</li>
<li>The mender recommends me to amend the legend agenda.<br>修理工建议劝告我修改传奇议程。</li>
<li>His comprehensive apprehension about the appendix of the pendulum is<br>obvious.<br>他的广泛的关于这个摆的附录的忧虑明显。</li>
<li>Elevate the eleventh level to relevant height.<br>提高第11 步到相关的高度。</li>
<li>Thereafter, I adhered to the coherence inherent to the theory.<br>此后，我粘对理论固有的连贯性。</li>
<li>The prophet appropriately appropriated the fund for repairing propeller.<br>预言者恰当为修理螺旋桨拨专款。</li>
<li>I’m baffled why the affiliated man initiated the negotiator into ego.<br>被附属于的人为什么正式介绍谈判者进自我，我被困惑。</li>
<li>The radiation radius of the radioactive radium radiator in the stadium<br>is variable.<br>放射性的镭暖气装置的辐射半径在体育场是易变的。</li>
<li>Snobbish Knob is doing his hobby in the lobby.<br>势利的球形门柄正在大堂里做他的嗜好。</li>
<li>The ass bypassed the guard and assassinated the surpassing ambassador in<br>the embassy.<br>驴为警卫设旁路并且在大使馆暗杀胜过的大使。</li>
<li>The corporate bodies collaborate elaborately on producing vibrating<br>evaporator.<br>法人团体在生产振动蒸发器之后精心制作协作。</li>
<li>The dazzling light from the digital device dizzied me.<br>来自数字化的设备的耀眼的光使我头昏。</li>
</ol>
<p>16天记住7000考研词汇(最后一天)</p>
<ol start="751">
<li>The extinct exotic bird’s feather contains zinc.<br>那种已绝迹的珍奇的鸟的羽毛中含锌.</li>
<li>The smuggler shrugged to the bugler hugging the bug in the tugboat.<br>走私者对在拖船中拥抱臭虫的号手耸耸肩.</li>
<li>The vocation advocate found the word “vocal” and “reciprocal” not in the vocabulary.<br>职业倡导者发现“嗓音的”和“交互的”两词不在词汇表中.</li>
<li>Without my aid I’m afraid the maiden would have been raided.<br>没有我的帮助我怕少女已遭到袭击。</li>
<li>The slim Muslim reached his climax when he found the axis of the galaxy.<br>苗条的穆斯林在发现银河的轴线时达到了(人生的)顶点.</li>
<li>Bonus is a stimulus for me to study the silicon in the bacon.<br>奖金是我研究薰肉中硅原子的动力.</li>
<li>The categories of the lubricated duplicators are intricate.<br>那些润滑过的复印机的种类错综复杂.</li>
<li>The wagging wasp grasps the crisp clasp for a gasp.<br>摇摆的黄蜂抓住脆钩喘息.</li>
<li>The reconciled reptiles rest on a fragile tile.<br>和解的爬行动物歇在易碎的瓷砖上.</li>
<li>The gossip tossed the mossy blossom fossil.<br>爱讲闲话者向上抛长满苔藓的花化石.</li>
<li>Test the immune function by immersed dispersion.<br>用浸入扩散(法)测试免疫功能.</li>
<li>The lateral élite is literally illiterate.<br>边上的杰出人物简直是文盲.</li>
<li>To abide the abiding bidding, the oxide bidder strides on the seaside.<br>为了忍耐无休止的吩咐,氧化物投标者在海滨阔步行走.</li>
<li>The tormentor enlarged the engagement garment.<br>折磨者加大了订婚服装.</li>
<li>The cripple dipped the whip tip into the chip solution nearby his hip.<br>跛子将鞭子末端浸入他臀部旁边的芯片溶液中。</li>
<li>The tickler pricked a tick on the nickname Nickel.<br>挠痒者在绰号“镍币”上刺了个勾号。</li>
<li>The administrator diminished the feminine miniature to minimal size.<br>管理员将女性缩样缩减到最小尺寸.</li>
<li>The man with mittens intermittently intervened the remittance.<br>戴连指手套的人间歇地介入汇款.</li>
<li>The scorched couch is put in the porch of epoch.<br>被烤焦睡椅放在时代门廊内.</li>
<li>The monstrous monarch monopolied monarchy.<br>可怕的君主垄断了君主国.</li>
<li>The missionary transmitted emission emitted lately.<br>传教士传播了新近散发出来的散发物.</li>
<li>I’m intent on tentative retention of potential patents.<br>我热衷于潜在专利权的暂时保留.</li>
<li>The expelled man repelled billions of rebellions.<br>遭到驱逐的男子击退了数十亿次叛乱.</li>
<li>The cellar-dweller yelled, “Fell the jellyfish burglar!”<br>住地下室的人喊道:”打倒海蜇窃贼!”</li>
<li>The diplomatic diplomas are made in automation in the autonomy.<br>外交证书在自治区是自动化生产的。</li>
<li>The enrolled jolly stroller polled on the trolley.<br>被招收的快乐的散步者在无轨电车上投票.</li>
<li>The contaminated vital vitamin made racial discrimination come to culmination.<br>被污染的重要维他命使种族歧视达到极点.</li>
<li>The jogger made an analytical analogy between the ecology and geology.<br>慢跑者在生态学和地质学之间进行了分析类比.</li>
<li>The alliance enhanced the reliability of the applicable alloy appliances.<br>盟友增强了适用的合金用具的可靠性.</li>
<li>The gigantic panther in pants passed the transition period of heart transplant.<br>穿裤子的巨大黑豹度过了心脏移植的过度期.</li>
<li>With a clatter, the flatterer shattered the chattering wattmeter in the chaos.<br>当啷一声,马屁精在混乱中打碎了格格作响的瓦特表.</li>
<li>“Homely food is wholesome,” the comedist said on the dome.<br>“家常食品有益于健康，”喜剧作家在拱顶上说.</li>
<li>The subtle subscriber found the prescription manuscript.<br>敏锐的认购者找到处方原稿.</li>
<li>Time is finite and infinite. I defy the indefinite definition.<br>时间既是有限的又是无限的.我公然对抗这个模糊的定义.。</li>
</ol>
]]></content>
      <tags>
        <tag>杂七杂八</tag>
      </tags>
  </entry>
  <entry>
    <title>自动换行 word-break:break-all和word-wrap:break-word</title>
    <url>/2010/12/31/word-break-break-all-word-wrap-break-word.html</url>
    <content><![CDATA[<p>word-break:break-all和word-wrap:break-word都是能使其容器如DIV的内容自动换行。</p>
<p>它们的区别就在于：</p>
<p>1，word-break:break-all 例如div宽200px，它的内容就会到200px自动换行，如果该行末端有个英文单词很长（congratulation等），它会把单词截断，变成该行末端为conra(congratulation的前端部分)，下一行为tulation（conguatulation）的后端部分了。</p>
<p>2，word-wrap:break-word 例子与上面一样，但区别就是它会把congratulation整个单词看成一个整体，如果该行末端宽度不够显示整个单词，它会自动把整个单词放到下一行，而不会把单词截断掉的。</p>
<p>3，word-break;break-all 支持版本：IE5以上 该行为与亚洲语言的 normal 相同。也允许非亚洲语言文本行的任意字内断开。该值适合包含一些非亚洲文本的亚洲文本。 WORD-WRAP:break-word 支持版本：IE5.5以上 内容将在边界内换行。如果需要，词内换行( word-break )也将发生。表格自动换行，避免撑开。 word-break : normal | break-all | keep-all 参数： normal : 依照亚洲语言和非亚洲语言的文本规则，允许在字内换行 break-all : 该行为与亚洲语言的normal相同。也允许非亚洲语言文本行的任意字内断开。该值适合包含一些非亚洲文本的亚洲文本 keep-all : 与所有非亚洲语言的normal相同。对于中文，韩文，日文，不允许字断开。适合包含少量亚洲文本的非亚洲文本 语法： word-wrap : normal | break-word 参数： normal : 允许内容顶开指定的容器边界 break-word : 内容将在边界内换行。如果需要，词内换行（word-break）也行发生说明：设置或检索当当前行超过指定容器的边界时是否断开转行。</p>
<p>对应的脚本特性为wordWrap。请参阅我编写的其他书目。 语法： table-layout : auto | fixed 参数： auto : 默认的自动算法。布局将基于各单元格的内容。表格在每一单元格读取计算之后才会显示出来。速度很慢 fixed : 固定布局的算法。在这算法中，水平布局是仅仅基于表格的宽度，表格边框的宽度，单元格间距，列的宽度，而和表格内容无关说明：设置或检索表格的布局算法。对应的脚本特性为tableLayout。</p>
<p>建议：word-break 用3C检测会显示问题的，导致百度快照也会出问题-这个属性OPERA FIREFOX 浏览器也不支持 word-break属性可以用white-space:normal;来代替，这样在FireFox和IE下就都能正确换行，而且要注意，单词间的空格不能用 来代替，不然不能正确换行。</p>
]]></content>
      <tags>
        <tag>前端</tag>
      </tags>
  </entry>
  <entry>
    <title>在网络部的那段日子（一）</title>
    <url>/2010/12/25/the-life-of-ldsn-1.html</url>
    <content><![CDATA[<p>网络部全称鲁东大学网络信息部,是隶属于学校团委的一个很奇妙的部门(关于隶属问题从我进入这个部门开始，就一直很模糊，但是我感觉到的性质是，运作起来像是一个社团，但是编制在校学生会，却对团委直接负责，因为上传的新闻是团委直接审核)。</p>
<h2 id="初来乍到"><a href="#初来乍到" class="headerlink" title="初来乍到"></a>初来乍到</h2><p>我大一那会儿进入部门的时候，部门里的前辈很少，甚至都可以说整个部门很荒凉，每天的任务也很简单，就是给学生会的网站传几篇新闻，学校里有活动的时候就去拍个照片，其他的就是每周一次部内的例会，听着部长在讲一些关于考研、就业之类的人生规划或者社会经历。很多满腔热血的新成员就是被这种现状给打击了，认为这是在浪费时间，所以选择了离开。</p>
<p>这种现状对于我的打击也是非常大的，我之所以选择了这个部门，就因为我衡量了所有进行招新的部门和社团后，认为该部门最适合我，我觉得我会在里面学到我想学的东西，并且我可以得到实践和锻炼。但是现实往往是残酷的。无可奈何的我也不会跳槽去其他的团队，因为别的地方更不适合我（我不喜欢权利味很重的学生会，而其他社团有些虽然感兴趣，但是我找不到我的位置），思考后，我觉得我应该做的事情就是沉下心来自学我应该学的东西。</p>
<p>于是大一一年的多数时间都是在自学ASP网站制作以及一些零零碎碎的东西，尤其是下学期，通过参加学校的科技节网页制作大赛，督促着自己加强了对于ASP中很多概念的理解，虽然成绩不是很理想。</p>
<p>现在想想大一下学期的确很疯狂。那个学期还未开始，在寒假的时候我就意识到将要来临的这个学期将不会平凡，将是4年最难熬的一个学期，于是我从3月16号开始就每天记日记发在校内和QQ空间上，以此来记录这段艰苦的日子。这次写这篇文章，促使我又翻看了过往的日记，从3月16日全天9小时泡在部里研究废弃电脑，到4月份开始疯狂的研究技术，再到学期末和08级的战友们策划下学期的纳新事宜，期间的酸甜苦辣都再一次浮现在眼前。最最让我记忆深刻的就是那时还没有电脑，因此总是去通宵上网。结果就出现这么一幕，别人通宵去上网都在打游戏，而我却在翻着一本本从图书馆借出来的图书学习我渴望的技术。</p>
<p>在这一个学期，我成长了很多，并且凭借自己的积极和技术相对不错，开始担当网管组的副组长，负责网管组的一些相关事务（PS：当时部门有网管组，摄影组，美工组，文编组四个小组），开始有了改版现有学生会网站的思想萌芽，也逐渐开始和我的08级的战友们探索应该怎样去实现这个目标。大一的光阴就这样飞逝而去。</p>
<p>回顾大一的这一年，由于是新人，要适应很多，并且通过自己的日记记录，发现当时自己的想法很稚嫩，即使是现在虽然成长了许多，但是不见得思想就不再稚嫩了。</p>
<p>对于大一上学期和我同期的大多数新人退部的情况，我的总结就是，当发现现实情况与自己期待的东西相差很大的时候，一定要仔细分析现状，更多的是考虑怎样适应现有的工作环境，而不是首先选择退出（08级的管理层6个人就是坚持到最后的胜利者）。其次作为新人一定要精力旺盛，做事情要积极，如果只是积极的话也是不够的，还需要具备独立思考的能力，思考这个事情怎么做才能尽可能的完美，不要你的头儿说写1你就仅仅是写1。</p>
<p>这让我想到了曾经听到的一个故事。那个故事说的是两个竞聘者同时被安排去调查公司后面的菜市场某种蔬菜的价钱。第一个人，很快就回来了，并且把那种蔬菜的价钱带了回来；等了一段时间后才见第二个人回来，第一个人很想嘲笑第二个人的效率，但是却被第二个人带回来的答案所震惊，第二个人带来的不仅仅是那种指定的蔬菜的价钱，而是把其他的相关的有用的信息都带了回来。很明显，公司录用了第二个人。</p>
<p>这就是独立思考的结果，而这种能力，正是中国教育所缺乏的(此乃个人之见)，也是大多数人所缺的，从我带09级的过程中，我是深深地感受到了这一点，具体的内容后面会讲到。总之，作为一个新人，如果能做到以下4点，态度端正、做事积极、勤奋好学、独立思考，那么你会在这个团队中有一席之地。</p>
<h2 id="小试牛刀"><a href="#小试牛刀" class="headerlink" title="小试牛刀"></a>小试牛刀</h2><p>大一暑假一个假期你在做什么？如果你不能立刻给出答案，那么你肯定又一次输在了起跑线上。大一暑假我都做了什么？第一，用自学的ASP语言写了一个简易的调查问卷系统，并且起草调查了山东地区学生群体的网络购物情况；第二，思考、准备部门纳新；第三，进一步学习ASP；第四，写了两篇安全文章并投稿到《非安全》；第五，思考网络部应该怎样发展。因为假期多数人都在休息放松，所以这是最好超越别人的时候，尽管这是老生常谈，但是一个人在一个行业的优势和经验都是这样慢慢积累起来的。可能自己感觉不到进步，但最终进步带来的成果将是令人惊讶的。</p>
<p>一个假期过得很快，转眼间已是大二，开始有人叫学长了，也开始慢慢接手整个部门的工作了。</p>
<p>开学后第一件大事就是纳新。说到纳新就不得不说在我之前两届的纳新都是草草了事（原因后文有分析，因为大三又经历了一些事情后才想明白），导致的结果就是来报名的人也就50人左右。如此少的报名人数势必将会导致人才的匮乏。对于这一点，我们08级管理层很清楚，因此决定这次纳新一定要尽可能搞得大一些。</p>
<p>由于我们的纳新准备工作早在大一下学期期末就开始启动，因此我们有充足的时间来思考每一个环节，力保一切顺利。那段时间，我们6个08管理层人员基本上是大家都没有课的时候，就到部里来讨论纳新细节，用PS制作刊版，写纳新策划和纳新公告，编制纳新报名表，调试网络报名系统……（PS：这里你可能会疑惑，我大一才刚刚是副组长，怎么大二一开始就是管理层人员了。其实这跟我们部门的特殊的人员使用体系有关：每个组的组长都是上一届的管理层人员，副组长基本上就是下一届管理层人员，而大一下学期，副组长基本上就要负责半个部门的事务，到了大二之后，上一届管理层只是名誉管理层而已，实际的管理权基本上就交给了下一届的管理层。）</p>
<p>经过充分的准备，纳新走访开始后，我们就在按部就班的工作，等到报名的那段时间，我们收到了将近260份的报名表，这个数字是上一年的近5倍，这是我们08管理层组建来的第一场胜利。正因为有充足的人数，所以我们在筛选的时候更加的游刃有余。面试、统计、审核复试作品、公布最终结果，一步一步走下来，整个纳新都在我们08级的掌控中进行着。</p>
<p>整个纳新的工作总结：此次纳新可以说是08级管理层组建来的第一次磨合，总的来说大家分工还是比较明确的，并且每个人都很努力，都把纳新的事情看作是自己的事情，丝毫不敢懈怠，毕竟当时我们都有一个共识就是我们要为网络部这个“家”做出自己的一份贡献，使这个“家”更加的健壮。另外，对于整个过程很流畅的进行下来，我觉得是我们08级重视纳新的每一个细节所得到的最好的回报。</p>
<p>与今年09级纳新想比，我感觉我们的纳新过程更让人放心，也许是我没有参与到今年09级纳新的每个环节，观察不足导致的断章取义吧。但是我还是想说一些关于今年09级纳新的一些不足。</p>
<p>第一个问题就是时间观念不强，面试第一天上午，定的是9点开始面试，09级负责面试的人员几乎都是8点50之后到的，这样怎么可以呢？最起码也要提前半个小时以上到达办公室吧，原因我不解释，我只想提醒每一个人，在时间问题上你能赶早就不要托晚，这也许就是积极的一种简单形式。</p>
<p>第二个问题就是思维还是不够开放，有些定式，仅是为了面试而面试，我们要清楚我们本身是做什么工作的，作为一个合格的网络媒体工作者，难道不应该借助这次面试顺道通过来面试的同学，粗略了解下大一新生的精神面貌，从中获取一些以后工作的思路或者启发吗？</p>
<p>总之，我认为一个团队做事情，只要每个成员都用心去想、用心去做了，我想没有什么细节问题会出现，也没有什么困难会打败这个团队的！</p>
<p>继续阅读：<a href="/2011/02/11/the-life-of-ldsn-2.html" title="在网络部的那段日子（二）">在网络部的那段日子（二）</a></p>
]]></content>
      <tags>
        <tag>随笔</tag>
      </tags>
  </entry>
  <entry>
    <title>数学曼联--------------------迟到两年的冠军</title>
    <url>/2010/11/20/math-mu-the-champion.html</url>
    <content><![CDATA[<h3 id="本文来自梁队的人人网"><a href="#本文来自梁队的人人网" class="headerlink" title="本文来自梁队的人人网"></a><strong>本文来自梁队的人人网</strong></h3><p>中午上班路上接到小师弟电话，电话那边欢声笑语，一听就知道数学系拿下了今年的足球赛冠军。电话挂掉，斯慨万千，说实话，这一届数学队已经不能算是学校里绝对意义上的强队，人员配置不是很好，赛前还有很多内部矛盾。杯赛前，我就觉得数学系可能要出问题，但是还是没想到问题在第一场小组赛中就出线了，竟然败给了交院，落到最后一场小组赛要死拼心理的地步。问题出现了反而对数学系起到了积极地作用，不过小伙子们也很争气，团结一致，一场一场硬仗打到决赛一直获得冠军。祝福这些小子，圆了老一代数学曼联球员的冠军梦。<span id="more"></span></p>
<p>遥想数学曼联05黄金一代，那批球员配置、战术打法、球队氛围可以说是全校最好的，那个时候的中前场拼抢特别积极，进攻像行云流水一样。我们的实力？哈哈，我们甚至在裁判尺度严重偏袒的情况下被体育系逼平了，这话一点都不夸张。是的，是我们领先，然后向全学校展示了切尔西般的混凝土式滴水不漏的防守，在裁判变态到甚至不让我们队员之间谈话交流的哨子下，终于被对手攻克了。个人认为那是05数学一代的巅峰之战，防守和进攻都做到了极致。要不是徐军的两次浪费机会，我们完全可以3:0完胜体育系；要不是最后废头教练的自乱阵脚，点球大战我们也可以获胜的，毕竟前三轮我已经扑出了两个点球2:1领先了（小支罚丢了第一个点球）</p>
<p>嘿，05黄金一代，你们还好吗？在烟台、威海、在淄博、在临沂、的你们还有在安徽的昊昊和在新疆的老牛，毕业离开大学后在工作岗位上的你们还好吗？你们还踢球吗？在武汉上学的亚亚图雷，你应该也不少踢吧在武汉的校园里？你们还记得那个老队长吗？你们还记得那个废头教练吗？球队刚成立的时候，我们就在土场上踢；我们一度憧憬的新球场在大三的时候建成了，那更是变成了我们的主场；冬天下雪的时候还记得我们二十几人彪呼呼的去玩吗？我们一直疯玩到毕业，直至天南海北。。。。。。。球队刚成立的时候的视频</p>
<p>对于足球，这是我一辈子的情人，我不会舍弃；对于数学曼联，我倾注了自己很多心血，从买队服组建球队，联系对手组织比赛，选拔队员参加联赛，组织内部对抗，组织球队聚餐，甚至每次比赛买水，我都事必躬亲。数学曼联，我大学最棒的球队，在这个迟到两年的数学冠军日子里，我献上自己的大学足球赛文笔，希望老同学们常来坐坐，想一想我们的那些辉煌。文采疏浅，还请多多指教。</p>
<p><strong>大三数学</strong>**@<strong><strong>曼联废头足球队</strong></strong> **</p>
<p><strong>队服</strong>：上身红色长袖，正面印有vodafone赞助商名字，背后印有黑色号码；黑色短裤。</p>
<p><strong>家人名单：</strong></p>
<p>领队：高壮  教练：赵帅  队长：梁恒  副队：汪进峰</p>
<p>队员： 1号 张磊    2号 王延磊   5号 牛纪鹏    6号 汪进峰   7号 邵峻川</p>
<p>8号 郑仕宝  9号 陈京华  10号 赵帅     11号 杜元章  13号 裴洙浩</p>
<p>14号 梁恒   15号 高壮    17号 孙景坤   18号 高学伟  19号 李杰</p>
<p>23号 袁昊   29号 彭化荣  30号 吕剑     36号 陈建丰  00号 袁祥龙</p>
<p><strong>球队战绩：（括号内为梁队表现）</strong></p>
<p>2007上半年赛季</p>
<p>数学曼联 3 ：3  交院意大利</p>
<p>四中教师 2 ：1  数学曼联      （比赛中打进一球，但罚丢点球）</p>
<p>数学曼联 2 ：2  历史阿根廷    （右脚打进一远射世界波）</p>
<p>数学曼联 11：2  数学联队      （比赛中留下了“1，2，3，4，5，6，</p>
<p>7，7个吃干饭的吗？”经典语录）</p>
<p>这个赛季是球队成立后的第一个赛季，四战一胜两平一负，进17球失9球（最后一场水分太大）。在赵帅的带领下球队磨合阵容很快，队内热身赛很多，球队气氛很融洽。在比赛中暴露出来守门员位置薄弱，防守不力，以及注意力不集中最后时刻莫名丢球的问题，但球队进入状态很快，开场后能迅速进球取得领先。</p>
<p>2007年下半年赛季（福音杯七人制比赛，场地：北区水泥场）</p>
<p>小组赛：</p>
<p>应用学院   4 ：5   数学曼联 （打进一球）</p>
<p>体育明星联  0 ：3   数学曼联</p>
<p>体育皇马   5 ：0   数学曼联 （吃到一张黄牌）</p>
<p>计算机    3 ：3   数学曼联 （打进一球，吃到一张黄牌）</p>
<p>港城火龙   1 ：3   数学曼联 （打进一球）</p>
<p>四分之一决赛：</p>
<p>交院意大利 5 ：1   数学曼联 （打进一球）</p>
<p>小组赛2胜1平2负小组第三出线。淘汰赛碰交院，以大比分失利结束此次杯赛。五场比赛共进14球，失18球，净胜—4球。</p>
<p>这次比赛我第一次带队打比赛，达到球队的最低目标了。队伍管理方面有很大的漏洞，大牌现象很严重，导致球队气氛有些紧张。球队战术方面安排不好，缺乏整体打法，太依靠个人能力。队员普遍第一次打正式比赛，在对方紧逼之下紧张慌乱，在比分落后时缺乏翻盘的信心和勇气。18个失球，3易门将也反映了球队这一环的薄弱。</p>
<p>作为队长，虽然打进四球，但整体表现不好。拼抢积极之外，有两张黄牌。在带领球队打逆风球下，只是一味的过人后选择强行射门，没有很好的鼓舞带动队友，没有做到队长的责任。</p>
<p><strong>鲁大数学曼联足球联队</strong>** **</p>
<p><strong>队服：</strong>上身红色长袖，正面印有AIG赞助商名字，背后印有数学与信息学院呈拱形以及白色号码”；黑色短裤并印有黑色号码。</p>
<p><strong>家人名单：</strong></p>
<p>领队：赵帅、袁祥龙   教练：梁恒   队长：梁恒   副队：支凯青、汪进峰</p>
<p>队员： 1号 魏垂龙    3号 殷晓阳    5号 汪进峰    7号 支凯青   9号  李仁廷</p>
<p>10号 孙昊     11号 杜元章   12号 刘欣然   13号 欧仕仁  14号  梁恒</p>
<p>15号 黄启     18号 徐军     20号 花俊彤  23号 袁昊     25号  陈琛</p>
<p>00号袁祥龙</p>
<p>上述队员名单只是2008年鲁东大学足球联赛上报名单，此外还有张磊、王延磊、邵峻川、郑仕宝、陈京华、李杰等人，原来废头队中有些人已经不再踢球，有些人因为专业分在其他院系，老裴也到北区住了。另外，靳奉亮，孙建等人经常和我们一起玩。</p>
<p><strong>球队战绩：（括号内为梁队表现）</strong>** **</p>
<p>2008上半年赛季</p>
<p>数学曼联  4 ：2  经贸西班牙 （打进一球）</p>
<p>数学曼联  5 ：1  地理       （打进一球，有一脚类似马斯切拉诺的铲传助攻）</p>
<p>数学曼联  2 ：2  经贸西班牙 （王凤去看我踢球了，我第一次穿皮足，很兴奋，很想进个球送给王凤，有好几次射门都操之过急了，尤其那次单刀确实很可惜）</p>
<p>数学曼联  5 ：2  地理       （左右脚分别打进远射）</p>
<p>数学曼联  4 ：2  延边朝鲜队 （梅开二度）</p>
<p>2008年百事可乐5人制足球比赛</p>
<p>第一轮淘汰赛   数学曼联 1 ：3 土木国米 （打进一球）   （首发：魏垂龙、支凯青、徐军、李仁廷、袁昊。下半场梁恒替补李仁廷出场。孙昊全场替补）</p>
<p>在新赛季下，球队召入2007年鲁东大学足球联赛数学联队的几名主力队员：魏垂龙、支凯青、李仁廷，孙昊，又召回旧将徐军，分别解决了门将，中卫，后腰，攻击性前卫位置上人员的空缺。此刻队伍信心高涨，兵强马壮，打法剽悍，逼抢积极，配合默契，打法丰富，进入状态极快，半场就能确定很大的领先优势，基本上球在对方半场攻防演练。4胜1平1负的骄人战绩也是对我们付出的回报。</p>
<p>不过球队也有自己的缺点：习惯了高逼抢状态，不喜欢控制节奏，也反映了此类球员的缺乏；定位球利用不好，往往选择自己射门，而不与队友配合，另外角球没有一个转化成进球；防守定位球不力，打地理对方有直接任意球挂死角，打经贸对方有角球破门；最后时刻注意力不集中，经贸最后时刻的角球破门就是最好的明证。</p>
<p>这一赛季我的表现自己认为还算可以的啦，跑动很多，拼抢成功率很高，有很多自己认为的得意之作，有高速插上后的推射，也有禁区外大力远射。在带领球队方面，队员彼此之间很信任，比赛中情绪始终十分高涨。只是最后五人制输给对手很窝心，自己下半场替补出场打进一球，但队友没有防住对方的反扑。自己真是心有力而气不足，右大腿上缠着厚厚的绷带，拖着一只伤腿暗淡的离开了这个舞台。</p>
<p>2008下半年赛季</p>
<p>福音杯七人制比赛</p>
<p>小组赛：</p>
<p>港城联队     1 ：4   数学曼联（打进一球）</p>
<p>化学系(弃权)   0 ：3   数学曼联</p>
<p>体育幻影     5 ：0   数学曼联</p>
<p>土木克罗地亚  3 ：5   数学曼联 （打进一球）</p>
<p>应用国米     9 ：1   数学曼联</p>
<p>体育皇马     3 ：1   数学曼联</p>
<p>交院意大利    n ：n   数学曼联</p>
<p>小组赛成绩差强人意，原因是球队战斗欲望不强，人员不整，部分主力球员为怕受伤错过学校联赛出工不出力，但也有很感人一幕：袁昊受伤后坚持完全场。自己也只参加了三场比赛，后三场因为家里明子订婚和去监考错过比赛。最终球队如愿以偿遭到淘汰可以全身心的投入学校联赛的备战中。</p>
<p><strong>2008**<strong>年鲁东大学足球联赛</strong></strong> **</p>
<p><strong>———这是我大学四年唯一的机会，却与冠军擦肩而过！！！</strong></p>
<p>小组赛成绩：小组赛4场进11球仅失1球积12分小组第一昂首出线</p>
<p>第一轮： 11月3号  数学 1 ：0心理      第二轮：11月6号   数学6 ：0 国交</p>
<p>第三轮：11月12号  美术 1 ：2 数学      第四轮：11月13号  物理 0 ：2 数学</p>
<p>四分之一决赛： 11月17号  数学 3 ：0 交院</p>
<p>半决赛：       11月18号  数学 1 ：1 物理  点球5 ：4    总比分6 ：5获胜</p>
<p>决赛：         11月20号  数学 2 ：2 地理  点球1 ：3    总比分3 ：5失利</p>
<p>热身赛：   数学曼联5 ：3 土木国米</p>
<p><strong>球队日志：</strong>** **</p>
<p>**<br>**</p>
<p><strong>1</strong>，<strong>球队前期准备工作</strong>** **</p>
<p>**——-**<strong>队员选择以及队服确立和购买</strong></p>
<p>接到鲁大体委的比赛通知是在10月份。离小组比赛第一轮比赛还有将近三周的时间。首先是队员的选择，这个报名表需要在13号前交上。主力队员是很好选择，基本上都是上个赛季的主力。就是这些主力也让我很费心，汪进峰、杜元章由于考研怕浪费时间不想参加，孙昊也说大三学习紧张，我知道他是对自己在队伍中的位置没有信心。我打电话，发信息，当面说，总算说服了我的两个铁卫。由于我与孙昊接触不多，只好让他的好朋友徐军去劝他，最后也把他说服了。毕竟破密集防守很需要他的突破，另外他踢球时很有激情，动作让人赏心悦目，只是曾经我认为身体制约了他的进一步发挥。这样，魏垂龙门将，中卫小支，小皇帝汪副队两个边卫，我梁恒李仁廷防守型中场，徐军组织型中场，孙昊超级边锋，袁昊进球狂人。一个主力阵型形成了雏形。</p>
<p>替补的选择是最伤脑筋的，我现在需要一个中卫替补，两个边卫替补。在一起踢球的数学系哥们中能达到我心目中要求的很少。像小宝、赵帅、张磊、靳奉亮这些人都很有特点，可这些人已经不需要了。这种人不在主力阵容中，让他们大部分时间在场下看着大三大二的踢比赛心里肯定有意见，对队伍管理不好。最重要的这些人体能不好，拼抢不积极，这是我最看重的一个态度。另外邵峻川我也狠心没有招他，虽然他是我的好哥们，可踢球水平实在不敢恭维，脾气也很火爆，对队伍管理、气氛都是一个很大的隐患。首先学生会组织了大一喜欢踢球的在一个中午踢了一个小半场。由于时间很短，彼此之间又很陌生，他们的表现很难达到正事比赛的要求。而且他们都喜欢中前场，没有人愿意在后面防守干脏活。只有一个门将表现的出击很果断，敢于做动作。和小支商量后要了这个门将，还有一个边卫，一个打后卫的和一个前锋只能舍弃了。在大二中我以前看过欧仕仁踢球，打边卫感觉还可以，把他找入了。去年比赛花俊彤是左卫主力，有经验也加入。殷晓阳也是当做李仁廷的替补进入的，有身体有体能。大三只一人，陈琛在小支的极力推荐下进队了，但我很担心他的纪律问题。</p>
<p>比赛队服的确立也是一波三折。由于涉及到金钱的问题，队服不能很贵但质量又不能太低。我们决定在网上购买。刚开始徐军看中了利物浦的红色新赛季队服，只是没有前面的Carlsberg 字样。可我总觉得这样的衣服总是别扭，被我一口否决了。小支又坚持白色皇马，我还是不同意，因为对于不愿洗衣服的男生来说，，等第二次第三次再打比赛衣服就脏的不成样了。由于自己对曼联的一直偏爱，我自己拿定主意选择了新赛季的曼联队服。红色长袖上身，正面印有AIG的赞助商名字，背后有曼联特色的白道，中间可以印上号码，再加上白色短裤，多么经典的搭配。另外只有30元人民币，队员都能接受的了。</p>
<p>还有赞助商的麻烦了。徐军凭借自己同学友网吧老板的关系本来筹到了150元钱的赞助，可在最后一刻老板却反悔了。学院里肖老师说不提供赞助费用，但可以帮我们印号码，前提也得印上数学与信息学院的字样。出于经济方面的考虑，我们接受了。</p>
<p>接下来就是分配号码，小支执意要走了C·罗的7号，徐军没有抢过杜元章的11号选择了18号，李仁廷出人意料的选了9号。我还是14号，永远怀念我心中的英雄阿兰·史密斯Alan·Smith。这样： 1号 魏垂龙，3号 殷晓阳， 5号 汪进峰，7号 支凯青，9号 李仁廷，10号 孙昊， 11号 杜元章， 12号 刘欣然， 13号 欧仕仁，14号 梁恒， 15号 黄启， 18号 徐军 ，    20号 花俊彤， 23号 袁昊， 25号  陈琛。</p>
<p>所有的前期准备工作都好了，接下俩我们开始准备比赛了。</p>
<p>在比赛开打之前我就默默的开始了艰苦加练，有时候一个人，有时候和袁祥龙。在操场上跑圈，压腿舒展身体，冲刺练爆发，玩球熟悉球性，联系熟悉的任意球和远射………为了冠军，所有的汗水都是值得的，我告诉自己！</p>
<hr>
<p><strong>2</strong>. <strong>队伍第一次开会</strong>** **</p>
<p>在10月31号晚上九点，正式比赛前一周周五晚上，球队正式开会。参加人员14人，徐军在家实习，陈琛无故缺席。</p>
<p>首先向刚进入球队的队员介绍了球队的基本情况包括优缺点，端正所有的球员的心态，既不能过度自信，也不能妄自菲薄。接下来强调了许多问题、细节。 1，不准出线打架现象，先动手直接开除球队，没有任何商量余地。挨打可以还手，但必须接受队内停赛处罚。 2， 在场上无条件绝对服从裁判判罚，不准恐吓辱骂。有意见可以告诉场上队长，通过队长交涉。 3， 红黄牌问题。领红牌或累计两张黄牌须自动停赛一场。红黄牌累计带入下一阶段。 4，由于组织方规定不准穿皮足，不准使用铲球技术。 5，球队团结。这个问题细节很多，包括：不能对队友指指点点，更不准私下议论队友，可以公开说或找队长商量；在场上场下不能有对队友不满的情绪上的宣泄；不计较钱、干活之类的事情；替补席上的心态问题。</p>
<p>比赛准备方面。 1，提前一个小时在101宿舍集合，提前四十分钟去场地热身；下午有课的下课后直接去场地。有事情不到必须提前24小时请假。 2，热身。包括替补席上的热身保持身上温度，防止受伤。  3，受伤、保险。</p>
<p>对方受伤听裁判的哨，自己人受伤尽快将球踢出场地，喊裁判，球在对方脚下不能放松做好继续比赛的准备。不提倡高难度动作以避免受伤。  5，队长资格。梁恒为第一队长，支凯青为第二队长，汪进峰为第三队长。在第二队长的选择下中，先找汪进峰谈话，做通他的思想工作。任命小支为第二队长可以帮助他来年更好的做好队长职务，也可以很方便的沟通我与大二大三队员之间的沟通。6，首发资格以及替补。 这是队员们最敏感的最关心一个问题。首发资格考虑的因素有：福音杯参赛态度；自己踢球实力；比赛风貌，包括场上的跑动、防守以及你在替补席上的态度；赛程的特殊需要；大一啦啦队的到来，此情况只针对大一黄启刘欣然两人，但必须提前一天打招呼。比赛资格是相对民主允许商量的，但我会拿最终意见。郑重承诺会在小组赛阶段所有队员都会有至少半场的比赛时间，门将是一场（这个承诺没有做到，刘欣然只在对国交的比赛中有半场表现时间）。首发阵容会在比赛前一天或两天短信、电话或面谈公布。在这方面有挑衅队长权威，或有矛盾处理方式，有意见发泄方式不对的会分情节队内处罚。</p>
<p>球队战术方面。总的来说：八人制，一门将，一中卫两边卫，两防守型中场一进攻型中场，一名前锋；要求积极跑动，就地反抢，向前传球挤压空间，是一个整体打法，但不会扼杀个人发挥（必须适度）。在位置上，都有各自要求。守门员必须喊起来，布置防守队员久违以及人墙安排，在快速开球方面也得聪明点。做动作必须勇敢，舒展。后卫基本要求：不准后场带球，解围干脆，尽量不回传门将。压上助攻适度时注意回追以及找喊队友给其补位。中场争抢第一点，多拼抢，多跑动，多传球，</p>
<p>尽量把球交给前面锋线。前锋分两种：1，射手型的自己多打门，如孙昊、袁昊。2，搅局型的，自己多跑动逼抢给对方后卫施加压力，有中场球员压上完成射门。</p>
<p>安排第一场比赛对心理系的具体细节。（见下一章）</p>
<p>最后特别强调了几点。1，比赛前不准带女朋友出去开房。一经发现立即取消本次比赛资格。 2，红黄牌，特别是不要因为铲球和对裁判不满吃牌。  3，比赛中多注意自己的位置，如欧仕仁、黄启、陈琛。 4，比赛中战术纪律。包括角球任意球的安排。 5，基本常识：中场开球、界外球、守门员接回传球。</p>
<p>这次会议基本上都是我在说，队员有说有笑不时插几句，气氛很可以。本次会议形成了球队轻松团结的气氛，规定了球队严格的纪律，确立了我在球队中的绝对核心位置，为接下来的比赛打下了基础。</p>
<p><strong>3</strong>.  <strong>小组赛第一场</strong></p>
<p><strong>数学与信息学院</strong>** 1 <strong><strong>：</strong></strong>0 <strong><strong>心理与教育学院</strong></strong> **</p>
<p>上半场首发阵容：魏垂龙，花俊彤、支凯青、欧仕仁，黄启、梁恒、李仁廷，袁昊。</p>
<p>下半场首发阵容：魏垂龙，梁恒、支凯青、汪进峰，孙昊、李仁廷、袁祥龙，袁昊。</p>
<p>上半场 袁昊进球</p>
<p>下半场 支凯青、袁祥龙黄牌</p>
<p>这场比赛的准备时间早在开场前半个月就在准备，由于比赛对手的不确定我准备了两套方案，一套是准备打强队时的阵容，首发阵容包托魏垂龙，杜元章、支凯青、汪进峰，孙昊、我、李仁廷，袁昊八人当时的最强阵容，另一套阵容是对付一些实力比较弱的对手，也就是事后的首发阵容：魏垂龙，花俊彤、支凯青、欧仕仁，黄启、我、李仁廷，袁昊。相比于最强阵容有三个位置上换人，左右边卫、左前。   比赛开打后才发现并不是想象中的那么简单，心理系会踢球的不多，可他们身体很强壮，拼抢很积极，这种始料未及的态势让我们有点慌乱，最明显的表现就是边卫、边前不敢拿球，总是匆匆的把球交给队友。好在袁昊开场不久的进球让我们安稳了一点心，但并没有引起大家的警觉。下半场我们开始大面积的换人，孙昊替补黄启，汪进峰替补欧仕仁，袁祥龙替补花俊彤，我撤回左卫。下半场更加不好打，中场压上太厉害回收不及时，中后场脱节严重，最可怕的是我们失去了对中场的控制。对方开始反扑，频频打出速度极快的过顶身后，好在对方个人能力不是很好，没有创造出很好的机会。小支防守犯规吃到一张黄牌，袁祥龙排人墙没及时撤回有效距离吃到一张黄牌，最终磕磕绊绊的我们拿了首场比赛。</p>
<p>比赛结束后我大口的吐了一口气，终于拿到既定的三分。回顾这场比赛我们打得不是很好，有些队员是第一次和我们踢比赛，配合非常生疏，黄启竟然是第一次踢大场！黄启跑位存在严重问题，好几次出现在队友跑动路线上，最气人的是竟然和拿球时的我撞在了一起！队员把握机会能力不好，上半场黄启面对大半个空门一脚踹在了对方门将身上，下半场李仁廷近在咫尺的射门狠狠的打在了横梁上。中场控制型球员几乎没有，上半场我还能压住，等下半场我撤回左卫位置后中场完全是混战。对定位球的利用不好，那么多的机会没有把握住。整场比赛亮点也有，袁昊的发挥特别好，盘带、过人突破、传球、射门、进球无所不能；小支率领的后防线封堵让对方打门没有形成实质性的威胁。</p>
<p>上半场我打的位置是后腰，在负责中场拦截、组织调度上发挥还可以。也有四五次的角球机会总是罚的力量很大，队友都没有抢到落点。下半场我撤回左卫，在这一个新的位置上我却显得有点不适应，有几次贸然起跳没有抢到球，给了对方打身后的机会。虽说有一次在对方禁区突破后的射门（被干扰），但在自己禁区有一次贸然铲球送给对方一个禁区间接任意（我认识裁判的缘故没有判罚点球），导致禁区一片混乱。在队长的位置上做的很还可以，稳定军心，控制形势。只是下半场陈琛的要求上场是个小插曲，我大声骂了他几句他也没有说</p>
<p>什么。印象中这场比赛我是在大鸟、刘倩还有木头的加油中完成的，还有，在上半场我在中场有一个接对方门将的大叫开球直接胸部停球很漂亮哦。呵呵呵</p>
<p><strong>4</strong>.    <strong>小组赛第二场</strong></p>
<p><strong>数学与信息学院</strong>** 6<strong><strong>：</strong></strong>0 **<strong>国际交流学院</strong></p>
<p>上半场首发阵容：魏垂龙，殷晓阳、支凯青、汪进峰，孙昊、梁恒、陈琛，袁昊。</p>
<p>下半场首发阵容：刘欣然，支凯青、汪进峰，孙昊、梁恒、李仁廷、张磊（杜元章），袁昊。</p>
<p>上半场：支凯青,梁恒,袁昊（2个）陈琛进球。</p>
<p>下半场：张磊进球。</p>
<p>由于上一场比赛打得有点窝心，我害怕队员信心会慢慢消失，我决定这场比赛要派出最强阵容赢得要干脆利落。在战术上，我要求要全部压上，尤其两个边卫要压过中场防守；在进攻上强调边路，两个人边前卫要压着边线，充分调开对方防守，边路突破后把球交给袁昊，由袁昊完成最后一击；外围加强远射。</p>
<p>比赛是在计划之中进行的，确切的说是上半场。由于队员对战术的坚决执行，比赛打得异常顺利。先是小支接到孙昊主罚的角球头球破门，再是我的禁区线上大力远射挂网，袁昊接到边路传中后两度把球送进对方网窝，陈琛也在一次补射中进球，这还不包括浪费的很多机会。下半场换人后队员普遍很放松，心态也明显发生了变化，都挤扎在禁区里想进球，连小支半场过后就一直调整着打门。这样我们又错失了一次次的机会，只有张磊取得了一个进球。说实话，下半场我们的机会更多更好，我们如果把握好的话，这场比赛完全可是是一场十五个净胜球以上的大胜。这场比赛下半场试验了双中卫的组合，由于对方实力实在太弱，没有得到太多机会试验，有待于进一步观察。比赛最大的意外的就是陈琛的发挥，突破很犀利，和左路的孙昊把两个边路进攻踢的非常棒。</p>
<p>全场比赛我打的后腰，在对方进攻上没有受到太多的考验，也把角球的主罚交给了两个边路队员。这样倒是把全部的精力用在了组织进攻上，往禁区里直塞渗透，往两个边路分球，回传边卫还是突破远射都做的非常棒。印象中最深的不是那个远射挂死角，而是下半场在中场右侧有一个类似马斯切拉诺的滑铲破坏，最终顺利的把球断下，迅速的起身把球交给了孙昊。还有一次在张磊的身体掩护下禁区高速插上一次抢射射偏了一点点，非常遗憾的！</p>
<p>这场比赛上半场赵继磊老师观看了，对我领导的队伍很是满意，而我和袁昊作为他的得意门生进球也为他长了不少面子。</p>
<p>呵呵呵</p>
<p>赵老师：梁伟在不在场上？怎么看不到啊？</p>
<p>袁祥龙：怎么不在场上，你看看那个最能装B的那个。</p>
<p>赵老师：哦。他还带着队长袖标！</p>
<p>袁祥龙：你看别的队有戴的吗？</p>
<p>赵老师：没看到，呵呵呵</p>
<p>袁祥龙：呵呵呵</p>
<p><strong>5</strong>.   <strong>小组赛第三场</strong></p>
<p><strong>美术学院</strong>** 1 <strong><strong>：</strong></strong>2 **<strong>数学与信息学院</strong></p>
<p>首发阵容：魏垂龙，杜元章、支凯青、汪进峰，孙昊、李仁廷、梁恒，袁昊。</p>
<p>下半场换人：徐军  （李仁廷下场）</p>
<p>上下半场 孙昊各入一球</p>
<p>梁恒战术犯规黄牌   孙昊对方禁区危险铲球黄牌</p>
<p>杜元章故意手球黄牌 袁昊阻碍对方门将发球黄牌</p>
<p>这场比赛是背靠背的第一场，为了小组提前出现，我们想拿下对手，又怕上一场的大胜使队员过度轻视对手造成进入状态慢，我在本场比赛准备的细节上抓了很多。1，边卫帮助李仁廷协防。2，单后腰李仁廷只负责后场横向跑动接应，拦截，不可以过度助攻，以防体力不支，延误对物理的比赛肯定的首发资格和整体安排。3，两个边前卫协助防守，负责单侧角球，可以选择内切射门，和上一场一样压在边线上，把后卫带出来，把禁区留给袁昊一个人。最重要的是体能分配，为了第二天队伍里的强强对话，我特别嘱托袁昊不能随便大范围跑动，由边卫来完成上下来回冲刺。另外在定位球上也下了很大的功夫：在任意球防守时由中前场完成人墙安排，在角球防守时前门柱后门柱由孙昊汪进峰负责，人盯人的三个大个分别为杜元章、小支和李仁廷，袁昊负责防守大禁区的远射，梁恒自由人；角球进攻时完全靠大个的身高和身体，主罚权交给两个边前卫；前场任意球的主罚是我梁恒。</p>
<p>开队会最后作总结时强调了时间：3：00到场地热身，边路拉开，聪明分配体能，对方9号队员的盯防由李仁廷和区域人员共同完成，不许轻易得黄牌。</p>
<p>比赛比想象的激烈的多，人仰马翻的场面比比皆是。由于对方拼的太凶，我及时和李仁廷换了位置，打到了后腰的位置，算是稳定了中路的防守。在双方频频的倒地中，我队觅得一个机会：汪进峰右路45度斜长传，我胸部把球卸下，假射真传将球轻轻的推给前面位置更好的孙昊，孙昊不做任何调整半转身抽射打开僵局。进球后的我们异常兴奋，我们觉得我们可以拿下这场比赛了，可就是这一时刻的放松让我们吃到了后果：对方中场发球通过简单的几脚倒球就射门完成进球了。期间我们没有碰到一脚球，情绪一下子从刚才的进球中跌倒了这种失球的窝囊中。在看到球飞近自己大门的一刻我自己都不知道说什么好了，出了怪我们没有集中注意力外，更多的是对自己的愤怒。对方射门时应该第一时间做出干扰的人应该是打后腰的我，而我却还在中圈线那儿回头呆呆的看着。回过神来的我赶紧大胜鼓励队友，说道没关系，大家都没有责任，好好踢，再踢一个就是了。我心里很清楚那个责任人就是我，我的失位不应该让全队来买单。我开始扩大并前移自己的跑动范围，除了应做的抢断组织外，上半场还有两脚禁区外（一脚打偏了，一脚打得太正），另外还有禁区内连过两人后小禁区线上的打门稍微高了一点。在接连错过几次机会后，下半场我开始换人调整，徐军替补李仁廷登场。换人后前场对球的控制进一步加强了，徐军也获得了不少机会，但由于刚回来身体跟不上比赛节奏的缘故射门效果不是很好，可他传出一记极具想象力的直塞，孙昊心领神会捅射破门。虽然我们还有不少机会，包括我的高速插上小禁区推射远角擦柱而出，但2：1的比分还是维持到了终场。</p>
<p>赛后我向全队道歉了，由于我的失位导致了那个完全可以避免的失球。还有我的比赛准备没有做到最好，关于小组计分和决定名次的细节问题研究的不好，“如遇两个或两个以上队积分相等，以积分相等队间比赛的下列结果决定名次：（1）相互间胜负关系（2）相互间净胜球（3）相互间进球总数（4）全部比赛净胜球（5）全部比赛进球总数（6）如果仍相等以抽签决定名次”其中第一条就是相互间胜负关系！赛前美术队显然仔细研读了这一条规则，只要赢得和我们的比赛，我们就只有死拼物理的一条出路。怪不得他们打物理时明显防水，在我们面前示弱以麻痹我们，想法实在狠毒，把我们当成软柿子了。等想到这一点时我已经在踩着球等待中场开球了，仓忙之间我喊道：输谁不能输给美术！这也算是引起这场比赛非常火爆的导火索！</p>
<p>比赛虽然拿下了，可付出的代价确是巨大的。力，就是黄牌我们仅这一场就拿到了四张。</p>
<p>梁恒战术犯规黄牌， 孙昊对方禁区危险铲球黄牌，杜元章故意手球黄牌，阻碍对方门将发球黄牌。这还不是全部，赛后比赛监督秦老师说，“比赛说话过多，明显可以给黄牌警告，却一张都没有。那个手球故意犯规，意图十分明显，完全可以红牌直接罚下（指杜元章）。还有下半场23号在裁判后鸣哨后将球大力踢向门将身上，也可以给张黄牌，累计两张黄牌出示红牌下场（指袁昊）。”这样一来主力阵容中除魏垂龙、汪进峰、李仁廷、徐军外都有黄牌在身了。万一打最后一场小组赛再吃到牌淘汰赛怎么打？还有小支在禁区里防守时手上动作非常明显，若是碰到执法比较严的裁判后果不堪设想！这个队伍主力队员与替补队员的差距很大的。所有的这些问题很是让人头痛，重中之重的很多黄牌中有很多是完全可以避免的。经过深思熟虑，又和小支、汪进峰商量后，在当晚的队会上，我宣布：以后比赛中只要出现无谓黄牌，包括故意手球、妨碍守门员发球、禁区内推人犯规（特别针对小支）、裁判鸣哨后继续踢球、禁区铲球五方面，不管是谁都要交罚款10元人民币，特别指出以下 梁恒、支凯青、汪进峰、魏垂龙、杜元章、李仁廷、孙昊、袁昊八人是20元人民币标准，所交罚款用作队费，用途公开。这一决定从下场对物理队比赛中生效。经过耐心教育和罚款规定的公布，全体队员认识到了主动申请黄牌的一人失误全队买单的后果危害和自己所由此承担的个人经济损失，心里认可了这项决定。</p>
<p>在这次会议上，在队伍管理方面我还强调了以下几点：1，比赛过程中对裁判的无条件服从。2，主动申请黄牌罚款制度。（见上段）3，面对对手挑衅，你不用管它。你也可以选择骂他，但是放聪明点。后一做法我不支持。在战术方面有以下几点：1，在比赛集合前找不到陈琛，在中场休息时也没有找到。以后在规定时间不出现，罚款5元人民币。中场休息的时候大家要坐在一起，交流比赛。2，李仁廷单后腰的薄弱，有点吃力，得多加保护，周围有人接球。3，后场解围要干净利索。（比赛者杜元章在后场危险地带有托大玩火行为。4，孙昊位置太靠前，得往回跑接应5，孙昊袁昊两人相互传球不多，配合太少，个人单打独斗太多。6，小支座位中卫，一定要注意手上动作，可以张开，注意防守地点和犯规位置。7，比赛中任意球和角球的主罚是赛前安排好的，原则上不允许私自更改，除非个人感觉特别好。8，在比赛中出现了做为队长的梁恒我骂人的事情。当时徐军没有把球分给位置更好的我，选择禁区外远射，结果很偏，我骂了一句“X你妈”。对此我向徐军道歉，但强调这种情况这在足球比赛中极其常见，但骂人的原则是对事不对人，不能影响队伍团结，比赛该怎么踢就怎么踢。</p>
<p>在后来分析B组出线形势时，大家都很苦恼，那个组形势很混乱，怎么算都不是很明朗。大家也就作罢，但这也影响了我们下一场对物理的比赛准备。（见下一小节）会议的的最后我把孙昊袁昊两人留下了，据高壮在场下观察，两人似乎有矛盾。他俩也显得很是不好意思，毕竟都是男子汉，笑一笑男人间什么矛盾都没有了。</p>
<p>在送走队友后我躺在了床上，我们出现了！我们进八强了！虽说比赛很艰苦，事后写这些文字时我都认为对美术之战才是我的巅峰之作，尽管很多人都认为是1&#x2F;4决赛中之中的帽子戏法。但我感觉这场比赛无论节奏还是强度都不可同言而语，自己在比赛之中的发挥也特别好，首先比赛刚开始果断作出选择回到中路，在比赛节奏控制、中场拦截、送最后一脚球方面都是无可挑剔，最遗憾的是临门一脚发挥，上下半场分别错失一次极佳的破门机会，就连上半场的犯规黄牌都觉得是一种享受。（对方进攻队员过掉李仁廷后长驱直入，在侧后方紧追的我在看到小支不往上顶时果断犯规，将对方球员放到终止了对方的进攻）</p>
<p>在赛前有袁昊剃发明志，戴着帽子上场比赛。在晚上的队会上，陈琛说道自己的所见所闻：在对方啦啦队的阵容中坐着些女生，</p>
<p>女生甲：看到那个戴帽子的人了吗？</p>
<p>女生已：噢，怎么了？</p>
<p>女生甲：我真想上去把他的帽子摘下来，别拦我（佯做起来的动作）</p>
<p>众女生：不要啊，别去了。。。。。（众人配合做拦她的样子）</p>
<p>女生甲：算了，我还是别去了。</p>
<p>女生丙：我去，我去把他的帽子摘下来。</p>
<p>女生甲：你也别去了</p>
<p>女生丙：为什么呀？</p>
<p>女生甲：我猜那个人一定是太丑了，我怕你摘下他帽子后把你吓坏了！</p>
<p>这场比赛还有比较恶心的一点东西，美术系的队员真是娇的很，一碰就倒，倒地还长时间起不来，在地上不停打滚呲牙咧嘴做痛苦状，起来后却像没事一样重新投入比赛。这种恶劣而且拙笨的表演令我们极度不满和作呕，甚至赛后我们都没有任何交流。</p>
<p><strong>6</strong>.   <strong>小组赛第三场</strong></p>
<p><strong>物理与电子工程学院</strong>** 0 <strong><strong>：</strong></strong>2 **<strong>数学与信息学院</strong></p>
<p>首发阵容：魏垂龙，花俊彤、支凯青、汪进峰，孙昊、徐军，陈琛，外加全场自由人李仁廷。</p>
<p>下半场换人：梁恒    （花俊彤下场）</p>
<p>袁昊    （陈琛下场）</p>
<p>30分钟换人 杜元章  （李仁廷下场）</p>
<p>上下半场分别由孙昊、袁昊取得进球</p>
<p>陈琛故意手球黄牌（罚款十元人民币）</p>
<p>花俊彤动作频率慢出脚放倒对方10号黄牌</p>
<p>这场比赛早在与国交的第二场小组赛结束之后就着手开始准备。由于赛程安排第三场第四场是背靠背，我起先安排了魏垂龙，杜元章、支凯青、汪进峰，孙昊&#x2F;徐军、梁恒，陈琛&#x2F;袁昊加上全场自由人李仁廷的比赛阵容。由于小组提前出线和淘汰赛对手的不确定性，再加上我身上的一张黄牌，我将自己排除在首发阵容之外，由此孙昊徐军的单选也变成双选搭档中场；上一场对手对袁昊的严密盯防和憋一憋袁昊的状态，我把袁昊放在了替补席上，陈琛第二次打首发。在战术安排上由李仁廷来专门盯防再加上区域人员的帮助来拟制对方10号球员的发挥。在与美术的比赛中徐军控制中路比较得手，本场比赛中场人数少，主攻中路。由于B组形势的极度混乱，本次比赛我也有点矛盾，既想一鼓作气打出气势拿下对手，又想打平或输掉比赛以避开B组交院，后者极有可能获的其小组第二，这也是我们最不愿碰到的对手。在这种思想矛盾中我也没有明确说出自己的想法，只丢下了一句—–好好踢就行。</p>
<p>这种矛盾在其他队员身上也存在着苦恼，在上半场孙昊打进第一球其他队员正忙着庆祝时汪进峰竟然跑过问我“梁队，这场比赛咱到底怎么踢？是想赢还是想输？”事到如今，照这情势发展下去想输都难了，我索性回到：拿下比赛，我们谁都不怕！下半场我们开始大面积换人，昊昊在场下一直要求上场，我也想上去试两脚，于是徐军撤回左卫，我和孙昊打中场。由于比分落后，对手开始反扑，中场渐渐的失去了优势，见此情形我把杜元章换上来打左卫，徐军又重新回到中场，这才将形势稳定下来。调整后不久，昊昊打进了个人本次比赛的第四球，看到换人有些效果，我自己心里也有小小的得意。在看到大势已去后，物理也纷纷换将，2：0的比分也维持到了最后。</p>
<p>本场比赛中，花俊彤由于动作频率慢出脚总是慢一拍，在一次防守中，放倒了对方10号得到一张黄牌，陈琛顶风作案故意手球主动申请黄牌，罚款五元人民币。在经过私下沟通后当晚他就很爽快的交上了罚款，并向全队道歉并得到了大家的谅解。下半场我上场后有很多射门，很多次没有将球分给位置更好的队友，都强行射门了，却状态全无。事后我也认识到了自己的自私，在队会上第一时间表达了我的歉意：我实在是太想要一个进球了。另外下半场前卫线扑球太猛，容易被过掉，前锋线也没有适当回撤，把三条线拉的有点太长。比赛中有很多亮点，我们打这种技术流派的球队并不处于下风，下半场我和徐军、孙昊、袁昊的倒球丝毫不亚于他们；上下半场的进球更是我们小组赛的第10球和第11球；汪进峰的发挥越来越稳定，在右路防守稳健，助攻也比以前有质的提升。</p>
<p>总的来说，比赛踢的非常友好，赛前我们和他们有说有笑，赛后也是，我们都为对方送上了彼此最真诚的祝福，并约定半决赛再见。</p>
<p>附：昊昊下半场上场以后突破、射门感觉特别好，打入球队第二粒进球锁定进球，也把自己的进球数提高至4个。赛后他接受了校电视台记者的采访，很谦虚的说道：只要球队表现好，拿下比赛这才是最重要的。下面的淘汰赛不容易，我们要一场一场的打好。  呵呵呵，很有球星的模样哦。</p>
<p>*<em>7 **. *<em>小组赛总结和1&#x2F;4</em>***决赛的准备</em>*</p>
<p>1, 小组赛总结</p>
<p>在过去的小组赛中我们四战四胜积12分小组第一昂首出线，进11球场均3.67球，进攻力惊人的同时破门手段多样化也让我感到满意，包括头球攻门、角球破门、后排插上、远射还有个人杂耍进球；仅失1球场均.025球，密不透风的防守也是我们下一步前进的基石。</p>
<p>所有的队员都获得了比赛实战机会，有的发挥特别好，出乎我的意料的有汪进峰，虽然从第二队长降为第三队长，他在右路的发挥非常出色。还有陈琛，他绝对是我们小组赛中发现的最大财富，他的冲击力绝对是我们需要的，在对物理的比赛他在一次头球争抢中直接把对方顶下了赛场。虽然如此我们也暴露出了一些问题：1，比赛领先时的放松，唯一的失球就是明证。2，控制型球员的缺少倒置比赛打法有时候缺少变化。在比赛节奏上一味求快，缺乏必要的节奏控制。</p>
<p>我们可爱的啦啦队永远给我们提供了最好的氛围，他们也是我们勇往直前的动力。我爱你们！</p>
<p>2, 淘汰赛的准备</p>
<p>八强淘汰赛对阵表</p>
<p>经过小组赛后计算机、经贸分别取得C组和D组头名，土木在最后一场小组赛中把握住了自己的命运战胜了只需打平即可出现的管理，以C组小组第二身份出线对阵经贸，而地理一胜一负以小组第二出现迎战计算机。（D组由于政法的弃权只有经贸、地理、化学三支球队，可怜的化学两战皆负惨遭淘汰）我们最关心的B组的出线形势极其混乱，在最后一轮小组赛开打之前只有中文稳获出线权，但也不能确定最后的小组名次，交院、应用、历史也都有出现的可能，最终交院4 ：0 拿下了早已被淘汰无心恋战的音乐把自己的积分提升至7分获得小组第二。</p>
<p>1&#x2F;4决赛对手是交通学院，我们心里最不愿意碰到的对手。以前我们和他们踢过两次，一次3：3打平，一次是溃败。我们似乎心里没有多大的底拿下对手，老是害怕对方的身体和头球。可已经碰到了，我们必须得面对事实。不过我也想，我们没有理由怕他们的，美术和他们的风格差不多，甚至与其比赛时拼抢和身体接触更厉害，我们却踢得很棒，对方一点办法没有啊，况且我们又是小组第一，交院却只是两胜一平一负仅积7分出线的。完全没有理由怕他们的，而且，害怕的也应该是他们！</p>
<p>在比赛前一晚的队会上，第一件事情就是我鼓舞大家的士气，告诉自己和队友我们是曼联，我们谁都不怕！在分析对手球员特点和打法时，我介绍的很仔细。交院有两个人很关键，其他人一般。一个是大个，闫易（不知道名字写的对不对），脚下活很细，身体高大特别强壮，头球号且在小组赛时有头球破门记录，缺点是跑动不积极，从内心愿意近身对抗而耽误传球时机，爆发也不是很好；队长，穿着草绿色球袜，后场组织能力特别强，拿球比较稳，但我私下认为他不具备当队长的基本素质，落后时情绪控制不好，情绪不对发挥立即下很大的档次，还有他的体力已经明显不如以前，踢球风格也有以前的刚猛路线转为现在的玩细腻脚法，我认为这是他的死穴，也是较远的死穴！</p>
<p>对应的我决定派出3-2-1-1的首发阵容：魏垂龙，杜元章、支凯青、汪进峰，梁恒、徐军，孙昊，袁昊。陈琛、李仁廷、花俊彤、刘欣然四人招入替补阵容。总体打法要求是：中前卫回收，先稳固防守，注意三条线紧凑以相互保护，以地滚传接球为主；防守一定要靠整体，进攻靠个人发挥，相信我们球员的个人能力。单前腰孙昊活动范围要扩大，奔跑更要积极，防止中后场脱节，袁昊只负责最后的射门。阵容的主要特点是双后腰我梁恒和徐军的设置，我负责对方队长，徐军负责闫易，我们的第一任务是保护后卫线，不让对方轻易远射，避免先失球是第一位的，鼓励双后腰的相互倒球，但是不能同时前插助攻，可以轮流。在定位球防守时前后门柱是汪进峰、孙昊；禁区看人是小支、杜元章、徐军三人，我和袁昊看守大禁区。在角球进攻中，孙昊主罚，杜元章和小支禁区负责抢点，我和徐军负责大禁区，汪进峰留守中场，特别安排袁昊站在对方守门员前来回移动干扰。当然也可以迅速做出战术角球，由禁区外双后腰完成远射。</p>
<p>我强调了一点，上半场一定要按照这种思路来打，首发队员一定要坚定不移的执行战术安排。我们上半场0：0的比分，甚至0：1落后的比分完全是可以接受的，因为我们有中场休息，可以换人可以换战术。    在0：0的情况下调整方案一：撤孙昊换陈琛和袁昊打双前锋，这时就需要我和徐军的大胆压上。或者撤孙昊换李仁廷，后者与徐军构建新的双后腰，李仁廷此时不能压上，除非前场任意球和角球，只负责会追保护队友的失位，和保护徐军的拿球。我梁恒提上一步打前腰。两边卫杜元章和汪进峰的中后场斜长传直接找前锋，第一落点和第二落点都要抢。      在落后的情况下做出的调整方案二：阵型2-2-1-2.魏垂龙，支凯青、汪进峰，徐军、李仁廷，梁恒，袁昊，孙昊&#x2F;陈琛。撤左卫变双中卫，增加一名前锋，开始疯狂压上。  如果最后打平需要点球大战了，看各自的状态，要自告奋勇，不强求某个队员去踢也不事先安排。</p>
<p>我要求大家记住自己的位置和具体要求，最后大家说了会儿话，大战之前的紧张并没有让我们脸上的笑容走掉，在声声欢笑中我看到球队的信心是不可战胜的！</p>
<p>**8 **.  *<em>1&#x2F;4</em>***决赛 The **<strong>Quarter Final</strong></p>
<p><strong>数学与信息学院</strong>** 3 <strong><strong>：</strong></strong>0 <strong><strong>交通学院</strong></strong> **</p>
<p>首发阵容3-2-1-1：魏垂龙，杜元章、支凯青、汪进峰，梁恒、徐军，孙昊，袁昊。</p>
<p>30分钟换人：  陈琛    （袁昊下场）</p>
<p>30分钟换人：  李仁廷  （孙昊下场）</p>
<p>上半场 梁恒进球 1 ：0</p>
<p>下半场 梁恒又进两球完成帽子戏法 3 ：0</p>
<p>梁恒故意手球黄牌一张，</p>
<p>罚款二十元人民币，累计两张黄牌半决赛自动停赛。</p>
<p>徐军遭受裁判误判得到黄牌一张。</p>
<p>在比赛开打之前我们得到了一个再好不过的好消息，对方的大个闫易由于家里有事突然回家了。他们的门将直到比赛开打之前才姗姗来迟，比赛开打后他们替补席上甚至没有一名替补队员到场。天气很冷，风也很大，我们已经热身很久了，而他们却是换上衣服匆匆上阵。比赛胜负在开打之前已经分晓了。比赛一开始我们就死死的把他们压在了半场，他们僵硬的身体使得他们做动作很慢，我们中场抢断就地组织进攻很很多次。光我自己一人开场就有两次抢断，一次突破后分给袁昊，袁昊单刀却被门将弃门倒地铲出，第二次我突破一名补防上来的后卫后又带了一步选择了射门，球挂远角入网。1：0，此时比赛刚刚开始才4分11秒。我兴奋的绕道门后自己跑了一会才回到场上和队友庆祝，此后的我越踢越有劲，甚至有次在对方半场都有铲球的动作，惊得队友一身冷汗，幸亏主裁网开一面。孙昊的突破也是很顺手，屡屡送出好球，徐军也有几脚很有质量的远射，最遗憾的要数袁昊了，这明显不是我们平时所熟悉的那个无敌昊昊了，他错失了很多的机会，连他自己也是很懊恼。很快上半场就结束了。等下半场开始的时候我嘱托赵帅再过5分钟昊昊的表现没有太大起色的时候把他换下来。由于对方球员对单箭头昊昊盯防的还是非常严密，昊昊没有及时调整起来，30分钟由陈琛把昊昊替换下场。就在陈琛上场一分钟后我因为一次手球犯规得到了一张黄牌，我有点失望：下一场我要停赛了，队友都跑过来安慰我没有关系，好好踢完这场再说。赵帅见状赶紧换下表现特好的孙昊加以保护，换上李仁廷把我提上前腰的位置，我知道要实现方案二了。我们相互交代位置要求，我开始毫无顾忌自己的体力疯狂跑动，频频要球，就连后场门球、大脚也大声呼喊着找我。很快我接到后场大脚传球后将球卸下，在面对紧逼上来的两后卫把球从其中间轻轻跳过，半转身从左边跑过，假动作晃过冲上来的门将，左脚把球送进空门，2：0！我没有进球的一点喜悦，慢慢的往回走，队友见状上前摸摸我的头，也不知道是祝福我的进球还是安慰我的下一场停赛。对方队长完全情绪完全失控了，自己控球控不住，传球也没有传球路线，把怨气发泄在了我们的啦啦队身上，可又自讨没趣碰了一鼻子灰，连队友都开始埋怨起来。（赛后我试图去安慰失利的他，他也没怎么搭理我，他的队友对我说，他就那个样，一急了就这样，你不用管他。哎，真是没肚量，后来在争夺5、6名比赛中他甚至没有上场，一身便装只是在场下安静的看着）我接着错失了一次极佳的机会，在一次角球进攻中，我在迎上对手头球解围就是一左脚半凌空，无奈被对方门将身体挡出，全场一阵扼腕叹息，我也是抱头不敢相信（有一点点像杰拉德的感觉哦，呵呵）。好在随后不久我在禁区乱战中左脚抽射打进了自己本场比赛的第三粒进球。虽说是帽子戏法，可我还是没有一点庆祝动作，搭拉着头往回走等待中场开球。在比赛的最后我接到战术角球后小角度右脚大力抽射差点完成自己的大四喜，球仅仅高了一点点。这时我才露出了自己的一点笑容，用双手比划着高出的一点距离给队友解释着自己的打门，队友送上了掌声之外也没有说什么。</p>
<p>强悍的大四啦啦队是我们强大的动力，他们绝对是场下最可爱的一群人。近排左起：李仁廷、袁祥龙、陈京华、张磊、邵俊川、郑仕宝、靳奉亮、李新佳、孙建辉。（摄于1&#x2F;4决赛开场仪式前）</p>
<p>又被判罚了一张黄牌，致命的黄牌！赛后我仔细的回想着发生的这一切，发现这一切是早有阴谋的。半决赛的对手很可能是物理，而物理请的主教练吴波一组正好负责我们组的裁判工作，他想做掉我们的主力。早在上半场我铲球动作爬起来主裁判只是口头警告的时候，在近端的边裁吴波就大声嚷着要出黄牌。在中场休息时肯定有所密谋裁判，在下半场一开场就判给我一张黄牌。我觉得很冤，因为当时我准备挑起争顶，对方在后面很坏的退了我一下，我在空中失去平衡，手臂本能张开碰到了皮球，裁判二话没说就拿出了黄牌。我在骂娘的时候看了一眼边裁，气死我了。 黄牌已经亮出来了，当场更改不现实，赛后有人说去找找赵老师耿老师什么的或者上诉仲裁委员会。我苦笑这些的没用，我大四了，学校组织什么样子的我见得多了。在篮球比赛小组赛开打前就应内部定下来政法冠军的判罚尺度，甚至连小组出线进八强的队伍都会定下来。排球比赛也是，这也不难解释为什么我们的老师在抗议判罚无用的情况下出现打裁判的过激行为了。现在只能做的就是做好所有的一切准备，在没有我队长的情况下完成比赛。</p>
<p>附： 这场比赛后我被通知去北区足球办公室参加会议。原来学校认为赛程过长的足球赛已经影响到了正常的教学科研工作，要求加快进程。这样所有的比赛在接下来的两天内进行完。决赛有原定的11月24日移到11月19号开打。这就意味着所有的八强球队要在17、18、19三天内连打三场比赛，够狠！</p>
<p>**8 **.  *<em>1&#x2F;2</em>***决赛 The **<strong>Semi-Final</strong></p>
<p><strong>数学与信息学院</strong>** 1 <strong><strong>：</strong></strong>1 <strong><strong>物理与电子工程学院</strong></strong> **</p>
<p>*<em>点球大战</em><em>*<em>5 <strong><strong>：</strong></strong>4 <strong><strong>总比分</strong></strong>6 <strong><strong>：</strong></strong>5</em>*</em><em>淘汰对手进入决赛</em>*****</p>
<p>首发阵容3-1-2-1：魏垂龙，杜元章、支凯青、汪进峰，徐军、孙昊，袁昊，陈琛。</p>
<p>38分钟 李仁廷 （陈琛下场）</p>
<p>5分钟  被判罚点球  0：1落后</p>
<p>15分钟  徐军禁区扫射1：1</p>
<p>5分钟  袁昊被判禁区犯规吃到黄牌</p>
<p>20分终  袁昊报复铲球吃到第二张黄牌，红牌下场</p>
<p>点球大战（物理先罚）  4：5</p>
<p>第一轮： 物理 √ ： 支凯青 √  1：1</p>
<p>第二轮： 物理 × ： 孙 昊  ×  1：1</p>
<p>第三轮： 物理 √ ： 杜元章 √  2：2</p>
<p>第四轮： 物理 √ ： 李仁廷 √  3：3</p>
<p>第五轮： 物理 √ ： 徐 军  √  4：4</p>
<p>五轮过后还是平局，开始一加一</p>
<p>第六轮： 物理 × ： 汪进峰 √  4：5</p>
<p>比赛开打之前我们不停地鼓舞着自己的士气，这是我们心里最脆弱的时期。我们不再像以前那么充满着快要爆炸的信心，确切的说在1&#x2F;4决赛中我吃到黄牌的那一瞬间起，队伍就已经变了。高壮说赛后李仁廷和魏垂龙的对话中流露出了对我不能参加半决赛的遗憾，李仁廷直接说道梁队在场上可以当两个人用，谁能替补他呢，况且对手又是物理，小组赛那么不好打的对手。在17号晚上的队会上，我一开始就不停的强调自己的信心，我们小组赛在没有我的情况下又不是踢不过他们，我们1：0进球了，着急害怕的是他们！队员也不停的告诉着自己要有信心。</p>
<p>经过深思熟虑， 我决定排出3-1-2-1的首发阵容：魏垂龙，杜元章、支凯青（场上队长）、汪进峰，徐军，孙昊、袁昊，陈琛。替补阵容有：李仁廷、花俊彤、殷晓阳和刘欣然。首发八人中有一两个人有些变化，袁昊由于体力充沛、拼抢积极辅助徐军在中场多组织，前锋由陈琛来担当，需要的是他的身体和舍我其谁的霸气！由于对手喜欢玩脚下喜欢多传球的特点，在整体打法上安排稳守后场伺机反击的战术。要求每个人多跑一跑，来弥补队友的失位，在进攻上不要求人数上的压上，靠聪明的跑位和个人的发挥，但也可以适当的在前场展开身体冲撞和围抢逼抢，但要选择好合适的时机：对方出现紧张慌乱的时候。边后卫压上助攻的时候不能同时压上，后场必须保持至少小支和一名边卫的配置。对于对方核心人物10号的盯防上，有着严格的人选和要求：半场过后徐军要贴身逼防，在前场时只围不抢，不轻易出脚选择让他传球。</p>
<p>由于我不能上场，所以在比赛准备上我做的很充分，很多进攻防守细节都有着严格要求。在防守角球时汪进峰和孙昊负责前后门柱，汪进峰在自己的右卫位置上；徐军、支凯青、陈琛、杜元章负责禁区内人盯人，小皇帝也要在自己的左卫位置上；袁昊还是大禁区前保护。在角球进攻中，还是传统的打法，孙昊负责前场右侧的角球；徐军、支凯青、陈琛、杜元章四人在禁区内抢点；袁昊和汪进峰负责禁区线前保护和留守后场，但前场左侧的角球有陈琛主罚，利用自己弧线球力度打的特点可以直接旋球门，此时的孙昊也应进入禁区抢点，以增加对对方球门的压力。另外前场30米内的任意球，徐军主罚，可以选择直接打门，此时后卫不压上抢点，徐军也得迅速后腰回位。</p>
<p>首发阵容中也有一个隐患，陈琛的体能不是很好，可能到了最后一段时间会挺不住，在替补人选上只有李仁廷可算放心。这时由李仁廷打全职后腰负责10号，为了打到此目的可以不惜犯规和吃牌来阻止10号的发挥。徐军解放出来，提上一步加强进攻，相应孙昊的体能来保护中场的空位。</p>
<p>比赛当天天气很不好，已经断断续续的风雪一天了，在开场时也不见见好。看到本场裁判的时候我的心都凉了，虽说不是物理系的教练一行，但也是体育系的。比赛前所有的准备被这个裁判在开场仅5分钟的一次判罚破坏的一无是处，在禁区内一次很正常的身体接触后双方都倒地了，主裁先是判罚对方犯规，就在我队往前跑的时候裁判又更改手势判罚了禁区内间接任意球，我们队员又跑回来在搭人墙，这个2B征询了边裁意见后又将手指向了点球点。妈的！这个畜生！哪有这么偏的哨子！就连对方都觉得很吃惊，愣了一会才明白过来怎么回事。我们队员不干了，一堆围住主裁问怎么回事，我离得很远，不知道发生了什么，他向袁昊出示了一张黄牌。（我原本以为是袁昊先前的犯规，后来才知道他指着裁判骂他黑哨了）</p>
<p>没办法对方10号一蹴而就场上形势就不一样了，不能按照既前制定的战术了。我先在场下大声喊着不要慌，要有信心，我们还有很多时间，肯定能扳回来的。（说实话，我的心里也有点没底，这可是我们第一次先失球，队员怎么在这种落后情况下保持怎样的心态我除了在场下大喊之外一点帮不上忙。）比分落后的队员刚开始有些着急，连小支截到皮球以后都会带上两步，危险地信号！我赶忙跑到球门以后，嘱托了他几句。还有他的大脚门球，因为风的关系老是掌握不好方向。队友们确实都很争气，显然这个莫须有的点球激起了我们的愤怒，这种愤怒有时侯也是种强大的战斗力。队员们士气高涨起来，尤其是10号孙昊。不久他边路突破后送出一脚传中，陈琛却没踢好部位，把球打高了，娘啊，我当时一惊，不能这么浪费机会啊！好在孙昊故伎重演又送出一脚一模一样的传中，这次包抄到位的徐军一脚低射把球送入网窝，1：1！可在这期间袁昊的情绪一直没稳定好，我犹豫着是否把他换下场：他也累计两张黄牌了，进入决赛他也只是名观众了，剩下的时间他肯定会很拼命的；另外他的拼命似乎用在了和对手和裁判的斗气上，这会要他付出代价的。就在我刚稳定好队伍情绪看病扳平比分的时候，开始商量他换不换下来的时候，意外产生了，昊昊在一次丢球后紧接着怒气冲冲的背后铲球，黄牌！红牌！下场！少一人！我的心都凉了，连昊昊自己都知道这是什么后果，铲完球倒地起来后径直走向了观众的位置，他很清楚自己身后裁判亮起的红牌！如果说第一张黄牌还有争议的话，第二张就无话可说了，甚至直接出示一张红牌都不冤枉。错在我犹豫的时间太长了，昊昊的脾气、我自己的犹豫害场上的另外七人来买单。好在上半场只剩下五分钟了，队员使使劲扛下来了。</p>
<p>中场休息的时候我决定不换人先，先打着，谁体力扛不下来赶紧说，千万不要硬撑。我们要有信心不输给对手！下半场开场后，对手攻的更盛，有些招架不住，英雄是魏垂龙！他一次有一次的化解着对方的射门，其中10号一脚远射角度又好力度又大，被他侧身一扑挡住了，对方前锋急速跟上补射，就在所有人瞪大眼睛的时候倒在地上的魏垂龙第二反应极快奋起双手硬是把球摁在了自己的怀里，让对手踢空了，魏垂龙完成了自己在本场比赛中英雄角色的开始！队员们被鼓舞着，好多人出现了抽筋的迹象，徐军和汪进峰只能硬撑着，因为这两个位置很关键。陈琛确实一点都不能跑了，我赶紧用李仁廷把他换下。场上没有前锋了，队员们知道这场比赛要完全守平局了，开始众志成城的投入防守。对方也没有了更好的射门机会，点球大战不可避免了。</p>
<p>赛前的轻松热身   比赛的残酷激烈</p>
<p>这时开始下雪了，漫天飞舞的雪花和彪悍的北风不会冷却我们的热情。我在场下只能看着中圈的他们，我知道徐军会最后罚，小支会选择第一个，可其他人我实在不知道谁会主罚。</p>
<p>我们都知道比赛都踢到这份上了，我们不能再强求他们了，恶劣的天气，很黑的裁判，少一个人的比赛。我们场下所有的啦啦队抱在一起，整齐的喊着加油的口号。硬币决定了物理先罚，他们第一个人竟然不是10号，显然第一个的压力太大让他选择了退让。第一个都罚进去了，紧接着第二轮10号出场了，压力再一次击倒了他，他的射门高出快乐横梁，可孙昊的射门却被对方门将扑出去了。紧接着杜元章、李仁廷很艰难的把点球都送进去了：杜元章本来射丢了，裁判看到对方门将先移动让踢得第二次，小皇帝索性来了脚爆射，球直接从门将头上飞过进网；李仁廷的射门被门就爱那个扑了一下还是进网了。第五轮对手也罚进了，徐军在重压之下冷静的压低射进了。进入残酷的一加一加罚后，对手首先顶不住了，射出的半高球正好被魏垂龙扑个正着。汪进峰开始走向点球点了，只要射入这个点球，比赛就结束了。助跑！射门！进球！比赛结束！进入决赛！！！我们疯狂的跑向那七个英雄，我们所有人在在大雪中跑着、跳着、喊着，兴奋着。</p>
<p>我们要打决赛了！！！</p>
<p>我们一点要夺冠军！！！！！</p>
<p>附：</p>
<p>1， 汪进峰在比赛中两度抽筋，等第三次的时候他躺在地上，小支和杜元章赶紧过去帮忙压腿放松肌肉。这时汪进峰却偷偷的说道，过来一个人就行了，我假装的，耽误点时间。不料这话却被旁边的裁判正好听到，主裁要求他出场接受治疗，在场下喊了一阵后得到主裁允许后才进场重新参加比赛。呵呵，聪明的小六，呵呵，笨笨的小六，呵呵，可爱的小六。</p>
<p>2，点球大战中我们啦啦队紧紧的拥抱在一起，每次的进球都会让我们热血沸腾。我们整齐响亮的加油口号“魏垂龙，加油！”“杜元章，加油！”“李仁廷，加油！”“徐军，加油！”……这道别样的风景线令摄影记者都把镜头从赛场转向了我们。呵呵，珍贵的雪中回忆。</p>
<p>3，<strong>徐军的<strong><strong>QQ</strong></strong>日志：</strong> <strong>幸福的时刻</strong></p>
<p>发表于：2008年11月18日 19时37分37秒</p>
<p>来源：<a href="http://blog.renren.com/blog/0/"></a>权限: 公开阅读(28)评论(3)<a href="http://jubao.service.qq.com/cgi-bin/jubao?bizname=qzone&cate=blog&uin=232112250&blogid=1227008257"> 举报</a></p>
<table cellpadding="0" cellspacing="0" style="width: 540px;" border="0" >
<tbody >
<tr >

<td width="540" valign="top" >**幸福的时刻**

<p>今天下午我们这里下雪了 好大的雪。天气非常的冷，我们将在下午三点四十迎战半决赛的对手物理系。在赛前我们就知道了一切的一切外部因素都是对我们不利的，包括队长的停赛，裁判的因素等等，注定了这是一场异常艰苦的比赛。比赛开始后我打的是后腰 还是单后腰同时我还要兼顾进攻，总之对体能是有很大的要求。比赛刚开始不久我们的前锋就因为一个很无意的犯规吃到了一张黄牌，其实那个黄牌出示的非常勉强。我们的前锋有点受影响，其实裁判对我们的一些判罚很不公平。紧接着我们后卫和对方前锋的一个非常正常的身体接触，却被裁判判罚了点球，说实话当时我情绪有些波动，但是我控制住了自己。对方将球罚进，我们一球落后。可是我们没有任何的失落，依然气势很旺盛，因为我们相信我们自己，接着中场10号在边路突破后喂了一个非常舒服的传中，可是另一名前锋却很遗憾的把球打高了，当是我心里又凉了一下，觉得这个球真应该进。三分钟后在同样的位置 10号（和我关系非常好的哥们）又在同样的位置传了一个不错的球，我正好插进对方禁区，很冷静的一脚低射，把球打进扳平了比分，很兴奋，（由于实习的原因，我们队的前两场小组赛我都没有赶上，所以就打了余下两场小组赛和1&#x2F;4以及这场半决赛，）这是我这届比赛的第一个进球，但是很关键，鼓舞了球队的士气（插一句当时进球的时候我一直吃着口香糖，但是进球后庆祝过程中却将它咽到了肚子里 ）。比赛继续我们的士气也上来了，但是就是在上半场快结束的时候，又是裁判的原因，他将我们的前锋红牌罚了下去，说实话我当时心里凉透了，因为还有将近三十分钟比赛呢，天气情况还这么恶劣。可是我们坚持了，足足三十分钟的比赛我们少打一人，在场上我们很被动，可是我们每个队员都在努力，一直把对方拖入了最后的点球大战。我们的右后卫2次抽筋，其他队员也都跑不动了，最后几分钟的时候我在前场就没在回去防守因为我实在不能跑了，2个腿都有抽筋的倾向。多亏了后卫兄弟们。点球大战我申请了最后一个罚，因为我知道我点球还是比较稳定。点球大战开始了，这个时候天气暗了，雪也越来越大了。对方先罚第一个球罚进，我们第一个罚球的是我们的中后卫，顶住压力罚进，1：1.对方第二轮是他们的中场核心但是他过于追求角度，将球打高，我们一阵兴奋，但是我们的10号也由于脚冷的原因没有把握住这个优势也没罚进，他往中场走的时候眼神呆滞，但是我们仍然相互揽着站成一排，鼓励了他一下 没有关系 毕竟现在还平，对方第三个也进了，我们第三个是左后卫11号，有点波折但是也成功打进，第四个球双方也都进了，第五个对方先罚进，轮到我了 压力来了 因为我要是进不了我们队就输了我就成了千古罪人。裁判鸣哨我将球打进，可是裁判却示意我不算必须重新发，我当时心里就着急了，这不是明摆着找茬吗？但是我冷静了一下，心想全场比赛裁判的判罚对我们一直不利，可是我们不还是凭借着自己的毅力坚持了下来吗？我又一次站在对方门将面前 我很紧张，我又选择了右路下角。。。球进了我很为自己骄傲，场下的队友和拉拉队也都为我欢呼。然后是1+1了，对方一个队员的球被我们门将扑了出去，然后最后一个我们的右后卫顶住压力把球罚进了，我们晋级决赛了。在这一瞬间我感觉自己好幸福，所有的场下队员都冲了进来，我们压在了一起，虽然雪仍然很大，风也仍然很大，可是我们的心里很暖和 我们凭借着自己的能力，冲破了一切的不利因素，晋级了决赛。我们有一股精神在，我真的觉得很幸福，因为我们努力了，我们几乎尽力到了筋疲力尽，我们即使输了也是虽败犹荣，但是老天看到了我们的努力，眷顾着我们，被我们这一股不服输的精神感动了。我们努力了，所以我们得到了我们想要的。马上要毕业进入社会了，去读研究生也好，去工作也好，总之是无论干什么我都会努力，都会尽全力（其实本来就是这样的人 嘿嘿自恋了），我相信老天是会开眼的 呵呵。在这一刻我要说我是最幸福的，然后呢，好好休息，准备明天的决赛，毕竟那个冠军才是我最想要的。呵呵</p>
</td>
</tr>
</tbody>
</table>
**9**.   **决赛  The ****Final**

<p><strong>数学与信息学院</strong>** 2 <strong><strong>：</strong></strong>2 <strong><strong>地理与规划学院</strong></strong>**</p>
<p>*<em>点球大战</em><em>*<em>1 <strong><strong>：</strong></strong>3 <strong><strong>总比分</strong></strong>3 <strong><strong>：</strong></strong>5</em>*</em><em>输掉比赛</em>*****</p>
<p>首发阵容3-2-1-1：魏垂龙，杜元章、支凯青、汪进峰，梁恒、李仁廷，徐军，孙昊。</p>
<p>2分钟   0：1落后</p>
<p>28分钟  梁恒（点球）1：1</p>
<p>30分钟   1：2 落后</p>
<p>37分钟  孙昊半转身侧凌空</p>
<p>4分钟  梁恒抗议裁判判罚吃到黄牌</p>
<p>15分钟  徐军犯规 黄牌警告</p>
<p>32分钟  徐军吃到第二张黄牌，红牌！黑哨！</p>
<p>点球大战（数学先罚）</p>
<p>第一轮： 支凯青 √：地理 √1：1</p>
<p>第二轮： 孙  昊 ×：地理 √1：2</p>
<p>第三轮： 杜元章 ×：地理 √1：3</p>
<p>第四轮： 李仁廷 ×  1：3 比赛结束！！！</p>
<p>早在我们踢物理之前，就知道地理已经率先打进决赛了。地理和土木的比赛安排在在了中午的，也是在雪花中的点球大战。最终地理幸运的赢得了比赛。我和赵帅当时在场边看比赛冻得要死，看到结果后心里得意的不得了：地理进了决赛，两次的手下败将，只要进决赛我们就是冠军的念头充满了我的大脑。在回宿舍的路上我还和赵帅轻松地说笑，甚至惊诧下半赛区的结果难以预料。C组的生科以去年亚军（只在最后点球决赛中输掉比赛）的种子队竟然小组赛早早被淘汰，计算机意外的获得小组第一出线后竟然会被地理迎头干掉，地理又狗屎运的进了决赛，还有更惊奇的是经贸，上届的冠军经贸1&#x2F;4决赛都没有挺住，被土木给淘汰了。所有的这些让我们得意不已，最大的假想敌已经没有了，冠军似乎唾手可得。</p>
<p>轻敌的思想蔓延在整个队伍中，甚至整个数学系都知道我们要夺冠了。队员脸上全部写着笑容，没有一个人提醒我们要小心！冠军，危险！</p>
<p>首发的我们笑的很甜，比赛结果很苦，心很痛！</p>
<p>前排左起： 徐军  孙昊   汪进峰  梁恒</p>
<p>后排左起：魏垂龙 李仁廷 杜元章  支凯青</p>
<p>在赛前的队会比赛准备上我也只是公布了首发阵容，简单的介绍了地理的打法，说明几点比赛注意要求。1，地理有个10号大个，他的力量很大，但是频率比较慢，而且秋风不顺时容易闹情绪，有李仁廷专人盯防。 2，对方阵容中还有个边路快马，喜欢在边路活动，这人由边卫和梁恒报价爱协防，可以让他选择边路传中，不让他内切射门。此时支凯青要注意保护第一落点。3，左卫6号球员。这是我们很讨厌的一个人，踢球不好的同时脾气也大，经常假摔，话语比较多，很烦人的那种。但速度慢、转身慢将是他的死穴，孙昊完全可以选择从这一点切进去。4， 其他队员如中卫出脚很笨，有点像1&#x2F;4决赛踢交院时的对手，紧逼之下容易犯错，要求大举压上，在前场直接紧逼围起来，断球后直接选择射门。5，对方唯一的一名前锋24号，基本没有威胁。总之，全场要紧逼，把球开在对方半场内解决战斗。  最后我强调了几点：1，对方开中场球时会选择直接射门，需要全军注意，前卫孙昊和徐军第一时间上前干扰。 2，10号踢任意球时要排人墙，此时必须要压球，我们曾吃过他这方面的亏。 3，自己人回收不及时的时候，对方的反击会很有威胁，所以对方过半场后要贴身盯防，不让他舒服的做下一步的动作。 就这样，短短的十分钟，决赛前的准备就交代玩完了，甚至角球任意球的细节我都没有布置。</p>
<p>比赛的准备不充分和轻敌让我们输在了起跑线上，其实很多细节方面的不说，就说这着首发阵容，安排了三个后腰在中场一字型摆开，却没有明确分配各自的任务，还有战术的制定，一点都没有想到形势不好的时候又该怎么打，甚至点球大战连想都没想。</p>
<p>因为天气的原因，比赛延期一天后同一时间进行。我们早早来到了场地，却没有好好做准备活动，随便跑了两圈，压压腿就算是做好了，所有人脸上都解读出一个字词：轻松。</p>
<p>决赛由我梁恒和孙昊开球</p>
<p>甚至连裁判我们都不介意了，虽然不是要求的足球教师执法，但对地理这种对手我们也没有计较。开球后我们发现对手并没有我们想象的那样很害怕我们龟缩防守，而是压上的很靠前。就在我们吃惊刚刚反应过来的时候对手10号在我们漫不经心的一次防守中晃过汪进峰射门打中立柱弹出，紧接着他跟上补射进球，又是他妈的0：1落后！我的情绪完全爆炸了，我指着脑袋大声的吼着什么，要我们迅速进入状态，不能这么轻松！队友也刚刚从这个失球中反应过来，纷纷鼓舞着彼此。上半场的时候我有几次机会，在一次射门中踢到了扑出来的门将身上，那个机会我完全可以选择把他过掉，如果他拌倒我的话那将是一个点球，如果当时冷静点就好了。还有一次角球进攻中，我应该勇敢的冲上去头球，而不是选择把球卸下来，等我完成停球后一堆人已经冲上来把我的射门角度给堵死了。队友也踢得不是很顺，中场分工的不明确让我们运转的不好。孙昊也当场抱怨了自己不会踢球了。我当然踢的也很不顺，我明显感觉到队友都陷入了各自的单打独斗中，很少把球交给我来组织。我把怨气撒向了主裁身上，在大声的抗议着一次犯规时吃到了一张黄牌，我操！紧接着他在徐军一次动作不大的犯规后也出示了张黄牌，妈的，这裁判显然很喜欢掏牌。</p>
<p>中场休息的调整很关键，下半场我们打入两球</p>
<p>在中场休息时我们中场经过了明确分工，鼓舞士气后等待下半场的逆转。这样球能倒开了，运转的也顺畅了，很快孙昊在一次突破后被推倒了，裁判指向了点球点！我就在身后，把球拿起来摆在了点球点上。这个点球由我主罚，我助跑，用习惯性的左脚，把球推向非习惯性的左上角，球总算进了！1：1！可这场我们的对手比我们准备的更充分，他们中后场的出球很果断，连后场球也不经过组织直接打到小禁区地带，这让我们有点始料未及，小支就把自己压在了最后面想帮助下魏垂龙。随着时间的流逝，天色越来越暗了，由于赛前魏垂龙把眼镜弄坏了，他对来球看的不是很清楚。在一次任意球防守中，对方再一次直接把球踢向了小禁区，球在飞行路线中碰到了小支，由于离门太近魏垂龙没有反应过来折射入网，这个狗屎运！再一次开球后我们发动了潮水般的进攻，不过意外再一次的发生了，对手的一次假摔蒙蔽了这个2B裁判，他甚至没有征求近在咫尺的边裁意见就对徐军出示第二张黄牌将他罚下了。当时所有人更是气的不行了，徐军一把脱掉上衣扔在了地上表示不满。少一人！比分落后！只剩下十分钟！我们都不怕，就在场下议论着要换人的时候，我们在前场右路获得了一个任意球，我再一次的站在了球的面前。刚开始我打算用右脚开一脚平快球，不知为什么在射门之前改成了左脚，利用弧度使劲往球门远角旋，等球开出后我没有看清发生了什么，只见我们都欢呼起来，球进了！2：2！刚开始的时候我还远以为是我直接旋进去的呢，跪在地上握紧双拳后高兴地在地上打滚，那个兴奋啊！我看队员都围着孙昊，才明白这球是他小子进的，至于怎么进的直到比赛结束后第二天晚上球队聚餐时才知道。起来后的我赶紧示意不要换人，扳平比分后的我们甚至还有机会反超。我在一次突破被放倒后赢得了一个位置很不错的直接任意球。我站起来把球摆了摆，一定要进球的念头冲聚了我的脑袋，我抬头观察一下，对方人墙排的人数很多，高度也很高，而且退让的距离不够，直接打门不是很好，可为了直接结束比赛我还是选择了直接打门。右脚搓出的弧线球打到了跳起的人墙上弹回来了，最后的机会没有了，裁判吹哨结束了常规时间的比赛。</p>
<p>又要打点球了，我们紧接着商量人选：小支第一个，我第五个。汪进峰还是死活不踢，孙昊提出来不想踢，我们安慰他没关系，他只好去踢压力最小的第二个，杜元章第三个，李仁廷第四个。选好球门后对方队长是门将，选择了后罚。我们先罚，这样也好，正和我意。首先小支把球摆好，骗过门将后把球送入了左侧下角，进球后的他把上衣脱了，压力实在太大了。他们第一个的点球也踢进去了。第二个出场的是孙昊，这一次是踢高了，他也脱掉了上衣，对着数学系的啦啦队深深的鞠了一躬，我赶忙跑过去把他接回来，试图说些安慰的话，可还没说他的眼泪就掉下来了，接着对方把球也踢进去了，1：2落后。等第三个杜元章去踢得时候，我还抱着些许希望，可他踢出了门将最喜欢扑的半高球，球没有进，对方又罚进去了，已经1:3落后了！李仁廷去罚第四个点球时的时候我闭上了眼睛，等我听到欢呼声和哨声时我知道我们输了。我们输掉了比赛，没有成为想要的冠军！</p>
<p>李仁廷面无表情的走向我们，孙昊已经泣不成声了，杜元章躺在了地上呆滞的看着天空……一直在安慰他们的我再也忍不住自己的泪水了，我把头深深的埋向了上来的人的怀里，好让自己的哭声不被其他人看到。许久也平静不下来情绪，我擦擦眼泪后开始逐个安慰队友，他们的失望和痛苦我能体会的到。可是这一切似乎都决定了，就在半决赛结束之后……</p>
<p>附：</p>
<p>1，在裁判越来越偏的判罚下，我们的啦啦队除了给我们的最大分贝的加油声之外，也把口号对准了裁判。徐军的两张黄牌都是我们球迷的眼皮底下亮出的，这种对裁判的极度不满在对徐军红牌后更是达到高潮。事后我知道在一次全场默契的沉默中，宋欣自己一个人骂道：“裁判，你妈的B，我操你妈，你会不会判，妈了个B的黑哨，我操你！”在赵帅的描述中，他说这样的骂声宋欣骂了不止一遍，连着好几遍的骂声都把一些比赛监督吸引过来维持秩序了，差点引起了群架。呵呵，可爱而执着的大四啦啦队！！！可爱而义气的的宋欣！！！</p>
<p>2， 徐军球队日记：悲情英雄–倒在决赛的赛场上</p>
<p>悲情英雄–倒在决赛的赛场上</p>
<p>发表于：2008年11月22日 18时14分18秒</p>
<p>来源：<a href="http://blog.renren.com/blog/0/"></a>权限: 公开阅读(16)评论(2)<a href="http://jubao.service.qq.com/cgi-bin/jubao?bizname=qzone&cate=blog&uin=232112250&blogid=1227348858"> 举报</a>本文链接：</p>
<table cellpadding="0" cellspacing="0" border="0" >
<tbody >
<tr >

<td width="312" valign="top" >本来应该在周三结束的决赛因为接连的大雪被推迟到了周四，这天天气很好，阳光很温馨。下午三点四十开始了决赛，说实话和地理系交手也不是一次两次了彼此都很熟悉，我们有很大的心里优势，因为打友谊赛我们都是取胜，也使得我们在比赛前就有点轻敌，也许这个也为我们的失败埋下了伏笔。这场比赛前锋23号停赛（因为半决赛的黄牌），队长复出，很多人都看好我们，总体上来讲我们以为比赛的胜利已经到手了。赛前的热身大家都没有太当一回事，也没有练点球，因为我们以为比赛结束前一定能结束比赛的。这场比赛没有像我们想象中的老师来吹主裁，所以无形中埋下的危险我们也没有意识到，上半场我们的战术不是很对，把10号一个人顶在了前锋，三个后腰保护。很显然10号身体不行在我和队长前压接应之前，前面基本上就一个人进攻，所以导致上半场我们几乎没有什么像样的进攻。而且刚开场没几分钟我们就由于一次不是很注意的防守让对方补射进了一个这场比赛我脚风很顺，一脚劲射被门将扑住，上半场我还有一脚非常漂亮的远射，力量球速都很棒但是还是被对方那个反应很快的门将扑了出去，0：1上半场结束我们落后。

<p>决赛后失落的星星</p>
<p>下半场刚一开始10号突入禁区被对方后卫撞倒，点球！！！当时我们很兴奋，由队长把球罚进，之后我们非常兴奋开始进攻。说实话今天运气也不好，我一个左侧的角球直接转到了球门门梁上，还有2个角球罚的很有质量，但是我们队员都没有争到点。下半场大约10分钟左右，对方一个中场附近的任意球直接往我们禁区里面掉，结果我们后卫顶着对方前锋都没有碰到球，反而挡住了守门员视线，结果丢球了，但是我们很顽强，大约15分钟左右10号一个非常漂亮</p>
<p>的侧打门将比分再次扳平。2分钟后，我在边线的一次断球后，好像有一点脚部接触，结果对方10号走了两步，到了边线外面后倒下了，几乎所有人都看见了明显的一个假摔，但是那个2B裁判居然把我罚下去了，我靠。我当时直接火了，差点要揍那个裁判，我们的球迷也都火了，太不公平了。裁判的愚蠢让我们又一次重演半决赛的情景，可是没有办法，我下来后气的脱光了上衣 只穿着短裤在那看，后来维明孙振赶紧给我把衣服穿上怕我感冒了，一直到点球大战，我没有办法罚，只能在场下紧张的看着，有种不祥的预感。结果真的“如我所愿”我们失败了，不知道为什么，当比赛结束的时候我的眼泪控制不住的就流下来了，真的我们没有拿到我们想要的结果，我终于明白了努力了也不一定就能得到想要的结果。但是还得努力，要不然更不会有结果，我像个孩子一样，兄弟们都过来安慰我，可是我的心里依然很难受，队长也哭了，大家心里都不好受，可是没有办法，我们无法左右结果了。最后我觉得我们整个球队都是悲情英雄了</p>
</td>
</tr>
</tbody>
</table>
**10**.  **球队聚餐时，所有的人眼睛都是红的。**

<p>决赛失利后我一度感到这是幻觉，甚至觉得这都是梦中的影像，我睁大眼睛看着屋子里坐着的人唉声叹气不说话的样子知道这是事实，已经发生了的事实，无法改变的事实。我告诉自己要想个男人一样去去面对，我是队长，我还要事情要做。我和所有人商量了一下，明天中午举行队内友谊赛，接着晚上就队内聚餐，把联赛这事好好的画个句号。</p>
<p>第二天中午的时候人去的特别多，我特意制作了红黄牌，买了个哨子来增加娱乐气息。所有的人都玩得很开心，最后我们默契的打平进入点球大战，在每个人都踢完一轮后我们躺在场上有说有笑，似乎忘记了昨天的失利。</p>
<p>晚上聚餐的时候，喝的很多，很多人醉了。所有的人眼睛红红的。</p>
<p>宋欣，我们大四最牛的啦啦队。他拿着杯白酒在我桌上一饮而尽，说决赛不容易，那个傻B裁判就是他妈的欠骂，他妈要是有种来打我，来啊，他不敢，我更是不怕他。徐军那张红牌是转折点，怨就怨他妈的那个裁判。咱踢得多好啊，就说孙昊那个进球，想都没想直接侧凌空，多漂亮的进球。在那一刻他把自己的身体安全置之度外，他就没想这球会不会受伤…… 球迷的伤心丝毫不亚于我们球员，我感同身受。</p>
<p>汪副，他拿着酒杯，勾着我的脖子说，“梁队，没拿到这个冠军我觉得特别遗憾，一开始你叫我参加比赛报名的时候我就只想拿冠军，因为比赛我抽出了很多时，考研复习也学不进去，整天想着决赛，今天一天又在想决赛发生的一切，第一个失球是我的责任，我没有卡住位置，对不起，梁队。我真的很遗憾的，这个冠军没拿到，这事一直在我心里憋屈着，可能最后我研究生都考不上。我亏啊……  ”他说话时断断续续的，曾几度有些话哽咽好久说出来。英雄的泪水和苦闷全在酒里了。</p>
<p>徐军喝的最凶，烂醉如泥的脱光上身在地上打滚，我们中途就把他送回了宿舍。等回到宿舍的时候他躺在我的床上，嘴里一直叨叨的说着什么。等知道我回去的时候他就开始骂裁判2B，说那是对方的假摔…他又说我对兄弟都是真心实意的，我对兄弟没得说……我笑了笑，以前发生的不愉快，这一刻又算得了什么呢。宋欣又到我宿舍来闹了，又是唱歌又是跳舞，还整个吉他装模作样的边弹边唱，笑的我们肚子直接不行了…</p>
<p>那一晚，所有人喝的都很多，为了足球，为了友谊。那一晚，只有干杯。</p>
<p>聚会24人：</p>
<p>邵俊川、赵帅、梁恒三人一桌</p>
<p>徐军、孙昊、陈琛、欧仕仁、花俊彤、袁昊、殷晓阳七人一桌</p>
<p>袁祥龙、魏垂龙、李仁廷、刘欣然、黄启、袁昊、高壮七人一桌</p>
<p>张磊、陈建丰、郑仕宝、宋欣、杜元章、支凯青、汪进峰七人一桌</p>
<p><strong>11</strong>.  <strong>痛苦的片段</strong></p>
<p>决赛已经结束很久了，心中的痛却许久抹不开，有时候做梦还在踢地理。真的，在纸张上随便写着如下的字样： 如果周二晚上布置的时候详细的布置下防守任务和中场分工……队员一直在轻视对手，如果有人或者自己提醒一下要小心，要紧张一些……一开场的时候被打懵了，没有及时的反应过来……我自己的表现不是最好的，我没有做到最好，我不能怨别人…徐军的红牌让我们很被动……点球不是我们的强项，赛前也没有布置过……我们把握机会能力太差了，换句话说，我们挥霍了太多的机会……</p>
<p>（右图： 儿时的大空翼、，永远的足球）</p>
<p>我们就这样的失败了，在最后的点球决战中竟然四罚一中，我们就这样败给了自己，我们赛前的自大在那一刻被自己踢得粉碎。就这样的，我们只是亚军，没有任何人会记住我们，记住我们的只是我们自己，我们自己记住的也只是我们的泪水……</p>
<p><strong>12</strong>.  <strong>球队费用来源及开支、奖品分配</strong></p>
<p>队费共计 670元 ：</p>
<p>40元×16人＝640元</p>
<p>对物理陈琛故意手球 罚款10元</p>
<p>对交院梁恒故意手球 罚款20元</p>
<p>队费开支：</p>
<p>队服30元×16人＝480元    邮费 60元</p>
<p>买水 5元（10月12号）+5元（10月18号）+4元（11月3号）</p>
<p>纸杯4.5元 （10月12号）</p>
<p>11月21号  哨子 2元</p>
<p>11月21号  球队聚餐 打车7元 买水 4元</p>
<p>11月22号  打印照片和纪念册 26.6元+14元</p>
<p>11月22号  魏垂龙报销眼镜 50元</p>
<p>截止到11月22号剩余 8.9元</p>
<p>附：</p>
<p>1， 队服总计16件，包括2黑14红</p>
<p>黑色   XXL号  2件   1号 、12号</p>
<p>红色     XL号  3件  10号、 13号、15号</p>
<p>XXL号  8件  00号、 5号、  7号、 14号、18号、 20号、23号、25号</p>
<p>XXXL号 3件   3号、  9号、 11号</p>
<ol>
<li>11月21号球队聚餐消费开支（川宁火锅）</li>
</ol>
<p>24人吃饭，共计950元。一人40元 （都交齐）</p>
<p><strong>2009**<strong>年鲁东大学首届告别校园足球纪念赛</strong></strong> —-**小记</p>
<p>第一阶段为小组赛，分4个小组，每组4支，D组三支。小组赛采取单循环，小组前两名出现。</p>
<p>A组： 体育  地理   国交  汉语言        B组： 物理  数学  福音  11人</p>
<p>C组： 交院  经贸   土木  化学          D组： 心理  生物  计算机</p>
<p>第二阶段八强采取欧冠原则重新抽签，一次进行淘汰，决出1-4名。<br>地理━━━┓                                                   ┏━━━福音<br>数学 ┓                         ┏━     福音<br>数学━━━┛                                                  ┗━━  生物<br>体育    —– 福音<br>体育━━━┓                                                     ┏━━━土木<br>体育 ┛                          ┗━    土木<br>计算机━━┛                                                          ┗━━━经贸</p>
<p>人员搭配：大四为主，加入支凯青、李仁廷、魏垂龙、耿云龙四人。</p>
<p>比赛进程：</p>
<p>小组赛： 三胜一平积7分以净胜球优势进入八强</p>
<p>第一场   数学5 ：0  物理    （郑仕宝、梁恒（点球）靳奉亮、支凯青头球梅开二度）</p>
<p>第一场   数学1 ：0  11人   （靳奉亮）</p>
<p>第一场   数学1 ：1  福音    （张磊）</p>
<p>1&#x2F;4决赛     数学3 ：2  地理    （梁恒梅开二度，其中一点球   靳奉亮）</p>
<p>1&#x2F;2决赛     数学1 ：1  体育    （梁恒（点球）） 点球决战2：3惜败</p>
<p>三四名决赛  数学2 ：1  土木    （梁恒、徐军）</p>
<p>难忘瞬间：</p>
<p>1， 对阵物理的比赛中袁祥龙的惊天一吼 吼的所有人都呆住了</p>
<p>2， 对阵11人的比赛中娄和忠半场替补出场又被紧急换下后对着我们说：“要不是看着他是社会上的，我早揍他了。” 而替补老娄的赵帅一上场就把人家的鞋给踩下来了。</p>
<p>3， 1&#x2F;4决赛打地理的火爆，点球；补射；2 ：0；角球；乌龙；被追平；绝杀；红牌；黑哨……这场比赛具备一场足球比赛所有的一切，只差群殴</p>
<p>还有赛后的捅刀，罢赛？！</p>
<p>4， 半决赛对体院的半场防守；点球罚进；半场1：0领先；被追平；滑铲堵抢眼；防远射；点球决战；三轮过后2 ：1领先；却最后2 ：3失利；失利后最美的笑容</p>
<p>5， 三四名决赛：又是徐军的红牌！</p>
<p>6， 球迷啦啦队的大力支持。</p>
<p>7， 最后颁奖时我却不在场……</p>
]]></content>
      <tags>
        <tag>随笔</tag>
      </tags>
  </entry>
  <entry>
    <title>apache限制并发数 IP 带宽设置教程</title>
    <url>/2010/12/27/apache-limit-ip-num-config.html</url>
    <content><![CDATA[<p><strong>限制并发数</strong><br>下载模块：</p>
<p>到官方网址： <a href="http://www.nowhere-land.org/programs/mod_vhost_limit/">http://www.nowhere-land.org/programs/mod_vhost_limit&#x2F;</a>下载模块</p>
<p><a href="http://www.nowhere-land.org/programs/mod_vhost_limit/mod_vhost_limit-0.4.tar.gz">http://www.nowhere-land.org/programs/mod_vhost_limit/mod_vhost_limit-0.4.tar.gz</a></p>
<p>安装：<br>apxs -c mod_vhost_limit.c -o &#x2F;path&#x2F;to&#x2F;libexec&#x2F;mod_vhost_limit.so</p>
<p>在 httpd.conf 加入：</p>
<p>LoadModule vhost_limit_module libexec&#x2F;mod_vhost_limit.so<br>AddModule mod_vhost_limit.c</p>
<p>配置：</p>
<p>MaxClients 150<br>ExtendedStatus On</p>
<p>NameVirtualHost *</p>
<p>&lt;VIRTUALHOST * &#x2F;&gt;<br>ServerName       server1<br>DocumentRoot     &#x2F;some&#x2F;where&#x2F;1<br>MaxVhostClients  100</p>
<p>&lt;VIRTUALHOST * &#x2F;&gt;<br>ServerName       server2<br>DocumentRoot     &#x2F;some&#x2F;where&#x2F;2<br>MaxVhostClients  30</p>
<p>&lt;VIRTUALHOST * &#x2F;&gt;<br>ServerName       server3<br>DocumentRoot     &#x2F;some&#x2F;where&#x2F;3</p>
<p>其中： server1 被限制为 100 个并发线程数。 server2 被限制为 30 个并发线程数。 server3 没有被限制。</p>
<p>注：需 mod_status 的 ExtendedStatus On 支持！！</p>
<p>如超出限制的并发数在客户端就会出现503错误</p>
<p><strong><span id="more"></span>———————————————————————————————-</strong></p>
<p><strong>限制<strong><strong>IP</strong></strong>连接数**</strong> **</p>
<p>到这里下载模块 <a href="http://dominia.org/djao/limit/mod_limitipconn-0.04.tar.gz">http://dominia.org/djao/limit/mod_limitipconn-0.04.tar.gz</a></p>
<p>安装:<br>tar zxvf mod_limitipconn-0.04.tar.gz<br>cd mod_limitipconn-0.04<br>make APXS&#x3D;&#x2F;usr&#x2F;local&#x2F;apache&#x2F;bin&#x2F;apxs  ß—–这里要按你自己的路径设置<br>make install APXS&#x3D;&#x2F;usr&#x2F;local&#x2F;apache&#x2F;bin&#x2F;apxs ß—–这里要按你自己的路径设置</p>
<p>编辑httpd.conf<br>添��<br>全局变量:<br>&lt; IfModule mod_limitipconn.c &gt;<br>&lt; Location &#x2F; &gt;   # 所有虚拟主机的&#x2F;目录<br>MaxConnPerIP 3     # 每IP只允许3个并发连接<br>NoIPLimit image&#x2F;*  # 对图片不做IP限制<br>&lt; &#x2F;Location &gt;</p>
<p>&lt; Location &#x2F;mp3 &gt;  # 所有主机的&#x2F;mp3目录<br>MaxConnPerIP 1         # 每IP只允许一个连接请求<br>OnlyIPLimit audio&#x2F;mpeg video    # 该限制只对视频和音频格式的文件<br>&lt; &#x2F;Location &gt;<br>&lt; &#x2F;IfModule &gt;</p>
<p>或者虚拟主机的:<br>&lt; VirtualHost xx.xxx.xx.xx &gt; ##ip 地址<br>ServerAdmin <a href="mailto:easy@phpv.net">easy@phpv.net</a><br>DocumentRoot &#x2F;home&#x2F;easy<br>ServerName <a href="http://www.phpv.net/">www.phpv.net</a><br>&lt; IfModule mod_limitipconn.c &gt;<br>&lt; Location &#x2F; &gt;<br>MaxConnPerIP 5<br>NoIPLimit image&#x2F;*<br>&lt; &#x2F;Location &gt;<br>&lt; Location &#x2F;mp3 &gt;    # 所有主机的&#x2F;mp3目录<br>MaxConnPerIP 2         # 每IP只允许一个连接请求<br>OnlyIPLimit audio&#x2F;mpeg video # 该限制只对视频和音频格式的文件<br>&lt; &#x2F;Location &gt;<br>&lt; &#x2F;IfModule &gt;<br>&lt; &#x2F;VirtualHost &gt;</p>
<p>** **</p>
<p><strong>———————————————————————————————-</strong></p>
<p><strong>限制带宽：</strong></p>
<p>下载模块 <a href="ftp://ftp.cohprog.com/pub/apache/module/1.3.0/mod_bandwidth.c">ftp://ftp.cohprog.com/pub/apache/module/1.3.0/mod_bandwidth.c</a><br>安装:<br>&#x2F;usr&#x2F;local&#x2F;apache&#x2F;bin&#x2F;apxs -c .&#x2F;mod_bandwidth.c -o &#x2F;usr&#x2F;local&#x2F;apache&#x2F;libexec&#x2F;mod_bandwidth.so</p>
<p>&lt;——-以上&#x2F;usr&#x2F;local&#x2F;apache请设置为你的路径</p>
<p>编辑httpd.conf<br>添加：<br>LoadModule bandwidth_module libexec&#x2F;mod_bandwidth.so<br>AddModule mod_bandwidth.c</p>
<p>重启你的apache</p>
<p>相关文档：</p>
<p><strong>Global configuration directives :</strong></p>
<ul>
<li><strong>BandWidthDataDir</strong><br>Syntax : BandWidthDataDir <directory><br>Default : “&#x2F;tmp&#x2F;apachebw”<br>Context : server config</li>
</ul>
<p>Sets the name of the root directory used by mod_bandwidth to store its internal temporary information. Don’t forget to create the needed directories : <directory>&#x2F;master and <directory>&#x2F;link</p>
<ul>
<li><strong>BandWidthModule</strong><br>Syntax : BandWidthModule &lt;On|Off&gt;<br>Default : Off<br>Context : per server config</li>
</ul>
<p>Enable or disable totaly the whole module. By default, the module is disable so it is safe to compile it in the server anyway.</p>
<p>PLEASE, NOTE THAT IF YOU SET A BANDWIDTH LIMIT INSIDE A VIRTUALHOST BLOCK, YOU ALSO <strong>NEED</strong> TO PUT THE “BandWidthModule On” DIRECTIVE INSIDE THAT VIRTUALHOST BLOCK !</p>
<p>IF YOU SET BANDWIDTH LIMITS INSIDE DIRECTORY BLOCKS (OUTSIDE OF ANY VIRTUALHOST BLOCK), YOU ONLY NEED TO PUT THE “BandWidthModule On” DIRECTIVE ONCE, OUTSIDE OF ANY VIRTUALHOST OR DIRECTORY BLOCK.</p>
<ul>
<li><strong>BandWidthPulse</strong><br>Syntax : BandWidthPulse <microseconds><br>Default :<br>Context : per server config</li>
</ul>
<p>Change the algorithm used to calculate bandwidth and transmit data. In normal mode (old mode), the module try to transmit data in packets of 1KB. That mean that if the bandwidth available is of 512B, the module will transmit 1KB, wait 2 seconds, transmit another 1KB and so one.</p>
<p>Seting a value with “BandWidthPulse”, will change the algorithm so that the server will always wait the same amount of time between sending packets but the size of the packets will change. The value is in microseconds. For example, if you set “BandWidthPulse 1000000” (1 sec) and the bandwidth available is of 512B, the sever will transmit 512B, wait 1 second, transmit 512B and so on.</p>
<p>The advantage is a smother flow of data. The disadvantage is a bigger overhead of data transmited for packet header. Setting too small a value (bellow 1&#x2F;5 of a sec) is not realy useful and will put more load on the system and generate more traffic for packet header.</p>
<p>Note also that the operating system may do some buffering on it’s own and so defeat the purpose of setting small values.</p>
<p>This may be very useful on especialy crowded network connection : In normal mode, several seconds may happen between the sending of a full packet. This may lead to timeout or people may believe that the connection is hanging. Seting a value of 1000000 (1 sec) would guarantee that some data are sent every seconds…</p>
]]></content>
      <tags>
        <tag>后端</tag>
        <tag>理论</tag>
      </tags>
  </entry>
  <entry>
    <title>【中国茶道】--茶 文 化</title>
    <url>/2011/01/03/tea-culture.html</url>
    <content><![CDATA[<p>　　茶，是中华民族的举国之饮。它发乎神农，闻于鲁周公，兴于唐朝，盛在宋代，如今已成了风靡世界的三大无酒精饮料（茶叶、咖啡和可可）之一，并将成为21世纪的饮料大王，饮茶嗜好遍及全球，全世界已有50余个国家种茶。寻根溯源，世界各国最初所饮的茶叶，引种的茶种，以及饮茶方法、栽培技术、加工工艺、茶事礼俗等，都是直接或间接地由中国传播去的。茶树原产我国西南地区，我国是世界上最早发现茶树和利用茶树的国家，中国是茶的发祥地，被誉为“茶的祖国”。茶，乃是中华民族的骄傲！<br>　　茶文化从广义上讲，分茶的自然科学和茶的人文科学两方面，是指人类社会历史实践过程中所创造的与茶有关的物质财富和精神财富的总和。从狭义上讲，着重于茶的人文科学，主要指茶对精神和社会的功能。由于茶的自然科学已形成独立的体系，因而，现在常讲的茶文化偏重于人文科学。</p>
<p>茶 的 起 源<br>　　早在秦汉以前，我国四川一带已盛行饮茶。西汉时，茶是四川的特产，曾通过进贡传到京城长安，原来我国古代四川东鄂西就是茶树的发祥地，而这里正是三皇五帝最早生息之地。神农氏是“三苗”、“九黎”部族之首领。在《史记&middot;吴起传》与《说苑》等古籍中有“三苗氏，衡山在其南，歧山其北，左洞庭之坡，右彭蠡之川”的记载，这说明神农氏的部族发源在四川东部和湖北西部山区，这正是今日大神农架的地域。在这样一个植被茂盛，至今还盛产茶叶的环境里，神农尝百草完全是可能的。后来这些部族不断北移或东徙，西北才成为华夏政治中心到舜帝禅让王位于大禹，氏族社会的政治中心已移到河南登封一带，前几年己在该处王城岗发掘出夏代遗址遗物，大禹接位，并非一帆风顺，当初在江浙沿海治水，疏流入海，导苕溪、余不溪、入太湖，克服了洪水之患。后又战败防风氏，逐渐北上。舜帝得知大禹治水有功，就让位于他。而“三苗”后裔不服，所以，《史记五帝本纪》有“三苗在江淮，荆州数为乱”的记载。大禹治水在江南，史书也有根据：秦始皇统一中国后，曾“上会稽、祭大禹”，司马迁2 0岁时，也“登会稽，探禹穴。”所以今日浙江绍兴留有大禹遗迹。夏禹原让位于“百虫将军”伯益，但为儿子夏启夺权，启有太康、仲康和少康三子，不断发生王位之争，到禹的第六代孙夏杼时政局统一，国力强盛，他曾率部南下寻根，至浙西、驻骅金斗山东南延峦妙峰一带，故这一带山称之为杼山。当时在山南至今尚留有避它城夏王村等遗迹。夏杼之后八代而衰，履癸（桀）为契灭，契建立先商世代。<br>　　从现存的历史资料也不难看出，氏族社会“三苗氏”生息之地，产茶历代不衰，如南北朝时，《刘琨购茶书》中提到安州（今湖北安陆）；《桐君录》中提到酉阳（今湖北黄风东）、巴东（四川奉节）；《荆州土地记》中提到武陵（湖南常德）。都盛产茶叶。唐代的史料中提到湖北江陵、南漳、四川彭景、安景、邛崃等地盛产茶。陆羽《茶经》中提茶叶品质不详的十一州中就有鄂州即今湖北武昌。由此可见，《神农本草经》记载：“神农尝百草，日遇七十二毒，得茶而解之”的事应发生我国中原。即使从《王褒僮约》所记载的饮茶、卖茶的事实看来，我国汉代以前，川东鄂西地区生产和利用茶叶的事业已相当发达。人们不难设想从采野茶到人工栽培茶树，从自给自用到“产、供、销”的过程，需要多长年代。所以说我国祖先发现利用栽培茶叶的历史是悠久的。</p>
<p> <span id="more"></span></p>
<p>中 国 茶 文 化 的 形 成<br>　　茶文化从广义上讲，分茶的自然科学和茶的人文科学两方面，是指人类社会历史实践过程中所创造的与茶有关的物质财富和精神财富的总和。从狭义上讲，着重于茶的人文科学，主要指茶对精神和社会的功能。由于茶的自然科学已形成独立的体系，因而，现在常讲的茶文化偏重于人文科学。<br>三国以前的茶文化启蒙<br>　　 很多书籍把茶的发现时间定为公元前2737-2697年，其历史可推到三皇五帝。东汉华佗《食经》中：“苦茶久食，益意思”记录了茶的医学价值。西汉以将茶的产地县命名为“荼陵”，即湖南的茶陵。到三国魏代《广雅》中已最早记载了饼茶的制法和饮用：荆巴间采叶作饼，叶老者饼成，以米膏出之。茶以物质形式出现而渗透至其他人文科学而形成茶文化。<br>晋代、南北朝茶文化的萌芽<br>　　 随着文人饮茶之兴起，有关茶的诗词歌赋日渐问世，茶已经脱离作为一般形态的饮食走入文化圈，起着一定的精神、社会作用。<br>唐代茶文化的形成<br>　　 780年陆羽著《茶经》，是唐代茶文化形成的标志。其概括了茶的自然和人文科学双重内容，探讨了饮茶艺术，把儒、道、佛三教融入饮茶中，首创中国茶道精神。以后又出现大量茶书、茶诗，有《茶述》、《煎茶水记》、《采茶记》、《十六汤品》等。唐代茶文化的形成与禅教的兴起有关，因茶有提神益思，生精止渴功能，故寺庙崇尚饮茶，在寺院周围植茶树，制定茶礼、设茶堂、选茶头，专呈茶事活动。在唐代形成的中国茶道分宫廷茶道、寺院茶礼、文人茶道。<br>宋代茶文化的兴盛<br>　　宋代茶业已有很大发展，推动了茶叶文化的发展，在文人中出现了专业品茶社团，有官员组成的“汤社”、佛教徒的“千人社”等。宋太祖赵匡胤是位嗜茶之士，在宫庭中设立茶事机关，宫廷用茶已分等级。茶仪已成礼制，赐茶已成皇帝笼络大臣、眷怀亲族的重要手段，还赐给国外使节。至于下层社会，茶文化更是生机活泼，有人迁徙，邻里要“献茶”、有客来，要敬“元宝茶”，定婚时要“下茶”，结婚时要“定茶”，同房时要“合茶”。民间斗茶风起，带来了采制烹点的一系列变化。<br>明、清茶文化的普及<br>　　此时已出现蒸青、炒青、烘青等各茶类，茶的饮用已改成“撮泡法”，明代不少文人雅士留有传世之作，如唐伯虎的《烹茶画卷》、《品茶图》，文徵明的《惠山茶会记》、《陆羽烹茶图》、《品茶图》等。茶类的增多，泡茶的技艺有别，茶具的款式、质地、花纹千姿百态。到清朝茶叶出口已成一种正式行业，茶书、茶事、茶诗不计其数。<br>现代茶文化的发展<br>　　 新中国成立后，我国茶叶从1949的年产7500T发展到1998年的60余万T。茶物质财富的大量增加为我国茶文化的发展提供了坚实的基础，1982年，在杭州成立了第一个以宏扬茶文化为宗旨的社会团体–“茶人之家”，1983年湖北成立“陆羽茶文化研究会”，1990年“中国茶人联谊会”在北京成立，1993年“中国国际茶文化研究会”在湖洲成立，1991年中国茶叶博物馆在杭州西湖乡正式开放。1998年中国国际和平茶文化交流馆建成。随着茶文化的兴起，各地茶艺馆越办越多。国际茶文化研讨会已开到第五界，吸引了日、韩、美、斯及港台地区纷纷参加。各省各市及主产茶县份份主办“茶叶节”，如福建武夷市的岩茶节、云南的普洱茶节，浙江新昌、泰顺、湖北英山、河南信阳的茶叶节不胜枚举。都以茶为载体，促进全面的经济贸易发展。　</p>
<p>茶 说<br>中 国 茶 文 化 点 滴<br>　　 “茶”字的起源，最早见于我国的《神农本草》一书，它是世界上最古的第一部药物书。据有关专家考证，该书为战国时代（公元前5年－一公元前221年）的著作。<br>　　 我国茶圣一－唐代陆羽于公元７５８年左右写成了世界上最早的茶叶专著《茶经》，系统而全面地论述了栽茶、制茶、饮茶、评茶的方法和经验。根据陆羽《茶经》推论，我国发现茶树和利用茶叶迄今已有四千七百多年的历史。<br>　　 茶叶在我国西周时期是被作为祭品使用的，到了春秋时代茶鲜叶被人们作为菜食，而战国时期茶叶作为治病药品，西汉时期茶叶已成为主要商品之一了。从三国到南北朝的三百多年时间内，特别是南北朝时期，佛教盛行，佛家利用饮茶来解除坐禅瞌睡，于是在寺院庙旁的山谷间普遍种茶。饮茶推广了佛教，而佛教又促进了茶灶的发展，这就是历史上有名的所谓“茶佛一味”的来源。到了唐代，茶叶才正式作为普及民间的大众饮料。<br>　　 茶叶自古以来就成为中日两国人民友谊的纽带。唐朝时，日本僧人最澄来我国浙江天台山国清寺研究佛学，回国时带回茶籽种植于日本贺滋县（即现在的池上茶园），并由此传播到日本的中部和南部。南宋时，日本荣西禅师两次来到中国，到过天台、四明、天童等地，宋孝宗赠他“千光法师”称号。荣西掸师不仅对佛学造诣颇深，对中国茶叶也很有研究，并写有《吃茶养生记》一书，被日本人民尊为茶祖。南宋开庆年问，日本佛教高僧禅师来到浙江径山寺攻研佛学，回国时带去了径山寺的“茶道具”、“茶台子”，井将径山寺的“茶宴”和“抹茶”制法传播到日本，启发和促进了日本茶道的兴起。<br>　　 我国宋代时就已有阿拉伯商人定居在福建泉州运销茶叶；明代郑和下西洋，茶叶也随着销售到东南亚和南部非洲各国。明代末期，公元１６１０年荷兰商船首先从澳门运茶到欧洲，打开了中国茶叶销往两方的大门。<br>　　 我国关于茶馆的最早记载，要算唐代开元年间封演的《封氏闻见记》了，其中有“自邹、齐、沧、隶，渐至京邑，城市多开店铺，煮茶卖之，不问道俗，投钱取饮”。唐宋以后，不少地方都开设了以卖茶水为业的茶馆。到了清朝，民间曲艺进入茶馆，使茶馆成为文化娱乐和休息的场所。<br>　　 相传我国最大的茶馆是四川当年的“华华茶厅”，内有三厅四院。成都茶馆设有大靠背椅，饮茶聊天或打盹都极为舒适。<br>　　 我国人民历来就有“客来敬茶”的习惯，这充分反映出中华民族的文明和礼貌。古代的齐世祖、陆纳等人曾提倡以茶代酒。唐朝刘贞亮赞美“茶”有十德，认为饮茶除了可健身外，还能“以茶表敬意”、“以茶可雅心”、“以茶可行道”。唐宋时期，众多的文人雅士如白居易、李白、柳宗元、刘禹锡、皮日休、韦应物、温庭筠、陆游、欧阳修、苏东坡等，他们不仅酷爱饮茶，而且还在自己的佳作中歌颂和描写过茶叶。</p>
<p>茶说 — 茶史的发展<br>　　 茶，是中华民族的举国之饮。它发乎神农，闻于鲁周公，兴于唐朝，盛在宋代，如今已成了风靡世界的三大无酒精饮料（茶叶、咖啡和可可）之一，并将成为21世纪的饮料大王，饮茶嗜好遍及全球，全世界已有50余个国家种茶，寻根溯源，世界各国最初所饮的茶叶，引种的茶种，以及饮茶方法、栽培技术、加工工艺、茶事礼俗等，都是直接或间接地由中国传播去的。中国是茶的发祥地，被誉为“茶的祖国”。茶，乃是中华民族的骄傲！</p>
<p>　　 茶树原产我国西南地区，我国是世界上最早发现茶树和利用茶树的国家，我国茶史的发展经历了五个阶段：<br>　　 一、野生药用阶段。茶的利用始作药料，在《神农本草经》一书中曾经指出：“神农尝百草，日遇七十二毒，得荼而解之”（注：茶原名荼），说是远在公元前2737-2697年茶被神农所发现，并用为药料，自此后，茶逐渐推广为药用。但何时开始作为饮料，史料极缺，只有公元前59年的王褒《僮约》一文，曾提到“武阳买茶”“烹茶尽具”等工作内容，这是茶用来饮用的最早记载。<br>　　 二、少量种植供寺僧、贵族饮用阶段。饮茶的习惯，最早应当起源于川蜀之地，后逐渐向各地传播，至西汉未年，茶已成为寺僧、皇室和贵族的高级饮料，到三国之时，宫廷饮茶更为经常。<br>　　 三、大量发展阶段。从晋到隋，饮茶逐渐普及开来，成为民间饮品。不过，一直到南北朝前期，饮茶风气在地域上仍存在着一定的差距，南方饮茶较北方为盛，但随着南北文化的逐渐融合，饮茶风气也渐渐由南向北推广开来，但茶风的大盛却是在大唐帝国建立以后。唐代饮茶兴盛的原因有以下几点：<br>　　 1、唐朝建立以后，社会安定，经济发达，交通便利，使茶的生产、贸易和消费大大发展；<br>　　 2、饮茶的兴盛还与唐朝政府颁布的禁酒令有关。由于人口的增长以及战乱所造成的农民大量的流亡、土地的丧失，使得唐中期以后的粮食十分匮乏，而造酒却需要消耗大量粮食，为了缓解这一矛盾，唐肃宗于乾元元年颁布禁酒令，开始在长安禁酒，这便使许多嗜酒而不得饮的人转向饮茶，以茶代酒，促进了饮茶风气的传播。<br>　　 3、唐代饮茶的兴盛与贡茶的兴起、诗风的大盛以及科举制度、佛教的传播有着千丝万缕的联系。<br>　　 唐以前的饮茶是粗放式的。唐代随着饮茶的蔚然成风，饮茶方式也发生了显著变化，出现了细煎慢品式的饮茶方式，这一变化在饮茶史上是一件大事，其功劳应归于茶圣陆羽。<br>　　 宋人饮茶继承了唐人饮茶方式，但比唐人更为讲究，制作也更为精细，而尤为精细的是宫廷团茶（饼茶）的制作。宋代饮茶虽以饼茶为主，但同时也有一些有名的散茶，如日铸茶、双井茶和径山茶，散茶尤为文人所喜爱。在饮用上，改唐代的煮茶法为点茶法，即不再把茶末投入水中煎煮，而是放在茶盏 用开水冲注，再充分搅拌，使茶与水充分溶和，待到呈现乳状，满碗出现细密的白色泡沫时，便可慢慢品饮了。<br>明清时代的饮茶，无论在茶叶类型上，还是在饮用方法上，都与前代差异显著。明代在唐宋散茶的基础上加以发展扩大，使之成为盛行明、清两代并且流传至今的主要茶类。明代炒青法所制的散茶大都是绿茶，兼有部分花茶。清代除了名目繁多的绿茶、花茶之外，又出现了乌龙茶、红茶、黑茶和白茶等类茶，从而奠定了我国茶叶结构的基本种类。<br>　　 四、衰落阶段。尽管我国古代劳动人民对茶叶有不少的宝贵经验，并为世界各国发展茶叶生产作出贡献，但由于解放前腐败政治的统治，茶叶科学技术和经验得不到总结、发扬和利用，茶叶生产在帝国主义排挤和操纵下，日趋衰败</p>
<p>　　 五、解放后我国茶叶生产大发展阶段。解放后，我国茶叶生产获得了恢复和发展，开辟了集中成片的高标准新茶园，使茶园面积不断扩大；因地制宜综合治理了大批低产茶园；同是注重建设茶场和茶厂，实行科学种茶，培训茶叶科技人员，推动了茶叶生产的大发展。这一阶段大致经历了两个阶段。</p>
<p>　　 第一阶段是1950-1970年，这20年基本上以垦复、发展、努力扩大种植面积为主，这期间茶园面积平均年增加7.3%，而茶叶产量平均年增加5.9%. 第二阶段是1970后,这一阶段的重点转向改善茶园结构,提高茶园单产,完善制茶工艺。进入90年代后，名优茶生产异军突起，种类繁多，不但恢复生产了许多历史上的名茶，还创制了种类繁多新名茶。<br>　　 茶，二十一世纪的饮料大王，随着社会的发展，人民生活水平的提高，必将得到更大的发展。</p>
<p>　　 我国既是“茶的祖国”，又是“诗的国家”，因此茶很早就渗透进诗词之中，从最早出现的茶诗到现在，历时一千七百年，为数众多的诗人，文学家已创作了不少优美的茶叶诗词。</p>
<p>　　 我国狭义的茶叶诗词是指“咏茶”诗词，既诗的主题是茶，这种茶叶诗词数量略少；广义的茶叶诗词不仅包括咏茶诗词，而且也包括“有茶”诗词，即诗词的主题不是茶，但是诗词中提到了茶，这种诗词数量就很多了。我国的广义茶叶诗词，据估计：唐代约有500首，宋代多达1000首，再加上金、元、明、清，以及近代，总数当在2000首以上，真可谓美不胜收、琳琅满目了。<br>　　 卢仝，自号玉川子，爱茶成癖，被后人尊为茶中亚圣，他的《走笔谢孟谏议寄新茶》即《饮茶歌》是他在品尝友人谏议大夫孟简所赠新茶之后的即兴之作，是一首著名的咏茶的七言古诗:<br>日高丈五睡正浓，军将打门惊周公。<br>口云谏议送书信，白绢斜封三道印。<br>开缄宛见谏议面，手阅月团三百片。<br>闻道新年入山里，蛰虫惊动春风起。<br>天子须尝阳羡茶，百草不敢先开花。<br>仁风暗结珠蓓蕾，先春抽出黄金芽。<br>摘鲜焙芳旋封裹，至精至好且不奢。<br>至尊之余合王公，何事便到山人家？<br>柴门反关无俗客，纱帽笼头自煎吃。<br>碧云引风吹不断，白花浮光凝碗面。<br>一碗喉吻润，二碗破孤闷。<br>三碗搜枯肠，惟有文字五千卷。<br>四碗发轻汗，平生不平事，尽向毛孔散。<br>五碗肌骨清，六碗通仙灵。<br>七碗吃不也，唯觉两腋习习清风生。<br>蓬莱山，在何处？玉川子乘此清风欲归去。<br>山上群仙司下土，地位清高隔风雨。<br>安得知百万亿苍生命，堕在颠崖受辛苦。<br>便为谏议问苍生，到头还得苏息否？<br>（月团喻指茶饼）<br>　　 齐已的《咏茶十二韵》是一首优美五言排律。<br>百草让为灵，功先百草成。<br>甘传天下口，贵占火前名。<br>出处春无雁，收时谷有莺。<br>封题从泽国，贡献入秦京。<br>嗅觉精新极，尝知骨自轻。<br>研通天柱响，摘绕蜀山明。<br>赋客秋吟起，禅师昼卧惊。<br>角开香满室，炉动绿凝铛。<br>晚忆凉泉对，闲思异果平。<br>松黄干旋泛，云母滑随倾。<br>颇贵高人寄，尤宜别柜盛。<br>曾寻修事法，妙尽陆先生。<br>元稹的《一字至七字茶诗》<br>茶。<br>香叶、嫩芽。<br>慕诗客、爱僧家。<br>碾雕白玉、罗织红纱。<br>铫煎黄蕊色、碗转曲尘花。<br>夜后邀陪明月、晨前命对朝霞。<br>洗尽古今人不倦、将至醉后岂堪夸。</p>
<p>茶 联<br>　　 茶联，乃是我国楹联宝库中的一枝夺目鲜花。相传最早始于五代后蜀主孟昶在寝门桃符板上的题词，自唐至宋，饮茶兴盛，又受文人墨客所推崇，因此，茶联的出现，至迟应在宋代。但目前有记载的，而且数量又比较多的，乃是在清代，尤以郑燮为最。<br>　　 清代的郑燮能诗、善画，又懂茶趣，善品茗，他在一生中曾写过许多茶联，如下：<br>汲来江水烹新茗，买尽青山当画屏。<br>扫来竹叶烹茶叶，劈碎松根煮菜根。<br>墨兰数枝宣德纸，苦茗一杯成化窑。<br>雷言古泉八九个，日铸新茶三两瓯。<br>山光扑面因潮雨，江水回头为晚潮。<br>从来名士能评水，自古高僧爱斗茶。<br>楚尾吴头，一片青山入座； 淮南江北，半潭秋水烹茶。　</p>
<p>　　 近代茶联更多，现择录部分如下：</p>
<p>为爱清香频入座，欣同知已细谈心。<br>只缘清香成清趣，全因浓酽有浓情。<br>四海咸来不速客，一堂相聚知音人。<br>欲把西湖比西子，从来佳茗似佳人。<br>一杯春露暂留客，两腋清风几欲仙。<br>得与天下同其乐，不可一日无此君。<br>尘虑一时净，清风两腋生。<br>香飘屋内外，味醇一杯中。<br>扬子江心水，蒙顶山上茶。<br>客至心常热，人走茶不凉。<br>美酒千杯难成知已，清茶一盏也能醉人。<br>茗外风清移月影，壶边夜静听松涛。<br>诗写梅花月，茶煎谷雨春。<br>秀萃明湖游目频来过溪处， 腴含古井情正及采茶时。<br>为名忙，为利忙，忙里偷闲，且喝一杯茶去；<br>劳心苦，劳力苦，苦中作乐，再倒一杯酒来。<br>菜在街面卖，茶在壶中吐香。<br>龙井云雾毛尖瓜片碧螺春， 银针毛峰猴魁甘露紫笋茶。<br>疑成云雾顶，飘出晨露香。<br>剪取吴淞半江水，且尽卢仝七碗茶。<br>四方来客坐片刻无分你我， 两头是路吃一盏各自东西。<br>陆羽摇头去，卢仝拍手来。<br>佳肴无肉亦可，雅谈离我难成。<br>泉从石出情宜冽，茶自峰生味更圆。<br>禅榻常闲，看袅袅茶烟随落花风去； 远帆无数，有盈盈轨水从罨画溪来。<br>秀萃明湖，游目频来过溪处； 腴含古井，怡情正及采茶时。<br>半壁山房待明月，一盏清茗酬知音。<br>饮一盏新绿，染满身清香。<br>半榻梦刚回，活火初煎新涧水； 一帘春欲暮，茶烟细扬落花风。<br>趣言能适意，茶品可清心。<br>坐，请坐，请上坐；茶，泡茶，泡好茶。</p>
<p>茶说 — 饮 茶 方 式 的 演 变<br>　　 茶叶被我们的祖先发现以后，对它的利用方式先后经历了几个阶段的发展演化，才进展到如今天这种“开水冲泡散茶”的饮用方式。<br>　　 在远古时代，我们的祖先仅仅是把茶叶当作药物。这与《神农本草》记载的“神农尝百草，日遇七十二毒，得荼而解之”是相吻合的。茶叶具有清热解毒、提神、醒脑等功能，至今仍被某些地区的群众当作药用。那时人们从野生的茶树上砍下枝条、采下芽叶，放在水中烧煮，然后饮其汁水，这就是原始的“粥茶法”。这样煮出的茶水，滋味苦涩，因此那时称茶为”苦荼”。<br>　　 至迟到秦汉时，人们创造了“半茶半饮”的制茶和用茶方法，即不直接烧煮鲜叶，而将制好的茶饼在火上灸烤，然后捣碎研成细末，冲入开水，再加葱、姜、橘子等调和。这种在茶中加入调料的饮法，在我国的部分民族和地区中沿习至今，如傣族饮的“烤茶”，就是在铛罐中冲泡茶叶后，加入椒、姜、桂、盐、香糯竹等调和而成。<br>　　 到唐宋时期，饮茶之风大盛，当时人们最推崇福建的建溪茶，这种压成团饼形的茶，制作十分精巧，茶饼的表面上分别压有龙凤图案，称为“龙团凤饼”。饮茶时先将团茶敲碎，碾细，细筛，置于盏杯之中，然后冲入沸水，这就是所谓的“研膏团茶点茶法”。当时皇宫、寺院以及文人雅士之间还盛行茶宴，茶宴的气氛庄重，环境雅致，礼节严格，且必用贡茶或高级茶叶，取水于名泉、清泉，选用名贵茶具。茶宴的内容大致先由主持人亲自调茶或亲自指挥、监督调茶，以示对客人的敬意，然后献茶，接茶，闻茶香，观茶色，品茶味。茶过三巡之后，便评论茶的品第，称颂主人道德，以及赏景叙情、行文做诗等等。</p>
<p>　　 到了明代，太祖朱元璋有感于制作龙团凤饼劳民伤财，于是亲自下诏：“罢造龙团，惟芽茶以进。”这里所说的芽茶也就是我们现在用的散茶叶了。从此以后人们不必将茶先压成饼，再碾成末，而是直接在壶或盏中沏泡条形散茶，使饮茶的方式发生了重大的变革。这样的饮茶方式使人们对茶的利用简单而方便了。人们把盏玩壶品茶，也使盏、壶的制作更加精美，使茶具成为艺术。这种饮茶方式一直延续到现在。<br>　　 目前，除了适应快节奏的生活，一部分人饮用即冲即饮的速溶茶，或为了治病保健的需要，饮用含茶或不含茶的保健茶外，饮茶的方式、方法自明朝以来基本上没有发生什么变化。</p>
<p>茶说 — 茶与健康<br>茶叶有抗衰老作用<br>　　 茶叶有益于人体健康，其抗衰延老作用，这一作用中国的古人通过观察和实践很早就有知晓，并早已有记述。《神农食经》曾记载“久服令人有力悦志”，《杂录》也曾记载“苦茶轻身换骨”。<br>　　 现代研究证实茶叶中含有人体所必需的化学成分，含有对某些疾病确具有疗效的物质。每天饮茶摄入量虽少，但经常补充这些物质，对人体能起到营养和保健作用。故茶叶称之为天然保健饮料是名符其实的。<br>　　 按照中国传统医学的解释，茶叶性味甘苦，微寒无毒。入心肺胃经。有驱散疲劳，清思明目；生津止渴，利尿止泻；治咳站喘，清热解毒，消食减肥等作用。用于防治高血压，高脂血症，肥胖症，冠心病，治疗食积不化、泻痢；精神不振，思维迟钝；水肿尿少，水便不利；痰喘咳嗽等等。现代茶也被认为有预防与抵抗放射性伤害的作用。<br>　　 茶叶中微量元素锰、锌、硒，维生素C、P、E及茶多酚类物质，能清除氧自由基，抑制脂质过氧化，因而经常饮茶确有一定延年益寿之功。茶叶中的茶单宁物质，能维持细胞正常代谢，抑制细胞突变和癌细胞分化，因而饮茶有一定抗癌作用。茶叶中的脂多糖能防辐射损害，改善造血功能和保护血管。能增强微血管韧性，防上破裂；降低血脂，防止动脉粥样硬化。<br>　　 其实将抗衰老作用理解为延年益寿作用可能更恰当一些。但是不管怎么说，饮茶对健康的益用很多。</p>
<p>　　 茶叶美容法<br>　　 茶叶含有丰富的化学成分，是天然的健美饮料，经常饮用一些茶水，有助于保持皮肤光洁白嫩，推迟面部皱纹的出现和减少皱纹。<br>　　 假如你的眼睛因用眼过多而疲劳（这对网友们来说是经常的事情），可用棉花沾冷茶水清洗眼睛，几分钟后，喷上冷水，再拍干，有助于恢复疲劳。<br>　　 消除黑眼圈</p>
<p>　　 产生黑眼圈的主要原因有：睡眠不足、用眼过度、较长时间的强刺激、缺少维生素B12、轻度发炎、贫血、曝晒在阳光下过久、遗传、疏忽护理、月经期间、性生活过度等，都会产生黑眼圈。因此要根据不同的情况加以防治。避免黑眼圈的最好办法是：作息正常、睡眠充足、营养均衡多运动、多呼吸新鲜空气来减少压力，并避免太阳直接照射，以减少黑色素的产生。消除黑眼圈最简单的方法是先把2袋茶包(茶叶包在纱布中)在冷水中浸透，闭上眼睛，在左右眼皮上各放1个茶包，搁15分钟。或是用清洁的棉织手帕包冰块，搁在黑眼圈上停留几分钟，经常坚持。<br>　　 如果你在太阳底上使皮肤受损，可用一块棉花蘸冷茶水抹不舒服的部分，不要用力过大。时间以觉得舒服为好。<br>　　 睡前应彻底清洁眼部化妆品，如果清洁方法不当，最容易使眼睛红肿。最好用温水浸泡过的茶袋压在眼皮上10分钟，但不可太靠近眼睑。<br>　　 茶糖美容法</p>
<p>　　 茶叶中所含的营养成分甚多，经常饮茶的人，皮肤显得滋润好看。将红茶叶和红糖各两汤匙加水煲煎，加面粉调匀敷面，15分钟后，再用湿毛巾擦净脸部。每日涂敷一次，一个月后即可使容颜滋润白皙。<br>饮茶与防治心脏病<br>　　 茶对多种疾病有防治作用，这在古今中外都有认识。<br>　　 “研究发现，煮沸的茶水对心脏期前收缩（简称早搏），不论是房性、室性早搏或心房纤维颤动，均能起到标本兼治的作用。”分析认为，这是因为茶叶在高温的水中能释出高浓度的茶色素，它不但可将动脉壁上硬化的粥样物质清除，使动脉组织逐渐恢复正常，还能防止胆固醇类物质沉积于动脉壁，从而阻止动脉硬化的发生。<br>　　 但是这样的茶多半不会好喝，呈中药状，而且不是对所有类型的心脏病都有效。该报还给出了一个“药方”：<br>　　 可将红茶或绿茶五克，加入清水二百毫升，中火煮沸，小火沸腾五分钟，离火沉淀片刻，去渣空腹一次饮下，每日一次，坚持三个月即可。<br>饮茶可减轻吸烟的危害<br>　　 据世界卫生组织、英国帝国癌症研究基金会和美国癌症协会共同完成的一份关于吸烟的调查报告说，目前全世界每10秒钟就有1人死于吸烟所引起的疾病，每年全世界至少有315万人因吸烟而丧生，而且这个数字还在增加；而中国吸烟人数已高达3亿多，每年消耗香烟1万5干多亿支，占全世界消耗总量的30％以上，中国的中年男人的70％吸烟，每分钟就有1人死于吸烟。若中国烟民人数还在增加的话，预计每分钟将有5人死于吸烟。这对吸烟者来说，无疑是一个值得警惕的信号。从健康角度考虑，戒烟势在必行。而对那些一时还难以戒掉烟痛的吸烟者来说，饮茶则是减轻吸烟危害的最好方法。因为茶叶中的茶多酚、维生素Ｃ等成分对香烟中所含有的各种有害物质有降解作用，边饮茶边吸烟，毒素可随饮茶不断解除，通过粪便排出体外。吸烟者常饮茶，主要有四大好处：<br>　　 一是可以减轻吸烟诱发癌症的可能性。香烟的烟雾里含有4千多种化学物质，其中50种以上化学物质属于致癌物质，而且经过呼吸道吸收又最有利于这些香烟中致癌物质在全身扩散。长期吸烟不仅可以导致肺癌，还可能得食道癌、喉癌、胰腺癌、肾癌。膀眈癌等各种癌症，尤其是肺癌患者中吸烟者要占80％至99.5％。美国休斯敦安德森癌症中心的科研人员从分子角度阐明了吸烟与肺癌的关系，指出吸烟引起的基团变异是导致肺瘤的直接原因。饮茶有防癌抗癌作用。茶叶中的茶多酚能抑制自由基的释放，控制癌细胞的增殖。自由基是人体在呼吸代谢过程中，在消耗氧的同时产生的一组有害“垃圾”。它几乎存在于人体的每一个细胞之中，是人体的一大隐患和“定时炸弹”。研究表明，自由基也是造成基因变异、致癌的重要原因。一般情况下人的机体是处于自由基不断产生和不断消除的动态平衡之中。值得指出的是，香烟是自由基发生剂，据测定，人们每吸一日烟就可产生10的17次方个自由基，吸烟会破坏这种动态平衡。自由基产生过多，人体致癌的可能性也加大了。茶叶中茶多酚的主体儿茶素类物质是一种抗氧化剂，也是一种自由基强抑制剂．它可以抑制由于吸烟引起的肿瘤发生。绿茶中的茶多酚清除自由基的能力较强，它们对超氧阴离子自由基具有很强的清除效应。中国预防医学科学院营养与食品卫生研究所在研究了145种茶叶后证实，茶叶确有阻断人体内亚硝胺合成的能力。南京中山肿瘤研究所阎玉森经试验发现，茶多酚进入人体后能与致癌物结合，使其分解，降低致癌活性，从而抑制致癌细胞的生长。美国泊杜大学从事食品与营养研究的多罗西·莫尔说：“我们的研究表明，绿茶的叶富含抗癌物质，其浓度相当高，足以在体内产生抗癌作用。”在癌症研究方面积有四十年丰富经验的美国健康基金会名誉会长约翰·韦斯柏格博士说：“我的研究结果表明，如果你每天喝6杯茶，就可以不得癌症”。美国哥伦比亚大学哈菜姆医学中心的研究人员研究结果也显示，绿茶具有抗癌功效。因此吸烟者饮茶有助于减少癌症的发生。<br>　　 二是可以有助于减轻由于吸姻所引起的辐射污染。据美国马萨诸塞大学医疗中心的约瑟夫·迪法兰赞博士估计，每天吸30支烟的人，他的肺部在一年内得到香烟中放射性物质的辐射量相当于他的皮肤在胸腔Ｘ光机上透视了大约300次。而饮茶能有效地阻止放射性物质侵入骨髓并可使锶90和钻60迅速排出体外，茶叶中的儿茶素类物质和脂多糖物质可减轻辐射对人体的危害，对造血功能有显著的保护作用。用茶叶片剂治疗由于放射引起的轻度辐射病的临床试验表明，其总有效率可达90％。<br>　　 三是可以防治由于吸烟而促发的白内障。科学研究发现，吸烟正成为危害眼睛健康的大敌，会促发白内障。美国哈沸大学医学院研究人员发现，与那些从不吸烟的人相比，每天吸20支以上香烟的人，患白内障的可能性是不吸烟人的2倍，吸烟量越大，患白内障的可能性也就越大。在我国不明原因的失明者中就有的4％的人是因为吸烟引起的。加拿大科学家却发现，多饮茶可以防止白内障。他们认为，白内障是由于人体内氧化反应产生的自由基作用于眼球的晶状体所致，而茶叶中的茶多酚分解产生的具有抗氧化作用的代谢物可以阻止体内产生自由基的氧化反应的发生。另外，美国农业部营养与衰老研究中心的科学家们最近发现，白内障的发病率与人体血浆中胡萝卜素含量高低及浓度大小关系密切。凡是白内障患者，其血浆中胡萝卜素浓度往往很低，且发病率比正常人高3～4倍。茶叶中含有比一般蔬菜和水果都高得多的胡萝卜素。胡萝卜素不仅有防止白内障、保护眼睛的作用，同时还有防癌抗癌、抗尼古丁、解烟毒的作用。吸烟者饮茶对保护视力是有好处的。<br>　　 四是可以补充由于吸烟所消耗掉的维生素Ｃ。因为吸烟可促使人体血清中的维生素Ｃ与烟雾中的一氧化碳、亚硝胺、尼古丁、甲醛等氧化致癌物结合，进而转变为无毒化合物或非突变物质排出体外，使得维生素C含量大大减少，导致人体内的垃圾一自由基的大量堆积，给人体留下了隐患，加剧了自由基对各种正常细胞的损伤作用。比奴吸入尼古丁等有害物质，使细胞中氧自由基浓度名加。氧自由基对人体细胞有侵害作用，极易引起癌变反应，美国的研究人员发现，经常补充一定剂量的维生素Ｃ则可避免吸烟所带来的这种危害。因为维生素Ｃ具有抗氧化作用，可抑制氧自由基的生成，使人体细胞免受侵害。茶叶中维生素Ｃ的含量较丰富，尤其是绿茶，在正常情况下，茶叶中维生素C的浸出率可以达到80％左右，茶汤中的维生素Ｃ在摄氏90的温度下也很少被破坏。吸烟音饮茶可以摄取到适量的维生素C，特别是坚持饮绿茶，完全可以补充由于吸烟造成的维生素C的不足，以保持人体内产生和清除自由基的动态平衡，增强人体的抵抗能力。<br>　　 总而言之，虽然饮茶对吸烟者有一定的好处，但本文的目的绝非是鼓励人们去吸烟，更不是因为饮茶可缓解吸烟的危害而可以肆无忌惮地去吸烟。恰恰相反，由于吸烟所带来的危害无论是对个人还是对社会都是巨大而惨痛的，因此戒烟是大势所趋，是明智之举。饮茶只能作为戒烟过程中的一项补救措施而已，以尽可能减少吸烟的危害。为了您的健康，彻底戒烟才是我们的最终目的。</p>
<p>信息来源：中华农历网：<a href="http://www.nongli.com/Doc/0409/20104037-3.htm">http://www.nongli.com/Doc/0409/20104037.htm</a></p>
]]></content>
      <tags>
        <tag>杂七杂八</tag>
      </tags>
  </entry>
  <entry>
    <title>大羽，见羽不见</title>
    <url>/2011/01/07/da-yu-soccer.html</url>
    <content><![CDATA[<p>真不知道该从哪里说起，因为当几天前一看到大羽挂靴的消息后，心情就不是很好，突然回忆起了很多很多过往的画面。</p>
<p>我第一次看李金羽的比赛应该还是在小学，当时好像是国青队参加某个比赛，在小组赛中，李金羽飘逸的进球和充满乐趣的庆祝动作，让我深深的记住了他，让我最佩服的就是他门前的灵气，他拥有作为一个前锋应有的嗅觉，甚至说他的这种嗅觉比其他人更加的灵敏。小学四年级鲁能夺得双冠王，那一年他还在辽小虎，而我正因为看了国青的比赛后对他的能力很佩服，所以很害怕他能够和辽小虎的其他成员击败鲁能。虽然知道最后也没有成功，但是他的威慑力我觉的还是很大的。</p>
<p>我平时也踢球，踢得位置也是前锋，而我则是经常去模仿学习李金羽的跑动等技能，因为我觉得他在门前就是一个神，每次进球，都会用一种不可思议的姿势，把球送进球门。回顾他的每一粒进球，其实都是一种享受，尤其是07赛季的双冠王，鲁能三叉戟的华丽进攻，更是因为最后一击的大羽给力而锦上添花。</p>
<p>如今，大羽挂靴了，这来临的2011年，我们不会再在球场上唤回那个熟悉的29号了，一切都已成为了过往。但是，我想李金羽的名字一定会在我们这几代看鲁能球的球迷心里留存下来，就像宿茂臻，就像李霄鹏。</p>
<p>最后，希望大羽退役后，能在新的位置上给我们带来更多的精彩，我相信大羽一定做得到！</p>
<p>加一段来自鲁能吧的纪念视频：</p>
]]></content>
      <tags>
        <tag>杂七杂八</tag>
      </tags>
  </entry>
  <entry>
    <title>ASP中对于XLS文件的一些操作方法</title>
    <url>/2011/01/17/asp-xls.html</url>
    <content><![CDATA[<p>1.ASP对Excel的基本操作</p>
<p>(1) 建立Excel对象</p>
<p>创建Excel对象可以通过下面的代码来实现:</p>
<figure class="highlight plaintext"><table><tr><td class="code"><pre><span class="line">&lt;%</span><br><span class="line">set objExcelApp = CreateObject(&quot;Excel.Application&quot;)</span><br><span class="line">objExcelApp.DisplayAlerts = false &#x27;不显示警告</span><br><span class="line">objExcelApp.Application = false &#x27;不显示界面</span><br><span class="line">%&gt;</span><br></pre></td></tr></table></figure>

<p>(2) 新建Excel文件</p>
<p>新建Excel文件可以通过以下代码来实现:</p>
<figure class="highlight plaintext"><table><tr><td class="code"><pre><span class="line">&lt;%</span><br><span class="line">objExcelApp.WorkBooks.add</span><br><span class="line">set objExcelBook = objExcelApp.ActiveWorkBook</span><br><span class="line">set objExcelSheets = objExcelBook.Worksheets</span><br><span class="line">set objExcelSheet = objExcelBook.Sheets(1)</span><br><span class="line">%&gt;</span><br></pre></td></tr></table></figure>

<p>(3) 读取已有的Excel文件</p>
<p>读取已有的Excel文件可以通过下面的代码来实现</p>
<figure class="highlight plaintext"><table><tr><td class="code"><pre><span class="line">&lt;%</span><br><span class="line">strAddr = Server.MapPath(&quot;.&quot;)</span><br><span class="line">objExcelApp.WorkBooks.Open(strAddr &amp; &quot;TempletTable.xls&quot;)</span><br><span class="line">set objExcelBook = objExcelApp.ActiveWorkBook</span><br><span class="line">set objExcelSheets = objExcelBook.Worksheets</span><br><span class="line">set objExcelSheet = objExcelBook.WorkSheets(1)</span><br><span class="line">%&gt;</span><br></pre></td></tr></table></figure>

<p>(4) 另存Excel文件</p>
<p>另存Excel文件可以通过以下代码来实现</p>
<figure class="highlight plaintext"><table><tr><td class="code"><pre><span class="line">&lt;%</span><br><span class="line">objExcelBook.SaveAs strAddr &amp; &quot;templateTables.xls&quot;</span><br><span class="line">%&gt;</span><br></pre></td></tr></table></figure>

<p>(5) 保存Excel文件</p>
<p>保存Excel文件可以通过以下代码来实现:</p>
<figure class="highlight plaintext"><table><tr><td class="code"><pre><span class="line">&lt;%</span><br><span class="line">objExcelBook.Save</span><br><span class="line">%&gt;</span><br></pre></td></tr></table></figure>

<p>(6) 退出Excel操作</p>
<figure class="highlight plaintext"><table><tr><td class="code"><pre><span class="line">&lt;%</span><br><span class="line">objExcelApp.Quit &#x27;一定要退出</span><br><span class="line">set objExcelApp = nothing</span><br><span class="line">%&gt;</span><br></pre></td></tr></table></figure>

<p>2 读取Excel文件的实例</p>
<figure class="highlight plaintext"><table><tr><td class="code"><pre><span class="line">&lt;%</span><br><span class="line">set xlApp = server.CreateObject(&quot;Excel.Application&quot;)</span><br><span class="line">strsource = server.MapPath(&quot;xl.xls&quot;)</span><br><span class="line">set xlbook = xlApp.WorkBooks.Open(strsource)</span><br><span class="line">set xlsheet = xlbook.Worksheets(1)</span><br><span class="line"></span><br><span class="line">i = 1</span><br><span class="line">response.write &quot;&lt;table&gt;&quot;</span><br><span class="line"></span><br><span class="line">while xlsheet.cells(i,1) &lt;&gt; &quot;&quot;</span><br><span class="line"></span><br><span class="line">response.write &quot;&lt;tr&gt;&quot;</span><br><span class="line">response.write &quot;&lt;td&gt;&quot; &amp; xlsheet.Cells(i,1) &amp; &quot;&lt;/td&gt;&quot;</span><br><span class="line">response.write &quot;&lt;td&gt;&quot; &amp; xlsheet.Cells(i,2) &amp; &quot;&lt;/td&gt;&quot;</span><br><span class="line">response.write &quot;&lt;td&gt;&quot; &amp; xlsheet.Cells(i,3) &amp; &quot;&lt;/td&gt;&quot;</span><br><span class="line">response.write &quot;&lt;tr&gt;&quot;</span><br><span class="line">i = i + 1</span><br><span class="line"></span><br><span class="line">wend</span><br><span class="line"></span><br><span class="line">response.write &quot;&lt;/table&gt;&quot;</span><br><span class="line">set xlsheet = nothing</span><br><span class="line">set xlbook = nothing</span><br><span class="line">xlApp.quit</span><br><span class="line">&#x27;千万记住要加这一句，否则每运行一次你的机器里就增加一个Excel进程，而且无法释放</span><br><span class="line">&#x27;set xlApp = nothing 是不行的</span><br><span class="line">%&gt;</span><br></pre></td></tr></table></figure>

<ol start="3">
<li>怎样将数据从Excel导入到SQL Server中</li>
</ol>
<p>(1)</p>
<figure class="highlight plaintext"><table><tr><td class="code"><pre><span class="line">&lt;%</span><br><span class="line">sub dataIntoSqlServer_ceritificate(strFileName,strSheetName,myConn)</span><br><span class="line">&#x27;定义</span><br><span class="line">dim myConnection</span><br><span class="line">dim strName</span><br><span class="line">dim rsXsl,rsSql</span><br><span class="line">dim myConn_Xsl</span><br><span class="line">dim cmd</span><br><span class="line">dim i,j</span><br><span class="line">dim maxId</span><br><span class="line"></span><br><span class="line">strName = strFileName</span><br><span class="line">set myConnection = Server.CreateObject(&quot;ADODB.Connection&quot;)</span><br><span class="line">set rsXsl = Server.CreateObject(&quot;ADODB.Recordset&quot;)</span><br><span class="line">set rsSql = Server.CreateObject(&quot;ADODB.Recordset&quot;)</span><br><span class="line">set cmd = server.CreateObject(&quot;ADODB.Command&quot;)</span><br><span class="line"></span><br><span class="line">cmd.ActiveConnection = myConn</span><br><span class="line"></span><br><span class="line">myConn_Xsl = &quot;Provider=Microsoft.Jet.OLEDB.4.0;Data Source=&quot; &amp; strName &amp; _</span><br><span class="line">&quot;;Extended Properties=Excel 8.0&quot;</span><br><span class="line">&#x27;打开连接</span><br><span class="line">myconnection.open myConn_Xsl</span><br><span class="line">&#x27;打开表</span><br><span class="line">str_Xsl = &quot;select * from [&quot; &amp; strSheetName &amp; &quot;$]&quot;</span><br><span class="line">rsXsl.open str_Xsl,myconnection,1,1</span><br><span class="line">j = 1</span><br><span class="line">Do while not rsXsl.eof</span><br><span class="line">&#x27;取出最大值</span><br><span class="line">str_sql = &quot;select Max(id) as maxId from exceltosql&quot;</span><br><span class="line">rsSql.open str_Sql,myConn,1,3</span><br><span class="line">if Not rsSql.eof then</span><br><span class="line">if not isNull(rsSql(&quot;maxId&quot;)) then</span><br><span class="line">maxId=CLng(rsSql(&quot;maxId&quot;)) + 1</span><br><span class="line">else</span><br><span class="line">maxId = 1</span><br><span class="line">end if</span><br><span class="line">else</span><br><span class="line">maxId = 1</span><br><span class="line">end if</span><br><span class="line">rsSql.close &#x27;//关闭对象</span><br><span class="line">&#x27;加入数据库</span><br><span class="line">str_Sql = &quot;insert into exceltosql values(&quot; &amp; maxId&amp;&quot;,&#x27;&quot;&amp;rsXsl(1)&amp;&quot;&#x27;,&#x27;&quot; &amp; rsXsl(2)&amp;&quot;&#x27;)&quot;</span><br><span class="line">cmd.CommandText = str_Sql</span><br><span class="line">cmd.Excute()</span><br><span class="line">&#x27;&#x27;&#x27;&#x27;&#x27;&#x27;&#x27;&#x27;&#x27;&#x27;&#x27;&#x27;&#x27;&#x27;&#x27;&#x27;&#x27;&#x27;&#x27;&#x27;&#x27;&#x27;&#x27;&#x27;&#x27;&#x27;&#x27;&#x27;&#x27;&#x27;&#x27;&#x27;&#x27;&#x27;&#x27;&#x27;&#x27;&#x27;&#x27;&#x27;&#x27;&#x27;</span><br><span class="line">j = j + 1</span><br><span class="line">rsXsl.moveNext</span><br><span class="line">loop</span><br><span class="line"></span><br><span class="line">response.write &quot;共导入 &quot; &amp; j_1 &amp; &quot; 条记录.&lt;br&gt;&quot;</span><br><span class="line">response.write &quot;&lt;a href=# onclick=&#x27;self.close();&#x27;&gt;关闭窗口&lt;/a&gt;&quot;</span><br><span class="line">set rsXsl = nothing</span><br><span class="line">set rsSql = nothing</span><br><span class="line">set myconnection = nothing</span><br><span class="line">set cmd = nothing</span><br><span class="line">end sub</span><br><span class="line">(2)</span><br><span class="line">&#x27;调用方法</span><br><span class="line">&lt;%</span><br><span class="line">file1 = &quot;c:excelexample.xls&quot;</span><br><span class="line">myconn = &quot;DRIVER=&#123;SQL SERVER&#125;;SERVER=(local);uid=sa;pwd=sa;DATABASE=aspbook&quot;</span><br><span class="line">dataIntoSqlServer_ceritificate file1,&quot;sheet1&quot;,myconn</span><br><span class="line">%&gt;</span><br></pre></td></tr></table></figure>

<p>4.ASP操作Excel技术总结</p>
<p>目录</p>
<pre><code>一、 环境配置
二、 ASP对Excel的基本操作
三、 ASP操作Excel生成数据表
四、 ASP操作Excel生成Chart图
五、 服务器端Excel文件浏览、下载、删除方案
六、 附录
</code></pre>
<p>正文</p>
<pre><code>一、 环境配置
服务器端的环境配置从参考资料上看，微软系列的配置应该都行，即：
1．Win9x+PWS+Office
2．Win2000 Professional+PWS+Office
3．Win2000 Server+IIS+Office
目前笔者测试成功的环境是后二者。Office的版本没有特殊要求，考虑到客户机配置的不确定性和下兼容特性，建议服务器端Office版本不要太高，以防止客户机下载后无法正确显示。
服务器端环境配置还有两个偶然的发现是：
1． 笔者开发机器上原来装有金山的WPS2002，结果Excel对象创建始终出现问题，卸载WPS2002后，错误消失。
2． 笔者开发ASP代码喜欢用FrontPage，结果发现如果FrontPage打开（服务器端），对象创建出现不稳定现象，时而成功时而不成功。扩展考察后发现，Office系列的软件如果在服务器端运行，则Excel对象的创建很难成功。
服务器端还必须要设置的一点是COM组件的操作权限。在命令行键入“DCOMCNFG”，则进入COM组件配置界面，选择Microsoft Excel后点击属性按钮，将三个单选项一律选择自定义，编辑中将Everyone加入所有权限。保存完毕后重新启动服务器。
客户端的环境配置没发现什么特别讲究的地方，只要装有Office和IE即可，版本通用的好象都可以。

二、 ASP对Excel的基本操作
1、 建立Excel对象
set objExcelApp = CreateObject(&quot;Excel.Application&quot;)
objExcelApp.DisplayAlerts = false 不显示警告
objExcelApp.Application.Visible = false 不显示界面
2、 新建Excel文件
objExcelApp.WorkBooks.add
set objExcelBook = objExcelApp.ActiveWorkBook
set objExcelSheets = objExcelBook.Worksheets
set objExcelSheet = objExcelBook.Sheets(1)
3、 读取已有Excel文件
strAddr = Server.MapPath(&quot;.&quot;)
objExcelApp.WorkBooks.Open(strAddr &amp; &quot;TempletTable.xls&quot;)
set objExcelBook = objExcelApp.ActiveWorkBook
set objExcelSheets = objExcelBook.Worksheets
set objExcelSheet = objExcelBook.Sheets(1)
4、 另存Excel文件
objExcelBook.SaveAs strAddr &amp; &quot;TempTable.xls&quot;
5、 保存Excel文件
objExcelBook.Save （笔者测试时保存成功，页面报错。）
6、 退出Excel操作
objExcelApp.Quit 一定要退出
set objExcelApp = Nothing

三、 ASP操作Excel生成数据表
1、 在一个范围内插入数据
objExcelSheet.Range(&quot;B3:k3&quot;).Value = Array(&quot;67&quot;, &quot;87&quot;, &quot;5&quot;, &quot;9&quot;, &quot;7&quot;, &quot;45&quot;, &quot;45&quot;, &quot;54&quot;, &quot;54&quot;, &quot;10&quot;)
2、 在一个单元格内插入数据
objExcelSheet.Cells(3,1).Value=&quot;Internet Explorer&quot;
3、 选中一个范围
4、 单元格左边画粗线条
5、 单元格右边画粗线条
6、 单元格上边画粗线条
7、 单元格下边画粗线条
8、 单元格设定背景色
9、 合并单元格
10、 插入行
11、 插入列

四、 ASP操作Excel生成Chart图
1、 创建Chart图
objExcelApp.Charts.Add
2、 设定Chart图种类
objExcelApp.ActiveChart.ChartType = 97
注：二维折线图，4；二维饼图，5；二维柱形图，51
3、 设定Chart图标题
objExcelApp.ActiveChart.HasTitle = True
objExcelApp.ActiveChart.ChartTitle.Text = &quot;A test Chart&quot;
4、 通过表格数据设定图形
objExcelApp.ActiveChart.SetSourceData objExcelSheet.Range(&quot;A1:k5&quot;),1
5、 直接设定图形数据（推荐）
objExcelApp.ActiveChart.SeriesCollection.NewSeries
objExcelApp.ActiveChart.SeriesCollection(1).Name = &quot;=&quot;&quot;333&quot;&quot;&quot;
objExcelApp.ActiveChart.SeriesCollection(1).Values = &quot;=&#123;1,4,5,6,2&#125;&quot;
6、 绑定Chart图
objExcelApp.ActiveChart.Location 1
7、 显示数据表
objExcelApp.ActiveChart.HasDataTable = True
8、 显示图例
objExcelApp.ActiveChart.DataTable.ShowLegendKey = True

五、 服务器端Excel文件浏览、下载、删除方案
浏览的解决方法很多，“Location.href=”，“Navigate”，“Response.Redirect”都可以实现，建议用客户端的方法，原因是给服务器更多的时间生成Excel文件。
下载的实现要麻烦一些。用网上现成的服务器端下载组件或自己定制开发一个组件是比较好的方案。另外一种方法是在客户端操作Excel组件，由客户端操作服务器端Excel文件另存至客户端。这种方法要求客户端开放不安全ActiveX控件的操作权限，考虑到通知每个客户将服务器设置为可信站点的麻烦程度建议还是用第一个方法比较省事。
删除方案由三部分组成：
A： 同一用户生成的Excel文件用同一个文件名，文件名可用用户ID号或SessionID号等可确信不重复字符串组成。这样新文件生成时自动覆盖上一文件。
B： 在Global.asa文件中设置Session_onEnd事件激发时，删除这个用户的Excel暂存文件。
C： 在Global.asa文件中设置Application_onStart事件激发时，删除暂存目录下的所有文件。
注：建议目录结构 Src 代码目录 Templet 模板目录 Temp 暂存目录

六、 附录
出错时Excel出现的死进程出现是一件很头疼的事情。在每个文件前加上“On Error Resume Next”将有助于改善这种情况，因为它会不管文件是否产生错误都坚持执行到“Application.Quit”，保证每次程序执行完不留下死进程。
</code></pre>
]]></content>
      <tags>
        <tag>编程语言</tag>
      </tags>
  </entry>
  <entry>
    <title>IE8中字体兼容性问题</title>
    <url>/2011/01/19/ie8-css-font.html</url>
    <content><![CDATA[<p>今天在做前台页面的时候，遇到了一个小问题，就是字体在IE8中显示异常，但是在Firefox和谷歌浏览器中显示正常。在IE8中的显示效果如下：</p>
<p><img src="/img/2011/01/19/5369437485_462edb9f19.jpg"></p>
<p><img src="/img/2011/01/19/5370049290_1374ef2d2a.jpg"></p>
<p>经过排查，发现问题出在了css的字体设置上，如下图：</p>
<p><img src="/img/2011/01/19/5370053702_8f0b9a4d4c.jpg"></p>
<p>原来是sans-serif捣的鬼，把这一个属性值去掉，一切就正常了，如图：</p>
<p><img src="/img/2011/01/19/5369449787_ee8d2f004f.jpg"></p>
<p><img src="/img/2011/01/19/5369452165_36d32cdfc8.jpg"></p>
]]></content>
      <tags>
        <tag>前端</tag>
      </tags>
  </entry>
  <entry>
    <title>免费顶级域名.tk</title>
    <url>/2011/01/19/domain-tk.html</url>
    <content><![CDATA[<p>今天的新发现，一个免费的顶级域名，该域名支持A，CNAME，MX，免费的要求只有一个，就是90天内至少要有25个IP访问。这对于奔波在网上的站长来说，应该是个Easy的事情吧，哈哈。</p>
<p>这是我这个博客的另外一个域名 <a href="http://www.ety001.tk/">http://www.ety001.tk</a></p>
<p>申请地址：<a href="http://www.dot.tk/">http://www.dot.tk</a></p>
]]></content>
      <tags>
        <tag>杂七杂八</tag>
      </tags>
  </entry>
  <entry>
    <title>开水比凉水先结冰的奥秘</title>
    <url>/2011/01/19/water-frozen.html</url>
    <content><![CDATA[<p>今天看了一个非常有意思的视频，讲的是零下三十多度的室外环境，泼一杯子热水，接着就成冰了。这个情景我还是第一次见，真神奇。自己想了很长时间没有答案，遂从网上找了一下，把比较满意的答案附在下面吧。</p>
<p>姆潘巴的问题——开水比凉水先结冰的奥秘</p>
<p>如果向你提问：“同样多的开水和冷水一同放进冰箱里，哪个先结冰？”，你很可能带着讥笑回答：“当然是冷水了！”错啦！</p>
<ol>
<li>姆潘巴的物理问题</li>
</ol>
<p>坦桑尼亚的马干巴中学三年级曾有一位名叫姆潘巴的学生，在学校他经常与同学一起做冰淇淋吃。他们的做法是这样的：先把生牛奶煮沸，加入糖，等冷却后再倒入冰格中，然后放进冰箱的冷冻室内冷冻。因为学校里的同学很多，所以冷冻室放冰格的位置一直供不应求。</p>
<p>一九六三年的一天，当姆潘巴来做冰淇淋时，冰箱冷冻室内放冰格的空位已经所剩无几了。一位同学为了抢在他前面，竟把生牛奶加糖后立即抢先放在冰格中送进了冰箱的冷冻室。而姆潘巴只好急急忙忙把牛奶煮沸，放入糖，等不得冷却，立即把滚烫的牛奶倒入冰格，送入冰箱的冷冻室里。奇迹发生了，过了一个半小时后，姆潘巴发现他的热牛奶已经冻结了，而其他同的冷牛奶却还是粘稠的液，并没有结冰，这个现象使姆潘巴惊愕不已！</p>
<ol start="2">
<li>嘲笑和回答</li>
</ol>
<p>姆潘巴百思不得其解，就去请教物理老师：为什么热牛奶反而比冷牛奶先冻结？老师的回答是：“你一定弄错了，这样的事是不可能发生的。”姆潘巴并没有就此罢休，他牢牢地记下了这个不同寻常<br>的现象，常陷入深思之中……</p>
<p>姆潘巴后来升入了伊林加的姆克瓦高中，他并没有忘记这个问题，又向高中的物理老师请教：“为什么热牛奶和冷牛奶同时放进冰箱，热牛奶先冻结？”他没想到老师却这样嘲笑说：“我所能给你的回<br>答是：你肯定错了。”当他继续提出疑问与老师辩论时，老师又讥讽他：“这是姆潘巴的物理问。”姆潘巴想不通，不满意，但又不敢顶撞教师。</p>
<ol start="3">
<li>博士的答卷</li>
</ol>
<p>终于，一个极好的机会来到了，达累斯萨拉姆大学物理系主任奥斯玻恩博士访问姆克瓦高中。奥斯玻恩博士给学生作完了学术报告，接下去是回答同学的问题。姆潘巴经过充分的酝酿，鼓足勇气向他<br>提出了那个多年思虑的问题：</p>
<p>如果你取两个相似的容器，放入等容积的水，一个处于35℃，另一个处于100℃，把它们同时放进冰箱，100℃的水先结冰，为什么？</p>
<p>奥斯玻恩博士在小姆潘巴面前接到了一份严肃认真的“考卷”，他还是第一次听说到这个不同寻常的现象。感到为难和迷惑的博士并不掩饰什么，而是实事求是地回答道：“这个，我不知道，不过我<br>保证在我回到达累斯萨拉姆之后亲自做这个实验。”回去后，他立即和他的助手做了这个实验。结果证明，姆潘巴说的那个现象是一个实实在在的事实！这究竟是怎么一回事？为什么会这样呢？</p>
<p>一九六九年，由姆潘巴和奥斯玻恩两人撰写的一篇文章发表在英国《物理教师》杂志上，文章对“姆潘巴的物理问题”做了详细的实验记录，并对问题的原因作了第一次尝试性的解释。</p>
<p>他们做了一系列的实验。实验用品是直径4.5厘米，容积100毫升的硼硅酸玻璃烧杯，内放70毫升沸腾过的各种不同温度的水。通过对实验结果的定量分析得出了这样的结论：</p>
<p>冷却主要取决于液体表面；<br>冷却速率决定于液体表面的温度而不是它整体的平均温度；<br>液体内部的对流使液面温度维持得比体内温度高（假定温度高于4℃）；<br>即使两杯液体冷却到相同的平均温度，原来热的系统其热量仍要比原来冷的系统损失得多；<br>液体在冻结之前必然经过一系列的过渡温度，所以用单一的温度来描述系统的状态显然是不够的，还要取决于初始条件的温度梯度。<br>奥斯玻恩博士虽然没有最终解决姆潘巴的物理问题，但面对科学和事实，他给了小姆潘巴和我们一份科学求实的答卷。</p>
<ol start="4">
<li>问题远比想象的要复杂</li>
</ol>
<p>后来许多人也在这方面做了大量的实验和研究，人们发现，这个看来似乎简单的问题实际上要比我们的设想复杂得多，它不但涉及到物理上的原因，而且还涉及到作为结晶中心的微生物的作用，是一<br>个地地道道的“多变量问题”。</p>
<p>(1). 物理原因</p>
<p>从物理方面来说，致冷有四种并存的机制：辐射、传导、汽化、对流。通过实验观察并对结果进行比较，发现引起热水比冷水先结冰的原因主要是传导、汽化、对流三者相互作用的综合效果。如果把热水和冷水结冰的过程叙述出来并分析其原因就更能说明问题了：</p>
<p>盛有初温4℃冷水的杯，结冰要很长时间，因为水和玻璃都是热传导不良的材料，液体内部的热量很难依靠传导而有效地传递到表面。杯子里的水由于温度下降，体积膨胀，密度变小，集结在表面。所<br>以水在表面处最先结冰，其次是向底部和四周延伸，进而形成了一个密闭的“冰壳”。这时，内层的水与外界的空气隔绝，只能依靠传导和辐射来散热，所以冷却的速率很小，阻止或延缓了内层水温<br>继续下降的正常进行。另外由于水结冰时体积要膨胀，已经形成的“冰壳”也对进一步结冰起着某种约束或抑制作用。</p>
<p>盛有初温100℃热水的杯，冷冻的时间相对来说要少得多，看到的现象是表面的冰层总不能连成冰盖，看不到“冰壳”形成的现象，只是沿冰水的界面向液体内生长出针状的冰晶（在初温低于12℃时，看不到这种现象）。随着时间的流逝，冰晶由细变粗，这是因为初温高的热水，上层水冷却后密度变大向下流动，形成了液体内部的对流，使水分子围绕着各自的“结晶中心”结成冰。初温越高，这种对流越剧烈，能量的损耗也越大，正是这种对流，使上层的水不易结成冰盖。由于热传递和相变潜热，在单位时间内的内能损耗较大，冷却速率较大。当水面温度降到0℃以下并有足够的低温时，<br>水面就开始出现冰晶。初温较高的水，生长冰晶的速度较大，这是由于冰盖未形成和对流剧烈的缘故，最后可以观察到冰盖还是形成了，冷却速率变小了一些，但由于水内部冰晶已经生长而且粗大，<br>具有较大的表面能，冰晶的生长速率与单位表面能成正比，所以生长速度仍然要比初温低的水快得多。</p>
<p>(2). 生物原因</p>
<p>同雨滴的形成需要“凝结核”一样，水要结成冰，需要水中有许许多多的“结晶中心”。生物实验发现，水中的微生物往往是结晶中心。某些微生物在热水（水温在100℃以下一点）中繁殖比冷水中快，这样一来，热水中的“结晶中心”就要比冷水中的“结晶中心”多得多，加速了热水结冰的协同作用：</p>
<p>围绕“结晶中心”生长出子晶，子晶是外延结晶的晶核。对流又使各种取向的分子流过子晶，依靠晶体表面的分子力，抓住合适取向的水分子，外延生长出分子作有序排列的许多晶粒，悬浮在水中。结晶释放的能量则通过对流放出，而各相邻的冰粒又连结成冰，直到水全部冻结为止。</p>
<p>以上是科学家对观察到的现象进行综合分析所得出的一些结论和提出的一些解释。但要真正解开“姆潘巴问题”的谜，对其做出全面定量而令人满意的结论，还有待于进一步的探索。现在有的学者提<br>出用高锰酸钾作液体示踪剂，用双层通电玻璃观察窗来进一步观察，有兴趣的读者不妨一试，或许揭开这个历时二十多年奥秘的人将是你。</p>
<p>最后附上我看的那个视频：</p>
]]></content>
      <tags>
        <tag>杂七杂八</tag>
      </tags>
  </entry>
  <entry>
    <title>今天我终于加入了GoogleAdsense计划</title>
    <url>/2011/01/20/add-google-adsense.html</url>
    <content><![CDATA[<p>从我去年9月份买了这个域名到现在，还差两个月左右才半年，而之前刚注册完域名时去申请GoogleAdsense，结果都被驳回，原因是因为建站时间不足半年，这一点让我很郁闷，但是也能理解。所以就这么先把这个撂这里不管了。</p>
<p>前天心血来潮，又去重新提交了申请，没想到顺利的通过了，在正式通过前，收到了一封需要再确认的邮件，里面的大体内容就是说审核基本通过，再向自己的根目录下传一个规定内容的txt文件以证实这个域名的归属，并再重新提交该文件地址。通过这封邮件，我总结的经验是，半年其实并不是一个死规定，关键是看你的网站的价值所在，我觉得一个新域名刚注册完两天，你就能建立起一个资讯比较丰富专业的站点，我想你立刻就能申请GoogleAdsense成功。</p>
<p>对于上传txt的要求很简单，很快就搞定了，又过了一天，也就是今天，我收到了梦寐以求的通过邮件，截图如下：</p>
<p><img src="/img/2011/01/20/5372457816_1038981f03.jpg"></p>
<p><img src="/img/2011/01/20/5371857991_57121259dc.jpg"></p>
<p>希望这将是一个新的开始！</p>
]]></content>
      <tags>
        <tag>网站日志</tag>
        <tag>SEO</tag>
      </tags>
  </entry>
  <entry>
    <title>解决开机画面（splash）分辨率低的方法</title>
    <url>/2011/01/24/splash.html</url>
    <content><![CDATA[<p>不知道各位在安装 ubuntu的时候有没有发现，你们刚安装完，进系统的时候，splash的分辨率很高，而进入系统安装完显卡驱动后，再重启发现splash的分辨率低了，变得非常难看了，按照softpedia上的文章的说法，the logo gets bigger and ugly!本文就将告诉你如何解决这个问题。该文方法来自softpedia上的那篇相关的文章《<a href="http://news.softpedia.com/news/How-to-Fix-the-Big-and-Ugly-Plymouth-Logo-in-Ubuntu-10-04-140810.shtml">How to Fix the Big and Ugly Plymouth Logo in Ubuntu 10.04</a>》。</p>
<p>闲话不多说，有两种方案可以选择，下面都详细来讲一下（建议采用方案二，因为使用方案一的时候我没有成功，问题应该出在了gksu和sudo我没有分清楚上）。</p>
<p><strong>方案一：</strong></p>
<p>Step 1.首先打开终端，输入_sudo apt-get install v86d_ 回车，输入密码进行安装，如图</p>
<p><img src="/img/2011/01/24/5383323783_3a332a203a.jpg" alt="splash"></p>
<p>Step 2.在紧接着输入_gksu gedit &#x2F;etc&#x2F;default&#x2F;grub_ （如果你用的是Ylmf OS，请把gedit换成leafpad），打开的文档编辑器中，找到以下两行：</p>
<blockquote>_GRUB_CMDLINE_LINUX_DEFAULT="quiet splash"_</blockquote>

<blockquote>__#GRUB_GFXMODE=640x480__</blockquote>

<p>分别替换为</p>
<blockquote>_GRUB_CMDLINE_LINUX_DEFAULT="quiet splash nomodeset video=uvesafb:mode_option=1280x1024-24,mtrr=3,scroll=ywrap"_</blockquote>

<blockquote>__GRUB_GFXMODE=1280x1024__</blockquote>

<p>如下图</p>
<p><img src="/img/2011/01/24/5383955244_1481daa2c8.jpg"></p>
<p>然后保存。</p>
<p>Step 3.回到终端，再输入_gksu gedit &#x2F;etc&#x2F;initramfs-tools&#x2F;modules_，在打开的文本后面再加上下面这句：</p>
<blockquote>_uvesafb mode_option=1280x1024-24 mtrr=3 scroll=ywrap_</blockquote>


<p>如图</p>
<p><img src="/img/2011/01/24/5383454173_205e8123f5.jpg"></p>
<p>保存一下，关闭</p>
<p>Step 4 回到终端，再输入_echo FRAMEBUFFER&#x3D;y | sudo tee &#x2F;etc&#x2F;initramfs-tools&#x2F;conf.d&#x2F;splash_</p>
<p>命令运行结束后，再输入_sudo update-grub2_</p>
<p>OK，现在重启机器看看吧</p>
<p><strong>方案二：</strong></p>
<p>方案二简单的不得了，直接安装一个叫做Startup Manager（启动管理器）的软件就OK，</p>
<p><strong><a href="apt:/startupmanager">Install Startup Manager</a>（点击这里安装）</strong></p>
<p>安装完后，就直接在系统-》系统管理-》启动管理器 里面找到分辨率选项，改为1280x1024，色彩改为24位，重启机器看看，祝你成功。</p>
]]></content>
      <tags>
        <tag>Server&amp;OS</tag>
      </tags>
  </entry>
  <entry>
    <title>我的个人电台春节特别节目《我要过春节》</title>
    <url>/2011/02/03/spring-festival.html</url>
    <content><![CDATA[<p>我的个人电台春节特别节目《我要过春节》，年三十下午进行的直播，现在放出录播文件。由于是第一次做节目，希望各位听友多多指教。</p>
]]></content>
      <tags>
        <tag>杂七杂八</tag>
      </tags>
  </entry>
  <entry>
    <title>Ubuntu下安装MySQL获得 mysql.h 建立C接口</title>
    <url>/2011/01/22/mysql-c-ubuntu.html</url>
    <content><![CDATA[<p>在Ubuntu下费了好长时间终于让C操作MySQL成功了，在此把方法记下来，留着以后用。先安装MySQL<br>代码:</p>
<figure class="highlight plaintext"><table><tr><td class="code"><pre><span class="line">sudo apt-get install mysql-server mysql-client</span><br></pre></td></tr></table></figure>

<p>再装开发包<br>代码:</p>
<figure class="highlight plaintext"><table><tr><td class="code"><pre><span class="line">sudo apt-get install libmysqlclient15-dev</span><br></pre></td></tr></table></figure>

<p>安装完以后，C代码里添加头文件</p>
<p>代码:<br>#include<br>编译方法：<br>代码:</p>
<figure class="highlight plaintext"><table><tr><td class="code"><pre><span class="line">gcc $(mysql_config --cflags) xxx.c -o xxx $(mysql_config --libs)</span><br></pre></td></tr></table></figure>


<p>可以用以下代码测试一下</p>
<p>代码:</p>
<figure class="highlight plaintext"><table><tr><td class="code"><pre><span class="line">/* Simple C program that connects to MySQL Database server*/</span><br><span class="line">#include</span><br><span class="line">#include</span><br><span class="line"></span><br><span class="line">main() &#123;</span><br><span class="line">MYSQL *conn;</span><br><span class="line">MYSQL_RES *res;</span><br><span class="line">MYSQL_ROW row;</span><br><span class="line"></span><br><span class="line">char *server = &quot;localhost&quot;;</span><br><span class="line">char *user = &quot;root&quot;;</span><br><span class="line">char *password = &quot;&quot;; /* 此处改成你的密码 */</span><br><span class="line">char *database = &quot;mysql&quot;;</span><br><span class="line"></span><br><span class="line">conn = mysql_init(NULL);</span><br><span class="line"></span><br><span class="line">/* Connect to database */</span><br><span class="line">if (!mysql_real_connect(conn, server,</span><br><span class="line">user, password, database, 0, NULL, 0)) &#123;</span><br><span class="line">fprintf(stderr, &quot;%s\n&quot;, mysql_error(conn));</span><br><span class="line">exit(1);</span><br><span class="line">&#125;</span><br><span class="line"></span><br><span class="line">/* send SQL query */</span><br><span class="line">if (mysql_query(conn, &quot;show tables&quot;)) &#123;</span><br><span class="line">fprintf(stderr, &quot;%s\n&quot;, mysql_error(conn));</span><br><span class="line">exit(1);</span><br><span class="line">&#125;</span><br><span class="line"></span><br><span class="line">res = mysql_use_result(conn);</span><br><span class="line"></span><br><span class="line">/* output table name */</span><br><span class="line">printf(&quot;MySQL Tables in mysql database:\n&quot;);</span><br><span class="line">while ((row = mysql_fetch_row(res)) != NULL)</span><br><span class="line">printf(&quot;%s \n&quot;, row[0]);</span><br><span class="line"></span><br><span class="line">/* close connection */</span><br><span class="line">mysql_free_result(res);</span><br><span class="line">mysql_close(conn);</span><br><span class="line">&#125;</span><br></pre></td></tr></table></figure>

<p>会输出现有数据库和表内容。</p>
]]></content>
      <tags>
        <tag>编程语言</tag>
      </tags>
  </entry>
  <entry>
    <title>网站再一次进行改动和调整（重要）</title>
    <url>/2011/02/10/my-blog-edit.html</url>
    <content><![CDATA[<p>由于之前更换的那个绿版的主题实在是太非主流了，我都已经看不下去了，所以今天进行了今年的第二次主题更换，终于有个像样的主题了，这里还要感谢<a href="http://www.wpbus.com/">WordPress主题巴士。</a></p>
<p>另外，对评论的表情进行了更换，换成了淫淫网的部分表情了，看上去也亲切许多。再就是对于博客的部分细节还在调整中，比如说这个伪静态问题，一直搞不懂，这个是不是需要服务器必须安装某些必要的东西才能实现网站的伪静态啊？再比如说清理一部分标签。</p>
<p>总之希望各位经常光顾本小站。</p>
<p>—————————————————————————————————————————————</p>
<p>21:00 重新编辑</p>
<p>伪静态已经能够实现，但是这导致了之前被搜索引擎收录的链接地址都指向了404。折腾了4个多小时了，没有找到正确的正则表达式进行转向，哪位高人能指点一下？我原来的地址是这个形式的<a href="http://www.domyself.me/index.php/2010/10/657%EF%BC%8C%E7%8E%B0%E5%9C%A8%E7%9A%84%E5%BD%A2%E5%BC%8F%E6%98%AFhttp://www.domyself.me/archives/657.html%E3%80%82">http://www.domyself.me/index.php/2010/10/657，现在的形式是http://www.domyself.me/archives/657.html。</a></p>
<p>另外，已经删除了10多个没有用的插件，清理了许多标签（标签之所以成灾很大程度上是因为当初刚开始用Wordpress的时候把标签和关键字当做一回事，进而导致的，各位一定要吸取教训啊）。</p>
<p><strong>本次改动动作很大，导致通过搜索引擎进来的用户找不到相应的文章，本博主在这里像各位道个歉，希望各位能够谅解。如果各位想访问由搜索引擎指向的资源，暂时只能自行修改地址来访问，修改方法是把“index.php&#x2F;数字&#x2F;数字”替换成“archives”，然后再在最后加上“.html”。</strong></p>
<p>—————————————————————————————————————————————</p>
<p>2月11号   12：00重新编辑</p>
<p>还是谷歌 给力 ，新的连接地址已经开始收录了，并且已经收录了许多了。唉，度娘一直都是 不给力 的。</p>
]]></content>
      <tags>
        <tag>网站日志</tag>
      </tags>
  </entry>
  <entry>
    <title>在网络部的那段日子（二）</title>
    <url>/2011/02/11/the-life-of-ldsn-2.html</url>
    <content><![CDATA[<p>接上：<a href="/2010/12/25/the-life-of-ldsn-1.html" title="在网络部的那段日子（一）">在网络部的那段日子（一）</a></p>
<h2 id="磨合"><a href="#磨合" class="headerlink" title="磨合"></a>磨合</h2><p>一切看上去都很顺利，我们部门也在比较良好的环境中慢慢的发展，至少我们的负责老师对于我们的工作思路和想法很了解，最重要的是很支持我们去做尝试，不害怕我们失败。我想之所以老师这么信任我们，应该就是从我们身上看到了责任感和对工作的热情。</p>
<p>转眼间，我的大二上学期结束了。这个学期是很平静的一个学期，但是往往平静就意味着有暴风雨即将到来。下学期开学后，由于我的工作方式方法出现了问题，导致了08级管理层的一次很严重的危机，最主要的问题出在我和团长之间的矛盾。其实也没有严重到称之为矛盾的地步，我们只是之前的沟通没有效果，相互之间都没有理解对方而已。只是这种不理解积攒的太多了，就成了一个很大的结，在一定的环境因素的刺激下，就会大爆发。虽然是大爆发，幸好大家之前的关系都很不错，经过了一段短时间的沟通和交流大家真正的磨合好了。所以说有效的、及时的沟通是一个团队所必需的。而怎么样才能做到有效的沟通呢？我觉得在这次这个事件中我学到的是，努力使自己去理解对方以及学会忍耐。忍耐是很关键的，在有些时候，不要因为性子来了就说大话，甚至是狠话，这是很不好的，应该学会忍耐，这样事后再回想一下这件事情，如果真是自己做的不对，也有挽回余地，即使自己做对了，也没有因为说狠话而伤到双方的感情。另外在团队中不要包裹自己太严，只要想到我们都是兄弟姐妹，就没有什么好害羞的了。</p>
<p>经过开学这一个月的“闹腾”，团队终于是稳定下来，08管理层也才算是真正的进入完美的配合期，在之后发生的两件大事情上就能看的出来。第一件事就是烟台五大高校学生网络媒体交流会的举办，另一件就是裁撤09级不符合要求的人员（即第三轮测试的结束，开始准备形成09级的工作团队）。在这两件事情上就不多说什么了，但是其中的过程体现了我们08管理层度过了磨合期，大家之间互相信任，互相帮助，互相理解，尤其是在做重大决策发生分歧的时候，我感谢08级的各位对于我的尊重，感谢你们提出来的建议，正是因为分歧，我们才想的更细，我们才做的更好！</p>
<p>随着这两个大事件的结束，我们也开始逐渐的发现一些团队发展的问题，其中很重要的一件事情就是怎样能够保持这个团队的性质不发生变化，很幸运的是我们不约而同的想到了“团队文化”。</p>
<h2 id="从“家”文化起源到以“家”文化为中心的部门文化建设"><a href="#从“家”文化起源到以“家”文化为中心的部门文化建设" class="headerlink" title="从“家”文化起源到以“家”文化为中心的部门文化建设"></a>从“家”文化起源到以“家”文化为中心的部门文化建设</h2><p>提起“团队文化”，就不得不说我们的“家”文化，最早的提出是在大一下学期，大约学生会纳新前的那段时间，一次部里开例会在会议室开完后又回到部里办公室继续开小会。当时貌似发生了一件比较严重的事情，所以搞得小会的气氛很严肃（09级的同志们你们要知道你们是幸运的，我们就批过你们一次，而我们08级原来则是经常挨批的，我现在觉得挨批其实有利于成长 :) 嘻嘻……），但是具体是什么事情我也已经淡忘了，最后建波（07管理）问大家有多少想进校学生会的，结果除了我以外，在场的人都举手了。</p>
<p>我印象很深刻，当时场面很尴尬，大约共有15、6个08级的都举手了除了我。建波问我为什么不举手，我的回答很简单，当时我大致是这样说的，“我最初报这个部门就是为了进来学习一些技术，交结一些志同道合的朋友，然后再能实践一下技术就足够了。我一直把这里当做我在这个校园的‘家’，因为在这里我可以不用拘束我自己，在这里我可以做我自己最喜欢做的事情，在这里我看不到人与人之间的勾心斗角，所以我喜欢这里。然而在学生会，我看不到这些，更无所说起能获得这些权利，因此我加入这个部门而不是学生会！既然这样，那我肯定也不是想借着网络部的方便进入学生会。”</p>
<p>这就是最早的“家”文化的成形，之前07级只是在这么做而没有明确出来。正如我之前说的，我们怎么才能保证这个团队的性质不发生变化呢，我想只有拥有优秀的“团队文化”才能鼓舞和指引之后的团队成员完成上一届还没有完成的任务。</p>
<p>由于我们08级对于这个事情都认同，所以我们在努力的开始去做这个事情，只是我们的在这个团队的时间越来越少了，而需要做的又太多太多，所以只能成为我们的一个未完成的心愿留给后继者去做了。一个有历史的团队应该有一个像样的文化作为支撑整个团队前进的精神力量！</p>
<p>总之，我要说的就是这些，之后到了大三后发生的重大事情，我觉得我还是留给09级的去写去说的好，那件事他们来说是最好的。最后我罗列一些看似比较有用的东西出来：</p>
<pre><code>1. 注重结果和效率，而不是出勤时间。准时参加团队的重要会议并且在团队共同工作时间内随叫随到。
2. 努力确保团队成员都在各自擅长的岗位。
3. 尽可能让成员投身于其热衷的项目。
4. 通过设定积极目标和督促成员定期汇报工作进度来建立绩效文化。
5. 避免责备团队成员。
6. 学会正确终结项目。如果一位优秀成员负责一个糟糕的项目，项目失败并不能说明管理项目的人能力差，而是因为那个项目根本无法实现。
7. 不要给出所有的答案，培养成员的独立思考。
8. 要让成员知道“为什么”。
</code></pre>
<p>原来宣传中心主任王国辉说过，相对于学生会这帮蓝领，我们宣传中心的这几个部门（网络部、电视台、电台、团刊）是白领阶层。我一直国辉学长的这个话说的很不错，我们是知识型团队，所以说既然是这样，那我们的任务就是提供创造性的解决方案和决策。各位，团队的前途是光明的，但是道路很曲折，你们需要努力，希望你们能踩着我们的肩膀爬的更高！</p>
<p>（完）</p>
]]></content>
      <tags>
        <tag>随笔</tag>
      </tags>
  </entry>
  <entry>
    <title>天干地支记年法你知道多少</title>
    <url>/2011/02/10/tian-gan-di-zhi.html</url>
    <content><![CDATA[<p>一个甲子是60年，以下是天干地支相关计算方法。</p>
<p>一．十支纪年是我国传统的纪年方法。</p>
<p>1．干和支的含义：干支是天干，地支的合称。 干指天干，共有10个符号： 1 2 3 4 5 6 7 8 9 10 甲 乙 丙 丁 戊 己 庚 辛 壬 癸  支指地支，共有12个符号： 1 2 3 4 5 6 7 8 9 10 11 12 子 丑 寅 卯 辰 巳 午 未 申 酉 戌 亥</p>
<p>2．干和支组合后用于纪年。即：将十天干和十二地支按顺序搭配组合成干支，用于纪年。按此排法，当天干10个符号排了六轮与地支12个符号排了五轮以后，可构成60干支。续排下去又将恢复原状，周而复始，即如民间所说“六十年转甲子”。</p>
<p>二．查看不同时间段的万年历。如：1516—2060年的万年历，记着五百年的干支，一查便知。</p>
<pre><code>六十年甲子（干支表）

1 2 3 4 5 6 7 8 9 10 甲子 乙丑 丙寅 丁卯 戊辰 己巳 庚午 辛未 壬申 癸酉

11 12 13 14 15 16 17 18 19 20 甲戌 乙亥 丙子 丁丑 戊寅 己卯 庚辰 辛己 壬午 癸未

21 22 23 24 25 26 27 28 29 30 甲申 乙酉 丙戌 丁亥 戊子 己丑 庚寅 辛卯 壬辰 癸巳

31 32 33 34 35 36 37 38 39 40 甲午 乙未 丙申 丁酉 戊戌 己亥 庚子 辛丑 壬寅 癸卯

41 42 43 44 45 46 47 48 49 50 甲辰 乙巳 丙午 丁未 戊申 己酉 庚戌 辛亥 壬子 癸丑

51 52 53 54 55 56 57 58 59 60 甲寅 乙卯 丙辰 丁巳 戊午 己未 庚申 辛酉 壬戌 癸亥
</code></pre>
<p>根据“六十年甲子（干支表）”的公元年对应进行向上或朝下地反推。如：《辛亥革命》的辛亥年是1911年（48号干支），《戊戌变法》的戊戌年为35号干支，比辛亥年早13年，则“1911-13&#x3D;1898”故《戊戌变法》是1898年。  应用公元年进行计算。应用公元年的某一年，聊以60（指六十年甲子），余数小于60，再用余数减去3（干支纪年是从公元4年开始使用的），便知。  如2002年：2002÷60，余数为22，再22-3，得数是19，查六十年甲子（干支表）19号干支，得知是壬午年。</p>
<p>三．结合实际了解“十二地支”</p>
<p>1．用十二种动物分别与十二地支相配成为“十二生肖年”。（见下图）如凡是含有“子”的干支年，就是“鼠年”，这一年里出生的人都是属“鼠”；凡是含有“丑”的干支年就是“牛年”，这一年进而出生的人都是属“牛”。以此类推。（如下表）</p>
<p>十二生肖年 1 2 3 4 5 6 7 8 9 10 11 12 子鼠 丑牛 寅虎 卯兔 辰龙 巳蛇 午马 未羊 申猴 酉鸡 戌狗 亥猪</p>
<p>2． 以十二地支来表示十二时辰。 一日有二十四小时，而我国传统则以十二个时辰来表示，即一时辰是二小时。（如下表） 二十四小时和十二时辰对照表 子 丑 寅  卯 辰 己 23-01：01-03：03-05 :05-07：07-09：09-11 午 未 申 酉 戊 亥  11-13：13-15：15-17：17-19：19-21：21-23</p>
<p>四、由公元推干支记年 为了便于运算和使检索更加直观，借用六十干支表并按顺序加以编号成表一如下： 六十干支表</p>
<p>甲子0 乙丑1 丙寅2 丁卯3 戊辰4 己巳5 庚午6 辛未7 壬申8 癸酉9</p>
<p>甲戌10 乙亥11 丙子12 丁丑13 戊寅14 己卯15 庚辰16 辛巳17 壬午18 癸未19</p>
<p>甲申20 乙酉21 丙戌22 丁亥23 戊子24 己丑25 庚寅26 辛卯27 壬辰28 癸巳29</p>
<p>甲午30 乙未31 丙申32 丁酉33 戊戌34 己亥35 庚子36 辛丑37 壬寅38 癸卯39</p>
<p>甲辰40 乙巳41 丙午42 丁未43 戊申44 己酉45 庚戌46 辛亥47 壬子48 癸丑49</p>
<p>甲寅50 乙卯51 丙辰52 丁巳53 戊午54 己未55 庚申56 辛酉57 壬戌58 癸亥59</p>
<p>该表于公元前后的推算均适用，具体的方法如下：</p>
<p>1，求公元后某年（设为Y）的干支。方法是：先以Y除以60得出余数，然后再减去4，最后根据所得结果查表一中相应序数所对应的干支即为该年的干支。  例如求公元1911年的干支：1911÷60余数为51，减4后得47，查表一47对应的干支是辛亥，即1911年为辛亥年。由于干支纪年60年一循环，当Y÷60的余数小于4时，需借干支纪年的一个周期60之数，例如1981年除以60余数为1，直接减4不够减，加上60之后再减4等于57，查表一便知1981年为辛酉年。余可类推。</p>
<p>2，求公元前某年（设为X）的干支。方法是：先以X除以60求其余数，再用57减去所得余数，根据所得结果再查表一中对应的干支，即为该年的干支。  例如求公元前221年的干支：221÷60，余数是41，以57－41＝16，查表一16对应的是庚辰，即公元前221年对应的干支应为庚辰。同样由于干支纪年的循环周期为60年，当余数大于57时，也需再借60。例如求公元前479年（孔子卒年）的干支：479除以60余59，用57减59不够减，加上60之后再减59等于58，查表一知该年对应的干支为壬戌。其余可以类推。  上述方法简便易行，只要记住表一，就完全可以不用纸笔，直接由心算推出结果。</p>
<p>五、速查干支农历纪月法</p>
<p>其方法为：若遇甲或己的年份  ，正月是丙寅；遇上乙或庚之年，正月为戊寅；遇上丙或辛之年，正月为庚寅；遇上丁或壬之年，正月为壬寅；遇上戊或癸之年，正月为甲寅。依照正月之干支，其余月份按干支推算即可。详见下表：</p>
<p>年 份 一月 二月 三月 四月 五月 六月 七月 八月 九月 十月 十一月 十二月</p>
<p>甲、巳 丙寅 丁卯 戊辰 己巳 庚午 辛未 壬申 癸酉 甲戌 乙亥 丙子 丁丑</p>
<p>乙、庚 戊寅 己卯 庚辰 辛巳 壬午 癸未 甲申 乙酉 丙戌 丁亥 戊子 己丑</p>
<p>丙、辛 庚寅 辛卯 壬辰 癸巳 甲午 乙未 丙申 丁酉 戊戌 己亥 庚子 辛丑</p>
<p>丁、壬 壬寅 癸卯 甲辰 乙巳 丙午 丁未 戊申 己酉 庚戌 辛亥 壬子 癸丑</p>
<p>戊、癸 甲寅 乙卯 丙辰 丁巳 戊午 己未 庚申 辛酉 壬戌 癸亥 甲子 乙丑</p>
<p>由上可见，农历的月份，地支是固定的，天干却不固定，要经过推算才能排出。注意：农历的闰月是不记干支的。  例如：2006年为‘丙戌’年，查天干年份为‘丙’子头，在上表的第三行，其正月为庚寅，二月为辛卯，三月为壬辰，余类推。 转自百度知道</p>
<p>woshao_555005c8352511e08595000c2959fd2a</p>
]]></content>
      <tags>
        <tag>杂七杂八</tag>
      </tags>
  </entry>
  <entry>
    <title>MBTI职业性格测试 测评报告</title>
    <url>/2011/02/15/mbti-test.html</url>
    <content><![CDATA[<h2 id="今天做了一份职业性格测试题，收录一下测试结果："><a href="#今天做了一份职业性格测试题，收录一下测试结果：" class="headerlink" title="今天做了一份职业性格测试题，收录一下测试结果："></a>今天做了一份职业性格测试题，收录一下测试结果：</h2><h2 id="1、前言"><a href="#1、前言" class="headerlink" title="1、前言"></a>1、前言</h2><p>MBTI人格共有四个维度，每个维度有两个方向，共计八个方面。<br>分别是：<br>外向（E） 和 内向（I）<br>感觉（S） 和 直觉（N）<br>思考（T） 和 情感（F）<br>判断（J） 和 知觉（P）<br>如：<br>我们与世界的相互作用是怎样的？–&gt;外向（E）和内向（I）<br>我们自然留意的信息类型？–&gt;感觉（S）和直觉（N）<br>如何做决定？ –&gt;思考（T）和情感（F）<br>做事方式？ –&gt;判断（J）和知觉（P）</p>
<p>每个人的性格都落足于四种维度每一种中点的这一边或那一边，我们把每种维度的两端称做”偏好”。<br>例如：如果你落在外向的那一边，那么就可以说你具有外向的偏好（得分为正数）。如果你落在内向的那一边，那么就可以说你具有内向的偏好（得分为负数）。</p>
<span id="more"></span>
<p><a href="http://www.sojump.com/ceping/index.aspx"><strong>更多热门测评问卷</strong></a></p>
<p>**<strong>您的性格类型是“ENTJ”(外向+直觉+思维+判断)</strong></p>
<p><strong>性格特征</strong>：<br>坦诚、果断，有天生的领导能力。能很快看到公司&#x2F;组织程序和政策中的不合理性和低效能性（就如同目前我对阳光谏言中的表现一样），发展并实施有效和全面的系统来解决问题。善于做长期的计划和目标的设定（再次如同）。通常见多识广，博览群书，喜欢拓广自己的知识面 并将此分享给他人。在陈述自己的想法时非常强而有力。</p>
<p>ENTJ型的人是伟大的领导者和决策人。他们能轻易地看出事物具有的可能性，很高兴指导别人，使他们的想象成为现实。他们是头脑灵活的思想家和伟大的长远规划者。因为ENTJ型的人很有条理和分析能力，所以他们通常 对要求推理和才智的任何事情都很擅长。为了在完成工作中称职，他们通常会很自然地看出所处情况中可能存在的缺陷，并且立刻知道如何改进。他们力求精通整个体系，而不是简单地把它们做为现存的接受而已。</p>
<p>ENTJ型 的人乐于完成一些需要解决的复杂问题，他们大胆地力求掌握使他们感兴趣的任何事情。 ENTJ型的人把事实看得高于一切，只有通过逻辑的推理才会确信。 ENTJ型的人渴望不断增加自己的知识基础，他们系统地计划和研 究新情况。他们乐于钻研复杂的理论性问题，力求精通任何他们认为有趣的事物。他们对于行为的未来结果更感兴趣，而不是事物现存的状况。</p>
<p>ENTJ型的人是热心而真诚的天生的领导者，他们往往能够控制他们所处的任何 环境。因为他们具有预见能力，并且向别人传播他们的观点，所以他们是出色的群众组织者。他们往往按照一套相当严格的规律生活，并且希望别人也是如此。因此他们往往具有挑战性，同样艰难地推动自我和他人前进。</p>
<p><strong>您适合的领域有</strong>：工商业、政界、金融和投资领域、管理咨询、培训、专业性领域</p>
<p><strong>您适合的职业有</strong>：</p>
<p>· 各类企业的高级主管<br>· 总经理<br>· 企业主<br>· 社会团体负责人<br>· 政治家<br>· 投资银行家<br>· 风险投资家<br>· 股票经纪人<br>· 公司财务经理<br>· 财务顾问<br>· 经济学家<br>· 企业管理顾问<br>· 企业战略顾问<br>· 项目顾问<br>· 专项培训师<br>· 律师<br>· 法官<br>· 知识产权专家<br>· 大学教师<br>· 科技专家<br>· 房产开发商<br>· 教育咨询顾问<br>· 投资顾问<br>· （人事、销售、营销）经理<br>· 技术培训人员<br>· （后勤、电脑信息服务和组织重建）顾问<br>· 国际销售经理<br>· 特许经营业主<br>· 程序设计员<br>· 环保工程师**</p>
<p>**</p>
<h2 id="3、测评结果分析"><a href="#3、测评结果分析" class="headerlink" title="3、测评结果分析"></a>3、测评结果分析</h2><hr>
<p>**</p>
<table cellpadding="3" cellspacing="0" border="0" id="ctl01_ContentPlaceHolder1_ctl01_dtlQuestionCounter_ctl01_tbItemCounter" >

<tr align="center" id="ctl01_ContentPlaceHolder1_ctl01_dtlQuestionCounter_ctl01_titleRow" >

<td align="center" >
</td>

<td align="center" >得分
</td>

<td align="center" >测评结果与建议
</td>
</tr>

<tbody >
<tr >

<td align="center" >I(内向)-E(外向)
</td>

<td align="center" >4
</td>

<td align="left" >中等程度外向（E）
</td>
</tr>
<tr >

<td align="center" >N(直觉)-S(感觉)
</td>

<td align="center" >-4
</td>

<td align="left" >中等程度偏向直觉（N）
</td>
</tr>
<tr >

<td align="center" >F(情感)-T(思考)
</td>

<td align="center" >8
</td>

<td align="left" >明确偏向思考（T）
</td>
</tr>
<tr >

<td align="center" >P(知觉)-J(判断)
</td>

<td align="center" >8
</td>

<td align="left" >明确偏向判断（J）
</td>
</tr>
</tbody>
</table>


<p>**</p>
<p>**</p>
]]></content>
      <tags>
        <tag>杂七杂八</tag>
      </tags>
  </entry>
  <entry>
    <title>一点点今天的心情片段……</title>
    <url>/2011/02/13/mood-slice.html</url>
    <content><![CDATA[<p><strong>片段一</strong></p>
<p>今天下雪了，这是一件很出乎意料的事情，虽然天气预报已经说过会下，但是应该没有一个人会相信雪来的这么突然。尽管窗外是小雪，但还是覆盖住了一切，白茫茫的一片，让躁动不安的心突然间就安静了下来。似乎一切烦恼都已经不再存在，世界在这一刻也凝固住了，你似乎都可以听见自己的呼吸声，感受到自己那心脏在平静的跳动。</p>
<p><strong>片段二</strong></p>
<p>旧友重逢本来就是一件惬意而温馨的事情，而恰恰又发生在这样一个很不错的天气下，让人心里很舒坦。看完电影在大街上，踏雪，逛街，小吃，看美女，就像一帮闲人一样东逛逛西转转，不时互相调侃两句，这种感觉我说不出，我只能是体会到，感觉到这是一种橘红色的力量，让你能产生新的希望和斗志！</p>
<p><strong>片段三</strong></p>
<p>酒文化是个很有意思的事情，因为酒更能拉近人和人之间的感情。今天可以说是我喝酒来喝的最多的一次，肚子都快被啤酒撑爆了，但是自己喝的心里痛快，喝的开心，我想这就足够了。和旧日的同学在一起吃顿饭，喝个酒，聊聊天难道这不是一种享受吗？我觉得对于一个高中和大学都不在本地上学的人来说，能够体会到这种感觉，更不用说我那些已经出国的兄弟姐妹们。</p>
<p><strong>片段四</strong></p>
<p>明天是情人节了，今天无论是在街上还是在影院，都看到了不少对情侣，很甜蜜，很温馨，不由得想起了我写在我的小号签名里的那句话“看着别人那么甜蜜、自己默默低下头想起曾经我们也那么暧昧”。记得昨天在和我一个铁哥们聊天的时候，回忆了许多往事，最后我们也只能以一句“往事不堪回首”来收拾一下当时的心情。往事既然过去了，就让它过去吧，再去追究什么，问什么都已经没有什么用处了，我们只需要思考一下，我们从中学到了什么，我们以后怎么做，然后面向未来，向前看，走好从现在开始的路，那么我觉得就一切OK啦~</p>
<p><strong>片段五</strong></p>
<p>又想到了酒，然后想到了酒后吐真言这句话，这个东西以后既然要在社会上混，那就要注意了……假若自己不注意，那可能自己最后就是死在自己的手里。</p>
]]></content>
      <tags>
        <tag>随笔</tag>
      </tags>
  </entry>
  <entry>
    <title>jQuery教程一  write by ETY001</title>
    <url>/2011/02/16/jquery-tutorial-write-by-ety001.html</url>
    <content><![CDATA[<p>今天开始正式学习jQuery，不过，在网上找了很长时间就没怎么找到一个适合我的教程。这让我想起了之前看过的一个老外写的关于“hello，world！”程序的重要性文章，而在jQuery的种种教程中就是缺乏这样的“hello，world！”</p>
<p>不过功夫不负有心人，我终于在官网<a href="http://docs.jquery.com/Tutorials:How_jQuery_Works%E6%89%BE%E5%88%B0%E4%BA%86%E5%AF%B9%E6%88%91%E5%8F%A3%E5%91%B3%E7%9A%84%E6%95%99%E7%A8%8B%EF%BC%8C%E4%BA%8E%E6%98%AF%E6%88%91%E5%B0%B1%E8%AF%A5%E6%96%87%E4%B8%BA%E5%9F%BA%E7%A1%80%EF%BC%8C%E6%95%B4%E5%90%88%E4%B8%80%E4%B8%8B%E5%85%B6%E4%BB%96%E7%9A%84%E8%B5%84%E6%96%99%E5%86%99%E4%B8%AA%E6%95%99%E7%A8%8B%E5%90%A7%E3%80%82">http://docs.jquery.com/Tutorials:How_jQuery_Works找到了对我口味的教程，于是我就该文为基础，整合一下其他的资料写个教程吧。</a></p>
<p>“Hello，world！”这个程序之所以经典，是因为通过短短的几行代码就能让初学者体验到成功的喜悦，而这短短的几行代码的编写到调试又是手把手的教，所以这个程序示例是所有编程入门书籍的开篇。那我们就来看看我们怎么入手jQuery。</p>
<p>关于jQuery的介绍我就不多说了，还不知道的看看这里就可以了，<a href="http://baike.baidu.com/view/1020297.htm%E3%80%82%E9%82%A3%E6%88%91%E4%BB%AC%E7%8E%B0%E5%9C%A8%E5%B0%B1%E5%BC%80%E5%A7%8B%E6%88%91%E4%BB%AC%E7%9A%84%E7%AC%AC%E4%B8%80%E4%B8%AA%E4%BE%8B%E5%AD%90%E3%80%82">http://baike.baidu.com/view/1020297.htm。那我们现在就开始我们的第一个例子。</a></p>
<p>首先，要运行js代码需要一个框架结构，下面这个就是最简单的结构：</p>
<figure class="highlight plaintext"><table><tr><td class="code"><pre><span class="line">&lt;html&gt;</span><br><span class="line">  &lt;head&gt;</span><br><span class="line">    &lt;meta charset=&quot;utf-8&quot;&gt;</span><br><span class="line">    &lt;title&gt;Demo&lt;/title&gt;</span><br><span class="line">  &lt;/head&gt;</span><br><span class="line">  &lt;body&gt;</span><br><span class="line">    &lt;a href=&quot;http://www.domyself.me&quot;&gt;jQuery&lt;/a&gt;</span><br><span class="line">    &lt;script src=&quot;jquery.js&quot;&gt;&lt;/script&gt;</span><br><span class="line">    &lt;script&gt;</span><br><span class="line">       /*从这里写你的js代码*/</span><br><span class="line">    &lt;/script&gt;</span><br><span class="line">  &lt;/body&gt;</span><br><span class="line">&lt;/html&gt;</span><br></pre></td></tr></table></figure>

<p>在你的网页编辑器里，新建一个html ，把上面的代码复制进去，不过其中有个地方需要根据你的情况进行修改，就是那个jquery.js 文件的位置，我的是调用的谷歌的，你也可以到这里下载<a href="http://docs.jquery.com/Downloading_jQuery%E3%80%82">http://docs.jquery.com/Downloading_jQuery。</a></p>
<p>然后我们把那句中文注释给删掉，加上下面的代码：</p>
<figure class="highlight plaintext"><table><tr><td class="code"><pre><span class="line">$(document).ready(function()&#123;</span><br><span class="line">  $(&quot;a&quot;).click(function(event)&#123;</span><br><span class="line">    alert(&quot;Hello，world!&quot;);</span><br><span class="line">  &#125;);</span><br><span class="line">&#125;);</span><br></pre></td></tr></table></figure>

<p>下面就让我们保存一下，然后打开网页，点击超链接，你就会看到一个弹出警告“Hello，world！”。这就是我们的第一个示例。</p>
<p>这里就需要解释一下这个示例里面用到的一些东西。</p>
<p>$(“a”)，它是一个jQuery选择器（selector），在这里的作用就是选择所有的<a>标签。$号是 jQuery “类”(jQuery “class”)的一个别称，因此$()构造了一个新的jQuery 对象(jQuery object)。函数click()是这个jQuery对象的一个方法，它绑定了一个单击事件到所有选中的标签(这里是所有的a标签)，并在事件触发时执行了它所提供的alert方法。</p>
<p>关于$，这里就多说些，jQuery中使用 $ ，可以通过元素的id, css class或 tag name很容易的获取到相应的元素。</p>
<p>简单的获取元素</p>
<figure class="highlight plaintext"><table><tr><td class="code"><pre><span class="line">$(&quot;p&quot;) //获取所有的P元素</span><br><span class="line">$(&quot;#pid&quot;) //通过 ID</span><br><span class="line">$(&quot;.p&quot;) //通过css class name</span><br></pre></td></tr></table></figure>

<p>它还可以钻取层次结构</p>
<figure class="highlight plaintext"><table><tr><td class="code"><pre><span class="line">$(&quot;table &gt; tbody &gt; tr&quot;) //获取Table的所有行</span><br><span class="line">$(&quot;#t1 &gt; tbody &gt; tr&quot;) //获取t1 中所有行</span><br><span class="line">$(&quot;.table &gt; tbody &gt; tr&quot;) // 获取css类名为.table的所有行</span><br></pre></td></tr></table></figure>

<p>Jquery为了让开发人员更准确方便的选择到相应的元素，还给我们提供了强大的筛选器的功能</p>
<figure class="highlight plaintext"><table><tr><td class="code"><pre><span class="line">$(“p:first”)  //first</span><br><span class="line">$(“p:last”)  //last</span><br><span class="line">$(“table &gt; tbody &gt; tr:even”)  //even rows</span><br><span class="line">$(“table &gt; tbody &gt; tr:odd”) //odd rows</span><br><span class="line">$(“p:eq(1)”) //索引为1</span><br><span class="line">$(“p:gt(2)”) //2以上的元素</span><br><span class="line">$(&quot;p:lt(10)”) // 0-9</span><br><span class="line">$(“p:empty”) //没有子孩子的p</span><br><span class="line">$(“p:parent”) //为父的p</span><br></pre></td></tr></table></figure>

<p>另外再说一下ready()，它的作用是极大地提高web应用程序的响应速度。通过使用这个方法，可以在DOM载入就绪能够读取并操纵时立即调用你所绑定的函数，而99.99%的JavaScript函数都需要在那一刻执行。</p>
<p>今天就先做到这里吧。</p>
<p>后记：第一次自己做细致的教程，里面如有错误还请高人指正，我也是边学边写，看不远。不过我挺喜欢外国人这种先运行代码，后解释代码的教学方法。</p>
]]></content>
      <tags>
        <tag>编程语言</tag>
      </tags>
  </entry>
  <entry>
    <title>关于ASP是否也应该开发一个库的一点想法</title>
    <url>/2011/02/19/asp-need-libraries.html</url>
    <content><![CDATA[<p>以前我都是把我自己的想法加密，但这次我觉得有必要公开一下。</p>
<p>一直在想一个问题，那就是为什么ASP不能有一个强大的函数库呢，或者提供一些方便使用的方法，就像PHP里，连接数据库只需要一个函数，而ASP需要自己去写一个连接数据库的函数。可能是我孤陋寡闻，至今没有听说过在ASP领域也会有想JS中的jQuery那样方便的东西出现。我猜测是不是很多人不屑于ASP这种非开源的东西，亦或是ASP的效率太低，不值当在这方面下功夫。我想以后有时间，我可以去探索一下，也希望看完该文章的人能留下您宝贵的想法。</p>
<p>另外，我很喜欢<a href="http://www.liufu.org/eekku/">E酷Cms</a>，大家如果感兴趣可以去看看。</p>
<p>————————————————————————</p>
<p>补充：从网上又仔细搜索了一下，发现了我的表述出现了些错误，我要说的应该是框架，库只是其中的一部分，我发现还是有很多人在尝试去做一个ASP的框架，但是外部因素受限是个问题。</p>
]]></content>
      <tags>
        <tag>DM实验室</tag>
        <tag>编程语言</tag>
      </tags>
  </entry>
  <entry>
    <title>GTP中的主歌,副歌</title>
    <url>/2011/02/20/gtp-main-song.html</url>
    <content><![CDATA[<p>主歌就是歌曲一般开始或者中间比较平淡的铺垫部分<br>一般即使是重复也大多会转变歌词的部分<br>副歌就是中心也就是歌曲的高潮以及精华的所在<br>一般的都会重复而且很少改变歌词<br>即使改变也是个别句子为了强调意义</p>
<span id="more"></span>下面的是轨道S是这个轨道独奏，M是这个轨道不响Volume是音量调节，Pan左右声道均衡。Chorus[合唱]，Reverb[回响]，Phaser[阶段],Tremolo[颤音]，apply
<p>the coefficient to the tempo[应用的拍子系数]<br>做这个软件最起码得懂一些基本乐理，不然这可是瞎耽误功夫。<br>用鼠标点是不是很麻烦，结合键盘就更快捷，下面介绍常用快捷键：</p>
<p>*或.————–[附点]<br>R—————–[休止符]<br>&#x2F;—————–[三分音符]<br>L—————–[连音]<br>Ctrl+L————[连拍子]<br>C—————–[复制拍&#x2F;三连音 至本小节]<br>lnsert————[插入一拍（是休止符）<br>Delete————[删除音符&#x2F;休止符]<br>Ctrl+X————[剪切小节]<br>Ctrl+C————[拷贝小节]<br>Ctrl+V————[粘贴小节]<br>Ctrl+Ins———-[插入小节]<br>Ctrl+SHIFT+Ins—-[插入音轨]<br>Ctrl————–SHIFT Sup[删除音轨]<br>F5—————-Score In *** 102;ormation（乐谱信息）<br>F6—————-音轨属性<br>F10 ————–综合参数变化表</p>
<p>[H]—————Hammer on &#x2F; Pull off[击弦]<br>[S]—————Slide Up &#x2F; Down[滑音（上或下）]<br>—————Bend[推放弦]<br>[A]—————Chord[和弦图]<br>[T]—————Text[注解]<br>[V]—————Vibrato[左手颤音]<br>[F]—————Fade in[渐强（符号为&lt;）]<br>[X]—————Dead note[闷音]<br>—————Let Ring [延长发音]<br>[G]—————Grace note[装饰音]<br>[Ctrl U]———-Upstroke[扫弦音长（上扫）]<br>[Ctrl D]———-Downstroke[扫弦音长（下扫）]</p>
<p>[Enter] ———-Next note[下一音符]<br>[Home]————First beat of the bar[本小节的最开始]<br>[End]————-Last beat of the bar[本小节的最末端]<br>→←↑↓<br>[Ctrl+←]———Previous bar[前一小节]<br>[Ctrl+→]———Next bar[下一小节]<br>[Ctrl Home]——-First bar[第一小节]<br>[Ctrl End]——–Last bar[做后一小节]</p>
<p>[Ctrl+↓]———Next track[下一个音轨]<br>[Ctrl+↑]———Previous track[上一个音轨]<br>[Ctrl+SHIFT+↓]—Last track[最后一个音轨]<br>[Ctrl+SHIFT+↑]—First track[最前一个音轨]</p>
<p>Space bar[空格]—Play &#x2F; Stop[播放&#x2F;暂停]<br>[F9]————–Speed Trainer速度教练</p>
<p>[Ctrl+N]———-New[新建]<br>[Ctrl+O]———-Open[打开]<br>[Ctrl+B]———-Browser[浏览器]<br>[Ctrl+S]———-Save[存储]<br>[Ctrl+P]———-Print[打印]<br>[F1]————–Help[帮助]<br>[F9]————–Preferences[参数选择]</p>
<p>打击乐器最常用的几个<br>31 - stick[敲鼓棰]<br>36 - bass drum[底鼓]<br>40 - snare drum[军鼓]<br>41, 43, 45, 47, 48 - toms, from low to high[通鼓，从低到高]<br>42, 44, 46 - respectively[分别为]: closed charleston[闭合踩镲], charleston<br>pedal[踩住踩镲], open charleston[镲弓（踩镲边）]<br>51, 53 - cymbals[吊镲], dome et body[镲帽]<br>54 - tambourine[小手鼓]<br>49, 57 - crachs, two sounds[高低吊镲]</p>
]]></content>
      <tags>
        <tag>杂七杂八</tag>
      </tags>
  </entry>
  <entry>
    <title>ntalker开发中的一句话的事儿</title>
    <url>/2011/02/23/ntalker-one-word.html</url>
    <content><![CDATA[<p>由于刚开始学习PHP，里面有很多函数或者细节不了解，遂用这篇日志记录一下，随时保持更新。</p>
<p><strong>“@”在php中起什么作用？</strong><br>$a&#x3D;@(57&#x2F;0)<br>@在任何表达式之前使用<br>这个列子里面如果没有 @ 这行代码将出现除0的警告 使用这个代码 警告就被抑制住了</p>
<p><strong>PHP中explode的作用？</strong><br>explode — 使用一个字符串分割另一个字符串   这个有点像ASP中的 split()</p>
<p><strong>$_SERVER[‘PHP_SELF’]的意思？</strong><br>在 URL 地址为 <a href="http://www.domyself.me/test.php/foo.bar">http://www.domyself.me/test.php/foo.bar</a> 的脚本中使用 $<em>SERVER[‘PHP_SELF’] 将会得到 &#x2F;test.php&#x2F;foo.bar 这个结果。__FILE</em>_ 常量包含当前（例如包含）文件的绝对路径和文件名。</p>
<p><strong>ntalker用户验证失败的可能原因之一？</strong><br>你的im_connectIM函数的使用可能有问题，检查一下最后有没有加一个空字符串，如下：</p>
<p>[code lang&#x3D;”php”]im_connectIM(‘<?php echo($im_siteid); ?>‘,’<?php echo($Example_uid); ?>‘, ‘<?php echo($Example_username); ?>‘, ‘<?php echo($Example_uid); ?>‘,’’);[&#x2F;code]</p>
<p><strong>microtime — 返回当前 Unix 时间戳和微秒数</strong><br>microtime() 当前 Unix 时间戳以及微秒数。本函数仅在支持 gettimeofday() 系统调用的操作系统下可用。<br>如果调用时不带可选参数，本函数以 “msec sec” 的格式返回一个字符串，其中 sec 是自 Unix 纪元（0:00:00 January 1, 1970 GMT）起到现在的秒数，msec 是微秒部分。字符串的两部分都是以秒为单位返回的。<br>如果给出了 get_as_float 参数并且其值等价于 TRUE，microtime() 将返回一个浮点数。</p>
<p><strong>PHP error_reporting() 函数</strong><br>error_reporting() 设置 PHP 的报错级别并返回当前级别。具体看这里：<a href="http://www.w3school.com.cn/php/func_error_reporting.asp">http://www.w3school.com.cn/php/func_error_reporting.asp</a></p>
<p><strong>PHP ini_set() 函数</strong><br>ini_set — Sets the value of a configuration option （设置一个配置选项的值）<br>具体看这里：<a href="http://cn.php.net/manual/zh/function.ini-set.php">http://cn.php.net/manual/zh/function.ini-set.php</a></p>
<p><strong>mysql_pconnect() 和 mysql_connect() 非常相似，但有两个主要区别：</strong><br>当连接的时候本函数将先尝试寻找一个在同一个主机上用同样的用户名和密码已经打开的（持久）连接，如果找到，则返回此连接标识而不打开新连接。<br>其次，当脚本执行完毕后到 SQL 服务器的连接不会被关闭，此连接将保持打开以备以后使用（mysql_close() 不会关闭由 mysql_pconnect() 建立的连接）。</p>
]]></content>
      <tags>
        <tag>编程语言</tag>
        <tag>后端</tag>
      </tags>
  </entry>
  <entry>
    <title>近期小记</title>
    <url>/2011/02/28/diary.html</url>
    <content><![CDATA[<p>从2月26号返回学校就一直在忙碌着，调整了很多事情，主要是在做收尾工作。从去年9月就开始和团委周旋的事情也基本算是落下了帷幕，我终于可以解放出来啦~</p>
<p>既然事情基本上都已安排妥当，那么就要开始学习了，毕竟接下来的这一年是考研复习的一年，可能自己的博客就不再经常更新了，只能感叹精力有限啊！利用有限的时间好好的把我的专业课搞一下。</p>
<p>最后就是简单一提最近看到的两个新闻，一个是诺基亚好像从明年开始就停止s60系统的维护工作了，这意味着统治那么长时间的塞班s60系统的正式落伍吧。另一个就是联通今年将发布Linux的手机操作系统。这两个新闻对我很有冲击力，别的我就不多说了。</p>
]]></content>
      <tags>
        <tag>随笔</tag>
      </tags>
  </entry>
  <entry>
    <title>DM博客的服务器空间调换完毕</title>
    <url>/2011/03/12/my-blog-change-host.html</url>
    <content><![CDATA[<p>由于最近服务器经常不给力，打开个页面居然要10s以上，有时候甚至到了20s，再忍耐了将近2个星期后，我不得不重新买了一个新的空间，并进行了调换。不过调换的过程也是痛苦的，在原空间的数据备份包下载速度几乎为0，我这还是用的迅雷离线下载，下了一个通宵才搞回来。</p>
<p>话说还是cpanel面板给力，linux服务器给力，一切调试配置起来都是那么的轻松。</p>
<p>另外，DM博客开通了自己的个人微博，用来用一句话记录生活，毕竟有时候没有那么多要说的，地址是:<a href="http://t.domyself.me,在页面的右上角也有连接./">http://t.domyself.me，在页面的右上角也有连接。</a></p>
]]></content>
      <tags>
        <tag>网站日志</tag>
      </tags>
  </entry>
  <entry>
    <title>我的Adsense终于破0了</title>
    <url>/2011/03/13/adsense-no-longer-zero.html</url>
    <content><![CDATA[<p>今天偶然的去我的GoogleAdsense账户上查看了一下，居然发现我的帐户上破0拉，哈哈，截个图留念一下。话说这是我从今年1月20日(<a href="/2011/01/20/add-google-adsense.html">&#x2F;2011&#x2F;01&#x2F;20&#x2F;add-google-adsense.html</a>)正式开通的Adsense，到现在为止也就2000多次的显示，大家不要笑话阿～</p>
<p><a href="/img/2011/03/Screenshot1-400x203.png"><img src="/img/2011/03/Screenshot1-400x203.png"></a></p>
]]></content>
      <tags>
        <tag>网站日志</tag>
      </tags>
  </entry>
  <entry>
    <title>关于if和else的一点心得及程序调试的方法</title>
    <url>/2011/03/10/think-for-if-and-else.html</url>
    <content><![CDATA[<p>今天上C++的第一堂实验课，老师为了了解一下我们之前学的C语言怎么样，出了一到程序题，让我们编一下。题目很简单就是给定一元二次方程ax^2+bx+c&#x3D;0的三个系数，然后给出结果，并能够循环执行，主函数只负责输入参数，要至少有一个函数，本人很快就理清思路开始编写，很快写完了，并且编译了，下面的就是我的第一遍源代码（VC编译环境）：</p>
<figure class="highlight plaintext"><table><tr><td class="code"><pre><span class="line">#include &lt;stdio.h&gt;</span><br><span class="line">#include &lt;math.h&gt;</span><br><span class="line">void charge(float a,float b,float c);            //判断过程</span><br><span class="line">void runorstop();		//是否继续运行</span><br><span class="line">int run = 1;		//继续运行的标志，1为继续运行，0为停止运行</span><br><span class="line">void main()</span><br><span class="line">&#123;</span><br><span class="line">	while(run == 1)</span><br><span class="line">	&#123;</span><br><span class="line">		float a,b,c;</span><br><span class="line">		printf(&quot;请输入a\n&quot;);</span><br><span class="line">		scanf(&quot;%f&quot;,&amp;a);</span><br><span class="line">		printf(&quot;请输入b\n&quot;);</span><br><span class="line">		scanf(&quot;%f&quot;,&amp;b);</span><br><span class="line">		printf(&quot;请输入c\n&quot;);</span><br><span class="line">		scanf(&quot;%f&quot;,&amp;c);</span><br><span class="line">		charge(a,b,c);//进行运算</span><br><span class="line">	&#125;</span><br><span class="line">&#125;</span><br><span class="line">void runorstop()</span><br><span class="line">&#123;</span><br><span class="line">	printf(&quot;是否还要继续运行程序，“是”请输入“1”，“否”请输入“0”\n&quot;);</span><br><span class="line">	scanf(&quot;%d&quot;,&amp;run);</span><br><span class="line">&#125;</span><br><span class="line">void charge(float a,float b,float c)</span><br><span class="line">&#123;</span><br><span class="line">	float x1,x2;</span><br><span class="line">	float d;		//daite</span><br><span class="line">	if(a == 0)</span><br><span class="line">	&#123;</span><br><span class="line">		if(b == 0)</span><br><span class="line">		&#123;</span><br><span class="line">			if(c == 0)</span><br><span class="line">			&#123;</span><br><span class="line">				printf(&quot;方程有无穷个解！\n\n&quot;);</span><br><span class="line">				runorstop();</span><br><span class="line">			&#125;</span><br><span class="line">			else</span><br><span class="line">			&#123;</span><br><span class="line">				printf(&quot;a,b同时为0，方程错误！&quot;);</span><br><span class="line">				runorstop();</span><br><span class="line">			&#125;</span><br><span class="line">		&#125;</span><br><span class="line">		else</span><br><span class="line">		&#123;</span><br><span class="line">			x1 = -c/b;</span><br><span class="line">			printf(&quot;方程的解为 x = %f&quot;,x1);</span><br><span class="line">			runorstop();</span><br><span class="line">		&#125;</span><br><span class="line">	&#125;</span><br><span class="line">	else</span><br><span class="line">	&#123;</span><br><span class="line">		d = b*b - 4*a*c;</span><br><span class="line">		if(d&gt;0)</span><br><span class="line">		&#123;</span><br><span class="line">			x1 = (-b+sqrt(d))/(2*a);</span><br><span class="line">			x2 = (-b-sqrt(d))/(2*a);</span><br><span class="line">			printf(&quot;方程的两个根分别是：\n&quot;);</span><br><span class="line">			printf(&quot;x1 = %f , x2 = %f\n&quot;,x1,x2);</span><br><span class="line">			runorstop();</span><br><span class="line">		&#125;</span><br><span class="line">		if(d=0)//  《《---这里就是错误的出现的地方</span><br><span class="line">		&#123;</span><br><span class="line">			x1=-b/(2*a);</span><br><span class="line">			printf(&quot;方程有两个相同的根：%f\n\n&quot;,x1);</span><br><span class="line">			runorstop();</span><br><span class="line">		&#125;</span><br><span class="line">		if(d&lt;0)</span><br><span class="line">		&#123;</span><br><span class="line">			printf(&quot;方程没有实数解！\n\n&quot;);</span><br><span class="line">			runorstop();</span><br><span class="line">		&#125;</span><br><span class="line">	&#125;</span><br><span class="line">&#125;</span><br></pre></td></tr></table></figure>

<p>但是在运行的时候，发现输入完a,b,c三个数据后，程序不停的出现 【是否还要继续运行程序，“是”请输入“1”，“否”请输入“0”】 这个提示信息，看来可能是while循环导致的不停的循环，先注释掉，然后再运行，输入完三个数后什么也没显示，程序就结束了。</p>
<p>我前前后后看了好几遍也没找到问题，第一次猜测是数据输入有些问题，于是在第16行之后加了一行printf输出一下a,b,c三个值，编译运行，成功输出，证明输入正确。于是又猜测可能是数据没有被带入到函数中去，于是又在28行后面插入输出语句进行测试（这里注意，一定要把printf放到后面，不能放到27或者28行前面，因为27，28行是声明的局部变量，局部变量的声明必须要放在这个函数的头部，这是老师说的）。测试结果正常，证明数据已经能进入函数。由于我输入测试的数据，应该进入68行的那个花括号，所以就在那附近检查，终于发现了问题，原来是一时打字疏忽，把62行的判断相等双等号打成了赋值单等号。这样一来，就成了把0赋值给d，而if(0)肯定不执行花括号里的内容，所以程序就跳过了所有的if，结果就是什么都不会显示。于是我想到了，如果当时使用了else的话，那么问题很快就能找到，因为一个判断不正确，他会跳转到else的花括号，这样就等于所以了检查范围。既然找到了问题，那么把之前注释掉的while循环改过来，然后把&#x3D;加上，编译运行成功了。</p>
<p>附：由于机房使用的是VC，而我现在写这篇文章的时候是在我的本本的ubuntu系统下，于是又出现了点小插曲，就是sqar()函数在编译时，提示错误信息：</p>
<figure class="highlight plaintext"><table><tr><td class="code"><pre><span class="line">/tmp/ccszYPUG.o: In function `charge&#x27;:</span><br><span class="line">1.c:(.text+0x1a6): undefined reference to `sqrt&#x27;</span><br><span class="line">1.c:(.text+0x1cc): undefined reference to `sqrt&#x27;</span><br><span class="line">collect2: ld returned 1 exit status</span><br></pre></td></tr></table></figure>

<p>我在网上搜索了一下，找到了下面的这个资料，先收了，以备后用：</p>
<figure class="highlight plaintext"><table><tr><td class="code"><pre><span class="line">-l参数和-L参数</span><br><span class="line">-l参数就是用来指定程序要链接的库，-l参数紧接着就是库名，那么库名跟真正的库文件名有什么关系呢？就拿数学库来说，他的库名是m，他的库文件名是libm.so，很容易看出，把库文件名的头lib和尾.so去掉就是库名了</span><br><span class="line">好了现在我们知道怎么得到库名，当我们自已要用到一个第三方提供的库名字libtest.so，那么我们只要把libtest.so拷贝到/usr/lib里，编译时加上-ltest参数，我们就能用上libtest.so库了（当然要用libtest.so库里的函数，我们还需要与libtest.so配套的头文件）</span><br><span class="line">放在/lib和/usr/lib和/usr/local/lib里的库直接用-l参数就能链接了，但如果库文件没放在这三个目录里，而是放在其他目录里，这时我们只用-l参数的话，链接还是会出错，出错信息大概是：“/usr/bin/ld: cannot find -lxxx”，也就是链接程序ld在那3个目录里找不到libxxx.so，这时另外一个参数-L就派上用场了，比如常用的X11的库，它在/usr/X11R6/lib目录下，我们编译时就要用-L/usr/X11R6/lib -lX11参数，-L参数跟着的是库文件所在的目录名。再比如我们把libtest.so放在/aaa/bbb/ccc目录下，那链接参数就是-L/aaa/bbb/ccc -ltest</span><br><span class="line">另外，大部分libxxxx.so只是一个链接，以RH9为例，比如libm.so它链接到/lib/libm.so.x，/lib/libm.so.6又链接到/lib/libm-2.3.2.so，</span><br><span class="line">如果没有这样的链接，还是会出错，因为ld只会找libxxxx.so，所以如果你要用到xxxx库，而只有libxxxx.so.x或者libxxxx-x.x.x.so，做一个链接就可以了ln -s libxxxx-x.x.x.so libxxxx.so</span><br><span class="line">手工来写链接参数总是很麻烦的，还好很多库开发包提供了生成链接参数的程序，名字一般叫xxxx-config，一般放在/usr/bin目录下，比如</span><br><span class="line">gtk1.2的链接参数生成程序是gtk-config，执行gtk-config --libs就能得到以下输出&quot;-L/usr/lib -L/usr/X11R6/lib -lgtk -lgdk -rdynamic</span><br><span class="line">-lgmodule -lglib -ldl -lXi -lXext -lX11 -lm&quot;，这就是编译一个gtk1.2程序所需的gtk链接参数，xxx-config除了--libs参数外还有一个参数是--cflags用来生成头文件包含目录的，也就是-I参数，在下面我们将会讲到。你可以试试执行gtk-config --libs --cflags，看看输出结果</span><br><span class="line">现在的问题就是怎样用这些输出结果了，最笨的方法就是复制粘贴或者照抄，聪明的办法是在编译命令行里加入这个`xxxx-config --libs --cflags`，比如编译一个gtk程序：gcc gtktest.c `gtk-config --libs --cflags`这样就差不多了。注意`不是单引号，而是1键左边那个键。</span><br></pre></td></tr></table></figure>

<p>最后还是找到了，需要加-lm参数，编译指令如下：</p>
<figure class="highlight plaintext"><table><tr><td class="code"><pre><span class="line">gcc 1.c -o a -lm</span><br></pre></td></tr></table></figure>

<p>这样就编译生成名字为a的程序了，但是运行的时候全是乱码，这个问题好解决，因为在VC下编写的源代码文件都是GBK格式的，只需要在ubuntu下面用leafpad打开源文件并且另存为UTF-8再编译运行就可以了。</p>
]]></content>
      <tags>
        <tag>编程语言</tag>
      </tags>
  </entry>
  <entry>
    <title>关于指针的学习</title>
    <url>/2011/03/15/study-c-point.html</url>
    <content><![CDATA[<p>今天C++学的指针，之前C语言课上讲过指针，但是当时几乎就没怎么深讲。今天讲的内容甚是让人头晕啊，回来后我在自己机器上把书上的示例程序修改了一下，仔细来看看指针。下面的就是我的指针学习程序。</p>
<figure class="highlight plaintext"><table><tr><td class="code"><pre><span class="line">//      Copyright 2011 ETY001 &lt;ety001@akawa.ink&gt;</span><br><span class="line">//      Website:akawa.ink</span><br><span class="line">#include &lt;iostream&gt;</span><br><span class="line">using namespace std;</span><br><span class="line">int main()</span><br><span class="line">&#123;</span><br><span class="line">	static char t[2][3][5]=&#123;&quot;abcd&quot;,&quot;efgh&quot;,&quot;ijkl&quot;,&quot;mnop&quot;,&quot;qrst&quot;,&quot;uvwx&quot;&#125;;</span><br><span class="line">	cout&lt;&lt;&quot;       t[i]   &quot;&lt;&lt;&quot;   &amp;t[i]   &quot;&lt;&lt;endl;</span><br><span class="line">	cout&lt;&lt;&quot;01::&quot;&lt;&lt;t[0]&lt;&lt;&quot;  &quot;&lt;&lt;&amp;t[0]&lt;&lt;&quot; &lt;---t[0]&quot;&lt;&lt;endl;</span><br><span class="line">	cout&lt;&lt;&quot;02::&quot;&lt;&lt;t[1]&lt;&lt;&quot;  &quot;&lt;&lt;&amp;t[1]&lt;&lt;&quot; &lt;---t[1]&quot;&lt;&lt;endl;</span><br><span class="line">	cout&lt;&lt;&quot;03::&quot;&lt;&lt;t[0][0]&lt;&lt;&quot;  &quot;&lt;&lt;&amp;t[0][0]&lt;&lt;&quot;      &lt;---t[0][0]&quot;&lt;&lt;endl;</span><br><span class="line">	cout&lt;&lt;&quot;04::&quot;&lt;&lt;t[0][1]&lt;&lt;&quot;  &quot;&lt;&lt;&amp;t[0][1]&lt;&lt;&quot;      &lt;---t[0][1]&quot;&lt;&lt;endl;</span><br><span class="line">	cout&lt;&lt;&quot;05::&quot;&lt;&lt;t[0][2]&lt;&lt;&quot;  &quot;&lt;&lt;&amp;t[0][2]&lt;&lt;&quot;      &lt;---t[0][2]&quot;&lt;&lt;endl;</span><br><span class="line">	cout&lt;&lt;&quot;06::&quot;&lt;&lt;t[1][0]&lt;&lt;&quot;  &quot;&lt;&lt;&amp;t[1][0]&lt;&lt;&quot;      &lt;---t[1][0]&quot;&lt;&lt;endl;</span><br><span class="line">	cout&lt;&lt;&quot;07::&quot;&lt;&lt;t[1][1]&lt;&lt;&quot;  &quot;&lt;&lt;&amp;t[1][1]&lt;&lt;&quot;      &lt;---t[1][1]&quot;&lt;&lt;endl;</span><br><span class="line">	cout&lt;&lt;&quot;08::&quot;&lt;&lt;t[1][2]&lt;&lt;&quot;  &quot;&lt;&lt;&amp;t[1][2]&lt;&lt;&quot;      &lt;---t[1][2]&quot;&lt;&lt;endl;</span><br><span class="line">	cout&lt;&lt;&quot;09::&quot;&lt;&lt;t[0][0][0]&lt;&lt;&quot;  &quot;&lt;&lt;&amp;t[0][0][0]&lt;&lt;&quot;         &lt;---t[0][0][0]&quot;&lt;&lt;endl;</span><br><span class="line">	cout&lt;&lt;&quot;10::&quot;&lt;&lt;t[0][0][1]&lt;&lt;&quot;  &quot;&lt;&lt;&amp;t[0][0][1]&lt;&lt;&quot;         &lt;---t[0][0][1]&quot;&lt;&lt;endl;</span><br><span class="line"></span><br><span class="line">	cout&lt;&lt;&quot;11::&quot;&lt;&lt;t[0][1][0]&lt;&lt;&quot;  &quot;&lt;&lt;&amp;t[0][1][0]&lt;&lt;&quot;         &lt;---t[0][1][0]&quot;&lt;&lt;endl;</span><br><span class="line">	cout&lt;&lt;&quot;12::&quot;&lt;&lt;t[0][1][1]&lt;&lt;&quot;  &quot;&lt;&lt;&amp;t[0][1][1]&lt;&lt;&quot;         &lt;---t[0][1][1]&quot;&lt;&lt;endl;</span><br><span class="line"></span><br><span class="line">	cout&lt;&lt;&quot;13::&quot;&lt;&lt;t[0][2][0]&lt;&lt;&quot;  &quot;&lt;&lt;&amp;t[0][2][0]&lt;&lt;&quot;         &lt;---t[0][2][0]&quot;&lt;&lt;endl;</span><br><span class="line">	cout&lt;&lt;&quot;14::&quot;&lt;&lt;t[0][2][1]&lt;&lt;&quot;  &quot;&lt;&lt;&amp;t[0][2][1]&lt;&lt;&quot;         &lt;---t[0][2][1]&quot;&lt;&lt;endl;</span><br><span class="line"></span><br><span class="line">	cout&lt;&lt;&quot;-----------------------------------&quot;&lt;&lt;endl;</span><br><span class="line">	cout&lt;&lt;&quot;1::&quot;&lt;&lt;t&lt;&lt;&quot; &lt;--- t&quot;&lt;&lt;endl;</span><br><span class="line">	cout&lt;&lt;&quot;2::&quot;&lt;&lt;t+1&lt;&lt;&quot; &lt;--- t+1&quot;&lt;&lt;endl;</span><br><span class="line">	cout&lt;&lt;&quot;3::&quot;&lt;&lt;*t&lt;&lt;&quot; &lt;--- *t&quot;&lt;&lt;endl;</span><br><span class="line">	cout&lt;&lt;&quot;4::&quot;&lt;&lt;*t+1&lt;&lt;&quot; &lt;--- *t+1&quot;&lt;&lt;endl;</span><br><span class="line">	cout&lt;&lt;&quot;5:&quot;&lt;&lt;*(t+1)&lt;&lt;&quot; &lt;--- *(t+1)&quot;&lt;&lt;endl;</span><br><span class="line">	cout&lt;&lt;&quot;6:&quot;&lt;&lt;*(*t+1)&lt;&lt;&quot; &lt;--- *(*t+1)&quot;&lt;&lt;endl;</span><br><span class="line">	cout&lt;&lt;&quot;7:&quot;&lt;&lt;**t&lt;&lt;&quot; &lt;--- **t&quot;&lt;&lt;endl;</span><br><span class="line">	cout&lt;&lt;&quot;8:&quot;&lt;&lt;***t&lt;&lt;&quot; &lt;---***t&quot;&lt;&lt;endl;</span><br><span class="line">	cout&lt;&lt;&quot;9:&quot;&lt;&lt;**(t+1)&lt;&lt;&quot; &lt;---**(t+1)&quot;&lt;&lt;endl;</span><br><span class="line">	return 0;</span><br><span class="line">&#125;</span><br></pre></td></tr></table></figure>

<p>通过这个程序，对照着来看指针，就会看的比较明白。下面是程序的运行截图：</p>
<p><img src="/img/2011-03-15-cplus.png" alt="截图"></p>
<p>从程序的运行结果中，我总结了以下几点：</p>
<pre><code>1、直接输入数组名称的时候，数组名代表的是数组的入口第一个空间的地址，t和t[0]，t[0][0]的地址都是一样的；
2、*t+1和&amp;t[0][1]等价，*(t+1)和&amp;t[1][0]等价；
3、对*t进行加1操作的时候，有时候是对t，也就是地址加一，结果是t对应的地址加上一个数据类型长度，而有时候则是对于*t所代表的值，也就是t地址所指向内存里的值进行加一（我不知道我这个理解对不对，希望高人指点，我在这里感觉有点晕）。
</code></pre>
<p>暂时就总结这么多，另外，补充一点，在编译过程中曾经出现错误提示，说cout没有定义，从网上搜索了一下，了解到以下情况：</p>
<pre><code>&lt;iostream&gt;和&lt;iostream.h&gt;格式不一样　　前者没有后缀，实际上，在你的编译器include文件夹里面可以看到，二者是两个文件，打开文件就会发现，里面的代码是不一样的。 后缀为.h的头文件c++标准已经明确提出不支持了，早些的实现将标准库功能定义在全局空间里，声明在带.h后缀的头文件里，c++标准为了和C区别开，也为了正确使用命名空间，规定头文件不使用后缀.h。 因 此，当使用&lt;iostream.h&gt;时，相当于在c中调用库函数，使用的是全局命名空间，也就是早期的c++实现；当使用&lt; iostream&gt;的时候，该头文件没有定义全局命名空间，必须使用namespace std；这样才能正确使用cout。
解决方案一就是在头部加上
</code></pre>
<figure class="highlight plaintext"><table><tr><td class="code"><pre><span class="line">using namespace std;</span><br></pre></td></tr></table></figure>

<p>，就像上面我的程序那样；<br>方案二就是把每个cout改为std::cout。</p>
<p>想知道更多，请看百度百科的namespace词条。</p>
]]></content>
      <tags>
        <tag>编程语言</tag>
      </tags>
  </entry>
  <entry>
    <title>Wordpress中的页面模板如何使用</title>
    <url>/2011/03/16/how-to-use-wordpress-templete.html</url>
    <content><![CDATA[<p>最近在浏览一些Wordpress博客时发现人家的“页面”功能做的貌似和我的显示效果不一样，从网上查了一下，说可以使用模板，即自己复制page.php模板文件后，进行修改和制作后，重命名，并且上传到模板文件夹下，然后在后台“页面”里选择刚才新上传的模板即可。但是我操作了一下，发现在页面编辑里面根本就没有选择模板这一项，倒是在“快速编辑”中有，但是里面只有“默认”这一个选项。</p>
<p>又是在网上一阵搜索，发现貌似2.6版本后已经没有这个选项，但是可以通过修改模板文件名来实现。比如说，我的留言板的别名写的是guestbook，那么我想用的模板文件名就需要改为“page-guestbook.php”，这样博客就会自动使用这个模板文件啦。</p>
]]></content>
      <tags>
        <tag>后端</tag>
      </tags>
  </entry>
  <entry>
    <title>吾酷彩铃词典大全</title>
    <url>/2011/03/17/wu-ku.html</url>
    <content><![CDATA[<p>&#x2F;我赚钱了&#x2F;<br>我赚钱啦赚钱啦 我都不知道怎么去花 我左手买个诺基亚右手买个摩托罗拉 我移动联通小灵通一天换一个电话号码 我坐完奔驰开宝马 没事洗桑拿吃龙虾 干嘛呢干嘛呢干嘛呢 说你呢 病人家属在哪人儿（妈。。） 病人该吃药啦</p>
<p>&#x2F;双向收费 &#x2F;<br>COME ON BABY 双向收费了 它怎么那么黑啊 它赛过活李魁 它是气死猛张飞 要拿着手机聊会儿天啊 你银子哗哗没 你可想清楚了 我可这就要接通了 我掏四毛你掏四毛咱俩就开始聊了 我还忘了告诉你我卡里没多少钱了 我减四毛我去四毛我还剩一块六啦 我再去四毛再减四毛我还剩八毛钱啦 我再去四毛再减四毛我还剩一块六 我 别聊了 赔啦</p>
<p>&#x2F;二百块钱罚三分&#x2F;<br>COME ON BABY 我现在不能接你的电话 我在开车路上全是警察 一旦我不慎被拿下呀 二百块钱罚三分呀 弄不好还吊销本儿呀。。。。</p>
<p>&#x2F;阿里巴巴&#x2F;<br>阿里 阿里巴巴 阿里巴巴从来就不接电话 阿里 阿里巴巴 阿里巴巴从来就不接电话 噢噢噢噢 无人应答无人应答 啊啊啊啊，呆会儿再打呆会儿再打</p>
<p>&#x2F;西门大关人&#x2F;<br>潘金莲儿 挑春帘儿 砸得我手机断了线 我笑咪咪地对她说 给我出来赔钱 我的手机是分期付款 按揭一下就好多年 舍不得打我也舍不得接 今年毁在你的手里面 我说大哥大哥你好吗 啪啊。。。</p>
<p>&#x2F;新年成语接龙&#x2F;<br>新年好新年好 欢迎你打电话来参加新年成语接龙活动 嗯 干 成功干 干净利索 所向披靡呀 迷迷糊糊 呼来唤去 去去就来 来来去去 去去就来 砰 唉哟 来者不善 善者不来 嘿 来者不善 善者不来 砰啪 来来回回 回眸一笑啊 笑口常开嘛 开开心心 新年快乐<br>&#x2F;吾酷快板&#x2F;<br>哎 闲言碎语不要讲 机主现在特别忙 五点多钟就起床他半夜两点上不了炕 没白天没黑夜是名符其实工作狂 当里个当当里个当当里个当里个当里个当 哎 那么你这位说了 他到底是接了这个电话接不了呢 我可有急事找他呀 哎 不要急来不要慌 有我们吾酷来帮忙 跟你唱跟你跳是跟你说完跟你笑 让你听了心欢喜是忘了给谁打手机 这就是 手机进了新世纪 机主不接也可以 要嘛你就发短信 要嘛你就听我唠唠叨叨唠唠叨叨说到底 说到底 当里个当当里个当当里个当里个当里个当</p>
<p>&#x2F;吃饱撑的&#x2F;<br>哎哟吃饱撑的 闲得没事儿 给卡里设了个密码 已经输错两次了呀 啊呀，倒霉催的 手一哆嗦又摁了一个YES 现在全锁上了呀 哎哟赶紧跑到营业厅去找找解决办法 却发现登记名字不是自己的 啊呀苦思冥想终于想起机主曾经是谁啦 是五六年前分手的她 你让我现在哪儿找去呀 呃 这个故事告诉我们分手前一定要过户</p>
<p>&#x2F;上课不能接手机&#x2F;<br>食不言<br>食不言<br>寝不语<br>寝不语<br>上课不能接手机<br>上课偷着接手机<br>不对 是上课不能接手机<br>上课偷着接手机<br>怎么回事儿啊 还不对 是上课不能偷手机<br>上课不能接。。。<br>哎呀 什么呀 你们都把我说乱了 应该是上课偷着接手机<br>老师 老师老师 你做人也得厚道点儿吧 你一会儿让我们翻来覆去说多少遍呀 您到底是让我们上课不能偷手机还是上课偷着接手机还是上课接着偷手机还不一串儿的手机呀<br>你们 我 我 我 啊 统统给我关手机<br>吾酷提醒：上课不能接手机</p>
<p>&#x2F;麻将夜话&#x2F;<br>在这种寂静的夜里 我还在这个小屋里 因为寂寞会一直伴我到天明 幸好还有你 我的朋友 打来这个电话 还有我身旁这三个陪我玩儿麻将的朋友 哎 赶紧出牌快点儿 他们催我了 我现在正落着听呢 所以不能接你这个电话 我是五六筒 等待生命中的四七筒 咚 四筒 哎哎哎 胡了 T胡 给钱给钱</p>
<p>&#x2F;123接电话&#x2F;<br>ONE 我不能接电话 TWO 我有个好办法 THREE 将你要说的话精简一下 然后发短信吧 FOUR 怎么你还没挂 FIVE 我看着电话直犯傻 你的执着彻底感动我啦 我现在就来接电话啊</p>
<p>&#x2F;红孩儿&#x2F;<br>唐三藏 就知道你会给我打电话来 今儿是我红孩儿的生日 你都给我准备了什么礼物啊 是（）啊还是矛台啊 是XO啊还是介绍女朋友啊 哈哈哈 咦 小东西的还反了你了 又烟又酒你还五（啊哈）毒俱全了你 我想教训人我也早不是一（哎呀）天两（两天）天了我跟你说 我看你小东西还敢在电话里跟我张（啊）牙舞（啊）爪 以前观音他们打我我不还手怎么了 我不还手那是迷惑他们呢儿子 想当年我也（你） 你你你你竟敢（打死你） 哎哟 哈哈哈 我打你屁股 行你等着 啊 炸弹 砰。。。。我告诉我妈去</p>
<p>&#x2F;你快了吗&#x2F;<br>你快了吗 我就快了吗 我就快手机没电了我跟你说 你快了吗 他快不了 他要快他早就接你电话了 那你快了吗 哎 我快疯掉了 我这不正找备用电池呢嘛 你快了吗 他快嘛呢 他那备用电池也是没电的 哈哈 干嘛呢你们怎么又唱上了 说你呢 拿那块肥皂硬往那个电视遥控器上塞什么呀你 哎 赶紧抢过来 哎张大夫 张大夫 给他们吃药了吗 病人又犯病了。。。</p>
<p>&#x2F;波斯猫&#x2F;<br>喵 波斯猫 我的手机没电 波斯猫 我的卡里没钱 波斯猫 既然好久没见 还不如请我吃个饭聊聊天 喵喵喵 最好是吃海鲜 喵喵喵 我最爱吃螃蟹 喵喵喵 如果没有意见 准备好我们现在就来接 喵。。。。</p>
<p>&#x2F;ONLY YOU &#x2F;<br>ONLY YOU 当当当当当 悟空 你终于想明白了 你肯给师父打来电话了吗 为师现在不接你的电话 是为了大家好 我一接 你要付四毛 我要付四毛 砰砰 你打我干什么 你真的要为师接吗 你要我接你说话嘛 你不说我怎么知道你要我接呢 你要我接我不会不接而不要我接我偏要接 我靠 I服了YOU 你看你又猴急猴急的嘛 是你给我打的电话嘛 你不要挂 我马上就来接 你闭嘴 哒哒哒哒。。。。。</p>
<p>&#x2F;机主学中文&#x2F;<br>你好请你等一等 机主正在学中文 你好请再等一等 机主学会了 噢。。。。。。</p>
<p>&#x2F;别挂机&#x2F;<br>你现在才打电话 正好是饭点儿啊 我为了等你电话一天没吃饭啦 别挂别挂 我现在就接电话 别挂别挂 我现在就接电话 别挂别挂 我现在就接电话 别挂别挂 我现在就接电话 。。。。啊哈哈哈哈</p>
<p>&#x2F;新疆绕口令&#x2F;<br>机主现在不说话嘛 因为在吃哈蜜瓜 机主一下子吃掉了三个 所以你就慢慢等着了吧 哎 朋友 教你一段新疆绕口令 你要说得象的嘛 机主就来接电话啦 准备好了吗 吃了吐鲁番的葡萄不接电话不着急 不吃吐鲁番的葡萄接个电话没人理 别吃吐鲁番的葡萄然后别发短信息 %￥%￥%￥%￥%￥%￥%￥% 记住了吗 娃哈哈 娃哈哈哈 每个人的脸上都乐开了花 娃哈哈 娃哈哈 每个人的脸上都乐开了花</p>
<p>&#x2F;别别挂 &#x2F;<br>请你别别挂 请稍等一下 机主现在手里有工作放不下 请你别别挂 请再等一下 希望你能多等些时间给他 请你别别挂 机主听见啦 他派我来 感谢你还再等他 请你先别挂 这就接通啦 接通以后 别再让他轻易挂断啦</p>
<p>&#x2F;酒干了瓶卖我&#x2F;<br>酒干了瓶卖我 酒干了瓶卖我 酒干了瓶卖我 你快把酒干了瓶子卖给我 多么浪费的年轻人啊 喝完酒瓶子到处乱扔 严重影响了公共卫生 也阻碍了资源的再生 你昏天又黑地 我着不起你这份儿急 你就这么点出息呀 以后（）了你就爱唱戏。。。</p>
<p>&#x2F;春天的信息&#x2F;<br>春天 我打开手机 在想着现在 谁会让铃声响起 是你 我知道是你 打到我这里 让我一时无语 所以 我没按接听 你可否挂断 然后发短讯息 我会 将它珍藏在 我的手机里 因为这是你发给我的 春天的 信息</p>
<p>&#x2F;南无摩托罗拉&#x2F;<br>孙悟空　你欺师灭祖　长年拖欠话费　还敢打电话来　今天我要替天行道　让你停机　哎哎　观音姐姐　你闭嘴　哎哟　是我呀我是唐僧＃￥￥　我知道是你　贫僧·＃￥　你是够贫的你￥％￥　唉哟　别打了　贫僧愿意为他交话费　什么　　我是说贫僧愿意为徒儿补交话费　你待怎讲　这正是我佛慈悲的宽大胸怀啊　正所谓　我不入移动谁入移动　南无摩托罗拉　啪啪啪··</p>
<p>&#x2F;鸳鸯火锅诺基亚&#x2F;<br>唉哟我的妈呀　我手机掉火锅里啦　我算完了蛋了呀　刚刚新买的诺基亚　我赶紧捞起来了吧　上面挂着毛肚还有金针茹　你老就慢慢等着吧　等它干了咱才能再通话　唉呀　伙计　又掉啤酒里了　服务员　上餐巾纸　唉　你稍等啊　你正好在这儿把它先涮涮</p>
<p>&#x2F;蜡笔小新个人简历&#x2F;<br>大家好 这里是我的个人简历哟 我只说一次 好好听喔 我叫蜡笔小新 我的学历是幼儿园小班 嗜好就是爱和漂亮姐姐在一起 缺点就是太早熟了 最喜欢的运动是睡觉 最喜欢的零食是小雄饼干 最好的朋友 阿呆 正男 风间 哈 让我猜猜你是谁啊 咦 我的花呢 噢 在这里</p>
<p>&#x2F;帅哥小强&#x2F;（宝宝版）<br>喂 我是帅哥小强啊 前两天 我们老板跟我说 哎 小强 你怎么这么帅呢 告诉他 哪里哪里 我一点都不帅 没想到啊 他居然用砖头打我的头 噼￥#啪%# 他说我虚伪 所以我为了不挨打 就只好承认了%……￥#￥%·</p>
<p>&#x2F;小猪乐乐诞生篇&#x2F;<br>大家好　我是一只猪　一只手机小猪　初次见面　请多关照　我有一只可爱的名字　因为　妈妈在生我时候　她正在打麻将　我的猪妈妈特别喜欢打　就吧哒吧哒的打　打到清一色的时候　她饿得肚子咕嘟咕嘟叫　我一看见她乐　就很好奇呀　所以我就想出来看看　有什么事情那么高兴哩　于是我就来到了这个世界　所以妈生了我　还赢了钱　特别高兴　我就有了一个好听的名字　叫乐乐</p>
<p>&#x2F;小猪乐乐之作诗篇&#x2F;<br>哈喽 偶是手机小猪乐乐 最近我作了一首诗 妈说很有人生哲理 充满了矛盾与冲突 非常适合配乐诗朗诵 乐队老师请伴奏 在错的时间接通对的电话是一种遗憾 在对的时间接通错的电话是一声叹息 在对的时间接能对的电话是一生的幸福～～～～现在是什么时间　嘀～～　又是什么样的电话　这次要不要接哩～～</p>
<p>&#x2F;小猪乐乐之作诗篇二&#x2F;<br>哈喽　偶是手机小猪乐乐　自从上次那首诗发表以后　反响很好　有很多人找我签名　于是　偶又做了一首诗　妈说　这次偶又进步了　乐队老师请伴奏　不是这首　乐队老师已经学会开玩笑喽　嗯嗯　就是这首　开始　我醉了　因为我快乐　我快乐　因为你想我　如果没有你　生活没法过　钱包没有钱　等待你支援　你就是我冬天里的棉袄　夏天里的鹅毛扇　完了　谢谢</p>
<p>&#x2F;老头与手机&#x2F;<br>很久很久以前有一个老头　年纪一大把了还喜欢赶潮流　有天进城看见人人手里拿块砖　老头看半天　那是啥砖哩　嘟～～忽然看见有个人拿砖往脸上拍　他嘻嘻哈哈说说笑笑感觉挺自在　老头明白了　他原来不是砖啊　他原来不是砖是个录音机啊　嘿嗦嘿嗦嘿　嘿嗦嘿嗦嘿　嘿嗦嘿嗦嘿　　嘿嗦嘿嗦嘿</p>
<p>小猪乐乐之&#x2F;可爱Ｋ歌的小猪&#x2F;<br>哈喽　偶是手机小猪乐乐　最近我迷上了Ｋ歌　现在我正在卡啦ＯＫ　请勿打扰　你有事吗　你叫做啥　你不知道偶的电话没钱啦　偶不敢接偶不敢听　偶怕你说起来就没完没了的　你的心事偶全知道　偶的心事你怎么就不知道　好了　唱完了　偶刚刚请你免费听歌　不用谢　你是不是应该请偶吃饭哩　谢谢</p>
<p>&#x2F;来我家干活&#x2F;<br>你找我们家大人吧　他们现在没空　因为他们都在干活　你有什么急事啊　你你得给我买好吃的　我才去叫他们　哎呀　不行　我妈妈说了　不能要别人东西　那你还是来我们家干活吧　这样你就能找到我们家大人了</p>
<p>&#x2F;约会中&#x2F;（宝宝版）<br>你好　我现在在回家的途中　塞车　不方便接听你的电话　他骗你的　他在电影院门口呢　咳咳　本来就是　上午下班之前　他接了一个电话　说和美眉约好去看电影　真的　不骗你　咳咳咳　主人　你没事吧　怎么老咳嗽啊　哎　你别卸我电池啊　你别取我电池啊···</p>
<p>&#x2F;谦虚的宝宝&#x2F;<br>其实我没那么好　就是比其他女孩漂亮点儿　温柔一点儿　聪明一点儿　贤惠一点儿　懂事一点　大方一点　谦虚一点儿　嘿嘿</p>
<p>&#x2F;替我交话费&#x2F;<br>你所拨打的用户　话费余额已不足０.１元　无法与您正常通话请你在近日内　卖儿卖女卖大米　砸锅卖铁卖点血　卖房卖地卖老婆　替他把话费交了吧　啊喔</p>
<p>&#x2F;手机小丽&#x2F;<br>喂　你好　我是手机小丽啊　你找谁呀　是找我的主人吗　他现在没空　你可以留言　我会把你的话转告给他的　但是你得说慢点　我个儿小　记不住　预备　开始</p>
<p>&#x2F;接还是不接是个问题&#x2F;<br>接电话前　听首诗吧　陶冶一下情操　感悟一把人生吧　啊　天上飘着老大一块儿云　一个纯洁的声音从半空中响起　接吧接吧接个电话吧　啊哈　我的内心苦苦挣扎　接还是不接　这是个问题　接吧花钱儿　不接吧　闹心　砰　晴天一个霹雳　啊　这回省事儿了　电话给霹断了</p>
<p>&#x2F;两只小蜜蜂&#x2F;<br>两只小蜜蜂啊　飞到花从中啊　左飞飞　右飞飞　接呀　啊啊　接呀　嗯嗯　接呀　唔啊　你到底接还是不接呀　嗯　挺好玩儿的　再来一遍　两只小蜜蜂啊　飞到花从中啊　左飞飞　右飞飞　接呀　啊啊　接呀　嗯嗯　接呀　唔啊　你怎么还是不接啊　ＪＪＱＱ　就是不接···</p>
<p>&#x2F;我是个男人&#x2F;<br>你要找谁呀　干嘛一上来就对我不那么礼貌呢　告诉你　我也有尊严的　别看我不起眼吧　我也比插座高啊　就说我是小孩吧　但我也是人呀　我还就告诉你　我还是个男人</p>
<p>&#x2F;骗你是刚发生的事&#x2F;<br>想你是件快乐的事　骗你是件开心的事　爱你是我永远要做的事　把你放在心上是我一直要做的事　不过　骗你是刚发生的事</p>
<p>&#x2F;人是人　妖是妖&#x2F;<br>喂　你好哇　哇　好久没有你这们的美眉给我打电话了　讨厌　谁说我是女的　哎呀　好久没有象你这样特别的男生给我打电话了　讨厌　干嘛说人家是男的　哇噻　好久没有象你这样的（）给我打电话了　讨厌人就是人　妖就是妖　干嘛还（）的　唉呀　救命呀　讨厌　好久没有给你这样可爱的（）打电话了　啊·····</p>
<p>&#x2F;接电话是有原则的&#x2F;<br>哎　你好　打电话来了　我事先声明一下啊　我这个人是很有原则的　接电话按程序办事　第一步要把电话找到　第二步把电话的套套摘掉　第三步把电话的盖盖打开　嘿嘿　对了　我这个是翻盖的啊　第四步　看一下电话号码　第五步挂断　对不起　你拨打的用户已挂机　第六步　找一个公家的电话给你打过去哈　你稍微等一下下哈</p>
<p>&#x2F;我有一句话&#x2F;<br>嘿　哥们儿你来电话　影响我的工作你很不象话　今儿我正好有一句话　我要跟你讲你可不要挂　你知道哥们儿我长得有点帅吧　兜里有点钱我脾气也不坏吧　总的来说这个人是要啥啥不赖吧　咋就没个姑娘啥的跟我谈恋爱呀　一天到晚辛勤工作还得学文化　我是没有时间没有机会跟你俩说会儿话　只要你身边认识姑娘正好没有嫁　你可赶紧介绍给我　千万不要挂　流氓</p>
<p>&#x2F;喂喂唱&#x2F;<br>喂喂 我现没接电话请你稍等一下下下下下下下下下。。。喂喂<br>如果你不着急请你再等一会儿会会会会。。。。。。喂喂怎么还没接电话估计自己很忙忙忙忙忙忙。。。。。。喂喂估计现在有事儿请你稍后再拨拨拨。。。。。喂喂我还没接电话请你稍等一下下下下下下下。。。。。喂喂如果你不着急请你再等一会儿会会会会。。。。。</p>
<p>&#x2F;水果健身&#x2F;<br>我现在不能接电话因为我在吃水果等我补充完了能量再接你的电话吧 　吃了苹果吃香蕉呀吃了香蕉吃菠萝 吃了菠萝吃葡萄呀最后再捡个西瓜 加油加油大家一起多吃水果多运动把身体里的肥肥肉统统减去了吧 全国人民努力吧全民健身重要啊 一切为了2008大家奋斗努力吧</p>
]]></content>
      <tags>
        <tag>杂七杂八</tag>
      </tags>
  </entry>
  <entry>
    <title>程序员的十层楼（作者：周伟明）转载</title>
    <url>/2011/03/24/programer-ten-floors.html</url>
    <content><![CDATA[<p>自西方文艺复兴以来，中国在自然科学方面落后西方很多，软件领域也不例外。当然现在中国的许多程序员们对此可能有许多不同的意见，有些人认为中国的程序员水平远落后于西方，有些则认为中国的程序员个人能力并不比西方的程序员差，只是整个软件产业落后而已。<br>那么，到底中国的程序员水平比西方程序员水平差，还是中国有许多优秀的程序员达到或超过了西方程序员同等水平呢？要解决这个问题，必须先知道程序员有多少种技术层级，每个层级需要什么样的技术水平，然后再比较中国和西方在各个技术层级的人数，就可以知道到底有没有差距，差距有多大。<br>当然，对于如何划分程序员的技术层级，不同公司或不同人会有不同的划分标准，下面的划分仅代表个人的观点，如有不当之处，还请砸板砖予以纠正。</p>
<p>第1层  菜鸟</p>
<p>第1层楼属于地板层，迈进这层楼的门槛是很低的。基本上懂计算机的基本操作，了解计算机专业的一些基础知识，掌握一门基本的编程语言如C&#x2F;C++，或者Java，或者JavaScript，…，均可入门迈进这层。<br>在这层上，中国有着绝对的优势，除了从计算机专业毕业的众多人数外，还有大量的通信、自动化、数学等相关专业的人士进入这一行，此外还有众多的其他专业转行的人士，人数绝对比西方多出甚多。并且还有一个优势就是我们这层人员的平均智商比西方肯定高。<br>没有多少人愿意一辈子做菜鸟，因为做”菜鸟”的滋味实在是不咋的，整天被老大们吆喝着去装装机器，搭建一下测试环境，或者对照着别人写好的测试用例做一些黑盒测试，好一点的可以被安排去写一点测试代码。当然如果运气”好”的话，碰到了国内的一些作坊式的公司，也有机会去写一些正式的代码。<br>所以，菜鸟们总是在努力学习，希望爬更高的一层楼去。</p>
<p>第2层 大虾</p>
<p>从第1层爬到第2层相对容易一些，以C&#x2F;C++程序员为例，只要熟练掌握C&#x2F;C++编程语言，掌握C标准库和常用的各种数据结构算法，掌握STL的基本实现和使用方法，掌握多线程编程基础知识，掌握一种开发环境，再对各种操作系统的API都去使用一下，搞网络编程的当然对socket编程要好好掌握一下，然后再学习一些面向对象的设计知识和设计模式等，学习一些测试、软件工程和质量控制的基本知识，大部分人经过2～3年的努力，都可以爬到第2层，晋升为”大虾”。<br>中国的”大虾”数量和”菜鸟”数量估计不会少多少，所以这层上仍然远领先于西方。<br>大虾们通常还是有些自知之明，知道自己只能实现一些简单的功能，做不了大的东西，有时候还会遇到一些疑难问题给卡住，所以他们对那些大牛级的人物通常是非常崇拜的，国外的如Robert C. Martin、Linus Torvalds，国内的如求伯君、王志东等通常是他们崇拜的对象。其中的有些人希望有一天也能达到这些大牛级人物的水平，所以他们继续往楼上爬去。</p>
<p>第3层 牛人</p>
<p>由于”大虾”们经常被一些疑难问题给卡住，所以有了”大虾”们只好继续学习，他们需要将原来所学的知识进一步熟练掌握，比如以熟练掌握C++编程语言为例，除了学一些基础性的C++书籍如《C++ Primer》，《Effective C++》，《Think in C++》，《Exception C++》等之外，更重要的是需要了解C++编译器的原理和实现机制，了解操作系统中的内部机制如内存管理、进程和线程的管理机制，了解处理器的基础知识和代码优化的方法，此外还需要更深入地学习更多的数据结构与算法，掌握更深入的测试和调试知识以及质量管理和控制方法，对各种设计方法有更好的理解等。<br>学习上面说的这些知识不是一挥而就的，不看个三五十本书并掌握它是做不到的。以数据结构算法来说，至少要看个5～10本这方面的著作；以软件设计来说，光懂结构化设计、面向对象设计和一些设计模式是不够的，还要了解软件架构设计、交互设计、面向方面的设计、面向使用的设计、面向数据结构算法的设计、情感化设计等，否则是很难进到这个楼层的。<br>当然除了上面说的知识外，大虾们还需要去学习各种经验和技巧。当然这点难不倒他们，现在出版的书籍众多，网络上的技术文章更是不胜数，然后再去各种专业论坛里泡一泡，把这些书籍和文章中的各种经验、技能、技巧掌握下来，再去学习一些知名的开源项目如Apache或Linux操作系统的源代码实现等。此时对付一般的疑难问题通常都不在话下，菜鸟和大虾们会觉得你很”牛”，你也就爬到了第3层，晋升为”牛人”了。<br>看了上面所讲的要求，可能有些大虾要晕过去了，成为牛人要学这么多东西啊！要求是不是太高了？其实要求一点也不高，这么点东西都掌握不了的话，怎么能让别人觉得你”牛”呢？<br>需要提一下的是，进入多核时代后，从第2层爬到第3层增加了一道多核编程的门槛。当然要迈过这道门槛并不难，已经有很多前辈高人迈进了这道门槛，只要循着他们的足迹前进就可以了。想迈进这道门槛者不妨去学习一下TBB开源项目的源代码(链接：<a href="http://www.threadingbuildingblocks.org/">http://www.threadingbuildingblocks.org/</a>)，然后上Intel的博客（<a href="http://softwareblogs-zho.intel.com/">http://softwareblogs-zho.intel.com/</a>）和多核论坛（<a href="http://forum.csdn.net/Intel/IntelMulti-core/">http://forum.csdn.net/Intel/IntelMulti-core/</a>）去看看相关文章，再买上几本相关的书籍学习一下。<br>在国内， 一旦成为”牛人”，通常可以到许多知名的公司里去，运气好者可以挂上一个架构师的头衔，甚至挂上一个”首席架构师”或者”首席xx学家”的头衔也不足为奇。有不少爬到这层的人就以为到了楼顶了，可以眼睛往天上看了，开始目空一切起来，以为自己什么都可以做了，什么都懂了，经常在网络上乱砸板砖是这个群体的最好写照。由此也看出，国内的牛人数量仍然众多，远多于西方的牛人数量，在这层上仍然是领先的。<br>也有不少谦虚的”牛人”，知道自己现在还不到半桶水阶段。他们深知爬楼的游戏就像猴子上树一样，往下看是笑脸，往上看是屁股。为了多看笑脸，少看屁股，他们并没有在此停步不前，而是继续寻找到更上一层的楼梯，以便继续往上爬。</p>
<p>第4层 大牛</p>
<p>从第3层爬到第4层可不像上面说过的那几层一样容易，要成为大牛的话，你必须要能做牛人们做不了的事情，解决牛人们解决不了问题。比如牛人们通常都不懂写操作系统，不会写编译器，不懂得TCP&#x2F;IP协议的底层实现，如果你有能力将其中的任何一个实现得象模象样的话，那么你就从牛人升级为”大牛”了。<br>当然，由于各个专业领域的差别，这里举操作系统、编译器、TCP&#x2F;IP协议只是作为例子，并不代表成为”大牛”一定需要掌握这些知识，以时下热门的多核编程来说，如果你能比牛人们更深入地掌握其中的各种思想原理，能更加自如的运用，并有能力去实现一个象开源项目TBB库一样的东西，也可以成为”大牛”，又或者你能写出一个类似Apache一样的服务器，或者写出一个数据库，都可以成为”大牛”。<br>要成为”大牛”并不是一件简单的事情，需要付出比牛人们多得多的努力，一般来说，至少要看过200~400本左右的专业书籍并好好掌握它，除此之外，还得经常关注网络和期刊杂志上的各种最新信息。<br>当”牛人”晋升为”大牛”，让”牛人们”发现有比他们更牛的人时，对”牛人”们的心灵的震撼是可想而知的。由于牛人们的数量庞大，并且牛人对大虾和菜鸟阶层有言传身教的影响，所以大牛们通常能获得非常高的社会知名度，几乎可以用”引无数菜鸟、大虾、牛人竞折腰”来形容，看看前面提过的Linus Torvalds等大牛，应该知道此言不虚。<br>虽然成为”大牛”的条件看起来似乎很高似的，但是这层楼并不是很难爬的一层，只要通过一定的努力，素质不是很差，还是有许多”牛人”可以爬到这一层的。由此可知，”大牛”这个楼层的人数其实并不像想像的那么少，例如比尔·盖茨之类的人好像也是属于这一层的。<br>由于”大牛”这层的人数不少，所以也很难统计除到底是中国的”大牛”数量多还是西方的大牛数量多？我估计应该是个旗鼓相当的数量，或者中国的”大牛”们会更多一些。<br>看到这里，可能会有很多人会以为我在这里说瞎话，Linus Torvalds写出了著名的Linux操作系统，我国并没有人写出过类似的东西啊，我国的”大牛”怎么能和西方的比呢? 不知大家注意到没有，Linus Torvalds只是写出了一个”象模象样”的操作系统雏形，Linux后来真正发展成闻名全球的开源操作系统期间，完全是因为许多支持开源的商业公司如IBM等，派出了许多比Linus Torvalds更高楼层的幕后英雄在里面把它开发出来的。<br>可能有些菜鸟认为Linus Torvalds是程序员中的上帝，不妨说个小故事：<br>Linus，Richard Stallman和Don Knuth（高德纳）一同参加一个会议。<br>Linus 说：”上帝说我创造了世界上最优秀的操作系统。”<br>Richard Stallman自然不甘示弱地说：”上帝说我创造了世界上最好用的编译器。”<br>Don Knuth一脸疑惑的说：”等等，等等，我什么时候说过这些话？”<br>由此可以看出，Linus Torvalds的技术水平并不像想像中那么高，只是”牛人”和”大虾”觉得”大牛”比他们更牛吧了。在我国，有一些当时还处于”大虾”层的人物，也能写出介绍如何写操作系统的书，并且书写得非常出色，而且写出了一个有那么一点点象模象样的操作系统来。我想中国的”大牛”们是不会比西方差的，之所以没有人写出类似的商业产品来，完全是社会环境的原因，并不是技术能力达不到的原因。<br>“大牛”们之所以成为大牛，主要的原因是因为把”牛人”给盖了下去，并不是他们自己觉得如何牛。也许有很多菜鸟、大虾甚至牛人觉得”大牛”这层已经到顶了，但大多数”大牛”估计应该是有自知之明的，他们知道自己现在还没有爬到半山腰，也就勉强能算个半桶水的水平，其中有些爬到这层没有累趴下，仍然能量充沛，并且又有志者，还是会继续往更上一层楼爬的。<br>看到这里，也许有些菜鸟、大虾、牛人想不明白了，还有比”大牛”们更高的楼层，那会是什么样的楼层？下面就来看看第5层楼的奥妙。</p>
<p>第5层 专家</p>
<p>当大牛们真正动手做一个操作系统或者类似的其他软件时，他们就会发现自己的基本功仍然有很多的不足。以内存管理为例，如果直接抄袭Linux或者其他开源操作系统的内存管理算法，会被人看不起的，如果自动动手实现一个内存管理算法，他会发现现在有关内存管理方法的算法数量众多，自己并没有全部学过和实践过，不知道到底该用那种内存管理算法。<br>看到这里，可能有些人已经明白第5层楼的奥妙了，那就是需要做基础研究，当然在计算机里，最重要的就是”计算”二字，程序员要做基础研究，主要的内容就是研究非数值”计算”。<br>非数值计算可是一个非常庞大的领域，不仅时下热门的”多核计算”与”云计算”属于非数值计算范畴，就是软件需求、设计、测试、调试、评估、质量控制、软件工程等本质上也属于非数值计算的范畴，甚至芯片硬件设计也同样牵涉到非数值计算。如果你还没有真正领悟”计算”二字的含义，那么你就没有机会进到这层楼来。<br>可能有人仍然没有明白为什么比尔·盖茨被划在了大牛层，没有进到这层来。虽然比尔·盖茨大学未毕业，学历不够，但是家有藏书2万余册，进入软件这个行业比绝大部分人都早，撇开他的商业才能不谈，即使只看他的技术水平，也可以算得上是学富五车，顶上几个普通的计算机软件博士之和是没有问题的，比起Linus Torvalds之类的”大牛”们应该技高一筹才对，怎么还进不了这层楼呢？<br>非常遗憾的是，从Windows操作系统的实现来看，其对计算的理解是很肤浅的，如果把Google对计算方面的理解比做大学生，比尔·盖茨只能算做一个初中生，所以比尔·盖茨永远只能做个大牛人，成不了”专家”。<br>看到这里，也许国内的大牛们要高兴起来了，原来比尔·盖茨也只和我等在同一个层次，只要再升一层就可以超越比尔·盖茨了。不过爬到这层可没有从”牛人”升为”大牛”那么简单，人家比尔·盖茨都家有2万多册书，让你看个500~1000本以上的专业书籍并掌握好它应该要求不高吧。当然，这并不是主要的条件，更重要的是，需要到专业的学术站点去学习了，到ACM，IEEE，Elsevier，SpringerLink，SIAM等地方去下载论文应该成为你的定期功课，使用Google搜索引擎中的学术搜索更是应该成为你的日常必修课。此外，你还得经常关注是否有与你研究相关的开源项目冒出来，例如当听到有TBB这样针对多核的开源项目时，你应该第一时间到Google里输入”TBB”搜索一下，将其源代码下载下来好好研究一番，这样也许你的一只脚已经快迈进了这层楼的门槛。<br>当你象我上面说的那样去做了以后，随着时间的推移，总会有某天，你发现，在很多小的领域里，你已经学不到什么新东西了，所有最新出来的研究成果你几乎都知道。此时你会发现你比在做”牛人”和”大牛”时的水平不知高出了多少，但是你一点也”牛”不起来，因为你学的知识和思想都是别人提出来的，你自己并没有多少自己的知识和思想分享给别人，所以你还得继续往楼上爬才行。<br>我不知道国内的”专家”到底有多少，不过有一点可以肯定的是，如果把那些专门蒙大家的”砖家”也算上的话，我们的砖家比西方的要多得多。</p>
<p>第6层 学者</p>
<p>当”专家”们想继续往上一层楼爬时，他们几乎一眼就可以看到楼梯的入口，不过令他们吃惊的是，楼梯入口处竖了一道高高的门槛，上面写着”创新”二字。不幸的是，大多数人在爬到第5层楼时已经体能消耗过度，无力翻过这道门槛。<br>有少数体能充足者，可以轻易翻越这道门槛，但是并不意味着体力消耗过度者就无法翻越，因为你只是暂时还没有掌握恢复体能的方法而已，当掌握了恢复体能的方法，将体能恢复后，你就可以轻易地翻越这道门槛了。<br>怎么才能将体能恢复呢？我们的老祖宗”孔子”早就教导过我们”温故而知新”，在英文里，研究的单词是”research”，其前缀”re”和”search”分别是什么意思不用我解释吧。或许有些人觉得”温故而知新”和”research”有些抽象，不好理解，我再给打个简单的比方，比如你在爬一座高山，爬了半天，中途体力不支，怎么恢复体力呢？自然是休息一下，重新进食一些食物，体力很快就可以得到恢复。<br>由此可知，对体能消耗过度者，休息＋重新进食通常是恢复体能的最佳选择。可惜的是，国内的老板们并不懂得这点，他们的公司里不仅连正常国家规定的休息时间都不给足，有些公司甚至有员工”过劳死”出现。所以国内能翻越”创新”这道门槛的人是”少之又少”，和西方比起来估计是数量级的差别。<br>再说说重新进食的问题，这个重新进食是有讲究的，需要进食一些基础性易消化的简单食物，不能进食山珍海味级的复杂食物，否则很难快速吸收。以查找为例，并不是去天天盯着那些复杂的查找结构和算法进行研究，你需要做的是将二分查找、哈希查找、普通二叉树查找等基础性的知识好好地复习几遍。<br>以哈希查找为例，首先你需要去将各种冲突解决方法如链式结构、二次哈希等编写一遍，再试试不同种类的哈希函数，然后还需要试试在硬盘中如何实现哈希查找，并考虑数据从硬盘读到内存后，如何组织硬盘中的数据才能快速地在内存中构建出哈希表来，…，这样你可能需要将一个哈希表写上十几个不同的版本，并比较各个版本的性能、功能方面的区别和适用范围。<br>总之，对任何一种简单的东西，你需要考虑各种各样的需求，以需求来驱动研究。最后你将各种最基础性的查找结构和算法都了然于胸后，或许某天你再看其他更复杂的查找算法，或者你在散步时，脑袋里灵光一现，突然间就发现了更好的方法，也就从专家晋升为”学者”了。<br>学者所做的事情，通常都是在前人的基础上，进行一些小的优化和改进，例如别人发明了链式基数排序的方法，你第1个发现使用一定的方法，可以用数组替代链表进行基数排序，性能还能得到进一步提高。<br>由于学者需要的只是一些小的优化改进，因此中国还是有一定数量的学者。不过和国外的数量比起来，估计少了一个数量级而已。<br>也许有人会觉得现在中国许多公司申请专利的数量达到甚至超过西方发达国家了，我们的学者数量应该不会比他们少多少。因此，有必要把专利和这里说的创新的区别解释一下。<br>所谓专利者，只要是以前没有的，新的东西，都可以申请专利；甚至是以前有的东西，你把他用到了一个新的领域的产品里去，也可以申请专利。比如你在房子里造一个水泥柱子，只要以前没有人就这件事申请专利，那么你就可以申请专利，并且下次你把水泥柱子挪一个位置，又可以申请一个新的专利；或者你在一个柜子上打上几个孔，下次又把孔的位置改一改，…，均可申请专利。<br>这层楼里所说的创新，是指学术层面的创新，是基础研究方面的创新，和专利的概念是完全不同的，难度也是完全不同的。你即使申请了一万个象那种打孔一类的专利，加起来也够不到这层楼里的一个创新。<br>当你爬到第6层楼时，你也许会有一种突破极限的快感，因为你终于把那道高高的写着”创新”二字的门槛给翻过去了，实现了”0”的突破。这时，你也许有一种”独上高楼，欲望尽天涯路”的感觉，但是很快你会发现看到的都是比较近的路，远处的路根本看不清楚。如果你还有足够的体力的话，你会想爬到更高一层的楼层去。</p>
<p>第7层 大师</p>
<p>从第6层楼爬到第7层楼，并没有多少捷径可走，主要看你有没有足够的能量。你如果能象Hoare一样设计出一个快速排序的算法；或者象Eugene W. Myers一样设计出了一个用编辑图的最短路径模型来解决diff问题的算法；或者象M.J.D. Powell一样提出了一个能够处理非线性规划问题的SQP方法；或者你发现基于比较的排序算法，它的复杂度下界为O(NLogN)；或者你发现用栈可以将递归的算法变成非递归的；或者你设计出一个红黑树或者AVL树之类的查找结构；或者你设计出一个象C++或Java一样的语言；或者你发明了UML；…，你就爬到了第7层，晋升为”大师”了。<br>上面举的这些例子中，其中有些人站的楼层比这层高，这里只是为了形象说明而举例他们的某个成就。从上面列出的一些大师的贡献可以看出，成为大师必须要有较大的贡献。首先解决问题必须是比较重要的，其次你要比前辈们在某方面有一个较大的提高，或者你解决的是一个全新的以前没有解决过的问题；最重要的是，主要的思路和方法必须是你自己提供的，不再是在别人的思路基础上进行的优化和改进。<br>看了上面这些要求，如果能量不够的话，你也许会觉得有些困难，所以不是每个人都能成为”大师”的。中国软件业里能称得上是”大师”的人，用屈指可数来形容，估计是绰绰有余。值得一提得是，国外的”大师”就象我们的”大牛”一样满天飞的多。<br>我把我猜测本国有可能进到这层楼的大师列一下，以起个抛砖引玉的作用。汉王的”手写识别”技术由于是完全保密的，不知道它里面用了什么思想，原创思想占的比重有多少，因此不知道该把它划到这层楼还是更高一层楼去。原山东大学王小云教授破解DES和MD5算法时，用到的方法不知道是不是完全原创的，如果是的话也可进到这层楼来。<br>陈景润虽然没有彻底解决哥德巴赫猜想，但他在解决问题时所用的方法是创新的，因此也可以进到这层楼来。当然，如果能彻底解决哥德巴赫猜想，那么可以算到更高的楼层去。<br>求伯君和王志东等大牛们，他们在做WPS和表格处理之类的软件时，不知是否有较大的原创算法在里面，如果有的话就算我错把他们划到了大牛层。由于所学有限，不知道国内还有那些人能够得上”大师”的级别，或许有少量做研究的教授、院士们，可以达到这个级别，有知道的不妨回个帖子晾一晾。<br>鉴于”大师”这个称号的光环效应，相信有不少人梦想着成为”大师”。或许你看了前面举的一些大师的例子，你会觉得要成为大师非常困难。不妨说一下，现在有一条通往”大师”之路的捷径打开了，那就是多核计算领域，有大量的处女地等待大家去挖掘。<br>以前在单核时代开发的各种算法，现在都需要改写成并行的。数据结构与算法、图像处理、数值计算、操作系统、编译器、测试调试等各个领域，都存在大量的机会，可以让你进到这层楼来，甚至有可能让你进到更高一层楼去。</p>
<p>第8层 科学家</p>
<p>科学家向来都是一个神圣的称号，因此我把他放在了“大师”之上。要成为科学家，你的贡献必须超越大师，不妨随便举一些例子。<br>如果你象Dijkstra一样设计了ALGOL语言，提出了程序设计的三种基本结构：顺序、选择、循环，那么你可以爬到第8层楼来。顺便说一下，即使抛开这个成果，Dijkstra凭他的PV操作和信号量概念的提出，同样可以进到这层楼。<br>如果你象Don Knuth一样，是数据结构与算法这门学科的重要奠基者，你也可以进到这层楼来。当然，数据结构和算法这门学科不是某个人开创的，是许多大师和科学家集体开创的。<br>如果你象巴科斯一样发明了Fortran语言，并提出了巴科斯范式，对高级程序语言的发展起了重要作用，你也可以进到这层楼来。<br>或者你象Ken Thompson、Dennis Ritchie一样发明了Unix操作系统和功能强大、高效、灵活、表达力强的C语言，对操作系统理论和高级编程语言均作出重大贡献，那么你也可以进到这层楼来。<br>或者你有Frederick P. Brooks一样机会，可以去领导开发IBM的大型计算机System&#x2F;360和OS&#x2F;360操作系统，并在失败后反思总结，写出《人月神话》，对软件工程作出里程碑式的贡献，你也可以进到这层来。<br>或者你提出了面向对象设计的基本思想，或者你设计了互联网的TCP&#x2F;IP协议，或者你象Steven A.Cook一样奠定NP完全性的理论基础，或者你象Frances Allen一样专注于并行计算来实现编译技术，在编译优化理论和技术取得基础性的成就，…，均可进入这层。<br>当然，如果你发明了C++语言或者Java语言，你进不到这层来，因为你用到的主要思想都是这层楼中的科学家提出的，你自己并没有没有多少原创思想在里面。<br>看了上面列出的科学家的成就，你会发现，要成为“科学家”，通常要开创一门分支学科，或者是这个分支学科的奠基者，或者在某个分支学科里作出里程碑式的重大贡献。如果做不到这些的话，那么你能象Andrew C. Yao（姚期智）一样在对计算理论的多个方向如伪随机数生成，密码学与通信复杂度等各个方向上作出重要贡献，成为集大成者，也可以进入这层楼。<br>成为“科学家”后，如果你有幸象Dijkstra一样，出现在一个非常重视科学的国度。当你去世时，你家乡满城的人都会自动地去为你送葬。不过如果不幸生错地方的话，能不挨“板砖”估计就算万幸了。<br>从上面随便举的一些例子中，你可能能猜到，西方科学家的数量是非常多的，于是你会想中国应该也有少量的科学家吧？我可以很负责任地告诉你一个不幸的结果，中国本土产生的科学家的数量为0。目前在国内，软件领域的唯一的科学家就是上面提过的姚期智，还是国外请回来的，并不是本土产生的。<br>可能你不同意我说的本土科学家数量为0的结论，因为你经常看到有许多公司里都有所谓“首席XX科学家”的头衔。我想说的是，这些所谓的“首席XX科学家”都是远远够不到这层楼的级别的，有些人的水平估计也就是一个“牛人”或“大牛”的级别，好一点的最多也就一个“学者”的级别。尤其是那些被称作“首席经X学家”的，基本上可以把称号改为“首席坑大家”。<br>虽然我国没有人能爬到这层楼上来，但是西方国家仍然有许多人爬到了比这层更高的楼上。如果要问我们比西方落后多少？那么可以简单地回答为：“落后了三层楼”。下面就来看看我们做梦都没有到过的更高一层楼的秘密。</p>
<p>第9层 大科学家</p>
<p>进入这层楼的门槛通常需要一些运气，比如某天有个苹果砸到你头上时，你碰巧发现了万有引力，那么你可以进到这层楼来。当然，万有引力几百年前就被人发现了，如果你现在到处嚷嚷着说你发现了万有引力，恐怕马上会有人打110，然后警察会把你送到不正常人类的聚集地去。因此，这里举万有引力的例子，只是说你要有类似的成就才能进到这层楼来。<br>牛顿发现万有引力定律开创了经典物理运动力学这门学科，如果你也能开创一门大的学科，那么你就从科学家晋升为“大科学家”。比如爱因斯坦创建了相对论，从一个小职员变成了大科学家。当然大科学家可远不止这两人，数学界里比物理学界更是多得多，如欧几里得创建了平面几何，笛卡尔开创解析几何，还有欧拉、高斯、莱布尼茨等数不清的人物，跟计算相关的大科学家则有图灵等人。<br>从上面列出的一些大科学家可以发现，他们的成就不仅是开创了一个大的学科，更重要的是他们的成就上升到了“公理”的层面。发现公理通常是需要一点运气的，如果你的运气不够好的话，另外还有一个笨办法也可以进到这层楼来，那就是成为集大成者。例如冯·诺伊曼，对数学的所有分支都非常了解，许多领域都有较大的贡献，即使撇开他对计算机的开创贡献，成为大科学家照样绰绰有余。<br>当然，程序员们最关心的是自己有没有机会变成大科学家。既然计算机这门大学科的开创性成果早就被冯·诺伊曼、图灵等人摘走了，那么程序员们是不是没有机会变成大科学家了呢？我们的古人说得好：“江山代有才人出，各领风骚数百年”，现在在计算机这门学科下面诞生了许多非常重要的大的分支，所以你还是有足够的机会进到这层楼的。<br>如果你能够彻底解决自然语言理解（机器翻译）这门学科中的核心问题， 或者你在人工智能或者机器视觉（图像识别）方面有突破性的发现，那么你同样可以轻易地晋升为“大科学家”。这样当某天你老了去世时，或许那天国人已经觉醒，你也能享受到如Dijkstra一样的待遇，有满城甚至全国的人去为你送葬。<br>现在还剩下另外一个大家感兴趣的问题没有讨论，那就是这层中已经出现了牛顿、爱因斯坦、高斯等我们平常人都认为是顶级的科学家，是不是这层已经是楼顶了呢？相信还记得本文标题的人应该知道现在仅仅是第9层，还有第10层没有到达呢。可能不少人现在要感到困惑了，难道还有人站在比牛顿、爱因斯坦、高斯等人更高的楼层上？<br>这个世界上确实存在可以用一只手的手指数得清的那么几个人，他们爬到了第10层楼上。因此，第10层楼不是虚构的，而是确实存在的。如果对此有疑惑或者认为我在胡诌一番的话，那么不妨继续往下看下去，窥一下第10层楼的秘密。</p>
<p>第10层 大哲</p>
<p>看了这层楼的名字“大哲”，可能不少人已经猜到了这层楼的秘密，那就是你的成果必须要上升到哲学的高度，你才有机会能进到这层来。<br>当然，上升到哲学高度只是一个必要条件，牛顿的万有引力似乎也上升到了哲学的高度，因为不知道引力到底是怎么来的，但是牛顿没有被划到这一层，因为进到这层还有另外的条件，那就是你的成果必须引起了哲学上的深度思考，并能让人们的世界观向前跨进一大步。窃以为牛顿、爱因斯坦等人的成就还达不到让人们世界观向前跨进一大步的程度。<br>所以，这层楼中的人的成就对我们普通人认识世界非常重要，你可以不学相对论，但是你不可以不对这层楼的人所作出的成就不了解，否则你的世界观就是极其不完整的，会犯许多认识上的错误。不幸的是，中国的科普知识普及还不够到位，知道这层楼成就的人好像并不多，程序员中恐怕更少。下面就来看看这些用一只手的手指数得清的大哲们，到底有什么成就，能比万有引力定律和相对论还重要。</p>
<p>1、希尔伯特 (1862～1943)</p>
<p>第1位进到此楼层是一位名叫“希尔伯特”的大数学家，如果你学过《泛函分析》，那么你在学习希尔伯特空间时可能已经对这位大数学家有所了解；如果你不是学数学出身的，又对数学史不感兴趣的话，恐怕你从来没有听说过这个名字。不过如果我问一下，知不知道二次世界大战前世界数学中心在那里，你肯定会有兴趣想知道。<br>不妨说一下，二战前整个世界的数学中心就在德国的哥廷根，而我们这位大数学家希尔伯特便是它的统帅和灵魂人物。即使在二战期间，希特勒和丘吉尔也有协定，德国不轰炸牛津和剑桥，作为回报，英国不轰炸海德堡和哥廷根。<br>整个二十世纪上半期的超一流数学家，几乎都出自其门下。这里不妨举几个我们熟悉的人物，例如冯·诺伊曼就曾受到他和他的学生施密特和外尔的思想影响，还到哥廷根大学任过希尔伯特的助手，钱学森的老师冯·卡门是在哥廷根取得博士学位的。顺便提一下，这位大数学家发现当时物理学上出了很多大的成果如相对论和量子力学，但是这些物理学家的数学功力明显不足，因此有一段时间带领他的学生们研究过物理学，并独立发现了广义相对论，只是不好意思和物理学家争功劳，将广义相对论的功劳全部让给了爱因斯坦。<br>广义相对论相对于这位大数学家在数学上的贡献，其实是算不了什么的，只是由此可看出这位大数学家品格的高尚之处。如果再去看看牛顿之流的人物的品行，整天和莱布尼茨、虎克等人争功劳，利用自己的优势地位打压他人，甚至闹得上法庭，和这位希尔伯特先生比起来，简直就是个小丑。<br>说到这里，你可能对这位大数学家“希尔伯特”有了一些初步映象，感觉到了他的重要性，不过他在数学上的主要成就可不是几句话说得清楚的。首先，他是一位集大成者，精通当时数学所有分支领域，在数学的各个领域都有较大的贡献，当然这些成就只能让他成为一个大科学家，不能带他进入这层楼。事实上这位“希尔伯特”解决的任何一个数学问题都够不到这层楼的高度，那么他怎么混到这层楼来了呢？<br>话得从1900年说起，当时还很年轻的希尔伯特在当时的世界数学大会上做了一个报告，高屋建瓯地提出了著名的23个未解决的数学问题，然后整个二十世纪上半期，全世界的数学家们都在这23个问题的指导下展开研究，直到现在仍然有许多数学家受这23个问题的指导在进行研究。例如我们熟知的哥德巴赫猜想，就属于其中第8个问题素数分布的一个子问题。<br>如果用“高瞻远瞩”来形容这位大数学家的话，那么这个世界上恐怕没有第二个人再配得上“高瞻远瞩”这四个字，不论是欧拉、高斯、牛顿、爱因斯坦还是被誉为最有才华的数学家伽罗华，概不例外。<br>虽然那23个问题是归纳总结出来的，并不全是原创，但是其中有不少问题是可以上升到哲学的高度，引起深度思考的。可能大多数人都会觉得希尔伯特是进不到这层楼的，我们知道提出问题的人和解决问题的人是一样伟大的，何况他提出的问题是如此之多，基于这点，个人觉得应该让希尔伯特跨进这层楼的门槛里。<br>看完这位希尔伯特的成就，你可能会觉得对你的世界观并没有产生任何影响。确实如此，他提出的问题不是用来影响你的，而是用来影响其他大科学家和大哲的，下面再来说说另一位对他提出的23个问题中的第2个问题有杰出贡献的大哲，你就会感觉到大哲们的成果的威力了。</p>
<p>2、哥德尔 (1906~1978)</p>
<p>这位大哲的名字叫“哥德尔 (G?del) ”，你可能从来也没有听说过这个名字，即使你读了一个数学系的博士学位，如果你的研究方向不和这位大哲对口的话，你也不一定了解这位大哲的成就，更不知道他的成果对我们这个世界有何意义。<br>简单地说，这位大哲20多岁时就证明了两个定理，一个叫做“哥德尔完全性定理”，另一个更重要的叫做“哥德尔不完全性定理”。你也许会觉得奇怪，第9层楼的成就就已经上升到了公理的高度，这种证明定理的事情不是学者和大师们做的事情吗？怎么能比第9层楼的成就还高呢？下面就来简单说一下这两个定理的含义，你就会明白这属于系统级的定理，绝不是普通的定理和公理所能比拟的。<br>“哥德尔完全性定理”证明了逻辑学的几条公理是完备的，即任何一个由这些公理所产生出的问题，在这个公理系统内可以判定它是真的还是假的，这个结论表明了我们人类所拥有的逻辑思维能力是完备的。这条定理并不能将其带入这层楼来，带其进入这层楼的是另一条定理。<br>“哥德尔不完全性定理”是在1930年证明的，它证明了现有数学的几条公理（ZF公理系统）是不完备的，即由这些公理产生出的问题，无法由这几条公理判断它是真的还是假的。例如希尔伯特23个问题中的第1个问题，也就是著名的康托尔连续统假设，哥德尔在1938年证明了现有公理系统中不能证明它是“假”的，科恩（Cohen，或许也可以称得上是“半”个大哲）在1963年证明了现有公理系统不能证明它是“真”的。最有趣的是，即使你将某个不可判定的问题，作为一条新的公理加入进去，所组成的新的公理系统仍然是不完备的，即你无法构造一个有限条公理的系统，让这个公理系统是完备的。<br>也许你仍然无法理解上面这段话的含义，不妨先说一下它对我们现实世界的影响。你可能知道1936年出现的图灵机是现代计算机的理论模型，如果没有哥德尔不完全性定理的思想，图灵机什么时候能出来是很难说的，所以这位哥德尔可以算作计算机理论的奠基者的奠基者。计算机对我们这个世界产生的影响比原子弹大了多少，我想不用我说大家也都清楚。当然，对现实世界的影响只能把哥德尔同图灵等人一样划到大科学家那一层去，能进入这层乃是另有原因。<br>可能你看过《未来战士》、《黑客帝国》、《I，Robot》之类的科幻电影，于是你产生制造一个和人一样或者比人更高一级的智能机器人的想法，这就引入了一个达到哲学高度的问题，“人到底能不能制造出具有和人一样的思维能力的机器来？”。<br>我只能告诉你，“你的愿望是良好的，但现实是残酷的”。如果你仔细思考一下不完全性定理的含义，并结合现代计算机所具有的能力分析一下，你会发现这个问题的答案暂时是否定的。如果你想造出和人一样思维能力的机器，那么你需要去好好学习这位大哲及其后续研究者的成果，并在他们的基础上有新的突破才行。<br>为了说明这位大哲所研究领域的重要性，这里顺便再讨论一个我们日常争议不休的问题，那就是孔夫子的“人之初、性本善”以及西方认为“人之初、性本恶”的观点孰优孰劣的问题。可能有许多人发现西方社会现在领先我们，于是就认为“性本恶”是对的，“性本善”是错的，中国应该抛弃以前的旧思想，改用西方的思想。当然也有一些老学究们，认为中国的人文思想是领先于西方的，自然而然地认为“性本善”是对的，“性本恶”是错的。<br>如果你学过大哲用过的公理化的分析方法，你就知道一套系统的多条公理间只要不会推导出矛盾的地方，即可以自圆其说，那么它可以看作是对的。这样你可以很轻易地给这个问题下一个结论，即“性本善”和“性本恶”是对等的，不存在孰优孰劣的问题，更不存在谁对谁错的问题。只要你不同时将“性本善”和“性本恶”放入一个系统内，那么是不会有问题的，甚至你也可以认为“人之初、既无善、亦无恶”，或者认为“人之初、部分善、部分恶”，都是可以自圆其说的，所以我们的老祖宗提出的思想并没有问题，之所以落后乃是其他原因造成的。这个问题其实在高斯所处的时代就有了结论，那时有人提出了非欧几何，即平行线公理问题，有人认为过一点可以作多条平行线，还有人认为平行线在无穷远点是相交的，和欧氏几何关于过一点只能作一条平行线的公理都是矛盾的，但是他们各自的系统内推导出的结论都是正确的。<br>上面说的只是对哥德尔不完全性定理的一些粗浅解析，实际上如果深入思考一下它的含义的话，你会发现它对物理学等许多学科有重大影响，包含的道理实在是深刻，远非一般的思想所能比拟，有兴趣者不妨“google”或“百度”一下“哥德尔”。或许只有我们的老祖宗“老子”提出的哲学思想，深度可以有得一比。<br>哥德尔不完全性定理也给那些认为科学是严谨的人当头一棒，原来连数学这样的纯理论学科都是不严谨的，其他学科就更不用说了。<br>至此，已经说完数学上的大哲，下面不妨再看看物理学上的大哲，物理学上好像只出过一位叫“海森堡”的大哲（注：由于本人对物理学不甚了解，不知道“霍金”够不够得上大哲的称号）。</p>
<p>3、海森堡 (1901~1976)</p>
<p>海森堡这个名字相信没有几个人不知道的，大部分人在学习物理时都学过他的“测不准关系”，也就是因为这个“测不准关系”，海森堡爬到了第十层楼。<br>如果你看过《时间简史》和《霍金讲演录－黑洞、婴儿宇宙及其他》，你也许已经了解测不准关系的威力，所以这里不想做过多的讨论，只谈一些和本土产生的哲学思想相关的东西。<br>首先看看争论了几千年，并且现在仍然有人在争论不休的“宿命论”问题。霍金认为，只要这个宇宙有一个初始状态，粒子的运动是按照一定物理定律进行的（比如相对论、量子力学属于这些物理定律的一部分），那么所有的粒子运动轨迹将是确定的，然后只要你承认唯物论，即精神是由物质决定的，那么宿命论就是“对”的。当然由于测不准关系的存在，对人而言，又是无法准确预测的，因此也可以将其看作是“不对”的。简单的说，可以认为宿命论是“对”的是绝对的，宿命论是“不对”的是相对的。<br>可能上面这段话你现在仍然难以理解，或许你又觉得你的命运并不是上天注定的，而是可以通过自己的努力可以改变的。我要告诉你的是，你在想什么也是事先已注定的，包括你在预测本身也是事先注定的，因为大脑思考问题最终是基本粒子运动的结果，而这些粒子的运动必然要遵循物理定律进行，所以你会不会努力，想不想努力，包括你在想你该不该努力这件事本身也是事先注定的。顺便说一下，你现在正在看这篇文章，可能正在想这个宿命论问题值得怀疑，或者觉得写得不够好，准备砸个板砖上来；或者你在想这篇问题写得有点意思，准备看完后转给朋友看一看；又或者你看到这里，觉得很累了，准备休息一下；…；这些都是上天事先就注定的。从你自身的相对角度看，因为你事先不知道后来会发生什么，也可以认为不是事先注定的，可能这句话有些不好理解，不妨好好理解前面说过的公理化思想。<br>如果你没看过《霍金讲演录－黑洞、婴儿宇宙及其他》，你可能会觉得很惊讶，宿命论历来不都被认为是唯心论吗，怎么由唯物论推导出了宿命论呢？现实就是这样和你开了一个大的玩笑，不过这个玩笑也是事先注定的。如果你再仔细用公理化的方法思考一下唯物论和唯心论的矛盾性，就像前面分析性善论和性恶论一样，你会发现唯物论、唯心论不一定就是冲突的，矛盾的双方是可以统一的，只要你不要同时将唯物和唯心放进同一个系统中就行。<br>当然也有聪明者仍然会怀疑宿命论问题的正确性，因为这里有一个前提条件，即宇宙要有一个初始状态。宇宙有没有初始状态，我们并不知道啊，虽然有大爆炸学说，但那也只是假说而已，并没有得到确证，有些人就认为宇宙是一直都存在的。这样看来似乎你又有合理的理由在怀疑宿命论了，不过我仍然要告诉你，你现在在怀疑宿命论仍然是事先注定的，不相信的话就来看看下面的分析。<br>虽然宇宙的初始状态值得怀疑，但是这个宇宙至少已经存在了一段时间，这点我想是毋庸置疑的。我们可以在我们已知的宇宙存在的这段时间内，任意取一个时间点t0，那么在这个时间点t0上，所有的粒子都有一个运动状态。在时间点t0之后的时间里，由于粒子运动是按照物理定律进行的，因此粒子运动轨迹由时间点t0的状态决定。说白一点，如果取100年前的一个时间点作为t0，那么现在的所有粒子运动状态100年前就已经确定了，如果取10000年前一个时间点作为t0，那么最近10000年内所有粒子运动的轨迹在10000年前就确定了，当然，你可以取更早的时间，比如100亿年前的时间点。<br>总之，现在你会发现宇宙有没有初始状态并不会影响宿命论的正确性，所以这个世界的一切都是注定的。只不过由于粒子间相互影响过于复杂，我们无法知道这些粒子的运动轨迹而已。当然，如果将测不准关系用上的话，那么就是这个运动轨迹对人来说是无法准确预测的，所以不妨开个玩笑：“算命先生经常算得不准大概是测不准关系的缘故吧”。<br>如果你再深入思考一下测不准关系，你会发现这是一个测量系统的问题。由于宿命论的存在，这个世界本身实际上是确定的，是“准“的，之所以测不准乃是我们人类所具有的测量能力依赖于基本粒子造成的。所以我在前面说宿命论是“不对”的是相对的，它是相对于我们人类的测量能力而言的。根岑（Gentzen，曾任希尔伯特的助手）在一个更强的系统内证明了ZF系统内的问题都是可判定的，从一个侧面说明这个世界本身是确定的。（注：它和哥德尔不完全性定理并不矛盾，由于数学上的复杂性，这里就不详细解释了）<br>不妨再想想我们老祖宗提出的“是庄周梦见了蝴蝶？还是蝴蝶梦见了庄周？”，“风动？幡动？还是心动？”之类的问题，当然以前你都认为这是纯粹的唯心主义，甚至认为是封建糟粕，但是如果结合测不准关系的内涵，再结合前面所说的公理化分析方法进行分析，估计你现在不敢轻易地下结论。<br>也许到现在你仍然无法理解为什么把大哲们划在了大科学家的上一层，你可能仍然觉得万有引力、相对论等成果是最伟大的。下面就来谈谈为什么大哲比大科学家高一层。<br>如果把人类在现有能力情况下，将来所能够拥有的知识总集看成是一个集合A，人类现在已有的知识总集看成是集合B，显然，集合B只是集合A的一个子集，并且是很小的一个子集。牛顿力学、相对论这些理论只能算作集合B里的一个子集，相对于集合A，只能算作是沧海一粟。 换句话说，在人类现有能力可做的事情集合中，牛顿力学和相对论等理论给出了详细的办法让你可以做其中的一些事情，当然剩下的更多的事情是牛顿力学和相对论所无法解决的。<br>哥德尔不完全性定理和测不准关系的意义在于，它指出集合A的范围，即将人类现有能力发挥到极限的情况下，那些事情是你能做到的，那些是你不能做到的。当然，它并没有给出具体的方法让你去做你能做到的事情，它只是告诉我们我们人类现在发现的能力所能达到的极限。或许将来发现人类有其他新的未发现的能力，那么这个极限就被打破了。比如将来能发现不依赖于基本粒子的其他测量方法，并且测量过程中不会改变其他粒子的状态，那么测不准关系就被打破了。<br>看到这里，估计你已经发现了一些秘密，科学兜了一大圈，最终还是回到了哲学，也就是我们所认为的玄学上。同时你也会发现，我们老祖宗提出的所谓玄学，原来和现代科学是相通的，并非象某些人想像的那样全是糟粕。如果有人认为西方现代暂时领先我们，进而就认为西方古代就已经超越我们，我们老祖宗就已经落后西方，他们的思想都是糟粕的话，那么我认为他可能犯了崇洋媚外的毛病。我不得不化用一句周杰伦在春晚上的歌词送给他：“你不妨抓一副我们祖传的中医良方，治一治你那崇洋媚外的内伤”。顺便告诉他一下，中医用的阴阳五行理论，它的前提假设就是宿命论。<br>上面说的这几位大哲的成果，可能对你的世界观会有很大的影响，于是你可能会羡慕起这些大哲们的成果来。如果你有大志的话，你会希望有朝一日你也能变成大哲，但是你发现上面的大哲是研究数学和物理学的，而你是学计算机的程序员，那么是不是没有机会变成大哲呢？<br>如果你能将NP难题给彻底解决掉，意味着计算机内的计算的奥秘基本被揭开，或许你可以进到这层楼来；或者你能发现另外一套计算机可以理解的数学公理系统，并且这个公理系统是完备的，那么计算机取代人类进行思维的一个必要条件就满足了，计算机将具有真正意义上的“逻辑思维和推理能力”，你可以轻松地进到这层楼来。如果你发现了新的方法可以打破测不准关系，同样你也可以轻松地进到这层楼来。<br>如果你能彻底揭开人类抽象思维的奥妙，并让计算机懂得了如何创建抽象，具备抽象思维能力，那么也就具备了“设计能力”，可以取代人类进行各种设计了，你也可以轻松地进到这层楼来。顺便说一下，如果你对软件设计有真正深刻理解的话，就会明白这不是在写科幻小说。对此感兴趣者，不妨好好地研究一下程序切片方面的技术，会让你对软件设计和测试等方面的理解有质的提高，或许有一天你能打开这扇大门。<br>当然，计算机要完全取代人还有其他必要条件，后面还会提及。<br>值得一提的是，虽然第10层楼是本文中所写的最高层，但是大哲们并没有觉得他们到了顶层，他们通常都还会努力寻找通往更高一层的楼梯。如果你也有成为天下第一的想法，那么你或许会想要做什么事情才能超越大哲们的成就，当然，这都得依赖于找到更高一层楼的楼梯。<br>个人认为，再往上一层楼的楼梯是通往天堂的道路，也就是说第11层楼的名字叫“天堂”，是“上帝”住的地方，而不是人住的地方。如果将来某天有人能爬到天堂的话，那么他已经不是人了，而是由人变成了“上帝”。<br>你也许会怀疑这个世界到底有没有“天堂”，“上帝”是否根本就不存在，我也很有同感。因此有必要再写上一段文字，讨论一下“上帝”的问题。如果你想了解天堂的奥妙，有没有办法让你变成“上帝”，不妨看看继续往下看看第11层楼的玄妙。注意我这里用的是“玄妙”二字，因为上帝在大部分人眼里估计都是“玄之又玄”的东西。</p>
<p>第11层 上帝</p>
<p>看了上面的小标题，你可能会觉得奇怪，这篇文章不是讲“程序员的十层楼”吗？怎么冒出了第11层来了？<br>其实这并不矛盾，程序员确实只有十层楼，因为爬到第11层时，已经变成上帝，不再是程序员了；所以超出10层楼本身并不重要，关键的问题是看你有没有能力变成上帝。</p>
<p>1、谁是上帝？</p>
<p>菜鸟们认为Linus Torvalds是程序员中的上帝，看完了前面各层楼的介绍，此时再看到这句话，相信你要忍不住在心里笑起来。当然，你会不会笑起来是事先注定的。Don Knuth也不是上帝，他离上帝还有三层楼的距离。即使是大哲们，他们离天堂也还差一层楼，因此这个世界上有史以来还没有任何一个人变成过上帝。<br>我们感兴趣的是，将来会不会有人爬到比大哲们更高的楼层上，变成了上帝。<br>要变成上帝，你得有上帝一样的能力，上帝会造人，你会吗？<br>你也许会怯生生地问：“我可以和爱人生小孩，算不算造人？”，你可能还会理直气壮地说：“现在生物学上都可以克隆人了，早就有人掌握了造人的方法”。<br>事实上克隆人需要有人的体细胞，必须要先有人才会有体细胞。上帝造人时，这个世界上并没有人，是从无生命的物质“尘土”中创造出的人。因此，用最原始的方法生人和克隆人都是从有生命信息的物质中生人，不能算作造人。<br>这样看来，你根本不会造人，不过我可以告诉你一个“玄方”，让你有机会学会如何造人。<br>如果你揭开了人类情感的奥秘，让计算机也可以拥有和人类一样的情感，那么计算机将可以理解人类的需求，具有了“情商”，将具有完整的和人一样的能力。此时，人类进化到了机器人，科幻小说将变成现实，也就是说你已经掌握了真正的造人能力，晋升为“上帝”了。<br>未来到底有没有人能变成“上帝”，人能不能进化到机器人，这是宿命论中事先注定了的。说到这里，不妨再告诉你一个打破宿命论的方法，这个方法就是你要爬到比上帝还要高的楼层。<br>“还有比上帝还高的楼层？”，你可能会第1时间内冒出这个问题，其实我也有同样的怀疑。因此在写第12层楼前，有必要弄清楚它到底存不存在，即你可不可以骑到上帝的头上的问题。</p>
<ol start="2">
<li>骑到上帝的头上？</li>
</ol>
<p>为了解决是否可以骑到上帝的头上这个问题，不妨先假设存在比上帝高的楼层，也就是存在打破宿命论的方法。<br>宿命论的本质原因是因为时间是单向运行，不可逆转造成的。如果你找到一种可以使时间逆转的方法，那么你就打破了宿命论，爬到了比上帝还高的楼层。<br>看到这里，你也许会摆脱刚才陷于宿命论的困惑情绪，变得充满希望般高兴起来。不过，如果你的逻辑思维能力足够好，仔细思考一下，会发现存在一个逻辑上的悖论。<br>在你找到时间逆转的方法之前，显然这个世界仍然是需要服从宿命论的，也就是说你能不能找到打破宿命论的方法是事先注定的。假设你在某个时间点t0处找到了打破宿命论的方法，你在打破宿命论后，想利用时间逆转的方法回到某个时间点t2。下面来看看你到底能不能回到时间点t2。<br>取位于t0和t2之间的任意一个时间点t1，你在回到时间点t2之前，必须先经过时间点t1，考虑你到达t1的那一时刻，由于t1比t0要早，这个时间点上你还没有找到时间逆转的方法，所以到了时间t1点后，你无法再使用时间逆转的能力回到时间点t2去，所以你永远也回不到时间点t2，由于时间点t2是任意取的，因此，你永远也无法使时间逆转，或者说你根本就没打破过宿命论，这与你在时间点t0打破了宿命论产生了矛盾。<br>上面这段话看起来似乎有点像“人永远迈不出一步”的诡辩一样，你可能会想返回到时间点t1时，仍然可以拥有时间逆转能力啊。不过你又会发现一个新的问题，时间点t1本来是没有时间逆转能力的，现在又认为时间点t1又有时间逆转能力，那时间点t1到底是有还是没有时间逆转能力呢？或者说在时间点t0前，宿命论注定了时间点t1是没有时间逆转能力的，现在你又认为时间点t1具有时间逆转能力，那么这两个时间点t1究竟是不是同一个时间点？如果不是同一个时间点，说明你没有回到过去；如果是同一个时间点的话，岂不是自相矛盾吗？<br>为了说得更形象一些，不妨假设你坐一艘超光速飞船，准备从时间点t0回到时间点t2去，假设你回到t2后，随着时间的流逝，又达到了时间点t0，如果这时你又再次坐超光速飞船返回时间点t2，那么一个值得思考的问题就出现了，“你在时间点t2能不能看到上次返回时间点t2的飞船？”<br>如果回答不能看到飞船，那么上次返回的飞船那里去了呢？显然很难解释通。如果回答能看到飞船，那么你可以到达时间点t2后，下次时间到达t0时，你又坐飞船返回t2，这次你将可以看到上两次的两艘飞船。如果这样一直循环下去，最后你会发现你可以在时间点t2看到无穷多的飞船。用程序员的术语说，叫做“程序陷入了死循环”，最后系统必然会出现“Out of Memory”现象而崩溃。<br>当然，你也可以认为有其他的方法，不需要飞船，可以一次性从时间点t0直接跳跃到时间点t2，并不需要经过时间点t1。下面不妨来分析一下这个方法是否可行。<br>既然是直接跳跃到时间点t2，那么你必然是在一个无穷小的时间里出现在时间点t2的某个空间里，例如你要在时间点t2回到某个广场上。首先说明一下为什么是无穷小的时间里出现的，因为如果不是无穷小的时间里出现的话，那么必然可以取到一个时间点t1，会导致前面所说的时间点t1上出现悖论。<br>你在广场上出现的时，广场上的空气必然要为你让开空间，而这是在无穷小的时间里完成的，那么很容易推导出你周围的空气获得的加速度和速度都是无穷大，因而它具有的动能也是无穷大，无穷大的能量和无穷大的速度意味着什么？一只鸟都可以将飞机撞下来，如果宇宙是有限大的话，它可以让这个宇宙炸毁无穷次；即使宇宙是无限大，它也足以让宇宙炸毁一次。宇宙都毁灭了，又何来的时间？还能说你回到了时间点t2吗？<br>也许上面说的这些你仍然难以相信，不妨再说得更现实一些，假设你要回到100年前的一个时间点，这100年中，天上有多少流星湮灭了？有多少新星生成了？宇宙膨胀了多少？你有能力让湮灭的流星复原、生成的新星重新返回未生成前的状态，膨胀的宇宙收缩回去吗？如果这些东西的状态没有回复到100年前，又怎么能说明你回到的是100年前的时间点呢?<br>根据上面的推导和分析，个人认为使时间逆转的方法是不存在的，所以第12层楼是不存在的，自然没有人可以骑到“上帝”的头上。<br>宿命论将在有时间的时间里永远统治这个世界。</p>
]]></content>
      <tags>
        <tag>杂七杂八</tag>
      </tags>
  </entry>
  <entry>
    <title>最迷茫的一群人……</title>
    <url>/2011/04/06/group-of-people-lose-their-way.html</url>
    <content><![CDATA[<p>前言：平时日记都是在我的人人网和QQ空间上发布，毕竟里面涉及点不想让所有人看的东西，但是今天这篇很中性，所以就晒出来在博客上，也为最近没啥更新的博客填充点东西。</p>
<p>今天从老蒋师哥的人人那里看到了一篇文章《<a href="http://www.domyself.me/archives/1237.html">程序员的十层楼</a>》（<a href="http://www.domyself.me/archives/1237.html">www.domyself.me/archives/1237.html</a>我已经转到我的博客里啦，哈哈）。看完后甚是无语，在别人眼里，大家都觉得我的电脑操作水平挺高，但是说实话，我一直不觉得是，尤其是看完这篇文章后，我终于找到了我现在的位置，不到一层的水平而已，而我希望能在40岁前达到第6层的水平，那我就已经很知足了~</p>
<p>今天下午上操作系统，又正好说到了这篇文章中提到过的一个人，迪杰斯特拉（Dijkstra），以及他的两个成就，信号量和PV操作。迪杰斯特拉1930年出生，如果我没记错的话，他是1956年左右提出pv操作和信号量概念的，也就是说，他在26岁就已经达到了第八层科学家的水平。我想这其中除了他可能是个天才，还有自己的努力外，跟学校的教育方法有很大的关系吧。想想我们从小到大接受的教育，那些是在教我们做什么，我不知道，我也不想多说。</p>
<p>另外今天路过创新工场网站的时候，又一次看了遍李开复写给大学生的信。首先，我要说，我每次看这个信的时候，总是很厌倦此人，我想原因就是因为人家的一系列成就自己做不到而眼红，正所谓“羡慕嫉妒恨”就是这样吧。其次，因为有厌倦和讨厌的情绪在里面，所以看他写的每句话总是很抵触，虽然知道这种心理很不健康，但是实在是克制不住，我觉得这个跟从小受到的中国教育应该脱离不了干系。这让我想起来《三傻大闹宝莱坞》中男主人公被virus强行带到课堂上给大家讲课时男一号所做的一切，每个人在听到任务后，想到的第一件事是竞争，而不是知识给我们带来的乐趣是什么，每个人的大脑都被“竞争”所绑架，然后压力就越来越大，进而心态就开始变化，最后就出现了“羡慕嫉妒恨”。</p>
<p>别的不想说，我只是感到我在大环境面前貌似只能选择去屈服，除非我后半辈子衣食住行无忧，也尽管我一直在提醒自己做自己喜欢做的事情，甚至我的博客域名都是domyself.me。</p>
<p>也许中国大学生可能是世界上最迷茫的一群人吧……</p>
]]></content>
      <tags>
        <tag>随笔</tag>
      </tags>
  </entry>
  <entry>
    <title>最近对于博客的一些变动</title>
    <url>/2011/04/08/some-change-of-my-blog.html</url>
    <content><![CDATA[<p>由于前几天的未知错误，导致博客中断了几天。重新开张后的博客，做了以下的改动：<br>1.安装“春菜”插件（插件安装搜索MP-Ukagaka即可），插件首页：<a href="http://blog.lolily.com/wordpress-plugin-mp-ukagaka.html">http://blog.lolily.com/wordpress-plugin-mp-ukagaka.html</a><br>2.安装了“wordpress连接微博”插件。详见这里<a href="http://www.smyx.net/">http://www.smyx.net/</a></p>
<p>准备新开一个栏目，外文翻译栏目，用来提高一下自己的英语水平。也为了更好的了解最新的动态，毕竟最新的东西都在国外。</p>
]]></content>
      <tags>
        <tag>网站日志</tag>
      </tags>
  </entry>
  <entry>
    <title>博客终于恢复正常了</title>
    <url>/2011/04/06/my-blog-recovery.html</url>
    <content><![CDATA[<p>4月2号博客出现了未知的错误，导致一直无法访问。现在网站已经恢复正常了，但是数据是3月24号的，丢失了将近20条评论和几篇博文，遗憾啊……</p>
]]></content>
      <tags>
        <tag>网站日志</tag>
      </tags>
  </entry>
  <entry>
    <title>【日记】2011.4.26 记事狗ntalker插件测试版终于是完工了</title>
    <url>/2011/04/25/ntalker-over.html</url>
    <content><![CDATA[<p>这几天一直憋着没写日记是有原因的，因为一直在开发ntalker插件(测试地址：<a href="http://999981.tk/">999981.tk</a>)。下面就说说开发的事情。</p>
<p>总体来说，对于此次的开发我不是很满意的，一共就需要写两个文件，加起来的代码量不足1000行，只是实现了最基本的聊天功能，并且其中70%是来自于ntalker提供的demo程序和ntalker提供的ucenterhome的插件，效率以及抗压能力太差了。主要是效率太低了，几乎每天都在马不停蹄的思考，阅读，编写，但是还是用了4天。本来以为3天的时间会很轻松完成任务的，但是预估错了……就现在这个状态，上社会上怎么能有竞争力呢？！</p>
<p>总结以下原因：</p>
<p>1、对于一些基本概念的理解还是不到位。</p>
<p>由于刚开始学C++，所以对于PHP的面向对象编程也不是很懂，这就导致了在阅读记事狗微博的源程序时耗费了很多时间，即使是现在对于一些概念的理解还是不够深入，比如说上节课C++老师刚重点强调的变量的作用域。</p>
<p>2、时间利用率不高。</p>
<p>工作期间开着QQ基本上就是个错误，即使自己隐身但是还是有很多的消息来影响你，因为貌似现在都知道我隐身了……所以说，以后再开发东西的时候，果断QQ离线！另外，在baidu未知知识的时候，总是被一些其他的信息所吸引，这个以后要注意！还有通宵并不总是明智的选择，当你没有思路的时候，又很困，那就没必要再通宵了，好好的去睡个觉。只有在你思路很清晰或者灵感来的时候，可以考虑通一下宵，借着热乎劲把东西写出来。</p>
<p>3、自我调节能力差。</p>
<p>遇到卡壳的问题的时候，不能一直在电脑前傻坐着，应该换个空间呆一会。</p>
<p>4、基础的一些类似算法，SQL等东西的掌握很不牢固，这条很第一条都差不多一个意思。之所以再写一编，就是因为这次这个原因对于我的触动真的是太大了！得好好反思和继续学习啊！</p>
<p>由于现在程序并不是很完善，我打算再完善一下后放出来插件程序供大家下载使用，还请各位有需要的朋友随时关注本博客～</p>
<p>如果时间不紧的话，我还打算把ntalker做到wordpress上来，这个先这么计划着吧～</p>
<p>调整两天后，进入新的压力测试！</p>
]]></content>
      <tags>
        <tag>DM实验室</tag>
        <tag>后端</tag>
      </tags>
  </entry>
  <entry>
    <title>今天新发现3美刀每月的便宜VPS</title>
    <url>/2011/04/24/vps-3-dollar.html</url>
    <content><![CDATA[<p>今天在网上乱转的时候，发现了一个3美刀每月的便宜VPS。一直想试试VPS，看看是个什么效果，并且也想写个机器人放到VPS上运行运行看看，这次是有机会了，等这个空间到期后，我准备买一个试试。</p>
<p>他的具体配置如下：</p>
<pre><code>磁盘空间20GB RAID10
内存128MB
突发内存256MB
月流量300GB
1个独立IP
SolumsVM控制面板
</code></pre>
<h1 id="大家可以点击：这里去看看"><a href="#大家可以点击：这里去看看" class="headerlink" title="大家可以点击：这里去看看"></a><strong>大家可以点击：<a href="http://www.vpszz.net/client/aff.php?aff=301">这里去看看</a></strong></h1>]]></content>
      <tags>
        <tag>网站日志</tag>
      </tags>
  </entry>
  <entry>
    <title>C++的指针和数组的复习</title>
    <url>/2011/04/14/c-plus-pointer.html</url>
    <content><![CDATA[<p>今天的C++实验课上的实验之一是调试并运行程序，然后分析结果。继续关于指针和数组的复习。通过该实验，我对于指针又有了更进一步的理解。下面我们就来看一下，对于指针的理解，都写在了程序的注释部分了。我自己的总结就是，看到指针时，先看看这是几维的，然后分清楚+1是对第几维做的，再然后看好*是对哪一部分进行降维操作的，最后看看是输出的地址还是值。</p>
<figure class="highlight plaintext"><table><tr><td class="code"><pre><span class="line">#include &lt;iostream.h&gt;</span><br><span class="line">int a[][3]=&#123;1,2,3,4,5,6,7,8,9&#125;;</span><br><span class="line">int *p[]=&#123;a[0],a[1],a[2]&#125;;</span><br><span class="line">int **pp=p;</span><br><span class="line">void main()</span><br><span class="line">&#123;</span><br><span class="line">  int (*s)[3]=a,*q=&amp;a[0][0];</span><br><span class="line">  for(int i(1);i&lt;3;i++)</span><br><span class="line">    for(int j(0);j&lt;2;j++)</span><br><span class="line">      &#123;</span><br><span class="line">	cout&lt;&lt;*(a[i]+j)&lt;&lt;&#x27;,&#x27;&lt;&lt;*(*(p+i)+j)&lt;&lt;&#x27;,&#x27;&lt;&lt;(*(pp+i))[j]&lt;&lt;&#x27;,&#x27;;</span><br><span class="line">	cout&lt;&lt;*(q+3*i+j)&lt;&lt;&#x27;,&#x27;&lt;&lt;*(*s+3*i+j)&lt;&lt;endl;</span><br><span class="line">      &#125;</span><br><span class="line"></span><br><span class="line">  cout&lt;&lt;*s&lt;&lt;&#x27;,&#x27;&lt;&lt;s[0]&lt;&lt;endl;</span><br><span class="line">&#125;</span><br><span class="line"></span><br><span class="line">/*</span><br><span class="line">(1)运行结果分析</span><br><span class="line">4,4,4,4,4</span><br><span class="line">5,5,5,5,5</span><br><span class="line">7,7,7,7,7</span><br><span class="line">8,8,8,8,8</span><br><span class="line">Press any key to continue</span><br><span class="line">*(a[i]+j)表示第i+1+j行第一列元素</span><br><span class="line">*(*(p+i)+j):p是二级指针，p+i表示第i行地址，也是二级指针，通过*降维，然后加j表示第i行第j+1列元素地址，再用*降维</span><br><span class="line">(*(pp+i))[j]：(*(pp+i))的效果其实就是a[i],</span><br><span class="line">*(q+3*i+j):q是一维指针，所以该式表示的是从q指向的元素向后移动3*i+j个元素</span><br><span class="line">*(*s+3*i+j)：s和p是一样的，*s表示的是一个一维的数组的首地址，即*s和q是等价的。</span><br><span class="line"></span><br><span class="line">(3)</span><br><span class="line">a[0]+1表示的是第一行第二列的元素的地址，因为a[0]是一个一维的指针，即a[0]表示的是从数组的第一个元素开始的一个一维数组的首地址</span><br><span class="line">*(p+1)+1表示第二行第二列元素的地址，因为p是二维指针，p+1表示的是二维中的第一维加一，即p+1表示的是第二行元素，通过*进行降维后再加一即为第二列的元素地址</span><br><span class="line">*(pp+1)[1]表示第二行第二列元素</span><br><span class="line">q+3表示第四个元素的地址，即4的地址</span><br><span class="line">*s+3表示第4个元素的地址</span><br><span class="line"></span><br><span class="line">(4)</span><br><span class="line">p是指针数组，s是指向数组的指针。p[]是一个数组空间的，只不过这个数组的每个空间是用来存储的地址的，而s是一个指针，指向的是一个数组空间。</span><br><span class="line"></span><br><span class="line">*/</span><br></pre></td></tr></table></figure>

]]></content>
      <tags>
        <tag>编程语言</tag>
      </tags>
  </entry>
  <entry>
    <title>c++中指针数组的研究</title>
    <url>/2011/04/08/c-plus-point.html</url>
    <content><![CDATA[<p>上次的C++实验课第二个题，我一直在调试，今天终于搞出来了。下面我把整个过程写一写。<br>题目：</p>
<p>【题目2】编写程序，输入十个国家名称用字符指针数组实现排序输出。</p>
<p>【要求】<br>    ① 程序的功能是实现字符串的排序输出，例如，输入10个国家的名字分别是”China”,”USA”,”Australia”,”Austria”,”Brazil”,”Japan”,”England”,”Canada”,”Italy”,”France”，则排序后输出的结果为<br>    “Australia”,”Austria”,”Brazil”,”Canada”,”China”,”England”,”France”,”Italy”,”Japan”,”USA”<br>    ② 设计一个独立的函数ccmp，实现相应的功能<br>    ③ 函数调用时，参数通过字符指针数组传递<br>    【提示】<br>    ① ccmp函数可按如下方式定义：<br>    void ccmp(char * a[]);;<br>    其中，字符指针数组a中的指针分别指向10个国家的名称字符串<br>    ② 程序可用中的 <code>strcmp(char *s1,char * s2)</code> 函数对两个字符串的先后顺序进行判定，当s1&lt;s2时，返回值&lt;0，当s1&#x3D;s2时，返回值&#x3D;0 当s1&gt;s2时，返回值&gt;0</p>
<p>我写的成品代码如下：</p>
<figure class="highlight plaintext"><table><tr><td class="code"><pre><span class="line">#include&lt;iostream&gt;</span><br><span class="line">#include&lt;string.h&gt;</span><br><span class="line">using namespace std;</span><br><span class="line">void ccmp(char *a[]);</span><br><span class="line">int main()</span><br><span class="line">&#123;</span><br><span class="line">	int i=0;</span><br><span class="line">	char* num[10]; //申请一个指针数组</span><br><span class="line">	char a[][10]=&#123;&quot;China&quot;,&quot;USA&quot;,&quot;Australia&quot;,&quot;Austria&quot;,&quot;Brazil&quot;,&quot;Japan&quot;,&quot;England&quot;,&quot;Canada&quot;,&quot;Italy&quot;,&quot;France&quot;&#125;;//初始字符串</span><br><span class="line"></span><br><span class="line">	for(i=0;i&lt;10;i++)num[i]=a[i];//把字符串数组发给一个指针数组</span><br><span class="line"></span><br><span class="line">	ccmp(num);</span><br><span class="line"></span><br><span class="line">	for(i=0;i&lt;10;i++)cout&lt;&lt;num[i]&lt;&lt;endl;//输出结果</span><br><span class="line"></span><br><span class="line">	return 0;</span><br><span class="line">&#125;</span><br><span class="line">void ccmp(char* a[])</span><br><span class="line">&#123;</span><br><span class="line">	char *temp;</span><br><span class="line">	for(int i=0;i&lt;9;i++)</span><br><span class="line">	&#123;</span><br><span class="line">		for(int j=0;j&lt;9-i;j++)</span><br><span class="line">		&#123;</span><br><span class="line">			if(strcmp(a[j],a[j+1])&gt;0)</span><br><span class="line">			&#123;</span><br><span class="line">				temp=a[j];</span><br><span class="line">				a[j]=a[j+1];</span><br><span class="line">				a[j+1]=temp;</span><br><span class="line">			&#125;</span><br><span class="line">		&#125;</span><br><span class="line">	&#125;</span><br><span class="line">&#125;</span><br></pre></td></tr></table></figure>

<p><strong>出现的第一个问题是</strong>，对于指针数组的理解刚开始有些模糊，不过现在已经算是明白了。先说一下什么是指针？指针就是一个存储地址的变量。比如说我们申请一个存储整型数据的空间来存储整数，那么这个空间的地址就是一个整型指针，申请方法如下：</p>
<figure class="highlight plaintext"><table><tr><td class="code"><pre><span class="line">//这里申请了一个整型指针，我习惯把*靠近int书写，这样更容易理解，这个下面会讲到</span><br><span class="line">int* p;</span><br><span class="line">int a=6;</span><br><span class="line">p=&amp;a;</span><br></pre></td></tr></table></figure>

<p>上面这个小段程序，我们可以把变量a理解为一个小房子，这个小房子建设在内存里，而要找到这个房子需要有一个地址，这个地址就是平时我们所说的内存地址，而p也同样也是一个小房子，只是这个房子很特殊，只存储其他普通房子的地址，也就是变量a的地址。指针一直困惑人的地方就是<em>p和p到底是什么意思？其实</em>p在内存里面是没有空间的，也就是说<em>p根本不是房子，p才是房子，就好比一把打开房门的钥匙，只有</em>和p组合在一起成为<em>p，才能读取出p中存放地址所指向空间内的内容（这里就是数字6）。那为什么申请普通变量的时候是<code>int a;</code>而申请指针变量的时候是<code>int *p</code>呢？这里a的地位难道和</em>p不是一回事吗？很显然这不是一回事，但是就是这种书写导致了初学者的混淆，这也是为什么我习惯写成<code>int* p;</code>了，也就是说<code>int</code>和<code>int*</code>不是一回事，而<code>a</code>和<code>p</code>的地位是一样的，都是一个变量，只不过p只能用来存储地址。不知道我罗嗦这么多，大家是否看懂了，不过至少我现在明白了，嘿嘿～</p>
<p>那说完指针，就来看看指针数组。所谓的指针数组，就是一组变量每个变量都是用来并且只能用来存储地址的。在我写的那段程序中，用来存储全部字符串的数组<code>a[][]</code>，第一维维数其实就是字符串的个数，第二维的维数即是每个字符串的最大字符个数。我出现的第一个错误就是在这里出现的。依照上面的分析，那么a[0]的值就是第一个字符串“China”的首字符的地址，如果用cout输出a[0]的话，得到的输出结果就是“China”，因此程序写出来的第一遍中没有那个num指针数组。我在第13行直接写的是  ccmp(a[]);  然后就是一系列的错误，后来发现不能这样写，而是应该把这些字符串的首字母的地址给一个指针数组，然后用这个指针数组进行传值。于是就有了num指针数组。但是在使用num时，又出现了很多错误，但是错误的本质都是相同的，都是出错在赋值运算上。<strong>也就是说从一个变量到另一个变量的赋值时出错，原因就是没有搞清楚你正在使用变量的类型，它里面存储的东西的类型，以及将要用来承接用的变量的类型和它能存储什么样的数据。前前后后调试了很多遍，把每一个变量的每种情形都搞明白了，这里的错误也就解决了。</strong></p>
<p><strong>第二个问题出在了strcmp()的使用上</strong>。最开始第26行，我写的是if(strcmp(a[j],a[j+1]))，也就是没有那个”&gt;0”。依照题目的意思只要a[j]&gt;a[j+1]，那么strcmp的返回值就是大于0的值，那么在if中就是真，但是运行的时候，排序就是不对。这里我插一句我是如何发现问题出现在这里的，下面的代码就是我的调试代码（只粘贴了ccmp函数），注意第8、11、12、13、17行的输出代码。</p>
<figure class="highlight plaintext"><table><tr><td class="code"><pre><span class="line">void ccmp(char* a[])</span><br><span class="line">&#123;</span><br><span class="line">	char *temp;</span><br><span class="line">	for(int i=0;i&lt;9;i++)</span><br><span class="line">	&#123;</span><br><span class="line">		for(int j=0;j&lt;9-i;j++)</span><br><span class="line">		&#123;</span><br><span class="line">			cout&lt;&lt;&quot;wai:&quot;&lt;&lt;strcmp(a[j],a[j+1])&lt;&lt;endl;</span><br><span class="line">			if(strcmp(a[j],a[j+1])&gt;0)</span><br><span class="line">			&#123;</span><br><span class="line">				cout&lt;&lt;strcmp(a[j],a[j+1])&lt;&lt;endl;</span><br><span class="line">				cout&lt;&lt;&quot;a[j]&quot;&lt;&lt;a[j]&lt;&lt;&quot;::a[j+1]&quot;&lt;&lt;a[j+1]&lt;&lt;endl;</span><br><span class="line">				cout&lt;&lt;j&lt;&lt;endl;</span><br><span class="line">				temp=a[j];</span><br><span class="line">				a[j]=a[j+1];</span><br><span class="line">				a[j+1]=temp;</span><br><span class="line">				cout&lt;&lt;&quot;a[j]&quot;&lt;&lt;a[j]&lt;&lt;&quot;::a[j+1]&quot;&lt;&lt;a[j+1]&lt;&lt;endl;</span><br><span class="line">			&#125;</span><br><span class="line">		&#125;</span><br><span class="line">	&#125;</span><br><span class="line">&#125;</span><br></pre></td></tr></table></figure>

<p>最初的时候，我只是添加了第12行的代码，输出了每次循环体中的a[j]和a[j+1]，观察结果发现i&#x3D;0时的所有循环结果输出，“China”字符串一直在a[j]的位置，也就是说它一直都是被当作最大值的。为了验证想法，于是我又添加了第13和17行，又输出了一遍，我的判断被验证了，那么问题就出在了if的判断条件上了。我又添加第11行的代码，发现i&#x3D;0时，这里输出的全是-1，然后我又添加了第9行代码，继续运行，结果使我很疑惑，因为我的概念搞混了。<code>我在写程序的时候，想成了大于0的数代表真，小于等于0的数代表假。直到我开始写这篇文章了，我才反应过来，非0值都是真，只有0才是假（我为我自己学的不牢固感到悲哀啊……=_=）。</code>问题找到，加上”&gt;0”就解决了。</p>
<p>以上即为我的整个实验过程，希望对各位正在学习C的看客有所帮助吧。有理解不到位的地方，还请高人指点一二，小弟不胜感激～</p>
]]></content>
      <tags>
        <tag>编程语言</tag>
      </tags>
  </entry>
  <entry>
    <title>芯片制造商: Alcor(安国) 芯片型号: FC8308</title>
    <url>/2011/05/07/alcor-fc8308.html</url>
    <content><![CDATA[<p>今天花钱买了个教训。之前一直都是无视各种地摊的U盘，知道便宜无好货。最近在一次机房上机后，把我原来的4GB的联想原装U盘给弄丢了，没办法只能去新买一块了。由于知道地摊货不好，即使是门面店也不会有好货，但是因为急用，于是就从学校边上的爱书人店里买了一块SONY 4GB的U盘。</p>
<p>当时买的时候，女老板一直在说这里进货都是正品，各种理由来阐明自己进的货是正品，我也没多少工夫和她磨这个嘴皮子，速战速决就回宿舍了。</p>
<p>回宿舍后就发现了问题。由于我的电脑是使用的win7+ylmf os 3.0的双系统，平时都是在ylmf os下工作，所以回宿舍测试U盘的时候，就是在ylmf下进行的，结果ubuntu不识别……杯具了，换到win7下面，从百度上搜了一个检测软件<a href="http://www.mydigit.cn/chipgenius.htm">Chip Genius（芯片精灵）</a>，检测了一下，显示内容如下：</p>
<p><img src="/upload/2011/05/xinpianjingling-400x316.jpg"></p>
<p>我的天，晕掉了，这个山寨u盘，我又从网上搜到了一条信息，sony人家只有记忆棒，从来没有出过u盘……</p>
<p>于是继续百度，看看能不能解决ubuntu不识别的问题。结果很好，有人也和我一样，并且已经搞定了。思路基本上和我想的是一样的，不过他成功了，那就不需要我再探索了，只要按照他说的做做看就OK了。方法在这里：<a href="http://wenku.baidu.com/view/178d7913a2161479171128b1.html">http://wenku.baidu.com/view/178d7913a2161479171128b1.html</a></p>
<p>杯具的是通过量产工具低格后，4G变1G了…… 鸭梨</p>
<p>还是希望各位以后买U盘的时候能够去专卖店，比如说去联想专卖店买联想的U盘，还有就是真品U盘都有防伪码的，注意包装质量。</p>
]]></content>
      <tags>
        <tag>杂七杂八</tag>
      </tags>
  </entry>
  <entry>
    <title>网站再一次搬家</title>
    <url>/2011/05/02/my-blog-move-host.html</url>
    <content><![CDATA[<p>今天网站再一次搬家啦，并不是因为之前的服务器不好用，而是因为想上手个VPS玩玩，所以正好前一个8元&#x2F;月的服务器空间马上到期，现在入手了一个便宜的VPS。</p>
<p>经过2个多小时的配置，服务器已经可以使用了，并且我还邪恶的下载了挂QQ软件，一口气挂了4个QQ在那上面。</p>
<p>现在的服务器的软件配置如下：</p>
<p>win2003+xampp+一个小ftp服务器软件<br><del>接下来，就要好好学习一下怎样配置和维护服务器了</del></p>
<p>整体来看52元&#x2F;月的VPS速度对于我这样的一个小站完全可以接受，现在就是看看稳定性如何了。</p>
<p>如果大家感兴趣的话，可以来这里看看，<a href="http://vps.03host.com/page.aspx?c=referral&u=12202">http://vps.03host.com/page.aspx?c=referral&u;=12202</a>。</p>
]]></content>
      <tags>
        <tag>网站日志</tag>
      </tags>
  </entry>
  <entry>
    <title>今天手绘的一些表情</title>
    <url>/2011/05/13/my-works.html</url>
    <content><![CDATA[<p>今天闲着的时候手绘的一些表情，现在拿出来跟大家分享一下，希望各位伸手党手下留情能留着我的水印哈，谢谢啦！</p>
<p><img src="/upload/2011/05/1.jpg"></p>
<p><img src="/upload/2011/05/2.jpg"></p>
<p><img src="/upload/2011/05/3.jpg"></p>
<p><img src="/upload/2011/05/4.jpg"></p>
<p><img src="/upload/2011/05/5.jpg"></p>
<p><img src="/upload/2011/05/6.jpg"></p>
<p><img src="/upload/2011/05/7.jpg"></p>
<p><img src="/upload/2011/05/9.jpg"></p>
<p><img src="/upload/2011/05/17.jpg"></p>
<p><img src="/upload/2011/05/19.jpg"></p>
<p><img src="/upload/2011/05/18.jpg"></p>
<p><img src="/upload/2011/05/16.jpg"></p>
<p><img src="/upload/2011/05/21.jpg"></p>
<p><img src="/upload/2011/05/20.jpg"></p>
<p><img src="/upload/2011/05/8.jpg"></p>
<p><img src="/upload/2011/05/10.jpg"></p>
<p><img src="/upload/2011/05/11.jpg"></p>
<p><img src="/upload/2011/05/12.jpg"></p>
<p><img src="/upload/2011/05/15.jpg"></p>
<p><img src="/upload/2011/05/14.jpg"></p>
<p><img src="/upload/2011/05/13.jpg"></p>
<p><img src="/upload/2011/05/24.jpg"></p>
<p><img src="/upload/2011/05/23.jpg"></p>
<p><img src="/upload/2011/05/22.jpg"></p>
]]></content>
      <tags>
        <tag>杂七杂八</tag>
      </tags>
  </entry>
  <entry>
    <title>博客停两周今天终于恢复正常了</title>
    <url>/2011/05/24/blog-move-again.html</url>
    <content><![CDATA[<p>由于我在办理域名转移时遇到了很垃圾的服务商，导致了我的域名转移过程中域名停止解析长达将近两周。现在网站的域名转移已经进入最后的接入商手续办理阶段，等全部结束此次域名转移后，我将详细向大家讲述一下这次的经历，到时候希望大家看后以后能够注意一下。</p>
<p>另外各位使用@domyself.me的各个朋友真是很抱歉，由于我个人之前没有备份过DNS配置信息，另加腾讯的域名邮箱功能的不完善，不得不迫使我把当前的域名邮箱注销掉，然后在24小时之后重新开通。对于近两周@domyself.me域名邮箱的不能使用给大家抱个歉，希望没有耽误大家什么重要的事情！</p>
]]></content>
      <tags>
        <tag>网站日志</tag>
      </tags>
  </entry>
  <entry>
    <title>浅谈JavaScript的回调函数，附实例</title>
    <url>/2011/06/15/js-callback.html</url>
    <content><![CDATA[<p>1、背景<br>Javascript中的回调函数，相信大家都不陌生，最明显的例子是做Ajax请求时，提供的回调函数，<br>实际上DOM节点的事件处理方法（onclick,ondblclick等）也是回调函数。</p>
<p>在使用DWR的时候，回调函数可以作为第一个或者最后一个参数出现，如：</p>
<p>function callBack(result){<br>}<br>myDwrService.doSomething(param1,param2,callBack);&#x2F;&#x2F;DWR的推荐方式<br>&#x2F;&#x2F;或者<br>myDwrService.doSomething(callBack,param1,param2);</p>
<p>2、问题描述<br>最近在使用Dojo+Dwr的时候，碰到一个问题：<br>如果回调函数是属于某个对象（记为obj1）的方法，等到DWR执行该回调函数的时候，<br>上下文却不是obj1。<br>表现的现象就是在回调函数中访问obj1的任何属性都是undefined。</p>
<p>版本：Dojo1.3.1和dwr2</p>
<p>3、模拟问题的代码<br>下面的测试代码可以模拟这个问题：</p>
<figure class="highlight plaintext"><table><tr><td class="code"><pre><span class="line">&lt;html&gt;</span><br><span class="line">&lt;head&gt;</span><br><span class="line">&lt;script&gt;</span><br><span class="line">var context=&quot;全局&quot;;</span><br><span class="line">var testObj=&#123;</span><br><span class="line">context:&quot;初始&quot;,</span><br><span class="line">callback:function (str)&#123;//回调函数</span><br><span class="line">alert(&quot;callback:我所处的上下文中，context=&quot;+this.context+&quot;，我被回调的方式：&quot;+str);</span><br><span class="line">&#125;</span><br><span class="line">&#125;;//创建一个对象，作为测试回调函数的上下文</span><br><span class="line">testObj.context=&quot;已设置&quot;;</span><br><span class="line"></span><br><span class="line">function testCall()&#123;</span><br><span class="line">callMethod(testObj.callback);</span><br><span class="line">callObjMethod(testObj,testObj.callback);</span><br><span class="line">&#125;</span><br><span class="line">function callObjMethod(obj,method)&#123;</span><br><span class="line">method.call(obj,&quot;指定显式对象上下文回调&quot;);</span><br><span class="line">&#125;</span><br><span class="line">function callMethod(method)&#123;</span><br><span class="line">method(&quot;通过默认上下文回调&quot;);</span><br><span class="line">&#125;</span><br><span class="line">&lt;/script&gt;</span><br><span class="line">&lt;/head&gt;</span><br><span class="line">&lt;body&gt;</span><br><span class="line">&lt;a href=&quot;javascript:void(0)&quot; onclick=&quot;testCall()&quot;&gt;调用测试&lt;/a&gt;</span><br><span class="line">&lt;/body&gt;</span><br><span class="line">&lt;/html&gt;</span><br></pre></td></tr></table></figure>

<p>在testCall方法中，我用了两种方式回调“testObj.callback”方法：<br>第一种方式：method(“通过默认上下文回调”);<br>没有指定上下文，我们发现回调函数内部访问context的值是全局变量的值，<br>这说明，执行该方法的默认上下文是全局上下文。</p>
<p>第二种方式：method.call(obj,”指定显式对象上下文回调”);<br>指定obj为method执行的上下文，就能够访问到对象内部的context。</p>
<p>4、研究DWR<br>因为06年使用DOJO+DWR(1.0)的时候，已经遇到过这个问题，当时没做太多功课，直接改了dwr的源代码。</p>
<p>现在用dwr2，于是想先看看DWR是不是对这个问题有新的处理方式，<br>将dwr.jar中的engine.js拿出来，查看了有关回调的相关代码（<code>_remoteHandleCallback</code>和<code>_execute</code>)，<br>发现对回调的处理方式似乎比1.0更简单，没办法将对象和方法一起传过去。</p>
<p>5、做进一步的研究<br>因为这次DWR在项目中的使用太广泛，而且我相信这样的需求应该是可以满足的，于是没有立刻修改源码，</p>
<p>首先，在Google上搜Dojo+dwr，没有查到什么结论，可能Dojo的用户不是太多。</p>
<p>于是又搜”javascript callback object context“，得到一篇文章专门介绍java回调函数的文章：<br><a href="http://bitstructures.com/2007/11/javascript-method-callbacks">http://bitstructures.com/2007/11/javascript-method-callbacks</a><br>最重要的一句话：</p>
<pre><code>When a function is called as a method on an object (obj.alertVal()),
&quot;this&quot; is bound to the object that it is called on (obj).
And when a function is called without an object (func()),
&quot;this&quot; is bound to the JavaScript global object (window in web browsers.)
</code></pre>
<p>这篇文章也提供了解决方案，就是使用Closure和匿名方法，<br>javascript中，在function内部创建一个function的时候，会自动创建一个closure，<br>而这个closure就能记住对应的function创建时的上下文。</p>
<p>所以，如果这样：</p>
<figure class="highlight plaintext"><table><tr><td class="code"><pre><span class="line">var closureFunc=function()&#123;</span><br><span class="line">testObj.callback();</span><br><span class="line">&#125;</span><br></pre></td></tr></table></figure>

<p>那么无论在什么地方，直接调用closureFunc()和调用testObj.callback()是等价的。</p>
<p>详情参见上面提到的文章：<a href="http://bitstructures.com/2007/11/javascript-method-callbacks%E3%80%82">http://bitstructures.com/2007/11/javascript-method-callbacks。</a></p>
<p>6、改进模拟代码<br>在模拟代码中，我们再增加一种回调方式：</p>
<figure class="highlight plaintext"><table><tr><td class="code"><pre><span class="line">&lt;html&gt;</span><br><span class="line">&lt;head&gt;</span><br><span class="line">&lt;script&gt;</span><br><span class="line">var context=&quot;全局&quot;;</span><br><span class="line">var testObj=&#123;</span><br><span class="line">context:&quot;初始&quot;,</span><br><span class="line">callback:function (str)&#123;//回调函数</span><br><span class="line">alert(&quot;callback:我所处的上下文中，context=&quot;+this.context+&quot;，我被回调的方式：&quot;+str);</span><br><span class="line">&#125;</span><br><span class="line">&#125;;//创建一个对象，作为测试回调函数的上下文</span><br><span class="line">testObj.context=&quot;已设置&quot;;</span><br><span class="line"></span><br><span class="line">function testCall()&#123;</span><br><span class="line">callMethod(testObj.callback);</span><br><span class="line">callWithClosure(function(param)&#123;testObj.callback(param);&#125;);</span><br><span class="line">callObjMethod(testObj,testObj.callback);</span><br><span class="line">&#125;</span><br><span class="line">function callObjMethod(obj,method)&#123;</span><br><span class="line">method.call(obj,&quot;指定显式对象上下文回调&quot;);</span><br><span class="line">&#125;</span><br><span class="line">function callMethod(method)&#123;</span><br><span class="line">method(&quot;通过默认上下文回调&quot;);</span><br><span class="line">&#125;</span><br><span class="line">function callWithClosure(method)&#123;</span><br><span class="line">method(&quot;通过Closure保持上下文回调&quot;);</span><br><span class="line">&#125;</span><br><span class="line">&lt;/script&gt;</span><br><span class="line">&lt;/head&gt;</span><br><span class="line">&lt;body&gt;</span><br><span class="line">&lt;a href=&quot;javascript:void(0)&quot; onclick=&quot;testCall()&quot;&gt;调用测试&lt;/a&gt;</span><br><span class="line">&lt;/body&gt;</span><br><span class="line">&lt;/html&gt;</span><br></pre></td></tr></table></figure>

<p>测试以上代码，我们可以发现，通过Closure和通过显示指定对象得到的效果一致。</p>
]]></content>
      <tags>
        <tag>编程语言</tag>
        <tag>前端</tag>
      </tags>
  </entry>
  <entry>
    <title>关于近期的动态</title>
    <url>/2011/06/22/active-now.html</url>
    <content><![CDATA[<p>这篇日志算是写给我自己看的吧，毕竟我自己的这个个人博客很长时间没有维护，现在已经算是荒草丛生了。最近一段时间各种事情各种忙碌啊，还认识了一个值得自己去爱的女孩，再加上自己有点时间就想休息了，一偷懒就更木有时间来打点博客了。之前曾经说到的关于我的这个博客域名的转移时出现的问题，我现在还暂时没有时间写，估计会放到暑假里写吧。现在域名已经转移成功了，我一定会好好的构思一下，写一写这次的经历，尤其是要写一写我的前域名服务商——卓汇互联（joz.cn）【终于可以写名字了，之前就怕没有转移完的时候，遭到报复】。<br>马上就要期末考试了，又要开始各种纠结和复习了。俗话说“一天不学习，赶不上刘少奇”啊……</p>
]]></content>
      <tags>
        <tag>随笔</tag>
      </tags>
  </entry>
  <entry>
    <title>Html5本地数据库实例</title>
    <url>/2011/06/22/html5-local-database.html</url>
    <content><![CDATA[<figure class="highlight plaintext"><table><tr><td class="code"><pre><span class="line">&lt;!DOCTYPE html&gt;</span><br><span class="line">&lt;html&gt;</span><br><span class="line">&lt;head&gt;</span><br><span class="line">    &lt;meta charset=&quot;gb2312&quot; /&gt;</span><br><span class="line">    title&gt;HTML5 WebDatabase&lt;/title&gt;</span><br><span class="line">    &lt;script&gt;</span><br><span class="line">        var db=&quot;&quot;</span><br><span class="line">        window.onload=function()&#123;</span><br><span class="line">            if(window.openDatabase)&#123;</span><br><span class="line">                //打开数据库，不存在数据库则会自动创建</span><br><span class="line">                db = window.openDatabase(&quot;test&quot;, &quot;1.0&quot;, &quot;HTML5 Database API example&quot;, 200000);</span><br><span class="line">                //创建表</span><br><span class="line">                db.transaction(</span><br><span class="line">                    function(tx)&#123;</span><br><span class="line">                        tx.executeSql(</span><br><span class="line">                            &quot;create table oo(id REAL UNIQUE, text TEXT)&quot;,</span><br><span class="line">                            [],</span><br><span class="line">                            function(tx)&#123;alert(&quot;创建表成功&quot;);&#125;,</span><br><span class="line">                            function(tx, error)&#123;alert(&quot;创建表失败，错误信息:&quot;+error.message );&#125;</span><br><span class="line">                        );</span><br><span class="line">                    &#125;</span><br><span class="line">                );</span><br><span class="line">            &#125;</span><br><span class="line">            else&#123;</span><br><span class="line">                alert(&quot;不支持WebDatabase&quot;);</span><br><span class="line">            &#125;</span><br><span class="line"></span><br><span class="line">        &#125;</span><br><span class="line"></span><br><span class="line">        //删除数据库表</span><br><span class="line">        function drop()&#123;</span><br><span class="line">            db.transaction(</span><br><span class="line">                function(tx)&#123;</span><br><span class="line">                    tx.executeSql(</span><br><span class="line">                        &quot;drop table oo&quot;,</span><br><span class="line">                        [],</span><br><span class="line">                        function(tx)&#123;alert(&#x27;删除数据库表成功&#x27;);&#125;,</span><br><span class="line">                        function(tx,error)&#123;alert(&quot;删除数据库表失败，错误信息:&quot;+error.message);&#125;</span><br><span class="line">                    );</span><br><span class="line">                &#125;</span><br><span class="line">            );</span><br><span class="line"></span><br><span class="line">            //释放资源</span><br><span class="line">            db = null;</span><br><span class="line">        &#125;</span><br><span class="line"></span><br><span class="line">        function add()&#123;</span><br><span class="line">            var num = Math.round(Math.random() * 10000); // random data</span><br><span class="line">            var value = document.getElementById(&quot;text&quot;).value;</span><br><span class="line">            db.transaction(</span><br><span class="line">                function(tx)&#123;</span><br><span class="line">                    tx.executeSql(</span><br><span class="line">                        &quot;insert into oo(id,text) values(?,?)&quot;,</span><br><span class="line">                        [num,value],</span><br><span class="line">                        function(tx)&#123;alert(&quot;添加成功&quot;);&#125;,</span><br><span class="line">                        function(tx, error)&#123;alert(&quot;添加数据失败，错误信息:&quot;+error.message);&#125;</span><br><span class="line">                    );</span><br><span class="line">                &#125;</span><br><span class="line">            );</span><br><span class="line">        &#125;</span><br><span class="line"></span><br><span class="line">        function show()&#123;</span><br><span class="line">            db.transaction(</span><br><span class="line">                function(tx)&#123;</span><br><span class="line">                    tx.executeSql(</span><br><span class="line">                        &quot;select * from oo&quot;,</span><br><span class="line">                        [],</span><br><span class="line">                        function(tx, result)&#123;</span><br><span class="line">                            for(var i = 0; i &lt; result.rows.length; i++)&#123;</span><br><span class="line">                                var item = result.rows.item(i);</span><br><span class="line">                                alert(item[&#x27;id&#x27;]+&quot;:&quot;+item[&#x27;text&#x27;]);</span><br><span class="line">                            &#125;</span><br><span class="line">                        &#125;,</span><br><span class="line">                        function(tx,error)&#123;alert(&quot;查询数据失败，错误信息:&quot;+error.message);&#125;</span><br><span class="line">                    );</span><br><span class="line">                &#125;</span><br><span class="line">            );</span><br><span class="line"></span><br><span class="line">        &#125;</span><br><span class="line">    &lt;/script&gt;</span><br><span class="line">&lt;/head&gt;</span><br><span class="line"></span><br><span class="line">&lt;body&gt;</span><br><span class="line">    &lt;input  type=&quot;text&quot; id=&quot;text&quot;/&gt;&lt;br/&gt;</span><br><span class="line">    &lt;input type=&quot;button&quot; value=&quot;增加&quot; onclick=&quot;add()&quot;/&gt;&lt;br/&gt;</span><br><span class="line">    &lt;input type=&quot;button&quot; value=&quot;查询&quot; onclick=&quot;show()&quot;/&gt;&lt;br/&gt;</span><br><span class="line">    &lt;input type=&quot;button&quot; value=&quot;删除表&quot; onclick=&quot;drop()&quot;/&gt;&lt;br/&gt;</span><br><span class="line">&lt;/body&gt;</span><br><span class="line"></span><br><span class="line">&lt;/html&gt;</span><br></pre></td></tr></table></figure>

]]></content>
      <tags>
        <tag>编程语言</tag>
        <tag>前端</tag>
      </tags>
  </entry>
  <entry>
    <title>今天我们夺冠了！</title>
    <url>/2010/11/19/we-are-the-champion.html</url>
    <content><![CDATA[<p><img src="/img/p_large_DPPB_1c6f00003ee15c43.jpg" alt="夺冠后的合影"></p>
<p>经过了小组赛和淘汰赛后，今天我们终于迎来了决赛，并且经过了点球大战后夺得冠军，圆了上一届只是亚军的。一路走来艰辛与痛快，快乐与幸福我们系队中每个人都无不感触颇多。尤其是每次赛前与赛后开会讨论总是有些这样或那样的小摩擦，但是大家的心还是齐的，因为我们的目标都是一样的。</p>
<p><img src="/img/p_large_9ZMh_5a5e000147355c44.jpg" alt="决赛前的放松和热身"></p>
<p>这次比赛之所以能够夺冠，除了我们自身实力外，最主要的就是因为第一场比赛因为准备不足和大意而输给了交通学院（其实小组赛第一轮计算机放弃，所以我们不战而胜）给了我们很大的教训，这有点像今年世界杯上的西班牙。正因为那场比赛2比0输了，所以从那以后，每场比赛赛前开会分析对手，赛后也开会进行总结，给予了对手充分的重视。其次一点就是每场比赛都是拿体能和毅力拼下来的。<span id="more"></span></p>
<p><img src="/img/p_large_ULK5_1c75000146b95c43.jpg" alt="决赛登场前"></p>
<p><img src="/img/p_large_rjAj_5a7f0001fc0f5c41.jpg" alt="决赛开始前向观众致意"></p>
<p>就我个人来说，虽然是全队唯一一个场场比赛都打满的人，但是半决赛之前状态一直不好，并且一球未进，被大家冠以托雷斯之名。很大程度上还是自己没有坚持自己的踢球风格，并且自信心下降的太严重了，只要一碰球心里就开始慌乱。幸好在半决赛前和之前的足球课老师聊了聊天，让他开导指点了一番（毕竟上一场比赛就是我的老师当主裁），于是在半决赛中连入2球，既打破了个人的进球慌，也为球队锁定了胜利。作为一个身穿9号球衣的前锋来说，我觉得这场比赛任务完成的很出色。</p>
<p><img src="/img/p_large_cq0C_10a10002134f5c3f.jpg" alt="比赛中我在摆脱后卫贴身防守"></p>
<p>值得一说的是这场比赛又是那个学生裁判来执法。之前小组赛与交通学院以及淘汰赛又碰交院的主裁都是他，而这场又是他，我们这三场比赛每场都让他给莫名其妙的吹了点球。有两个点球都是在场边观众的呼喊中改判的，这让我们全队感觉很不爽。但是就是在这样恶劣的裁判的执法下，我们挺住了，并且运气也好，所以我们赢了。</p>
<p><img src="/img/p_large_VD3P_1c75000147825c43.jpg" alt="决赛后合影完收拾装备"></p>
<h3 id="数学曼联本届校庆杯比赛夺冠历程"><a href="#数学曼联本届校庆杯比赛夺冠历程" class="headerlink" title="数学曼联本届校庆杯比赛夺冠历程"></a>数学曼联本届校庆杯比赛夺冠历程</h3><h4 id="小组赛（C组）"><a href="#小组赛（C组）" class="headerlink" title="小组赛（C组）"></a>小组赛（C组）</h4><p><strong>第一轮 数学 对阵 计算机   由于计算机弃权，数学以2：0的比分取胜。</strong></p>
<p><strong>第二轮 交院 对阵 数学 2：0</strong></p>
<p><strong>第三轮 数学 对阵 教科院（心理） 5：1    我们一个乌龙球</strong></p>
<p>最终小组赛，我们以3战2胜1负凭借净胜球以小组第一出线（另外心理和交院都是2胜1负，由于心理胜交院，交院胜数学，数学胜心理，因此看三队之间的净胜球，最终数学净胜球第一，交院净胜球第二）。</p>
<h4 id="淘汰赛"><a href="#淘汰赛" class="headerlink" title="淘汰赛"></a>淘汰赛</h4><p><strong>8进4  C组第一（数学） 对阵  D组第二（食品） 2：0</strong></p>
<p><strong>半决赛 数学 对阵 交院 3：1</strong></p>
<p>本场比赛由于带有复仇色彩，所以大家都憋着劲，上半场结束时我们2：0领先。下半场进行一半的时候，因我方右边前的故意手球被裁判红牌罚下（个人认为该判罚过重，应该是出示黄牌），紧接着交院反击，球至我们大禁区后，裁判莫名其妙的吹我们犯规并给了交院一个点球。正因为这两个事情，交院一下子上了劲，但是运气并不属于他们，在他们的一轮进攻结束后，我们快速反击，并且由我带球突入对方禁区完成了本场比赛的个人第二粒进球，梅开二度并且也彻底打消了交院翻盘的信心。</p>
<p><strong>决赛 数学 对阵 土木 5：3</strong></p>
<p>本场比赛誓死一拼，所以大家都踢得很努力。上半场结束我们1：0领先。下半场离比赛还有十分钟就要结束了，又是同样的事情发生了，在一次大禁区的防守中，那个SB裁判又吹我们犯规并且判了一个点球。最终常规时间内1：1战平，进入点球大战。对方先发，对方的2发选手把球打飞，4发和5发都被我们门将扑出。我方2发球员打飞，其余都命中了。</p>
]]></content>
      <tags>
        <tag>随笔</tag>
      </tags>
  </entry>
  <entry>
    <title>【日记】7月10日，比赛作品已提交，又可以开始写日志啦～</title>
    <url>/2011/07/10/keep-diary-again.html</url>
    <content><![CDATA[<p>今天上午终于把持续了将近2个月的比赛作品弄完了（这也意味着我的解禁，后文解释），其实也不能算是弄完，因为提交的作品连个半成品都算不上。虽然心里很不甘，但是水平有限，时间不足，只能是尽自己的最大的努力去完成能完成的部分了。</p>
<p>不过话说回来，通过参加这次腾讯的这个Html5应用设计比赛，我还是学到了不少的关于Html5的知识。</p>
<p>首先就是来说一下一个很方便的开发库（也可以称其为工具），那就是jQuery Mobile（<a href="http://jquerymobile.com/">http://jquerymobile.com/</a>）。这是一个非常好用的东西，只需要简单的几句代码就可以轻松的把view（MVC中的 V）做出来，并且jQuery Mobile库实现的界面是仿苹果app的，看上去及其的舒服。这样对于一个开发者来说，如果写Html5应用程序的话，剩下的主要任务就是写代码，来实现剩下的M和C了（这其中主要是来写JS代码）。</p>
<p>其次，就是发现了Html5的确正在流行，因为国外的进度明显的走在了内地之前的。我是4月底知道有这个比赛的，然后就开始在搜集相关的Html5的示例资料等等。我发现，国内很少有原创的资料，这就更不用说入门级的中文教程了，想了解更多的html5知识，只能是去国外的网站搜集资料。我用了几乎5月份一个月的时间去搞明白什么是html5，腾讯举办这次比赛的目的是什么。虽然用的时间很长，感觉有点浪费，但是最终还是有所收获的。作为正在兴起的一门技术，html5无疑是具有极强的吸引力的，这主要表现在html5应用的强大性上。就现在我对于html5应用的理解来说，html5代码实现了html5应用的view框架，而js等代码实现的则是M（Model）和C（Controller）。正因为html5应用几乎只需要使用html5代码和js即可实现很强大的功能，所以浏览器厂商尤其是手机浏览器，现在都想在这个领域投入力量，先占有市场，而我分析占有市场的方式就是能拥有相当数量的优质html5应用，然后形成一个App store（应用商店），最后通过这个进行盈利。另外期间还发现了很多优秀的应用，举个例子：<a href="http://taskbox.cn/">http://taskbox.cn/</a></p>
<p>不过，这些东西终究离我还很遥远，当下里最重要的就是这次比赛暴露出来的问题，很多基础性的技术还没有掌握，比如说JS（这也包括jQuery），再比如说PHP框架。总之，在接下来的一年里，除了考研复习外，必须要自学一些必要的东西，并且能真正写出点什么有价值的程序（其实我一直对于我之前写的那个自习室查询平台因为学校的缘故，不能正常投入使用而耿耿于怀）。所以说接下来的半年依旧是艰巨的！</p>
<p>比赛的事情基本上就说这么多了，再就是说一说刚开头为什么说解禁。当我准备要参加这个比赛的时候，我的原计划是，4月下旬和5月的上旬进行资料收集，6月上旬结束前把作品提交，这期间作品交不上就不能写日志。由于比赛的难度远超出我的预料，所以一直拖到现在。其实中间有几次差点忍不住要写的，但是由于我自己平时总好犯制定了计划而不能自始至终的贯彻的毛病，所以这次我告诫自己一定要克制住，所以一直憋着不写，最后有点演化成自己与自己怄气的感觉，不过好歹是这次我实现了克己。</p>
<p>从开始停止写日志到今天恢复写日志，期间发生了太多的事情，有杯具有洗具，反正满茶几的都是东西，思考了很多事情和问题，不过可惜的是现在都已经忘记了到底发生过什么了，毕竟事情已经过去了，冲动也随之过去了。不过虽然现在想不起来，但是这些思考过的东西都已经记录在大脑的某个区域了，我想等我需要的时候，他们一定会再次出现的。</p>
<p>其实这段时间，最值得记录的事情就是我认识了我现在的女友。其实这很感谢这次腾讯的比赛阿，要不是这个比赛，我也不会在半夜里不睡觉而看英文技术文章，这也不会在121部落上结识到她～我也就不多说什么了，各位有空就来我们倆的人人网情侣空间帮忙给树浇浇水，我就已经感激不尽了～</p>
<p>另外，笨兔兔的王兄，我会抽时间写一下针对于wordpress的ntalker的，这个事情我还木有忘记。</p>
<p>今天就写这么多吧，没想到写着写着就跨天了，已经不是10号了……</p>
]]></content>
      <tags>
        <tag>随笔</tag>
      </tags>
  </entry>
  <entry>
    <title>Ntalker for Wordpress</title>
    <url>/2011/07/24/ntalker-for-wordpress.html</url>
    <content><![CDATA[<p>这个页面是专门用来记录我开发的Ntalker for Wordpress插件的相关信息的。</p>
<p>Ntalker可以用来实现，使所有访问当前页面的用户进行及时聊天和互动。当前是1.1版本，只是实现了最基本的聊天功能，添加好友，列出好友列表等功能将会在稍候的版本中推出。</p>
<p>由于已经在Wordpress官网上上传了该插件，地址：<a href="http://wordpress.org/extend/plugins/ntalker-for-wordpress/">http://wordpress.org/extend/plugins/ntalker-for-wordpress/</a>，所以该页面以后主要用作插件信息反馈。欢迎各位使用过插件的亲们留下宝贵的意见。</p>
<p>&#x3D;&#x3D;&#x3D;&#x3D;&#x3D;&#x3D;&#x3D;&#x3D;&#x3D;&#x3D;&#x3D;&#x3D;&#x3D; Ntalker for Wordpress 1.1 新浪云平台特别版 &#x3D;&#x3D;&#x3D;&#x3D;&#x3D;&#x3D;&#x3D;&#x3D;&#x3D;&#x3D;&#x3D;&#x3D;&#x3D;</p>
<p>该版本针对新浪云平台研发，具体使用方法同普通版本一样，请参见：<a href="/2011/07/24/ntalker-for-wordpress.html" title="Ntalker for Wordpress">Ntalker for Wordpress</a>。<br>感谢您对于本插件的关注，如果您有好的建议或者想法，希望您能来 <a href="/2011/07/24/ntalker-for-wordpress.html" title="Ntalker for Wordpress">Ntalker for Wordpress</a> 页面留言。如果您觉得这个插件很好用的话，恳请您能通过您的博客帮助推广，再次感谢！</p>
<p>++++++++++++++++++++++++++++++++++++++++++++++++++++</p>
<p>&#x3D;&#x3D;&#x3D;&#x3D;&#x3D;&#x3D;&#x3D;&#x3D;&#x3D;&#x3D;&#x3D;&#x3D;&#x3D; Ntalker for Wordpress 展望 &#x3D;&#x3D;&#x3D;&#x3D;&#x3D;&#x3D;&#x3D;&#x3D;&#x3D;&#x3D;&#x3D;&#x3D;&#x3D;</p>
<ul>
<li>1、预计在1.2版本中去掉该文件，实现在wp后台进行相关数据的配置。</li>
<li>2、1.x系列版本将主要实现Ntalker的基础聊天功能，其余功能如加好友，改在线等状态这类附加功能，初步计划在2.x版本中加入，届时可以通过Ntalker for Wordpress插件把你的wp打造成一个小型的社区。2.x版本将会在wp数据库新建一个表来实现记录好友关系，我已经开始着手思考这个表的构造了，如果您有好的想法，还请您能在这里留言，我将会为此感激不尽！</li>
</ul>
<p>++++++++++++++++++++++++++++++++++++++++++++++++++++</p>
<p><strong>～～～～～～～～～～～～～～～ 感谢区 ～～～～～～～～～～～～～～～</strong></p>
<p><strong>感谢“鲁大Ubuntu群”里帮助我测试的同志们，感谢<a href="http://www.bentutu.com/">笨兔兔</a>和<a href="http://www.hsyyf.me/">寒山烟雨</a>的一直充当首测！</strong></p>
<p><strong>～～～～～～～～～～～～～～～～～～～～～～～～～～～～～～～～～～</strong></p>
<p>如果各位有什么问题可以在这个页面留言。</p>
<p>&#x3D;&#x3D;&#x3D;&#x3D;&#x3D;&#x3D;&#x3D;&#x3D;&#x3D;&#x3D;&#x3D;&#x3D;&#x3D;&#x3D;&#x3D;&#x3D;&#x3D;&#x3D;&#x3D;下载区&#x3D;&#x3D;&#x3D;&#x3D;&#x3D;&#x3D;&#x3D;&#x3D;&#x3D;&#x3D;&#x3D;&#x3D;&#x3D;&#x3D;&#x3D;&#x3D;&#x3D;&#x3D;&#x3D;</p>
<p><strong><a href="http://www.domyself.me/download/dmntalker1.1sae.zip">Ntalker for Wordpress 1.1 新浪云平台特别版</a></strong></p>
]]></content>
      <tags>
        <tag>DM实验室</tag>
      </tags>
  </entry>
  <entry>
    <title>关于前段时间我的域名转移时的小插曲</title>
    <url>/2011/07/10/change-domain-service.html</url>
    <content><![CDATA[<p>今天终于是有时间可以给大家写一写我前段时间，更换域名商时出现的一些问题了。不过，现在已经木有火气了，更遗憾的是，和前域名商的QQ客服交流的记录基本上没有了，可惜了，不过网站的在线问答还是有的，现在我整理一下给大家看看，希望大家看后能有所收获。</p>
<p>我的前域名服务商是<strong>卓汇互联</strong>（<a href="http://www.joz.cn),该网站办的第一件令人发指的事情就是,居然修改我的域名注册时的邮箱地址为他们的邮箱地址,这意味着,转移域名时的信件都将经过他们的邮箱,这也是为什么我在没有成功转移前,不敢写这篇文章的原因.并且,域名转出邮件(含有转移密码的那封)发送的失败率也太高了吧,我使用的是qq邮箱,刚开始能接收到一封确认转移的邮件,之后含有转移密码的邮件就是收不到,经过多次和客服交涉,最后是客服把该邮件转发过来的.我很怀疑这是由于他们公司私自改动我的注册邮箱导致的./">www.joz.cn），该网站办的第一件令人发指的事情就是，居然修改我的域名注册时的邮箱地址为他们的邮箱地址，这意味着，转移域名时的信件都将经过他们的邮箱，这也是为什么我在没有成功转移前，不敢写这篇文章的原因。并且，域名转出邮件（含有转移密码的那封）发送的失败率也太高了吧，我使用的是QQ邮箱，刚开始能接收到一封确认转移的邮件，之后含有转移密码的邮件就是收不到，经过多次和客服交涉，最后是客服把该邮件转发过来的。我很怀疑这是由于他们公司私自改动我的注册邮箱导致的。</a></p>
<p>第二件事情就是，当我收到域名转移信后，卓汇就停掉了我的域名解析。这是我非常想不明白的事情，我交了一年的费用，到期日是今年的9月24日，而我5月份开始办理转移手续，在我转移没有成功前，卓汇应该是应当承担我的域名解析的。下面是在线问答上的对话：</p>
<pre><code>ETY001：我还有一个问题就是我在你们公司交了一年的费用,我现在转出域名了,但是离9月份到期时间还有3个多月,而你们已经把我的域名解析给删掉了,是不是应该给我退这将近4个月的款额?要不就继续解析我的域名。
JOZ客服：**尊敬的用户:**
** 您好,很高兴为您服务!**
** 在此告知您,您的域名转转出我司,域名到期时间不会减少。这个域名到期时间是 2011年9月24日,如果您在新服务商那边转入续费,到期时间是接2011年9月24日延长一年。**
** 域名注册费是ME注册局的域名登记费用,域名解析功能是我司提供,是免费的,凡是注册我司的域名,都免费提供解析功能,**
** 非常感谢您对我们的长久支持!**
</code></pre>
<p>对于该回答，我很是不解，就此事我咨询了我现在的域名商，我现在的域名商也是不解，并且对于他们的这个解释感到可笑。其实，正是因为我在转移域名前，搜集资料的时候，看到过说转移过程不影响域名解析，所以我才选择进行转移操作的。然后事实挺打击人的，这个事情导致了我的博客半个月无法访问。</p>
<p>第三件事情就是他们的服务态度，表面上看一般，实际很差。之所以这么说是因为他们的回复只是客套话而已，语气则并不像那些客套话那样好听，尤其他们的QQ客服给人的感觉是没有耐心。并且，在经过我1个多星期的“纠缠”后，他们的QQ客服貌似是把我拖黑了，对于此事我表示很无语……</p>
<p>总之，这次的转移之旅，其实始因就是因为在卓汇第二年续费需要230，而我的新域名商只需要150，为了省银子才不得不采取转移，没想到有了这么一大串的事情。大家就当作看个热闹，长个见识吧～</p>
]]></content>
      <tags>
        <tag>网站日志</tag>
      </tags>
  </entry>
  <entry>
    <title>这是DM实验室的起航</title>
    <url>/2011/07/26/establish-dm-lab.html</url>
    <content><![CDATA[<p>从最初建立这个自己的个人博客的时候开始，就一直想着能够有这样一个版块，用来分享我自己做的小东西，或者是用来分享一些我的小想法，于是就有了DM实验室。然后博客建起来快一年了吧，一直都没有一个大众化的实际的小软件来填充。唯一做的一个小众网站程序自习室查询平台，还被学校暂时停用……</p>
<p>直到如今，已经是准大四的人了，才开始能找到一些时间写写自己喜欢的东西（之前的时间都投入到社团了），而<a href="http://www.domyself.me/lab/ntalker-for-wordpress">Ntalker for Wordpress</a>就是作为我的DM实验室的起航之作了，希望它能够好好的生存下去，希望他能够给大众带来实际的效益，希望我自己能再接再厉做出更好的东西！</p>
]]></content>
      <tags>
        <tag>网站日志</tag>
      </tags>
  </entry>
  <entry>
    <title>Ntalker for Wordpress 1.1版本发布</title>
    <url>/2011/08/07/ntalker-for-wordpress-over.html</url>
    <content><![CDATA[<p>经过今天下午一下午的研究，暂时解决了1.0版本的一些问题，并且发布了1.1版本，总算是能在明天返校前完成这个事情了～</p>
<p>由于我已经单独开了一个这个插件的页面用来记录这个插件的事情，所以就不再在这篇日志里多说什么了，请各位幻影移形到这里看看吧～希望能看到您的留言～～ <a href="/2011/07/24/ntalker-for-wordpress.html" title="Ntalker for Wordpress">Ntalker for Wordpress</a></p>
]]></content>
      <tags>
        <tag>DM实验室</tag>
        <tag>后端</tag>
      </tags>
  </entry>
  <entry>
    <title>今天对自己的VPS进行了更换系统</title>
    <url>/2011/07/25/vps-change-system.html</url>
    <content><![CDATA[<p>由于之前一直都是想拿自己的VPS做记事狗QQ机器人的存放空间（这个机器人只能在win下运行），所以，最初安装VPS的操作系统的时候，选择的是win2003。经过这两个多月的使用，我实在是无法忍受win+apache这种不良的组合了，服务器软件总是出错，还是换回linux系统才是王道！</p>
<p>于是乎，今天早上9点，在VPS上的服务器软件又一次当掉的情况下，果断选择重装系统为Cent OS。经过两个半小时的折腾，终于是把一切都搞定了～现在服务器架设的环境是LNMP，终于用上了我一直梦想的ngix啦，哈哈～</p>
<p>下面总结一下：</p>
<pre><code>1、我使用的是“LNMP一键安装包”，详细的安装教程，**请看这里：[http://lnmp.org/install.html](http://lnmp.org/install.html)**，我就不再多做阐述。
2、需要自己手动在nginx.conf中添加wordpress的rewrite规则。添加方法在这里：[http://bbs.vpser.net/viewthread.php?tid=2730&amp;highlight=wordpress](http://bbs.vpser.net/viewthread.php?tid=2730&amp;highlight=wordpress)。
3、我选择的VPS服务商提供给我的VPS的硬盘空间不是一个整块硬盘，意思就是说我的硬盘空间是20G，而实际是由两块10G的硬盘拼起来的，而VPS用户面板的重装系统按钮只能在一块上安装，这就导致我的另一块10G空间没有用了。我联系客服后，客服给出了教程，教程地址如下：[http://forum.xensystem.com/thread-50-1-1.html](http://forum.xensystem.com/thread-50-1-1.html)。这个教程可以帮你把另外的空间扩充到现在的空间上。这个教程很简单，不要看着那么多的命令就发怵，其实一步一步来做就可以了，只不过一些具体的硬盘空间数据不同罢了（也可能有些硬盘的标示不同，这个我觉得应该不是问题），这里我就提醒一句话，注意命令的大小写（有一个命令的参数是大写的L，还有linux是大小写敏感的，所以硬盘标示之类的大小写也要注意下～）。
</code></pre>
<p><strong>最后，我再做个我的VPS的广告，我现在用的VPS是52元一个月的，就我现在使用的这三个月来看足够我个人使用了～如果你对于我的这款VPS感兴趣，可以来这里看看：<a href="http://www.domyself.me/archives/1427.html">http://www.domyself.me/archives/1427.html</a>。</strong></p>
]]></content>
      <tags>
        <tag>杂七杂八</tag>
        <tag>网站日志</tag>
        <tag>Server&amp;OS</tag>
      </tags>
  </entry>
  <entry>
    <title>新浪云平台缓存使用方法</title>
    <url>/2011/08/18/sinaapp-memcache.html</url>
    <content><![CDATA[<p>今天遇到一个在<a href="http://sinaapp.com/">新浪云平台</a>搭建Wordpress的朋友，他也正好要用我写的<a href="http://www.domyself.me/ntalker-for-wordpress">Ntalker for Wordpress插件</a>，但是有些问题存在，于是我就开始开始研究看看。经过分析，发现原来是缓存无法写入，导致的部分功能的丢失。这是新浪云平台官网原话：“SAE不允许写本地文件目录。由于SAE是分布式架构，每次的请求可能到达不同的机器，为了提升性能和安全，我们不允许对代码目录进行写操作。数据并不会永久地写到“本地”，而是通过以下两个方法写到临时存储或Storage&#x2F;MC服务中：TmpFS，用于处理临时文件需求； Wrapper，让你只需要修改文件路径就可以将数据写入到Storage服务或者Memcache服务中。详细的说明请参照相关服务说明。”<br>下面是这次修改的主要方法的参照源。根据提示我选择了Memcache服务来代替原插件里的那个开源cache类。关于Memcache的使用方法如下：</p>
<p>服务概要</p>
<p>Memcache是SAE为开发者提供的分布式缓存服务，用来以共享的方式缓存用户的小数据。用户需要先在在线管理平台创建Memcache，然后通过标准的memcache*函数读写Memcache。</p>
<p>特别注意：</p>
<ol>
<li>SAE平台的Memcache技术指标和标准的Memcache相同，不适合存放大文件，特别是大于4M的数据</li>
<li>SAE Memcache不需要用户调用memcache_connect函数，取而代之的，用户在get、set之前需要调用memcache_init函数</li>
</ol>
<p>应用场景</p>
<p>因为SAE的Web Service是分布式环境，所以当用户需要共享的缓存某些key-value形式的小数据时，就需要用Memcache服务，这样可以快速进行数据响应，而且可以减轻后端存储的压力。</p>
<p>使用指南</p>
<p>例子：</p>
<p>appname: saetest<br>appversion: 1</p>
<p>开启Memcache</p>
<p>您需要先到SAE在线管理平台开通Memcache服务，在服务管理&#x3D;&gt;Memcache页面开通Memcache服务后，就可以通过在线管理平台的UI接口，测试Memcache读写情况，以确认开通成功。</p>
<p>关闭Memcache</p>
<p>在您不需要使用缓存服务时，也可以在在线管理平台禁用Memcache服务.禁用后，用户就不可以再使用分布式缓存服务。</p>
<p>特别注意：当禁用后，原有的缓存数据将全部被删除！</p>
<p>使用Memcache</p>
<p>Memcache服务目前提供以下接口：</p>
<p>memcache_init - 初始化MC链接<br>memcache_get - 获取MC数据<br>memcache_set - 存入MC数据<br>除memcache_init外,其他接口和php的memcahe模块保持一致.</p>
<p>需要注意的是, memcache_connect()，Memcache::connect()、memcache_pconnect()、Memcache::pconnect()、memcache_add_server() ，Memcache::addServer()等函数不建议使用。</p>
<p>使用示例：</p>
<p>$mmc&#x3D;memcache_init();<br>if($mmc&#x3D;&#x3D;false)<br>echo “mc init failed\n”;<br>else<br>{<br>memcache_set($mmc,”key”,”value”);<br>echo memcache_get($mmc,”key”);<br>}</p>
]]></content>
      <tags>
        <tag>编程语言</tag>
        <tag>Server&amp;OS</tag>
      </tags>
  </entry>
  <entry>
    <title>推荐一本Web前端开发的书</title>
    <url>/2011/08/21/a-book-web-frontend.html</url>
    <content><![CDATA[<p>Web前端开发是从网页制作演变而来的，名称上有很明显的时代特征。在互联网的演化进程中，网页制作是Web 1.0时代的产物，那时网站的主要内容都是静态的，用户使用网站的行为也以浏览为主。2005年以后，互联网进入Web 2.0时代，各种类似桌面软件的Web应用大量涌现，网站的前端由此发生了翻天覆地的变化。网页不再只是承载单一的文字和图片，各种富媒体让网页的内容更加生动，网页上软件化的交互形式为用户提供了更好的使用体验，这些都是基于前端技术实现的。</p>
<p>以前会Photoshop和Dreamweaver就可以制作网页，现在只掌握这些已经远远不够了。无论是开发难度上，还是开发方式上，现在的网页制作都更接近传统的网站后台开发，所以现在不再叫网页制作，而是叫Web前端开发。Web前端开发在产品开发环节中的作用变得越来越重要，而且需要专业的前端工程师才能做好，这方面的专业人才近两年来备受青睐。Web前端开发是一项很特殊的工作，涵盖的知识面非常广，既有具体的技术，又有抽象的理念。简单地说，它的主要职能就是把网站的界面更好地呈现给用户。</p>
<p>如何才能做得更好呢？</p>
<pre><code>第一，必须掌握基本的Web前端开发技术，其中包括：CSS、HTML、DOM、BOM、Ajax、JavaScript等，在掌握这些技术的同时，还要清楚地了解它们在不同浏览器上的兼容情况、渲染原理和存在的Bug。
第二，在一名合格的前端工程师的知识结构中，网站性能优化、SEO和服务器端的基础知识也是必须掌握的。
第三，必须学会运用各种工具进行辅助开发。
第四，除了要掌握技术层面的知识，还要掌握理论层面的知识，包括代码的可维护性、组件的易用性、分层语义模板和浏览器分级支持，等等。
</code></pre>
<p>可见，看似简单的网页制作，如果要做得更好、更专业，真的是不简单。这就是前端开发的特点，也是让很多人困惑的原因。如此繁杂的知识体系让新手学习起来无从下手，对于老手来说，也时常不知道下一步该学什么。</p>
<p>目前市面上关于Web前端开发的书主要都是针对单一技术的，《编写高质量代码》与这些书有着本质的区别。它主要想实现两个目标：第一，为不太有经验的 Web前端开发工程师建立大局观，让他们真正了解和理解这个职业；第二，帮助有一定Web前端开发经验的工程师修炼内功，通过编写高质量的代码来提高前端代码的可维护性。这是很多前端开发工程师感兴趣的内容。</p>
<p>《编写高质量代码》的前两章讨论了网站重构和团队合作，这是很有必要的。网站重构的目的仅仅是为了让网页更符合Web标准吗？不是！重构的本质应该是构建一个前端灵活的MVC框架，即HTML作为信息模型（Model），CSS控制样式（View），JavaScript负责调度数据和实现某种展现逻辑（Controller）。同时，代码需要具有很好的复用性和可维护性。这是高效率、高质量开发以及协作开发的基础。建立了这种大局观后，学习具体技术的思路就更清晰了。</p>
<p>代码质量是前端开发中应该重点考虑的问题之一。例如，实现一个网站界面可能会有无数种方案，但有些方案的维护成本会比较高，有些方案会存在性能问题，而有些方案则更易于维护，而且性能也比较好。这里的关键影响因素就是代码质量。CSS、HTML、JavaScript这三种前端开发语言的特点是不同的，对代码质量的要求也不同，但它们之间又有着千丝万缕的联系。《编写高质量代码》中包含着很多开发的思想和经验，都是在长期的开发实践中积累下来的，不同水平的Web前端工程师都会从中获得启发。</p>
<p>图书封面：</p>
<p><img src="/upload/2011/08/qianduan.jpg"></p>
]]></content>
      <tags>
        <tag>前端</tag>
      </tags>
  </entry>
  <entry>
    <title>Wordpress打不开的解决方案</title>
    <url>/2011/08/27/wordpress-open-failed.html</url>
    <content><![CDATA[<p>今天，访问我的博客的时候，发现博客打开后是空白页，什么都不显示，访问后台登录页面也是空白页，不知道哪个地方又出错了。</p>
<p>于是登录服务器的ssh，把wp-content目录重命名，然后再次访问后台登录页面，可以访问了，不过是英文界面，因为缺少了wp-content目录下的语言包的翻译，但是这个不影响我们操作。</p>
<p>初步断定是wp-content目录内的文件导致的问题，于是逐步缩小搜查范围，把wp-content的名字改回来，逐一把wp-content文件夹内的各个文件夹改名，</p>
<p>最后发现是我使用的D4主题出现了错误，遂进入后台把之前使用过的另一个主题启用，一切恢复正常～</p>
]]></content>
      <tags>
        <tag>网站日志</tag>
      </tags>
  </entry>
  <entry>
    <title>ubuntu linux搜索文件</title>
    <url>/2011/08/22/how-to-search-file-in-linux.html</url>
    <content><![CDATA[<p>最近在搞记事狗的QQ机器人，破解了源代码后进行修改，有时候一些提示的错误信息就是找不到，由于是在ubuntu下工作，所以就收集下关于搜索的命令，尤其是搜索内容为指定关键字的文件的路径地址。</p>
<p>whereis &lt;程序名称&gt;<br>查找软件的安装路径<br>-b 只查找二进制文件<br>-m 只查找帮助文件<br>-s 只查找源代码<br>-u 排除指定类型文件<br>-f 只显示文件名<br>-B &lt;目录&gt; 在指定目录下查找二进制文件<br>-M &lt;目录&gt; 在指定目录下查找帮助文件<br>-S &lt;目录&gt; 在指定目录下查找源代码</p>
<p>locate &lt;文件名称&gt;<br>在文件索引数据库中搜索文件<br>-d &lt;数据库路径&gt; 搜索指定数据库<br>updatedb<br>更新文件索引数据库</p>
<p>find [路径] &lt;表达式&gt;<br>查找文件<br>-name &lt;表达式&gt; 根据文件名查找文件<br>-iname &lt;表达式&gt; 根据文件名查找文件，忽略大小写<br>-path &lt;表达式&gt; 根据路径查找文件<br>-ipath &lt;表达式&gt; 根据路径查找文件，忽略大小写<br>-amin &lt;分钟&gt; 过去N分钟内访问过的文件<br>-atime &lt;天数&gt; 过去N天内访问过的文件<br>-cmin &lt;分钟&gt; 过去N分钟内修改过的文件<br>-ctime &lt;天数&gt; 过去N天内修改过的文件<br>-anewer &lt;参照文件&gt; 比参照文件更晚被读取过的文件<br>-cnewer &lt;参照文件&gt; 比参照文件更晚被修改过的文件<br>-size &lt;大小&gt; 根据文件大小查找文件，单位b c w k M G<br>-type &lt;文件类型&gt; 根据文件类型查找文件。b 块设备 c 字符设备 d 目录 p 管道文件 f 普通文件 l 链接 s 端口文件<br>-user &lt;用户名&gt; 按归属用户查找文件<br>-uid <uid> 按UID查找文件<br>-group &lt;群组名&gt; 按归属群组查找文件<br>-gid <gid> 按GID查找文件<br>-empty 查找空文件</p>
<p>grep &lt;字符串&gt;|”&lt;正则表达式&gt;” [文件名]<br>在文件中搜索内容</p>
<p>问题描述：<br>我有一个1千万行的querylog，每一个都有keyword，现在我想随机查找某个query是否存在。<br>用find命令来做。<br>解决方法：</p>
<figure class="highlight plaintext"><table><tr><td class="code"><pre><span class="line">find query.log | xargs grep &quot;感冒&quot; // 在query.log文件中查找“感冒”</span><br></pre></td></tr></table></figure>

]]></content>
      <tags>
        <tag>Server&amp;OS</tag>
      </tags>
  </entry>
  <entry>
    <title>Java作业简单拼图游戏</title>
    <url>/2011/08/31/java-homework.html</url>
    <content><![CDATA[<p>这是我的Java作业，一个简单的拼图游戏，源文件从这里下载：<a href="http://u.115.com/file/clqajxh3">点击这里下载源文件</a>。由于是在ubuntu下压缩的，所以在windows下解压会有一个图片乱码，乱码的那张图片名称是“星座.jpg”（不含引号）。</p>
<p>下面直接贴代码：</p>
<figure class="highlight plaintext"><table><tr><td class="code"><pre><span class="line">/*</span><br><span class="line"> * Author：ETY001</span><br><span class="line"> * URI：https://akawa.ink</span><br><span class="line"> */</span><br><span class="line">import java.awt.*;</span><br><span class="line">import java.awt.event.*;</span><br><span class="line">import javax.swing.*;</span><br><span class="line">import java.lang.Math;</span><br><span class="line">import java.applet.Applet;</span><br><span class="line"></span><br><span class="line">public class pintu extends Applet implements ActionListener</span><br><span class="line">&#123;</span><br><span class="line">	int EmptyRow = 0;//空白图横坐标</span><br><span class="line">	int EmptyCol = 0;//空白图纵坐标</span><br><span class="line">	JPanel up = new JPanel();//上部面板</span><br><span class="line">	JPanel down = new JPanel();//下部面板</span><br><span class="line">	JButton[][] btn = new JButton[5][5];//拼图按钮</span><br><span class="line">	int a[][] =new int[5][5];//记录是否重复随机数的数组</span><br><span class="line">	int m,n;//记录随机数</span><br><span class="line">	//JTextField tt = new JTextField(15);//调试使用</span><br><span class="line"></span><br><span class="line">	public void init()</span><br><span class="line">	&#123;</span><br><span class="line">		//上部</span><br><span class="line">		ImageIcon oriPic = new ImageIcon(&quot;星座.jpg&quot;);</span><br><span class="line">		JLabel oriPicLabel = new JLabel(&quot;&quot;,oriPic,JLabel.CENTER);</span><br><span class="line">		JButton next = new JButton(&quot;下一局&quot;);</span><br><span class="line">		up.setLayout(new BorderLayout());</span><br><span class="line">		up.add(oriPicLabel,BorderLayout.WEST);</span><br><span class="line">		up.add(next,BorderLayout.CENTER);</span><br><span class="line">		next.addActionListener(this);</span><br><span class="line"></span><br><span class="line">		//下部</span><br><span class="line">		down.setLayout(new GridLayout(5,5));</span><br><span class="line">		for(int i=0;i&lt;5;i++) //清空记录数组</span><br><span class="line">		&#123;</span><br><span class="line">			for(int j=0;j&lt;5;j++)</span><br><span class="line">			&#123;</span><br><span class="line">				a[i][j]=0;</span><br><span class="line">			&#125;</span><br><span class="line">		&#125;</span><br><span class="line">		for(int i=0;i&lt;5;i++)//产生随机的图片碎片</span><br><span class="line">		&#123;</span><br><span class="line">			for(int j=0;j&lt;5;j++)</span><br><span class="line">			&#123;</span><br><span class="line">				m=(int)(Math.random() * 5);</span><br><span class="line">				n=(int)(Math.random() * 5);</span><br><span class="line">				while(a[m][n]==1)</span><br><span class="line">				&#123;</span><br><span class="line">					m=(int)(Math.random() * 5);</span><br><span class="line">					n=(int)(Math.random() * 5);</span><br><span class="line">				&#125;</span><br><span class="line">				a[m][n]=1;</span><br><span class="line">				if(m==0 &amp;&amp; n==0)//记录初始时刻空白图片的位置</span><br><span class="line">				&#123;</span><br><span class="line">					EmptyRow = i;</span><br><span class="line">					EmptyCol = j;</span><br><span class="line">				&#125;</span><br><span class="line">				//注意原素材的10和11两张图片的扩展名是大写的，这也是两张图片导入失败的原因		</span><br><span class="line">				btn[i][j] = new JButton(new ImageIcon(m+&quot;&quot;+n+&quot;.jpg&quot;));</span><br><span class="line">				down.add(btn[i][j]);</span><br><span class="line">				btn[i][j].setActionCommand(i+&quot;:&quot;+j);</span><br><span class="line">				btn[i][j].addActionListener(this);</span><br><span class="line">			&#125;</span><br><span class="line">		&#125;</span><br><span class="line"></span><br><span class="line">		//全局面板</span><br><span class="line">		setLayout(new BorderLayout());</span><br><span class="line">		add(up,BorderLayout.NORTH);</span><br><span class="line">		add(down,BorderLayout.CENTER);</span><br><span class="line">		//add(tt,BorderLayout.SOUTH);//调试使用</span><br><span class="line">		setSize(275,360);</span><br><span class="line">		setVisible(true);</span><br><span class="line">	&#125;</span><br><span class="line"></span><br><span class="line">	public void PicRepeat()</span><br><span class="line">	&#123;</span><br><span class="line">		for(int i=0;i&lt;5;i++) //清空记录数组</span><br><span class="line">		&#123;</span><br><span class="line">			for(int j=0;j&lt;5;j++)</span><br><span class="line">			&#123;</span><br><span class="line">				a[i][j]=0;</span><br><span class="line">			&#125;</span><br><span class="line">		&#125;</span><br><span class="line">		for(int i=0;i&lt;5;i++)</span><br><span class="line">		&#123;</span><br><span class="line">			for(int j=0;j&lt;5;j++)</span><br><span class="line">			&#123;</span><br><span class="line">				m=(int)(Math.random() * 5);</span><br><span class="line">				n=(int)(Math.random() * 5);</span><br><span class="line">				while(a[m][n]==1)</span><br><span class="line">				&#123;</span><br><span class="line">					m=(int)(Math.random() * 5);</span><br><span class="line">					n=(int)(Math.random() * 5);</span><br><span class="line">				&#125;</span><br><span class="line">				a[m][n]=1;</span><br><span class="line">				if(m==0 &amp;&amp; n==0)//记录初始时刻空白图片的位置</span><br><span class="line">				&#123;</span><br><span class="line">					EmptyRow = i;</span><br><span class="line">					EmptyCol = j;</span><br><span class="line">				&#125;</span><br><span class="line">				//更新按钮上的随机图片</span><br><span class="line">				btn[i][j].setIcon(new ImageIcon(m+&quot;&quot;+n+&quot;.jpg&quot;));</span><br><span class="line">			&#125;</span><br><span class="line">		&#125;</span><br><span class="line">	&#125;</span><br><span class="line"></span><br><span class="line">	public void changePic(int clickRow,int clickCol,int emptyRow,int emptyCol)</span><br><span class="line">	&#123;</span><br><span class="line">		if(Math.abs(clickRow-emptyRow)+Math.abs(clickCol-emptyCol)==1)</span><br><span class="line">		&#123;</span><br><span class="line">			Icon tmp1 = btn[clickRow][clickCol].getIcon();</span><br><span class="line">			Icon tmp2 = btn[emptyRow][emptyCol].getIcon();</span><br><span class="line">			btn[clickRow][clickCol].setIcon(tmp2);</span><br><span class="line">			btn[emptyRow][emptyCol].setIcon(tmp1);</span><br><span class="line">			EmptyRow = clickRow;</span><br><span class="line">			EmptyCol = clickCol;</span><br><span class="line">		&#125;</span><br><span class="line">	&#125;</span><br><span class="line"></span><br><span class="line">	public void actionPerformed(ActionEvent e)</span><br><span class="line">	&#123;</span><br><span class="line">		int row=0,col=0;</span><br><span class="line">		if (e.getActionCommand() == &quot;下一局&quot;)</span><br><span class="line">		&#123;</span><br><span class="line">			PicRepeat();</span><br><span class="line">		&#125;</span><br><span class="line">		else</span><br><span class="line">		&#123;</span><br><span class="line">			String[] tmp;</span><br><span class="line">			tmp = e.getActionCommand().split(&quot;:&quot;);</span><br><span class="line">			row = Integer.parseInt(tmp[0]);</span><br><span class="line">			col = Integer.parseInt(tmp[1]);</span><br><span class="line">			changePic(row,col,EmptyRow,EmptyCol);</span><br><span class="line">		&#125;</span><br><span class="line">		//tt.setText(&quot;&quot;+btn[row][col].getIcon());//调试使用</span><br><span class="line">	&#125;</span><br><span class="line">&#125;</span><br></pre></td></tr></table></figure>
]]></content>
      <tags>
        <tag>编程语言</tag>
      </tags>
  </entry>
  <entry>
    <title>jQuery入门教程笔记2</title>
    <url>/2011/09/02/jquery-tutorial.html</url>
    <content><![CDATA[<p>这是《jQuery入门教程笔记》系列2，在第2篇里面将开始讲述jQuery很重要的一种东西，那就是选择器，这篇先从基本选择器讲起。</p>
<p>下面是基本选择器的语法表格：</p>
<table cellpadding="0" cellspacing="0" >
   <tbody >
      <tr >
         选择器
         功能
         返回值
      </tr>
      <tr >

<td >#id
</td>

<td >根据给定的ID匹配一个元素
</td>

<td >单个元素
</td>
      </tr>
      <tr >

<td >element
</td>

<td >根据给定元素名匹配所有元素
</td>

<td >元素集合
</td>
      </tr>
      <tr >

<td >.class
</td>

<td >根据给定的类匹配元素
</td>

<td >元素集合
</td>
      </tr>
      <tr >

<td >*
</td>

<td >匹配所有元素
</td>

<td >元素集合
</td>
      </tr>
      <tr >

<td >selector1,selectorN
</td>

<td >将每一个选择器匹配到的元素合并后一起返回
</td>

<td >元素集合
</td>
      </tr>
   </tbody>
</table>
<span id="more"></span>
下面是基本选择器的示例，该示例我是在原书（[《jQuery权威指南》](http://item.tmall.com/item.htm?id=10862959121&prc=1&ali_trackid=2:mm_13275160_0_0:1314978130_3z4_1193337051)）的基础上修改的，为了更好的来理解没有方式的选择器是如何工作的，建议各位新手依次把下面代码中的所有选择器用法先注释掉，然后一条一条，一个一个的来实验，然后观察效果如何。

<figure class="highlight plaintext"><table><tr><td class="code"><pre><span class="line">&lt;!DOCTYPE html PUBLIC &quot;-//W3C//DTD XHTML 1.0 Strict//EN&quot;</span><br><span class="line">	&quot;http://www.w3.org/TR/xhtml1/DTD/xhtml1-strict.dtd&quot;&gt;</span><br><span class="line">&lt;html xmlns=&quot;http://www.w3.org/1999/xhtml&quot; xml:lang=&quot;en&quot; lang=&quot;en&quot;&gt;</span><br><span class="line"></span><br><span class="line">&lt;head&gt;</span><br><span class="line">	&lt;title&gt;chap2-2&lt;/title&gt;</span><br><span class="line">	&lt;meta http-equiv=&quot;content-type&quot; content=&quot;text/html;charset=utf-8&quot; /&gt;</span><br><span class="line">	&lt;meta name=&quot;generator&quot; content=&quot;Geany 0.20&quot; /&gt;</span><br><span class="line">	&lt;script language=&quot;javascript&quot; type=&quot;text/javascript&quot; src=&quot;jquery-1.6.2.min.js&quot;&gt;&lt;/script&gt;</span><br><span class="line">	&lt;style type=&quot;text/css&quot;&gt;</span><br><span class="line">		body&#123;</span><br><span class="line">			font-size:12px;</span><br><span class="line">			text-align:center;			</span><br><span class="line">		&#125;</span><br><span class="line">		.clsFrame&#123;</span><br><span class="line">			width:300px;</span><br><span class="line">			height:100px;</span><br><span class="line">			float:left;</span><br><span class="line">		&#125;</span><br><span class="line">		.clsFrame div,span&#123;</span><br><span class="line">			display:none;</span><br><span class="line">			float:left;</span><br><span class="line">			width:65px;</span><br><span class="line">			height:65px;</span><br><span class="line">			border:solid 1px #ccc;</span><br><span class="line">			margin:8px;</span><br><span class="line">		&#125;</span><br><span class="line">		.clsOne&#123;</span><br><span class="line">			background-color:#eee;</span><br><span class="line">		&#125;</span><br><span class="line">	&lt;/style&gt;</span><br><span class="line">	&lt;script type=&quot;text/javascript&quot;&gt;</span><br><span class="line">		$(function()&#123; //ID匹配元素</span><br><span class="line">			$(&quot;#divOne&quot;).css(&quot;display&quot;,&quot;block&quot;);</span><br><span class="line">			//$(&quot;#divOnei&quot;).css(&quot;display&quot;,&quot;block&quot;);</span><br><span class="line">		&#125;);</span><br><span class="line">		/*$(function()&#123; //元素名匹配元素</span><br><span class="line">			$(&quot;div span&quot;).css(&quot;display&quot;,&quot;block&quot;);</span><br><span class="line">		&#125;);</span><br><span class="line">		$(function()&#123; //类匹配元素</span><br><span class="line">			$(&quot;.clsFrame .clsOne&quot;).css(&quot;display&quot;,&quot;block&quot;);</span><br><span class="line">		&#125;);*/</span><br><span class="line">		$(function()&#123; //合并匹配元素</span><br><span class="line">			$(&quot;#divOne,span&quot;).css(&quot;display&quot;,&quot;block&quot;);</span><br><span class="line">		&#125;);</span><br><span class="line">	&lt;/script&gt;</span><br><span class="line">&lt;/head&gt;</span><br><span class="line"></span><br><span class="line">&lt;body&gt;</span><br><span class="line">	&lt;div class=&quot;clsFrame&quot;&gt;</span><br><span class="line">		&lt;div id=&quot;divOne&quot;&gt;ID&lt;/div&gt;</span><br><span class="line">		&lt;div class=&quot;clsOne&quot;&gt;CLASS&lt;/div&gt;</span><br><span class="line">		&lt;span&gt;SPAN&lt;/span&gt;</span><br><span class="line">	&lt;/div&gt;</span><br><span class="line">	&lt;div class=&quot;clsFrame&quot;&gt;</span><br><span class="line">		&lt;div id=&quot;divOnei&quot;&gt;ID&lt;/div&gt;</span><br><span class="line">		&lt;div class=&quot;clsOne&quot;&gt;CLASS&lt;/div&gt;</span><br><span class="line">		&lt;span&gt;SPAN&lt;/span&gt;</span><br><span class="line">	&lt;/div&gt;</span><br><span class="line">&lt;/body&gt;</span><br><span class="line">&lt;/html&gt;</span><br></pre></td></tr></table></figure>

]]></content>
      <tags>
        <tag>编程语言</tag>
        <tag>前端</tag>
      </tags>
  </entry>
  <entry>
    <title>jQuery入门教程笔记3</title>
    <url>/2011/09/05/jquery-tutorial.html</url>
    <content><![CDATA[<p>这是《jQuery入门教程笔记》系列3，在第3篇里面将继续讲述jQuery的选择器，这篇讲述“层次选择器”。</p>
<p>下面是基本选择器的语法表格：</p>
<table cellpadding="0" cellspacing="0" >
<tbody >
<tr >
选择器
功能
返回值
</tr>
<tr >

<td >ancestor descendant
</td>

<td >根据祖先元素匹配所有的后代元素
</td>

<td >元素集合
</td>
</tr>
<tr >

<td >parent>child
</td>

<td >根据父元素匹配所有子元素
</td>

<td >元素集合
</td>
</tr>
<tr >

<td >prev + next
</td>

<td >匹配所有紧接在prev元素后的相邻元素
</td>

<td >元素集合
</td>
</tr>
<tr >

<td >prev ~ siblings
</td>

<td >匹配prev元素之后的所有兄弟元素
</td>

<td >元素集合
</td>
</tr>
</tbody>
</table>


<span id="more"></span>  

<p><strong>说明：</strong>ancestor descendant 与 parent&gt;child 所选择的元素集合是不同的，这一点在下面的示例里面是很显然就能看出来的，ancestor descendant匹配的descendant是ancestor里的所有匹配descendant元素（也就是说可以向下匹配好几层），而parent&gt;child只匹配parent元素的子元素（即只能匹配一层）；另外，prev + next可以使用.next()代替，而prev ~ siblings可以用.nextAll()来代替。</p>
<p>下面是示例代码，请自己调整注释符的位置来体会各种不同的选择器的效果。  </p>
<figure class="highlight plaintext"><table><tr><td class="code"><pre><span class="line">&amp;lt;!DOCTYPE html PUBLIC &amp;quot;-//W3C//DTD XHTML 1.0 Strict//EN&amp;quot;&lt;br /&gt;</span><br><span class="line">    &amp;quot;http://www.w3.org/TR/xhtml1/DTD/xhtml1-strict.dtd&amp;quot;&amp;gt;&lt;br /&gt;</span><br><span class="line">&amp;lt;html xmlns=&amp;quot;http://www.w3.org/1999/xhtml&amp;quot; xml:lang=&amp;quot;en&amp;quot; lang=&amp;quot;en&amp;quot;&amp;gt;&lt;/p&gt;</span><br><span class="line">&lt;p&gt;&amp;lt;head&amp;gt;&lt;br /&gt;</span><br><span class="line">    &amp;lt;title&amp;gt;chap2-3 使用jQuery层次选择器&amp;lt;/title&amp;gt;&lt;br /&gt;</span><br><span class="line">    &amp;lt;meta http-equiv=&amp;quot;content-type&amp;quot; content=&amp;quot;text/html;charset=utf-8&amp;quot; /&amp;gt;&lt;br /&gt;</span><br><span class="line">    &amp;lt;meta name=&amp;quot;generator&amp;quot; content=&amp;quot;Geany 0.20&amp;quot; /&amp;gt;&lt;br /&gt;</span><br><span class="line">    &amp;lt;script language=&amp;quot;javascript&amp;quot; type=&amp;quot;text/javascript&amp;quot; src=&amp;quot;jquery-1.6.2.min.js&amp;quot;&amp;gt;&amp;lt;/script&amp;gt;&lt;br /&gt;</span><br><span class="line">    &amp;lt;style type=&amp;quot;text/css&amp;quot;&amp;gt;&lt;br /&gt;</span><br><span class="line">        body&#123;&lt;br /&gt;</span><br><span class="line">            font-size:12px;&lt;br /&gt;</span><br><span class="line">            text-align:center;&lt;br /&gt;</span><br><span class="line">        &#125;&lt;br /&gt;</span><br><span class="line">        div,span&#123;&lt;br /&gt;</span><br><span class="line">            float:left;&lt;br /&gt;</span><br><span class="line">            border:solid 1px #ccc;&lt;br /&gt;</span><br><span class="line">            margin:8px;&lt;br /&gt;</span><br><span class="line">            display:none;&lt;br /&gt;</span><br><span class="line">        &#125;&lt;br /&gt;</span><br><span class="line">        .clsFraA&#123;&lt;br /&gt;</span><br><span class="line">            width:65px;&lt;br /&gt;</span><br><span class="line">            height:65px;&lt;br /&gt;</span><br><span class="line">        &#125;&lt;br /&gt;</span><br><span class="line">        .clsFraP&#123;&lt;br /&gt;</span><br><span class="line">            width:45px;&lt;br /&gt;</span><br><span class="line">            height:45px;&lt;br /&gt;</span><br><span class="line">            background-color:#eee;&lt;br /&gt;</span><br><span class="line">        &#125;&lt;br /&gt;</span><br><span class="line">        .clsFraC&#123;&lt;br /&gt;</span><br><span class="line">            width:25px;&lt;br /&gt;</span><br><span class="line">            height:25px;&lt;br /&gt;</span><br><span class="line">            background-color:#ddd;&lt;br /&gt;</span><br><span class="line">        &#125;&lt;br /&gt;</span><br><span class="line">    &amp;lt;/style&amp;gt;&lt;br /&gt;</span><br><span class="line">    &amp;lt;script type=&amp;quot;text/javascript&amp;quot;&amp;gt;&lt;br /&gt;</span><br><span class="line">        /*$(function()&#123; //匹配后代元素&lt;br /&gt;</span><br><span class="line">            $(&amp;quot;#divMid&amp;quot;).css(&amp;quot;display&amp;quot;,&amp;quot;block&amp;quot;);&lt;br /&gt;</span><br><span class="line">            $(&amp;quot;div span&amp;quot;).css(&amp;quot;display&amp;quot;,&amp;quot;block&amp;quot;);&lt;br /&gt;</span><br><span class="line">        &#125;);&lt;br /&gt;</span><br><span class="line">        $(function()&#123; //匹配子元素&lt;br /&gt;</span><br><span class="line">            $(&amp;quot;#divMid&amp;quot;).css(&amp;quot;display&amp;quot;,&amp;quot;block&amp;quot;);&lt;br /&gt;</span><br><span class="line">            $(&amp;quot;div&amp;gt;span&amp;quot;).css(&amp;quot;display&amp;quot;,&amp;quot;block&amp;quot;);&lt;br /&gt;</span><br><span class="line">        &#125;);*/&lt;br /&gt;</span><br><span class="line">        $(function()&#123; //匹配后面元素&lt;br /&gt;</span><br><span class="line">            $(&amp;quot;#divMid + div&amp;quot;).css(&amp;quot;display&amp;quot;,&amp;quot;block&amp;quot;);&lt;br /&gt;</span><br><span class="line">            //$(&amp;quot;#divMid&amp;quot;).next().css(&amp;quot;display&amp;quot;,&amp;quot;block&amp;quot;);&lt;br /&gt;</span><br><span class="line">        &#125;);&lt;br /&gt;</span><br><span class="line">        /*$(function()&#123; //合并所有后面元素&lt;br /&gt;</span><br><span class="line">            $(&amp;quot;#divMid ~ div&amp;quot;).css(&amp;quot;display&amp;quot;,&amp;quot;block&amp;quot;);&lt;br /&gt;</span><br><span class="line">            //$(&amp;quot;#divMid&amp;quot;).nextAll().css(&amp;quot;display&amp;quot;,&amp;quot;block&amp;quot;);&lt;br /&gt;</span><br><span class="line">        &#125;);&lt;br /&gt;</span><br><span class="line">        $(function()&#123; //匹配所有相邻的元素&lt;br /&gt;</span><br><span class="line">            $(&amp;quot;#divMid&amp;quot;).siblings(&amp;quot;div&amp;quot;)&lt;br /&gt;</span><br><span class="line">            .css(&amp;quot;display&amp;quot;,&amp;quot;block&amp;quot;);&lt;br /&gt;</span><br><span class="line">        &#125;);*/&lt;br /&gt;</span><br><span class="line">    &amp;lt;/script&amp;gt;&lt;br /&gt;</span><br><span class="line">&amp;lt;/head&amp;gt;&lt;/p&gt;</span><br><span class="line">&lt;p&gt;&amp;lt;body&amp;gt;&lt;br /&gt;</span><br><span class="line">    &amp;lt;div class=&amp;quot;clsFraA&amp;quot;&amp;gt;Left&amp;lt;/div&amp;gt;&lt;br /&gt;</span><br><span class="line">    &amp;lt;div class=&amp;quot;clsFraA&amp;quot; id=&amp;quot;divMid&amp;quot;&amp;gt;&lt;br /&gt;</span><br><span class="line">        &amp;lt;span class=&amp;quot;clsFraP&amp;quot; id=&amp;quot;Span1&amp;quot;&amp;gt;&lt;br /&gt;</span><br><span class="line">            &amp;lt;span class=&amp;quot;clsFraC&amp;quot; id=&amp;quot;Span2&amp;quot;&amp;gt;&amp;lt;/span&amp;gt;&lt;br /&gt;</span><br><span class="line">        &amp;lt;/span&amp;gt;&lt;br /&gt;</span><br><span class="line">    &amp;lt;/div&amp;gt;&lt;br /&gt;</span><br><span class="line">    &amp;lt;div class=&amp;quot;clsFraA&amp;quot;&amp;gt;Right_1&amp;lt;/div&amp;gt;&lt;br /&gt;</span><br><span class="line">    &amp;lt;div class=&amp;quot;clsFraA&amp;quot;&amp;gt;Right_2&amp;lt;/div&amp;gt;&lt;br /&gt;</span><br><span class="line">&amp;lt;/body&amp;gt;&lt;br /&gt;</span><br><span class="line">&amp;lt;/html&amp;gt;&lt;br /&gt;</span><br></pre></td></tr></table></figure>

]]></content>
      <tags>
        <tag>编程语言</tag>
        <tag>前端</tag>
      </tags>
  </entry>
  <entry>
    <title>吃饭睡觉打豆豆</title>
    <url>/2011/09/03/beat-beans.html</url>
    <content><![CDATA[<p><strong>打豆豆游戏</strong></p>
<p>[<a href="/img/2011/09/color_title.swf">原地址</a>]</p>
<p><strong>冷笑话</strong></p>
<p><code>吃饭睡觉打豆豆</code> 是网络上最为流行的小笑话之一，这则笑话的具体的内容如下：</p>
<p><img src="/img/2011/09/aa251d4ffb15a95caec3abf5.jpg"></p>
<p>有个记者去南极采访一群企鹅</p>
<p>他问第一只企鹅：“你每天都干什么？”</p>
<p>企鹅说：“吃饭 睡觉 打豆豆！”</p>
<p>接着又问第2只企鹅，那只企鹅还是说：“吃饭 睡觉 打豆豆！” 记者带着困惑问其他的企鹅，答案都一样，就这样一直问了99只企鹅。</p>
<p>当走到第100只小企鹅旁边时，记者走过去问它：每天都做些什么啊？</p>
<p>那只小企鹅回答：”吃饭，睡觉．”</p>
<p>那人惊奇的又问：”你怎么不打豆豆？”</p>
<p>小企鹅撇着嘴巴，瞪了记者一眼说：”我就是豆豆！！！！”</p>
<p>这则小笑话无疑是令人喷饭的，但又极为简单，最令人称奇的是这个笑话本身的名字居然有着不小的影响力。在各大搜索引擎点击搜索，以它为名字的个人空间和群组不计其数，而这些个人空间和群组的用户大多数为青年学生，这是一件很值得探究的事情。这个小笑话，简简单单却又富有生趣，广大青年朋友尤其是学生们在参与以它为名字的网络群组其中时，得到的是一种带有些许童趣的单纯心境。</p>
]]></content>
      <tags>
        <tag>杂七杂八</tag>
      </tags>
  </entry>
  <entry>
    <title>我的第一个Wordpress插件正式发布</title>
    <url>/2011/09/07/my-first-wordpress-plugin.html</url>
    <content><![CDATA[<p>[xiami soundfile&#x3D;”<a href="http://f1.xiami.net/3180/15814/194097_32389.mp3">http://f1.xiami.net/3180/15814/194097_32389.mp3</a>“ autostart&#x3D;”yes” loop&#x3D;”yes”]彩虹 – 羽·泉[&#x2F;xiami]<br>我的第一个Wordpress插件（<a href="http://www.domyself.me/lab/ntalker-for-wordpress">Ntalker for Wordpress</a>）正式在Wordpress官网发布啦～大家赶紧来踩踩看吧，地址是：<a href="http://wordpress.org/extend/plugins/ntalker-for-wordpress/">http://wordpress.org/extend/plugins/ntalker-for-wordpress/</a>。记得如果你觉得好的话，帮忙打个高分呀，如果你有啥想法的话，欢迎来这个页面留言：<a href="http://www.domyself.me/lab/ntalker-for-wordpress">http://www.domyself.me/lab/ntalker-for-wordpress</a></p>
]]></content>
      <tags>
        <tag>后端</tag>
        <tag>网站日志</tag>
      </tags>
  </entry>
  <entry>
    <title>jQuery入门教程笔记4</title>
    <url>/2011/09/10/jquery-tutorial.html</url>
    <content><![CDATA[<p>这是《jQuery入门教程笔记》系列4，在第4篇里面将继续讲述jQuery的选择器，这篇讲述“基本过滤选择器”。</p>
<p>下面是简单过滤选择器的语法表格：</p>
<table cellpadding="0" cellspacing="0" >
<tbody >
<tr >
选择器
功能
返回值
</tr>
<tr >

<td >first()或者:first
</td>

<td >获取第一个元素
</td>

<td >单个元素
</td>
</tr>
<tr >

<td >last()或:last
</td>

<td >获取最后一个元素
</td>

<td >单个元素
</td>
</tr>
<tr >

<td >:not(selector)
</td>

<td >获取除给定选择器外的所有元素
</td>

<td >元素集合
</td>
</tr>
<tr >

<td >:even
</td>

<td >获取所有索引值为偶数的元素，索引号从0开始
</td>

<td >元素集合
</td>
</tr>
<tr >

<td >:odd
</td>

<td >获取所有索引值为奇数的元素，索引号从0开始
</td>

<td >元素集合
</td>
</tr>
<tr >

<td >:eq(index)
</td>

<td >获取指定索引值的元素，索引号从0开始
</td>

<td >元素集合
</td>
</tr>
<tr >

<td >:gt(index)
</td>

<td >获取所有大于给定索引值的元素，索引号从0开始
</td>

<td >元素集合
</td>
</tr>
<tr >

<td >:lt(index)
</td>

<td >获取所有小于给定索引值的元素，索引号从0开始
</td>

<td >元素集合
</td>
</tr>
<tr >

<td >:header
</td>

<td >获取所有类型的元素，如h1,h2……
</td>

<td >元素集合
</td>
</tr>
<tr >

<td >:animated
</td>

<td >获取正在执行动画效果的元素
</td>

<td >元素集合
</td>
</tr>
</tbody>
</table>


<p>下面是示例代码，请自己调整注释符的位置来体会各种不同的选择器的效果。</p>
<figure class="highlight plaintext"><table><tr><td class="code"><pre><span class="line">&lt;!DOCTYPE html PUBLIC &quot;-//W3C//DTD XHTML 1.0 Strict//EN&quot;</span><br><span class="line">    &quot;http://www.w3.org/TR/xhtml1/DTD/xhtml1-strict.dtd&quot;&gt;</span><br><span class="line">&lt;html xmlns=&quot;http://www.w3.org/1999/xhtml&quot; xml:lang=&quot;en&quot; lang=&quot;en&quot;&gt;</span><br><span class="line"></span><br><span class="line">&lt;head&gt;</span><br><span class="line">    &lt;title&gt;chap2-4 使用jQuery基本过滤选择器&lt;/title&gt;</span><br><span class="line">    &lt;meta http-equiv=&quot;content-type&quot; content=&quot;text/html;charset=utf-8&quot; /&gt;</span><br><span class="line">    &lt;meta name=&quot;generator&quot; content=&quot;Geany 0.20&quot; /&gt;</span><br><span class="line">    &lt;script language=&quot;javascript&quot; type=&quot;text/javascript&quot; src=&quot;jquery-1.6.2.min.js&quot;&gt;&lt;/script&gt;</span><br><span class="line">    &lt;style type=&quot;text/css&quot;&gt;</span><br><span class="line">        body&#123;</span><br><span class="line">            font-size:12px;</span><br><span class="line">            text-align:center;      </span><br><span class="line">        &#125;</span><br><span class="line">        div&#123;</span><br><span class="line">            width:241px;</span><br><span class="line">            height:83px;</span><br><span class="line">            border:solid 1px #eee;</span><br><span class="line">        &#125;</span><br><span class="line">        h1&#123;</span><br><span class="line">            font-size:13px;</span><br><span class="line">        &#125;</span><br><span class="line">        ul&#123;</span><br><span class="line">            list-style-type:none;</span><br><span class="line">            padding:0px;</span><br><span class="line">        &#125;</span><br><span class="line">        .DefClass,.NotClass&#123;</span><br><span class="line">            height:23px;</span><br><span class="line">            width:60px;</span><br><span class="line">            line-height:23px;</span><br><span class="line">            float:left;</span><br><span class="line">            border-top:solid 1px #eee;</span><br><span class="line">            border-botton:solid 1px #eee;</span><br><span class="line">        &#125;</span><br><span class="line">        .GetFocus&#123;</span><br><span class="line">            width:58px;border:solid 1px #666;</span><br><span class="line">            background-color:#eee;</span><br><span class="line">        &#125;</span><br><span class="line">        #spanMove&#123;</span><br><span class="line">            width:238px;</span><br><span class="line">            height:23px;</span><br><span class="line">            line-height:23px;</span><br><span class="line">        &#125;</span><br><span class="line">        .clsFraA&#123;</span><br><span class="line">            width:65px;</span><br><span class="line">            height:65px;</span><br><span class="line">        &#125;</span><br><span class="line">        .clsFraP&#123;</span><br><span class="line">            width:45px;</span><br><span class="line">            height:45px;</span><br><span class="line">            background-color:#eee;</span><br><span class="line">        &#125;</span><br><span class="line">        .clsFraC&#123;</span><br><span class="line">            width:25px;</span><br><span class="line">            height:25px;</span><br><span class="line">            background-color:#ddd;</span><br><span class="line">        &#125;</span><br><span class="line">    &lt;/style&gt;</span><br><span class="line">    &lt;script type=&quot;text/javascript&quot;&gt;</span><br><span class="line">        /**/$(function()&#123; //增加第一个元素的类别</span><br><span class="line">            $(&quot;li:first&quot;).addClass(&quot;GetFocus&quot;);</span><br><span class="line">        &#125;);</span><br><span class="line">        /*$(function()&#123; //增加最后一个元素的类别</span><br><span class="line">            $(&quot;li:last&quot;).addClass(&quot;GetFocus&quot;);</span><br><span class="line">        &#125;);</span><br><span class="line">        $(function()&#123; //增加去除所有与给定选择器匹配的元素类别</span><br><span class="line">            $(&quot;li:not(.NotClass)&quot;).addClass(&quot;GetFocus&quot;);</span><br><span class="line">        &#125;);</span><br><span class="line">        $(function()&#123; //增加所有索引值为偶数的元素类别，从0开始计数</span><br><span class="line">            $(&quot;li:even&quot;).addClass(&quot;GetFocus&quot;);</span><br><span class="line">        &#125;);</span><br><span class="line">        $(function()&#123; //增加所有索引值为奇数的元素类别，从0开始计数</span><br><span class="line">            $(&quot;li:odd&quot;).addClass(&quot;GetFocus&quot;);</span><br><span class="line">        &#125;);</span><br><span class="line">        $(function()&#123; //增加一个给定索引值的元素类别，从0开始计数</span><br><span class="line">            $(&quot;li:eq(1)&quot;).addClass(&quot;GetFocus&quot;);</span><br><span class="line">        &#125;);</span><br><span class="line">        $(function()&#123; //增加所有大于给定索引值的元素类别，从0开始计数</span><br><span class="line">            $(&quot;li:gt(1)&quot;).addClass(&quot;GetFocus&quot;);</span><br><span class="line">        &#125;);</span><br><span class="line">        $(function()&#123; //增加所有小于给定索引值的元素类别，从0开始计数</span><br><span class="line">            $(&quot;li:lt(4)&quot;).addClass(&quot;GetFocus&quot;);</span><br><span class="line">        &#125;);</span><br><span class="line">        $(function()&#123; //增加标题类元素类别</span><br><span class="line">            $(&quot;div h1&quot;).css(&quot;width&quot;,&quot;238&quot;);</span><br><span class="line">            $(&quot;:header&quot;).addClass(&quot;GetFocus&quot;);</span><br><span class="line">        &#125;);</span><br><span class="line">        $(function()&#123;</span><br><span class="line">            animateIt();//增加动画效果元素类别</span><br><span class="line">            $(&quot;#spanMove:animated&quot;).addClass(&quot;GetFocus&quot;);</span><br><span class="line">        &#125;);*/</span><br><span class="line">        function animateIt() &#123; //动画效果</span><br><span class="line">            $(&quot;#spanMove&quot;).slideToggle(&quot;slow&quot;,animateIt);</span><br><span class="line">        &#125;</span><br><span class="line">    &lt;/script&gt;</span><br><span class="line">&lt;/head&gt;</span><br><span class="line"></span><br><span class="line">&lt;body&gt;</span><br><span class="line">    &lt;div&gt;</span><br><span class="line">        &lt;h1&gt;基本过滤选择器&lt;/h1&gt;</span><br><span class="line">        &lt;ul&gt;</span><br><span class="line">            &lt;li class=&quot;DefClass&quot;&gt;Item 0&lt;/li&gt;</span><br><span class="line">            &lt;li class=&quot;DefClass&quot;&gt;Item 1&lt;/li&gt;</span><br><span class="line">            &lt;li class=&quot;NotClass&quot;&gt;Item 2&lt;/li&gt;</span><br><span class="line">            &lt;li class=&quot;DefClass&quot;&gt;Item 3&lt;/li&gt;</span><br><span class="line">        &lt;/ul&gt;</span><br><span class="line">        &lt;span id=&quot;spanMove&quot;&gt;Span Move&lt;/span&gt;</span><br><span class="line">    &lt;/div&gt;</span><br><span class="line">&lt;/body&gt;</span><br><span class="line">&lt;/html&gt;</span><br></pre></td></tr></table></figure>

]]></content>
      <tags>
        <tag>编程语言</tag>
      </tags>
  </entry>
  <entry>
    <title>jQuery入门教程笔记5</title>
    <url>/2011/09/13/jquery-tutorial.html</url>
    <content><![CDATA[<p>这是《jQuery入门教程笔记》系列5，在第5篇里面将继续讲述jQuery的选择器，这篇讲述“内容过滤选择器”，“可见性过滤选择器”，“属性过滤选择器”。</p>
<p>下面是内容过滤选择器的语法表格：</p>
<table cellpadding="0" cellspacing="0" >
<tbody >
<tr >
选择器
功能
返回值
</tr>
<tr >

<td >:contains(text)
</td>

<td >获取包含给定文本的元素
</td>

<td >元素集合
</td>
</tr>
<tr >

<td >:empty
</td>

<td >获取所有不包含子元素或文本的空元素
</td>

<td >元素集合
</td>
</tr>
<tr >

<td >:has(selector)
</td>

<td >获取含有选择器所匹配的元素的元素
</td>

<td >元素集合
</td>
</tr>
<tr >

<td >:parent
</td>

<td >获取含有子元素或者文本的元素。
</td>

<td >元素集合
</td>
</tr>
</tbody>
</table>
<span id="more"></span>
下面是示例代码，请自己调整注释符的位置来体会各种不同的选择器的效果。

<figure class="highlight plaintext"><table><tr><td class="code"><pre><span class="line">&lt;!DOCTYPE html PUBLIC &quot;-//W3C//DTD XHTML 1.0 Strict//EN&quot;</span><br><span class="line">    &quot;http://www.w3.org/TR/xhtml1/DTD/xhtml1-strict.dtd&quot;&gt;</span><br><span class="line">&lt;html xmlns=&quot;http://www.w3.org/1999/xhtml&quot; xml:lang=&quot;en&quot; lang=&quot;en&quot;&gt;</span><br><span class="line"></span><br><span class="line">&lt;head&gt;</span><br><span class="line">    &lt;title&gt;chap2-5 使用jQuery内容过滤选择器&lt;/title&gt;</span><br><span class="line">    &lt;meta http-equiv=&quot;content-type&quot; content=&quot;text/html;charset=utf-8&quot; /&gt;</span><br><span class="line">    &lt;meta name=&quot;generator&quot; content=&quot;Geany 0.20&quot; /&gt;</span><br><span class="line">    &lt;script language=&quot;javascript&quot; type=&quot;text/javascript&quot; src=&quot;jquery-1.6.2.min.js&quot;&gt;&lt;/script&gt;</span><br><span class="line">    &lt;style type=&quot;text/css&quot;&gt;</span><br><span class="line">        body&#123;</span><br><span class="line">            font-size:12px;</span><br><span class="line">            text-align:center;      </span><br><span class="line">        &#125;</span><br><span class="line">        div&#123;</span><br><span class="line">            float:left;</span><br><span class="line">            display:none;</span><br><span class="line">            width:65px;</span><br><span class="line">            height:65px;</span><br><span class="line">            margin:8px;</span><br><span class="line">            border:solid 1px #ccc;</span><br><span class="line">        &#125;</span><br><span class="line">        span&#123;</span><br><span class="line">            float:left;</span><br><span class="line">            border:solid 1px #ccc;</span><br><span class="line">            margin:8px;</span><br><span class="line">            width:45px;</span><br><span class="line">            height:45px;</span><br><span class="line">            background-color:#eee;</span><br><span class="line">        &#125;</span><br><span class="line">    &lt;/style&gt;</span><br><span class="line">    &lt;script type=&quot;text/javascript&quot;&gt;</span><br><span class="line">        /*$(function()&#123; //显示包含给定文本的元素</span><br><span class="line">            $(&quot;div:contains(&#x27;A&#x27;)&quot;).css(&quot;display&quot;,&quot;block&quot;);</span><br><span class="line">        &#125;);</span><br><span class="line">        $(function()&#123; //显示所有不包含子元素或者文本的空元素</span><br><span class="line">            $(&quot;div:empty&quot;).css(&quot;display&quot;,&quot;block&quot;);</span><br><span class="line">        &#125;);</span><br><span class="line">        $(function()&#123; //显示含有选择器所匹配的元素</span><br><span class="line">            $(&quot;div:has(span)&quot;).css(&quot;display&quot;,&quot;block&quot;);</span><br><span class="line">        &#125;);*/</span><br><span class="line">        /**/$(function()&#123; //显示含有子元素或者文本的元素</span><br><span class="line">            $(&quot;div:parent&quot;).css(&quot;display&quot;,&quot;block&quot;);</span><br><span class="line">        &#125;);</span><br><span class="line">    &lt;/script&gt;</span><br><span class="line">&lt;/head&gt;</span><br><span class="line"></span><br><span class="line">&lt;body&gt;</span><br><span class="line">    &lt;div&gt;ABCD&lt;/div&gt;</span><br><span class="line">    &lt;div&gt;&lt;span&gt;&lt;/span&gt;&lt;/div&gt;</span><br><span class="line">    &lt;div&gt;EFaH&lt;/div&gt;</span><br><span class="line">    &lt;div&gt;&lt;/div&gt;</span><br><span class="line">&lt;/body&gt;</span><br><span class="line">&lt;/html&gt;</span><br></pre></td></tr></table></figure>

<p>下面是可见过滤选择器的语法表格：</p>
<table cellpadding="0" cellspacing="0" >
<tbody >
<tr >
选择器
功能
返回值
</tr>
<tr >

<td >:hidden
</td>

<td >获取所有不可见元素，或者type为hidden的元素
</td>

<td >元素集合
</td>
</tr>
<tr >

<td >:visible
</td>

<td >获取所有的可见元素
</td>

<td >元素集合
</td>
</tr>
</tbody>
</table>

<p>下面是示例代码，请自己调整注释符的位置来体会各种不同的选择器的效果。</p>
<figure class="highlight plaintext"><table><tr><td class="code"><pre><span class="line">&lt;!DOCTYPE html PUBLIC &quot;-//W3C//DTD XHTML 1.0 Strict//EN&quot;</span><br><span class="line">    &quot;http://www.w3.org/TR/xhtml1/DTD/xhtml1-strict.dtd&quot;&gt;</span><br><span class="line">&lt;html xmlns=&quot;http://www.w3.org/1999/xhtml&quot; xml:lang=&quot;en&quot; lang=&quot;en&quot;&gt;</span><br><span class="line"></span><br><span class="line">&lt;head&gt;</span><br><span class="line">    &lt;title&gt;chap2-6 使用jQuery可见性过滤选择器&lt;/title&gt;</span><br><span class="line">    &lt;meta http-equiv=&quot;content-type&quot; content=&quot;text/html;charset=utf-8&quot; /&gt;</span><br><span class="line">    &lt;meta name=&quot;generator&quot; content=&quot;Geany 0.20&quot; /&gt;</span><br><span class="line">    &lt;script language=&quot;javascript&quot; type=&quot;text/javascript&quot; src=&quot;jquery-1.6.2.min.js&quot;&gt;&lt;/script&gt;</span><br><span class="line">    &lt;style type=&quot;text/css&quot;&gt;</span><br><span class="line">        body&#123;</span><br><span class="line">            font-size:12px;</span><br><span class="line">            text-align:center;      </span><br><span class="line">        &#125;</span><br><span class="line">        div,span&#123;</span><br><span class="line">            float:left;</span><br><span class="line">            width:65px;</span><br><span class="line">            height:65px;</span><br><span class="line">            margin:8px;</span><br><span class="line">            border:solid 1px #ccc;</span><br><span class="line">        &#125;</span><br><span class="line">        .GetFocus&#123;</span><br><span class="line">            border:solid 1px #666;</span><br><span class="line">            background-color:#eee;</span><br><span class="line">        &#125;</span><br><span class="line">    &lt;/style&gt;</span><br><span class="line">    &lt;script type=&quot;text/javascript&quot;&gt;</span><br><span class="line">        $(function()&#123; //增加所有可见元素类别</span><br><span class="line">            $(&quot;span:hidden&quot;).show();</span><br><span class="line">            $(&quot;div:visible&quot;).addClass(&quot;GetFocus&quot;);</span><br><span class="line">        &#125;);</span><br><span class="line">        /*$(function()&#123; //增加所有不可见元素类别</span><br><span class="line">            $(&quot;span:hidden&quot;).show().addClass(&quot;GetFocus&quot;);</span><br><span class="line">        &#125;);*/</span><br><span class="line">    &lt;/script&gt;</span><br><span class="line">&lt;/head&gt;</span><br><span class="line"></span><br><span class="line">&lt;body&gt;</span><br><span class="line">    &lt;span style=&quot;display:none;&quot;&gt;Hidden&lt;/span&gt;</span><br><span class="line">    &lt;div&gt;Visible&lt;/div&gt;</span><br><span class="line">&lt;/body&gt;</span><br><span class="line">&lt;/html&gt;</span><br></pre></td></tr></table></figure>

<p>下面是属性过滤选择器的语法表格：</p>
<table cellpadding="0" cellspacing="0" >
<tbody >
<tr >
选择器
功能
返回值
</tr>
<tr >

<td >[attribute]
</td>

<td >获取包含给定属性的元素
</td>

<td >元素集合
</td>
</tr>
<tr >

<td >[attribute=value]
</td>

<td >获取等于给定的属性是某个特定值的元素
</td>

<td >元素集合
</td>
</tr>
<tr >

<td >[attribute!=value]
</td>

<td >获取不等于给定的属性是某个特定值的元素
</td>

<td >元素集合
</td>
</tr>
<tr >

<td >[attribute^=value]
</td>

<td >获取给定的属性是以某些值开始的元素
</td>

<td >元素集合
</td>
</tr>
<tr >

<td >[attribute$=value]
</td>

<td >获取给定的属性是以某些值结尾的元素
</td>

<td >元素集合
</td>
</tr>
<tr >

<td >[attribute*=value]
</td>

<td >获取给定的属性是以包含某些值的元素
</td>

<td >元素集合
</td>
</tr>
<tr >

<td >[selector1][selector2][selectorN]
</td>

<td >获取满足多个条件的复合属性的元素
</td>

<td >元素集合
</td>
</tr>
</tbody>
</table>

<p>下面是示例代码，请自己调整注释符的位置来体会各种不同的选择器的效果。</p>
<figure class="highlight plaintext"><table><tr><td class="code"><pre><span class="line">&lt;!DOCTYPE html PUBLIC &quot;-//W3C//DTD XHTML 1.0 Strict//EN&quot;</span><br><span class="line">    &quot;http://www.w3.org/TR/xhtml1/DTD/xhtml1-strict.dtd&quot;&gt;</span><br><span class="line">&lt;html xmlns=&quot;http://www.w3.org/1999/xhtml&quot; xml:lang=&quot;en&quot; lang=&quot;en&quot;&gt;</span><br><span class="line"></span><br><span class="line">&lt;head&gt;</span><br><span class="line">    &lt;title&gt;chap2-7 使用jQuery属性过滤选择器&lt;/title&gt;</span><br><span class="line">    &lt;meta http-equiv=&quot;content-type&quot; content=&quot;text/html;charset=utf-8&quot; /&gt;</span><br><span class="line">    &lt;meta name=&quot;generator&quot; content=&quot;Geany 0.20&quot; /&gt;</span><br><span class="line">    &lt;script language=&quot;javascript&quot; type=&quot;text/javascript&quot; src=&quot;jquery-1.6.2.min.js&quot;&gt;&lt;/script&gt;</span><br><span class="line">    &lt;style type=&quot;text/css&quot;&gt;</span><br><span class="line">        body&#123;</span><br><span class="line">            font-size:12px;</span><br><span class="line">            text-align:center;      </span><br><span class="line">        &#125;</span><br><span class="line">        div&#123;</span><br><span class="line">            float:left;</span><br><span class="line">            width:65px;</span><br><span class="line">            height:65px;</span><br><span class="line">            margin:8px;</span><br><span class="line">            display:none;</span><br><span class="line">            border:solid 1px #ccc;</span><br><span class="line">        &#125;</span><br><span class="line">    &lt;/style&gt;</span><br><span class="line">    &lt;script type=&quot;text/javascript&quot;&gt;</span><br><span class="line">        $(function()&#123; //显示所有含有id属性的元素</span><br><span class="line">            $(&quot;div[id]&quot;).show(3000);</span><br><span class="line">        &#125;);</span><br><span class="line">        $(function()&#123; //显示所有属性title的值是&quot;A&quot;的元素</span><br><span class="line">            $(&quot;div[title=&#x27;A&#x27;]&quot;).show(3000);</span><br><span class="line">        &#125;);</span><br><span class="line">        $(function()&#123; //显示所有属性title的值不是&quot;A&quot;的元素</span><br><span class="line">            $(&quot;div[title!=&#x27;A&#x27;]&quot;).show(3000);</span><br><span class="line">        &#125;);</span><br><span class="line">        $(function()&#123; //显示所有属性title的值以&quot;A&quot;开始的元素</span><br><span class="line">            $(&quot;div[title^=&#x27;A&#x27;]&quot;).show(3000);</span><br><span class="line">        &#125;);</span><br><span class="line">        $(function()&#123; //显示所有属性title的值以&quot;C&quot;结束的元素</span><br><span class="line">            $(&quot;div[title$=&#x27;C&#x27;]&quot;).show(3000);</span><br><span class="line">        &#125;);</span><br><span class="line">        $(function()&#123; //显示所有属性title的值中含有&quot;B&quot;的元素</span><br><span class="line">            $(&quot;div[title*=&#x27;B&#x27;]&quot;).show(3000);</span><br><span class="line">        &#125;);</span><br><span class="line">        $(function()&#123; //显示所有属性title的值中含有&quot;B&quot;且属性id的值是&quot;divAB&quot;的元素</span><br><span class="line">            $(&quot;div[id=&#x27;divAB&#x27;][title*=&#x27;B&#x27;]&quot;).show(3000);</span><br><span class="line">        &#125;);</span><br><span class="line">    &lt;/script&gt;</span><br><span class="line">&lt;/head&gt;</span><br><span class="line"></span><br><span class="line">&lt;body&gt;</span><br><span class="line">    &lt;div id=&quot;divID&quot;&gt;ID&lt;/div&gt;</span><br><span class="line">    &lt;div title=&quot;A&quot;&gt;Title A&lt;/div&gt;</span><br><span class="line">    &lt;div id=&quot;divAB&quot; title=&quot;AB&quot;&gt;ID &lt;br /&gt;Title AB&lt;/div&gt;</span><br><span class="line">    &lt;div title=&quot;ABC&quot;&gt;Title ABC&lt;/div&gt;</span><br><span class="line">&lt;/body&gt;</span><br><span class="line">&lt;/html&gt;</span><br></pre></td></tr></table></figure>

]]></content>
      <tags>
        <tag>编程语言</tag>
      </tags>
  </entry>
  <entry>
    <title>使用PHP的fsockopen方法post提交数据</title>
    <url>/2011/09/15/php-fsockopen.html</url>
    <content><![CDATA[<p>test1.php文件如下:</p>
<figure class="highlight plaintext"><table><tr><td class="code"><pre><span class="line">function posttohost($url, $data) &#123;</span><br><span class="line">$url = parse_url($url);</span><br><span class="line">if (!$url) return “couldn’t parse url”;</span><br><span class="line">if (!isset($url[&#x27;port&#x27;])) &#123; $url[&#x27;port&#x27;] = “”; &#125;</span><br><span class="line">if (!isset($url[&#x27;query&#x27;])) &#123; $url[&#x27;query&#x27;] = “”; &#125;</span><br><span class="line">$encoded = “”;</span><br><span class="line">while (list($k,$v) = each($data)) &#123;</span><br><span class="line">$encoded .= ($encoded ? “&amp;” : “”);</span><br><span class="line">$encoded .= rawurlencode($k).”=”.rawurlencode($v);</span><br><span class="line">&#125;</span><br><span class="line">$fp = fsockopen($url[&#x27;host&#x27;], $url[&#x27;port&#x27;] ? $url[&#x27;port&#x27;] : 80);</span><br><span class="line">if (!$fp) return “Failed to open socket to $url[host]“;</span><br><span class="line">fputs($fp, sprintf(“POST %s%s%s HTTP/1.0\n”, $url[&#x27;path&#x27;], $url[&#x27;query&#x27;] ? “?” : “”, $url[&#x27;query&#x27;]));</span><br><span class="line">fputs($fp, “Host: $url[host]\n”);</span><br><span class="line">fputs($fp, “Content-type: application/x-www-form-urlencoded\n”);</span><br><span class="line">fputs($fp, “Content-length: ” . strlen($encoded) . “\n”);</span><br><span class="line">fputs($fp, “Connection: close\n\n”);</span><br><span class="line">fputs($fp, “$encoded\n”);</span><br><span class="line">$line = fgets($fp,1024);</span><br><span class="line">if (!eregi(“^HTTP/1\.. 200″, $line)) return;</span><br><span class="line">$results = “”; $inheader = 1;</span><br><span class="line">while(!feof($fp)) &#123;</span><br><span class="line">$line = fgets($fp,1024);</span><br><span class="line">if ($inheader &amp;&amp; ($line == “\n” || $line == “\r\n”)) &#123;</span><br><span class="line">   $inheader = 0;</span><br><span class="line">&#125;</span><br><span class="line">elseif (!$inheader) &#123;</span><br><span class="line">   $results .= $line;</span><br><span class="line">&#125;</span><br><span class="line">&#125;</span><br><span class="line">fclose($fp);</span><br><span class="line">return $results;</span><br><span class="line">&#125;</span><br><span class="line">$arrVal[&quot;cc&quot;] = 88;</span><br><span class="line">$strTemp = posttohost(“http://www.juuyou.com/test2.php“, $arrVal);</span><br><span class="line">print_r($strTemp);</span><br><span class="line">========================= 我是分隔线 ======================================</span><br><span class="line">test2.php文件如下:</span><br><span class="line">$intC = $_POST[&quot;cc&quot;];</span><br><span class="line">for($c=1; $c&lt;$intC; $c++)&#123;</span><br><span class="line">echo $c.”|”;</span><br><span class="line">&#125;</span><br></pre></td></tr></table></figure>

]]></content>
      <tags>
        <tag>编程语言</tag>
        <tag>后端</tag>
      </tags>
  </entry>
  <entry>
    <title>40条优化php代码的小实例</title>
    <url>/2011/09/17/40-php-code-trick.html</url>
    <content><![CDATA[<p>1、如果一个方法能被静态，那就声明他为静态的，速度可提高1&#x2F;4；</p>
<p>2、echo的效率高于print,因为echo没有返回值，print返回一个整型；</p>
<p>3、在循环之前设置循环的最大次数，而非在在循环中；</p>
<p>4、销毁变量去释放内存，特别是大的数组；</p>
<p>5、避免使用像<code>__get</code>, <code>__set</code>, <code>__autoload</code>等魔术方法；</p>
<p>6、requiere_once()比较耗资源；</p>
<span id="more"></span>
<p>7、在includes和requires中使用绝对路径，这样在分析路径花的时间更少；</p>
<p>8、如果你需要得到脚本执行时的时间，<code>$_SERVER[&#39;REQUSET_TIME&#39;]</code>优于time()；</p>
<p>9、能使用字符处理函数的，尽量用他们，因为效率高于正则；</p>
<p>10、str_replace字符替换比正则替换preg_replace快，但strtr比str_replace又快1&#x2F;4；</p>
<p>11、如果一个函数既能接受数组又能接受简单字符做为参数，例如字符替换，并且参数列表不是太长，可以考虑多用一些简洁的替换语句，一次只替换一个字符，而不是接受数组做为查找和替换参数。大事化小，1+1&gt;2；</p>
<p>12、用@掩盖错误会降低脚本运行速度；</p>
<p>13、$row[‘id’]比$row[id]速度快7倍，建议养成数组键加引号的习惯；</p>
<p>14、错误信息很有用；</p>
<p>15、在循环里别用函数，例如For($x&#x3D;0； $x &lt; count($array)； $x), count()函数在外面先计算；</p>
<p>16、在方法里建立局部变量速度最快，几乎和在方法里调用局部变量一样快；</p>
<p>17、建立一个全局变量要比局部变量要慢2倍；</p>
<p>18、建立一个对象属性（类里面的变量）例如（$this-&gt;prop++）比局部变量要慢3倍；</p>
<p>19、建立一个未声明的局部变量要比一个初始化的局部变量慢9-10倍；</p>
<p>20、声明一个未被任何一个函数使用过的全局变量也会使性能降低（和声明相同数量的局部变量一样），PHP可能去检查这个全局变量是否存在；</p>
<p>21、方法的性能和在一个类里面定义的方法的数目没有关系，因为我添加10个或多个方法到测试的类里面（这些方法在测试方法的前后）后性能没什么差异；</p>
<p>22、在子类里方法的性能优于在基类中；</p>
<p>23、只调用一个参数并且函数体为空的函数运行花费的时间等于7-8次$localvar++运算，而一个类似的方法（类里的函数）运行等于大约15次$localvar++运算；</p>
<p>24、Surrounding your string by ‘ instead of ” will make things interpret a little faster since php looks for variables inside “…” but not inside ‘…’. Of course you can only do this when you don’t need to have variables in the string.</p>
<p>25、当输出字符串时用逗号代替点分割更快些。注意：这只对echo起作用，这个函数能接受一些字符串作为参数；</p>
<p>26、在apache服务器里一个php脚本页面比相应的HTML静态页面生成至少要多花2-10倍的时间，建议多用些静态HTML页面和少量的脚步；</p>
<p>27、除非你的安装了缓存，不然你的php脚本每次被访问都需要被重编译。建议安装个php缓存程序，这样通过去除一些重复的编译来很明显的提高你20-100%的性能；</p>
<p>28、建议用memcached，高性能的分布式内存对象缓存系统，提高动态网络应用程序性能，减轻数据库的负担；</p>
<p>29、使用ip2long()和long2ip()函数把IP地址转成整型存放进数据库而非字符型。这几乎能降低1&#x2F;4的存储空间。同时可以很容易对地址进行排序和快速查找；</p>
<p>30、使用checkdnsrr()通过域名存在性来确认部分email地址的有效性，这个内置函数能保证每一个的域名对应一个IP地址；</p>
<p>31、如果你在使用php5和mysql4.1以上的版本，考虑使用mysql_*的改良函数mysqli_*；</p>
<p>32、试着喜欢使用三元运算符（？：）；</p>
<p>33、在你想在彻底重做你的项目前，看看PEAR有没有你需要的。PEAR是个巨大的资源库，很多php开发者都知道；</p>
<p>34、使用highlight_file()能自动打印一份很好格式化的页面源代码的副本；</p>
<p>35、使用error_reporting(0)函数来预防潜在的敏感信息显示给用户。理想的错误报告应该被完全禁用在php.ini文件里。可是 如果你在用一个共享的虚拟主机，php.ini你不能修改，那么你最好添加error_reporting(0)函数，放在每个脚本文件的第一行（或用 require_once()来加载）这能有效的保护敏感的SQL查询和路径在出错时不被显示；</p>
<p>36、使用 gzcompress() 和gzuncompress()对容量大的字符串进行压缩（解压）在存进（取出）数据库时。这种内置的函数使用gzip算法能压缩到90%；</p>
<p>37、通过参数变量地址得引用来使一个函数有多个返回值。你可以在变量前加个“&amp;”来表示按地址传递而非按值传递；</p>
<p>38、Fully understand “magic quotes” and the dangers of SQL injection. I’m hoping that most developers reading this are already familiar with SQL injection. However, I list it here because it’s absolutely critical to understand. If you’ve never heard the term before, spend the entire rest of the day googling and reading.</p>
<p>39、使用strlen()因为要调用一些其他操作例如lowercase和hash表查询所以速度不是太好，我们可以用isset()来实现相似的功能，isset()速度优于strlen()；</p>
<p>40、When incrementing or decrementing the value of the variable $i++ happens to be a tad slower then ++$i. This is something PHP specific and does not apply to other languages, so don’t go modifying your C or Java code thinking it’ll suddenly become faster, it won’t. ++$i happens to be faster in PHP because instead of 4 opcodes used for $i++ you only need 3. Post incrementation actually causes in the creation of a temporary var that is then incremented. While pre-incrementation increases the original value directly. This is one of the optimization that opcode optimized like Zend’s PHP optimizer. It is a still a good idea to keep in mind since not all opcode optimizers perform this optimization and there are plenty of ISPs and servers running without an opcode optimizer.</p>
]]></content>
      <tags>
        <tag>编程语言</tag>
        <tag>后端</tag>
      </tags>
  </entry>
  <entry>
    <title>jQuery入门教程笔记8</title>
    <url>/2011/09/24/jquery-tutorial.html</url>
    <content><![CDATA[<p>这是《jQuery入门教程笔记》的第八篇，这篇讲的是创建节点元素。</p>
<p>函数$()用于动态创建页面元素，其语法如下：</p>
<blockquote>$(html)</blockquote>


<p>其中，参数html表示用于动态创建DOM元素的HTML标记字符串，即如果要在页面中动态创建一个div标记，并设置其内容和属性，可以加入如下代码：</p>
<blockquote>var $div=$("
>
> Domyself
>
> ");
$("body").append($div);</blockquote>


<span id="more"></span>
<p>下面是Demo源代码：</p>
<figure class="highlight plaintext"><table><tr><td class="code"><pre><span class="line">&lt;!DOCTYPE html PUBLIC &quot;-//W3C//DTD XHTML 1.0 Transitional//EN&quot; &quot;http://www.w3.org/TR/xhtml1/DTD/xhtml1-transitional.dtd&quot;&gt;</span><br><span class="line">&lt;html xmlns=&quot;http://www.w3.org/1999/xhtml&quot;&gt;</span><br><span class="line">&lt;head&gt;</span><br><span class="line">&lt;meta http-equiv=&quot;Content-Type&quot; content=&quot;text/html; charset=utf-8&quot; /&gt;</span><br><span class="line">&lt;title&gt;创建动态节点元素&lt;/title&gt;</span><br><span class="line">&lt;script type=&quot;text/javascript&quot; src=&quot;jquery.js&quot;&gt;&lt;/script&gt;</span><br><span class="line">&lt;style type=&quot;text/css&quot;&gt;</span><br><span class="line">	body&#123;</span><br><span class="line">		font-size:13px;</span><br><span class="line">	&#125;</span><br><span class="line">	ul&#123;</span><br><span class="line">		padding:0px;</span><br><span class="line">		list-style:none;</span><br><span class="line">	&#125;</span><br><span class="line">	ul li&#123;</span><br><span class="line">		line-height:2.0em;</span><br><span class="line">	&#125;</span><br><span class="line">	.divL&#123;</span><br><span class="line">		float:left;</span><br><span class="line">		width:200px;</span><br><span class="line">		background-color:#eee;</span><br><span class="line">		border:solid 1px #666;</span><br><span class="line">		margin:5px;</span><br><span class="line">		padding:0px 8px;</span><br><span class="line">	&#125;</span><br><span class="line">	.divR&#123;</span><br><span class="line">		float:left;</span><br><span class="line">		width:200px;</span><br><span class="line">		display:none;</span><br><span class="line">		border:solid 1px #ccc;</span><br><span class="line">		margin:5px;</span><br><span class="line">		padding:0px 8px;</span><br><span class="line">	&#125;</span><br><span class="line">	.txt&#123;</span><br><span class="line">		border:#666 1px solid;</span><br><span class="line">		padding:3px;</span><br><span class="line">		width:120px;</span><br><span class="line">	&#125;</span><br><span class="line">	.btn&#123;</span><br><span class="line">		border:#666 1px solid;</span><br><span class="line">		padding:2px;</span><br><span class="line">		width:60px;</span><br><span class="line">		filter:progid:DXImageTransform.Microsoft.</span><br><span class="line">		Gradient(GradientType=0,</span><br><span class="line">		StartColorStr=#ffffff,EndColorStr=#ece9d8);</span><br><span class="line">	&#125;</span><br><span class="line">&lt;/style&gt;</span><br><span class="line">&lt;script type=&quot;text/javascript&quot;&gt;</span><br><span class="line">	$(function()&#123;</span><br><span class="line">		$(&quot;#Button1&quot;).click(function()&#123;</span><br><span class="line">			/*获取参数*/</span><br><span class="line">			var $str1=$(&quot;#select1&quot;).val();//获取元素名</span><br><span class="line">			var $str2=$(&quot;#text1&quot;).val();//获取内容</span><br><span class="line">			var $str3=$(&quot;#select2&quot;).val();//获取属性名</span><br><span class="line">			var $str4=$(&quot;#text2&quot;).val();//获取属性</span><br><span class="line">			var $div=$(&quot;&lt;&quot; + $str1 + &quot; &quot; + $str3 + &quot;=&#x27;&quot; + $str4 + &quot;&#x27;&gt;&quot; + $str2 + &quot;&lt;/&quot; + $str1 + &quot;&gt;&quot;);//创建DOM对象</span><br><span class="line">			$(&quot;.divR&quot;).show().append($div);//插入节点</span><br><span class="line">		&#125;);</span><br><span class="line">	&#125;);</span><br><span class="line">&lt;/script&gt;</span><br><span class="line">&lt;/head&gt;</span><br><span class="line"></span><br><span class="line">&lt;body&gt;</span><br><span class="line">	&lt;div class=&quot;divL&quot;&gt;&lt;p&gt;&lt;/p&gt;</span><br><span class="line">    	&lt;ul&gt;</span><br><span class="line">        	&lt;li&gt;元素名：</span><br><span class="line">            	&lt;select id=&quot;select1&quot;&gt;</span><br><span class="line">                	&lt;option value=&quot;p&quot;&gt;p&lt;/option&gt;</span><br><span class="line">                    &lt;option value=&quot;div&quot;&gt;div&lt;/option&gt;</span><br><span class="line">                &lt;/select&gt;</span><br><span class="line">            &lt;/li&gt;</span><br><span class="line">            &lt;li&gt;内容为：</span><br><span class="line">            	&lt;input type=&quot;text&quot; id=&quot;text1&quot; class=&quot;txt&quot; /&gt;</span><br><span class="line">            &lt;/li&gt;</span><br><span class="line">            &lt;li&gt;属性名：</span><br><span class="line">            	&lt;select id=&quot;select2&quot;&gt;</span><br><span class="line">                	&lt;option value=&quot;title&quot;&gt;title&lt;/option&gt;</span><br><span class="line">                &lt;/select&gt;</span><br><span class="line">            &lt;/li&gt;</span><br><span class="line">            &lt;li&gt;属性值：</span><br><span class="line">            	&lt;input type=&quot;text&quot; id=&quot;text2&quot; class=&quot;txt&quot; /&gt;</span><br><span class="line">            &lt;/li&gt;</span><br><span class="line">            &lt;li style=&quot;text-align:center; padding-top:5px;&quot;&gt;</span><br><span class="line">            	&lt;input id=&quot;Button1&quot; type=&quot;button&quot; value=&quot;创建&quot; class=&quot;btn&quot; /&gt;</span><br><span class="line">            &lt;/li&gt;</span><br><span class="line">        &lt;/ul&gt;</span><br><span class="line">    &lt;/div&gt;</span><br><span class="line">    &lt;div class=&quot;divR&quot;&gt;&lt;/div&gt;</span><br><span class="line">&lt;/body&gt;</span><br><span class="line">&lt;/html&gt;</span><br></pre></td></tr></table></figure>

]]></content>
      <tags>
        <tag>编程语言</tag>
        <tag>前端</tag>
      </tags>
  </entry>
  <entry>
    <title>jQuery入门教程笔记6</title>
    <url>/2011/09/21/jquery-tutorial.html</url>
    <content><![CDATA[<p>这是《jQuery入门教程笔记》的第六篇，这一篇将会作为选择器这部分的一个综合案例。对于选择器，还有几类在之前的笔记中没有提到，这些大家可以百度下，都是能百度的到的。之前笔记略过的部分有：子元素过滤选择器，表单对象属性过滤选择器，表单选择器。</p>
<p>现在开始这一篇的内容，这个综合案例实现的是一个导航条，效果是，单击标题时，可以伸缩导航条的内容，同时，标题中的提示图片也随之改变，另外，单击“简化”链接时，隐藏指定的内容，并将“简化”字样改变成“更多”，单击“更多”链接时，返回初始状态，并改变指定显示元素的背景色。</p>
<p>以下是源代码：</p>
<figure class="highlight plaintext"><table><tr><td class="code"><pre><span class="line">&lt;!DOCTYPE html PUBLIC &quot;-//W3C//DTD XHTML 1.0 Transitional//EN&quot; &quot;http://www.w3.org/TR/xhtml1/DTD/xhtml1-transitional.dtd&quot;&gt;</span><br><span class="line">&lt;html xmlns=&quot;http://www.w3.org/1999/xhtml&quot;&gt;</span><br><span class="line">&lt;head&gt;</span><br><span class="line">&lt;meta http-equiv=&quot;Content-Type&quot; content=&quot;text/html; charset=utf-8&quot; /&gt;</span><br><span class="line">&lt;title&gt;导航条在项目中的应用&lt;/title&gt;</span><br><span class="line">&lt;script language=&quot;javascript&quot; type=&quot;text/javascript&quot; src=&quot;jquery-1.4.2.min.js&quot;&gt;&lt;/script&gt;</span><br><span class="line">&lt;style&gt;</span><br><span class="line">	body&#123;</span><br><span class="line">		font-size:13px;</span><br><span class="line">	&#125;</span><br><span class="line">	#divFrame&#123;</span><br><span class="line">		border:solid 1px #666;</span><br><span class="line">		width:301px;</span><br><span class="line">		overflow:hidden;</span><br><span class="line">	&#125;</span><br><span class="line">	#divFrame .clsHead h3&#123;</span><br><span class="line">		padding:0px;</span><br><span class="line">		margin:0px;</span><br><span class="line">		float:left;</span><br><span class="line">	&#125;</span><br><span class="line">	#divFrame .clsHead span&#123;</span><br><span class="line">		float:right;</span><br><span class="line">		margin-top:3px;</span><br><span class="line">	&#125;</span><br><span class="line">	#divFrame .clsContent&#123;</span><br><span class="line">		padding:8px;</span><br><span class="line">	&#125;</span><br><span class="line">	#divFrame .clsContent ul&#123;</span><br><span class="line">		list-style-type:none;</span><br><span class="line">		margin:0px;</span><br><span class="line">		padding:0px;</span><br><span class="line">	&#125;</span><br><span class="line">	#divFrame .clsContent ul li&#123;</span><br><span class="line">		float:left;</span><br><span class="line">		width:95px;</span><br><span class="line">		height:23px;</span><br><span class="line">		line-height:23px;</span><br><span class="line">	&#125;</span><br><span class="line">	#divFrame .clsBot&#123;</span><br><span class="line">		float:right;</span><br><span class="line">		padding-top:5px;</span><br><span class="line">		padding-bottom:5px;</span><br><span class="line">	&#125;</span><br><span class="line">	.GetFocus&#123;</span><br><span class="line">		background-color:#eee;</span><br><span class="line">	&#125;</span><br><span class="line">&lt;/style&gt;</span><br><span class="line">&lt;script type=&quot;text/javascript&quot;&gt;</span><br><span class="line">	$(function()&#123; //页面加载事件</span><br><span class="line">		$(&quot;.clsHead&quot;).click(function()&#123; //图片单击事件</span><br><span class="line">			if($(&quot;.clsContent&quot;).is(&quot;:visible&quot;))&#123; //如果内容可见</span><br><span class="line">			   $(&quot;.clsHead span img&quot;)</span><br><span class="line">			   .attr(&quot;src&quot;,&quot;Images/a1.gif&quot;); //改变图片</span><br><span class="line">			   //隐藏内容</span><br><span class="line">			   $(&quot;.clsContent&quot;).css(&quot;display&quot;,&quot;none&quot;);</span><br><span class="line">			&#125;else&#123;</span><br><span class="line">			   $(&quot;.clsHead span img&quot;)</span><br><span class="line">			   .attr(&quot;src&quot;,&quot;Images/a2.gif&quot;); //改变图片</span><br><span class="line">			   //显示内容</span><br><span class="line">			   $(&quot;.clsContent&quot;).css(&quot;display&quot;,&quot;block&quot;);</span><br><span class="line">			&#125;</span><br><span class="line">		&#125;);</span><br><span class="line"></span><br><span class="line">		$(&quot;.clsBot &gt; a&quot;).click(function()&#123; //热点链接单击事件</span><br><span class="line">			//如果内容为“简化”字样</span><br><span class="line">			if($(&quot;.clsBot &gt; a&quot;).text() == &quot;简化&quot;)&#123;</span><br><span class="line">				//隐藏index号大于4且不是最后一项的元素</span><br><span class="line">				$(&quot;ul li:gt(4):not(:last)&quot;).hide();</span><br><span class="line">				//将字符内容更改为“更多”</span><br><span class="line">				$(&quot;.clsBot &gt; a&quot;).text(&quot;更多&quot;);</span><br><span class="line">			&#125;else&#123;</span><br><span class="line">				$(&quot;ul li:gt(4):not(:last)&quot;)</span><br><span class="line">				.show()</span><br><span class="line">				.addClass(&quot;GetFocus&quot;);//显示所选元素且增加样式</span><br><span class="line">				//将字符内容更改为“简化”</span><br><span class="line">				$(&quot;.clsBot &gt; a&quot;).text(&quot;简化&quot;);</span><br><span class="line">			&#125;</span><br><span class="line">		&#125;);</span><br><span class="line">	&#125;);</span><br><span class="line">&lt;/script&gt;</span><br><span class="line">&lt;/head&gt;</span><br><span class="line">&lt;body&gt;</span><br><span class="line">	&lt;div id=&quot;divFrame&quot;&gt;</span><br><span class="line">    	&lt;div class=&quot;clsHead&quot;&gt;</span><br><span class="line">        	&lt;h3&gt;图书分类&lt;/h3&gt;</span><br><span class="line">            &lt;span&gt;&lt;img src=&quot;Images/a2.gif&quot; alt=&quot;&quot; /&gt;&lt;/span&gt;</span><br><span class="line">        &lt;/div&gt;</span><br><span class="line">        &lt;div class=&quot;clsContent&quot;&gt;</span><br><span class="line">        	&lt;ul&gt;</span><br><span class="line">            	&lt;li&gt;&lt;a href=&quot;#&quot;&gt;小说&lt;/a&gt;&lt;i&gt;(1110)&lt;/i&gt;&lt;/li&gt;</span><br><span class="line">                &lt;li&gt;&lt;a href=&quot;#&quot;&gt;文艺&lt;/a&gt;&lt;i&gt;(230)&lt;/i&gt;&lt;/li&gt;</span><br><span class="line">                &lt;li&gt;&lt;a href=&quot;#&quot;&gt;青春&lt;/a&gt;&lt;i&gt;(1430)&lt;/i&gt;&lt;/li&gt;</span><br><span class="line">                &lt;li&gt;&lt;a href=&quot;#&quot;&gt;少儿&lt;/a&gt;&lt;i&gt;(1560)&lt;/i&gt;&lt;/li&gt;</span><br><span class="line">                &lt;li&gt;&lt;a href=&quot;#&quot;&gt;生活&lt;/a&gt;&lt;i&gt;(870)&lt;/i&gt;&lt;/li&gt;</span><br><span class="line">                &lt;li&gt;&lt;a href=&quot;#&quot;&gt;社科&lt;/a&gt;&lt;i&gt;(1460)&lt;/i&gt;&lt;/li&gt;</span><br><span class="line">                &lt;li&gt;&lt;a href=&quot;#&quot;&gt;管理&lt;/a&gt;&lt;i&gt;(1450)&lt;/i&gt;&lt;/li&gt;</span><br><span class="line">                &lt;li&gt;&lt;a href=&quot;#&quot;&gt;计算机&lt;/a&gt;&lt;i&gt;(1780)&lt;/i&gt;&lt;/li&gt;</span><br><span class="line">                &lt;li&gt;&lt;a href=&quot;#&quot;&gt;教育&lt;/a&gt;&lt;i&gt;(930)&lt;/i&gt;&lt;/li&gt;</span><br><span class="line">                &lt;li&gt;&lt;a href=&quot;#&quot;&gt;工具书&lt;/a&gt;&lt;i&gt;(3450)&lt;/i&gt;&lt;/li&gt;</span><br><span class="line">                &lt;li&gt;&lt;a href=&quot;#&quot;&gt;引进版&lt;/a&gt;&lt;i&gt;(980)&lt;/i&gt;&lt;/li&gt;</span><br><span class="line">                &lt;li&gt;&lt;a href=&quot;#&quot;&gt;其他类&lt;/a&gt;&lt;i&gt;(3230)&lt;/i&gt;&lt;/li&gt;</span><br><span class="line">            &lt;/ul&gt;</span><br><span class="line">            &lt;div class=&quot;clsBot&quot;&gt;&lt;a href=&quot;#&quot;&gt;简化&lt;/a&gt;</span><br><span class="line">            	&lt;img src=&quot;Images/a5.gif&quot; alt=&quot;&quot; /&gt;</span><br><span class="line">            &lt;/div&gt;</span><br><span class="line">        &lt;/div&gt;</span><br><span class="line">	&lt;/div&gt;</span><br><span class="line">&lt;/body&gt;</span><br><span class="line">&lt;/html&gt;</span><br></pre></td></tr></table></figure>

]]></content>
      <tags>
        <tag>编程语言</tag>
        <tag>前端</tag>
      </tags>
  </entry>
  <entry>
    <title>We&#39;re all in this togther!</title>
    <url>/2011/09/22/were-all-in-this-togther.html</url>
    <content><![CDATA[<p>鲁大学生网，前身是鲁东大学学生委员会网络信息部，这里有着我大学四年的大部分记忆，从大一加入，到大二大三工作，一直到现在大四了，即使退出管理但依旧还在关注着这个团队～一点一滴真的是在这个过程中结识了很多好朋友，学到了很多技能。我感谢这个团队，希望这个团队所向披靡～</p>
<p>这里就贴一段学生网正式上线时，在发布会现场放的一段视频，这里面有06级、07级学长学姐的面孔，也有我们08级的面孔，还有之后09和10级的童鞋们～</p>
<p>We’re all in this togther!</p>
<p>更多回忆，来看这里：<a href="http://sailboat.ldustu.com/2010/12/7.html">http://sailboat.ldustu.com/2010/12/7.html</a></p>
]]></content>
      <tags>
        <tag>随笔</tag>
      </tags>
  </entry>
  <entry>
    <title>jQuery入门教程笔记7</title>
    <url>/2011/09/23/jquery-tutorial.html</url>
    <content><![CDATA[<p>这是《jQuery入门教程笔记》的第七篇，这一篇将开始新的一章，操作DOM。</p>
<p>对于DOM的解释：当我们创建一个页面并加载到Web浏览器时，DOM模型则根据该页面的内容创建了一个文档文件；单词Object即对象，是指具有独立特性的一组数据集合，例如，我们把新创建的页面文档称之为文档对象，与对象相关联的特征称之为对象属性，访问对象的函数称之为对象方法；单词“Model”即模型，在页面文档中，通过树状模型展示页面的元素和内容，其展示的方式则是通过节点（node）来实现的。让我们来看个例子：</p>
<figure class="highlight plaintext"><table><tr><td class="code"><pre><span class="line">&lt;!DOCTYPE html PUBLIC &quot;-//W3C//DTD XHTML 1.0 Strict//EN&quot;</span><br><span class="line">	&quot;http://www.w3.org/TR/xhtml1/DTD/xhtml1-strict.dtd&quot;&gt;</span><br><span class="line">&lt;html xmlns=&quot;http://www.w3.org/1999/xhtml&quot; xml:lang=&quot;en&quot; lang=&quot;en&quot;&gt;</span><br><span class="line"></span><br><span class="line">&lt;head&gt;</span><br><span class="line">	&lt;title&gt;DOM演示&lt;/title&gt;</span><br><span class="line">	&lt;style type=&quot;text/css&quot;&gt;</span><br><span class="line">		body&#123;</span><br><span class="line">			font-size:13px;</span><br><span class="line">		&#125;</span><br><span class="line">		table,div,p,ul&#123;</span><br><span class="line">			width:280px;</span><br><span class="line">			border:solid 1px #666;</span><br><span class="line">			margin:10px 0px;</span><br><span class="line">			padding:0px;</span><br><span class="line">			background-color:#eee;</span><br><span class="line">		&#125;</span><br><span class="line">	&lt;/style&gt;</span><br><span class="line">&lt;/head&gt;</span><br><span class="line"></span><br><span class="line">&lt;body&gt;</span><br><span class="line">	&lt;table&gt;</span><br><span class="line">		&lt;tr&gt;</span><br><span class="line">			&lt;td&gt;Td1&lt;/td&gt;</span><br><span class="line">		&lt;/tr&gt;</span><br><span class="line">		&lt;tr&gt;</span><br><span class="line">			&lt;td&gt;Td2&lt;/td&gt;</span><br><span class="line">		&lt;/tr&gt;</span><br><span class="line">	&lt;/table&gt;</span><br><span class="line">	&lt;div&gt;Div&lt;/div&gt;</span><br><span class="line">	&lt;p&gt;P&lt;/p&gt;</span><br><span class="line">	&lt;div&gt;</span><br><span class="line">		&lt;span&gt;Span&lt;/span&gt;</span><br><span class="line">	&lt;/div&gt;</span><br><span class="line">	&lt;ul&gt;</span><br><span class="line">		&lt;li&gt;Li1&lt;/li&gt;</span><br><span class="line">		&lt;li&gt;Li2&lt;/li&gt;</span><br><span class="line">	&lt;/ul&gt;</span><br><span class="line">&lt;/body&gt;</span><br><span class="line">&lt;/html&gt;</span><br></pre></td></tr></table></figure>


<p><strong>一、访问元素</strong></p>
<table cellpadding="0" cellspacing="0" >
<tbody >
<tr >
<td>
叙述
</td>
<td>
方法
</td>
<td>
语法
</td>
</tr>
<tr >

<td >元素属性操作
</td>

<td >
获取和设置元素属性：attr()

<p>删除某一属性：removeAttr()</p>
</td>

<td >
获取：attr(name)

<p>例如：$(“img”).attr(“src”)&#x2F;&#x2F;获取img标签的src属性值</p>
<p>设置：attr(key,value)&#x2F;&#x2F;key表示属性的名称,value表示属性的值，当value是函数的时候，函数的返回值将作为value值</p>
<p>attr(key0:value0,key1:value1)&#x2F;&#x2F;可以一次设置多组</p>
<p>例如：$(“img”).attr(“title”,”domyself”)</p>
<p>$(“img”).attr(title:”domyself”,src:”&#x2F;images&#x2F;1.jpg”)</p>
<p>删除:removeAttr(name)</p>
<p>例如：$(“img”).removeAttr(“src”);</p>
</td>
</tr>
<tr >

<td >元素内容操作
</td>

<td >html()和text()
</td>

<td >
1、html()，用于获取元素的HTML内容

<p>2、html(val)，用于设置元素的HTML内容</p>
<p>3、text()，用于获取元素的文本内容</p>
<p>4、text(val)，用于设置元素的文本内容</p>
<p>说明：html()方法仅支持XHTML的文档，不能用于XML文档，而text()则既支持HTML文档，也支持XML文档。</p>
</td>
</tr>
<tr >

<td >获取或设置元素值
</td>

<td >
val(val)

<p>val().join(“,”)</p>
</td>

<td >
获取：val()，相当于attr("value")的作用

<p>使用val().join(“,”)可以获取一组值，并用“,”隔开，分隔符可以更换</p>
<p>赋值：val(val),val可以为数组</p>
</td>
</tr>
<tr >

<td >元素样式操作
</td>

<td >
css(name,value)

<p>addClass(class)</p>
<p>toggleClass(class)</p>
<p>removeClass([class])</p>
</td>

<td >
css(name,value)，直接修改某项css的值

<p>addClass(class)，添加一个class类别，可以用英文逗号隔开添加多个</p>
<p>toggleClass(class)，当元素中含有名称为class的CSS类别时，删除该类别，否则增加一个该名称的CSS类别</p>
<p>removeClass([class])，如果不给参数则是清空所有class，可以添加多个class，需要用逗号隔开</p>
</td>
</tr>
</tbody>
</table>

]]></content>
      <tags>
        <tag>编程语言</tag>
        <tag>前端</tag>
      </tags>
  </entry>
  <entry>
    <title>WordPress设置文章页面的动态关键字和描述</title>
    <url>/2011/09/25/wordpress-settings.html</url>
    <content><![CDATA[<p>用wordpress有段时间了，总结了一点小经验，要想网站被多收录的话，确实需要下一番功夫，推广是必不可少的，但是从我们自身网站结构来说，也有一定的技巧吧，观察了几个网站，在关键字设置上，发现一点：每个文章页面的关键字和描述都是不同的。很值得借鉴，怎么不同呢？首页的关键字和描述是固定的，但是文章页面的关键字是当前文章的标签、描述则是是文章的前100字（可以设置长度）。这样的话，更利于搜索引擎搜索了。</p>
<p>于是乎，这篇文章就诞生啦！</p>
<p>其实很简单，如果你设置了网站关键字的话（手动添加），我已经把代码整理好了</p>
<p><strong>步骤1</strong> ：打直接修改源文件（header.php）也好，或者登录后台修改：外观-编辑-选择修改（顶部）header.php文件。</p>
<p>找到代码：（作用：设置关键字）</p>
<blockquote><meta name="keywords" content="这里是你网站首页的关键字..." /></blockquote>


<p>替换为：</p>
<blockquote><meta name="keywords" content="<?php if (is_single()){ $keywords = "";$tags = wp_get_post_tags($post->ID);foreach ($tags as $tag ) {$keywords = $keywords . $tag->name . ", ";}echo $keywords;}else{echo ("这里是你网站首页的关键字...");} ?>" /></blockquote>


<p>找到代码：（作用：设置描述）</p>
<blockquote><meta name="description" content="这里是你网站首页的描述..." /></blockquote>


<p>替换为：</p>
<blockquote><meta name="description" content="<?php if (is_single()){ echo mb_strimwidth(strip_tags(apply_filters('the_content', $post->post_content)), 0, 180,"");} else{echo ("这里是你网站首页的描述...");}?>" /></blockquote>


<p><strong>步骤2</strong> ：点击“更新文件”保存设置。</p>
<p>这样就OK啦！打开一个文章页面，鼠标右键，查看源文件，看看效果吧！应该会对对收录有好处。</p>
<p>来源：浮云站<a href="http://www.fuyunz.com/">www.fuyunz.com</a> 原创教程转载注明出处！</p>
]]></content>
      <tags>
        <tag>后端</tag>
      </tags>
  </entry>
  <entry>
    <title>jQuery入门教程笔记9</title>
    <url>/2011/10/07/jquery-tutorial.html</url>
    <content><![CDATA[<p>这是《jQuery入门教程笔记》的第九篇，这篇继续讲关于节点的内容，并且将会在这篇中结束jQuery操作DOM这部分内容。 一、插入节点 插入节点分为内部插入节点方法和外部插入节点方法。内部插入节点的意思就是说在元素的内部插入一个新的元素，那么显然外部插入节点方法就是在元素的外部插入一个新的元素。详细见下面两个表格：</p>
<p>先来看看内部插入节点</p>
<table cellpadding="0" cellspacing="0" >
<tbody >
<tr >
语法格式
参数说明
功能描述
</tr>
<tr >

<td >append(content)
</td>

<td >content表示追加到目标中的内容
</td>

<td >向所选择的元素内部插入内容
</td>
</tr>
<tr >

<td >append(function(index,html))
</td>

<td >通过function函数返回追加到目标中的内容
</td>

<td >向所选择的元素内部插入function函数所返回的内容
</td>
</tr>
<tr >

<td >appendTo(content)
</td>

<td >content表示被追加的内容
</td>

<td >把所选择的元素追加到另一个指定的元素集合中
</td>
</tr>
<tr >

<td >prepend(content)
</td>

<td >content表示插入目标元素内部前面的内容
</td>

<td >向每个所选择的内容内部前置内容
</td>
</tr>
<tr >

<td >prepend(function(index,content))
</td>

<td >通过function函数返回插入目标元素内部前面的内容
</td>

<td >向所选择的元素内部插入function函数所返回的内容
</td>
</tr>
<tr >

<td >prependTo(content)
</td>

<td >content表示用于选择元素的jQuery表达式
</td>

<td >将所选择的元素前置到另一个指定的元素集合中
</td>
</tr>
</tbody>
</table>
这里补充一个我的总结：


<blockquote>x.append(y) 在x中插入y y.appendTo(x) 把y插入到x中</blockquote>


<p>接下来是外部插入节点before(content)content表示插入目标元素外部前面的内容向所选择的元素外部后面插入内容insertAfter(content)content表示插入目标元素外部后面的内容将所选择的元素插入另一个指定的元素外部后面</p>
<table cellpadding="0" cellspacing="0" >
<tbody >
<tr >
语法格式
参数说明
功能描述
</tr>
<tr >

<td >after(content)
</td>

<td >content表示插入目标元素外部后面的内容
</td>

<td >向所选择的元素外部后面插入内容
</td>
</tr>
</tbody>
</table>


<blockquote>备注：表中的三个方法都支持function做参数，即用function来代替content。</blockquote>


<p>二、复制节点 在页面中，有时需要将某个元素节点复制到另外一个节点后，如购物网站中购物车的设计。在传统的javascript中，学要写较为复杂的代码，而用jQuery，可以通过clone()轻松实现。 clone()有两种用法，一种是不加参数，一种是加true参数。区别在于：clone()复制匹配的DOM元素并且选中复制成功的元素，该方法仅是复制元素本身，被复制后的新元素不具有任何元素行为。如果想把元素的全部行为都复制，则需要使用clone(true)实现。 示例：</p>
<figure class="highlight plaintext"><table><tr><td class="code"><pre><span class="line">$(function()&#123;</span><br><span class="line">	$(&quot;img&quot;).click(function()&#123;</span><br><span class="line">		$(this).clone(true).appendTo(&quot;span&quot;);</span><br><span class="line">	&#125;)；</span><br><span class="line">&#125;)；</span><br></pre></td></tr></table></figure>

<blockquote>备注：该句代码的意思就是当单击img元素的时候，复制该元素并加入到span中去。</blockquote>


<p>三、替换节点 有两种方法: 1、replaceWith(content)，该方法的功能是将所有选择的元素替换成指定的HTML或DOM元素，其中参数content为被所选择元素替换的内容。 2、replaceAll(selector)，该方法的功能是将所有选择的元素替换成指定selector的元素，其中参数selector为需要替换的元素。 示例：</p>
<figure class="highlight plaintext"><table><tr><td class="code"><pre><span class="line">$(function()&#123;</span><br><span class="line">	$(&quot;#Span1&quot;).replaceWith(&quot;&lt;span&gt;domyself.me&lt;/span&gt;&quot;);</span><br><span class="line">	$(&quot;&lt;span&gt;domyself.me&lt;/span&gt;&quot;).replaceAll(&quot;#Span2&quot;);</span><br><span class="line">&#125;)；</span><br></pre></td></tr></table></figure>

<blockquote>备注：#Span1和#Span2是被替换的元素，请注意替换顺序，另外请注意一旦完成替换，被替换元素中的全部时间都将消失。</blockquote>


<p>四、包裹节点 在jQuery中，不仅可以通过方法替换元素节点，还可以根据需求包裹某个指定的节点，对节点的包裹也是DOM对象操作中很重要的一项，其与包裹节点相关的全部方法如下表：</p>
<table cellpadding="0" cellspacing="0" >
<tbody >
<tr >
语法格式
参数说明
功能描述
</tr>
<tr >

<td >wrap(html)
</td>

<td >html参数为字符串代码，用于生成元素并包裹所选元素
</td>

<td >把所有选择的元素用其他字符串代码包裹起来
</td>
</tr>
<tr >

<td >wrap(elem)
</td>

<td >elem参数用于包装所选元素的DOM元素
</td>

<td >把所有选择的元素用其他DOM元素包装起来
</td>
</tr>
<tr >

<td >wrap(fn)
</td>

<td >fn参数为包裹结构的一个函数
</td>

<td >把所有选择的元素用function函数返回的代码包裹起来
</td>
</tr>
<tr >

<td >unwrap()
</td>

<td >无参数
</td>

<td >移除所选元素的父元素或包裹标记
</td>
</tr>
<tr >

<td >wrapAll(html)
</td>

<td >html参数为字符串代码，用于生成元素并包裹所选元素
</td>

<td >把所有选择的元素用单个元素包裹起来
</td>
</tr>
<tr >

<td >wrapAll(elem)
</td>

<td >elem参数用于包装所选元素的DOM元素
</td>

<td >把所有选择的元素用单个DOM元素包裹起来
</td>
</tr>
<tr >

<td >wrapInner(html)
</td>

<td >html参数为字符串代码，用于生成元素并包裹所选元素
</td>

<td >把所有选择的元素的子内容（包括文本节点）用字符串代码包裹起来
</td>
</tr>
<tr >

<td >wrapInner(elem)
</td>

<td >elem参数用于包装所选元素的DOM元素
</td>

<td >把所有选择的元素的子内容（包括文本节点）用DOM元素包裹起来
</td>
</tr>
<tr >

<td >wrapInner(fn)
</td>

<td >fn参数为包裹结构的一个函数
</td>

<td >把所有选择的元素的子内容（包括文本节点）用function函数返回的代码包裹起来
</td>
</tr>
</tbody>
</table>
示例：

<figure class="highlight plaintext"><table><tr><td class="code"><pre><span class="line">$(function()&#123;</span><br><span class="line">	$(&quot;p&quot;).wrap(&quot;&lt;strong&gt;&lt;/strong&gt;&quot;);//所有段落标记字体加粗</span><br><span class="line">	$(&quot;span&quot;).wrapInner(&quot;&lt;em&gt;&lt;/em&gt;&quot;);//所有段落中的span标记斜体</span><br><span class="line">&#125;);</span><br></pre></td></tr></table></figure>

<blockquote>备注：该代码的执行效果是在<p>domyself.me</p>的外面加上<b></b>，即查看源代码时显示的是<b><p>domyself.me</p></b>，另一句代码的执行效果则是在<span>domyself.me</span>的内部加入<i></i>，即执行后的效果为，<span><i>domyself.me</i></span>。</blockquote>


<p>五、遍历元素<br>在DOM元素操作中，有时需要对同一标记的全部元素进行同一操作。在传统的javascript中，先获取元素的总长度，然后，以for循环依次访问其中的某个元素，代码相对复杂，而在jQuery中，可以直接使用each()方法实现元素的遍历，语法如下：</p>
<blockquote>each(callback)</blockquote>


<p>参数callback是一个function函数，该函数还可以接受一个形参index，此形参为遍历元素的序号（从0开始）；如果需要访问元素中的属性，可以借助形参index，配合this关键字来实现元素属性的设置或获取。 示例：</p>
<figure class="highlight plaintext"><table><tr><td class="code"><pre><span class="line">$(&quot;img&quot;).each(function(index)&#123;</span><br><span class="line">	//根据形参index设置元素的title属性</span><br><span class="line">	this.title = index;</span><br><span class="line">&#125;);</span><br></pre></td></tr></table></figure>

<p>六、删除元素<br>两种方法：<br>remove()，语法格式为remove([expr])，其中参数expr为可选项，如果接受参数，则该参数为筛选元素的jQuery表达式，通过该表达式获取指定的元素，并进行删除。<br>empty()，其功能为清空所选择的页面元素或所有的后代元素。</p>
]]></content>
      <tags>
        <tag>编程语言</tag>
        <tag>前端</tag>
      </tags>
  </entry>
  <entry>
    <title>PHP读书笔记四</title>
    <url>/2011/10/08/php-tutorial.html</url>
    <content><![CDATA[<ol>
<li><p>数组的声明规则：<br>（1）数组的名称由一个美元符号开始，第一个字符是字母或下划线，其后是任意数量的字幕，数字或下划线。<br>（2）在同一个程序中，标量变量和数组变量都不能重名。<br>（3）数组的名称区别大小写。</p>
</li>
<li><p>通过标示符[]可以直接为数组元素复制，格式如下：<br>$array_name[key]&#x3D;value;或者$array_name[]&#x3D;value;</p>
</li>
<li><p>应用array()函数创建数组，语法如下：<br>array array([mixed…])<br>参数mixed的语法为“key&#x3D;&gt;value”，多个参数mixed用逗号分开，分别定义了索引（key）和值（value）。应用array函数声明数组时，数组下标既可以是数值索引也可以是关联索引。</p>
</li>
</ol>
<p>示例：</p>
<figure class="highlight plaintext"><table><tr><td class="code"><pre><span class="line">&lt;?php</span><br><span class="line">	$arr1=array(&#x27;PHP&#x27;=&gt;&#x27;php&#x27;,&#x27;JAVA&#x27;=&gt;&#x27;java&#x27;); //以字符串作为数组索引，指定关键字，关联数组</span><br><span class="line">	print_r($arr1);</span><br><span class="line">	echo &quot;\n&quot;.$arr1[&#x27;JAVA&#x27;].&quot;\n&quot;;</span><br><span class="line"></span><br><span class="line">	$arr2=array(&#x27;PHP&#x27;,&#x27;Java&#x27;);  //以数字作为数组索引，从0开始，没有指定关键字，数字索引数组</span><br><span class="line">	print_r($arr2);</span><br><span class="line">	echo &quot;\n&quot;.$arr2[&#x27;0&#x27;].&quot;\n&quot;;</span><br><span class="line"></span><br><span class="line">	$arr3=array(0=&gt;&#x27;PHP&#x27;,1=&gt;&#x27;Java&#x27;,1=&gt;&#x27;domyself.me&#x27;); //指定相同的索引，后一个将会覆盖之前的值</span><br><span class="line">	print_r($arr3);</span><br><span class="line">?&gt;</span><br></pre></td></tr></table></figure>

<figure class="highlight plaintext"><table><tr><td class="code"><pre><span class="line">运行结果：</span><br><span class="line">Array</span><br><span class="line">(</span><br><span class="line">    [PHP] =&gt; php</span><br><span class="line">    [JAVA] =&gt; java</span><br><span class="line">)</span><br><span class="line"></span><br><span class="line">java</span><br><span class="line">Array</span><br><span class="line">(</span><br><span class="line">    [0] =&gt; PHP</span><br><span class="line">    [1] =&gt; Java</span><br><span class="line">)</span><br><span class="line"></span><br><span class="line">PHP</span><br><span class="line">Array</span><br><span class="line">(</span><br><span class="line">    [0] =&gt; PHP</span><br><span class="line">    [1] =&gt; domyself.me</span><br><span class="line">)</span><br></pre></td></tr></table></figure>

<ol start="4">
<li>遍历数组有三种方法：<br>（1）用foreach遍历数组<br>（2）用list()和each()遍历数组<br>示例：</li>
</ol>
<figure class="highlight plaintext"><table><tr><td class="code"><pre><span class="line">&lt;?php</span><br><span class="line">	$arr=array(0=&gt;&#x27;PHP&#x27;,1=&gt;&#x27;VB&#x27;,2=&gt;&#x27;Java&#x27;,3=&gt;&#x27;VC&#x27;);</span><br><span class="line">	while(list($key,$val)=each($arr))&#123;</span><br><span class="line">		echo &quot;$key=$val\n&quot;;</span><br><span class="line">	&#125;</span><br><span class="line">?&gt;</span><br></pre></td></tr></table></figure>

<p><strong>说明：each()返回数组中当前指针指向位置的键名和对应的值，然后移动指针到下一个位置，返回值就是4个元素的关联数组，通过list()语言结构赋给指定的值。</strong></p>
<p>（3）用for和count()来遍历数组<br>count($arr)的意思就是$arr的上界。</p>
<ol start="5">
<li><p>输出数组两种方法，一种是直接使用print_f()，一种是使用echo语句。前者可以把数组全部输出，包括结构，后者只能输出指定的数组项，还需要借助循环才能全部输出数组。</p>
</li>
<li><p>数组函数<br>（1）count()统计数组元素个数<br>（2）向数组添加元素，array_push()把数组当成一个栈，将传入的变量压入该数组的末尾。语法如下：<br>int array_push(array array,mixed var[,mixed…])<br>参数array为指定的数组，参数var是压入数组中的值。<br>建议：使用[]给数组添加元素。<br>（3）获取数组中最后一个元素，同样是把数组当作了栈，函数是：array_pop()。<br>（4）删除数组中重复元素，array_unique()<br>（5）获取数组中指定元素的键名，array_search()，语法如下：<br>mixed array_search(mixed needle,array haystack[,bool strict])<br>参数needle指定在数组中搜索的值，如果needle是字符串，则在搜索needle的值时是区分字符串的大小写的。参数haystack指定被搜索的数组。参数strict为可选参数，如果值为true，还将在haystack中检查needle的类型。（该函数区分大小写）<br>注意：使用array_search()函数查询数组中的指定元素时，如果查询的元素在数组中多次出现，那么该函数只返回第一个匹配的键名，如果想返回所有的，用array_keys()。</p>
</li>
</ol>
<figure class="highlight plaintext"><table><tr><td class="code"><pre><span class="line">补充：</span><br><span class="line">其他的创建数组的方法</span><br><span class="line">array_combine()===以一个数组为关键字，另一个数组为值创建新数组</span><br><span class="line">array_fill()===用值填充一个数组</span><br><span class="line">array_pad()===用一个值把数组填充到指定长度</span><br><span class="line">compact()===创建包含变量及其值的数组</span><br><span class="line">range()===创建一个包含一定范围内的元素的数组</span><br></pre></td></tr></table></figure>
]]></content>
      <tags>
        <tag>编程语言</tag>
        <tag>后端</tag>
      </tags>
  </entry>
  <entry>
    <title>PHP读书笔记二</title>
    <url>/2011/10/07/php-tutorial.html</url>
    <content><![CDATA[<p>由于已经有了一定的基础，所以我现在写的这个php笔记会跳过很多我已经很熟练的东西，只记录我不熟悉的东西。</p>
<ol>
<li>foreach循环（擅长处理数组，是遍历数组的一种简单方法）<br>语法：</li>
</ol>
<figure class="highlight plaintext"><table><tr><td class="code"><pre><span class="line">foreach(array_expression as $value)</span><br><span class="line">	statement</span><br><span class="line">或</span><br><span class="line">foreach(array_expression as $key=&gt;$value)</span><br><span class="line">	statement</span><br><span class="line">说明：foreach语句将遍历数组array_expression，每次循环时，将当前数组中的值赋给$value（或$key和$value），同时数组指针向后移动，直到遍历结束。</span><br></pre></td></tr></table></figure>

<p><strong>说明：除非数组是被引用，否则foreach所操作的是指定数组的一个拷贝，而不是该数组本身。因此数组指针不会被each()结构改变，对返回的数组单元的修改也不会影响原数组。不过原数组的内部指针的确在处理数组的过程中向前移动了。假定foreach循环运行到结束，原数组的内部指针将指向数组的结尾。另外foreach不支持用“@”来禁止错误信息。</strong></p>
<ol start="2">
<li>break语句跳出循环体，可以终止当前的循环，即还没有循环到的地方不会再执行（包括while，do…while，for，foreach和switch），另外break还可以跳出几重循环，给是为“break n;”。<br>示例：</li>
</ol>
<figure class="highlight plaintext"><table><tr><td class="code"><pre><span class="line">&lt;?php</span><br><span class="line">while(1)&#123;</span><br><span class="line">	for(;;)&#123;</span><br><span class="line">		for($i=1;$i&lt;=4;$i++)&#123;</span><br><span class="line">			echo $i.&quot;\t&quot;;</span><br><span class="line">			if($i==3)&#123;</span><br><span class="line">				echo &quot;&lt;p&gt;变量\$i等于3，跳出第一重循环&lt;p&gt;&quot;;</span><br><span class="line">				break 1;</span><br><span class="line">			&#125;</span><br><span class="line">		&#125;</span><br><span class="line">		for($j=1;$j&lt;5;$j++)&#123;</span><br><span class="line">			echo $j.&quot;\t&quot;;</span><br><span class="line">			if($j==4)&#123;</span><br><span class="line">				echo &quot;&lt;p&gt;变量\$j等于4，跳出最外重循环&lt;p&gt;&quot;;</span><br><span class="line">				break 3;</span><br><span class="line">			&#125;</span><br><span class="line">		&#125;</span><br><span class="line">	&#125;</span><br><span class="line">&#125;</span><br><span class="line">?&gt;</span><br></pre></td></tr></table></figure>

<p><strong>示例说明：当i&#x3D;3时，跳出一重循环，当j&#x3D;4时跳出3重循环，即跳出所有的循环。</strong></p>
<p>continue语句跳出本次循环，即本次循环体不执行，但是不跳出当前循环，不会影响下次循环的执行。</p>
<ol start="3">
<li><p>函数名称不区分大小写（常量和变量区分大小写）。如果误定义了两个不同大小写的重名函数，那么程序将中止运行。<br>还有一些函数命名有通用规则，如获取数值用get开头，然后跟上要获取的对象名字；设置数则用set开头，然后跟上要设置的对象的名字。<br>关于return：因为return()是语言结构而不是函数，所以仅在参数包含表达式时才需要用括号括起来。当返回一个变量时通常不用括号，也不建议用，这样可以减少php的负担。<br><strong>当用引用返回值时，永远不要使用括号。只能通过引用返回变量，而不是语句的结果。如果使用“return($a);”，其返回的不是一个变量，而是表达式($a)的值，当然，此时该值也正是$a的值。（暂时不懂……）</strong></p>
</li>
<li><p>变量函数不能用于语言结构，例如，each()，print()，unset()，isset()，empty()，include()，require()以及类似的语句，它需要使用自己的外壳函数来将这些结构用作变量函数。</p>
</li>
<li><p>转义和还原字符串：addslashes()和stripslashes()。<br>addslashes()可以给字符串加入斜线“\”，然后对指定字符串中的字符进行转义。它可以转义的字符包括单引号“’”、双引号“””、反斜线”\“，NULL字符”0“。常用的地方就是在生成SQL语句时，对SQL语句中的部分字符进行转义。<br>注意：所有数据在插入数据库之前，有必要应用addslashes()进行转义，以免特殊字符在插入数据库的时候出现错误。<br>addcslashes()和stripcslashes()函数可以对指定范围内的字符串进行转义和还原。语法如下：<br>string addcslashes(string str,string charlist)<br>string stripcslashes(string str)</p>
</li>
<li><p>substr()函数从字符串中按照指定位置截取一定长度的字符。如果使用一个正数作为子串起点，来调用这个函数，将得到从起点到字符串结束的这个字符串；如果使用一个负数作为起点，将得到一个原字符串尾部的一个子串，字符个数等于给定负数的绝对值。语法如下：<br>string substr(string str,int start[,int length])<br>str为指定字符串，start开始截取的位置，length指定了截取字符的个数，若为负数，则表示取到倒数第length个字符。</p>
</li>
</ol>
<p>例子，现在有$str&#x3D;’abcde’，遂有以下的值：</p>
<figure class="highlight plaintext"><table><tr><td class="code"><pre><span class="line">substr($str,0,3)==&#x27;abc&#x27;</span><br><span class="line">substr($str,-3,3)==&#x27;cde&#x27;//从倒数第3个字符往后取3个字符</span><br><span class="line">substr($str,0,-3)==&#x27;ab&#x27;//从第0个字符开始往后取，一直取到倒数第3个字符前一个字符为止。</span><br><span class="line">substr($str,1,3)==&#x27;bcd&#x27;</span><br></pre></td></tr></table></figure>

<ol start="7">
<li><p>strlen()获取字符串长度。</p>
</li>
<li><p>explode()用来分割字符串，语法：<br>array explode(string separator,string str[,int limit])</p>
<table cellpadding="0" cellspacing="0" >
<tbody >
<tr >
参数
说明
</tr>
<tr ></li>
</ol>
<td >separator
</td>

<td >必要参数，用于指定分隔符。如果separator为空字符串""，explode()函数将返回false。如果separator所包含的值在str中找不到，那么explode()函数将返回包含str单个元素的数组
</td>
</tr>
<tr >

<td >str
</td>

<td >必要参数，指定将要被分割的字符串
</td>
</tr>
<tr >

<td >limit
</td>

<td >可选参数，如果设置了limit参数，则返回的数组中最多包含limit个元素，而最后的元素将包含string的剩余部分。如果limit参数是负数，则返回除了最后的-limit个元素外的所有元素
</td>
</tr>
</tbody>
</table>

<p>implode()可以用来将数组中的元素合并成字符串，语法如下：<br>string implode(string glue,array pieces)<br>glue是字符串类型，用于指定分隔符，pieces是数组类型，即要被合并的数组。</p>
]]></content>
      <tags>
        <tag>编程语言</tag>
        <tag>后端</tag>
      </tags>
  </entry>
  <entry>
    <title>零碎总结</title>
    <url>/2011/10/21/scrappy-tip.html</url>
    <content><![CDATA[<p><strong>1、php页面产生数据存入数据库时，应使用</strong></p>
<figure class="highlight plaintext"><table><tr><td class="code"><pre><span class="line">header(&quot;content-type:text/html;charset=utf-8&quot;);</span><br></pre></td></tr></table></figure>

<p>对php页面的编码格式进行强制设置，并且还需要加入一行代码</p>
<figure class="highlight plaintext"><table><tr><td class="code"><pre><span class="line">mysql_query(&quot;set names utf8&quot;);</span><br></pre></td></tr></table></figure>

<p><strong>2、在做调试的时候，记的给自己添加进去的输出语句写一个不一样的标示性的注释，方便删除测试语句的时候查找。</strong></p>
<p><strong>3、这周在解决的一个bug的时候发现，</strong><br>jQuery中的$.ajax方法在chrome浏览器和IE浏览器中的执行顺序是不同的，<br>这还是在网络上搜索出来的。具体的表现如下：</p>
<p>ok.php文件中的js源代码：</p>
<figure class="highlight plaintext"><table><tr><td class="code"><pre><span class="line">/*for (i=1;i&lt;15;i++)</span><br><span class="line">&#123;</span><br><span class="line">	alert(i);</span><br><span class="line">	$.get(&quot;test.php&quot;,&#123;&quot;id&quot;:i&#125;,function(data)&#123;$(&quot;#return&quot;).append(data+&quot; &quot;)&#125;);</span><br><span class="line">&#125;*/</span><br><span class="line">for(i=1;i&lt;15;i++)</span><br><span class="line">&#123;</span><br><span class="line">	//alert(i);</span><br><span class="line">	$.ajax(&#123;</span><br><span class="line">		url:&quot;/test.php&quot;,</span><br><span class="line">		type:&quot;get&quot;,</span><br><span class="line">		data:&quot;id=&quot;+i,</span><br><span class="line">		dataType:&quot;text&quot;,</span><br><span class="line">		success:function(recvData)&#123;</span><br><span class="line">  				$(&quot;#return&quot;).append(recvData+&quot; &quot;);</span><br><span class="line">  			&#125;,</span><br><span class="line">  			error:function(a,b,c)&#123;</span><br><span class="line">  				alert(&quot;a:&quot;+a+&quot; b:&quot;+b+&quot; c:&quot;+c);</span><br><span class="line">  			&#125;,</span><br><span class="line">	&#125;);</span><br><span class="line">&#125;</span><br><span class="line"></span><br><span class="line">/*$(function()&#123;</span><br><span class="line">	$(&quot;header&quot;).click(function()&#123;</span><br><span class="line">		testajaxget(1);</span><br><span class="line">	&#125;)</span><br><span class="line">&#125;);*/</span><br><span class="line">function testajaxget(id)</span><br><span class="line">&#123;</span><br><span class="line">	if(id==15)</span><br><span class="line">	return;</span><br><span class="line">	$.get(&quot;test.php&quot;,&#123;&quot;id&quot;:id&#125;,function(data)&#123;$(&quot;#return&quot;).append(data+&quot; &quot;)&#125;);</span><br><span class="line">	id++;</span><br><span class="line">	setTimeout(&quot;testajaxget(&quot;+id+&quot;)&quot;,1000);</span><br><span class="line">&#125;</span><br></pre></td></tr></table></figure>

<p>test.php文件的源代码如下：</p>
<figure class="highlight plaintext"><table><tr><td class="code"><pre><span class="line">&lt;?php echo $_GET[&#x27;id&#x27;];?&gt;</span><br></pre></td></tr></table></figure>

<p>通过调试运行，可以发现1到14的顺序只有IE浏览器是一直正确的，</p>
<p>而chrome浏览器在不加alert的时候，也是一直正确的，但是加上alert后，<br>顺序就开始发生变化了，并且是没有规律的。</p>
<p>网络上给出的一种解决方案是用类似ok.php文件中testajaxget()函数里的setTimeout函数让数据提交延时。</p>
<p>而我遇到的这个bug的代码如下：</p>
<figure class="highlight plaintext"><table><tr><td class="code"><pre><span class="line">function passAudit(id)&#123;</span><br><span class="line">    $.get(&quot;/index.php?action=oa|OAContractChargesPassAudit&quot;,&#123;&quot;id&quot;:id&#125;, function(data)&#123;</span><br><span class="line">      if(data==&#x27;ok&#x27;)  window.location.reload();</span><br><span class="line">    &#125;);</span><br><span class="line">&#125;</span><br></pre></td></tr></table></figure>

<p>问题的表现是，在chrome浏览器下点击那个触发该js函数的超链接时，页面刷新了，</p>
<p>但是id值并没有提交到指定的页面处理，这一点我是通过在if判断前加alert知道的。</p>
<p>但是在if前加alert后，执行时，alert弹出，点击确定后，id就能成功提交了，</p>
<p>而ie下面的表现是，在alert前id就已经提交了，因为alert中有内容出现，</p>
<p>但是点击确定后，却返回到了index.php页面。<strong>这个表现我直到最后还是不明白，这就是所谓的异步吧，对于该问题持续关注……</strong></p>
<p>最后的解决方法是在if判断后加了一个alert。</p>
<p><strong>4、对于hidden属性的input不能掉以轻心，下面的几个截图就说明了一个问题：</strong></p>
<p>最初hidden属性的input在要显示的元素的上方</p>
<p><a href="/img/2011/10/1.png"><img src="/img/2011/10/1.png" alt="最初hidden属性的input在要显示的元素的上方"></a></p>
<p>在IE8下的效果就是这样，chrome倒是显示的很正常</p>
<p><a href="/img/2011/10/2.jpg"><img src="/img/2011/10/2.jpg" alt="在IE8下的效果就是这样，chrome倒是显示的很正常"></a></p>
<p>修改后显示效果如下</p>
<p><a href="/img/2011/10/3.png"><img src="/img/2011/10/3.png" alt="修改后显示效果如下"></a></p>
<p><strong>5、调试PHP的时候，一定记得先检查每句话的结尾的分号是不是有加！！</strong></p>
<p><strong>6、javascript中的变量作用域注意事项：</strong></p>
<p>虽然在全局作用域中编写代码时可以不适用var语句，但是在声明局部变量的时候，一定要使用var语句。下面的为相关测试代码：</p>
<figure class="highlight plaintext"><table><tr><td class="code"><pre><span class="line">scope = &quot;global&quot;;</span><br><span class="line">function checkscope() &#123;</span><br><span class="line">    scope = &quot;local&quot;;</span><br><span class="line">    document.write(scope);</span><br><span class="line">    myscope = &quot;local&quot;;</span><br><span class="line">    domcument.write(myscope);</span><br><span class="line">&#125;</span><br><span class="line">checkscope();</span><br><span class="line">document.write(scope);</span><br><span class="line">document.write(myscope);</span><br></pre></td></tr></table></figure>

<p><strong>7、关于PHP中的empty函数，</strong></p>
<p>bool <strong>empty</strong> ( <a href="http://cn2.php.net/manual/zh/language.pseudo-types.php#language.types.mixed">mixed</a> $var )</p>
<p>如果 <em>var</em> 是非空或非零的值，则 <strong>empty()</strong> 返回 <strong>FALSE</strong>。换句话说，</p>
<p>_””<em>、_0_、</em>“0”_、<strong>NULL</strong>、<strong>FALSE</strong>、_array()<em>、_var $var;</em> </p>
<p>以及没有任何属性的对象都将被认为是空的，如果 <em>var</em> 为空，则返回 <strong>TRUE</strong>。</p>
<p><strong>注意：为空的条件，0这个值也算在其中！！！！</strong></p>
<p><strong>8、datediff函数在mysql下只有起始时间、结束时间2个参数。</strong></p>
<p><strong>9、PHP删除文件函数unlink()。</strong></p>
<p><strong>10、读写相关的问题是永远存在的，</strong></p>
<p>文件锁就是为了解决这个问题而做的，其实它就是个简单的信号量。读写相关性指由于同时读写文件造成文件数据的随机性冲突。<br>为了 明确知道在何时通过何种操作对更改或是读取了文件中的那些数据，<br>有必要对操作进行序列化，原子化，同步化，使用户能确知在何时文件中有什么数据。<br>文件锁就 是其中一个工具。</p>
<p>文件系统一般有两种锁，共享锁及排它锁，也可被称为读锁和写锁。</p>
<p>文件系统锁的特点：<br>一个文件打开的时候只能拥有一把锁，就是说在同时，不能给一个文件同时分配两把以上的锁。</p>
<p>读写已被上锁的文件的用户可以持有这把锁，即持有这把锁的用户可以对该文件进行相应的操作，如读或写。用户可以申请持有某个文件锁，如果文件开始无锁，申请持有锁之前先由系统为该文件创建了一把锁，然后该申请者持有它。</p>
<p>持有锁的规则：如果这个文件已拥有一个读（共享）锁，其它用户不能为该文件分配排它锁或只读锁，但可以持有这把锁，也就是说其它用户可以读文件， 但只要该文件被锁住，就没有用户可以对其进行写入。如果该文件已有一把排它锁且已为某用户持有，则没有任何用户可以再持有这把锁，除非持有者解锁。</p>
<p>有一个重要的概念要记住：对文件的操作本身与锁其实没有什么关系，无论文件是否被上锁，用户都可以随意对文件进行正常情况下的任何操作，但操作系 统会检查锁，针对不同的情况给予不同的处理。比如说在无锁的情况下，任何人可以同时对某文件进行任意的读写，当然这样很有可能读写的内容会出现错误——注 意只是内容出错，操作并不会出错。加锁后，某些操作在某些情况下会被拒绝。文件锁的作用并不是保护文件及数据本身，而是保证数据的同步性，因此文件锁只对 持有锁的用户才是真正有效的，也只有所有用户都使用同一种完全相同的方式利用文件锁的限制对文件进行操作，文件锁才能对所有用户有效，否则，只要有一个例 外，整个文件锁的功能就会被破坏。比如，所有人都遵循的开文件，加锁，操作读写，解锁，关闭文件的步骤的话，所有的人操作都不会出现问题，因为基于文件锁 的分配及持有原则，文件中的数据的更新是作为原子操作存在的，是不可分的，因此也是同步的，安全的。但假如某个人不是采取此步骤，那么他在读写时就会出现 问题，不是读不准就是写不进等等。</p>
<p>基于以上原理，对读数据是否锁定这点就值得说说。一般来说，写数据的时候排它锁定是唯一的操作，它这时保证写到文件中的数据是正确的，文件被锁 时，其它用户无法得到该锁，因此无权做任何操作。在读的时候，要视具体情况而定，大多数情况下，如果不需要特别精确或是敏感的数据，无需锁定，因为锁定要 花时间和资源，一个人申请持有锁花不了时间，人一多就有问题了，最主要的是，如果该文件需要被更新的话，假如被上了只读锁，则写入无法进行，因为那些想写 入的用户将得不到排它锁，如果同时申请持有只读锁的人过多的话，排它锁就有可能一直申请不到，这样表现就是文件可能很长时间内无法被写入，显得很慢。一般 来说，写文件的机会相对较少，也更重要，因此主要做好排它锁定，只读锁在多数情况下并无必要。那么只读锁用在何处呢？只读锁其实只对用户本身有用，只读锁 保证用户读到的数据是确实从文件中读到的真实数据，而不是被称为“dirty”的脏数据。其实，这个还是针对那些不用锁的其它用户对文件的误操作，假如文 件上锁，其它用户不一定非要通过锁对文件进行读写，如果他是直接读写的话，对上了锁的文件操作不一定有效，持有读锁的用户可以肯定在他读数据的时候读出来 的是从真实的文件中得到的，而不是同时已被覆盖掉的数据。</p>
<p>因此，在写入的时候上排它锁应该是天经地义的，可以保证这时数据的不会出错。如果你不申请共享锁，可能读出的数据有错误，但对文件本身没有任何影 响，影响只是对用户的，申请共享锁后读出的数据肯定是当时读的时候文件中的真实数据，如果不是为了保证数据的精确性，共享锁可以不加，充其量就是重新读一 次，如果你读它是为了写入，不如直接加排它锁，没有必要用共享锁。</p>
<p>还有一点要强调的是：文件锁只对使用它的用户，而且是按规则使用它的用户才有效，否则，你用你的，我用我的，有的用，有的不用，还是会乱套的，错 误还是会出现的，对同一个文件，只有大家用同一个规则用文件锁，才能保证每个用户在对该文件进行共享操作的时候不会出现读写错误。</p>
<p><strong>11、当在 Unix 平台上规定路径时，正斜杠 (&#x2F;) 用作目录分隔符。而在 Windows 平台上，正斜杠 (&#x2F;) 和反斜杠 () 均可使用。</strong></p>
<p><strong>12、MYSQL数据库UTF8编码使用汉字拼音第一个字母排序的方法，</strong></p>
<figure class="highlight plaintext"><table><tr><td class="code"><pre><span class="line">select * from tag order by convert(tag USING gbk) COLLATE gbk_chinese_ci limit 100</span><br></pre></td></tr></table></figure>

<p>SQL语句里滑润油convert函数转换一下即可。</p>
<p><strong>13、在mysql中一次插入多条数据，</strong></p>
<figure class="highlight plaintext"><table><tr><td class="code"><pre><span class="line">INSERT INTO users(name, age) VALUES(&#x27;姚明&#x27;, 25), (&#x27;比尔.盖茨&#x27;, 50), (&#x27;火星人&#x27;, 600);</span><br></pre></td></tr></table></figure>

<p><strong>14、在制作列表页的时候，可以使用mb_strimwidth函数限制简介字数。</strong></p>
<figure class="highlight plaintext"><table><tr><td class="code"><pre><span class="line">&lt;?php</span><br><span class="line">echo mb_strimwidth(&quot;Hello World&quot;, 0, 10, &quot;...&quot;);</span><br><span class="line">?&gt;</span><br></pre></td></tr></table></figure>

<p><strong>15、strip_tags() 函数剥去 HTML、XML 以及 PHP 的标签。</strong></p>
<p><strong>16、func_num_args() 获取当前函数调用时提交的参数个数。</strong></p>
<p><strong>17、GD库控制图片生成质量的参数是负责最后生成图片的函数的第三个参数！（我勒个去。。。害我为了实现压缩图片功能找了大半天。。。）</strong></p>
<p><strong>18、parse_str() 函数把查询字符串解析到变量中</strong></p>
<p><strong>19、file_get_contents() 函数把整个文件读入一个字符串中</strong></p>
<p><strong>20、stream_set_blocking() — Set blocking&#x2F;non-blocking mode on a stream</strong></p>
<p><strong>21、imagecopyresized()，</strong></p>
<p>Note:因为调色板图像限制（255+1种颜色）有个问题。<br>重采样或过滤图像通常需要多于255种颜色，计算新的被重采样的像素及其颜色时采用了一种近似值。对调色板图像尝试分配一个新颜色时，如果失败我们选择了计算结果最接近（理论上）的颜色。这并不总是视觉上最接近的颜色。这可能会产生怪异的结果，例如空白（或者视觉上是空白）的图像。要跳过这个问题，请使用真彩色图像作为目标图像，例如用 imagecreatetruecolor() 创建的。</p>
<p><strong>22、解决跨域session失效问题，在php中加上</strong></p>
<figure class="highlight plaintext"><table><tr><td class="code"><pre><span class="line">header(&#x27;P3P: CP=&quot;CURa ADMa DEVa PSAo PSDo OUR BUS UNI PUR INT DEM STA PRE COM NAV OTC NOI DSP COR&quot;&#x27;);</span><br></pre></td></tr></table></figure>

<p><strong>23、touch函数</strong></p>
<p>bool <strong>touch</strong> ( string $filename [, int $time [, int $atime ]] )</p>
<p>尝试将由 filename 给出的文件的访问和修改时间设定为给出的时间。<br>如果没有给出可选参数 time，则使用当前系统时间。<br>如果给出了第三个参数 atime，则给定文件的访问时间会被设为 atime。<br>注意访问时间总是会被修改的，不论有几个参数。<br>如果文件不存在，则会被创建。成功时返回 TRUE， 或者在失败时返回 FALSE.</p>
<p><strong>24、function gethostbyname — Get the IPv4 address corresponding to a given Internet host name</strong></p>
<p><strong>25、FIND_IN_SET()可以用来处理类似3,6,34,67,235这样的存在某个字段中的字符串。</strong></p>
<p><strong>26、du –max-depth&#x3D;1 -h  查目录深度为一的目录大小。</strong></p>
<p><strong>27、获取根目录的一种方式：</strong></p>
<figure class="highlight plaintext"><table><tr><td class="code"><pre><span class="line">//其中ntalker/install.php是当前文件</span><br><span class="line">if(!defined(&#x27;APP_ROOT_PATH&#x27;))&#123;</span><br><span class="line">	define(&#x27;APP_ROOT_PATH&#x27;, str_replace(&#x27;ntalker/install.php&#x27;, &#x27;&#x27;, str_replace(&#x27;\\&#x27;, &#x27;/&#x27;, __FILE__)));</span><br><span class="line">&#125;</span><br></pre></td></tr></table></figure>

]]></content>
      <tags>
        <tag>后端</tag>
      </tags>
  </entry>
  <entry>
    <title>XP下装LinuxDeepin后XP无法引导解决办法</title>
    <url>/2011/10/24/linux-vbox-boot.html</url>
    <content><![CDATA[<p>昨天给所里一哥们装双系统XP+LinuxDeepin（这是深度从ubuntu11.04改过来的，适合新手和喜欢偷懒的老手），结果安装完LD后，LD顺利能进入，但是XP进不去了，具体现象就是在选择系统的菜单里选择XP后，过两秒钟又跳回选择菜单了……</p>
<p>各种修改grub都没有成功。偶然间发现一条信息，说ubuntu默认安装的时候，会把引导装入mbr，这样会破坏XP的引导部分。于是乎，找了找修复mbr的命令，最终，利用一个原装的XP盘引导进故障控制台后，分别使用fixmbr和fixboot两天命令把XP的mbr修复OK，重启能够引导进入XP，然后又用LiveUSB引导进入LD，升级了一下grub２后，一切ok～</p>
]]></content>
      <tags>
        <tag>Server&amp;OS</tag>
      </tags>
  </entry>
  <entry>
    <title>使用L2TP VPN产生vpn 768错误解决办法</title>
    <url>/2011/10/31/l2tp-vpn-768.html</url>
    <content><![CDATA[<p>在自己的centos vps上装了L2TP，但是在win下一直无法连接，最初显示800错误，在建立的那个vpn链接里选择“网络”选项卡，里面有个“VPN类型”，在这里选择我配置的那个“L2TP IPsec VPN”选项后再连接，出现768错误，从这个地方<a href="http://xinyangla.com/592.shtml">http://xinyangla.com/592.shtml</a>找到了解决方案，现在贴出来：</p>
<blockquote>如果用vpn PPTP登录方式无法登录那么可以尝试用L2TP登录
常见使用windows xp很容易出现768错误，可以尝试以下方法解决。
在开始中点击运行，输入命令“services.msc”，然后在服务中找到并启用“IPSEC services”即可，如为了方便以后经常使用L2TP IPsec VPN，则可以把该项服务设置为“自动”。
也可以在桌面单击选定我的电脑 然后右键点管理 然后在管理菜单找到服务 然后打开在服务项找到IPSEC SERVICES 单击这个服务右键属性设为自动就可以了
也许还回出现  那么请导入l2tp 768 注册表补丁 一般就可以解决这个问题
</blockquote>

]]></content>
      <tags>
        <tag>后端</tag>
      </tags>
  </entry>
  <entry>
    <title>ucenter在nginx下的应用通讯问题</title>
    <url>/2011/10/30/ucenter-nginx.html</url>
    <content><![CDATA[<p>今天大半天就在折腾这个了，直接复制帖子了，不多说了……</p>
<p>由于ucenter是用socket通讯，但是nginx下socket支持不好，会出现连接超时，整个网站死掉，出现症状：头像不能编辑，discuz登陆退出不了，uc里面通讯一直是“正在连接”。</p>
<p>好了，说正题了</p>
<p>很简单，iis、lighttpd、apache下ucenter 通讯正常，</p>
<p>ok  那就让ucenter跑在iis、lighttpd、apache下，</p>
<p>虚拟主机用户 需要两个虚拟主机，<br>一个iis或者lighttpd、apache环境，专门跑ucenter，域名用uc.xxx.com<br>一个nginx环境，专门跑discuz等等这些 高耗资源的程序</p>
<p>有独立主机、vps的 就可以建两个web服务器，这时候跑uc.xxx.com的web服务器就要另外指定端口了，比如88，访问ucenter就可以用uc.xxx.com:88<br>另一个那就是nginx咯</p>
<p>ok 布置完了，再去uc里面看  是不是发现 “正在连接”没了， 出现 久违的 连接成功 ！！！</p>
]]></content>
      <tags>
        <tag>后端</tag>
      </tags>
  </entry>
  <entry>
    <title>VIM做PHP开发环境</title>
    <url>/2011/11/30/vim-php.html</url>
    <content><![CDATA[<p>转自：<a href="http://blog.163.com/shangshujie_1005/blog/static/186713514201171511835578/">http://blog.163.com/shangshujie_1005&#x2F;blog&#x2F;static&#x2F;186713514201171511835578&#x2F;</a></p>
<p>更换了注释插件NER_commenter,函数出错找不到解决办法，于是更换为插件EnhancedCommentify</p>
<hr>
<p>折腾了四天终于把 vim差不多搞定了 实现了目录，函数跳转，注释和php自动缩进，自动补全。有待日后完后<br>vimrc代码如下：</p>
<figure class="highlight plaintext"><table><tr><td class="code"><pre><span class="line">&quot; 设置leader为,</span><br><span class="line">let mapleader=&quot;,&quot;</span><br><span class="line">let g:mapleader=&quot;,&quot;</span><br><span class="line">set nocompatible            &quot; 关闭 vi 兼容模式</span><br><span class="line">syntax on                   &quot; 自动语法高亮</span><br><span class="line"></span><br><span class="line"></span><br><span class="line">set mouse=a                 &quot; 开启鼠标模式</span><br><span class="line">filetype plugin indent on   &quot; 开启插件</span><br><span class="line">set number                  &quot; 显示行号</span><br><span class="line">set nocursorline            &quot; 不突出显示当前行</span><br><span class="line">set shiftwidth=4            &quot; 设定 &lt;&lt; 和 &gt;&gt; 命令移动时的宽度为 4</span><br><span class="line">set softtabstop=4           &quot; 使得按退格键时可以一次删掉 4 个空格</span><br><span class="line">set tabstop=4               &quot; 设定 tab 长度为 4</span><br><span class="line">set nobackup                &quot; 覆盖文件时不备份</span><br><span class="line">set autochdir               &quot; 自动切换当前目录为当前文件所在的目录</span><br><span class="line">set backupcopy=yes          &quot; 设置备份时的行为为覆盖</span><br><span class="line">set ignorecase smartcase    &quot; 搜索时忽略大小写，但在有一个或以上大写字母时仍大小写敏感</span><br><span class="line">set nowrapscan              &quot; 禁止在搜索到文件两端时重新搜索</span><br><span class="line">set incsearch               &quot; 输入搜索内容时就显示搜索结果</span><br><span class="line">set hlsearch                &quot; 搜索时高亮显示被找到的文本</span><br><span class="line">set noerrorbells            &quot; 关闭错误信息响铃</span><br><span class="line">set novisualbell            &quot; 关闭使用可视响铃代替呼叫</span><br><span class="line">set t_vb=                   &quot; 置空错误铃声的终端代码</span><br><span class="line">&quot; set showmatch               &quot; 插入括号时，短暂地跳转到匹配的对应括号</span><br><span class="line">&quot; set matchtime=2             &quot; 短暂跳转到匹配括号的时间</span><br><span class="line">&quot; set nowrap                  &quot; 不自动换行</span><br><span class="line">set magic                   &quot; 显示括号配对情况</span><br><span class="line">set hidden                  &quot; 允许在有未保存的修改时切换缓冲区，此时的修改由 vim 负责保存</span><br><span class="line">set smartindent             &quot; 开启新行时使用智能自动缩进</span><br><span class="line">set cindent                 &quot; c风格程序缩进</span><br><span class="line">set cinoptions=&#123;0,1s,t0,n-2,p2s,(03s,=.5s,&amp;gt;1s,=1s,:1s</span><br><span class="line"></span><br><span class="line">set backspace=indent,eol,start &quot; 不设定在插入状态无法用退格键和 Delete 键删除回车符</span><br><span class="line">set cmdheight=1             &quot; 设定命令行的行数为 1</span><br><span class="line">set laststatus=2            &quot; 显示状态栏 (默认值为 1, 无法显示状态栏)</span><br><span class="line">set foldenable              &quot; 开始折叠</span><br><span class="line">set foldmethod=syntax       &quot; 设置语法折叠</span><br><span class="line">set foldcolumn=0            &quot; 设置折叠区域的宽度</span><br><span class="line">setlocal foldlevel=1        &quot; 设置折叠层数为</span><br><span class="line">&quot; set foldclose=all           &quot; 设置为自动关闭折叠</span><br><span class="line">&quot; colorscheme colorzone       &quot; 设定配色方案</span><br><span class="line">colorscheme default         &quot; 设定配色方案</span><br><span class="line"></span><br><span class="line">&quot; 设置在状态行显示的信息</span><br><span class="line">set statusline=\ %&lt;%F[%1*%M%*%n%R%H]%=\ %y\ %0(%&#123;&amp;fileformat&#125;\ [%&#123;(&amp;fenc==&quot;&quot;?&amp;enc:&amp;fenc).(&amp;bomb?&quot;,BOM&quot;:&quot;&quot;)&#125;]\ %c:%l/%L%)\</span><br><span class="line"></span><br><span class="line">&quot; 显示Tab符</span><br><span class="line">:.,extends:&gt;,precedes:&lt;</span><br><span class="line">set listset listchars=tab:&gt;- ,trail</span><br><span class="line"></span><br><span class="line">&quot;设置代码折叠方式为 手工indent</span><br><span class="line">set foldmethod=indent</span><br><span class="line"></span><br><span class="line">&quot;设置代码块折叠后显示的行数</span><br><span class="line">set foldexpr=1</span><br><span class="line">if has(&quot;gui_running&quot;)</span><br><span class="line">   set guioptions-=m &quot; 隐藏菜单栏</span><br><span class="line">   set guioptions-=T &quot; 隐藏工具栏</span><br><span class="line">   set guioptions-=L &quot; 隐藏左侧滚动条</span><br><span class="line">   set guioptions-=r &quot; 隐藏右侧滚动条</span><br><span class="line">   set guioptions-=b &quot; 隐藏底部滚动条</span><br><span class="line">   set showtabline=0 &quot; 隐藏Tab栏</span><br><span class="line">endif</span><br><span class="line"></span><br><span class="line"></span><br><span class="line">&quot;启动后自动最大化 </span><br><span class="line"></span><br><span class="line">if has(&quot;win32&quot;)</span><br><span class="line">   au GUIEnter * simalt ~x</span><br><span class="line">endif</span><br><span class="line"></span><br><span class="line">&quot; vim 支持中文</span><br><span class="line">set enc=utf-8</span><br><span class="line">set fencs=utf-8,ucs-bom,shift-jis,gb18030,gbk,gb2312,cp936</span><br><span class="line">set langmenu=zh_CN.UTF-8</span><br><span class="line">language message zh_CN.UTF-8</span><br><span class="line">set guifont=NSimSun:h8</span><br><span class="line">set helplang=cn</span><br><span class="line">set ambiwidth=double</span><br><span class="line"></span><br><span class="line">&quot;php缩进</span><br><span class="line">let PHP_autoformatcomment=1</span><br><span class="line"></span><br><span class="line">&quot;-------------------------------------------------------</span><br><span class="line"></span><br><span class="line">&quot;快捷键</span><br><span class="line">&quot; 全文搜索选中的文字。选中后  ,f</span><br><span class="line">:vmap &lt;silent&gt; &lt;leader&gt;f y/&lt;C-R&gt;=escape(@&quot;, &#x27;\\/.*$^~[]&#x27;)&lt;CR&gt;&lt;CR&gt;</span><br><span class="line">:vmap &lt;silent&gt; &lt;leader&gt;F y?&lt;C-R&gt;=escape(@&quot;, &#x27;\\/.*$^~[]&#x27;)&lt;CR&gt;&lt;CR&gt;</span><br><span class="line">&quot; 删除所有行未尾空格。快捷键f12</span><br><span class="line">nmap &lt;F12&gt; :%s/[ \t\r]\+$//g&lt;CR&gt;</span><br><span class="line">&quot; Buffers操作快捷方式!切换文件 shirt+l.shift+h</span><br><span class="line">nmap &lt;S-L&gt; :bnext&lt;CR&gt;</span><br><span class="line">nmap &lt;S-H&gt; :bprevious&lt;CR&gt;</span><br><span class="line">&quot;切换窗口。ctrl+w+whjkl</span><br><span class="line">nmap &lt;C-h&gt; &lt;C-w&gt;h</span><br><span class="line">nmap &lt;C-j&gt; &lt;C-w&gt;j</span><br><span class="line">nmap &lt;C-k&gt; &lt;C-w&gt;k</span><br><span class="line">nmap &lt;C-l&gt; &lt;C-w&gt;l</span><br><span class="line">&quot;nmap &lt;C-w&gt; &lt;C-w&gt;w</span><br><span class="line">&quot; 插入模式下左右移动光标</span><br><span class="line">&quot;imap &lt;c-l&gt; &lt;esc&gt;la</span><br><span class="line">&quot;imap &lt;c-h&gt; &lt;esc&gt;ha</span><br><span class="line"></span><br><span class="line">&quot; 选中状态下复制  ctrl+c</span><br><span class="line">vmap &lt;C-c&gt; &quot;+y</span><br><span class="line"></span><br><span class="line">&quot;映射转换语法。快捷键：html:,1  php:,2  javascript,3  css,4 defalur ,5</span><br><span class="line">nmap &lt;leader&gt;1 :set filetype=xhtml&lt;CR&gt;</span><br><span class="line">nmap &lt;leader&gt;2 :set filetype=css&lt;CR&gt;</span><br><span class="line">nmap &lt;leader&gt;3 :set filetype=javascript&lt;CR&gt;</span><br><span class="line">nmap &lt;leader&gt;4 :set filetype=php&lt;CR&gt;</span><br><span class="line">nmap &lt;leader&gt;5 :set filetype=default&lt;CR&gt;</span><br><span class="line"></span><br><span class="line">&quot; php语法进行检测 ctrl+p启动</span><br><span class="line">map &lt;C-P&gt; :!/php/php/bin/php -l %&lt;CR&gt;</span><br><span class="line"></span><br><span class="line">&quot; php启动帮助 快捷键普通模式下K</span><br><span class="line">autocmd BufNewFile,Bufread *.ros,*.inc,*.php set keywordprg=&quot;help</span><br><span class="line"></span><br><span class="line">&quot;快速保存。 ,wq保存并退出说有  ,qq不保存退出所有 ,w保存所有 ctrl+w插入模式保存</span><br><span class="line">nmap &lt;leader&gt;wq :wqa&lt;cr&gt;</span><br><span class="line"></span><br><span class="line">nmap &lt;leader&gt;qq :qa!&lt;cr&gt;</span><br><span class="line">nmap &lt;leader&gt;w :w!&lt;cr&gt;</span><br><span class="line"></span><br><span class="line"></span><br><span class="line"></span><br><span class="line">&quot;粘帖模式开启和关闭</span><br><span class="line"></span><br><span class="line">:set pastetoggle=&lt;F4&gt;</span><br><span class="line"></span><br><span class="line"></span><br><span class="line"></span><br><span class="line">&quot;-------------------------------------------------------</span><br><span class="line"></span><br><span class="line">&quot;不同文件类型的缩进</span><br><span class="line">au FileType html,python,vim,javascript setl shiftwidth=2</span><br><span class="line">au FileType html,python,vim,javascript setl tabstop=2</span><br><span class="line">au FileType java,php setl shiftwidth=4</span><br><span class="line">au FileType java,php setl tabstop=4</span><br><span class="line">set completeopt=longest,menu</span><br><span class="line"></span><br><span class="line">&quot;-----------------------------------------------------------------</span><br><span class="line"></span><br><span class="line">&quot; plugin - Mark.vim 给各种tags标记不同的颜色，便于观看调式的插件。</span><br><span class="line">&quot;   ,hl”光标下的单词或者文本高亮</span><br><span class="line">&quot;   ,hh会清除该单词的高亮。如果在高亮单词外输入则清除所有的高亮</span><br><span class="line">&quot;   ,hr来高亮符合输入一个正则表达式的文本</span><br><span class="line">nmap &lt;silent&gt; &lt;leader&gt;hl &lt;Plug&gt;MarkSet</span><br><span class="line">nmap &lt;silent&gt; &lt;leader&gt;hh &lt;Plug&gt;MarkClear</span><br><span class="line">nmap &lt;silent&gt; &lt;leader&gt;hr &lt;Plug&gt;MarkRegex</span><br><span class="line">vmap &lt;silent&gt; &lt;leader&gt;hl &lt;Plug&gt;MarkSet</span><br><span class="line">vmap &lt;silent&gt; &lt;leader&gt;hh &lt;Plug&gt;MarkClear</span><br><span class="line">vmap &lt;silent&gt; &lt;leader&gt;hr &lt;Plug&gt;MarkRegex</span><br><span class="line">&quot; 你可以在高亮文本上使用“,#”或“,*”来上索高亮文本。在使用了“,#”或“,*</span><br><span class="line">&quot; ”后，就可以直接输入“#”或“*”来继续查找该高亮文本，直到你又用“#”或“</span><br><span class="line">&quot; *”查找了其它文本。</span><br><span class="line"></span><br><span class="line">&quot;-----------------------------------------------------------------</span><br><span class="line"></span><br><span class="line">&quot; plugin - EnhCommentify.vim  注释代码用的，</span><br><span class="line"></span><br><span class="line">&quot; &lt;leader&gt;c 这个注释之后光标会跳转到下一行。</span><br><span class="line"></span><br><span class="line">&quot; &lt;leader&gt;x 用这个注释之后，光标仍然停留在当前行。</span><br><span class="line">nmap &lt;silent&gt; &lt;F3&gt; ,x</span><br><span class="line">vmap &lt;silent&gt; &lt;F3&gt; ,x</span><br><span class="line">imap &lt;silent&gt; &lt;F3&gt; ,x</span><br><span class="line"></span><br><span class="line"></span><br><span class="line"></span><br><span class="line">let g:EnhCommentifyUseSyntax = &#x27;Yes&#x27;         &quot;自动按照类型进行不同的注释</span><br><span class="line">let g:EnhCommentifyMultiPartBlocks = &#x27;yes&#x27;   &quot;注释多行时不要每行都加注释符</span><br><span class="line"></span><br><span class="line">let g:EnhCommentifyAlignRight = &#x27;yes&#x27;        &quot;注释自动对齐</span><br><span class="line">&quot; let g:EnhCommentifyRespectIndent = &#x27;Yes&#x27;    &quot;注释靠近代码</span><br><span class="line"></span><br><span class="line">let g:EnhCommentifyPretty = &#x27;Yes&#x27;             &quot;注释和文字中间加空格</span><br><span class="line"></span><br><span class="line">&quot;-----------------------------------------------------------------</span><br><span class="line"></span><br><span class="line">&quot; plugin - NERD_tree.vim 以树状方式浏览系统中的文件和目录</span><br><span class="line">&quot; :ERDtree 打开NERD_tree         :NERDtreeClose    关闭NERD_tree</span><br><span class="line">&quot; NERDTree  &lt;f10&gt;开启和关闭</span><br><span class="line">map &lt;F10&gt; :NERDTreeToggle&lt;CR&gt;</span><br><span class="line">&quot; o 打开关闭文件或者目录         t 在标签页中打开</span><br><span class="line">&quot; T 在后台标签页中打开           ! 执行此文件</span><br><span class="line">&quot; p 到上层目录                   P 到根目录</span><br><span class="line">&quot; K 到第一个节点                 J 到最后一个节点</span><br><span class="line">&quot; u 打开上层目录                 m 显示文件系统菜单（添加、删除、移动操作）</span><br><span class="line">&quot; r 递归刷新当前目录             R 递归刷新当前根目录</span><br><span class="line"></span><br><span class="line">&quot;-----------------------------------------------------------------</span><br><span class="line">&quot; plugin - NeoComplCache.vim    自动补全插件</span><br><span class="line">&quot; 自动补全结合supertab插件使用tab补全或者ctrl+n</span><br><span class="line">&quot; imap &lt;C-t&gt; &lt;C-x&gt;&lt;C-o&gt;</span><br><span class="line">let g:neocomplcache_enable_at_startup = 1 &quot; Use smartcase.</span><br><span class="line">let g:neocomplcache_enable_smart_case = 1 &quot; Use camel case completion.</span><br><span class="line">let g:neocomplcache_enable_camel_case_completion = 1 &quot; Use underbar completion.</span><br><span class="line">let g:neocomplcache_enable_underbar_completion = 1 &quot; Set minimum syntax keyword length.</span><br><span class="line">let g:neocomplcache_min_syntax_length = 3</span><br><span class="line">let g:neocomplcache_lock_buffer_name_pattern = &#x27;\*ku\*&#x27;</span><br><span class="line">&quot; Define dictionary.</span><br><span class="line">let g:NeoComplCache_DictionaryFileTypeLists = &#123;&#x27;default&#x27; : &#x27;&#x27;,&#x27;php&#x27; :&#x27;/usr/share/vim/vim70/dict/php.dict&#x27;&#125;</span><br><span class="line">&quot; imap &lt;silent&gt;&lt;C-T&gt; &lt;Plug&gt;(neocomplcache_snippets_expand)</span><br><span class="line">&quot; smap &lt;silent&gt;&lt;C-T&gt; &lt;Plug&gt;(neocomplcache_snippets_expand)</span><br><span class="line">&quot; Define keyword.</span><br><span class="line">if !exists(&#x27;g:neocomplcache_keyword_patterns&#x27;)</span><br><span class="line">&gt;-&gt;-let g:neocomplcache_keyword_patterns = &#123;&#125;</span><br><span class="line">endif</span><br><span class="line">&gt;-&gt;-let g:neocomplcache_keyword_patterns[&#x27;default&#x27;] = &#x27;\h\w*&#x27;</span><br><span class="line"></span><br><span class="line">&quot;-----------------------------------------------------------------</span><br><span class="line"></span><br><span class="line">&quot; plugin -supertab  智能tab插件</span><br><span class="line">&quot; tab键自动补全</span><br><span class="line">let g:SuperTabDefaultCompletionType=&quot;&lt;C-X&gt;&lt;C-O&gt;&quot;</span><br><span class="line"></span><br><span class="line">&quot;-----------------------------------------------------------------</span><br><span class="line"></span><br><span class="line">&quot; plugin - bufexplorer.vim Buffers切换</span><br><span class="line">&quot; &lt;F8&gt;打开文件列表窗口（上下方式）</span><br><span class="line">map &lt;F8&gt; &lt;leader&gt;bs</span><br><span class="line">&quot; ,be 全屏方式查看全部打开的文件列表</span><br><span class="line">&quot; ,bv 左右方式查看   ,bs 上下方式查看</span><br><span class="line">&quot; 切换Buffers的操作快捷方式： shirt+l.shift+h</span><br><span class="line">let g:bufExplorerDefaultHelp=0       &quot; Do not show default help.</span><br><span class="line">let g:bufExplorerShowRelativePath=0  &quot; 不显示相对路径（全路径）</span><br><span class="line">let g:bufExplorerSortBy=&#x27;mru&#x27;        &quot; Sort by most recently used.</span><br><span class="line">let g:bufExplorerSplitRight=0        &quot; Split left.</span><br><span class="line">let g:bufExplorerSplitBelow=0        &quot; Split new window above current</span><br><span class="line"></span><br><span class="line">&quot;-----------------------------------------------------------------</span><br><span class="line"></span><br><span class="line">&quot; plugin - Tlist相关设置</span><br><span class="line">&quot; &lt;F9&gt;开启和关闭</span><br><span class="line"></span><br><span class="line">map &lt;F9&gt; :TlistToggle&lt;cr&gt;</span><br><span class="line">let Tlist_Auto_Highlight_Tag = 1</span><br><span class="line">let Tlist_Auto_Open = 0let Tlist_Auto_Update = 1</span><br><span class="line">let Tlist_Close_On_Select = 0</span><br><span class="line">let Tlist_Compact_Format = 0</span><br><span class="line">let Tlist_Display_Prototype = 0</span><br><span class="line">let Tlist_Display_Tag_Scope = 1</span><br><span class="line">let Tlist_Enable_Fold_Column = 0</span><br><span class="line">let Tlist_Exit_OnlyWindow = 1</span><br><span class="line"></span><br><span class="line">let Tlist_File_Fold_Auto_Close = 0</span><br><span class="line">let Tlist_GainFocus_On_ToggleOpen = 1</span><br><span class="line">let Tlist_Hightlight_Tag_On_BufEnter = 1</span><br><span class="line">let Tlist_Inc_Winwidth = 0</span><br><span class="line">let Tlist_Max_Submenu_Items = 1</span><br><span class="line">let Tlist_Max_Tag_Length = 30</span><br><span class="line">let Tlist_Process_File_Always = 0</span><br><span class="line">let Tlist_Show_Menu = 0</span><br><span class="line">let Tlist_Show_One_File = 0</span><br><span class="line">let Tlist_Sort_Type = &quot;order&quot;</span><br><span class="line">let Tlist_Use_Horiz_Window = 0</span><br><span class="line">let Tlist_Use_Right_Window = 1</span><br><span class="line">let Tlist_WinWidth = 20</span><br><span class="line">let tlist_php_settings = &#x27;php;c:class;i:interfaces;d:constant;f:function&#x27;</span><br><span class="line"></span><br><span class="line">&quot;-----------------------------------------------------------------</span><br><span class="line"></span><br><span class="line">&quot;折叠设置</span><br><span class="line">set diffexpr=MyDiff()</span><br><span class="line">function! MyDiff()</span><br><span class="line"> let opt = &#x27;-a --binary &#x27;</span><br><span class="line"> if &amp;diffopt =~ &#x27;icase&#x27; | let opt = opt . &#x27;-i &#x27; | endif</span><br><span class="line"> if &amp;diffopt =~ &#x27;iwhite&#x27; | let opt = opt . &#x27;-b &#x27; | endif</span><br><span class="line"> let arg1 = v:fname_in</span><br><span class="line"> if arg1 =~ &#x27; &#x27; | let arg1 = &#x27;&quot;&#x27; . arg1 . &#x27;&quot;&#x27; | endif</span><br><span class="line"> let arg2 = v:fname_new</span><br><span class="line"> if arg2 =~ &#x27; &#x27; | let arg2 = &#x27;&quot;&#x27; . arg2 . &#x27;&quot;&#x27; | endif</span><br><span class="line"> let arg3 = v:fname_out</span><br><span class="line"> if arg3 =~ &#x27; &#x27; | let arg3 = &#x27;&quot;&#x27; . arg3 . &#x27;&quot;&#x27; | endif</span><br><span class="line"> let eq = &#x27;&#x27;</span><br><span class="line"> if $VIMRUNTIME =~ &#x27; &#x27;</span><br><span class="line">   if &amp;sh =~ &#x27;\&lt;cmd&#x27;</span><br><span class="line">     let cmd = &#x27;&quot;&quot;&#x27; . $VIMRUNTIME . &#x27;\diff&quot;&#x27;</span><br><span class="line">     let eq = &#x27;&quot;&#x27;</span><br><span class="line">   else</span><br><span class="line">     let cmd = substitute($VIMRUNTIME, &#x27; &#x27;, &#x27;&quot; &#x27;, &#x27;&#x27;) . &#x27;\diff&quot;&#x27;</span><br><span class="line">   endif</span><br><span class="line"> else</span><br><span class="line">   let cmd = $VIMRUNTIME . &#x27;\diff&#x27;</span><br><span class="line"> endif</span><br><span class="line"> silent execute &#x27;!&#x27; . cmd . &#x27; &#x27; . opt . arg1 . &#x27; &#x27; . arg2 . &#x27; &gt; &#x27; . arg3 . eq</span><br><span class="line">endfunction</span><br><span class="line"></span><br></pre></td></tr></table></figure>

<p>所安装的插件列表如下：</p>
<ul>
<li><p>omnicppcomplete-0.41.zip：实现自动补全 Tab键或者ctrl+l</p>
</li>
<li><p>vim-php-manual.tar.gz ： php函数文档  K键</p>
</li>
<li><p>supertab.vba： 实现tab键补全</p>
</li>
<li><p>taglist_45.zip： 生成右侧的函数列表</p>
</li>
<li><p>NERD_tree.zip ： vim界面左侧目录树</p>
</li>
<li><p>mattn-zencoding-vim-88d8991.zip ：生成html</p>
</li>
<li><p>&#x2F;&#x2F;NERD_commenter.vim   注释代码用的，</p>
</li>
<li><p>EnhancedCommentify 注释插件</p>
</li>
<li><p>php的字典文件</p>
</li>
<li><p>mark.vba.gz 标记</p>
</li>
<li><p>javascript.zip</p>
</li>
<li><p>css.vim</p>
</li>
<li><p>php.vim（PHP-correct-Indenting 最新修订的php缩进vim）</p>
</li>
<li><p>参考<a href="http://koch.ro/blog/index.php?/archives/63-VIM-an-a-PHP-IDE.html">http://koch.ro/blog/index.php?/archives/63-VIM-an-a-PHP-IDE.html</a></p>
</li>
<li><p>参考<a href="http://www.laruence.com/2010/08/18/1718.html">http://www.laruence.com/2010/08/18/1718.html</a></p>
</li>
<li><p>参考<a href="http://yinqiongjie.blog.163.com/blog/static/5619762008102823227166/">http://yinqiongjie.blog.163.com/blog/static/5619762008102823227166/</a></p>
</li>
<li><p>另参考<a href="http://www.blags.org/my-vim-php-development-profile/">http://www.blags.org/my-vim-php-development-profile/</a></p>
</li>
<li><p>另有人的配置见连接：<a href="http://nootn.com/blog/Tool/22">http://nootn.com/blog/Tool/22</a>（附各种插件）</p>
</li>
</ul>
]]></content>
      <tags>
        <tag>后端</tag>
      </tags>
  </entry>
  <entry>
    <title>Linux vps生成100mb.bin文件测试下载速度</title>
    <url>/2011/12/14/linux-vps-100mb-test-file.html</url>
    <content><![CDATA[<p>　　大家买了vps之后是不是都迫不及待的想让朋友们帮忙测试下下载速度，很多vps商或者独立服务器都提供100mb.bin 或者1000mb.bin的文件下载，当然这些文件都不是上传上去的，用服务器自动生成即可。<br>　　进入你的网站目录，指向命令：</p>
<pre><code>dd if=/dev/zero of=100mb.bin bs=100M count=1
</code></pre>
<p>其中的文件大小和数量，你自己决定吧！</p>
<p>生成之后可以直接在浏览器输入文件的网址，测试单线程的下载速度，如果想测试极限速度可以找几家国外的vps或者服务器，下载你的文件试试。</p>
]]></content>
      <tags>
        <tag>Server&amp;OS</tag>
      </tags>
  </entry>
  <entry>
    <title>利用php重启apache进程</title>
    <url>/2011/12/16/php-restart-apache.html</url>
    <content><![CDATA[<h2 id="问题"><a href="#问题" class="headerlink" title="问题"></a>问题</h2><p>通过php重启apache可以把apache的控制放到web页面上。<br>但是由于php本身的运行模式，一般而言，除非apache具备root权限，否则php连&#x2F;etc都访问不了，更不用说反过来控制apache了。<br>因此，我们需要找到别的方法。</p>
<h3 id="思路"><a href="#思路" class="headerlink" title="思路"></a>思路</h3><p>通过system,exec等方法,PHP可以呼出一些权限之内的命令，或者执行一些可执行的程序。<br>因此我们可以事先编译一个重启apache的可执行程序，并赋予其root权限，然后让php调用该程序来实现apache的重启动。</p>
<h3 id="具体方法"><a href="#具体方法" class="headerlink" title="具体方法"></a>具体方法</h3><p>首先我们建立sample.c文件，并进行编译：</p>
<figure class="highlight plaintext"><table><tr><td class="code"><pre><span class="line">#include &lt;stdio.h&gt;</span><br><span class="line">#include &lt;stdlib.h&gt;</span><br><span class="line">#include &lt;sys/types.h&gt;</span><br><span class="line">#include &lt;sys/wait.h&gt;</span><br><span class="line">#include &lt;unistd.h&gt;</span><br><span class="line"></span><br><span class="line">int main(int argc, char **argv)</span><br><span class="line">&#123;</span><br><span class="line">  pid_t pid;</span><br><span class="line">  uid_t uid,euid;</span><br><span class="line">  uid=getuid();</span><br><span class="line">  euid=geteuid();</span><br><span class="line">  setreuid(euid,uid); //交换uid和euid，临时转让文件本身的root权限给PHP(apache)。</span><br><span class="line"></span><br><span class="line">  if ((pid = fork()) == 0)      //生成子进程</span><br><span class="line">    &#123;</span><br><span class="line">      if ((pid = fork()) &gt; 0)    //子进程下继续生成孙进程</span><br><span class="line">        &#123;</span><br><span class="line">          exit(0); //杀掉子进程</span><br><span class="line">        &#125;</span><br><span class="line">      else if (pid == 0)</span><br><span class="line">        &#123;</span><br><span class="line">          sleep(2);</span><br><span class="line">         //由于子进程已死，因此孙进程成为孤儿进程，并自动由init进程领养。</span><br><span class="line">          //此时孙进程发送消息给apache，请求其重启。</span><br><span class="line">          system(&quot;apachectl -k restart&quot;);</span><br><span class="line">          exit(0);</span><br><span class="line">        &#125;</span><br><span class="line">    &#125;</span><br><span class="line">  else if (pid &gt; 0)</span><br><span class="line">　//程序最初的父进程在这里回收子进程。</span><br><span class="line">    waitpid(pid, NULL, 0);</span><br><span class="line">  return 0;</span><br><span class="line">&#125;</span><br></pre></td></tr></table></figure>

<p>编译完该文件之后，我们需要对执行文件的权限进行一下处理</p>
<pre><code>chmod u+s sample
</code></pre>
<p>sample是由root建立，root编译，因此原本也只能由root执行调用。<br>但通过上面这个命令，其他用户也可以调用这个文件了。<br>然后我们在PHP中调用这个文件就可以重启apache了。</p>
<h4 id="一些关键点的解说"><a href="#一些关键点的解说" class="headerlink" title="一些关键点的解说"></a>一些关键点的解说</h4><p>1:<br>重启Apache的系统命令很多，比起代码中的调用，更有名的应该是&#x2F;etc&#x2F;init.d&#x2F;httpd restart，但是很遗憾，在本应用中这个系统命令是不能调用的，如果使用这个命令，那么Apache会在中止掉自己进程的瞬间，终止这个程序的继续运行，也就无法对自身进行重启动，因此我们需要通过发送信号给Apache，在不中止进程的情况下重启Apache，这一点非常重要。<br>关于apachectl -k restart的详细信息，可以参照下面的网址<br><a href="http://man.chinaunix.net/newsoft/Apache2.2_chinese_manual/stopping.html">http://man.chinaunix.net/newsoft/Apache2.2_chinese_manual&#x2F;stopping.html</a></p>
<p>2: 双重fork。 如果只是重启apache，而不在乎程序本身的动作，那么我们可以直接在代码中执行system(“apachectl -k restart”)而不必产生新的进程。<br>但是，考虑一下整个流程，如果我们这样做了，那么当我们访问PHP页面的时候，PHP(Apache)调用文件，瞬间重启自身，那么很自然，结果就是页面崩溃。<br>当然，Apache依然可以重启成功，但是，这一点也不优雅。<br>因此，使用双重fork可以让我们避免当前页面崩溃而对Apache进行重启动。</p>
<p>3: 更进一步的安全措施:<br>编译完sample后，计算其MD5值，并把该值固化到PHP中，然后在PHP中加入校验代码，以防止sample被恶意替换。</p>
]]></content>
      <tags>
        <tag>编程语言</tag>
      </tags>
  </entry>
  <entry>
    <title>关于神奇的收录</title>
    <url>/2012/01/18/the-amazing-seo-collecting.html</url>
    <content><![CDATA[<p>看来，半个月还不足以使我的博客死彻底，昨天刚刚抱怨了，我的博客因为停站半月备案，导致百度收录只剩一条，Google PR消失，但是刚才我又查了一下，18号，也就是半个小时前的昨天，在我抱怨后的12个小时里，我的博客被百度新收录了一条，而现在的seo综合查询结果，又和我停站备案前的数据相同了，也就是说，原来的好几百百度收录外加PR值3都恢复回来了。具体是什么情况真的不是很清楚。初步推测是3000多的外链起作用了，该观点有待验证。</p>
<p>另外，我发现了一个免费cdn加速器，不过需要备案号。<a href="http://www.webluker.com/">http://www.webluker.com/</a></p>
<p>还有，自从给评论加上验证码功能后，世界瞬间就安静啦，o(∩∩)o…哈哈</p>
<p>最后一个事，从这篇开始，要结束文章链接是数字的窘态，练习练习英文。不过这个变动的影响就是，如果不采取措施的话，以前被搜索引擎收录的文章将失效了。。。采取的措施就是使用rewrite了，在nginx的配置文件里加入</p>
<p><code>rewrite ^/archives/(\d+)\.html /\?p=$1 last;</code></p>
]]></content>
      <tags>
        <tag>网站日志</tag>
        <tag>SEO</tag>
      </tags>
  </entry>
  <entry>
    <title>运气不错，半个月搞定网站备案~</title>
    <url>/2012/01/16/beian.html</url>
    <content><![CDATA[<p>从2012年1月4日开始准备资料，到1月5号开始提交资料，再到今天1月16号备案号批下来，貌似一路很顺利，就是中间等待的时候，比较让人心急啊。。。。</p>
<p>由于这次备案是闭站备案，所以说这段时间，我的这个网站是一直无法访问的，不过我还是给自己预留了一个通道可以访问到的~</p>
<p>有了备案号就可以去百度申请广告了<del>吼吼</del></p>
<p>虽然我的这个站的流量实在是可怜，但是我相信，这只是现状。</p>
]]></content>
      <tags>
        <tag>网站日志</tag>
      </tags>
  </entry>
  <entry>
    <title>这次备案的损失</title>
    <url>/2012/01/18/the-lost-of-register.html</url>
    <content><![CDATA[<p>这两天我才发现我这次备案自己的博客，停站半个月的损失是什么。最初以为也就是少了点百度收录而已，但是事实却是，我的百度收录现在仅剩一条了，并且最痛心的是Google的PR值没有了，我的pr值原来为3阿，这是多么不容易积攒起来的阿。。。唉，看来一切又要从头再来了，既然现在是假期了，每天就要坚持发发博文了。希望能尽快回升回去。</p>
]]></content>
      <tags>
        <tag>网站日志</tag>
      </tags>
  </entry>
  <entry>
    <title>处理Nginx出现的413 Request Entity Too Large错误</title>
    <url>/2011/12/27/nginx-413-request-entity-too-large.html</url>
    <content><![CDATA[<p>处理Nginx出现的413 Request Entity Too Large错误<br>这个错误一般在上传文件的时候出现，打开nginx主配置文件nginx.conf，找到http{}段，添加</p>
<p><code>client_max_body_size 8m;</code></p>
<p>要是跑php的话这个大小client_max_body_size要和php.ini中的如下值的最大值一致或者稍大，这样就不会因为提交数据大小不一致出现的错误。</p>
<p><code>post_max_size = 8M upload_max_filesize = 2M</code></p>
]]></content>
      <tags>
        <tag>Server&amp;OS</tag>
      </tags>
  </entry>
  <entry>
    <title>WebShell检测思路浅谈</title>
    <url>/2012/01/18/webshell.html</url>
    <content><![CDATA[<p>转自：<a href="http://2ndx.tk/?post=18">http://2ndx.tk/?post=18</a></p>
<ul>
<li><a href="#0x00">0x00  前言</a></li>
<li><a href="#0x01">0x01  Webshell检测模型</a></li>
<li><a href="#0x02">0x02  静态特征检测</a></li>
<li><a href="#0x03">0x03  动态特征检测</a></li>
<li><a href="#0x04">0x04  结语</a></li>
</ul>
<p><a name="0x00"></a>0x00  前言</p>
<p>什么是webshell？我相信如果看官能有兴趣看这篇文章，一定对webshell有个了解。不<br>过不了解也没关系，那就请先搜索下相关资料[1]。当然，本着“know it then hack it”<br>的原则，建议你还是搭个环境，熟悉下先，毕竟纸上谈兵是要不得的。</p>
<p>随着网络的发展，Web站点的增加，webshell这种脚本后门技术也发展起来了，多少黑<br>客故事都是从一个小小的webshell开始的。所以对于网站，特别是站点和应用众多的互联网<br>企业，能够在出现webshell的阶段及时发现和响应就显得尤为重要。</p>
<p>本文以笔者多年从事相关工作的经验来探讨下webshell的检测手段。</p>
<p><a name="0x01"></a>0x01  Webshell检测模型</p>
<p>记得当年第一个ASP木马出来的时候号称“永不被杀的ASP木马”（请大家虔诚地起立，<br>我们一起来膜拜一下海洋顶端ASP木马之父LCX大叔），因为它使用正常端口，且脚本容易变<br>形，使得查杀它变得困难。但是，Webshell这种特殊的Web应用程序也有两个命门：文件和<br>HTTP请求。</p>
<p>我们先来看下Webshell的运行流程：hacker -&gt; HTTP Protocol -&gt; Web Server -&gt; CGI。<br>简单来看就是这样一个顺序：黑客通过浏览器以HTTP协议访问Web Server上的一个CGI文件。<br>棘手的是，webshell就是一个合法的TCP连接，在TCP&#x2F;IP的应用层之下没有任何特征（当然<br>不是绝对的），只有在应用层进行检测。</p>
<p>黑客入侵服务器，使用webshell，不管是传文件还是改文件，必然有一个文件会包含<br>webshell代码，很容易想到从文件代码入手，这是静态特征检测；webshell运行后，B&#x2F;S数<br>据通过HTTP交互，HTTP请求&#x2F;响应中可以找到蛛丝马迹，这是动态特征检测。</p>
<p><a name="0x02"></a>0x02  静态特征检测</p>
<p>静态特征检测是指不执行而通过围观的方式来发现webshell，即先建立一个恶意字符串<br>特征库，然后通过在各类脚本文件中检查是否匹配。这是一种最简单也是最常见的技术，高<br>级一些的，可能还涉及到语义分析。笔者06年开发的“雷客图ASP站长安全助手”[2]即是通<br>过此类办法查找ASP类型的webshell的。</p>
<p>静态特征检测面临的一个问题是误报。因为一些特征字符串正常程序本身也需要用到。<br>比如PHP里面的eval、system等，ASP里面的FileSystemObject、include等。所以雷客图在<br>设计之初就是一个辅助工具，最终还需要有相关安全经验的人来判定。</p>
<p>对于少量站点可以用这样人肉去检查，如果是一个成千上万站点的大型企业呢，这个时<br>候再人肉那工作量可就大了。所以用这样一种思路：强弱特征。即把特征码分为强弱两种特<br>征，强特征命中则必是webshell；弱特征由人工去判断。加入一种强特征，即把流行webshell<br>用到的特征作为强特征重点监控，一旦出现这样的特征即可确认为webshell立即进行响应。<br>比如PHPSpy里面会出现<code>phpspy</code>、<code>wofeiwo</code>、<code>eval($_POST[xxx])</code> 等，<br>ASP里面出现Shell.Application等。</p>
<p>当然，黑客完全可以变形躲过，没关系，还有人工检查的弱特征。</p>
<p>另一个问题是漏报。程序的关键是特征字符串，它直接关系着结果，如果你的特征库里<br>面没有记录的甚至是一种新的webshell代码，就可能束手无策了。雷客图第一版出来后，我<br>自以为所有的ASP webshell都可以查了，但是我错了，因为不断会有新的方式出来绕过，最<br>终结果就是特征被动的跟着webshell升级而升级，同时还面临未知的webshell——这个情况<br>和特征码杀毒软件何其相似。</p>
<p>要解决误报和漏报，就不能拘泥于代码级别了。可以换个角度考虑问题：文件系统。我<br>们可以结合文件的属性来判断，比如apache是noboy启动的，webshell的属主必然也是nobody，<br>如果我的Web目录无缘无故多了个nobody的文件，这里就有问题了。最理想的办法是需要制度<br>和流程来建设一个Web目录唯一发布入口，控制住这个入口，非法进来的Web文件自然可以发<br>现。</p>
<p><a name="0x03"></a>0x03  动态特征检测</p>
<p>webshell传到服务器了，黑客总要去执行它吧，webshell执行时刻表现出来的特征，我<br>们称为动态特征。</p>
<p>先前我们说到过webshell通信是HTTP协议。只要我们把webshell特有的HTTP请求&#x2F;响应<br>做成特征库，加到IDS里面去检测所有的HTTP请求就好了。</p>
<p>这个方案有个问题就是漏报。首先你得把网上有的webshell都搜集起来抓特征，这是个<br>体力活，新的webshell出来还要去更新这个库，总是很被动，被动就算了，但是一些不曾公<br>开的webshell通信就会漏掉。那么这个方案有没有效果，只能说效果有限吧，对付拿来主义<br>的菜鸟可以，遇到高级一些的黑客就无效了。杀毒软件都搞主动防御了，webshell也不能老<br>搞特征码是吧。</p>
<p>webshell起来如果执行系统命令的话，会有进程。Linux下就是nobody用户起了bash，<br>Win下就是IIS User启动cmd，这些都是动态特征，不过需要看黑客是否执行命令（多半会这<br>样），还有就是你的服务器上要有一个功能强大的Agent。要是黑客高兴，再反连回去，这<br>下就更好了，一个TCP连接（也可能是UDP），Agent和IDS都可以抓现行。这里还涉及到主机<br>后门的一些检测策略，以后有机会再另文叙述。</p>
<p>回到网络层来，之前我们探讨过，Webshell总有一个HTTP请求，如果我在网络层监控HTTP<br>请求（我没有监控Apache&#x2F;IIS日志），有一天突然出现一个新的PHP文件请求或者一个平时<br>是GET请求的文件突然有了POST请求，还返回的200，这里就有问题了。这种基于区别于正常<br>请求的异常模型，姑且称之为HTTP异常请求模型检测。一旦有了这样的模型，除了Webshell，<br>还可以发现很多问题的。</p>
<p>还有一个思路来自《浅谈javascript函数劫持》[3]和某款代码审计软件。回忆一下，<br>我们调试网马的时候，怎么还原它各种稀奇古怪的加密算法呢，简单，把eval改成alert就<br>好了！类似的，所以我们可以在CGI全局重载一些函数（比如ASP.Net的global.asax文件），<br>当有webshell调用的时候就可以发现异常。例如以下ASP代码就实现了对ASP的execute函数<br>的重载：</p>
<figure class="highlight plaintext"><table><tr><td class="code"><pre><span class="line">&lt;%</span><br><span class="line">Function execute(stra)</span><br><span class="line">Response.Write(&quot;get the arg : &quot;+stra)</span><br><span class="line">End Function</span><br><span class="line">a=&quot;response.write(&quot;&quot;hello,world&quot;&quot;)&quot;</span><br><span class="line">execute(a)</span><br><span class="line">%&gt;</span><br></pre></td></tr></table></figure>

<p>这个方法在应用层还是有些问题，所以如果在CGI引擎内核里面改可能会好些。根据小<br>道消息，这期ph4nt0m的webzine会有一篇文章涉及PHP内核中防webshell的，有兴趣的同学<br>可以关注。</p>
<p><a name="0x04"></a>0x04  结语</p>
<p>本文只探讨了检测Webshell的一些思路，希望对你有些帮助，如果你有更好的方案，也<br>可以和我探讨。至于一些工具和特征，由于这样那样的原因就不公开了，我始终认为，相比<br>于工具，思路永远是最重要的。</p>
<p>文章作者：lake2 - 这个ID不用我解释，某组织的牛淫</p>
]]></content>
      <tags>
        <tag>后端</tag>
        <tag>Hacker</tag>
      </tags>
  </entry>
  <entry>
    <title>nginx rewrite 参考资料</title>
    <url>/2012/01/19/nginx-rewrite-references.html</url>
    <content><![CDATA[<p>nginx rewrite 正则表达式匹配，其中：</p>
<ul>
<li><p>~ 为区分大小写匹配</p>
</li>
<li><p>~* 为不区分大小写匹配</p>
</li>
<li><p><code>!~</code>和<code>!~*</code>分别为区分大小写不匹配及不区分大小写不匹配</p>
</li>
</ul>
<p>文件及目录匹配，其中：</p>
<ul>
<li><p>-f和!-f用来判断是否存在文件</p>
</li>
<li><p>-d和!-d用来判断是否存在目录</p>
</li>
<li><p>-e和!-e用来判断是否存在文件或目录</p>
</li>
<li><p>-x和!-x用来判断文件是否可执行</p>
</li>
</ul>
<p>flag标记有：</p>
<ul>
<li><p>last 相当于Apache里的[L]标记，表示完成rewrite</p>
</li>
<li><p>break 终止匹配, 不再匹配后面的规则</p>
</li>
<li><p>redirect 返回302临时重定向 地址栏会显示跳转后的地址</p>
</li>
<li><p>permanent 返回301永久重定向 地址栏会显示跳转后的地址</p>
</li>
</ul>
<p>一些可用的全局变量有，可以用做条件判断(待补全)</p>
<figure class="highlight plaintext"><table><tr><td class="code"><pre><span class="line">$args</span><br><span class="line"></span><br><span class="line">$content_length</span><br><span class="line"></span><br><span class="line">$content_type</span><br><span class="line"></span><br><span class="line">$document_root</span><br><span class="line"></span><br><span class="line">$document_uri</span><br><span class="line"></span><br><span class="line">$host</span><br><span class="line"></span><br><span class="line">$http_user_agent</span><br><span class="line"></span><br><span class="line">$http_cookie</span><br><span class="line"></span><br><span class="line">$limit_rate</span><br><span class="line"></span><br><span class="line">$request_body_file</span><br><span class="line"></span><br><span class="line">$request_method</span><br><span class="line"></span><br><span class="line">$remote_addr</span><br><span class="line"></span><br><span class="line">$remote_port</span><br><span class="line"></span><br><span class="line">$remote_user</span><br><span class="line"></span><br><span class="line">$request_filename</span><br><span class="line"></span><br><span class="line">$request_uri</span><br><span class="line"></span><br><span class="line">$query_string</span><br><span class="line"></span><br><span class="line">$scheme</span><br><span class="line"></span><br><span class="line">$server_protocol</span><br><span class="line"></span><br><span class="line">$server_addr</span><br><span class="line"></span><br><span class="line">$server_name</span><br><span class="line"></span><br><span class="line">$server_port</span><br><span class="line"></span><br><span class="line">$uri</span><br></pre></td></tr></table></figure>

<p>多目录转成参数</p>
<figure class="highlight plaintext"><table><tr><td class="code"><pre><span class="line">abc.domian.com/sort/2 =&gt; abc.domian.com/index.php?act=sort&amp;name=abc&amp;id=2</span><br><span class="line">if ($host ~* (.*)\.domain\.com) &#123;</span><br><span class="line">    set $sub_name $1;</span><br><span class="line">    rewrite ^/sort\/(\d+)\/?$ /index.php?act=sort&amp;cid=$sub_name&amp;id=$1 last;</span><br><span class="line">&#125;</span><br></pre></td></tr></table></figure>

<p>目录对换</p>
<figure class="highlight plaintext"><table><tr><td class="code"><pre><span class="line">/123456/xxxx -&gt; /xxxx?id=123456</span><br><span class="line">rewrite ^/(\d+)/(.+)/ /$2?id=$1 last;</span><br></pre></td></tr></table></figure>

<p>例如下面设定nginx在用户使用ie的使用重定向到&#x2F;nginx-ie目录下：</p>
<figure class="highlight plaintext"><table><tr><td class="code"><pre><span class="line">if ($http_user_agent ~ MSIE) &#123;</span><br><span class="line">    rewrite ^(.*)$ /nginx-ie/$1 break;</span><br><span class="line">&#125;</span><br></pre></td></tr></table></figure>

<p>目录自动加“&#x2F;”</p>
<figure class="highlight plaintext"><table><tr><td class="code"><pre><span class="line">if (-d $request_filename)&#123;</span><br><span class="line">    rewrite ^/(.*)([^/])$ http://$host/$1$2/ permanent;</span><br><span class="line">&#125;</span><br></pre></td></tr></table></figure>

<p>禁止htaccess</p>
<figure class="highlight plaintext"><table><tr><td class="code"><pre><span class="line">location ~/\.ht &#123;</span><br><span class="line">    deny all;</span><br><span class="line">&#125;</span><br></pre></td></tr></table></figure>

<p>禁止多个目录</p>
<figure class="highlight plaintext"><table><tr><td class="code"><pre><span class="line">location ~ ^/(cron|templates)/ &#123;</span><br><span class="line">    deny all;</span><br><span class="line">    break;</span><br><span class="line">&#125;</span><br></pre></td></tr></table></figure>

<p>禁止以&#x2F;data开头的文件<br>可以禁止&#x2F;data&#x2F;下多级目录下.log.txt等请求;</p>
<figure class="highlight plaintext"><table><tr><td class="code"><pre><span class="line">location ~ ^/data &#123;</span><br><span class="line">    deny all;</span><br><span class="line">&#125;</span><br></pre></td></tr></table></figure>

<p>禁止单个目录<br>不能禁止.log.txt能请求</p>
<figure class="highlight plaintext"><table><tr><td class="code"><pre><span class="line">location /searchword/cron/ &#123;</span><br><span class="line">    deny all;</span><br><span class="line">&#125;</span><br></pre></td></tr></table></figure>

<p>禁止单个文件</p>
<figure class="highlight plaintext"><table><tr><td class="code"><pre><span class="line">location ~ /data/sql/data.sql &#123;</span><br><span class="line">    deny all;</span><br><span class="line">&#125;</span><br></pre></td></tr></table></figure>

<p>给favicon.ico和robots.txt设置过期时间;<br>这里为favicon.ico为99天,robots.txt为7天并不记录404错误日志</p>
<figure class="highlight plaintext"><table><tr><td class="code"><pre><span class="line">location ~(favicon.ico) &#123;</span><br><span class="line">    log_not_found off;</span><br><span class="line">    expires 99d;</span><br><span class="line">    break;</span><br><span class="line">&#125;</span><br><span class="line"></span><br><span class="line">location ~(robots.txt) &#123;</span><br><span class="line">    log_not_found off;</span><br><span class="line">    expires 7d;</span><br><span class="line">    break;</span><br><span class="line">&#125;</span><br></pre></td></tr></table></figure>

<p>设定某个文件的过期时间;这里为600秒，并不记录访问日志</p>
<figure class="highlight plaintext"><table><tr><td class="code"><pre><span class="line">location ^~ /html/scripts/loadhead_1.js &#123;</span><br><span class="line">    access_log off;</span><br><span class="line">    root /opt/lampp/htdocs/web;</span><br><span class="line">    expires 600;</span><br><span class="line">    break;</span><br><span class="line">&#125;</span><br></pre></td></tr></table></figure>

<p>文件反盗链并设置过期时间<br>这里的return 412 为自定义的http状态码，默认为403，方便找出正确的盗链的请求</p>
<figure class="highlight plaintext"><table><tr><td class="code"><pre><span class="line">rewrite ^/ http://leech.onexin.com/leech.gif; #显示一张防盗链图片</span><br><span class="line">access_log off;#不记录访问日志，减轻压力</span><br><span class="line">expires 3d;#所有文件3天的浏览器缓存</span><br><span class="line">location ~* ^.+\.(jpg|jpeg|gif|png|swf|rar|zip|css|js)$ &#123;</span><br><span class="line">    valid_referers none blocked *.onexin.com *.onexin.net localhost 208.97.167.194;</span><br><span class="line">    if ($invalid_referer) &#123;</span><br><span class="line">        rewrite ^/ http://leech.onexin.com/leech.gif;</span><br><span class="line">        return 412;</span><br><span class="line">        break;</span><br><span class="line">    &#125;</span><br><span class="line">    access_log off;</span><br><span class="line">    root /opt/lampp/htdocs/web;</span><br><span class="line">    expires 3d;</span><br><span class="line">    break;</span><br><span class="line">&#125;</span><br></pre></td></tr></table></figure>

<p>只充许固定ip访问网站，并加上密码</p>
<figure class="highlight plaintext"><table><tr><td class="code"><pre><span class="line">root /opt/htdocs/www;</span><br><span class="line">allow 8.8.8.8;</span><br><span class="line">deny all;</span><br><span class="line">auth_basic “ONEXIN_ADMIN”;</span><br><span class="line">auth_basic_user_file htpasswd;</span><br></pre></td></tr></table></figure>

<p>将多级目录形式转成一个文件形式，增强seo效果</p>
<figure class="highlight plaintext"><table><tr><td class="code"><pre><span class="line">/job-123-456-789.html 指向/job/123/456/789.html</span><br><span class="line">rewrite ^/job-([0-9]+)-([0-9]+)-([0-9]+)\.html$ /job/$1/$2/jobshow_$3.html last;</span><br></pre></td></tr></table></figure>

<p>将根目录下某个文件夹指向2级目录<br>如&#x2F;shanghaijob&#x2F; 指向 &#x2F;area&#x2F;shanghai&#x2F;<br>如果你将last改成permanent，那么浏览器地址栏显是&#x2F;location&#x2F;shanghai&#x2F;</p>
<figure class="highlight plaintext"><table><tr><td class="code"><pre><span class="line">rewrite ^/([0-9a-z]+)job/(.*)$ /area/$1/$2 last;</span><br></pre></td></tr></table></figure>

<p>上面例子有个问题是访问&#x2F;shanghai 时将不会匹配</p>
<figure class="highlight plaintext"><table><tr><td class="code"><pre><span class="line">rewrite ^/([0-9a-z]+)job$ /area/$1/ last;</span><br><span class="line">rewrite ^/([0-9a-z]+)job/(.*)$ /area/$1/$2 last;</span><br></pre></td></tr></table></figure>

<p>这样&#x2F;shanghai 也可以访问了，但页面中的相对链接无法使用，<br>如.&#x2F;list_1.html真实地址是&#x2F;area&#x2F;shanghia&#x2F;list_1.html会变成&#x2F;list_1.html,导至无法访问。<br>那我加上自动跳转也是不行咯<br>(-d $request_filename)它有个条件是必需为真实目录，而我的rewrite不是的，所以没有效果</p>
<figure class="highlight plaintext"><table><tr><td class="code"><pre><span class="line">if (-d $request_filename)&#123;</span><br><span class="line">    rewrite ^/(.*)([^/])$ http://$host/$1$2/ permanent;</span><br><span class="line">&#125;</span><br></pre></td></tr></table></figure>

<p>知道原因后就好办了，让我手动跳转吧</p>
<figure class="highlight plaintext"><table><tr><td class="code"><pre><span class="line">rewrite ^/([0-9a-z]+)job$ /$1job/ permanent;</span><br><span class="line">rewrite ^/([0-9a-z]+)job/(.*)$ /area/$1/$2 last;</span><br></pre></td></tr></table></figure>

<p>文件和目录不存在的时重定向：</p>
<figure class="highlight plaintext"><table><tr><td class="code"><pre><span class="line">if (!-e $request_filename) &#123;</span><br><span class="line">    proxy_pass http://127.0.0.1;</span><br><span class="line">&#125;</span><br></pre></td></tr></table></figure>

<p>域名跳转</p>
<figure class="highlight plaintext"><table><tr><td class="code"><pre><span class="line">server</span><br><span class="line"></span><br><span class="line">&#123;</span><br><span class="line">    listen 80;</span><br><span class="line">    server_name jump.onexin.com;</span><br><span class="line">    index index.html index.htm index.php;</span><br><span class="line">    root /opt/lampp/htdocs/www;</span><br><span class="line">    rewrite ^/ http://www.onexin.com/;</span><br><span class="line">    access_log off;</span><br><span class="line">&#125;</span><br></pre></td></tr></table></figure>

<p>多域名转向</p>
<figure class="highlight plaintext"><table><tr><td class="code"><pre><span class="line">server_name www.onexin.com www.onexin.net;</span><br><span class="line">index index.html index.htm index.php;</span><br><span class="line">root /opt/lampp/htdocs;</span><br><span class="line">if ($host ~ “onexin\.net”) &#123;</span><br><span class="line">    rewrite ^(.*) http://www.onexin.com$1 permanent;</span><br><span class="line">&#125;</span><br></pre></td></tr></table></figure>

<p>三级域名跳转</p>
<figure class="highlight plaintext"><table><tr><td class="code"><pre><span class="line">if ($http_host ~* “^(.*)\.i\.onexin\.com$”) &#123;</span><br><span class="line">    rewrite ^(.*) http://top.onexin.com$1;</span><br><span class="line">    break;</span><br><span class="line">&#125;</span><br></pre></td></tr></table></figure>

<p>域名镜向</p>
<figure class="highlight plaintext"><table><tr><td class="code"><pre><span class="line">server</span><br><span class="line">&#123;</span><br><span class="line">    listen 80;</span><br><span class="line">    server_name mirror.onexin.com;</span><br><span class="line">    index index.html index.htm index.php;</span><br><span class="line">    root /opt/lampp/htdocs/www;</span><br><span class="line">    rewrite ^/(.*) http://www.onexin.com/$1 last;</span><br><span class="line">    access_log off;</span><br><span class="line">&#125;</span><br></pre></td></tr></table></figure>

<p>某个子目录作镜向</p>
<figure class="highlight plaintext"><table><tr><td class="code"><pre><span class="line">location ^~ /job &#123;</span><br><span class="line">    rewrite ^.+ http://job.onexin.com/ last;</span><br><span class="line">    break;</span><br><span class="line">&#125;</span><br></pre></td></tr></table></figure>

<p>转载请注明出处：<a href="http://www.onexin.net/nginx-rewrite-references/">http://www.onexin.net/nginx-rewrite-references/</a></p>
]]></content>
      <tags>
        <tag>Server&amp;OS</tag>
      </tags>
  </entry>
  <entry>
    <title>ORM碎碎念</title>
    <url>/2012/01/21/something-of-orm.html</url>
    <content><![CDATA[<p>对象关系映射（ORM，Object&#x2F;Relation Mapping）提供了概念性的、易于理解的模型化数据的方法。ORM方法论基于三个核心原则： 简单：以最基本的形式建模数据。 传达性：数据库结构被任何人都能理解的语言文档化。 精确性：基于数据模型创建正确标准化了的结构。 典型地，建模者通过收集来自那些熟悉<a href="http://baike.baidu.com/view/330120.htm">应用程序</a>但不熟练的<a href="http://baike.baidu.com/view/1452242.htm">数据建模</a>者的人的信息开发信息模型。建模者必须能够用非技术企业专家可以理解的术语在概念层次上与<a href="http://baike.baidu.com/view/9900.htm">数据结构</a>进行通讯。建模者也必须能以简单的单元分析信息，对样本数据进行处理。ORM专门被设计为改进这种联系。</p>
]]></content>
      <tags>
        <tag>理论</tag>
      </tags>
  </entry>
  <entry>
    <title>ArchLinux配置DHCP自动获取IP</title>
    <url>/2012/01/27/archlinux-dhcp-config-auto-get-ip.html</url>
    <content><![CDATA[<p>捣鼓了好几个小时了，终于知道怎么配置DHCP自动获取IP了，还是得上ArchLinux的官方Wiki才是王道啊。。。</p>
<h3 id="DHCP-（自动获取）-IP"><a href="#DHCP-（自动获取）-IP" class="headerlink" title="DHCP （自动获取） IP"></a>DHCP （自动获取） IP</h3><p>在这种情况下，你需要安装 dhcpcd 包（绝大多数情况下都是默认安装好的）。这样编辑 <code>/etc/rc.conf</code> ：</p>
<figure class="highlight plaintext"><table><tr><td class="code"><pre><span class="line">eth0=&quot;dhcp&quot;</span><br><span class="line">INTERFACES=(eth0)</span><br><span class="line">ROUTES=(!gateway)</span><br></pre></td></tr></table></figure>

<p>貌似2012年9月份那个包以后，启动dhcp的方法有变化，看这里：<a href="https://wiki.archlinux.org/index.php/Configuring_Network_(%E7%AE%80%E4%BD%93%E4%B8%AD%E6%96%87)#.E5.90.AF.E5.8A.A8.E6.97.B6.E8.BF.90.E8.A1.8C_DHCP">https://wiki.archlinux.org/index.php/Configuring_Network_(%E7%AE%80%E4%BD%93%E4%B8%AD%E6%96%87)#.E5.90.AF.E5.8A.A8.E6.97.B6.E8.BF.90.E8.A1.8C_DHCP</a></p>
]]></content>
      <tags>
        <tag>Server&amp;OS</tag>
      </tags>
  </entry>
  <entry>
    <title>发现人人网一个安全隐患</title>
    <url>/2012/01/25/a-potential-problem-on-renren.html</url>
    <content><![CDATA[<p>刚才在看我的博客cnzz统计的时候，猛然间发现的这个隐患。</p>
<p>这个隐患是在人人网手机版页面，造成这个隐患的原因应该是方便手机用户能记忆登陆状态。</p>
<p>如果想触发这个漏洞，需要的条件比较多，但是一定会有上钩的。</p>
<p>介于现在还未和人人网说，所以暂且不公布，但是我想聪明的各位，应该能从我上面的叙述中猜出一二~</p>
]]></content>
      <tags>
        <tag>理论</tag>
        <tag>Hacker</tag>
      </tags>
  </entry>
  <entry>
    <title>php-fpm优化</title>
    <url>/2012/01/22/php-fpm-optimization.html</url>
    <content><![CDATA[<p>转载：<a href="http://hi.baidu.com/cpu686/blog/item/ad8caa0f05c652e1ab645709.html">http://hi.baidu.com/cpu686/blog/item/ad8caa0f05c652e1ab645709.html</a></p>
<p>于Nginx对高并发的优良性能，故配了个Nginx+php-fpm来跑在线代理程序，是按照张宴文章配的，刚配置好时运行正常，但运行一段时间 后，网站打开很慢，打开网站后，在输入框输入要访问的网站，也慢得不行。在网站打开慢时，在SSH终端上输入命令也慢，怀疑是机房网速问题，但在ssh上 输入</p>
<p>w3m <a href="http://www.example.com/">www.example.com</a></p>
<p>这个打开也慢，基本可以排除机房的网速问题。</p>
<p>当打开网站慢时，把服务器重启后，就会快起来，后来发现，用</p>
<p>&#x2F;usr&#x2F;local&#x2F;webserver&#x2F;php&#x2F;sbin&#x2F;php-fpm restart</p>
<p>把fastcgi重启下也会快起来，最把它加入计划任务，每小时重启下，基本保证网站不会慢，但终究不是办法。</p>
<p>查看了nginx.log和php-fpm.log，根据里面的错误，找了以上转载的几篇文章，总算是把问题解决了，主要修改了两个地方<br>1、<br>问题：<br>发现&#x2F;usr&#x2F;local&#x2F;webserver&#x2F;php&#x2F;etc&#x2F;php-fpm.conf文件里定义的打开文件描述符的限制数量是<br><value name="rlimit_files">51200</value><br>但用 命令ulimit -n查看，发现只有1024</p>
<p>我已在&#x2F;etc&#x2F;rc.local里添加了<br>ulimit -SHn 51200</p>
<p>竟然没生效</p>
<p>解决：<br>vi &#x2F;etc&#x2F;security&#x2F;limits.conf</p>
<p>文件最后加上<br>*        soft    nofile 51200<br>*        hard    nofile 51200</p>
<span id="more"></span>2、
<p>问题：<br>用命令</p>
<p>netstat -np | grep 127.0.0.1:9000 |wc -l</p>
<p>发现只有100多</p>
<p>解决：<br>根据服务器内存情况，可以把PHP FastCGI子进程数调到100或以上，在4G内存的服务器上200就可以<br>服务器上内存为8G，我把PHP FastCGI子进程数调整到300</p>
<p>vi &#x2F;usr&#x2F;local&#x2F;webserver&#x2F;php&#x2F;etc&#x2F;php-fpm.conf<br>将max_children修改为300<br><value name="max_children">300</value></p>
<p>重启服务器，这样，网站打开速度快，而且稳定了。</p>
<p>When you running a highload website with PHP-FPM via FastCGI, the following tips may be useful to you : )<br>如果您高负载网站使用PHP-FPM管理FastCGI，这些技巧也许对您有用：)</p>
<ol>
<li><p>Compile PHP’s modules as less as possible, the simple the best (fast);<br>1.尽量少安装PHP模块，最简单是最好（快）的</p>
</li>
<li><p>Increas PHP FastCGI child number to 100 and even more. Sometime, 200 is OK! ( On 4GB memory server);<br>2.把您的PHP FastCGI子进程数调到100或以上，在4G内存的服务器上200就可以<br>注：我的1g测试机，开64个是最好的，建议使用压力测试获取最佳值</p>
</li>
<li><p>Using SOCKET PHP FastCGI, and put into &#x2F;dev&#x2F;shm on Linux;<br>3.使用socket连接FastCGI，linux操作系统可以放在 &#x2F;dev&#x2F;shm中<br>注：在php-fpm.cnf里设置<value name="listen_address">&#x2F;tmp&#x2F;nginx.socket</value>就可以通过socket连接FastCGI了，&#x2F;dev&#x2F;shm是内存文件系统，放在内存中肯定会快了</p>
</li>
<li><p>Increase Linux “max open files”, using the following command (must be root):</p>
</li>
</ol>
<h1 id="echo-‘ulimit-HSn-65536′-etc-profile"><a href="#echo-‘ulimit-HSn-65536′-etc-profile" class="headerlink" title="echo ‘ulimit -HSn 65536′ &gt;&gt; &#x2F;etc&#x2F;profile"></a>echo ‘ulimit -HSn 65536′ &gt;&gt; &#x2F;etc&#x2F;profile</h1><h1 id="echo-‘ulimit-HSn-65536-etc-rc-local"><a href="#echo-‘ulimit-HSn-65536-etc-rc-local" class="headerlink" title="echo ‘ulimit -HSn 65536 &gt;&gt; &#x2F;etc&#x2F;rc.local"></a>echo ‘ulimit -HSn 65536 &gt;&gt; &#x2F;etc&#x2F;rc.local</h1><h1 id="source-etc-profile"><a href="#source-etc-profile" class="headerlink" title="source &#x2F;etc&#x2F;profile"></a>source &#x2F;etc&#x2F;profile</h1><p>4.调高linux内核打开文件数量，可以使用这些命令(必须是root帐号)<br>echo ‘ulimit -HSn 65536’ &gt;&gt; &#x2F;etc&#x2F;profile<br>echo ‘ulimit -HSn 65536’ &gt;&gt; &#x2F;etc&#x2F;rc.local<br>source &#x2F;etc&#x2F;profile<br>注：我是修改&#x2F;etc&#x2F;rc.local，加入ulimit -SHn 51200的</p>
<ol start="5">
<li>Increase PHP-FPM open file description rlimit:</li>
</ol>
<h1 id="vi-path-to-php-fpm-conf"><a href="#vi-path-to-php-fpm-conf" class="headerlink" title="vi &#x2F;path&#x2F;to&#x2F;php-fpm.conf"></a>vi &#x2F;path&#x2F;to&#x2F;php-fpm.conf</h1><p>Find “<value name=”rlimit_files”>1024</value>”<br>Change 1024 to 4096 or higher number.<br>Restart PHP-FPM.<br>5. 增加 PHP-FPM 打开文件描述符的限制:</p>
<h1 id="vi-path-to-php-fpm-conf-1"><a href="#vi-path-to-php-fpm-conf-1" class="headerlink" title="vi &#x2F;path&#x2F;to&#x2F;php-fpm.conf"></a>vi &#x2F;path&#x2F;to&#x2F;php-fpm.conf</h1><p>找到“<value name="rlimit_files">1024</value>”<br>把1024 更改为 4096 或者更高.<br>重启 PHP-FPM.</p>
<ol start="6">
<li>Using PHP code accelerator, e.g eAccelerator, XCache. And set “cache_dir” to &#x2F;dev&#x2F;shm on Linux.<br>6.使用php代码加速器，例如 eAccelerator, XCache.在linux平台上可以把<code>cache_dir</code>指向 &#x2F;dev&#x2F;shm</li>
</ol>
]]></content>
      <tags>
        <tag>后端</tag>
        <tag>理论</tag>
      </tags>
  </entry>
  <entry>
    <title>.htaccess未生效可能的原因</title>
    <url>/2012/02/02/htaccess-disabled-cause.html</url>
    <content><![CDATA[<p>.htaccess文件如果没有生效的话，那么很可能是你的虚拟机配置信息中的AllowOverride 配置项的参数是None（默认是None），把这个设置为All 即可。</p>
<p>下面是AllowOverride 指令的相关信息：</p>
<p><strong>说明：</strong>确定允许存在于<code>.[htaccess](http://www.jzxue.com/tag/htaccess/)</code>文件中的指令类型</p>
<p><strong>语法：</strong><a href="http://www.jzxue.com/tag/AllowOverride/">AllowOverride</a> All|None|directive-type[directive-type] …</p>
<p>当<a href="http://server.jzxue.com/">服务器</a>发现一个<code>.htaccess</code>文件(由<code>AccessFileName</code>指定)时，它需要知道在这个文件中声明的哪些指令能覆盖在此之前指定的配置指令。</p>
<span id="more"></span>


<h3 id="仅允许存在于配置段"><a href="#仅允许存在于配置段" class="headerlink" title="仅允许存在于配置段"></a>仅允许存在于<Directory>配置段</h3><p><code>AllowOverride</code>仅在不包含正则表达式的<code>&lt;Directory&gt;</code>配置段中才是有效的。在<code>&lt;Location&gt;</code>,<code>&lt;DirectoryMatch&gt;</code>, <code>&lt;Files&gt;</code>配置段中都是无效的。</p>
<p>如果此指令被设置为<code>None</code> ，那么.htaccess文件将被完全忽略。事实上，服务器根本不会读取<code>.htaccess</code>文件。</p>
<p>当此指令设置为 <code>All</code>时，所有具有”.htaccess”作用域的指令都允许出现在<code>.htaccess</code>文件中。</p>
<p><code>directive-type</code> 可以是下列各组指令之一：</p>
<p>AuthConfig<br>    允许使用与认证授权相关的指令(<code>AuthDBMGroupFile</code>, <code>AuthDBMUserFile</code>, <code>AuthGroupFile</code>,<code>AuthName</code>, <code>AuthType</code>, <code>AuthUserFile</code>, <code>Require</code>, 等)。<br>FileInfo<br>    允许使用控制文档类型的指令(<code>DefaultType</code>, <code>ErrorDocument</code>, <code>ForceType</code>, <code>LanguagePriority</code>,<code>SetHandler</code>, <code>SetInputFilter</code>, <code>SetOutputFilter</code>, <code>mod_mime</code>中的 Add* 和 Remove* 指令等等)、控制文档元数据的指令(<code>Header</code>, <code>RequestHeader</code>, <code>SetEnvIf</code>, <code>SetEnvIfNoCase</code>, <code>BrowserMatch</code>,<code>CookieExpires</code>, <code>CookieDomain</code>, <code>CookieStyle</code>, <code>CookieTracking</code>, <code>CookieName</code>)、<code>mod_rewrite</code>中的指令(<code>RewriteEngine</code>, <code>RewriteOptions</code>, <code>RewriteBase</code>, <code>RewriteCond</code>, <code>RewriteRule</code>)和<code>mod_actions</code>中的<code>Action</code>指令。<br>Indexes<br>    允许使用控制目录索引的指令(<code>AddDescription</code>, <code>AddIcon</code>, <code>AddIconByEncoding</code>, <code>AddIconByType</code>,<code>DefaultIcon</code>, <code>DirectoryIndex</code>, <code>FancyIndexing</code>, <code>HeaderName</code>, <code>IndexIgnore</code>, <code>IndexOptions</code>,<code>ReadmeName</code>, 等)。<br>Limit<br>    允许使用控制主机访问的指令(<code>Allow</code>, <code>Deny</code>, <code>Order</code>)。<br>Options[&#x3D;Option,…]<br>    允许使用控制指定目录功能的指令(<code>Options</code>和<code>XBitHack</code>)。可以在等号后面附加一个逗号分隔的(无空格的)<code>Options</code>选项列表，用来控制允许<code>Options</code>指令使用哪些选项。<br>例如：以下指令只允许在<code>.htaccess</code>中使用<code>AuthConfig</code>和<code>Indexes</code>组的指令：</p>
<p><code>AllowOverride AuthConfig Indexes</code></p>
<p>不在这两组中的指令将会导致服务器产生一个内部错误。</p>
]]></content>
      <tags>
        <tag>后端</tag>
        <tag>Server&amp;OS</tag>
        <tag>理论</tag>
      </tags>
  </entry>
  <entry>
    <title>BurstNet的OpenVZ架构的vps搭建VPN</title>
    <url>/2012/02/08/burstnet-openvz-openvpn.html</url>
    <content><![CDATA[<p>最近买了一个BurstNet的VPS来玩玩，的确是很给力的，性价比超高，关键是有两个公网IP，并且可以再装cpanel之类的面板，操作系统的可选择性也极高，centos5，centos5.5，centos6.2，ubuntu，fedora，gentoo等等，并且系统貌似都是经过精简过的，就像我安装的centos5，安装完居然只占13M内存，硬盘也是只花费了550M。</p>
<p>为了测试一下这款VPS是否能搭建VPN，我从网上搜索了很多资料，最终了解到，OpenVZ架构的VPS只能安装OpenVPN，并且还需要开启TUN支持和iptables_nat模块支持（这个其实可以换一个iptables语句的）。</p>
<p>我参考了以下两篇博文，<a href="http://wty.name/centos-install-openvpn/">http://wty.name/centos-install-openvpn/</a> 和 <a href="http://www.xiaozhou.net/ittech/linux-ittech/configure_openvpn_on_burstnet_vps-2010-03-28.htm">http://www.xiaozhou.net/ittech/linux-ittech/configure_openvpn_on_burstnet_vps-2010-03-28.htm</a></p>
<p>其中需要注意的两点，一个是第一篇博文中有一键安装包，那个shell脚本里的ip地址并没有获取到，导致生成的.ovpn文件中的remote的ip地址是空白，再一点就是shell里面涉及到iptables转发的问题，在第二篇博文的评论中有提到解决方案。这个问题在网上其实也是很多的，就是执行</p>
<p>iptables -t nat -A POSTROUTING -s 192.168.21.0&#x2F;24 -o eth0 -j MASQUERADE</p>
<p>的时候，会出现如下错误提示，</p>
<p>iptables：Unknown error 4294967295</p>
<p>解决方法是，改为下面的语句去执行：</p>
<p>&#x2F;sbin&#x2F;iptables -t nat -A POSTROUTING -s 192.168.21.0&#x2F;24 -j SNAT –to-source YourVpsIP</p>
<p>这个vps的vpn配置我算是折腾了两天了，不过现在终于是可以翻墙出去啦，吼吼~</p>
]]></content>
      <tags>
        <tag>Server&amp;OS</tag>
      </tags>
  </entry>
  <entry>
    <title>修改gnome shell主题</title>
    <url>/2012/02/14/customize-gnome-shell-theme.html</url>
    <content><![CDATA[<p>话说，真的是当小白很可怕。。。。原来一直幻想自己哪天可以把css，js引入到桌面中去，方便开发，好吧，这个想法原来已经被实现了。。。</p>
<p>直接贴文章地址吧，不贴文章了。。。。</p>
<p><a href="http://planet.linuxdeepin.com/2012/02/07/customize-gnome-shell-theme-1/">跟我一起修改Gnome Shell theme（1）</a></p>
<p><a href="http://planet.linuxdeepin.com/2012/02/08/customize-gnome-shell-theme-2/">跟我一起修改Gnome Shell 主题（2）</a></p>
<p><a href="http://www.94cat.com/blog/?p=1101">gnome-shell css文件中文注释</a></p>
]]></content>
      <tags>
        <tag>前端</tag>
      </tags>
  </entry>
  <entry>
    <title>Aptana Studio的failed to create the java virtual machine错误</title>
    <url>/2012/02/14/aptana-studio-failed-to-create-the-java-virtual-machine.html</url>
    <content><![CDATA[<p>最近不知道怎么安装过什么东西，导致了双击PHP文件打开Aptana Studio的时候，总是弹出failed to create the java virtual machine的错误提示框，但是Aptana Studio如果手动是能开启的。这个事情非常的让人郁闷，上百度搜了一圈都是说eclipse的处理方式的，后来在google上找到一篇英文的（<a href="http://kisdigital.wordpress.com/2011/06/16/speeding-up-aptana-studio-3/">http://kisdigital.wordpress.com/2011/06/16/speeding-up-aptana-studio-3/</a>），大体意思是说按照eclipse的那个方法修改Aptana的配置文件也是可以成功的，于是我就复制了一下他给的配置文件，然后就好了，现在贴出来配置文件：</p>
<figure class="highlight plaintext"><table><tr><td class="code"><pre><span class="line">--launcher.XXMaxPermSize</span><br><span class="line">256m</span><br><span class="line">--launcher.defaultAction</span><br><span class="line">openFile</span><br><span class="line">-name</span><br><span class="line">Aptana Studio 3</span><br><span class="line">-vmargs</span><br><span class="line">-Xms512m</span><br><span class="line">-Xmx512m</span><br><span class="line">-Declipse.p2.unsignedPolicy=allow</span><br><span class="line">-Djava.awt.headless=true</span><br><span class="line">-XX:PermSize=128m</span><br><span class="line">-XX:MaxPermSize=128m</span><br><span class="line">-Xverify:none</span><br><span class="line">-XX:+UseParallelGC</span><br><span class="line">-XX:+AggressiveOpts</span><br><span class="line">-XX:+UseFastAccessorMethods</span><br></pre></td></tr></table></figure>

]]></content>
      <tags>
        <tag>配置</tag>
      </tags>
  </entry>
  <entry>
    <title>J2ME下的JSON包</title>
    <url>/2012/02/15/the-lack-of-a-json-parser-for-j2me.html</url>
    <content><![CDATA[<p>今天在开发一个j2me程序的时候，需要用到json数据的解析，从百度上搜了一圈都是各种教你怎么用的，但问题是没有一个说，这个包从哪里获得。。。从一个老外的blog找到一个jar包，还看到一个非jar包的。先说jar包的，转自：<a href="http://per.liedman.net/2010/06/07/the-lack-of-a-json-parser-for-j2me/">http://per.liedman.net/2010/06/07/the-lack-of-a-json-parser-for-j2me/</a></p>
<p>In a pet project I’m spending my nights working on (hopefully more about that in a later post), I found myself in need of a JSON parser, or deserializer, for J2ME&#x2F;CLDC. A bit to my surprise, I found that such a thing was not easy to find, even with the whole of the internets at my disposal.</p>
<p>To summarize, it appears that there has been a JSON lib for J2ME up on <a href="http://www.google.se/search?aq=f&ie=UTF-8&q=org.json.me.zip">json.org at some point</a>, but at least I can’t find it any longer. Also, <a href="https://meapplicationdevelopers.dev.java.net/mobileajax.html">some project on java.net</a> is popular to link to, but come on, no download link? No pre-compiled JAR-file?</p>
<p>Anyway, after <a href="http://stackoverflow.com/questions/2981296/json-parser-for-j2me">asking over at stackoverflow.com</a> and getting surprisingly few answers, at least I found a link to some code that was easy enough to grab.</p>
<p>As some kind of attempt to give back to the community, I upload the compiled JAR from that source code here. So if you need to serialize, deserialize, marshal or unmarshal JSON from J2ME&#x2F;CLDC, grab this JAR and go ahead:</p>
<ul>
<li>Compiled JAR: <a href="http://per.liedman.net/wp-content/uploads/2010/06/json-me.jar">json-me.jar</a></li>
<li><del>Source code: <a href="http://per.liedman.net/wp-content/uploads/2010/06/json-me.tar.gz">json-me.tar.gz</a></del> <strong>Updated 2010-09-25:</strong> the source is now <a href="http://bitbucket.org/liedman/json-me">available on BitBucket</a></li>
</ul>
<p>The code is most likely a copy of the one that was previously posted on json.org, and is distributed under <a href="http://www.json.org/license.html">the json.org license</a> according to the copyright notice in the source (most importantly: “The Software shall be used for Good, not Evil.”)</p>
<p>As a very tiny modification, I have added the methods <em>remove</em> and <em>removeAll</em> to the class <em>JSONArray</em>, since I really needed them. I hope you don’t mind too much.</p>
<p>非jar包：<a href="https://github.com/upictec/org.json.me/">https://github.com/upictec/org.json.me/</a></p>
]]></content>
      <tags>
        <tag>编程语言</tag>
        <tag>理论</tag>
      </tags>
  </entry>
  <entry>
    <title>J2ME HTTP方式与服务器交互信息:GET方式和POST方式</title>
    <url>/2012/02/14/j2me-http-get-post.html</url>
    <content><![CDATA[<p><a href="http://blog.csdn.net/wufenglong/article/details/5508808">http://blog.csdn.net/wufenglong/article/details/5508808</a></p>
]]></content>
      <tags>
        <tag>编程语言</tag>
        <tag>理论</tag>
      </tags>
  </entry>
  <entry>
    <title>ssh代理命令</title>
    <url>/2012/02/14/ssh-agent-config.html</url>
    <content><![CDATA[<p>vpn安装神马的都弱爆了，在linux下，直接一条命令就用ssh翻墙了，对以前的无知感到羞愧呀。。。。<br>命令如下：</p>
<figure class="highlight plaintext"><table><tr><td class="code"><pre><span class="line">sudo ssh -qTfnN -D 7070 root@host</span><br></pre></td></tr></table></figure>

<p>7070是在本地开的代理端口，root是vps的用户名，host是vps的地址。<br>命令执行后，输入完vps密码，再在系统里设置代理即可，IP填127.0.0.1,端口7070.</p>
]]></content>
      <tags>
        <tag>后端</tag>
        <tag>理论</tag>
      </tags>
  </entry>
  <entry>
    <title>打造轻量高效Linux系统</title>
    <url>/2012/02/27/lightweight-efficient-linux-based-on-archlinux.html</url>
    <content><![CDATA[<p>转自：<a href="http://davidx.me/2009/09/14/lightweight-efficient-linux-based-on-archlinux/#more-266">http://davidx.me/2009/09/14/lightweight-efficient-linux-based-on-archlinux/</a></p>
<p>以前一直使用Gnome作为桌面系统, 后来慢慢的视觉疲劳了, 于是决定换掉它, 既然换, 就干脆换一个轻量级的桌面系统, 于是下面的组合出现了!</p>
<p>先说我使用的各个组件<br>1.窗口管理 — openbox, 轻量又好用, 简约而不简单<br>2.登录管理器 — slim, DM中比较轻量的一款了<br>3.文件管理器 — pcmanfm, nautilus的替代品<br>4.panel — tint2, 以前一直用fbpanel, 今天才发现一个比它更好看和好用的<br>5.背景更换 — feh, 由于没有rox这样的桌面管理软件, 所以还是需要自己设定下背景的(朋友说可以用pcmanfm来管理桌面的, 不过我还没有尝试)<br>6.系统监视 — conky, 没的说, 定制性最强的系统监视软件了<br>7.终端 — sakura, 以前一直用gnome-terminal, 后来有尝试xterm, 但是不支持鼠标右键, 而且配置比较复杂, 这里找到一个替代品, 可以完全替代gnome-terminal了</p>
]]></content>
      <tags>
        <tag>Server&amp;OS</tag>
      </tags>
  </entry>
  <entry>
    <title>校内人人网忘记了注册账号怎么办？</title>
    <url>/2012/02/22/how-to-do-when-forget-renren-login-name.html</url>
    <content><![CDATA[<p>由于各种原因，有些朋友注册了校内人人网后却忘记了注册账号，现在给大家个简单的方法：</p>
<p>第一步：用其他账号登陆校内人人网（自己再申请一个，或者用别人的）搜索自己的注册用户名，进入已经忘记了账号的主页，例如<a href="http://www.renren.com/profile.doid=1234567890&pma;=p_profile_m_pub_sharefriends_a_profile">http://www.renren.com/profile.doid=1234567890&pma;=p_profile_m_pub_sharefriends_a_profile</a></p>
<p>第二步：复制地址栏中等于号后面的那串数字（例如：1234567890）</p>
<p>第三部：打开人人网桌面（没有安装的可以下载安装一个）然后再用户名里面粘贴刚才复制的那串数字，然后输入自己注册时的密码，就可以登陆了，登陆成功后就可以通过人人桌面进入自己的主页</p>
<p>第四步：打开主页后就可以更改注册账户的邮箱了，这样下一次就可以直接登陆了。</p>
<p>注：如果只是密码忘了，可以申诉。但如果注册账户和密码都忘了，那就无力回天了。</p>
]]></content>
      <tags>
        <tag>Hacker</tag>
      </tags>
  </entry>
  <entry>
    <title>Nginx 502 Bad Gateway错误触发条件与解决方法</title>
    <url>/2012/02/20/nginx-502-bad-gateway-error.html</url>
    <content><![CDATA[<p>一些运行在Nginx上的网站有时候会出现“502 Bad Gateway”错误，有些时候甚至频繁的出现。以下是从Google搜集整理的一些Nginx 502错误的排查方法，供参考：</p>
<p>Nginx 502错误的原因比较多，是因为在代理模式下后端服务器出现问题引起的。这些错误一般都不是nginx本身的问题，一定要从后端找原因！但nginx把这些出错都揽在自己身上了，着实让nginx的推广者备受置疑，毕竟从字眼上理解，bad gateway？不就是bad nginx吗？让不了解的人看到，会直接把责任推在nginx身上，希望nginx下一个版本会把出错提示写稍微友好一些，至少不会是现在简单的一句 502 Bad Gateway，另外还不忘附上自己的大名。</p>
<p>Nginx 502的触发条件</p>
<p>502错误最通常的出现情况就是后端主机当机。在upstream配置里有这么一项配置：proxy_next_upstream，这个配置指定了 nginx在从一个后端主机取数据遇到何种错误时会转到下一个后端主机，里头写上的就是会出现502的所有情况拉，默认是error timeout。error就是当机、断线之类的，timeout就是读取堵塞超时，比较容易理解。我一般是全写上的：</p>
<p>proxy_next_upstream error timeout invalid_header http_500 http_503;<br>不过现在可能我要去掉http_500这一项了，http_500指定后端返回500错误时会转一个主机，后端的jsp出错的话，本来会打印一堆 stacktrace的错误信息，现在被502取代了。但公司的程序员可不这么认为，他们认定是nginx出现了错误，我实在没空跟他们解释502的原理 了……</p>
<p>503错误就可以保留，因为后端通常是apache resin，如果apache死机就是error，但resin死机，仅仅是503，所以还是有必要保留的。</p>
<p>解决办法</p>
<p>遇到502问题，可以优先考虑按照以下两个步骤去解决。</p>
<p>1、查看当前的PHP FastCGI进程数是否够用：</p>
<p>netstat -anpo | grep “php-cgi” | wc -l<br>如果实际使用的“FastCGI进程数”接近预设的“FastCGI进程数”，那么，说明“FastCGI进程数”不够用，需要增大。</p>
<p>2、部分PHP程序的执行时间超过了Nginx的等待时间，可以适当增加nginx.conf配置文件中FastCGI的timeout时间，例如：</p>
<p>……<br>http<br>{<br>……<br>fastcgi_connect_timeout 300;<br>fastcgi_send_timeout 300;<br>fastcgi_read_timeout 300;<br>……<br>}<br>……<br>php.ini中memory_limit设低了会出错，修改了php.ini的memory_limit为64M，重启nginx，发现好了，原来是PHP的内存不足了。</p>
<p>如果这样修改了还解决不了问题，可以参考下面这些方案：</p>
<p>一、max-children和max-requests</p>
<p>一台服务器上运行着nginx php(fpm) xcache，访问量日均 300W pv左右</p>
<p>最近经常会出现这样的情况： php页面打开很慢，cpu使用率突然降至很低，系统负载突然升至很高，查看网卡的流量，也会发现突然降到了很低。这种情况只持续数秒钟就恢复了</p>
<p>检查php-fpm的日志文件发现了一些线索</p>
<p>Sep 30 08:32:23.289973 [NOTICE] fpm_unix_init_main(), line 271: getrlimit(nofile): max:51200, cur:51200<br>Sep 30 08:32:23.290212 [NOTICE] fpm_sockets_init_main(), line 371: using inherited socket fd&#x3D;10, “127.0.0.1:9000″<br>Sep 30 08:32:23.290342 [NOTICE] fpm_event_init_main(), line 109: libevent: using epoll<br>Sep 30 08:32:23.296426 [NOTICE] fpm_init(), line 47: fpm is running, pid 30587<br>在这几句的前面，是1000多行的关闭children和开启children的日志</p>
<p>原来，php-fpm有一个参数 max_requests，该参数指明了，每个children最多处理多少个请求后便会被关闭，默认的设置是500。因为php是把请求轮询给每个 children，在大流量下，每个childre到达max_requests所用的时间都差不多，这样就造成所有的children基本上在同一时间 被关闭。</p>
<p>在这期间，nginx无法将php文件转交给php-fpm处理，所以cpu会降至很低(不用处理php，更不用执行sql)，而负载会升至很高(关闭和开启children、nginx等待php-fpm)，网卡流量也降至很低(nginx无法生成数据传输给客户端)</p>
<p>解决问题很简单，增加children的数量，并且将 max_requests 设置未 0 或者一个比较大的值：</p>
<p>打开 &#x2F;usr&#x2F;local&#x2F;php&#x2F;etc&#x2F;php-fpm.conf</p>
<p>调大以下两个参数(根据服务器实际情况，过大也不行）</p>
<p>5120<br>600<br>然后重启php-fpm。</p>
<p>二、增加缓冲区容量大小</p>
<p>将nginx的error log打开，发现“pstream sent too big header while reading response header from upstream”这样的错误提示。查阅了一下资料，大意是nginx缓冲区有一个bug造成的,我们网站的页面消耗占用缓冲区可能过大。参考老外写的修 改办法增加了缓冲区容量大小设置，502问题彻底解决。后来系统管理员又对参数做了调整只保留了2个设置参数：client head buffer，fastcgi buffer size。</p>
<p>三、request_terminate_timeout</p>
<p>如果主要是在一些post或者数据库操作的时候出现502这种情况，而不是在静态页面操作中常见，那么可以查看一下php-fpm.conf设置中的一项：</p>
<p>request_terminate_timeout</p>
<p>这个值是max_execution_time，就是fast-cgi的执行脚本时间。</p>
<p>0s</p>
<p>0s为关闭，就是无限执行下去。（当时装的时候没仔细看就改了一个数字）</p>
<p>发现，问题解决了，执行很长时间也不会出错了。</p>
<p>优化fastcgi中，还可以改改这个值5s 看看效果。</p>
<p>php-cgi进程数不够用、php执行时间长、或者是php-cgi进程死掉，都会出现502错误。</p>
<p>如果您还有其他的解决方法，欢迎留言！</p>
<p>永久链接 : <a href="http://www.ha97.com/4004.html">http://www.ha97.com/4004.html</a></p>
]]></content>
      <tags>
        <tag>Server&amp;OS</tag>
        <tag>理论</tag>
      </tags>
  </entry>
  <entry>
    <title>Linux中rename命令的用法</title>
    <url>/2012/03/08/the-manual-of-rename-in-linux.html</url>
    <content><![CDATA[<p>转自：<a href="http://hi.baidu.com/afantihome/blog/item/2a8abe1b319112fdaf513391.html">http://hi.baidu.com/afantihome/blog/item/2a8abe1b319112fdaf513391.html</a></p>
<p>刚学习linux的时候，对文件重命名首先想到的就是rename命令，但是按照在windows下对文件重命名的方式试了N多次都没有反应，在网上一搜索，发现很多人都对rename命令知之甚少，甚至有一部分人说linux下没有rename命令，建议大家用mv命令。鉴于此，于是man rename一下，好好的研究了一下它的用法 ，在此对rename命令和mv命令在重命名文件方面做一个比较，有不足之处，希望各位博友指正！</p>
<p>首先来说一下mv命令，在man mv中我们可以看到对于mv命令的介绍是这样的：</p>
<p>mv -move(rename) files</p>
<p>可以看到mv命令确实有重命名的功能，但是实际应用中，它只能对单个文件重命名，命令如下：</p>
<p>mv [path&#x2F;]oldfilename [path&#x2F;]newfilename</p>
<p>“mv命令只能对单个文件重命名”，这实就是mv命令和rename命令的在重命名方面的根本区别。</p>
<p>再来说rename命令，在man rename的说明如下：</p>
<p>NAME</p>
<p>rename -Rename files</p>
<p>SYNOPSIS</p>
<p>rename from to file….</p>
<p>DESCRIPTION</p>
<p>rename will rename the specified files by replacing the first occurrence of from in their name by to.</p>
<p>For example, given the files foo1, …, foo9, foo10, …, foo278, the commands</p>
<p>rename foo foo0 foo?</p>
<p>rename foo foo0 foo??</p>
<p>will turn them into foo001, …, foo009, foo010, …, foo278.</p>
<p>And</p>
<p>rename .htm .html *.htm</p>
<p>will fix the extension of your html files.</p>
<p>可以看出rename命令是专用于文件重命名的，而且根据其后的例子可以看出，rename除了给单个文件重命名，还可以批量文件重命名。同时，值得注意一点的是，rename命令是带3个参数而不是很多人认为的2个参数。</p>
<p>上面的例子中给出了两种文件批量重命名的用法，而实际上，rename结合通配符使用，它的功能比上面的例子所显示的更强大。基本的通配符有以下几个：</p>
<p>? 可替代单个字符</p>
<ul>
<li>可替代多个字符</li>
</ul>
<p>[charset] 可替代charset集中的任意单个字符</p>
<p>下面以例子加以说明：</p>
<p>如文件夹中有这些文件foo1, …, foo9, foo10, …, foo278，如果使用</p>
<p>rename foo foo0 foo?</p>
<p>则它只会把foo1到foo9的文件重命名为foo01到foo09，因为?通配符只能替代单个字符，所以被重命名的文件只是有4个字符长度名称的文件，文件名中的foo被替换为foo0。</p>
<p>再继续使用</p>
<p>rename foo foo0 foo??</p>
<p>则文件夹中的foo01到foo99的所有文件都被重命名为foo001到foo099，而foo100及其以后的文件名都不变，因为通配符?的使用，所以只重命名5个字符长度名称的文件，文件名中的foo被替换为foo0。</p>
<p>如果再继续使用</p>
<p>rename foo foo0 foo*</p>
<p>则foo001到foo278的所有文件都被重命名为foo0001到foo0278，因为通配符*可替代多个字符，所以，所有以foo开头的文件都被重命名了，文件名中的foo被替换为foo0。</p>
<p>我们再来看通配符[charset]的用法，还是继续在上面所说的文件夹中，执行如下命令</p>
<p>rename foo0 foo foo0[2]*</p>
<p>则从foo0200到foo0278的所有文件都被重命名为foo200到foo278，文件名中的foo0被替换为foo。</p>
<p>在使用中，三种通配符可以一起结合使用，关于具体的其它用法就只有自己不断的摸索了。</p>
]]></content>
      <tags>
        <tag>Server&amp;OS</tag>
      </tags>
  </entry>
  <entry>
    <title>Nginx启动出错</title>
    <url>/2012/02/27/when-run-nginx-error-libpcre-so-1.html</url>
    <content><![CDATA[<p>转自：<a href="http://www.forzw.com/archives/652">http://www.forzw.com/archives/652</a></p>
<p>启动nginx时出错。。。</p>
<p>&#x2F;usr&#x2F;local&#x2F;webserver&#x2F;nginx&#x2F;sbin&#x2F;nginx<br>&#x2F;usr&#x2F;local&#x2F;webserver&#x2F;nginx&#x2F;sbin&#x2F;nginx: error while loading shared libraries: libpcre.so.1: cannot open shared object file: No such file or directory</p>
<p>从错误看出是缺少lib文件导致，进一步查看下</p>
<p>[root@vps1 pcre-8.30]# ldd $(which &#x2F;usr&#x2F;local&#x2F;webserver&#x2F;nginx&#x2F;sbin&#x2F;nginx)</p>
<p>linux-vdso.so.1 &#x3D;&gt; (0x00007fff5dd56000)<br>libpthread.so.0 &#x3D;&gt; &#x2F;lib64&#x2F;libpthread.so.0 (0x00007fa8c1857000)<br>libcrypt.so.1 &#x3D;&gt; &#x2F;lib64&#x2F;libcrypt.so.1 (0x00007fa8c161f000)<br>libpcre.so.1 &#x3D;&gt; not found<br>libssl.so.6 &#x3D;&gt; &#x2F;lib64&#x2F;libssl.so.6 (0x00007fa8c13d3000)<br>libcrypto.so.6 &#x3D;&gt; &#x2F;lib64&#x2F;libcrypto.so.6 (0x00007fa8c1082000)<br>libdl.so.2 &#x3D;&gt; &#x2F;lib64&#x2F;libdl.so.2 (0x00007fa8c0e7e000)<br>libz.so.1 &#x3D;&gt; &#x2F;lib64&#x2F;libz.so.1 (0x00007fa8c0c6a000)<br>libc.so.6 &#x3D;&gt; &#x2F;lib64&#x2F;libc.so.6 (0x00007fa8c0912000)<br>&#x2F;lib64&#x2F;ld-linux-x86-64.so.2 (0x00007fa8c1a72000)<br>libgssapi_krb5.so.2 &#x3D;&gt; &#x2F;usr&#x2F;lib64&#x2F;libgssapi_krb5.so.2 (0x00007fa8c06e4000)<br>libkrb5.so.3 &#x3D;&gt; &#x2F;usr&#x2F;lib64&#x2F;libkrb5.so.3 (0x00007fa8c044f000)<br>libcom_err.so.2 &#x3D;&gt; &#x2F;lib64&#x2F;libcom_err.so.2 (0x00007fa8c024d000)<br>libk5crypto.so.3 &#x3D;&gt; &#x2F;usr&#x2F;lib64&#x2F;libk5crypto.so.3 (0x00007fa8c0028000)<br>libkrb5support.so.0 &#x3D;&gt; &#x2F;usr&#x2F;lib64&#x2F;libkrb5support.so.0 (0x00007fa8bfe20000)<br>libkeyutils.so.1 &#x3D;&gt; &#x2F;lib64&#x2F;libkeyutils.so.1 (0x00007fa8bfc1e000)<br>libresolv.so.2 &#x3D;&gt; &#x2F;lib64&#x2F;libresolv.so.2 (0x00007fa8bfa09000)<br>libselinux.so.1 &#x3D;&gt; &#x2F;lib64&#x2F;libselinux.so.1 (0x00007fa8bf7f1000)<br>libsepol.so.1 &#x3D;&gt; &#x2F;lib64&#x2F;libsepol.so.1 (0x00007fa8bf5ab000)</p>
<p>可以看出 libpcre.so.1 &#x3D;&gt; not found 并没有找到，进入&#x2F;lib64目录中手动链接下</p>
<p>[root@vps1 lib64]# ln -s libpcre.so.0.0.1 libpcre.so.1</p>
<p>之后启动正常。</p>
]]></content>
      <tags>
        <tag>Server&amp;OS</tag>
      </tags>
  </entry>
  <entry>
    <title>用C语言解决mv替换rm</title>
    <url>/2012/03/09/use-c-to-solve-the-problem-that-using-mv-to-replace-rm.html</url>
    <content><![CDATA[<p>昨天用shell脚本实现了（<a href="/2012/03/08/use-mv-replace-rm-without-params.html">akawa.ink&#x2F;2012&#x2F;03&#x2F;08&#x2F;use-mv-replace-rm-without-params.html</a>），把rm替换为mv，今天我又尝试了下写个简单的C程序来实现，也顺便练习下vim写代码，gcc编译。直接贴代码，不废话~</p>
<figure class="highlight plaintext"><table><tr><td class="code"><pre><span class="line">#include &lt;stdio.h&gt;</span><br><span class="line">#include &lt;string.h&gt;</span><br><span class="line">#define LANG 1000</span><br><span class="line">char *file_path = &quot;/home/ety001/.trash/&quot;;</span><br><span class="line">int main(int argc, char* argv[])</span><br><span class="line">&#123;</span><br><span class="line">    int i;</span><br><span class="line">    char str[LANG] = &quot;mv &quot;;</span><br><span class="line">    for(i=1;i&lt;argc;i++)</span><br><span class="line">    &#123;</span><br><span class="line">        if(argv[i][0]!=&#x27;-&#x27;)</span><br><span class="line">        &#123;</span><br><span class="line">            strcat(str,argv[i]);</span><br><span class="line">            strcat(str,&quot; &quot;);</span><br><span class="line">        &#125;</span><br><span class="line">    &#125;</span><br><span class="line">    strcat(str,file_path);</span><br><span class="line">    system(str);</span><br><span class="line">    return 0;</span><br><span class="line">&#125;</span><br></pre></td></tr></table></figure>

<p>另外需要注意的是strcat这个函数，之前，第八行一直写的是char* str &#x3D; “mv “; 然后运行总是报错（段错误），原因就是因为这句如果写成这样，就已经把str指向的空间长度指定的了，这样strcat函数再向这个字符串后面加字符串的时候肯定就会溢出了。详细的说明看这里：<a href="http://topic.csdn.net/t/20030525/20/1832507.html">http://topic.csdn.net/t/20030525/20/1832507.html</a>，所以说写这种跟指针打交道的代码还是要小心呀。</p>
]]></content>
      <tags>
        <tag>编程语言</tag>
      </tags>
  </entry>
  <entry>
    <title>用mv代替rm并且不带参数</title>
    <url>/2012/03/08/use-mv-replace-rm-without-params.html</url>
    <content><![CDATA[<p>由于单位的服务器是多人使用的，每次都会有人误删除文件，所以说就想到写个shell脚本用mv命令替换rm，但是随之问题就是，写出来的rm命名的shell脚本在使用的时候，大家还是按照原来的习惯，在删除文件夹的时候，使用rm -rf 这样的形式，而mv是没有-rf参数的，所以就会导致报错，为了解决这个问题，又完善了下shell脚本代码。</p>
<figure class="highlight plaintext"><table><tr><td class="code"><pre><span class="line">#! /bin/bash</span><br><span class="line">dst = &quot;/home/ety001/test_trash/&quot;</span><br><span class="line">for src_file in $@;</span><br><span class="line">do</span><br><span class="line">    if echo $src_file | grep -v &#x27;^-&#x27;</span><br><span class="line">    then</span><br><span class="line">        mv $src_file $dst</span><br><span class="line">    fi</span><br><span class="line">done</span><br></pre></td></tr></table></figure>

]]></content>
      <tags>
        <tag>Server&amp;OS</tag>
      </tags>
  </entry>
  <entry>
    <title>UnixBench：测试Linux VPS性能</title>
    <url>/2012/03/15/unixbench.html</url>
    <content><![CDATA[<p>转自：<a href="http://www.vpser.net/opt/unixbench.html">http://www.vpser.net/opt/unixbench.html</a></p>
<p>UnixBench是一款不错的Linux下的VPS性能测试软件，现在说一下具体用法。</p>
<p>UnixBench 4.10 下载地址：<a href="http://soft.vpser.net/test/unixbench/unixbench-4.1.0-wht.tar.gz">http://soft.vpser.net/test/unixbench/unixbench-4.1.0-wht.tar.gz</a></p>
<p>[root@noc ~]# wget <a href="http://soft.vpser.net/test/unixbench/unixbench-4.1.0-wht.tar.gz">http://soft.vpser.net/test/unixbench/unixbench-4.1.0-wht.tar.gz</a></p>
<p>[root@noc ~]# tar xzf unixbench-4.1.0-wht.tar.gz<br>[root@noc ~]# ls<br>unixbench-4.1.0-wht-2  unixbench-4.1.0-wht.tar.gz</p>
<p>[root@noc ~]# cd unixbench-4.1.0-wht-2&#x2F;<br>[root@noc unixbench-4.1.0-wht-2]# make<br>如果遇到 Error: Please install &#x2F;usr&#x2F;bin&#x2F;time. 错误提示<br>centos&#x2F;fedora 下运行 yum install time<br>ubuntu&#x2F;debian 下运行 apt-get install time</p>
<p>[root@noc unixbench-4.1.0-wht-2]# .&#x2F;Run</p>
<p>———————–以上为转载内容———————–</p>
<figure class="highlight plaintext"><table><tr><td class="code"><pre><span class="line">-----------------------下面是我现在博客用vps性能测试-----------------------</span><br><span class="line"></span><br><span class="line">==============================================================</span><br><span class="line">BYTE UNIX Benchmarks (Version 4.1-wht.2)</span><br><span class="line">System -- Linux MyVPS1128 2.6.18-274.17.1.el5xen #1 SMP Tue Jan 10 18:45:09 EST 2012 i686 i686 i386 GNU/Linux</span><br><span class="line">                      16061852   3311812  11922776  22% /</span><br><span class="line"></span><br><span class="line">Start Benchmark Run: Thu Mar 15 14:46:20 CST 2012</span><br><span class="line"> 14:46:20 up 25 days, 16:12,  2 users,  load average: 0.00, 0.00, 0.00</span><br><span class="line"></span><br><span class="line">End Benchmark Run: Thu Mar 15 14:57:03 CST 2012</span><br><span class="line"> 14:57:03 up 25 days, 16:22,  1 user,  load average: 15.58, 6.74, 2.98</span><br><span class="line"></span><br><span class="line"></span><br><span class="line">                     INDEX VALUES            </span><br><span class="line">TEST                                        BASELINE     RESULT      INDEX</span><br><span class="line"></span><br><span class="line">Dhrystone 2 using register variables        376783.7 10077205.9      267.5</span><br><span class="line">Double-Precision Whetstone                      83.1     1262.3      151.9</span><br><span class="line">Execl Throughput                               188.3     2721.0      144.5</span><br><span class="line">File Copy 1024 bufsize 2000 maxblocks         2672.0    87593.0      327.8</span><br><span class="line">File Copy 256 bufsize 500 maxblocks           1077.0    27004.0      250.7</span><br><span class="line">File Read 4096 bufsize 8000 maxblocks        15382.0   641324.0      416.9</span><br><span class="line">Pipe-based Context Switching                 15448.6   138134.4       89.4</span><br><span class="line">Pipe Throughput                             111814.6   851785.8       76.2</span><br><span class="line">Process Creation                               569.3     3992.0       70.1</span><br><span class="line">Shell Scripts (8 concurrent)                    44.8      553.8      123.6</span><br><span class="line">System Call Overhead                        114433.5   558929.2       48.8</span><br><span class="line">                                                                 =========</span><br><span class="line">     FINAL SCORE                                                     144.7</span><br></pre></td></tr></table></figure>

]]></content>
      <tags>
        <tag>Server&amp;OS</tag>
      </tags>
  </entry>
  <entry>
    <title>121回家插件</title>
    <url>/2012/03/17/hi121-backhome.html</url>
    <content><![CDATA[<p>这是一个基于记事狗微博的插件，<br>目的在于实现邀请长时间未登录微博的用户进行回访。</p>
<p>项目地址：<a href="https://github.com/ety001/hi121_backhome">https://github.com/ety001/hi121_backhome</a></p>
<p>注意：请谨慎使用该插件，该插件的使用过程具有危险性。</p>
<ul>
<li><p>使用方法：</p>
<ol>
<li>把plugin目录下的hi121_backhome复制到你的网站plugin目录下，把templates&#x2F;default&#x2F;plugin目录下的hi121_backhome目录复制到你网站的templates&#x2F;default&#x2F;plugin目录下；</li>
<li>进入网站后台插件面板进行安装；</li>
<li>安装后，第一次使用之前，请先设置插件参数（必须！）；</li>
<li>插件参数配置说明详见设置面板的各参数具体说明，其中发送方式一项当前版本可以不用选，默认使用PHP方式；</li>
<li>使用测试模式进行测试；</li>
<li>测试成功后，即可开始正常使用。</li>
</ol>
</li>
<li><p>参数设置样例：<br>  发送内容模板地址：&#x2F;tpl&#x2F;1&#x2F;mail.html （默认模板）<br>  件每批发送人数：25 （测试时可以把该值调大，这样可以减少发送批次）<br>  间隔时间（天）：15<br>  邮件标题：亲<del>121部落欢迎您再次回来</del><br>  发送批次间隔时间：20 （如果你用的是免费邮箱，请尽量调大这里的时间，因为过密集的发送邮件，会导致你使用的免费邮件服务提供商屏蔽你）<br>  执行方式：php方式执行<br>  测试模式：开启 （平时不用该插件时，请选择开启项，或者直接关闭这个插件，防止误操作）<br>  日志名称：test_log  （由于该文件记录了用户邮箱地址，防止被他人恶意采集，请使用者输入不易被猜到的名字）</p>
</li>
<li><p>测试方法：</p>
<ol>
<li>请在参数设置里，把每批发送人数调大，并把发送批次间隔时间调到0.1，这样可以节省测试时间。</li>
<li>测试模式一栏选择“开启”，这样插件只会进行一个发送的流程，但不会真正的发信。</li>
<li>在控制面板里点击“开始”前，请先确认发送总量和发送批次数以及总时间，根据发送总量和你的配置参数自己再计算下总时间看看是否一致，然后点击“开始”即可。</li>
<li>结束后，请检查核对日志中的发送批次数和开始前程序显示的发送批次数是否一致。如果一致，则说明测试通过，如果不一致则说明插件运转不正常。</li>
<li>如果不正常，基本上你现在的空间就无法使用该插件了。（另外注意：nginx用户，请查看你的nginx配置文件中的worker_processes 值是否大于1，如果等于1的话，当你执行插件的时候，整个网站将不可访问，因为php进程只有一条，还被插件给sleep掉了）</li>
</ol>
</li>
<li><p>关于模板：<br>  请自行制作模板，模板只支持且必须要有用户名和天数的预留位置，并且要先出现用户名，后出现天数。在模板中用%s代替用户名，%d代替天数。请参见自带的一个模板。</p>
</li>
</ul>
<p>如有疑问，请在<a href="https://github.com/ety001/hi121_backhome/issues">这个页面</a>留言。</p>
]]></content>
      <tags>
        <tag>DM实验室</tag>
      </tags>
  </entry>
  <entry>
    <title>121部落积分商城</title>
    <url>/2012/03/17/hi121-shop.html</url>
    <content><![CDATA[<p>这是一个基于记事狗微博的插件，<br>目的在于实现121部落积分商城的功能。<br>项目地址：<a href="https://github.com/ety001/hi121_shop">https://github.com/ety001/hi121_shop</a></p>
<p>别的不多说，这是个开源的项目，自己随意编写代码取用吧，但是还是希望大家能共享一下。</p>
<p>如有疑问，请在<a href="https://github.com/ety001/hi121_shop/issues">这个页面</a>下面留言。</p>
]]></content>
      <tags>
        <tag>DM实验室</tag>
      </tags>
  </entry>
  <entry>
    <title>配置proftpd的用户权限</title>
    <url>/2012/03/20/config-the-user-limits-of-authority-in-proftpd.html</url>
    <content><![CDATA[<p>今天需要在服务器上配置两个ftp账户a和b，两个账户需要在同一个组，并且a允许ssh登陆，而b不允许ssh登陆。两个用户登陆ftp的时候都必须要限制在自己的家目录内。</p>
<p>具体配置不详说，只说一下几个关键点：</p>
<p>1、b用户因为不具备ssh登陆权限，所以在proftpd的配置文件里要加下面这行配置<br>RequireValidShell               off<br>这个配置的作用就是允许没有ssh登陆权限的用户登陆ftp</p>
<p>2、限制某个用户组只能访问自己家目录的配置：<br>DefaultRoot    ~ groupname<br>其中 ~指的是家目录，groupname指的是你要限制的用户组。</p>
]]></content>
      <tags>
        <tag>Server&amp;OS</tag>
      </tags>
  </entry>
  <entry>
    <title>一个WordPress安装多个博客——wp-hive插件</title>
    <url>/2012/03/29/wordpress-wp-hive-plugin.html</url>
    <content><![CDATA[<p>标题的意思是：用一套WordPress源程序来驱动多个域名的WordPress博客。（ Multiple WordPress Blogs with a Single Installation）</p>
<p>工具：<a href="http://wp-hive.com/">wp-hive</a>插件</p>
<p>好处：1.不用每次WordPress升级时都多个博客分开升级，费时。</p>
<p>2.节省空间，一套wp解压后也要4兆多呢，再加上插件，主题等。</p>
<p>3.充分利用一个数据库。</p>
<p>4.没想好。用这个插件的朋友给我们说说吧。</p>
<span id="more"></span>

<p>＝＝＝＝＝＝＝＝＝＝＝＝＝＝＝＝<strong>使用方法</strong>＝＝＝＝＝＝＝＝＝＝＝＝＝＝＝＝＝＝＝＝＝</p>
<p>友情提示：这类插件使用之前，请备份你的数据库！</p>
<p>请你遵照如下步骤进行，【千万】别颠倒了！</p>
<p>1.按照正常程序安装你的主博客（第一个博客）。</p>
<p>2.将wp-hive文件夹上传到&#x2F;wp-content&#x2F;plugins&#x2F;目录。</p>
<p>3.将&#x2F;wp-hive&#x2F;db.php移动到&#x2F;wp-content&#x2F;目录。（不用激活插件之类的。）</p>
<p>4.马上打开你的主博客，wp-hive会自动配置数据库，添加wphive_config和wphive_hosts两个表。（记住一定是用你的主域名打开）</p>
<p>5.将第二个博客的域名绑定到第一个博客的目录。（可以是子域名，也可以是顶级域名）（其实这步你可以之前做好）</p>
<p>6.访问第二个域名，安装。（wp-hive自动会识别出这个是第二个博客的。）</p>
<p>7.在第二个博客的后台激活wp-hive插件。</p>
<p>重复5，6，7步，你就可以安装多个博客了。</p>
<p>＝＝＝＝＝＝＝＝＝＝＝＝＝＝＝＝<strong>注意事项</strong>＝＝＝＝＝＝＝＝＝＝＝＝＝＝＝＝＝＝＝＝＝</p>
<p>1.我说第五步可以先进行，但是千万别在第三和第四步之间就访问你的第二博客域名，那么wp-hive会将其记录为主域名了。</p>
<p>2.如果真的发生以上的情况，请删除数据库中的wphive_config和wphive_hosts表。</p>
<p>＝＝＝＝＝＝＝＝＝＝＝＝＝＝＝＝<strong>特殊文件</strong>＝＝＝＝＝＝＝＝＝＝＝＝＝＝＝＝＝＝＝＝＝</p>
<p>对于’sitemap.xml’, ‘robots.txt’, and ‘favicon.ico’这些文件，wp-hive会另外处理。</p>
<p>你要做的是：</p>
<p>1.别让这些文件出现在根目录里。</p>
<p>2.将每个域名所要使用的文件放在 <code>/wp-content/wp-hive/domainname.com/</code>  下即可。</p>
<p>＝＝＝＝＝＝＝＝＝＝＝＝＝＝＝＝＝＝<strong>卸载</strong>＝＝＝＝＝＝＝＝＝＝＝＝＝＝＝＝＝＝＝＝＝＝</p>
<p>不是要删除你的博客，请不要卸载哦。</p>
<p>1.禁用子博客里的wp-hive</p>
<p>2.删除数据库中的wphive_config和wphive_hosts表。（彻底卸载了。）</p>
<p>＝＝＝＝＝＝＝＝＝＝＝＝＝＝＝＝<strong>官方文档</strong>＝＝＝＝＝＝＝＝＝＝＝＝＝＝＝＝＝＝＝＝＝</p>
<p>1.<a href="http://wp-hive.com/documentation/">http://wp-hive.com/documentation/</a></p>
<p>2.WordPress.org下载地址：<a href="http://wordpress.org/extend/plugins/wp-hive/">http://wordpress.org/extend/plugins/wp-hive/</a></p>
]]></content>
      <tags>
        <tag>Server&amp;OS</tag>
      </tags>
  </entry>
  <entry>
    <title>关于linux下c语言中的exec简单笔记</title>
    <url>/2012/03/25/something-about-the-exec-function-in-c-programs.html</url>
    <content><![CDATA[<p>exec函数族的函数说明如下：</p>
<figure class="highlight plaintext"><table><tr><td class="code"><pre><span class="line">#include &lt;unistd.h&gt;</span><br><span class="line">int execl(const char *pathname,const char *arg, ...);</span><br><span class="line">int execlp(const char *filename,const char *arg, ...);</span><br><span class="line">int execle(const char *pathname,const char *arg, ... , char *const envp[]);</span><br><span class="line">int execv(const char *pathname,char *const argv[]);</span><br><span class="line">int execvp(const char *filename,char *const argv[]);</span><br><span class="line">int execve(const char *pathname,char *const argv[],char *const envp[]);</span><br></pre></td></tr></table></figure>

<p>函数名中含有字母“ l ”的函数，其参数个数不定。其参数由所谓调用程序的命令行参数列表组成，最后一个NULL表示结束。函数名中含有字母“ v ”的函数，则是使用一个字符串数组指针argv指向参数列表，这一字符串数组和含有“ l ”的函数中的参数列表完全相同，也同样以NULL结束。</p>
<p>函数名中含有字母“ p ”的函数可以自动在环境变量PATH指定的路径中搜索要执行的程序。因此它的第一个参数为filename表示可执行函数的文件名。而其他函数则需要用户在参数列表中指定该程序路径，其第一个参数pathname是路径名。路径的指定可以是绝对路径，也可以是相对路径。但出于对系统安全的考虑，建议使用绝对路径而尽量避免使用相对路径。</p>
<p>函数名中含有字母“ e ”的函数，比其他函数多含有一个参数envp。该参数是字符串数组指针，用于制定环境变量。调用这两个函数时，可以由用户自行设定子进程的环境变量，存放在参数envp所指向的字符串数组中。这个字符串数组也必须由NULL结束。其他函数则是接收当前环境变量。</p>
]]></content>
      <tags>
        <tag>编程语言</tag>
      </tags>
  </entry>
  <entry>
    <title>在centos下手动卸载软件</title>
    <url>/2012/03/29/remove-software-in-centos.html</url>
    <content><![CDATA[<p>由于工作需要在godaddy上买了最便宜的那款centos系统的VDS，没想到，把预装的apache，mysql，php，sendmail干掉后，居然内存占用仅9M多，真神奇。</p>
<p>下面就说下怎么手动卸载，首先要rpm -qa|grep mysql，这条命令可以找出安装的mysql的包，然后根据返回的信息，一个包一个包的用rpm -e 这条命令卸载即可。</p>
]]></content>
      <tags>
        <tag>Server&amp;OS</tag>
      </tags>
  </entry>
  <entry>
    <title>CSS网页布局困扰新手的八个问题</title>
    <url>/2012/04/03/8-css-layout-problems-that-perplex-the-newer.html</url>
    <content><![CDATA[<p>　　CSS网页布局，说难，其实很简单。说它容易，往往有很多问题困扰着新手，介绍了非常多的技巧，这些小技巧与知识能事半功倍的给大家以帮助。然而更多的时候，我们往往被一些小问题缠着不能轻松。今天向大家介绍八个技巧，这些技巧显得很有用。</p>
<p>　　一、若有疑问立即检测</p>
<p>　　在出错时若能对原始代码做简单检测可以省去很多头痛问题。W3C对于XHTML与CSS 都有检测工具可用，请见 <a href="http://validator.w3.org/">http://validator.w3.org</a> 。请注意，在文件开头的错误，可能因为不当的结构等因素造成更多错误；我们建议先修正一些最明显的错误之后重新检测，这样也许会让错误数量爆减。</p>
<p>　　二、使用浮动功能时记得适当清除指令</p>
<p>　　浮动是个危险的功能，未必会产生您所期望的结果。如果您遇到浮动元素延伸到外围容器的边框或者其他不正常情况，请先确定您的做法是正确的。</p>
<p>　　三、边界重合时利用padding或border来避免</p>
<p>　　您可能会为了一点不应该出现的空间而焦头烂额，或者您需要一点点空间时，怎样都挤不出来。如果您有用到margin，那么很容易产生边界的重合。</p>
<p>　　四、尝试避免同时对元素指定padding&#x2F;border以及高度或宽度</p>
<p>　　Windows版IE经常导致width与height的计算问题。有些方法可以解决此问题，但如果母元素需要指定高度与宽度时，最好能够在母元素之内的子元素套用margin,或者当子元素需要指定高度与宽度时，在母元素套用padding以达效果。</p>
<p>　　五、不要依赖min-width&#x2F;min-height</p>
<p>　　Windows版IE并不支援两种语法。但是在某种程度下，windows版IE可以达到相当于min-width&#x2F;min-height的效果，所以只要对IE做点过滤功能，即可达到您想要的结果。</p>
<p>　　六、若有疑问，先减少百分比</p>
<p>　　有时候某些错误会使50%+50%成为100.1%，使网页出现问题。这时请尝试将这些值改为49%，甚至49.9%。</p>
<p>　　七、记住“TRBL”写法</p>
<p>　　border，margin与padding的简写语法有特定顺序，从上方开始顺时针方向转动：top,right,bottom,left. 所以margin:0 1px 3px 5px;的结果是上方无边界，右边1像素，以此类推。记住“TRBL”，您就不会弄错次序了。</p>
<p>　　八、只要不是零的值，都要指定单位</p>
<p>　　这需要特别注意，很多新手朋友往往忽视这个问题。不止一只强调这个问题了。</p>
]]></content>
      <tags>
        <tag>前端</tag>
      </tags>
  </entry>
  <entry>
    <title>CSS布局口诀</title>
    <url>/2012/04/03/css-layout-pithy-formula.html</url>
    <content><![CDATA[<p>如果在用CSS设计布局时遇到BUG，请认真阅读以下内容，非常容易记忆的，不知道哪位高人把CSS BUG编成了顺口溜了！看看好不好记住呢？</p>
<p>一、IE边框若显若无，须注意，定是高度设置已忘记；</p>
<p>二、浮动产生有缘故，若要父层包含住，紧跟浮动要清除，容器自然显其中；</p>
<p>三、三像素文本慢移不必慌，高度设置帮你忙；</p>
<p>四、兼容各个浏览须注意，默认设置行高可能是杀手；</p>
<p>五、独立清除浮动须铭记，行高设无，高设零，设计效果兼浏览；</p>
<p>六、学布局须思路，路随布局原理自然直，轻松驾驭html，流水布局少hack，代码清爽，兼容好，友好引擎喜欢迎。</p>
<p>七、所有标签皆有源，只是默认各不同，span是无极，无极生两仪—内联和块级，img较特殊，但也遵法理，其他只是改造各不同，一个*号全归原，层叠样式理须多练习，万物皆规律。</p>
<p>八、图片链接排版须小心，图片链接文字链接若对齐，padding和vertical-align:middle要设定，虽差微细倒无妨。</p>
<p>九、IE浮动双边距，请用display：inline拘。</p>
<p>十、列表横向排版，列表代码须紧靠，空隙自消须铭记。</p>
]]></content>
      <tags>
        <tag>前端</tag>
      </tags>
  </entry>
  <entry>
    <title>fakeroot与sudo的区别</title>
    <url>/2012/05/01/the-differences-between-fakeroot-and-sudo.html</url>
    <content><![CDATA[<p>fakeroot不能获得root的权限，sudo可以。</p>
<p>fakeroot只是伪装成root，它不能改变需要root权限才能改变的文件，它只是让程序执行时按照有root权限的情况来运行，而对文件的操作实际上是在普通用户下进行的。</p>
<table >
<tbody >
<tr >

<td >1
2
</td>

<td >fakeroot tar cvf /tmp/local.tar /usr/local
sudo tar cvf /tmp/local.tar /usr/local
</td>
</tr>
</tbody>
</table>
上面两条命令都会在/tmp下建立local.tar，tar内的文件名都会以/开头，但前一条命令生成的文件属于当前用户，后一条命令生成的文件是root的。

]]></content>
      <tags>
        <tag>Server&amp;OS</tag>
      </tags>
  </entry>
  <entry>
    <title>安装archlinux+xfce4</title>
    <url>/2012/05/03/setup-archlinux-xfce4.html</url>
    <content><![CDATA[<p>喜欢折腾的人是闲不住的，这几天就在自己的笔记本上把原来的LinuxDeepin干掉，然后安装上了archlinux+xfce4的环境。现在基本是能用了，就说下流程，一次也写不全，先写下来，以后有时间再补充，也算是自己做个笔记，方便日后再次重装。</p>
<p>1、系统的安装。我用的是U盘安装，整个流程在archlinux的wiki上有详细介绍。</p>
<p>2、系统升级。我习惯安装完系统后第一时间升级，由于archlinux采用的是滚动升级的模式，所以只需要一条命令即可。</p>
<p>pacman -Syu</p>
<p>升级可能遇到的问题：执行命令后，可能系统会问pacman版本过低应先升级pacman，是否跳过升级pacman，这里一定要选择N。另外一个问题就是会有类似下面的错误：</p>
<p>error: failed to commit transaction (conflicting files)<br>filesystem: &#x2F;etc&#x2F;mtab exists in filesystem<br>Errors occurred, no packages were upgraded.</p>
<span id="more"></span>

<p>我查了网山很多的资料，有很多人都是用pacman -S filesystem –force强制升级的，不过还有个方法我比较推荐，就是先检查这个文件的关联，然后如果没有关联就把他mv或者rm掉。</p>
<p>3、使用adduser命令添加一个普通用户。其中用户要包含在哪些其他的组里面，在wiki上有说。</p>
<p>4、安装visudo，vim</p>
<p>5、安装yaourt。建议用修改pacman源的方式进行安装。</p>
<p>6、安装无线网络。这里使用的是wiki上的方法，由于我的笔记本无线网卡的型号是BCM4312,所以说，直接用yaourt安装AUR中博通的无线网卡驱动即可，具体方法见这里：<a href="https://wiki.archlinux.org/index.php/Broadcom_wireless_(%E7%AE%80%E4%BD%93%E4%B8%AD%E6%96%87)">https://wiki.archlinux.org/index.php/Broadcom_wireless_(%E7%AE%80%E4%BD%93%E4%B8%AD%E6%96%87)</a>。其中要注意的是，安装完驱动后，要用ip link set eth1 up命令启动端口（我的无线网卡名为eth1，这个详见wiki中wireless setup页面下半部分）。另外需要安装network manager，并且把rc.conf的DAEMONS中的network给换成networkmanager，并加上wl（这个wl在wiki页面有介绍，其实就是安装完驱动后，modprobe wl下）。另外，记得执行安装这些软件，pacman -S polkit-gnome gnome-keyring libgnome-keyring pyxdg，这些软件安装完毕你才能连接到加密的无线热点。</p>
<p>7、安装X，dbus，xfce，字体</p>
<p>8、启动xfce，安装chromium和flashplugins。</p>
<p>9、安装gstreamer0.10_base_plugins，这样在面板上就能添加个声音控制了。</p>
<p>10、安装slim，这样可以开机即可进入桌面。</p>
<p>以上就是大体的流程。下面是写问题总结：</p>
<p>1、win7下的硬盘已经能够看到，但是无法挂载，显示“Not authorized to perform operation”，但是以root登录的话就能挂载访问。经过各种搜索后，找到解决方案：</p>
<p>I solved it by modifying this file:<br>&#x2F;etc&#x2F;polkit-1&#x2F;localauthority&#x2F;50-local.d&#x2F;50-filesystem-mount-system-internal.pkla</p>
<p>You can refer to the wiki entry (<a href="https://wiki.archlinux.org/index.php/Udev#Mount_internal_drives_as_a_normal_user">https://wiki.archlinux.org/index.php/Ud … ormal_user</a>) for more info.</p>
<p>Basically you need to replace ‘udisks’ with ‘udisks2’:</p>
<pre><code>[Mount a system-internal device]
Identity=*
Action=org.freedesktop.udisks2.*
ResultActive=yes
</code></pre>
<p>This should fix all mounting problems.</p>
<p>2、挂载后发现中文乱码，又是各种搜索后，发现可以在“系统”-》“dconf Editor”中可以设置“system”-》“locale”-》“region”的值为utf8,gbk。</p>
<p>3、[12年7月8号补充] 新买了dell inspiron 15TR 1728的笔记本，安装archlinux的时候，从光盘引导不成功，出现了黑屏，从wiki上看是intel显卡导致的问题，按照wiki上的配置设置下，就可以继续进行安装了。wiki地址：<a href="https://wiki.archlinux.org/index.php/Beginners%27_Guide_(%E7%AE%80%E4%BD%93%E4%B8%AD%E6%96%87)#.E5.90.AF.E5.8A.A8.E6.93.8D.E4.BD.9C.E7.B3.BB.E7.BB.9F">https://wiki.archlinux.org/index.php/Beginners%27_Guide_(%E7%AE%80%E4%BD%93%E4%B8%AD%E6%96%87)#.E5.90.AF.E5.8A.A8.E6.93.8D.E4.BD.9C.E7.B3.BB.E7.BB.9F</a><br>在安装完以后，也出现了启动不起来的问题，参考了这篇博文后问题解决，<a href="https://www.deleak.com/blog/2010/09/19/solve-arch-boot-up-stopped/">https://www.deleak.com/blog/2010/09/19/solve-arch-boot-up-stopped/</a>，即在grub启动指令ro后面再加上nomodeset。<br>[未完]</p>
]]></content>
      <tags>
        <tag>Server&amp;OS</tag>
      </tags>
  </entry>
  <entry>
    <title>ZeroMQ的模式</title>
    <url>/2012/04/10/zeromq_message_patterns.html</url>
    <content><![CDATA[<p>转自：<a href="http://blog.codingnow.com/2011/02/zeromq_message_patterns.html">http://blog.codingnow.com/2011/02/zeromq_message_patterns.html</a></p>
<p>在需要并行化处理数据的时候，采用消息队列通讯的方式来协作，比采用共享状态的方式要好的多。Erlang ，Go 都使用这一手段来让并行任务之间协同工作。</p>
<p>最近读完了 <a href="http://www.zeromq.org/">ZeroMQ</a> 的 <a href="http://zguide.zeromq.org/chapter:all">Guide</a>。写的很不错。前几年一直有做类似的工作，但是自己总结的不好。而 ZeroMQ 把消息通讯方面的模式总结的很不错。</p>
<p>ZeroMQ 并不是一个对 socket 的封装，不能用它去实现已有的网络协议。它有自己的模式，不同于更底层的点对点通讯模式。它有比 tcp 协议更高一级的协议。（当然 ZeroMQ 不一定基于 TCP 协议，它也可以用于进程间和进程内通讯。）它改变了通讯都基于一对一的连接这个假设。</p>
<p>ZeroMQ 把通讯的需求看成四类。其中一类是一对一结对通讯，用来支持传统的 TCP socket 模型，但并不推荐使用。常用的通讯模式只有三类。</p>
<ol>
<li><p>请求回应模型。由请求端发起请求，并等待回应端回应请求。从请求端来看，一定是一对对收发配对的；反之，在回应端一定是发收对。请求端和回应端都可以是 1:N 的模型。通常把 1 认为是 server ，N 认为是 Client 。ZeroMQ 可以很好的支持路由功能（实现路由功能的组件叫作 Device），把 1:N 扩展为 N:M （只需要加入若干路由节点）。从这个模型看，更底层的端点地址是对上层隐藏的。每个请求都隐含有回应地址，而应用则不关心它。</p>
</li>
<li><p>发布订阅模型。这个模型里，发布端是单向只发送数据的，且不关心是否把全部的信息都发送给订阅端。如果发布端开始发布信息的时候，订阅端尚未连接上来，这些信息直接丢弃。不过一旦订阅端连接上来，中间会保证没有信息丢失。同样，订阅端则只负责接收，而不能反馈。如果发布端和订阅端需要交互（比如要确认订阅者是否已经连接上），则使用额外的 socket 采用请求回应模型满足这个需求。</p>
</li>
<li><p>管道模型。这个模型里，管道是单向的，从 PUSH 端单向的向 PULL 端单向的推送数据流。</p>
</li>
</ol>
<p>任何分布式，并行的需求，都可以用这三种模型组合起来解决问题。ZeroMQ 只专注和解决了消息通讯这一基本问题，干的非常漂亮。</p>
<p>基于定义好的模型，我们可以看到，api 可以实现的非常简单易用。我们不再需要 bind&#x2F;listen&#x2F;accept 来架设服务器，因为这个模型天然是 1:N 而不是 1:1 的，不需要为每个通道保留一个句柄。我们也不必在意 server 是否先启动（bind），而后才能让 client 工作起来（connect）。</p>
<p>这以上模型中，关注的是通讯双方的职责，而不是实现的方式：监听端口还是连接对方端口。对于复杂的多进程协同工作的系统, 不必纠结于进程启动的次序（在我前几年设计的系统中，启动脚本写起来就非常麻烦）。</p>
<p>使用 ZeroMQ 不必在意底层实现是使用短连接还是长连接方式。ZeroMQ 中的 Transient (短暂) 和 Durable (持久) socket 也并非区别于实现层是否保持了 tcp 连接。而是概念上的不同。对于 Durable socket ，其生命期可以长于一个进程的生命期，即使进程退出，再次启动后依旧可以维持继续之前的 socket 。当然，这并不是帮助你挽救你的程序因出错而崩溃的。它只是提出这个模式，让你根据设计需要可以实现。对于 ZeroMQ ，如有需求（若内存有限），甚至把数据传输的 buffer 放到磁盘上。</p>
<p>对于网络游戏，我觉得基于 ZeroMQ 来架构服务器非常合适。对于玩家 Client - Server 部分倒不必使用 ZeroMQ ，而可以写一个前端程序，比如<a href="http://blog.codingnow.com/2006/04/iocp_kqueue_epoll.html">前些年写过的一篇 blog 中提到的连接服务器</a>依然适用。这个连接服务器对内的服务集群则可以用 ZeroMQ 的协议通讯。</p>
]]></content>
      <tags>
        <tag>理论</tag>
      </tags>
  </entry>
  <entry>
    <title>epoll精髓</title>
    <url>/2012/04/10/the-marrow-of-epoll.html</url>
    <content><![CDATA[<p>转自：<a href="http://www.cnblogs.com/OnlyXP/archive/2007/08/10/851222.html">http://www.cnblogs.com/OnlyXP/archive/2007/08/10/851222.html</a></p>
<p>在linux的网络编程中，很长的时间都在使用select来做事件触发。在linux新的内核中，有了一种替换它的机制，就是epoll。<br>相比于select，epoll最大的好处在于它不会随着监听fd数目的增长而降低效率。因为在内核中的select实现中，它是采用轮询来处理的，轮询的fd数目越多，自然耗时越多。并且，在linux&#x2F;posix_types.h头文件有这样的声明：</p>
<figure class="highlight plaintext"><table><tr><td class="code"><pre><span class="line">#define __FD_SETSIZE    1024</span><br></pre></td></tr></table></figure>

<p>表示select最多同时监听1024个fd，当然，可以通过修改头文件再重编译内核来扩大这个数目，但这似乎并不治本。</p>
<p>epoll的接口非常简单，一共就三个函数：</p>
<ol>
<li>int epoll_create(int size);</li>
</ol>
<p>创建一个epoll的句柄，size用来告诉内核这个监听的数目一共有多大。这个参数不同于select()中的第一个参数，给出最大监听的fd+1的值。需要注意的是，当创建好epoll句柄后，它就是会占用一个fd值，在linux下如果查看&#x2F;proc&#x2F;进程id&#x2F;fd&#x2F;，是能够看到这个fd的，所以在使用完epoll后，必须调用close()关闭，否则可能导致fd被耗尽。</p>
<ol start="2">
<li><code>int epoll_ctl(int epfd, int op, int fd, struct epoll_event *event);</code></li>
</ol>
<p>epoll的事件注册函数，它不同与select()是在监听事件时告诉内核要监听什么类型的事件，而是在这里先注册要监听的事件类型。第一个参数是epoll_create()的返回值，第二个参数表示动作，用三个宏来表示：</p>
<pre><code>EPOLL_CTL_ADD：注册新的fd到epfd中；
EPOLL_CTL_MOD：修改已经注册的fd的监听事件；
EPOLL_CTL_DEL：从epfd中删除一个fd；
</code></pre>
<p>第三个参数是需要监听的fd，第四个参数是告诉内核需要监听什么事，struct epoll_event结构如下：</p>
<figure class="highlight plaintext"><table><tr><td class="code"><pre><span class="line">struct epoll_event &#123;</span><br><span class="line">  __uint32_t events;  /* Epoll events */</span><br><span class="line">  epoll_data_t data;  /* User data variable */</span><br><span class="line">&#125;;</span><br></pre></td></tr></table></figure>

<p>events可以是以下几个宏的集合：</p>
<figure class="highlight plaintext"><table><tr><td class="code"><pre><span class="line">EPOLLIN ：表示对应的文件描述符可以读（包括对端SOCKET正常关闭）；</span><br><span class="line">EPOLLOUT：表示对应的文件描述符可以写；</span><br><span class="line">EPOLLPRI：表示对应的文件描述符有紧急的数据可读（这里应该表示有带外数据到来）；</span><br><span class="line">EPOLLERR：表示对应的文件描述符发生错误；</span><br><span class="line">EPOLLHUP：表示对应的文件描述符被挂断；</span><br><span class="line">EPOLLET： 将EPOLL设为边缘触发(Edge Triggered)模式，这是相对于水平触发(Level Triggered)来说的。</span><br><span class="line">EPOLLONESHOT：只监听一次事件，当监听完这次事件之后，如果还需要继续监听这个socket的话，需要再次把这个socket加入到EPOLL队列里</span><br></pre></td></tr></table></figure>

<ol start="3">
<li><code>int epoll_wait(int epfd, struct epoll_event * events, int maxevents, int timeout);</code></li>
</ol>
<p>等待事件的产生，类似于select()调用。参数events用来从内核得到事件的集合，maxevents告之内核这个events有多大，这个maxevents的值不能大于创建epoll_create()时的size，参数timeout是超时时间（毫秒，0会立即返回，-1将不确定，也有说法说是永久阻塞）。该函数返回需要处理的事件数目，如返回0表示已超时。</p>
<hr>
<p>从man手册中，得到ET和LT的具体描述如下</p>
<p>EPOLL事件有两种模型：</p>
<pre><code>Edge Triggered (ET)
Level Triggered (LT)
</code></pre>
<p>假如有这样一个例子：</p>
<pre><code>1. 我们已经把一个用来从管道中读取数据的文件句柄(RFD)添加到epoll描述符
2. 这个时候从管道的另一端被写入了2KB的数据
3. 调用epoll_wait(2)，并且它会返回RFD，说明它已经准备好读取操作
4. 然后我们读取了1KB的数据
5. 调用epoll_wait(2)......
</code></pre>
<p>Edge Triggered 工作模式：</p>
<p>如果我们在第1步将RFD添加到epoll描述符的时候使用了EPOLLET标志，那么在第5步调用epoll_wait(2)之后将有可能会挂起，因为剩余的数据还存在于文件的输入缓冲区内，而且数据发出端还在等待一个针对已经发出数据的反馈信息。只有在监视的文件句柄上发生了某个事件的时候 ET 工作模式才会汇报事件。因此在第5步的时候，调用者可能会放弃等待仍在存在于文件输入缓冲区内的剩余数据。在上面的例子中，会有一个事件产生在RFD句柄上，因为在第2步执行了一个写操作，然后，事件将会在第3步被销毁。因为第4步的读取操作没有读空文件输入缓冲区内的数据，因此我们在第5步调用 epoll_wait(2)完成后，是否挂起是不确定的。epoll工作在ET模式的时候，必须使用非阻塞套接口，以避免由于一个文件句柄的阻塞读&#x2F;阻塞写操作把处理多个文件描述符的任务饿死。最好以下面的方式调用ET模式的epoll接口，在后面会介绍避免可能的缺陷。<br>   i    基于非阻塞文件句柄<br>   ii   只有当read(2)或者write(2)返回EAGAIN时才需要挂起，等待。但这并不是说每次read()时都需要循环读，直到读到产生一个EAGAIN才认为此次事件处理完成，当read()返回的读到的数据长度小于请求的数据长度时，就可以确定此时缓冲中已没有数据了，也就可以认为此事读事件已处理完成。</p>
<p>Level Triggered 工作模式</p>
<p>相反的，以LT方式调用epoll接口的时候，它就相当于一个速度比较快的poll(2)，并且无论后面的数据是否被使用，因此他们具有同样的职能。因为即使使用ET模式的epoll，在收到多个chunk的数据的时候仍然会产生多个事件。调用者可以设定EPOLLONESHOT标志，在 epoll_wait(2)收到事件后epoll会与事件关联的文件句柄从epoll描述符中禁止掉。因此当EPOLLONESHOT设定后，使用带有 EPOLL_CTL_MOD标志的epoll_ctl(2)处理文件句柄就成为调用者必须作的事情。</p>
<p>然后详细解释ET, LT:</p>
<p>LT(level triggered)是缺省的工作方式，并且同时支持block和no-block socket.在这种做法中，内核告诉你一个文件描述符是否就绪了，然后你可以对这个就绪的fd进行IO操作。如果你不作任何操作，内核还是会继续通知你的，所以，这种模式编程出错误可能性要小一点。传统的select&#x2F;poll都是这种模型的代表．</p>
<p>ET(edge-triggered)是高速工作方式，只支持no-block socket。在这种模式下，当描述符从未就绪变为就绪时，内核通过epoll告诉你。然后它会假设你知道文件描述符已经就绪，并且不会再为那个文件描述符发送更多的就绪通知，直到你做了某些操作导致那个文件描述符不再为就绪状态了(比如，你在发送，接收或者接收请求，或者发送接收的数据少于一定量时导致了一个EWOULDBLOCK 错误）。但是请注意，如果一直不对这个fd作IO操作(从而导致它再次变成未就绪)，内核不会发送更多的通知(only once),不过在TCP协议中，ET模式的加速效用仍需要更多的benchmark确认（这句话不理解）。</p>
<p>在许多测试中我们会看到如果没有大量的idle -connection或者dead-connection，epoll的效率并不会比select&#x2F;poll高很多，但是当我们遇到大量的idle- connection(例如WAN环境中存在大量的慢速连接)，就会发现epoll的效率大大高于select&#x2F;poll。（未测试）</p>
<p>另外，当使用epoll的ET模型来工作时，当产生了一个EPOLLIN事件后，<br>读数据的时候需要考虑的是当recv()返回的大小如果等于请求的大小，那么很有可能是缓冲区还有数据未读完，也意味着该次事件还没有处理完，所以还需要再次读取：</p>
<figure class="highlight plaintext"><table><tr><td class="code"><pre><span class="line">while(rs)</span><br><span class="line">&#123;</span><br><span class="line">  buflen = recv(activeevents[i].data.fd, buf, sizeof(buf), 0);</span><br><span class="line">  if(buflen &lt; 0)</span><br><span class="line">  &#123;</span><br><span class="line">    // 由于是非阻塞的模式,所以当errno为EAGAIN时,表示当前缓冲区已无数据可读</span><br><span class="line">    // 在这里就当作是该次事件已处理处.</span><br><span class="line">    if(errno == EAGAIN)</span><br><span class="line">     break;</span><br><span class="line">    else</span><br><span class="line">     return;</span><br><span class="line">   &#125;</span><br><span class="line">   else if(buflen == 0)</span><br><span class="line">   &#123;</span><br><span class="line">     // 这里表示对端的socket已正常关闭.</span><br><span class="line">   &#125;</span><br><span class="line">   if(buflen == sizeof(buf)</span><br><span class="line">     rs = 1;   // 需要再次读取</span><br><span class="line">   else</span><br><span class="line">     rs = 0;</span><br><span class="line">&#125;</span><br></pre></td></tr></table></figure>

<p>还有，假如发送端流量大于接收端的流量(意思是epoll所在的程序读比转发的socket要快),由于是非阻塞的socket,那么send()函数虽然返回,但实际缓冲区的数据并未真正发给接收端,这样不断的读和发，当缓冲区满后会产生EAGAIN错误(参考man send),同时,不理会这次请求发送的数据.所以,需要封装socket_send()的函数用来处理这种情况,该函数会尽量将数据写完再返回，返回-1表示出错。在socket_send()内部,当写缓冲已满(send()返回-1,且errno为EAGAIN),那么会等待后再重试.这种方式并不很完美,在理论上可能会长时间的阻塞在socket_send()内部,但暂没有更好的办法.</p>
<figure class="highlight plaintext"><table><tr><td class="code"><pre><span class="line">ssize_t socket_send(int sockfd, const char* buffer, size_t buflen)</span><br><span class="line">&#123;</span><br><span class="line">  ssize_t tmp;</span><br><span class="line">  size_t total = buflen;</span><br><span class="line">  const char *p = buffer;</span><br><span class="line"></span><br><span class="line">  while(1)</span><br><span class="line">  &#123;</span><br><span class="line">    tmp = send(sockfd, p, total, 0);</span><br><span class="line">    if(tmp &lt; 0)</span><br><span class="line">    &#123;</span><br><span class="line">      // 当send收到信号时,可以继续写,但这里返回-1.</span><br><span class="line">      if(errno == EINTR)</span><br><span class="line">        return -1;</span><br><span class="line"></span><br><span class="line">      // 当socket是非阻塞时,如返回此错误,表示写缓冲队列已满,</span><br><span class="line">      // 在这里做延时后再重试.</span><br><span class="line">      if(errno == EAGAIN)</span><br><span class="line">      &#123;</span><br><span class="line">        usleep(1000);</span><br><span class="line">        continue;</span><br><span class="line">      &#125;</span><br><span class="line"></span><br><span class="line">      return -1;</span><br><span class="line">    &#125;</span><br><span class="line"></span><br><span class="line">    if((size_t)tmp == total)</span><br><span class="line">      return buflen;</span><br><span class="line"></span><br><span class="line">    total -= tmp;</span><br><span class="line">    p += tmp;</span><br><span class="line">  &#125;</span><br><span class="line"></span><br><span class="line">  return tmp;</span><br><span class="line">&#125;</span><br></pre></td></tr></table></figure>

]]></content>
      <tags>
        <tag>编程语言</tag>
      </tags>
  </entry>
  <entry>
    <title>geolocation</title>
    <url>/2012/05/09/geolocation.html</url>
    <content><![CDATA[<p>获取地理位置的方式及其优缺点：</p>
<p>　　1、ip地址<br>　　书上说不准确，很多时候获取的是ISP机房的位置，但是获取非常方便，没有什么限制。但是实际上我觉得在中国，ip地址还是比较准确的，基本上上能精确到小区或大楼的标准。<br>　　2、GPS<br>　　非常准确，但是需要在户外，且需要很长时间搜索卫星。最主要的很多设备比如笔记本电脑基本都是不带GPS的，新的智能手机倒是都有。<br>　　3、WiFi基站的mac地址。（猜测是连接位置已知的公共WiFi的时候，通过Mac地址识别WiFi接入点，从而定位)<br>　　这种定位的精度还是很不错的，而且还可以在室内定位。不过由于这种位置公开的wifi比较少，此种方法的适用范围比较少。<br>　　4、 GSM或CDMA基站<br>　　通过基站定位，精度随基站密度变化，精度一般，还是只有手机能用。看来地理位置API还是手机上比较有实用性。<br>　　5、用户指定位置<br>　　晕，这个就不是HTML5的范畴了。</p>
<p>地理位置获取流程：</p>
<p>　　1、用户打开需要获取地理位置的web应用。<br>　　2、应用向浏览器请求地理位置，浏览器弹出询问窗口，询问用户是否共享地理位置。<br>　　3、假设用户允许，浏览器从设别查询相关信息。<br>　　4、浏览器将相关信息发送到一个信任的位置服务器，服务器返回具体的地理位置。</p>
<p>检测浏览器支持：</p>
<p>　　function loadDemo() {<br>    　　if(navigator.geolocation) {<br>    　　  document.getElementById(“support”).innerHTML &#x3D; “HTML5 Geolocation supported.”;<br>    　　} else {<br>    　　  document.getElementById(“support”).innerHTML &#x3D; “HTML5 Geolocation is not supported in your browser.”;<br>    　　}<br>　　}<br>位置请求方式：</p>
<pre><code>单次请求navigator.geolocation.getCurrentPosition(updateLocation, handleLocationError, options);
回调函数updateLocation接受一个对象参数，表示当前的地理位置，它有如下属性：
　　latitude——纬度
　　longitude——精度
　　accuracy——精确度，单位米
　　altitude——高度，单位米
　　altitudeAccuracy——高度的精确地，单位米
　　heading—运动的方向，相对于正北方向的角度
　　speed——运动的速度（假设你在地平线上运动），单位米/秒

回调函数handleLocationError接受错误对象，error.code是如下错误号。
　　UNKNOWN_ERROR (error code 0) —— 错误不在如下三种之内，你可以使用error.message获取错误详细信息。
　　PERMISSION_DENIED (error code 1)—— 用不选择不共享地理位置
　　POSITION_UNAVAILABLE (error code 2) ——无法获取当前位置
　　TIMEOUT (error code 3) ——在指定时间无法获取位置会触发此错误。
　　第三个参数options是可选参数，属性如下：
　　enableHighAccuracy——指示浏览器获取高精度的位置，默认为false。当开启后，可能没有任何影响，也可能使浏览器花费更长的时间获取更精确的位置数据。
　　timeout——指定获取地理位置的超时时间，默认不限时。单位为毫秒。
　　maximumAge——最长有效期，在重复获取地理位置时，此参数指定多久再次获取位置。默认为0，表示浏览器需要立刻重新计算位置。
　　参数使用的例子如下：
　　navigator.geolocation.getCurrentPosition(updateLocation,handleLocationError,
　　&#123;timeout:10000&#125;);
　　重复请求navigator.geolocation.watchPosition(updateLocation, handleLocationError);
　　使用 watchPosition可以持续获取地理位置，浏览器或多次调用updateLocation函数以便传递最新的位置。该函数返回一个watchID，使用navigator.geolocation.clearWatch(watchId)可以清除此次回调，使用不带参数的navigator.geolocation.clearWatch()清除说有watchPosition。
</code></pre>
<p>地址转换：</p>
<pre><code>由于地理位置API返回的是经纬度，如果要计算两个位置之间的距离，可以使用著名的Haversine公式计算两个坐标在地平线上的距离。

　　Listing 4-7. A JavaScript Haversine implementation
　　function toRadians(degree) &#123;
　　return degree * Math.PI / 180;
　　&#125;
　　function distance(latitude1, longitude1, latitude2, longitude2) &#123;
　　// R is the radius of the earth in kilometers
　　var R = 6371;
　　var deltaLatitude = toRadians(latitude2-latitude1);
　　var deltaLongitude = toRadians(longitude2-longitude1);
　　latitude1 =toRadians(latitude1);
　　latitude2 =toRadians(latitude2);
　　var a = Math.sin(deltaLatitude/2) *
　　Math.sin(deltaLatitude/2) +
　　Math.cos(latitude1) *
　　Math.cos(latitude2) *
　　Math.sin(deltaLongitude/2) *
　　Math.sin(deltaLongitude/2);
　　var c = 2 * Math.atan2(Math.sqrt(a),
　　Math.sqrt(1-a));
　　var d = R * c;
　　return d;
　　&#125;
</code></pre>
]]></content>
      <tags>
        <tag>前端</tag>
      </tags>
  </entry>
  <entry>
    <title>PHP的ip2long有bug，请慎用</title>
    <url>/2012/05/15/php-ip2long-has-bug.html</url>
    <content><![CDATA[<p>转自：<a href="http://www.php100.com/html/webkaifa/PHP/PHPyingyong/2009/0927/3349.html">http://www.php100.com/html/webkaifa/PHP/PHPyingyong/2009/0927/3349.html</a></p>
<p>先看看下边这段PHP代码。这段使用ip2long函数，对同一个IP进行转换。当然，也有人认为58.99.011.1和058.99.011.1算不上合法的</p>
<p>IP，那就Return，此文对你没有帮助。</p>
<p>为什么要使用带前导零的ip：为了在数据库中查询，这个可以在IP库中定位到ip所对应的位置信息。虽然没有整型的IP查询效率高，但毕竟直观啊。</p>
<figure class="highlight plaintext"><table><tr><td class="code"><pre><span class="line">echo ip2long(&#x27;58.99.11.1&#x27;),&quot;&lt;br/&gt;&quot;;   //输出是 979569409  </span><br><span class="line">echo ip2long(&#x27;58.99.011.1&#x27;),&quot;&lt;br/&gt;&quot;;  //输出是 979568897  </span><br><span class="line">echo ip2long(&#x27;058.99.11.1&#x27;),&quot;&lt;br/&gt;&quot;;  //输出是空  </span><br><span class="line"></span><br><span class="line">echo ip2long(&#x27;58.99.11.1&#x27;),&quot;&lt;br/&gt;&quot;;   //输出是 979569409</span><br><span class="line">echo ip2long(&#x27;58.99.011.1&#x27;),&quot;&lt;br/&gt;&quot;;  //输出是 979568897</span><br><span class="line">echo ip2long(&#x27;058.99.11.1&#x27;),&quot;&lt;br/&gt;&quot;;  //输出是空</span><br></pre></td></tr></table></figure>

<p>在PHP 4.x,5.x中, 有前导零的ip转换的结果都不正确。</p>
<p>解决办法，使用写自己的函数：</p>
<figure class="highlight plaintext"><table><tr><td class="code"><pre><span class="line">function myip2long($ip)&#123;  </span><br><span class="line">   $ip_arr = split(&#x27;\.&#x27;,$ip);  </span><br><span class="line">   $iplong = (16777216 * intval($ip_arr[0])) + (65536 * intval($ip_arr[1])) + (256 * intval($ip_arr[2])) + intval($ip_arr[3]);  </span><br><span class="line">   return $iplong;  </span><br><span class="line">&#125;</span><br></pre></td></tr></table></figure>

]]></content>
      <tags>
        <tag>编程语言</tag>
      </tags>
  </entry>
  <entry>
    <title>ArchLinux XFCE用快捷键调节音量</title>
    <url>/2012/06/02/archlinux-xfce-volume.html</url>
    <content><![CDATA[<p>安装完archlinux + xfce后发现笔记本键盘的音量调节不管用了，从archlinux的wiki上找了下，发现可以自己设置快捷键，在“设置”–》“键盘”–》“应用程序快捷键”中，选择“添加”，就可以添加新的快捷键了。</p>
<p>由于我用的ALSA，所以我按照下面的来设置即可，</p>
<p>升高音量：</p>
<figure class="highlight plaintext"><table><tr><td class="code"><pre><span class="line">amixer set Master 5%+</span><br></pre></td></tr></table></figure>


<p>降低音量：</p>
<figure class="highlight plaintext"><table><tr><td class="code"><pre><span class="line">amixer set Master 5%-</span><br></pre></td></tr></table></figure>


<p>静音：</p>
<figure class="highlight plaintext"><table><tr><td class="code"><pre><span class="line">amixer set Master toggle</span><br></pre></td></tr></table></figure>


<p>你如果使用的是标准的XF86Audio 快捷键，在在终端输入以下内容：</p>
<figure class="highlight plaintext"><table><tr><td class="code"><pre><span class="line">xfconf-query -c xfce4-keyboard-shortcuts -p /commands/custom/XF86AudioRaiseVolume -n -t string -s &quot;amixer set Master 5%+&quot;</span><br><span class="line">xfconf-query -c xfce4-keyboard-shortcuts -p /commands/custom/XF86AudioLowerVolume -n -t string -s &quot;amixer set Master 5%-&quot;</span><br><span class="line">xfconf-query -c xfce4-keyboard-shortcuts -p /commands/custom/XF86AudioMute -n -t string -s &quot;amixer set Master toggle&quot;</span><br></pre></td></tr></table></figure>


<p>若 <code>amixer set Master toggle</code> 不工作，尝试使用调节PCM直接调节音量(<code>amixer set PCM toggle</code>) 。</p>
<p>或者使用另外一条命令</p>
<figure class="highlight plaintext"><table><tr><td class="code"><pre><span class="line">pactl set-sink-mute 0 toggle</span><br></pre></td></tr></table></figure>

<p>其他的内容请参考wiki，<a href="https://wiki.archlinux.org/index.php/Xfce_(%E7%AE%80%E4%BD%93%E4%B8%AD%E6%96%87)#ALSA">https://wiki.archlinux.org/index.php/Xfce_(%E7%AE%80%E4%BD%93%E4%B8%AD%E6%96%87)#ALSA</a></p>
]]></content>
      <tags>
        <tag>Server&amp;OS</tag>
      </tags>
  </entry>
  <entry>
    <title>select使用append进option无法自适应宽度</title>
    <url>/2012/06/06/option-no-adaptive-width-in-jquery.html</url>
    <content><![CDATA[<p>转自：<a href="http://www.smuwcwt.com/archives/673">http://www.smuwcwt.com/archives/673</a></p>
<p>select备受鄙视，前端中会碰到各式各样的问题，例如：</p>
<p>1，弹出层无法阻挡select<br>2，宽度，高度受系统影响，甚至连系统主题都影响select的宽高<br>等等。</p>
<p>今天碰到这样一个问题，后台系统再做3级联动的时候，用jquery的append向select中推拼合好的option，在IE6&#x2F;7下居然无法自适应宽度。找到的唯一理由是，低版本浏览器无法重绘界面，导致宽度无法自适应，使用的解决方案：</p>
<p>对select先隐藏，后再显示。例如：</p>
<p>$(“#SelectID”).hide().show();</p>
<p>另外一种可能的解决方案是:</p>
<p>使用原生js的options.add向select中添加。</p>
]]></content>
      <tags>
        <tag>前端</tag>
      </tags>
  </entry>
  <entry>
    <title>mysql source、mysqldump导入导出数据（转）</title>
    <url>/2012/07/05/mysql-source-mysqldump.html</url>
    <content><![CDATA[<p>转自：<a href="http://www.cnblogs.com/zhuyue/archive/2012/07/04/2576971.html">http://www.cnblogs.com/zhuyue/archive/2012/07/04/2576971.html</a></p>
<p>一、导入数据</p>
<p>1、确定 数据库默认编码，比如编码 为gbk,将读入途径编码同样设为gbk，命令为：<br>set names gbk;<br>2、source d:&#x2F;20080613.sql 导入数据。验证 数据库 中的数据是否存在乱码。</p>
<p>3、如果仍然存在乱码问题，这时候就要考虑改变导入文件的编码，试着 导入，直至没有乱码出现。</p>
<p>网页数据存入乱码问题依照以上方法同样可以解决。可将网页编码改为与 数据库 相同的编码。问题自 然解决。</p>
<p>4、查看字符集</p>
<p>mysql&gt;   show   variables   like   “%char%”;</p>
<span id="more"></span>

<p>二、导出数据</p>
<p>mysqldump -u root -p –default-character-set&#x3D;数据编码 数据库名称&gt; file.sql</p>
<p>定义编码导出<br>mysqldump -u root -p –default-character-set&#x3D;utf8 discuss_chi&gt; dis.sql</p>
<p>定义编码导入<br>mysql -u root -p –default-character-set&#x3D;utf8 -f discuss_chi&lt;dis.sql<br>如还是乱码使用二进导入<br>mysql -u root -p –default-character-set&#x3D;binary -f discuss_chi&lt;dis.sql</p>
<p>还是不行，导出和导入都使用二进方式<br>导出<br>mysqldump -u root -p –default-character-set&#x3D;binary discuss_chi&gt; dis.sql<br>导入<br>mysql -u root -p –default-character-set&#x3D;binary -f discuss_chi&lt;dis.sql</p>
]]></content>
      <tags>
        <tag>后端</tag>
        <tag>理论</tag>
      </tags>
  </entry>
  <entry>
    <title>PHP对程序员的要求更高</title>
    <url>/2012/06/06/php-programmers-to-demand-higher.html</url>
    <content><![CDATA[<p>转自<a href="http://www.laruence.com/">Laruence</a>大神的博客：<a href="http://www.laruence.com/2012/04/01/2571.html">http://www.laruence.com/2012/04/01/2571.html</a></p>
<p>今天是愚人节, 但我这个文章标题可不是和大家开玩笑.</p>
<p>首先, 大家都知道, PHP也是一种编译型脚本语言, 和其他的预编译型语言不同, 它不是编译成中间代码, 然后发布.. 而是每次运行都需要编译..</p>
<p>为此, 也就有了一些Opcode Cache, 比如开源的APC, eacc. 还有商业的Zend O+等.</p>
<p>那么为什么PHP不把编译&#x2F;执行分开呢?</p>
<p>PHP虽然是一种编译型脚本语言, 但是它的编译速度非常快, 它的编译不做任何语义优化, 就是简单的忠实的把你所写的代码翻译成对应的Opcodes. 而其他语言因为在编译器做很多的优化工作, 会造成编译比较重, 也一定程度上要求它们分离.</p>
<p>所以, 理论上来说, 通过编译执行分离, 想达到源码加密, 是不会有什么太大收效的, 因为它很容易被反向.</p>
<p>另外, 编译直接分离, 并不会带来特别大的收益, 反而会降低调试部署的效率(想想, 修改, 编译, 发布, 看效果), 并且APC等Opcode Cache工具, 已经很成熟了..</p>
<p>到这里, 请大家注意这句:”它的编译不做任何语义优化”….</p>
<p>这也就是我为什么说, PHP对程序员的要求更高, 不同于其他的编译型语言, PHP在编译的时候不会帮你做一些优化, 比如对于如下的代码:</p>
<ol>
<li><p>$j &#x3D; “laruence”;</p>
</li>
<li><p>for ($i&#x3D;0;$i&lt;strlen($j);$i++) {</p>
</li>
<li><p>}</p>
</li>
</ol>
<p>如果是其他预编译语言, 它的编译器也许会帮你做优化, 把strlen提取到前面去, 只做一次就够了. 而对于PHP来说, 它在编译的时候不做任何优化, 也就是说, 你的strlen, 会忠实的被调用8次.</p>
<p>再比如:</p>
<ol>
<li><p>$table &#x3D; “table”;</p>
</li>
<li><p>while($i++ &lt; 1000) {</p>
</li>
<li><p>  $sql &#x3D; “select * from “ . $table . “ where id &#x3D; “ . $i;</p>
</li>
<li><p>}</p>
</li>
</ol>
<p>没错, “select * from ” . $table会被concat 1000次..</p>
<p>可见, PHP的程序员, 需要认真的想好, 你的代码会怎么被执行, 你怎么写代码, 最终的执行效率才最高. 而不像其他的语言, 程序员可以把一部分优化工作交给编译器.</p>
<p>这也就是我为什么说:”PHP对程序员的要求更高” 的原因. 当然, 这个是好是坏, 那就是见仁见智了.</p>
]]></content>
      <tags>
        <tag>编程语言</tag>
      </tags>
  </entry>
  <entry>
    <title>常用正则表达式</title>
    <url>/2012/06/12/commonly-used-regular-expression.html</url>
    <content><![CDATA[<figure class="highlight plaintext"><table><tr><td class="code"><pre><span class="line">验证数字：^[0-9]*$</span><br><span class="line">验证n位的数字：^\d&#123;n&#125;$</span><br><span class="line">验证至少n位数字：^\d&#123;n,&#125;$</span><br><span class="line">验证m-n位的数字：^\d&#123;m,n&#125;$</span><br><span class="line">验证零和非零开头的数字：^(0|[1-9][0-9]*)$</span><br><span class="line">验证有两位小数的正实数：^[0-9]+(.[0-9]&#123;2&#125;)?$</span><br><span class="line">验证有1-3位小数的正实数：^[0-9]+(.[0-9]&#123;1,3&#125;)?$</span><br><span class="line">验证非零的正整数：^\+?[1-9][0-9]*$</span><br><span class="line">验证非零的负整数：^\-[1-9][0-9]*$</span><br><span class="line">验证非负整数（正整数 + 0） ^\d+$</span><br><span class="line">验证非正整数（负整数 + 0） ^((-\d+)|(0+))$</span><br><span class="line">验证长度为3的字符：^.&#123;3&#125;$</span><br><span class="line">验证由26个英文字母组成的字符串：^[A-Za-z]+$</span><br><span class="line">验证由26个大写英文字母组成的字符串：^[A-Z]+$</span><br><span class="line">验证由26个小写英文字母组成的字符串：^[a-z]+$</span><br><span class="line">验证由数字和26个英文字母组成的字符串：^[A-Za-z0-9]+$</span><br><span class="line">验证由数字、26个英文字母或者下划线组成的字符串：^\w+$</span><br><span class="line">验证用户密码:^[a-zA-Z]\w&#123;5,17&#125;$ 正确格式为：以字母开头，长度在6-18之间，只能包含字符、数字和下划线。</span><br><span class="line">验证是否含有 ^%&amp;&#x27;,;=?$\&quot; 等字符：[^%&amp;&#x27;,;=?$\x22]+</span><br><span class="line">验证汉字：^[\u4e00-\u9fa5],&#123;0,&#125;$</span><br><span class="line">验证Email地址：^\w+[-+.]\w+)*@\w+([-.]\w+)*\.\w+([-.]\w+)*$</span><br><span class="line">验证InternetURL：^http://([\w-]+\.)+[\w-]+(/[\w-./?%&amp;=]*)?$ ；^[a-zA-z]+://(w+(-w+)*)(.(w+(-w+)*))*(?S*)?$</span><br><span class="line">验证电话号码：^(\(\d&#123;3,4&#125;\)|\d&#123;3,4&#125;-)?\d&#123;7,8&#125;$：--正确格式为：XXXX-XXXXXXX，XXXX-XXXXXXXX，XXX-XXXXXXX，XXX-XXXXXXXX，XXXXXXX，XXXXXXXX。</span><br><span class="line">验证身份证号（15位或18位数字）：^\d&#123;15&#125;|\d&#123;&#125;18$</span><br><span class="line">验证一年的12个月：^(0?[1-9]|1[0-2])$ 正确格式为：“01”-“09”和“1”“12”</span><br><span class="line">验证一个月的31天：^((0?[1-9])|((1|2)[0-9])|30|31)$ 正确格式为：01、09和1、31。</span><br><span class="line">整数：^-?\d+$</span><br><span class="line">非负浮点数（正浮点数 + 0）：^\d+(\.\d+)?$</span><br><span class="line">正浮点数 ^(([0-9]+\.[0-9]*[1-9][0-9]*)|([0-9]*[1-9][0-9]*\.[0-9]+)|([0-9]*[1-9][0-9]*))$</span><br><span class="line">非正浮点数（负浮点数 + 0） ^((-\d+(\.\d+)?)|(0+(\.0+)?))$</span><br><span class="line">负浮点数 ^(-(([0-9]+\.[0-9]*[1-9][0-9]*)|([0-9]*[1-9][0-9]*\.[0-9]+)|([0-9]*[1-9][0-9]*)))$</span><br><span class="line">浮点数 ^(-?\d+)(\.\d+)?$</span><br><span class="line">××××××××××××××××××××××××××××××××××××××</span><br><span class="line">以下未经测试，请验证后使用</span><br><span class="line">1.只能输入数字和英文的：</span><br><span class="line">&lt;input onkeyup=&quot;value=value.replace(/[\W]/g,&#x27;&#x27;) &quot; onbeforepaste=&quot;clipboardData.setData(&#x27;text&#x27;,clipboardData.getData(&#x27;text&#x27;).replace(/[^\d]/g,&#x27;&#x27;))&quot; ID=&quot;Text1&quot; NAME=&quot;Text1&quot;&gt;</span><br><span class="line">2.只能输入数字的：</span><br><span class="line">&lt;input onkeyup=&quot;value=value.replace(/[^\d]/g,&#x27;&#x27;) &quot; onbeforepaste=&quot;clipboardData.setData(&#x27;text&#x27;,clipboardData.getData(&#x27;text&#x27;).replace(/[^\d]/g,&#x27;&#x27;))&quot; ID=&quot;Text2&quot; NAME=&quot;Text2&quot;&gt;</span><br><span class="line">3.只能输入全角的：</span><br><span class="line">&lt;input onkeyup=&quot;value=value.replace(/[^\uFF00-\uFFFF]/g,&#x27;&#x27;)&quot; onbeforepaste=&quot;clipboardData.setData(&#x27;text&#x27;,clipboardData.getData(&#x27;text&#x27;).replace(/[^\uFF00-\uFFFF]/g,&#x27;&#x27;))&quot; ID=&quot;Text3&quot; NAME=&quot;Text3&quot;&gt;</span><br><span class="line">4.只能输入汉字的：</span><br><span class="line">&lt;input onkeyup=&quot;value=value.replace(/[^\u4E00-\u9FA5]/g,&#x27;&#x27;)&quot; onbeforepaste=&quot;clipboardData.setData(&#x27;text&#x27;,clipboardData.getData(&#x27;text&#x27;).replace(/[^\u4E00-\u9FA5]/g,&#x27;&#x27;))&quot; ID=&quot;Text4&quot; NAME=&quot;Text4&quot;&gt;</span><br><span class="line">5.邮件地址验证：</span><br><span class="line">var regu = &quot;^(([0-9a-zA-Z]+)|([0-9a-zA-Z]+[_.0-9a-zA-Z-]*[0-9a-zA-Z]+))@([a-zA-Z0-9-]+[.])+([a-zA-Z]&#123;2&#125;|net|NET|com|COM|gov|GOV|mil|MIL|org|ORG|edu|EDU|int|INT)$&quot;</span><br><span class="line">var re = new RegExp(regu);</span><br><span class="line">if (s.search(re) != -1) &#123;</span><br><span class="line">return true;</span><br><span class="line">&#125; else &#123;</span><br><span class="line">window.alert (&quot;请输入有效合法的E-mail地址 ！&quot;)</span><br><span class="line">return false;</span><br><span class="line">&#125;</span><br><span class="line">6.身份证：</span><br><span class="line">&quot;^\\d&#123;17&#125;(\\d|x)$&quot;</span><br><span class="line">7.17种正则表达式</span><br><span class="line">&quot;^\\d+$&quot; //非负整数（正整数 + 0）</span><br><span class="line">&quot;^[0-9]*[1-9][0-9]*$&quot; //正整数</span><br><span class="line">&quot;^((-\\d+)|(0+))$&quot; //非正整数（负整数 + 0）</span><br><span class="line">&quot;^-[0-9]*[1-9][0-9]*$&quot; //负整数</span><br><span class="line">&quot;^-?\\d+$&quot; //整数</span><br><span class="line">&quot;^\\d+([url=file://.//d+)?$]\\.\\d+)?$[/url]&quot; //非负浮点数（正浮点数 + 0）</span><br><span class="line">&quot;^(([0-9]+\\.[0-9]*[1-9][0-9]*)|([0-9]*[1-9][0-9]*\\.[0-9]+)|([0-9]*[1-9][0-9]*))$&quot; //正浮点数</span><br><span class="line">&quot;^((-\\d+([url=file://.//d+)?)%7C(0+(//.0+)?))$]\\.\\d+)?)|(0+(\\.0+)?))$[/url]&quot; //非正浮点数（负浮点数 + 0）</span><br><span class="line">&quot;^(-(([0-9]+\\.[0-9]*[1-9][0-9]*)|([0-9]*[1-9][0-9]*\\.[0-9]+)|([0-9]*[1-9][0-9]*)))$&quot; //负浮点数</span><br><span class="line">&quot;^(-?\\d+)([url=file://.//d+)?$]\\.\\d+)?$[/url]&quot; //浮点数</span><br><span class="line">&quot;^[A-Za-z]+$&quot; //由26个英文字母组成的字符串</span><br><span class="line">&quot;^[A-Z]+$&quot; //由26个英文字母的大写组成的字符串</span><br><span class="line">&quot;^[a-z]+$&quot; //由26个英文字母的小写组成的字符串</span><br><span class="line">&quot;^[A-Za-z0-9]+$&quot; //由数字和26个英文字母组成的字符串</span><br><span class="line">&quot;^\\w+$&quot; //由数字、26个英文字母或者下划线组成的字符串</span><br><span class="line">&quot;^[\\w-]+(\\.[\\w-]+)*@[\\w-]+(\\.[\\w-]+)+$&quot; //email地址</span><br><span class="line">&quot;^[a-zA-z]+://(\\w+(-\\w+)*)(\\.(\\w+(-\\w+)*))*(\\?\\S*)?$&quot; //url</span><br><span class="line">=============================================</span><br><span class="line">1.取消按钮按下时的虚线框</span><br><span class="line">在input里添加属性值 hideFocus 或者 HideFocus=true</span><br><span class="line">2.只读文本框内容</span><br><span class="line">在input里添加属性值 readonly</span><br><span class="line">3.防止退后清空的TEXT文档(可把style内容做做为类引用)</span><br><span class="line">&lt;INPUT style=behavior:url(#default#savehistory); type=text id=oPersistInput&gt;</span><br><span class="line">4.ENTER键可以让光标移到下一个输入框</span><br><span class="line">&lt;input onkeydown=&quot;if(event.keyCode==13)event.keyCode=9&quot; &gt;</span><br><span class="line">5.只能为中文(有闪动)</span><br><span class="line">&lt;input onkeyup=&quot;value=&quot;/value.replace(/[&quot; -~]/g,’’)&quot; onkeydown=&quot;if(event.keyCode==13)event.keyCode=9&quot;&gt;</span><br><span class="line">6.只能为数字(有闪动)</span><br><span class="line">&lt;input onkeyup=&quot;value=&quot;/value.replace(/[&quot;^\d]/g,’’) &quot;onbeforepaste=&quot;clipboardData.setData(’text’,clipboardData.getData(’text’).replace(/[^\d]/g,’’))&quot;&gt;</span><br><span class="line">7.只能为数字(无闪动)</span><br><span class="line">&lt;input ime-mode:disabled&quot; onkeydown=&quot;if(event.keyCode==13)event.keyCode=9&quot; onKeyPress=&quot;if ((event.keyCode&lt;48 || event.keyCode&gt;57)) event.returnValue=false&quot;&gt;</span><br><span class="line">8.只能输入英文和数字(有闪动)</span><br><span class="line">&lt;input onkeyup=&quot;value=&quot;/value.replace(/[\W]/g,&quot;’’)&quot; onbeforepaste=&quot;clipboardData.setData(’text’,clipboardData.getData(’text’).replace(/[^\d]/g,’’))&quot;&gt;</span><br><span class="line">9.屏蔽输入法</span><br><span class="line">&lt;input type=&quot;text&quot; name=&quot;url&quot; ime-mode:disabled&quot; onkeydown=&quot;if(event.keyCode==13)event.keyCode=9&quot;&gt;</span><br><span class="line">10. 只能输入 数字，小数点，减号（-） 字符(无闪动)</span><br><span class="line">&lt;input onKeyPress=&quot;if (event.keyCode!=46 &amp;&amp; event.keyCode!=45 &amp;&amp; (event.keyCode&lt;48 || event.keyCode&gt;57)) event.returnValue=false&quot;&gt;</span><br><span class="line">11. 只能输入两位小数，三位小数(有闪动)</span><br><span class="line">&lt;input maxlength=9 onkeyup=&quot;if(value.match(/^\d&#123;3&#125;$/))value=&quot;/value.replace(value,parseInt(value/10))&quot; ;value=&quot;/value.replace(/\.\d*\./g,’.&quot;’)&quot; onKeyPress=&quot;if((event.keyCode&lt;48 || event.keyCode&gt;57) &amp;&amp; event.keyCode!=46 &amp;&amp; event.keyCode!=45 || value.match(/^\d&#123;3&#125;$/) || /\.\d&#123;3&#125;$/.test(value)) &#123;event.returnValue=false&#125;&quot; id=text_kfxe name=text_kfxe&gt;</span><br><span class="line">&quot;^\\d+$&quot; //非负整数（正整数 + 0）</span><br><span class="line">&quot;^[0-9]*[1-9][0-9]*$&quot; //正整数</span><br><span class="line">&quot;^((-\\d+)|(0+))$&quot; //非正整数（负整数 + 0）</span><br><span class="line">&quot;^-[0-9]*[1-9][0-9]*$&quot; //负整数</span><br><span class="line">&quot;^-?\\d+$&quot; //整数</span><br><span class="line">&quot;^\\d+([url=file://\\.\\d+)?$]\\.\\d+)?$[/url]&quot; //非负浮点数（正浮点数 + 0）</span><br><span class="line">&quot;^(([0-9]+\\.[0-9]*[1-9][0-9]*)|([0-9]*[1-9][0-9]*\\.[0-9]+)|([0-9]*[1-9][0-9]*))$&quot; //正浮点数</span><br><span class="line">&quot;^((-\\d+([url=file://\\.\\d+)?)|(0+(\\.0+)?))$]\\.\\d+)?)|(0+(\\.0+)?))$[/url]&quot; //非正浮点数（负浮点数 + 0）</span><br><span class="line">&quot;^(-(([0-9]+\\.[0-9]*[1-9][0-9]*)|([0-9]*[1-9][0-9]*\\.[0-9]+)|([0-9]*[1-9][0-9]*)))$&quot; //负浮点数</span><br><span class="line">&quot;^(-?\\d+)([url=file://\\.\\d+)?$]\\.\\d+)?$[/url]&quot; //浮点数</span><br><span class="line">&quot;^[A-Za-z]+$&quot; //由26个英文字母组成的字符串</span><br><span class="line">&quot;^[A-Z]+$&quot; //由26个英文字母的大写组成的字符串</span><br><span class="line">&quot;^[a-z]+$&quot; //由26个英文字母的小写组成的字符串</span><br><span class="line">&quot;^[A-Za-z0-9]+$&quot; //由数字和26个英文字母组成的字符串</span><br><span class="line">&quot;^\\w+$&quot; //由数字、26个英文字母或者下划线组成的字符串</span><br><span class="line">&quot;^[\\w-]+(\\.[\\w-]+)*@[\\w-]+(\\.[\\w-]+)+$&quot; //email地址</span><br><span class="line">&quot;^[a-zA-z]+://(\\w+(-\\w+)*)(\\.(\\w+(-\\w+)*))*(\\?\\S*)?$&quot; //url</span><br><span class="line">&quot;^((\d&#123;1,3&#125;(,\d&#123;3&#125;)*?)|\d+)(\.\d+)?$ //带逗号的decimal</span><br><span class="line">具体的使用</span><br><span class="line">&lt;SCRIPT language=JavaScript&gt;</span><br><span class="line">var mm=/^\d+$/;</span><br><span class="line">function formCheck()</span><br><span class="line">&#123;</span><br><span class="line">if(!mm.test(document.f1.PropertyAmount.value))</span><br><span class="line">&#123;</span><br><span class="line">alert(&quot;请输入合法的数字&quot;);</span><br><span class="line">document.f1.PropertyAmount.focus();</span><br><span class="line">return false;</span><br><span class="line">&#125;</span><br><span class="line">return true;</span><br><span class="line">&#125;</span><br><span class="line">&lt;/SCRIPT&gt;</span><br></pre></td></tr></table></figure>

]]></content>
      <tags>
        <tag>编程语言</tag>
      </tags>
  </entry>
  <entry>
    <title>LDD命令的原理与使用方法</title>
    <url>/2012/07/07/the-ldd-command-using-the-principle-and-method.html</url>
    <content><![CDATA[<p>转自：<a href="http://blog.csdn.net/benben85/article/details/4161134">http://blog.csdn.net/benben85/article/details/4161134</a></p>
<p><em>作用：用来查看程式运行所需的共享库, 常用来解决程式因缺少某个库文件而不能运行的一些问题。</em></p>
<p>ldd命令原理</p>
<p>1、首先ldd不是个可执行程式，而只是个shell脚本<br>2、ldd能够显示可执行模块的dependency，<strong>其原理是通过设置一系列的环境变量</strong>，如下：LD_TRACE_LOADED_OBJECTS、LD_WARN、LD_BIND_NOW、LD_LIBRARY_VERSION、LD_VERBOSE等。当LD_TRACE_LOADED_OBJECTS环境变量不为空时，所有可执行程式在运行时，他*<em>都会只显示模块的</em><em><strong>dependency</strong></em>*，而程式并不真正执行。要不你能在shell终端测试一下，如下：<br>(1) export LD_TRACE_LOADED_OBJECTS&#x3D;1<br>(2) 再执行所有的程式，如ls等，看看程式的运行结果<br>3、ldd 显示可执行模块的dependency的工作原理，其实质是通过<code>ld-linux.so</code>（<code>elf</code>动态库的装载器）来实现的。我们知道，ld-linux.so模块会先于executable模块程式工作，并获得控制权，因此当上述的那些环境变量被设置时，ld-linux.so选择了显示可执行模块的dependency。</p>
<p>4、实际上能直接执行<code>ld-linux.so</code>模块，如：<code>/lib/ld-linux.so.2 --list program</code>（这相当于<code>ldd program</code>）</p>
<p>ldd命令使用方法(摘自ldd –help)<br>名称    ldd - 打印共享库的依赖关系<br>大纲    ldd [选项]…　文件…<br>描述    <strong>ldd输出在命令行上指定的每个程式或共享库需要的共享库。</strong></p>
<p>选项</p>
<pre><code>--version
打印ldd的版本号
-v --verbose
打印所有信息，例如包括符号的版本信息
-d --data-relocs
执行符号重部署，并报告缺少的目标对象（只对ELF格式适用）
-r --function-relocs
对目标对象和函数执行重新部署，并报告缺少的目标对象和函数（只对ELF格式适用）
--help 用法信息
</code></pre>
<p>注意:</p>
<pre><code>ldd的标准版本和glibc2一起提供。Libc5和老版本以前提供，在一些系统中还存在。在libc5版本中长选项不支持。另一方面，glibc2版本不支持-V选项，只提供等价的--version选项。
如果命令行中给定的库名字包含’/’，这个程式的libc5版本将使用他作为库名字；否则他将在标准位置搜索库。运行一个当前目录下的共享库，加前缀&quot;./&quot;。
错误:
ldd不能工作在a.out格式的共享库上。
ldd不能工作在一些非常老的a.out程式上，这些程式在支持ldd的编译器发行前已创建。如果你在这种类型的程式上使用ldd，程式将尝试argc = 0的运行方式，其结果不可预知。
</code></pre>
]]></content>
      <tags>
        <tag>Server&amp;OS</tag>
        <tag>理论</tag>
      </tags>
  </entry>
  <entry>
    <title>linux下chrome/chromium导入证书</title>
    <url>/2012/07/18/chrome_chromium-import-certificate.html</url>
    <content><![CDATA[<p>在linux下导入chrome或者chromium的证书，只需要检查下自己是否有certutil命令，然后执行下面的命令即可：</p>
<p>certutil -d sql:$HOME&#x2F;.pki&#x2F;nssdb -A -t “C,,” -n GoAgent -i ‘&#x2F;home&#x2F;ety001&#x2F;goagent&#x2F;local&#x2F;CA.crt’</p>
<p>说明：</p>
<p>1、该命令不需要root执行，只要当前用户即可。</p>
<p>2、-n后面的参数随便，就是个名字</p>
<p>3、-i参数是你要导入的证书的位置。</p>
<p>2013-01-08补充：</p>
<p>不知道是文件损坏还是怎么回事，一运行就出错，比如：</p>
<pre><code>certutil: function failed: security library: bad database.
</code></pre>
<p>或者：</p>
<pre><code>certutil: could not authenticate to token NSS Certificate DB.: An I/O error occurred during security authorization.
</code></pre>
<p>重建目录和文件也不行，找了好几次终于找到初始化的命令：</p>
<pre><code>modutil -changepw &quot;NSS Certificate DB&quot; -dbdir $HOME/.pki/nssdb
</code></pre>
]]></content>
      <tags>
        <tag>Server&amp;OS</tag>
      </tags>
  </entry>
  <entry>
    <title>又让BOM给坑掉了两个小时。。</title>
    <url>/2012/07/19/pay-attention-to-bom.html</url>
    <content><![CDATA[<p>今天帮别人调代码的时候遇到一个bug，就是在用thinkphp框架写一个模板页的时候，用的bootstrap，但是页面的文本框的高度不对，如下图：</p>
<p><a href="/img/2012/07/bom.png"><img src="/img/2012/07/bom-300x177.png"></a></p>
<p>鼓捣了一会，没有头绪，新建了一个一模一样的出来，放到另外一个空间跑，结果显示正常，仔细对比两者，发现区别在于灰色上面那个空白条。又是各种纠结后，最后无意中看到这个模板在geany的状态栏里显示含有BOM，我干你大爷的！又是BOM。重新搞一份没有BOM的，问题解决。。。</p>
<p>从百度百科摘出来的：</p>
<p>类似WINDOWS自带的<a href="http://baike.baidu.com/view/152865.htm">记事本</a>等软件，在保存一个以UTF-8编码的文件时，会在文件开始的地方插入三个不可见的字符（0xEF 0xBB 0xBF，即BOM）。它是一串隐藏的字符，用于让记事本等编辑器识别这个文件是否以UTF-8编码。对于一般的文件，这样并不会产生什么麻烦。但对于 PHP来说，BOM是个大麻烦。</p>
<p>PHP并不会忽略BOM，所以在读取、包含或者引用这些文件时，会把BOM作为该文件开头正文的一部分。根据嵌入式语言的特点，这串字符将被直接执行（显示）出来。由此造成即使页面的 top padding 设置为0，也无法让整个网页紧贴浏览器顶部，因为在html一开头有这3个字符呢！</p>
]]></content>
      <tags>
        <tag>编程语言</tag>
      </tags>
  </entry>
  <entry>
    <title>Archlinux关闭机器报警音</title>
    <url>/2012/08/16/archlinux-remove-spckr-module.html</url>
    <content><![CDATA[<p><del>archlinux加载模块时默认加载了pcspkr，去除掉即可。去除命令：sudo rmmod pcspkr，加载命令：sudo modprobe pcspkr。但这样只能起到临时作用，如果机器启动时就禁止加载模块，那么需要编辑&#x2F;etc&#x2F;rc.conf，在modules中加入：！pcspkr</del></p>
<p>最新方法：</p>
<p>在 <code>/etc/modprobe.d/</code> 中创建 <code>.conf</code> 文件，使用 <code>blacklist</code> 关键字屏蔽不需要的模块，例如如果不想装入 <code>pcspkr</code> 模块：</p>
<pre><code>/etc/modprobe.d/nobeep.conf
# Do not load the pcspkr module on boot
blacklist pcspkr
</code></pre>
<p>**注意: **<code>blacklist</code> 命令将屏蔽一个模板，所有不会自动装入，但是如果其它非屏蔽模块需要这个模块，系统依然会装入它。</p>
<p>要避免这个行为，可以让 modprobe 使用自定义的 <code>install</code> 命令，直接返回导入失败：</p>
<pre><code>/etc/modprobe.d/blacklist.conf
...
install MODULE /bin/false
...
</code></pre>
<p>这样就可以 “屏蔽” 模块及所有依赖它的模块。</p>
]]></content>
      <tags>
        <tag>Server&amp;OS</tag>
      </tags>
  </entry>
  <entry>
    <title>我的DELL 15R特别版安装了中国银行的安全控件后键盘失灵</title>
    <url>/2012/08/31/bank-of-china-is-rubbish.html</url>
    <content><![CDATA[<p>这个题目是摘自百度知道的题目，我也是15R特别版，也是在win7  64位下安装完中银的控件，键盘就不管用了，点击桌面文件也成了多选，初步判定是ctrl键成为了一直被触发的状态了。。。捣鼓半天最后发现了百度知道里一个很有用的答案，就是删掉</p>
<pre><code>C:\windows\system32\drivers\ETD.SYS
</code></pre>
<p>然后重启就OK了，不过副作用就是触摸板不能用了。看来是控件跟触摸板驱动冲突了。</p>
<p>我只想说：Bank of China is rubbish！</p>
<p>百度知道：<a href="http://zhidao.baidu.com/question/454034960.html">http://zhidao.baidu.com/question/454034960.html</a></p>
]]></content>
      <tags>
        <tag>杂七杂八</tag>
      </tags>
  </entry>
  <entry>
    <title>VFS虚拟文件系统</title>
    <url>/2012/08/26/vfs.html</url>
    <content><![CDATA[<p>转自<a href="http://dev.firnow.com/course/6_system/linux/linuxjq/2007211/19042.html">http://dev.firnow.com/course/6_system/linux/linuxjq/2007211/19042.html</a><br>蓝森林 <a href="http://www.lslnet.com/">http://www.lslnet.com</a> 2001年5月20日 21:16</p>
<p>作 者： difeijing</p>
<p>Richard Gooch <a href="mailto:&#x72;&#x67;&#x6f;&#x6f;&#99;&#x68;&#x40;&#97;&#116;&#110;&#x66;&#x2e;&#99;&#x73;&#x69;&#x72;&#x6f;&#x2e;&#x61;&#117;">&#x72;&#x67;&#x6f;&#x6f;&#99;&#x68;&#x40;&#97;&#116;&#110;&#x66;&#x2e;&#99;&#x73;&#x69;&#x72;&#x6f;&#x2e;&#x61;&#117;</a><br>23-APR-1999<br>翻译：difeijing <a href="mailto:&#100;&#x69;&#102;&#x65;&#x69;&#x6a;&#x69;&#x6e;&#x67;&#x40;&#50;&#54;&#51;&#x2e;&#x6e;&#x65;&#x74;">&#100;&#x69;&#102;&#x65;&#x69;&#x6a;&#x69;&#x6e;&#x67;&#x40;&#50;&#54;&#51;&#x2e;&#x6e;&#x65;&#x74;</a></p>
<h1 id="本文档中的惯例用法"><a href="#本文档中的惯例用法" class="headerlink" title="本文档中的惯例用法 "></a>本文档中的惯例用法 <section></h1><p>文 档中的每一节标题的右边都有一个字符串”<section>“。<br>每个小节都会有个”<subsection>“在右边。<br>这 些字符串是为了在文档中查询更容易而设的。</p>
<p>注意：本文档的最新更新可在下面找到：<br><a href="http://www.atnf.csiro.au/~rgooch/linux/docs/vfs.txt">http://www.atnf.csiro.au/~rgooch/linux/docs/vfs.txt</a></p>
<h1 id="它-到底是什么？"><a href="#它-到底是什么？" class="headerlink" title="它 到底是什么？ "></a>它 到底是什么？ <section></h1><p>Virtual File System(或者被称为Virtual Filesystem Switch)是Linux内核中的一个软件层，用于给用户空间的程序提供文件系统接口。它也提供了内核中的一个抽象功能，允许不同的文件系统共存。</p>
<h1 id="它-的工作方式的概览"><a href="#它-的工作方式的概览" class="headerlink" title="它 的工作方式的概览 "></a>它 的工作方式的概览 <section></h1><p>在这一节里，在讲解细节问题之前，我会简单扼要 的介绍一下VFS是如何工作的。首先，介绍一下当用户程序打开或者操作文件时发生了些什么，然后看看一个文件系统是如何被支持的。</p>
<h2 id="打开一-个文件"><a href="#打开一-个文件" class="headerlink" title="打开一 个文件 "></a>打开一 个文件 <subsection></h2><p>VFS实现了open(2)系统调用。路径参数被VFS用来在目 录入口缓存(dentry cache or “dcache”)。这提供了一个将路径名转化为特定的dentry的一个快的查找机制。</p>
<p>一 个单独的dentry通常包含一个指向i节点(inode)的指针。i节点存在于磁盘驱动器上，它可以是一个规则文件，目录，FIFO文件，等等。 Dentry存在于RAM中，并且永远不会被存到磁盘上：它们仅仅为了提高系统性能而存在。i节点存在于磁盘上，当需要时被拷入内存中，之后对它的任何改 变将被写回磁盘。存在于RAM中的i节点就是VFS的i节点，dentry所包含的指针指向的就是它。</p>
<p>dcache是你的整个文件空间的 观察点。跟Linus不同，我们中的大多数人不可能有足够的RAM空间来放我们的文件空间的所有文件的目录入口缓存(dentry),所以我们的 dcache会有缺少的项。为了将路径名转换为一个dentry,VFS不得不采取创建dentry的方式，并在创建dentry时将指针指向相应的i节 点。这是通过对i节点的查找完成的。</p>
<p>为了查找一个文件的i节点(通常从磁盘上读),VFS需要调用该文件的父目录的lookup()方 法，此方法是特定的文件系统所设置的。后面对此将会有更详尽的描述。</p>
<span id="more"></span>
<p>一旦VFS得到了所需要的dentry(同时也得到了相应的i节 点),我们就能够对文件做想要的操作：打开文件，或者用stat(2)来看i节点中的数据。stat(2)的操作非常简单：在VFS得到dentry之 后，它取得inode中的一些数据并将其中的一部分送回用户空间。打开一个文件需要其它的操作：分配一个struct file(定义于linux&#x2F;fs.h,这是内核中的文件描述)结构。新分配的structfile结构被指向dentry的指针和对文件进行操作的函数 集合所初始化，这些都是从i节点中得到的。通过这种方式，特定的文件系统实现才能起作用。</p>
<p>文件结构(struct file)被放在进程的文件描述符表中。</p>
<p>读，写和关闭文件(或者其它的VFS操作)是通过使用用户空间的文件描述符找到相应的文件结构 (struct file),然后调用所需要的方法函数来实现的。</p>
<p>当文件处于打开状态时，系统保持相应的dentry为”open”状态 (正在使用),这表示相应的i节点在被使用。</p>
<h2 id="注册和安装一个文件系统"><a href="#注册和安装一个文件系统" class="headerlink" title="注册和安装一个文件系统 "></a>注册和安装一个文件系统 <subsection></h2><p>如 果你想在内核中支持一种新的文件系统的话，你所需要做的仅仅是调用函数register_filesystem().你向内核中传递一个描述文件系统实现 的结构(struct filesystem), 此结构将被加入到内核的支持文件系统表中去。你可以运行下面的命令：<br>% cat &#x2F;proc&#x2F;filesystems<br>这样可以看到你的系统支持哪些文件系统。</p>
<p>当一个mount请求出现时，VFS将会为特定的文 件系统调用相应的方法。安装点的dentry结构将会被改为指向新文件系统的根i节点。</p>
<p>现在是看看细节的时候了，nice to look!</p>
<h1 id="struct-file-system-type"><a href="#struct-file-system-type" class="headerlink" title="struct file_system_type "></a>struct file_system_type <section></h1><p>此 结构描述了文件系统。在内核2.1.99中，此结构的定义如下：<br>(注:在2.2的内核中，此结构也没有变化)<br>struct file_system_type {<br>const char *name;<br>int fs_flags;<br>struct super_block *(*read_super) (struct super_block *, void *, int);<br>struct file_system_type * next;<br>};</p>
<p>其中各个域的意义：<br>name:文件系统的类型名称, 如”vfat”,”ext2”,等等。<br>fs_flags:变量标志,如FS_REQUIRES_DEV, FS_NO_DCACHE,等等.<br>read_super: 当此种文件系统的一个新的实例要被安装时，此方法会被调用。<br>next:被内部的VFS实现所使用，你只需要将其初试化为NULL。</p>
<p>函 数read_super具有以下的参数：<br>struct super_block *sb:超级块结构。此结构的一部分被VFS初始化，余下的部分必须被函数read_super初始化。<br>void * data:任意的安装选项，通常是ASCII的字符串。<br>int silent:表示当出现错误时是否保持安静。(不报警?)</p>
<p>read_super 方法必须确定指定的块设备是否包含了一个所支持的文件系统。当成功时返回超级块结构的指针，错误时返回NULL。</p>
<p>read_super方 法填充进超级块结构(struct super_block)的最有用的域是”s_op”域。这是一个指向struct super_operations的指针，此结构描述了文件系统实现的下一层细节。</p>
<h1 id="struct-super-operations"><a href="#struct-super-operations" class="headerlink" title="struct super_operations "></a>struct super_operations <section></h1><p>此结构描述了VFS对文件系统的超级块所能进行的操作。<br>在 内核2.1.99中，此结构的定义如下：<br>(注:在2.2的内核中，此结构已经有了改变)<br>struct super_operations {<br>void (*read_inode) (struct inode *);<br>void (*write_inode) (struct inode *);<br>void (*put_inode) (struct inode *);<br>void (*delete_inode) (struct inode *);<br>int (*notify_change) (struct dentry *, struct iattr *);<br>void (*put_super) (struct super_block *);<br>void (*write_super) (struct super_block *);<br>int (*statfs) (struct super_block *, struct statfs *, int);<br>int (*remount_fs) (struct super_block *, int *, char *);<br>void (*clear_inode) (struct inode *);<br>};</p>
<p>除 非特别提出，所有的方法都在未加锁的情况下被调用，这意味着大多数方法都可以安全的被阻塞。所有的方法都仅仅在进程空间被调用（例如，在中断处理程序和底 半部中不能调用它们）</p>
<p>read_inode:从一个文件系统中读取一个特定的i节点时调用此方法。i节点中的域”i_ino”被VFS初 始化为指向所读的i节点，其余的域被此方法所填充。</p>
<p>write_inode:当VFS需要向磁盘上的一个i节点写时调用。</p>
<p>put_inode: 当VFS的i节点被从i节点缓冲池移走时被调用。此方法是可选的。</p>
<p>delete_inode:当VFS想删除一个i节点时调用次方法。</p>
<p>notify_change: 当VFS的i节点的属性被改变时调用。若此域为NULL则VFS会调用rite_inode.此方法调用时需要锁住内核。<br>put_super:当 VFS要释放超级块时调用(umount一个文件系统).此方法调用时需要锁住内核。</p>
<p>write_super:当VFS超级块需要被写入 磁盘时被调用。此方法为可选的。</p>
<p>statfs:当VFS需要得到文件系统的统计数据时调用。此方法调用时需要锁住内核。</p>
<p>remount_fs: 当文件系统被重新安装时调用。此方法调用时需要锁住内核。</p>
<p>clear_inode:当VFS清除i节点时调用。可选项。</p>
<p>以 上方法中，read_inode需要填充”i_op”域，此域为一个指向struct inode_operations结构的指针，它描述了能够对一个单独的i节点所能进行的操作。</p>
<h1 id="struct-inode-operations"><a href="#struct-inode-operations" class="headerlink" title="struct inode_operations "></a>struct inode_operations <section></h1><p>此结构描述了VFS 能够对文件系统的一个i节点所能进行的操作。<br>在内核2.1.99中，此结构的定义如下：<br>(注:在2.2的内核中，此结构已经有了少许改 变)<br>struct inode_operations {<br>struct file_operations * default_file_ops;<br>int (*create) (struct inode *,struct dentry *,int);<br>int (*lookup) (struct inode *,struct dentry *);<br>int (*link) (struct dentry *,struct inode *,struct dentry *);<br>int (*unlink) (struct inode *,struct dentry *);<br>int (*symlink) (struct inode *,struct dentry *,const char *);<br>int (*mkdir) (struct inode *,struct dentry *,int);<br>int (*rmdir) (struct inode *,struct dentry *);<br>int (*mknod) (struct inode *,struct dentry *,int,int);<br>int (*rename) (struct inode *, struct dentry *,<br>struct inode *, struct dentry *);<br>int (*readlink) (struct dentry *, char *,int);<br>struct dentry * (*follow_link) (struct dentry *, struct dentry *);<br>int (*readpage) (struct file *, struct page *);<br>int (*writepage) (struct file *, struct page *);<br>int (*bmap) (struct inode *,int);<br>void (*truncate) (struct inode *);<br>int (*permission) (struct inode *, int);<br>int (*smap) (struct inode *,int);<br>int (*updatepage) (struct file *, struct page *, const char *,<br>unsigned long, unsigned int, int);<br>int (*revalidate) (struct dentry *);<br>};</p>
<p>default_file_ops:这是一个指向struct file_operations的指针，包含了对一个打开的文件所能进行的操作。</p>
<p>create:被open(2)和creat(2)所调 用，仅仅在你要支持普通文件时才需要。参数中的dentry不应该包含有i节点的指针(即应该为一个negative dentry)。这里你可能需要对传入的dentry和i节点调用函数d_instantiate.</p>
<p>lookup:当VFS要在一个父目 录中查找一个i节点时调用。待查找的文件名在dentry中。此方法必须调用d_add函数把找到的i节点插入到dentry中，i节点 的”i_count”域要加一。若指定的i节点不存在的话，一个NULL的i节点指针将被插入到dentry中去(这种情况的dentry被称为 negative dentry)。Returning an error code from this routinemust only be done on a real error, otherwise creating inodes withsystem calls like create(2), mknod(2), mkdir(2) and so on will fail.Ifyou wish to overload the dentry methods then you should initialise the”d_dop” field in the dentry; this is a pointer to a struct”dentry_operations”.This method is called with the directory semaphoreheld。</p>
<p>link:被link(2)所调用。仅在你需要支持 hard link时才需要它。跟create方法相同的原因，你可能在此方法中也需要调用d_instantiate()函数来验证。</p>
<p>unlink: 被unlink(2)所调用。仅在你要支持对i节点的删除时才需要它。</p>
<p>symlink:被symlink(2)调用。仅在需要支持符号链 接时才需要它。通上面两处，你需要对传入的参数进行验证，要调用d_instantiate()函数。</p>
<p>mkdir:被mkdir(2)调 用。仅在你要支持建立子目录时才需要它。同上，你需要调用d_instantiate()函数进行验证。</p>
<p>rmdir:被rmdir(2) 所调用。仅在你要支持对子目录的删除时才需要它。</p>
<p>mknod:被mknod(2)所调用，用于建立一个设备i节点，或者FIFO，或 socket.仅当你需要支持对这些类型的i节点的建立时才需要此方法。同上面几个，你可能也需要调用_instantiate来验证参数。</p>
<p>readlink: 被readlink(2)调用。仅当你要支持对符号链接的读取才需要它。</p>
<p>follow_link:被VFS调用，用以从一个符号链接找到 相应的i节点。仅当你需要支持符号链接时才需要此方法。</p>
<h1 id="struct-file-operations"><a href="#struct-file-operations" class="headerlink" title="struct file_operations "></a>struct file_operations <section></h1><p>结构file_operations包含了VFS对一个已 打开文件的操作。<br>在内核2.1.99中，此结构的定义如下：<br>(注:在2.2的内核中，此结构已经有了少许改变)<br>struct file_operations {<br>&#x2F;*在VFS需要移动文件位置指针时被调用　*&#x2F;<br>loff_t (*llseek) (struct file <em>, loff_t, int);<br>&#x2F;</em> 被read系统调用所使用　*&#x2F;<br>ssize_t (*read) (struct file *, char *, size_t, loff_t <em>);<br>&#x2F;</em> 被write系统调用所使用　*&#x2F;<br>ssize_t (*write) (struct file</p>
<p>const char *, size_t, loff_t *);<br>int (*readdir) (struct file *, void *, filldir_t);<br>unsigned int (*poll) (struct file *, struct poll_table_struct *);<br>int (*ioctl) (struct inode *, struct file *, unsigned int, unsigned long);<br>int (*mmap) (struct file *, struct vm_area_struct *);<br>int (*open) (struct inode *, struct file *);<br>int (*release) (struct inode *, struct file *);<br>int (*fsync) (struct file *, struct dentry *);<br>int (*fasync) (struct file *, int);<br>int (*check_media_change) (kdev_t dev);<br>int (*revalidate) (kdev_t dev);<br>int (*lock) (struct file *, int, struct file_lock *);<br>};</p>
<p>llseek:当 VFS需要移动文件指针的位置时调用。</p>
<p>read:被read(2)所调用。</p>
<p>write:被write(2)所调用。</p>
<p>readdir: 当VFS需要读取目录中的内容时被调用。</p>
<p>poll: called by the VFS when a process wants to check if there isactivity on this file and (optionally) go to sleep until there isactivity.<br>(注：这里我怎么想都翻不好，所以就把原文放在这里了，poll就是相当于select的东西)</p>
<p>ioctl: 被ioctl(2)所调用。</p>
<p>mmap:被mmap(2)所调用。</p>
<p>open:当VFS要打开一个i节点时调用它。当VFS 打开一个文件时，它建立一个新的structfile结构，并用i节点中的”default_file_ops”来初始化其中的f_op域，然后对新分配 的文件结构调用open方法。你可以认为open方法实际上属于struct inode_operations。I think it’s done the way it isbecause it makes filesystems simpler toimplement.open方法是一个很好的初始化文件结构中的”private_data”域的的地方。</p>
<p>release:当没有 对被打开文件的引用时调用此方法。</p>
<p>fsync:被fsync(2)所调用。</p>
<p>fasync:当用fcntl(2)激活一个 文件的异步模式时此方法被调用。</p>
<p>这些文件操作是由i节点所在的特定文件系统所实现的。当打开一个设备节点时(字符或块设备特殊文件),大 多数文件系统会调用VFS中的特定支持例程，由此来找到所需要的设备驱动信息；</p>
<p>这些支持例程用设备驱动程序的方法来代替文件系统的文件操 作，然后继续对文件调用新的open方法。这就是为什么当你打开文件系统上的一个设备特殊文件时，最后被调用的却是设备驱动程序的open方法。另 外，devfs(DeviceFilesystem)有一个从设备节点到设备驱动程序的更直接的方式(这是非官方的内核补丁)</p>
<h1 id="struct-dentry-operations"><a href="#struct-dentry-operations" class="headerlink" title="struct dentry_operations "></a>struct dentry_operations <section></h1><p>This describes how a filesystem can overload the standard dentry<br>operations.Dentries 和dcache是属于VFS和单个文件系统实现的，设备驱动与此无关。<br>在内核2.1.99中，此结构的定义如下：<br>(注:在2.2的内核 中，此结构没有改变)<br>struct dentry_operations {<br>int (*d_revalidate)(struct dentry *);<br>int (*d_hash) (struct dentry *, struct qstr *);<br>int (*d_compare) (struct dentry *, struct qstr *, struct qstr *);<br>void (*d_delete)(struct dentry *);<br>void (*d_release)(struct dentry *);<br>void (*d_iput)(struct dentry *, struct inode *);<br>};</p>
<p>d_revalidate:当 VFS要使一个dentry重新生效时被调用。</p>
<p>d_hash:当VFS向哈希表中加入一个dentry时被调用。</p>
<p>d_compare: 当指向一个dentry的最后的引用被去除时此方法被调用，因为这意味这没有人在使用此dentry;当然，此dentry仍然有效，并且仍然在 dcache中。</p>
<p>d_release: 当一个dentry被清除时调用此方法。</p>
<p>d_iput:当一个dentry释放 它的i节点时(在dentry被清除之前)此方法被调用。The default when thisis NULL is that the VFS calls iput(). If you define this method, youmust call iput() yourself.</p>
<p>每 个dentry都有一个指向其父目录dentry的指针，一个子dentry的哈希列表。子dentry基本上就是目录中的文件。</p>
<p>dget: 为一个已经存在的dentry打开一个新的句柄(这仅仅增加引用计数)</p>
<p>dput:关闭一个dentry的句柄(减少引用计数).如果引用 计数减少为0,d_delete方法将会被调用；并且，如果此dentry仍然在其父目录的哈希列表中的话，此dentry将被放置于一个未被使用的列表 中。将dentry放置于未使用表中意味着当系统需要更多的RAM时，将会遍历未使用的dentry的列表，并回收其内存空间。假如当detry的引用计 数为0时，它已经没有在父目录的哈希表中的话，在d_delete方法被调用之后系统就会回收起内存空间。</p>
<p>d_drop: 此方法将一个dentry从其父目录的哈希列表中去掉。如果被去掉的dentry的引用计数降为0的话，系统会马上调用d_put来去掉此dentry.</p>
<p>d_delete: 删除一个dentry.如果没有别的对此dentry的打开引用的话，此dentry会变成一个negative dentry(d_iput方法会被调用);如果有别的对此dentry的引用的话，将会调用d_drop.</p>
<p>d_add:向父目录的哈希 列表中加入一个dentry,然后调用d_instantiate().</p>
<p>d_instantiate:把一个dentry加入别名哈希列 表中，并更新其d_inode域为所给的i节点。i节点中的i_count域加一。假如i节点的指针为NULL，此dentry就被称 为”negative dentry”.此函数通常在为一个已存在的negativedentry建立i节点时被调用。</p>
]]></content>
      <tags>
        <tag>Server&amp;OS</tag>
      </tags>
  </entry>
  <entry>
    <title>一键LNMP包安装MagickWand</title>
    <url>/2012/09/01/install-magickwand-under-lnmp-env.html</url>
    <content><![CDATA[<p>由于项目开发需要，里面用到的一个图片缩放处理的PHP类库使用了MagickWand扩展，所以我需要在本地开发环境中配置一下。我本地的开发环境是LinuxDeepin + LNMP的一键安装包，默认是不带MagickWand的。</p>
<p>首先是用LNMP文件夹下的脚本先安装ImageMagick，这个很简单，一会就搞定了，然后去MagickWand的官网下载MagickWand包，下载回来后，按照网上说的编译成扩展形式，但是编译出错了，忘记是提示什么了，在百度上搜索了下，说要先安装libmagickwand-dev，于是先sudo apt-get install libmagickwand-dev，如果你找不到这个包就apt-cache search magickwand下看看。</p>
<p>安装好后，重新编译，编译成功得到magickwand.so文件了，我的在&#x2F;usr&#x2F;local&#x2F;php&#x2F;lib&#x2F;php&#x2F;extensions&#x2F;no-debug-none-zts-20060613&#x2F;下面，然后去php.ini中加入extension &#x3D; magickwand.so，重启php-fpm，提示错误：</p>
<p>undefined symbol zif_magicksetimageend</p>
<p>我了个去，各种搜索，最后只有在google上用zif_magicksetimageend搜出5条一模一样的问题，但还不是我要找的。。。。</p>
<p>昨天折腾了一天，换了magickwand 1.0.9在官网上的3种形式的压缩包，他们svn库的我也编译过了，错误依旧，今天索性换上个版本的试试，结果可以了。。。shit。。。。</p>
<p>另外编译MagickWand的时候，不要忘记 –enabled-share这个参数。</p>
]]></content>
      <tags>
        <tag>Server&amp;OS</tag>
      </tags>
  </entry>
  <entry>
    <title>IE6 Bug overflow:hidden失效</title>
    <url>/2012/09/06/ie6-bug-overflowhidden-display.html</url>
    <content><![CDATA[<p>当父元素的直接子元素或者下级子元素的样式拥有position:relative属性时，父元素的overflow:hidden属性就会失效。</p>
<p>解决方案：在父元素中也添加position:relative属性即可。</p>
]]></content>
      <tags>
        <tag>前端</tag>
      </tags>
  </entry>
  <entry>
    <title>移植goahead到android或其他嵌入式linux系统上</title>
    <url>/2012/09/12/move-goahead-webserver-to-android.html</url>
    <content><![CDATA[<p>从用上android平板开始就在想能不能把web服务器移植到平板上来，这样就能实现移动开发了，比带着笔记本方便多了，没想到这个已经是有人实现出来了，本文转载自：<a href="http://alex-yang-xiansoftware-com.iteye.com/blog/1498536">http://alex-yang-xiansoftware-com.iteye.com/blog/1498536</a></p>
<p>GoAhead是一款强大的嵌入式的web服务器，广泛应用在各种潜入式的系统中。支持各种多种操作系统。可以使用静态html，cgi或ASP以及嵌入式的JavaScript。而现在android又在嵌入式系统中应用越来越广泛，以下为在android上移植goahead的详细步骤，其他嵌入式linux与此相同：</p>
<p><strong>1.下载goahead的源码</strong></p>
<p><a href="https://github.com/embedthis/goahead/downloads">https://github.com/embedthis/goahead/downloads</a></p>
<p><strong>2.下载和解压arm-linux-gcc</strong><br>比如解压到&#x2F;usr&#x2F;local&#x2F;arm-gcc目录</p>
<p><strong>3.修改goahead的mkfile文件</strong></p>
<p>打开goahead&#x2F;LINUX&#x2F;Makefile文件，修改gcc和ar变量，如下两行：</p>
<p>CC&#x3D;&#x2F;usr&#x2F;local&#x2F;arm-gcc&#x2F;opt&#x2F;FriendlyARM&#x2F;toolschain&#x2F;4.4.3&#x2F;bin&#x2F;arm-none-linux-gnueabi-gcc<br>AR&#x3D;&#x2F;usr&#x2F;local&#x2F;arm-gcc&#x2F;opt&#x2F;FriendlyARM&#x2F;toolschain&#x2F;4.4.3&#x2F;bin&#x2F;arm-none-linux-gnueabi-ar</p>
<p>为了省去链接的麻烦，修改CFLAGS变量，添加static参数，直接修改为静态链接(否则在<br>执行编译后的目标码时一直报webs not found错误)：</p>
<p>CFLAGS &#x3D; -static -DWEBS -DOS&#x3D;&quot;LINUX&quot; -  DLINUX $(UMSW) $(DASW) $(SSLSW) $(IFMODSW)</p>
<span id="more"></span>
<p><strong>4.将goahead&#x2F;LINUX&#x2F;main.c的initWebs函数中的如下代码注释：</strong></p>
<p>if (gethostname(host, sizeof(host)) &lt; 0) {<br>error(E_L, E_LOG, T(“Can’t get hostname”));<br>return -1;<br>}<br>if ((hp &#x3D; gethostbyname(host)) &#x3D;&#x3D; NULL) {<br>error(E_L, E_LOG, T(“Can’t get host address”));<br>return -1;<br>}<br>memcpy((char *) &amp;intaddr, (char *) hp-&gt;h_addr_list[0],<br>(size_t) hp-&gt;h_length);</p>
<p>修改端口号为8080:</p>
<p>static int   port &#x3D; 8080;</p>
<p><strong>5.修改web服务器的根路径,在goahead&#x2F;LINUX&#x2F;initWebs函数中修改</strong><br>修改如下两行：</p>
<p>static char_t  <em>rootWeb &#x3D; T(&#x2F;data&#x2F;local&#x2F;webroot);    &#x2F;</em> Root web directory *&#x2F;<br>static char_t   <em>demoWeb &#x3D; T(&#x2F;data&#x2F;local&#x2F;webrootdemo);  &#x2F;</em> Root web directory *&#x2F;<br>修改如下代码：</p>
<p>sprintf(webdir, %s&#x2F;%s, dir, demoWeb);为:</p>
<p>sprintf(webdir, %s,  demoWeb);</p>
<p>修改如下代码：</p>
<p>sprintf(webdir, %s&#x2F;%s, dir, demoWeb);为：</p>
<p>sprintf(webdir, %s,  rootWeb);<br><strong>6.添加监听端口的提示：</strong><br>在在goahead&#x2F;webs.c的websOpenListen函数的倒数第二行增加如下代码:<br>fprintf(stderr,”goahead has started!\nlistener port:%d\n”,port);<br>使goahead运行起来我们可以看到它的监听端口。</p>
<p><strong>7.编译：</strong></p>
<p>在goahead&#x2F;LINUX下执行make命令进行编译，在此目录下生产webs可执行文件</p>
<p><strong>8.创建相关目录</strong><br>创建&#x2F;data&#x2F;local目录；<br>然后在此目录下创建webroot文件夹和webrootdemo文件夹；<br>在webroot目录下创建cgi-bin目录<br>在cgi-bin目录下创建tmp目录</p>
<p><strong>8.运行</strong><br>拷贝webs到android的&#x2F;data&#x2F;local目录下，并且修改为可执行权限，然<br>后在&#x2F;data&#x2F;local目录下，执行如下命令.&#x2F;webs &amp;</p>
<p><strong>9.测试</strong><br>在&#x2F;data&#x2F;local&#x2F;webroot文件夹下放入测试的静态网页hello.html<br>在android的浏览器上输入<br><a href="http://ip:8080/hello.html">http://ip:8080/hello.html</a><br>就可以看到hello.html网页的内容了；<br>在&#x2F;data&#x2F;local&#x2F;webroot放入goahead&#x2F;wwwdemo&#x2F;asptest.asp<br>然后在android的浏览器上输入<br><a href="http://ip:8080/asptest.asp,%E5%B0%B1%E5%8F%AF%E4%BB%A5%E7%9C%8B%E5%88%B0asptest.asp%E7%9A%84%E6%89%A7%E8%A1%8C%E7%BB%93%E6%9E%9C%E4%BA%86%E3%80%82">http://ip:8080/asptest.asp,就可以看到asptest.asp的执行结果了。</a><br>在&#x2F;data&#x2F;local&#x2F;webroot&#x2F;cgi-bin目录下放入<br>goahead&#x2F;wwwdemo&#x2F;cgi- bin&#x2F;cgitest<br>然后在android的浏览器上输入<br><a href="http://ip:8080/cgi-bin/cgitest,%E5%B0%B1%E5%8F%AF%E4%BB%A5%E7%9C%8B%E5%88%B0cgi%E7%9A%84%E6%89%A7%E8%A1%8C%E7%BB%93%E6%9E%9C%E4%BA%86%E3%80%82">http://ip:8080/cgi-bin/cgitest,就可以看到cgi的执行结果了。</a><br>也可以使用pc测试(前提是pc的ip应该和运行goahead程序的android或linux在同<br>一网段)，结果一样。</p>
]]></content>
      <tags>
        <tag>Server&amp;OS</tag>
      </tags>
  </entry>
  <entry>
    <title>php判断字符长度</title>
    <url>/2012/11/08/php-countthe-string-length.html</url>
    <content><![CDATA[<p>这个方法很多。 记录一个简单的。</p>
<p>mb_strlen($str, ‘GBK’);</p>
<p>缺点是要安装mb库。</p>
<p>不过这个还是有部分问题待解决。</p>
<p>GB码编码规则是这样的：每个汉字由两个字节构成，第一个字节的范围从0XA1－0XFE，共96种。第二个字节的范围分别为0XA1－0XFE，共96种。利用这两个字节共可定义出 96 * 96＝8836种汉字。实际共有6763个汉字。<br>BIG5码编码规则是这样的：每个汉字由两个字节构成，第一个字节的范围从0X81－0XFE，共126种。第二个字节的范围分别为 0X40－0X7E，0XA1－0XFE，共157种。也就是说，利用这两个字节共可定义出 126 * 157＝19782种汉字。这些汉字的一部分是我们常用到的，如一、丁，这些字我们称为常用字，其BIG5码的范围为0XA440－0XC671，共 5401个。较不常用的字，如滥、调，我们称为次常用字，范围为 0XC940－0XF9FE，共7652个，剩下的便是一些特殊字符。</p>
<p>安全点的方法。</p>
<p>function StrLenW($str)<br>{<br>$count &#x3D; 0;<br>$len &#x3D; strlen($str);<br>for($i&#x3D;0; $i&lt;$len; $i++,$count++)<br>if(ord($str[$i])&gt;&#x3D;128)<br>$i++;<br>return $count;<br>}</p>
<p>采自<a href="http://www.830abu.com/">八点半的阿布</a></p>
]]></content>
      <tags>
        <tag>编程语言</tag>
      </tags>
  </entry>
  <entry>
    <title>zoom清除ie6浮动bug</title>
    <url>/2012/10/15/zoom-can-clear-float-in-ie6.html</url>
    <content><![CDATA[<p>zoom:1在ie6中可以用来清除浮动，对于一些嵌套容器的浮动问题，这个zoom:1是个很不错的解决方案。</p>
<p>详情参见一下两篇文章：<a href="http://www.cnblogs.com/wangluochong/archive/2012/06/29/2570092.html">http://www.cnblogs.com/wangluochong/archive/2012/06/29/2570092.html</a></p>
<p><a href="http://51ui.blog.163.com/blog/static/61900372200828114494/">http://51ui.blog.163.com/blog/static/61900372200828114494/</a></p>
]]></content>
      <tags>
        <tag>前端</tag>
      </tags>
  </entry>
  <entry>
    <title>HeartBeat安装过程中出现hacluster用户已存在</title>
    <url>/2012/11/13/heartbeat-setup-user-hacluster-exsits.html</url>
    <content><![CDATA[<p>HeartBeat安装<br>[root@ha ~]# yum -y install heartbeat<br>安装过程中会报错：<br>useradd: user hacluster exists<br>error: %pre(heartbeat-2.1.3-3.el5.centos.i386) scriptlet failed, exit status 9<br>error:   install: %pre scriptlet failed (2), skipping heartbeat-2.1.3-3.el5.centos<br>退出后，再次执行：<br>[root@ha ~]# yum -y install heartbeat</p>
]]></content>
      <tags>
        <tag>Server&amp;OS</tag>
      </tags>
  </entry>
  <entry>
    <title>深入浅出REST</title>
    <url>/2012/10/04/rest.html</url>
    <content><![CDATA[<p>转自：<a href="https://www.infoq.cn/article/rest-introduction">https://www.infoq.cn/article/rest-introduction</a></p>
<p>不知你是否意识到，围绕着什么才是实现异构的应用到应用通信的“正确”方式，一场争论正进行的如火如荼：虽然当前主流的方式明显地集中在基于SOAP、WSDL和WS-*规范的Web Services领域，但也有少数人用细小但洪亮的声音主张说更好的方式是REST，表述性状态转移（REpresentational State Transfer）的简称。在本文中，我不会涉及争论的话题，而是尝试对REST和RESTful HTTP应用集成做实用性的介绍。以我的经验，有些话题一旦触及就会引来众多的讨论，当涉及到这方面话题的时候，我会深入详细地阐述。</p>
<h2 id="REST关键原则"><a href="#REST关键原则" class="headerlink" title="REST关键原则"></a>REST关键原则</h2><p>大部分对REST的介绍是以其正式的定义和背景作为开场的。但这儿且先按下不表，我先提出一个简单扼要的定义：REST定义了应该如何正确地使用（这和大多数人的实际使用方式有很大不同）Web标准，例如HTTP和URI。如果你在设计应用程序时能坚持REST原则，那就预示着你将会得到一个使用了优质Web架构（这将让你受益）的系统。总之，五条关键原则列举如下：</p>
<ul>
<li>为所有“事物”定义ID</li>
<li>将所有事物链接在一起</li>
<li>使用标准方法</li>
<li>资源多重表述</li>
<li>无状态通信</li>
</ul>
<p>下面让我们进一步审视这些原则。</p>
<h2 id="为所有“事物”定义ID"><a href="#为所有“事物”定义ID" class="headerlink" title="为所有“事物”定义ID"></a>为所有“事物”定义ID</h2><p>在这里我使用了“事物”来代替更正式准确的术语“资源”，因为一条如此简单的原则，不应该被淹没在术语当中。思考一下人们构建的系统，通常会找到一系列值得被标识的关键抽象。每个事物都应该是可标识的，都应该拥有一个明显的ID——在Web中，代表ID的统一概念是：URI。URI构成了一个全局命名空间，使用URI标识你的关键资源意味着它们获得了一个唯一、全局的ID。</p>
<p>对事物使用一致的命名规则（naming scheme）最主要的好处就是你不需要提出自己的规则——而是依靠某个已被定义，在全球范围中几乎完美运行，并且能被绝大多数人所理解的规则。想一下你构建的上一个应用（假设它不是采用RESTful方式构建的）中的任意一个高级对象（high-level object），那就很有可能看到许多从使用唯一标识中受益的用例。比如，如果你的应用中包含一个对顾客的抽象，那么我可以相当肯定，用户会希望将一个指向某个顾客的链接，能通过电子邮件发送到同事那里，或者加入到浏览器的书签中，甚至写到纸上。更透彻地讲：如果在一个类似于Amazon.com的在线商城中，没有用唯一的ID（一个URI）标识它的每一件商品，可想而知这将是多么可怕的业务决策。</p>
<p>当面对这个原则时，许多人惊讶于这是否意味着需要直接向外界暴露数据库记录（或者数据库记录ID）——自从多年以来面向对象的实践告诫我们，要将持久化的信息作为实现细节隐藏起来之后，哪怕是刚有点想法都常会使人惊恐。但是这条原则与隐藏实现细节两者之间并没有任何冲突：通常，值得被URI标识的事物——资源——要比数据库记录抽象的多。例如，一个定单资源可以由定单项、地址以及许多其它方面（可能不希望作为单独标识的资源暴露出来）组成。标识所有值得标识的事物，领会这个观念可以进一步引导你创造出在传统的应用程序设计中不常见的资源：一个流程或者流程步骤、一次销售、一次谈判、一份报价请求——这都是应该被标识的事物的示例。同样，这也会导致创建比非RESTful设计更多的持久化实体。</p>
<p>下面是一些你可能想到的URI的例子：</p>
<pre><code>http://example.com/customers/1234
http://example.com/orders/2007/10/776654
http://example.com/products/4554
http://example.com/processes/salary-increase-234
</code></pre>
<p>正如我选择了创建便于阅读的URI——这是个有用的观点，尽管不是RESTful设计所必须的——应该能十分容易地推测出URI的含义：它们明显地标识着单一“数据项”。但是再往下看：</p>
<pre><code>http://example.com/orders/2007/11
http://example.com/products?color=green
</code></pre>
<p>首先，这两个URI看起来与之前的稍有不同——毕竟，它们不是对一件事物的标识，而是对一类事物集合的标识（假定第一个URI标识了所有在2007年11月份提交的定单，第二个则是绿颜色产品的集合）。但是这些集合自身也是事物（资源），也应该被标识。</p>
<p>注意，使用唯一、全局统一的命名规则的好处，既适用于浏览器中的Web应用，也适用于机对机（machine-to-machine，m2m）通信。</p>
<p>来对第一个原则做下总结：使用URI标识所有值得标识的事物，特别是应用中提供的所有“高级”资源，无论这些资源代表单一数据项、数据项集合、虚拟亦或实际的对象还是计算结果等。</p>
<h2 id="将所有事物链接在一起"><a href="#将所有事物链接在一起" class="headerlink" title="将所有事物链接在一起"></a>将所有事物链接在一起</h2><p>接下来要讨论的原则有一个有点令人害怕的正式描述：“超媒体被当作应用状态引擎（Hypermedia as the engine of application state）”，有时简写为HATEOAS。（严格地说，这不是我说的。）这个描述的核心是<strong>超媒体</strong>概念，换句话说：是<strong>链接</strong>的思想。链接是我们在HTML中常见的概念，但是它的用处绝不局限于此（用于人们网络浏览）。考虑一下下面这个虚构的XML片段：</p>
<pre><code>&lt;order self=&quot;http://example.com/customers/1234&quot;&gt;
   &lt;amount&gt;23&lt;/amount&gt;
   &lt;product ref=&quot;http://example.com/products/4554&quot;&gt;
   &lt;customer ref=&quot;http://example.com/customers/1234&quot;&gt;
&lt;/customer&gt; &lt;/product&gt;&lt;/order&gt;
</code></pre>
<p>如果你观察文档中product和customer的链接，就可以很容易地想象到，应用程序（已经检索过文档）如何“跟随”链接检索更多的信息。当然，如果使用一个遵守专用命名规范的简单“id”属性作为链接，也是可行的——<strong>但是仅限于应用环境之内</strong>。使用URI表示链接的优雅之处在于，链接可以指向由不同应用、不同服务器甚至位于另一个大陆上的不同公司提供的资源——因为URI命名规范是全球标准，构成Web的所有资源都可以互联互通。</p>
<p>超媒体原则还有一个更重要的方面——应用“状态”。简而言之，实际上服务器端（如果你愿意，也可以叫服务提供者）为客户端（服务消费者）提供一组链接，使客户端能通过链接将应用从一个状态改变为另一个状态。稍后我们会在另一篇文章中探究这个方面的影响；目前，只需要记住：链接是构成动态应用的非常有效的方式。</p>
<p>对此原则总结如下：任何可能的情况下，使用链接指引可以被标识的事物（资源）。也正是超链接造就了现在的Web。</p>
<h2 id="使用标准方法"><a href="#使用标准方法" class="headerlink" title="使用标准方法"></a>使用标准方法</h2><p>在前两个原则的讨论中暗含着一个假设：接收URI的应用程序可以通过URI明确地<strong>做</strong>一些有意义的事情。如果你在公共汽车上看到一个URI，你可以将它输入浏览器的地址栏中并回车——但是你的浏览器如何知道需要对这个URI做些什么呢？</p>
<p>它知道如何去处理URI的原因在于所有的资源都支持同样的接口，一套同样的方法（只要你乐意，也可以称为操作）集合。在HTTP中这被叫做动词（verb），除了两个大家熟知的（GET和POST）之外，标准方法集合中还包含PUT、DELETE、HEAD和OPTIONS。这些方法的含义连同行为许诺都一起定义在HTTP规范之中。如果你是一名OO开发人员，就可以想象到RESTful HTTP方案中的所有资源都继承自类似于这样的一个类（采用类Java、C#的伪语法描述，请注意关键的方法）：</p>
<pre><code>class Resource &#123;
     Resource(URI u);
     Response get();
     Response post(Request r);
     Response put(Request r);
     Response delete();
&#125;
</code></pre>
<p>由于所有资源使用了同样的接口，你可以依此使用GET方法检索一个<strong>表述</strong>（representation）——也就是对资源的描述。因为规范中定义了GET的语义，所以可以肯定当你调用它的时候不需要对后果负责——这就是为什么可以“安全”地调用此方法。GET方法支持非常高效、成熟的缓存，所以在很多情况下，你甚至不需要向服务器发送请求。还可以肯定的是，GET方法具有<strong>幂等性</strong>[译注：指多个相同请求返回相同的结果]——如果你发送了一个GET请求没有得到结果，你可能不知道原因是请求未能到达目的地，还是响应在反馈的途中丢失了。幂等性保证了你可以简单地再发送一次请求解决问题。幂等性同样适用于PUT（基本的含义是“更新资源数据，如果资源不存在的话，则根据此URI创建一个新的资源”）和DELETE（你完全可以一遍又一遍地操作它，直到得出结论——删除不存在的东西没有任何问题）方法。POST方法，通常表示“创建一个新资源”，也能被用于调用任意过程，因而它既不安全也不具有幂等性。</p>
<p>如果你采用RESTful的方式暴露应用功能（如果你乐意，也可以称为服务功能），<strong>那这条原则和它的约束同样也适用于你</strong>。如果你已经习惯于另外的设计方式，则很难去接受这条原则——毕竟，你很可能认为你的应用包含了超出这些操作表达范围的逻辑。请允许我花费一些时间来让你相信不存在这样的情况。</p>
<p>来看下面这个简单的采购方案例子：</p>
<p><img src="/upload/201210/9695654e3922a66651aa7d4da8f69f84.jpg"></p>
<p>可以看到，例子中定义了两个服务程序（没有包含任何实现细节）。这些服务程序的接口都是为了完成任务（正是我们讨论的OrderManagement和CustomerManagement服务）而定制的。如果客户端程序试图使用这些服务，那它必须针对这些特定接口进行编码——不可能在这些接口定义之前，使用客户程序去有目的地和接口协作。这些接口定义了服务程序的应用协议（application protocol）。</p>
<p>在RESTful HTTP方式中，你将通过组成<strong>HTTP应用协议</strong>的通用接口访问服务程序。你可能会想出像这样的方式：</p>
<p><img src="/upload/201210/95a153a5b8af0d5bf75cba48efb7b7a7.jpg"></p>
<p>可以看到，服务程序中的特定操作被映射成为标准的HTTP方法——为了消除歧义，我创建了一组全新的资源。“这是骗人的把戏”，我听见你叫嚷着。不，这不是欺骗。标识一个顾客的URI上的GET方法正好相当于getCustomerDetails操作。有人用三角形形象化地说明了这一点：</p>
<p><img src="/upload/201210/702d46f5d16604966133da7cf1ed3f5d.jpg"></p>
<p>把三个顶点想象为你可以调节的按钮。可以看到在第一种方法中，你拥有许多操作，许多种类的数据以及固定数量的“实例”（本质上和你拥有的服务程序数量一致）。在第二种方法中，你拥有固定数量的操作，许多种类的数据和许多调用固定方法的对象。它的意义在于，证明了通过这两种方式，你基本上可以表示任何你喜欢的事情。</p>
<p>为什么使用标准方法如此重要？从根本上说，它使你的应用成为Web的一部分——应用程序为Web变成Internet上最成功的应用所做的贡献，与它添加到Web中的资源数量成比例。采用RESTful方式，一个应用可能会向Web中添加数以百万计的客户URI；如果采用CORBA技术并维持应用的原有设计方式，那它的贡献大抵只是一个“端点（endpoint）”——就好比一个非常小的门，仅仅允许有钥匙的人进入其中的资源域。</p>
<p>统一接口也使得所有理解HTTP应用协议的组件能与你的应用交互。通用客户程序（generic client）就是从中受益的组件的例子，例如curl、wget、代理、缓存、HTTP服务器、网关还有Google、Yahoo!、MSN等等。</p>
<p>总结如下：为使客户端程序能与你的资源相互协作，资源应该正确地实现默认的应用协议（HTTP），也就是使用标准的GET、PUT、POST和DELETE方法。</p>
<h2 id="资源多重表述"><a href="#资源多重表述" class="headerlink" title="资源多重表述"></a>资源多重表述</h2><p>到目前为止我们一直忽略了一个稍微复杂的问题：客户程序如何知道该怎样处理检索到的数据，比如作为GET或者POST请求的结果？原因是，HTTP采取的方式是允许数据处理和操作调用之间关系分离的。换句话说，如果客户程序知道如何处理一种特定的数据格式，那就可以与所有提供这种表述格式的资源交互。让我们再用一个例子来阐明这个观点。利用HTTP内容协商（content negotiation），客户程序可以请求一种特定格式的表述：</p>
<pre><code>GET /customers/1234 HTTP/1.1
Host: example.com
Accept: application/vnd.mycompany.customer+xml
</code></pre>
<p>请求的结果可能是一些由公司专有的XML格式表述的客户信息。假设客户程序发送另外一个不同的请求，就如下面这样：</p>
<pre><code>GET /customers/1234 HTTP/1.1
Host: example.com
Accept: text/x-vcard
</code></pre>
<p>结果则可能是VCard格式的客户地址。（在这里我没有展示响应的内容，在其HTTP Content-type头中应该包含着关于数据类型的元数据。）这说明为什么理想的情况下，资源表述应该采用标准格式——如果客户程序对HTTP应用协议和一组数据格式都有所“了解”，那么它就可以用一种有意义的方式<strong>与世界上任意一个RESTful HTTP应用交互</strong>。不幸的是，我们不可能拿到所有东西的标准格式，但是，或许我们可以想到在公司或者一些合作伙伴中使用标准格式来营造一个小环境。当然以上情况不仅适用于从服务器端到客户端的数据，反之既然——倘若从客户端传来的数据符合应用协议，那么服务器端就可以使用特定的格式处理数据，而不去关心客户端的类型。</p>
<p>在实践中，资源多重表述还有着其它重要的好处：如果你为你的资源提供HTML和XML两种表述方式，那这些资源不仅可以被你的应用所用，还可以被任意标准Web浏览器所用——也就是说，你的应用信息可以被所有会使用Web的人获取到。</p>
<p>资源多重表述还有另外一种使用方式：你可以将应用的Web UI纳入到Web API中——毕竟，API的设计通常是由UI可以提供的功能驱动的，而UI也是通过API执行动作的。将这两个任务合二为一带来了令人惊讶的好处，这使得使用者和调用程序都能得到更好的Web接口。</p>
<p>总结：针对不同的需求提供资源多重表述。</p>
<h2 id="无状态通信"><a href="#无状态通信" class="headerlink" title="无状态通信"></a>无状态通信</h2><p><strong>无状态通信</strong>是我要讲到的最后一个原则。首先，需要着重强调的是，虽然REST包含无状态性（statelessness）的观念，但这并不是说暴露功能的应用不能有状态——<br>事实上，在大部分情况下这会导致整个做法没有任何用处。REST要求状态要么被放入资源状态中，要么保存在客户端上。或者换句话说，服务器端不能保持除了单次请求之外的，任何与其通信的客户端的通信状态。这样做的最直接的理由就是可伸缩性—— 如果服务器需要保持客户端状态，那么大量的客户端交互会严重影响服务器的内存可用空间（footprint）。（注意，要做到无状态通信往往需要需要一些重新设计——不能简单地将一些session状态绑缚在URI上，然后就宣称这个应用是RESTful。）</p>
<p>但除此以外，其它方面可能显得更为重要：无状态约束使服务器的变化对客户端是不可见的，因为在两次连续的请求中，客户端并不依赖于同一台服务器。一个客户端从某台服务器上收到一份包含链接的文档，当它要做一些处理时，这台服务器宕掉了，可能是硬盘坏掉而被拿去修理，可能是软件需要升级重启——如果这个客户端访问了从这台服务器接收的链接，它不会察觉到后台的服务器已经改变了。</p>
<h2 id="理论上的REST"><a href="#理论上的REST" class="headerlink" title="理论上的REST"></a>理论上的REST</h2><p>我承认：以上我所说的REST不是真正的REST，而且我可能有点过多地热衷于简单化。但因为我想有一个与众不同的开场，所以没有在一开始就介绍其正式的定义和背景。现在就让我们稍微简要地介绍一下这方面的内容。</p>
<p>首先，先前我并没有明确地区分HTTP、RESTful HTTP和REST。要理解这些不同方面之间的关系，我们要先来看看REST的历史。</p>
<p><a href="http://www.ics.uci.edu/~fielding/">Roy T. Fielding</a>在他的<a href="http://www.ics.uci.edu/~fielding/pubs/dissertation/top.htm">博士学位论文</a>（实际上你应该访问这个链接——至少对于一篇学术论文来说，它是相当易读的。此论文已被翻译成<a href="http://www.redsaga.com/opendoc/REST_cn.pdf">中文</a>）中定义了术语REST。Roy曾是许多基本Web协议的主要设计者，其中包括HTTP和URIs，并且他在论文中对这些协议提出了很多想法。（这篇论文被誉为“REST圣经”，这是恰当的——毕竟，是作者发明了这个术语，所以在定义上，他写的任何内容都被认为是权威的。）在论文中，Roy首先定义一种方法论来谈论<strong>架构风格</strong>——高级、抽象的模式，来表达架构方法背后的核心理念。每一个架构风格由一系列的<strong>约束</strong>（constraints）定义形成。架构风格的例子包括“没有风格”（根本没有任何约束）、管道和过滤器（pipe and filter）、客户端&#x2F;服务器、分布式对象以及——你猜到它了——REST。</p>
<p>如果对你来说这些听起来都太抽象了，那就对了——REST在本质上是一个可以被许多不同技术实现的高层次的风格，而且可以被实例化——通过为它的抽象特性赋上不同的值。比如，REST中包含资源和统一接口的概念——也就是说，所有资源都应该对这些相同的方法作出反应。但是REST并没有说明是哪些方法，或者有多少方法。</p>
<p>REST风格的一个“化身”便是HTTP（以及一套相关的一套标准，比如URI），或者稍微抽象一些：Web架构自身。接着上面的例子，HTTP使用HTTP动词作为REST统一接口的“实例”。由于Fielding是在Web已经（或者至少是大部分）“完善”了之后才定义的REST风格，有人可能会争论两者是不是100%的匹配。但是无论如何，整体上来说Web、HTTP和URI仅仅是REST风格的一个主要实现。不过，由于Roy Fielding即是REST论文的作者，又对Web架构设计有过深远的影响，两者相似也在情理之中。</p>
<p>最后，我在前面一次又一次地使用着术语“RESTful HTTP”，原因很简单：许多使用HTTP的应用因为一些理由并没有遵循REST原则，有人会说使用HTTP而不遵循REST原则就等同于滥用HTTP。当然这听起来有点狂热——事实上违反REST约束的原因通常是，仅仅因为每个约束带来的设计权衡可能不适合于一些特殊情况。但通常，违背REST约束的原因可归咎于对其好处认知的缺乏。来看一个明显的反面案例：使用HTTP GET调用类似于删除对象的操作，这违反了REST的安全约束和一般性常识（客户程序不应为此负责，服务器端开发人员大概不是有意而为之）。但在随后的文章中，我会提及更多这样或那样的对HTTP的滥用。</p>
<h2 id="总结"><a href="#总结" class="headerlink" title="总结"></a>总结</h2><p>本文试图对REST（Web架构）背后的概念提供快速的介绍。RESTful HTTP暴露功能的方式与RPC、分布式对象以及Web Services是不相同的；要真正理解这些不同是需要一些心态的转变。不管你构建的应用是仅仅想暴露Web UI还是想把API变成Web的一份子，了解下REST的原则还是有好处的。</p>
<p><a href="http://www.innoq.com/blog/st/"><strong>Stefan Tilkov</strong></a><strong>是InfoQ SOA社区的首席编辑，并且是位于德国和瑞士的</strong><a href="http://www.innoq.com/"><strong>innoQ</strong></a><strong>公司的共同创始人、首席顾问和REST狂热分子首领。</strong></p>
<p><strong>查看英文原文</strong>：<a href="https://www.infoq.com/articles/rest-introduction/">A Brief Introduction to REST</a></p>
]]></content>
      <tags>
        <tag>理论</tag>
      </tags>
  </entry>
  <entry>
    <title>bt5设置静态ip</title>
    <url>/2012/11/13/set-the-static-ip-on-bt5.html</url>
    <content><![CDATA[<p>vim &#x2F;etc&#x2F;network&#x2F;interfaces</p>
<p>找到对应的网卡加入相关的信息，比如：</p>
<pre><code>auto eth0
iface eth0 inet static
address 192.168.1.101
netmask 255.255.255.0
gateway 192.168.1.1
network 192.168.1.0
broadcast 192.168.1.255
</code></pre>
]]></content>
      <tags>
        <tag>Server&amp;OS</tag>
        <tag>Hacker</tag>
      </tags>
  </entry>
  <entry>
    <title>heartbeat入手总结</title>
    <url>/2012/11/14/heartbeat-using-summary.html</url>
    <content><![CDATA[<p>最近在搞双机热备，准备用heartbeat和DRBD来实现，由于之前没有接触过，于是想先逐个研究下，然后再集成起来。</p>
<p>在自己本上搭了两个虚拟机，具体环境是</p>
<p>centos5.3系统，<br>一键lnmp包，<br>    VIP：192.168.1.150，<br>    RIP1：192.168.1.190，心跳IP1：192.168.2.190，<br>    RIP2：192.168.1.191，心跳IP2：192.168.2.191。</p>
<p>从昨天晚上8点一直折腾到今天5点终于是做好了。下面就是相关的总结：</p>
<p>1、安装heartbeat我是直接用的yum，这个就挺好用的，也不用担心安装顺序，系统自动按顺序安装，只是注意一点，就是第一次安装的时候，一共安装3个包，第三个包才是heartbeat，但是程序会在安装第三个包的时候报错，提示hacluster用户已存在，这个时候，你直接再来一遍yum install heartbeat就安装好了。。。在这里我卡住了1个多小时，现在还没有仔细考虑是什么原因。</p>
<p>2、配置方面的文章，网上有很多，经过我的实验过程，我觉得这一篇还是不错的，我也是看了这一篇文章后，才知道是什么原因卡住了我10多个小时。文章地址：<a href="http://sushan.blog.51cto.com/3532080/733484">http://sushan.blog.51cto.com/3532080/733484</a></p>
<p>3、haresource这个配置文件，主从节点是一样的。这个之前我配错了，所以卡住了10个多小时，具体的错误表现是，主从节点都绑定了VIP。</p>
<p>4、如果你是先安装了一台虚拟机，并且配置好了heartbeat后，通过复制得到从节点的话，那么你需要在从节点卸载掉heartbeat，然后删除&#x2F;var&#x2F;lib&#x2F;heartbeat目录，然后再重装heartbeat，因为uuid会有冲突。</p>
]]></content>
      <tags>
        <tag>Server&amp;OS</tag>
      </tags>
  </entry>
  <entry>
    <title>drbd安装调试成功</title>
    <url>/2012/11/15/drbd-setup-success.html</url>
    <content><![CDATA[<p>很久木有大半夜的写技术文章了，最早可以追溯到四年前的大一上学期，在网吧，周边一圈打游戏看电影聊天的人，就我自己拿着本ASP，在敲代码。。。。</p>
<p>扯远了，接着昨天把heartbeat跑通后（貌似准确的来说是前天了。。。现在是16号凌晨了。。暂且就当做是15号吧<img src="file:///C:\Users\ETY001\AppData\Roaming\Tencent\QQPinyin\Face\ImageCache\28.gif">o(︶︿︶)o），今天下午恶补和复习了n多的知识，比如LVM，硬盘分区之类的，然后晚上开工了，整个过程参考了这篇文章，<a href="http://linux.chinaunix.net/techdoc/database/2008/10/28/1041372.shtml%E3%80%82">http://linux.chinaunix.net/techdoc/database/2008/10/28/1041372.shtml。</a></p>
<p>这篇文章已经说的很详细了，只是说一下我在实现中遇到的问题和解决方法。</p>
<p>总的来说今天基本上没有遇到什么问题，一切很顺利，首先要说的是，我用的centos5.3，在DRBD官网上看到，centos5以上的可以用yum install drbd kmod-drbd 来安装软件和模块，瞬间就感到很幸福，但是在我实践的时候，并没有成功，提示kmod版本冲突，经过思考和观察，我试了下yum install drbd82 kmod-drbd82就成功了，应该是源里面只有8.2版本的吧。。。</p>
<p>貌似就这一条。。。</p>
<p>再就是现在还没有解决的问题就是两台机器都重启后，两台机器都处于secondary状态，不解中，感觉好像是heartbeat的haresource配置文件配置的不对，还在调试。</p>
<p>2：54补充：果然是haresource的问题。。。。shell命令和IP间掉了个空格。。。</p>
]]></content>
      <tags>
        <tag>Server&amp;OS</tag>
      </tags>
  </entry>
  <entry>
    <title>《黑客与画家》读书笔记1</title>
    <url>/2012/11/28/hackers-and-painters-1.html</url>
    <content><![CDATA[<p>保罗 格雷厄姆的创业哲学，他的创业公式是：</p>
<p>1、搭建原型<br>2、上线运营（别管bug）<br>3、收集反馈<br>4、调整产品<br>5、成长壮大</p>
<p>他鼓励创业公司快速发布产品，以尽早验证创意是否可行。<br>一定要关注用户需要什么，这样才有办法将一个坏项目变成好项目。<br>创始人的素质比好的创意更重要一些。<br>创始成员人数最好不要超过3个。</p>
]]></content>
      <tags>
        <tag>随笔</tag>
      </tags>
  </entry>
  <entry>
    <title>express 2.x 与 express 3.x的视图助手的区别</title>
    <url>/2012/12/17/the-helpers-differents-between-express-2-x-and-express-3-x.html</url>
    <content><![CDATA[<p>转自：<a href="http://cnodejs.org/topic/501f5d8ff767cc9a51c98165">http://cnodejs.org/topic/501f5d8ff767cc9a51c98165</a></p>
<p><strong>2.x:</strong></p>
<pre><code>&lt;code&gt;app.helpers(&#123; config: config, title: config.title &#125;); app.dynamicHelpers(&#123; //防止csrf攻击 csrf: function(req,res) &#123; return req.session ? req.session._csrf : &#39;&#39;; &#125;, req: function(req,res) &#123; return req; &#125;, userInfo: function(req,res)&#123; return req.session.user; &#125; &#125;);&lt;/code&gt;
</code></pre>
<p><strong>3.x</strong></p>
<pre><code>&lt;code&gt;//app.helpers() app.locals(&#123; config: config, title: config.title &#125;); //app.dynamicHelpers app.use(function(req, res, next)&#123; res.locals.title = config[&#39;title&#39;] res.locals.csrf = req.session ? req.session._csrf : &#39;&#39;; res.locals.req = req; res.locals.session = req.session; next(); &#125;); app.use(app.router);&lt;/code&gt;
</code></pre>
]]></content>
      <tags>
        <tag>编程语言</tag>
        <tag>理论</tag>
      </tags>
  </entry>
  <entry>
    <title>再谈heartbeat+DRBD</title>
    <url>/2012/11/16/retalk-heartbeat-and-drbd.html</url>
    <content><![CDATA[<p>今天开始上服务器上实战了，不得不说在虚拟机的演习跟在服务器上的实战差距还是很大的。现在说遇到的问题：</p>
<p>1、一共两台2U的服务器，其中一台2U机器的一个网卡貌似挂掉了，现在把心跳线合并进了另外那个RIP的网卡。其实这个网卡有问题，还是因为通过网络安装系统的时候发现的。</p>
<p>2、每个服务器上一共有8块硬盘，每块1个T，其中之前服务器的每块硬盘都是用过的，而我在做drbdadm create-md的时候，提示下面的错误：</p>
<p>&#96;md_offset<br>al_offset<br>bm_offset<br>Found ext3 filesystem which uses<br>Device size would be truncated, which<br>would corrupt data and result in<br>‘access beyond end of device’ errors.<br>You need to either</p>
<ul>
<li>use external meta data (recommended)</li>
<li>shrink that filesystem first</li>
<li>zero out the device (destroy the filesystem)<br>Operation refused.<br>Command ‘drbdmeta&#96;</li>
</ul>
<p>看意思是原来的分区的文件系统还存在，没法初始化成drbd设备，用下面这条命令处理下：</p>
<p><code>#dd if=/dev/zero bs=1M count=1 of=/dev/sda1; sync</code></p>
<p>然后再执行create-md，我是执行了两边才成功的，如下：</p>
<p><code>[root@node2 ~]# drbdadm create-md zentao v08 Magic number not found v07 Magic number not found v07 Magic number not found v08 Magic number not found Writing meta data... initialising activity log NOT initialized bitmap New drbd meta data block sucessfully created. [root@node2 ~]# drbdadm create-md zentao v07 Magic number not found v07 Magic number not found You want me to create a v08 style flexible-size internal meta data block. There apears to be a v08 flexible-size internal meta data block already in place on /dev/sdd1 at byte offset 1000202235904 Do you really want to overwrite the existing v08 meta-data? [need to type &#39;yes&#39; to confirm] yes</code></p>
<p>Writing meta data…<br>initialising activity log<br>NOT initialized bitmap<br>New drbd meta data block sucessfully created.</p>
<p>3、再就是我的drbd一直是secondery&#x2F;unknown，<del>更改了一下syncer的100M为10M后可以了。</del>又出现了这个问题，发现其实是防火墙导致的节点之间通信失败。</p>
]]></content>
      <tags>
        <tag>Server&amp;OS</tag>
      </tags>
  </entry>
  <entry>
    <title>《黑客与画家》读书笔记2</title>
    <url>/2012/11/29/hackers-and-painters-2.html</url>
    <content><![CDATA[<p>今天读完了《黑客与画家》的第一章，上次那篇读书笔记1是记录的译者写的序，一般看书我都是先看序，这里往往是一本书的精髓所在。我读书的速度依旧是很慢，即便是这一章在一年前，看过电子书版的。不得不说，即便是一年以后再看这一章，我依旧是和当年读这一章时的想法是一样的，感觉作者的一席话解释了自己脑袋中的各种为什么？</p>
<p>第一章讲的是书呆子为什么不受欢迎，虽然短短的十来页，但是我还是觉得，里面很多现象总结的很对，其中一点最为重要就是书呆子们其实并非是呆，而是因为对于和其他人相比，书呆子们追求的目标不同罢了。“书呆子不受欢迎的真正原因，是他们脑子里想着别的事情。他们的注意力都放在读书或者观察世界上面，而不是放在穿衣打扮、开晚会上面”。另外作者也阐述了为啥聪明的小孩在青少年时期，比如11岁到17岁，有着一生中最糟糕的人生经历，那是因为“11岁前，小孩的生活由家长主导，其他孩子的影响有限。孩子们不是不关心小学里其他同学的想法，但是后者不具有决定性影响”。在这一点上，我是深有感触，我的确是没有感到小学是痛苦，因为那时自己脑袋并没有很多东西，父母的指挥是你做事情的参照标尺，所以，小学可以用过的很幸福来形容，但是真正恶心的是从初三转学开始，我觉得我的生活就发生了很大的变化。<span id="more"></span></p>
<p>我还是非常怀念初一初二时的疯狂的，几个人在弄元铮集团，搞所谓的西天旅游文化，甚至是藏传佛教（尽管我到现在也不知道其中的任何知识），但是不得不说那两年，真的是在做你自己想做的事情，真的是把精力放到了你喜欢的地方。而从初三开始，一切变化很大，我感到了周边人很怪异，大家都在拼命的为了学习而奋斗，而不是为了自己的理想和兴趣。而我却为了防止自己变成不被欢迎的书呆子，就要伪装自己，在为了自己的理想努力和为了让自己受欢迎这两种角色间切换，由于智商也不高，这就导致了两个事情都没有做好。我还是很深刻的记着我爸在初三的时候说我花了大量的时间在看《黑客防线》《黑客X档案》以及其他的一些电脑书，纯粹是自己在找麻烦，等于别人学9门课，我是同等精力学了12门课，而多出去的3门课根本不考试，不记录到你的任何跟升学有关的记录中去。这种生活最大的弊病就是把原本对于学习的热情都击碎了。初四放弃了英语，高二开始有些不喜欢数学，尽管大学依旧因为喜欢数学报了数学专业，但是在数学系中，我反而更加的觉得数学变了味，这也就导致了大学基本没学数学。这一点，作者也说道了，“美国功利学校的平庸并不仅仅是让学生度过了不快乐的六年，还带来了严重后果。这种平庸直接导致学生的叛逆心理，使他们远离那些原本应该要学习的东西。许多书呆子可能都与我一样，知道高中毕业多年后，才去读中学里的指定读物。但是，我错过的绝不仅仅知识几本书而已。我对许多美好的字眼都嗤之以鼻，比如‘人格’、‘正直’，因为成年人贬低了这些词。在他们嘴里，这些词似乎都是同一个意思——‘听话’。一些孩子因为具备所谓的‘人格’和‘正直’，而受到夸奖，可是他们不是呆得像一头大笨牛，就是轻浮的像一个不懂脑筋的吹牛者。如果‘人格’和‘正直’就是这样子，我宁愿不要它们“。我不得不说我跟作者说的是一样的，我现在也是极度的想再去回顾原来不想学的东西，尤其今年还有买过《数学之美》、《大数据》这样的理论味很浓的书，不是因为自己想要装逼给别人看，而是真的对这玩意感兴趣，喜欢这个东西，原来我讨厌学就是因为叛逆，严重的叛逆，认为自己不学这些依旧是OK的，这就导致了在现有的环境中更糟糕的事情发生，最显然的就是高考的失利。不过这也许让我能看透更多的事情，引发我更多的对于这个世界的思考，以及让我对错过的事情有更大的信念想要再弥补回来。不过终究还是在一所不起眼的小学校里顺利的拿到了本科毕业和学士学位的证明，虽然这两张纸的价值几乎为0,但确实是很多人从初中开始就定为了努力的目标的说。</p>
<p>不得不说从初中开始，真正意义上（我的意思是臭味相投）的朋友就没有结交到几个，因为真的是找不到，每天都是感觉到天昏地暗，原来以为大学的社团可能会有我这样的另类出现，但是真实情况是，有另类的人存在，却很少，但对于我来说，有属于道不同那一类的。失望和孤独感是自始至终都有的，已经没有当年初二那种一群异类在类似垃圾场一样的环境中，鼓捣西天旅游文化那种感觉了，也没有了小学，和朋友在操场沙坑模仿电视上演的野外生存那样挖坑取火烤东西那样的事情发生了。</p>
<p>不过终究我还是恨乐观的，虽然在高二的时候一度不想再上学，想死。但是生活终究是自己要去面对的事情，还是有很多事情在等着我去做的，这也是我一直在遇到很折磨人的事情的时候，自己对自己说的最多的话。在这一点上，我看到了作者也是如此的乐观。</p>
]]></content>
      <tags>
        <tag>随笔</tag>
      </tags>
  </entry>
  <entry>
    <title>ubuntu下mongodb启动失败解决</title>
    <url>/2012/12/16/solving-ubuntu-mongodb-start-fail.html</url>
    <content><![CDATA[<p>用sudo apt-get install mongodb安装了mongodb后，总是启动失败，查看log日志，发现了以下错误：</p>
<figure class="highlight plaintext"><table><tr><td class="code"><pre><span class="line">***** SERVER RESTARTED *****</span><br><span class="line"></span><br><span class="line">/usr/bin/mongod: symbol lookup error: /usr/bin/mongod: undefined symbol: _ZN7pcrecpp2RE4InitEPKcPKNS_10RE_OptionsE</span><br></pre></td></tr></table></figure>

<p>从搜索引擎上找不到，最后，在MongoDB官网上找到一个方法又重新装了一遍就可以用了，是用的10gen编译的deb包安装的，不过貌似官方推荐源码编译安装。</p>
<p>具体安装10gen的方法如下：</p>
<figure class="highlight plaintext"><table><tr><td class="code"><pre><span class="line">The Ubuntu package management tool (i.e. dpkg and apt) ensure package consistency and authenticity by requiring that distributors sign packages with GPG keys. Issue the following command to import the 10gen public GPG Key:</span><br><span class="line"></span><br><span class="line">**sudo apt-key adv --keyserver keyserver.ubuntu.com --recv 7F0CEB10**</span><br><span class="line"></span><br><span class="line">Create a **/etc/apt/sources.list.d/10gen.list** file and include the following line for the 10gen repository.</span><br><span class="line">**deb http://downloads-distro.mongodb.org/repo/ubuntu-upstart dist 10gen**</span><br><span class="line"></span><br><span class="line">Now issue the following command to reload your repository:</span><br><span class="line">sudo apt-get update</span><br><span class="line"></span><br><span class="line">Install Packages</span><br><span class="line">Issue the following command to install the latest stable version of MongoDB:</span><br><span class="line">**sudo apt-get install mongodb-10gen**</span><br></pre></td></tr></table></figure>

]]></content>
      <tags>
        <tag>Server&amp;OS</tag>
      </tags>
  </entry>
  <entry>
    <title>svn服务器多个库共用同一个用户验证文件</title>
    <url>/2013/01/07/svn-server-share-the-same-authz-passwd-files.html</url>
    <content><![CDATA[<p>svnserve命令中有一个参数是config-file参数，可以用来设置svn服务启动的时候，指定一个全局config文件，这样每个库下面的conf文件夹的配置文件就不会再生效了。对于该参数，网上鲜有介绍，基本上svn配置的文章就那么几篇，还基本上都是互相copy的。。。大家比较常见的就是下面这条命令了：</p>
<pre><code>svnserve -d -r /home/svn
</code></pre>
<p>我们如果想用全局配置文件，那么就按下面的命令启动svn服务：</p>
<pre><code>svnserve -d -r /home/svn --config-file /home/svn/svnserve.conf
</code></pre>
<p>另外，我没有尝试成功把配置文件放到svn目录以外的地方，也就是说我的svn库目录是&#x2F;home&#x2F;svn，这个目录下有N个库目录，只有当我的全局配置文件svnserve.conf，passwd，authz放到&#x2F;home&#x2F;svn下才生效，我放到别的目录的时候，在客户端对库进行操作的时候是报错没有指定的用户（username cannot find）。包括在svnserve.conf中设置passwd和authz的位置为其他目录也失败了。</p>
]]></content>
      <tags>
        <tag>Server&amp;OS</tag>
      </tags>
  </entry>
  <entry>
    <title>Archlinux双显卡问题</title>
    <url>/2012/12/28/archlinux-double-video-cards.html</url>
    <content><![CDATA[<p>我的笔记本是Dell Inspiron 15R Turbo 1728，一块Intel集成显卡外加一块ATI显卡。问题出现的情况是：每次启动Archlinux起来，屏幕基本上都是最暗的，偶尔会出现一次正常情况。</p>
<p>我装系统的时候，先装的xf86-video-intel，然后装的xf86-video-ati，其实有尝试装catalyst-dkms，但是catalyst-dkms安装的时候有个gpl跟xf86-video-intel的冲突，需要删掉，并且安装完catalyst-dkms后，重启也是起不来桌面的。。。</p>
<p>当时以为能装上私有驱动后，应该问题就能解决，但是后来因为catalyst-dkms安装失败，我也就放弃了。转机出现，是我在Archlinux的wiki上搜索别的资料的时候，发现了一个文章介绍Sony笔记本Archlinux的相关配置，链接：<a href="https://wiki.archlinux.org/index.php/Sony_vaio_VGN-SA/SB">https://wiki.archlinux.org/index.php/Sony_vaio_VGN-SA&#x2F;SB</a>。</p>
<p>这篇文章里面就提到了关于ATI独显和Intel板载显卡关闭的问题，简要的说就是要先挂载debugfs，</p>
<h1 id="mount-t-debugfs-debugfs-sys-kernel-debug"><a href="#mount-t-debugfs-debugfs-sys-kernel-debug" class="headerlink" title="mount -t debugfs debugfs &#x2F;sys&#x2F;kernel&#x2F;debug"></a>mount -t debugfs debugfs &#x2F;sys&#x2F;kernel&#x2F;debug</h1><p>或者用在&#x2F;etc&#x2F;fstab中加入<br>debugfs &#x2F;sys&#x2F;kernel&#x2F;debug debugfs 0 0</p>
<p>我表示我的系统已经挂好了这个了，所以我直接进入下一步，加载ATI的模块，</p>
<h1 id="modprobe-radeon"><a href="#modprobe-radeon" class="headerlink" title="modprobe radeon"></a>modprobe radeon</h1><p>关掉不在使用中的显卡</p>
<h1 id="echo-OFF-sys-kernel-debug-vgaswitcheroo-switch"><a href="#echo-OFF-sys-kernel-debug-vgaswitcheroo-switch" class="headerlink" title="echo OFF &gt; &#x2F;sys&#x2F;kernel&#x2F;debug&#x2F;vgaswitcheroo&#x2F;switch"></a>echo OFF &gt; &#x2F;sys&#x2F;kernel&#x2F;debug&#x2F;vgaswitcheroo&#x2F;switch</h1><p>检查下设置的效果</p>
<h1 id="cat-sys-kernel-debug-vgaswitcheroo-switch"><a href="#cat-sys-kernel-debug-vgaswitcheroo-switch" class="headerlink" title="cat &#x2F;sys&#x2F;kernel&#x2F;debug&#x2F;vgaswitcheroo&#x2F;switch"></a>cat &#x2F;sys&#x2F;kernel&#x2F;debug&#x2F;vgaswitcheroo&#x2F;switch</h1><p>结果：<br>0:IGD:+:Pwr:0000:00:02.0<br>1:DIS: :Off:0000:01:00.0</p>
<p>注意带+号的表示现在正在用的显卡，IGD就是Intel的板载显卡，DIS就是ATI的那块独显。</p>
<p>如果想重新打开就执行</p>
<h1 id="echo-ON-sys-kernel-debug-vgaswitcheroo-switch"><a href="#echo-ON-sys-kernel-debug-vgaswitcheroo-switch" class="headerlink" title="echo ON &gt; &#x2F;sys&#x2F;kernel&#x2F;debug&#x2F;vgaswitcheroo&#x2F;switch"></a>echo ON &gt; &#x2F;sys&#x2F;kernel&#x2F;debug&#x2F;vgaswitcheroo&#x2F;switch</h1><p>其他的详情看这篇文章吧，不多说了。</p>
<p><del>再就是吐槽一下，我是最近用最新的镜像重装了下archlinux，原因是大版本变动的升级虽然升级成功了，但是有几个很纠结的小问题实在是没心情解决了，遂重装了，但是没想到这次重装后，发现又有变化就是之前的Sysvinit被systemd替换了。表示对于不会shell脚本的人来说，写一个能开机自动关掉显卡的service文件着实的蛋疼，虽然最终也算是成功了。在wiki上没有看到有关原来rc.local中开机自动执行脚本用systemd实现的方法，有知道的朋友，能否点播下我，谢啦～</del></p>
<p>vim &#x2F;usr&#x2F;lib&#x2F;systemd&#x2F;system&#x2F;rc-local.service</p>
<p>内容如下：</p>
<p>[Unit]</p>
<p>Description&#x3D;”&#x2F;etc&#x2F;rc.d&#x2F;rc.local Compatibility”</p>
<p>After&#x3D;network.target</p>
<p>[Service]</p>
<p>Type&#x3D;forking</p>
<p>ExecStart&#x3D;&#x2F;etc&#x2F;rc.d&#x2F;rc.local start</p>
<p>TimeoutSec&#x3D;0</p>
<p>StandardInput&#x3D;tty</p>
<p>RemainAfterExit&#x3D;yes</p>
<p>SysVStartPriority&#x3D;99</p>
<p>[Install]</p>
<p>WantedBy&#x3D;multi-user.target</p>
<p>启用脚本</p>
<p>systemctl enable rc-local.service</p>
<p>创建启动文件rc.local,</p>
<p>vim &#x2F;etc&#x2F;rc.d&#x2F;rc.local</p>
<p>chmod +x &#x2F;etc&#x2F;rc.d&#x2F;rc.local</p>
]]></content>
      <tags>
        <tag>Server&amp;OS</tag>
      </tags>
  </entry>
  <entry>
    <title>Linux 静态库与动态库搜索路径设置</title>
    <url>/2013/01/19/linux-lib-menu-set.html</url>
    <content><![CDATA[<ol>
<li>连接和运行时库文件搜索路径到设置</li>
</ol>
<p>库文件在连接（静态库和共享库）和运行（仅限于使用共享库的程序）时被使用，其搜索路径是在系统中进行设置的。一般 Linux 系统把 &#x2F;lib 和 &#x2F;usr&#x2F;lib 两个目录作为默认的库搜索路径，所以使用这两个目录中的库时不需要进行设置搜索路径即可直接使用。对于处于默认库搜索路径之外的库，需要将库的位置添加到库的搜索路径之中。设置库文件的搜索路径有下列两种方式，可任选其一使用：</p>
<p>(1). 在 &#x2F;etc&#x2F;ld.so.conf 文件中添加库的搜索路径。(或者在&#x2F;etc&#x2F;ld.so.conf.d 下新建一个.conf文件，将搜索路径一行一个加入-junziyang)</p>
<p>将自己可能存放库文件的路径都加入到&#x2F;etc&#x2F;ld.so.conf中是明智的选择添加方法也极其简单，将库文件的绝对路径直接写进去就OK了，一行一个。例如：</p>
<pre><code>/usr/X11R6/lib

/usr/local/lib

/opt/lib
</code></pre>
<p>需要注意的是：这种搜索路径的设置方式对于程序连接时的库（包括共享库和静态库）的定位已经足够了，但是对于使用了共享库的程序的执行还是不够的。这是因为为了加快程序执行时对共享库的定位速度，避免使用搜索路径查找共享库的低效率，所以是直接读取库列表文件 &#x2F;etc&#x2F;ld.so.cache 从中进行搜索的。&#x2F;etc&#x2F;ld.so.cache 是一个非文本的数据文件，不能直接编辑，它是根据 &#x2F;etc&#x2F;ld.so.conf 中设置的搜索路径由 &#x2F;sbin&#x2F;ldconfig 命令将这些搜索路径下的共享库文件集中在一起而生成的（ldconfig 命令要以 root 权限执行）。</p>
<span id="more"></span>
<p>因此，为了保证程序执行时对库的定位，在 &#x2F;etc&#x2F;ld.so.conf 中进行了库搜索路径的设置之后，还必须要运行 &#x2F;sbin&#x2F;ldconfig 命令更新 &#x2F;etc&#x2F;ld.so.cache 文件之后才可以。ldconfig ,简单的说，它的作用就是将&#x2F;etc&#x2F;ld.so.conf列出的路径下的库文件缓存到&#x2F;etc&#x2F;ld.so.cache 以供使用。因此当安装完一些库文件，(例如刚安装好glib)，或者修改ld.so.conf增加新的库路径后，需要运行一下 &#x2F;sbin&#x2F;ldconfig使所有的库文件都被缓存到ld.so.cache中，如果没做，即使库文件明明就在&#x2F;usr&#x2F;lib下的，也是不会被使用的，结果编译过程中抱错，缺少xxx库，去查看发现明明就在那放着，搞的想大骂computer蠢猪一个。</p>
<p>在程序连接时，对于库文件（静态库和共享库）的搜索路径，除了上面的设置方式之外，还可以通过 -L 参数显式指定。因为用 -L 设置的路径将被优先搜索，所以在连接的时候通常都会以这种方式直接指定要连接的库的路径。</p>
<p>这种设置方式需要 root 权限，以改变 &#x2F;etc&#x2F;ld.so.conf 文件并执行 &#x2F;sbin&#x2F;ldconfig 命令。而且，当系统重新启动后，所有的基于 GTK2 的程序在运行时都将使用新安装的 GTK+ 库。不幸的是，由于 GTK+ 版本的改变，这有时会给应用程序带来兼容性的问题，造成某些程序运行不正常。为了避免出现上面的这些情况，在 GTK+ 及其依赖库的安装过程中对于库的搜索路径的设置将采用另一种方式进行。这种设置方式不需要 root 权限，设置也简单。</p>
<p>(2). 在环境变量 LD_LIBRARY_PATH 中指明库的搜索路径。</p>
<p>设置方式：</p>
<p>export LD_LIBRARY_PATH&#x3D;&#x2F;opt&#x2F;gtk&#x2F;lib:$LD_LIBRARY_PATH</p>
<p>可以用下面的命令查看 LD_LIBRAY_PATH 的设置内容：</p>
<p>echo $LD_LIBRARY_PATH</p>
<p>至此，库的两种设置就完成了。</p>
<p>2.交叉编译时候如何配置连接库的搜索路径</p>
<p>交叉编译的时候不能使用本地（i686机器，即PC机器，研发机器）机器上的库，但是在做编译链接的时候默认的是使用本地库，即&#x2F;usr&#x2F;lib, &#x2F;lib两个目录。因此，在交叉编译的时候，要采取一些方法使得在编译链接的时候找到需要的库。</p>
<p>首先，要知道：编译的时候只需要头文档，真正实际的库文档在链接的时候用到。 （这是我的理解，假如有不对的地方，敬请网上各位大侠指教） 然后，讲讲如何在交叉编译链接的时候找到需要的库。</p>
<p>（1）交叉编译时候直接使用-L和-I参数指定搜索非标准的库文档和头文档的路径。例如：</p>
<p>arm-linux-gcc test.c -L&#x2F;usr&#x2F;local&#x2F;arm&#x2F;2.95.3&#x2F;arm-linux&#x2F;lib -I&#x2F;usr&#x2F;local&#x2F;arm&#x2F;2.95.3&#x2F;arm-linux&#x2F;include</p>
<p>（2）使用ld.so.conf文档，将用到的库所在文档目录添加到此文档中，然后使用ldconfig命令刷新缓存。</p>
<p>（3）使用如下命令：</p>
<p>export LD_LIBRARY_PATH&#x3D;$LD_LIBRARY_PATH:&#x2F;usr&#x2F;local&#x2F;arm&#x2F;2.95.3&#x2F;arm-linux-lib</p>
<p>参见《ld.so.conf 文档和PKG_CONFIG_PATH变量》这篇文章。</p>
<p>通过环境变量LD_LIBRARY_PATH指定动态库搜索路径（！）。</p>
<p>通过设定环境变量LD_LIBRARY_PATH也可以指定动态库搜索路径。当通过该环境变量指定多个动态库搜索路径时，路径之间用冒号”：”分隔。</p>
<p>不过LD_LIBRARY_PATH的设定作用是全局的，过多的使用可能会影响到其他应用程序的运行，所以多用在调试。（LD_LIBRARY_PATH 的缺陷和使用准则，可以参考《Why LD_LIBRARY_PATH is bad》 ）。通常情况下推荐还是使用gcc的-R或-rpath选项来在编译时就指定库的查找路径，并且该库的路径信息保存在可执行文件中，运行时它会直接到该路径查找库，避免了使用LD_LIBRARY_PATH环境变量查找。</p>
<p>（4）交叉编译时使用软件的configure参数。例如我编译minigui-1.3.3，使用如下配置：</p>
<p>#!&#x2F;bin&#x2F;bash</p>
<p>rm -f config.cache config.status</p>
<p>.&#x2F;configure –build&#x3D;i686-linux –host&#x3D;arm-linux –target&#x3D;arm-linux &#x2F;</p>
<p>CFLAGS&#x3D;-I&#x2F;usr&#x2F;local&#x2F;arm&#x2F;2.95.3&#x2F;arm-linux&#x2F;include &#x2F;</p>
<p>LDFLAGS&#x3D;-L&#x2F;usr&#x2F;local&#x2F;arm&#x2F;2.95.3&#x2F;arm-linux&#x2F;lib &#x2F;</p>
<p>–prefix&#x3D;&#x2F;usr&#x2F;local&#x2F;arm&#x2F;2.95.3&#x2F;arm-linux &#x2F;</p>
<p>–enable-lite &#x2F;</p>
<p>–disable-galqvfb &#x2F;</p>
<p>–disable-qvfbial &#x2F;</p>
<p>–disable-vbfsupport &#x2F;</p>
<p>–disable-ttfsupport &#x2F;</p>
<p>–disable-type1support &#x2F;</p>
<p>–disable-imegb2312py &#x2F;</p>
<p>–enable-extfullgif &#x2F;</p>
<p>–enable-extskin &#x2F;</p>
<p>–disable-videoqvfb &#x2F;</p>
<p>–disable-videoecoslcd</p>
<p>这里我配置了CFLAGS和LDFLAGS参数，这样一来，我就不用去修改每个Makefile里-L和-I参数了，也不用再去配置 LD_LIBRARY_PATH或改写ld.so.conf文档了。</p>
<p><strong>Linux下动态库使用小结</strong></p>
<ol>
<li>静态库和动态库的基本概念<br>静态库，是在可执行程序连接时就已经加入到执行码中，在物理上成为执行程序的一部分；使用静态库编译的程序运行时无需该库文件支持，哪里都可以用，但是生成的可执行文件较大。动态库，是在可执行程序启动时加载到执行程序中，可以被多个可执行程序共享使用。使用动态库编译生成的程序相对较小，但运行时需要库文件支持，如果机器里没有这些库文件就不能运行。</li>
</ol>
<p>2． 如何使用动态库<br>如何程序在连接时使用了共享库，就必须在运行的时候能够找到共享库的位置。linux的可执行程序在执行的时候默认是先搜索&#x2F;lib和&#x2F;usr&#x2F;lib这两个目录，然后按照&#x2F;etc&#x2F;ld.so.conf里面的配置搜索绝对路径。同时，Linux也提供了环境变量LD_LIBRARY_PATH供用户选择使用，用户可以通过设定它来查找除默认路径之外的其他路径，如查找&#x2F;work&#x2F;lib路径,你可以在&#x2F;etc&#x2F;rc.d&#x2F;rc.local或其他系统启动后即可执行到的脚本添加如下语句：LD_LIBRARY_PATH &#x3D;&#x2F;work&#x2F;lib:$(LD_LIBRARY_PATH)。并且LD_LIBRARY_PATH路径优先于系统默认路径之前查找（详细参考《使用 LD_LIBRARY_PATH》）。</p>
<p>不过LD_LIBRARY_PATH的设定作用是全局的，过多的使用可能会影响到其他应用程序的运行，所以多用在调试。（LD_LIBRARY_PATH 的缺陷和使用准则，可以参考《Why LD_LIBRARY_PATH is bad》）。通常情况下推荐还是使用gcc的-R或-rpath选项来在编译时就指定库的查找路径，并且该库的路径信息保存在可执行文件中，运行时它会直接到该路径查找库，避免了使用LD_LIBRARY_PATH环境变量查找。</p>
<p>3．库的链接时路径和运行时路径<br>现代连接器在处理动态库时将链接时路径（Link-time path）和运行时路径（Run-time path）分开,用户可以通过-L指定连接时库的路径，通过-R（或-rpath）指定程序运行时库的路径，大大提高了库应用的灵活性。比如我们做嵌入式移植时#arm-linux-gcc $(CFLAGS) –o target –L&#x2F;work&#x2F;lib&#x2F;zlib&#x2F; -llibz-1.2.3 (work&#x2F;lib&#x2F;zlib下是交叉编译好的zlib库)，将target编译好后我们只要把zlib库拷贝到开发板的系统默认路径下即可。或者通过- rpath（或-R ）、LD_LIBRARY_PATH指定查找路径。</p>
]]></content>
      <tags>
        <tag>Server&amp;OS</tag>
      </tags>
  </entry>
  <entry>
    <title>入手了树莓派</title>
    <url>/2013/01/21/bought-a-raspberry-pi.html</url>
    <content><![CDATA[<p>最近入手了树莓派，很是给力。</p>
]]></content>
      <tags>
        <tag>Server&amp;OS</tag>
      </tags>
  </entry>
  <entry>
    <title>pptp vpn需要在路由开放1723端口和放行GRE协议</title>
    <url>/2013/01/21/pptp-vpn-need-open-port-1723-and-the-gre-protocol.html</url>
    <content><![CDATA[<p>pptp vpn需要在路由开放1723端口和放行GRE协议</p>
]]></content>
      <tags>
        <tag>Server&amp;OS</tag>
      </tags>
  </entry>
  <entry>
    <title>Adding undetected resolutions</title>
    <url>/2013/01/20/adding-undetected-resolutions.html</url>
    <content><![CDATA[<p>From:ArchLinux Wiki <a href="https://wiki.archlinux.org/index.php/Xrandr#Adding_undetected_resolutions">https://wiki.archlinux.org/index.php/Xrandr#Adding_undetected_resolutions</a></p>
<h3 id="Adding-undetected-resolutions"><a href="#Adding-undetected-resolutions" class="headerlink" title="Adding undetected resolutions"></a>Adding undetected resolutions</h3><p>Due to buggy hardware or drivers, your monitor’s correct resolutions may not always be detected by xrandr. For example, the EDID data block queried from the monitor may be incorrect. However, we can add the desired resolutions to xrandr.</p>
<p>First we run <code>gtf</code> or <code>cvt</code> to get the <strong>Modeline</strong> for the resolution we want:</p>
<p>For some LCD screens (samsung 2343NW), the command “cvt -r” (&#x3D; with reduced blanking) is to be used.</p>
<pre><code> $ cvt 1280 1024

 # 1280x1024 59.89 Hz (CVT 1.31M4) hsync: 63.67 kHz; pclk: 109.00 MHz
 Modeline &quot;1280x1024_60.00&quot;  109.00  1280 1368 1496 1712  1024 1027 1034 1063 -hsync +vsync
</code></pre>
<span id="more"></span>Then we create a new xrandr mode. Note that the Modeline keyword needs to be ommited.


<pre><code>   xrandr --newmode &quot;1280x1024_60.00&quot;  109.00  1280 1368 1496 1712  1024 1027 1034 1063 -hsync +vsync
</code></pre>
<p>After creating it we need an extra step to add this new mode to our current output (VGA1). We use just the name of the mode, since the parameters have been set previously.</p>
<pre><code>   xrandr --addmode VGA1 1280x1024_60.00
</code></pre>
<p>Now we change the resolution of the screen to the one we just added:</p>
<pre><code>   xrandr --output VGA1 --mode 1280x1024_60.00
</code></pre>
<p>Note that these settings only take effect during this session.</p>
<p>If you are not sure about the resolution you will test, you may add a “sleep 5” and a safe resolution command line following, like this :</p>
<pre><code>   xrandr --output VGA1 --mode 1280x1024_60.00 &amp;&amp; sleep 5 &amp;&amp; xrandr --newmode &quot;1024x768-safe&quot; 65.00 1024 1048 1184 1344 768 771 777 806 -HSync -VSync &amp;&amp; xrandr --addmode VGA1 1024x768-safe &amp;&amp; xrandr --output VGA1 --mode 1024x768-safe
</code></pre>
<p>Also, change the output to the real one : VGA1 or DVI-I-1, …</p>
]]></content>
      <tags>
        <tag>Server&amp;OS</tag>
      </tags>
  </entry>
  <entry>
    <title>一些做nfs时的注意事项</title>
    <url>/2013/01/21/something-need-to-pay-attention-when-config-nfs.html</url>
    <content><![CDATA[<p>近期入手了一个Raspberry Pi，然后在折腾的时候，想把一台局域网内的机器的硬盘中的一个目录做nfs挂载过来，其间出了些问题，下面列举出来。</p>
<p>1、服务端的&#x2F;etc&#x2F;exports文件配置的时候，允许的ip地址和操作权限之间是没有空格的</p>
<p>2、cenos6做nfs服务器的时候，portmap已经更名为rpcbind</p>
<p>3、由于我的Raspberry Pi上安装的是archlinux，所以还需要安装nfs-utils，然后才能挂载nfs，否则挂载的时候会提示类型不识别</p>
<p>4、挂载的时候需要 -o nolock参数</p>
<p>5、如果你的客户端处在另一个网段下面，与服务端的通信经过了NAT，客户端mount的时候会有下面的报错</p>
<p>mount.nfs: access denied by server while mounting</p>
<p>那么你需要在服务端的权限配置中加入insecure的参数，不使用nfs预留端口，因为走NAT，所以端口都是大于1024的，这一点从服务器端查看log日志，</p>
<p>cat &#x2F;var&#x2F;log&#x2F;messages | grep mount</p>
<p>就会发现端口非法（illegal port）。详情见这里：<a href="http://blog.sina.com.cn/s/blog_5e66060c01017bpx.html">http://blog.sina.com.cn/s/blog_5e66060c01017bpx.html</a></p>
]]></content>
      <tags>
        <tag>Server&amp;OS</tag>
      </tags>
  </entry>
  <entry>
    <title>man iptables</title>
    <url>/2013/01/23/man-iptables.html</url>
    <content><![CDATA[<p>man iptables<br> 命令格式：</p>
<h1 id="iptables-t-表名-命令-链-规则号-条件-规则"><a href="#iptables-t-表名-命令-链-规则号-条件-规则" class="headerlink" title="iptables [-t 表名] 命令 [链]  [规则号]  [条件]  [规则]"></a>iptables [-t 表名] 命令 [链]  [规则号]  [条件]  [规则]</h1><p> 说明：⑴ -t 表名    指定规则所在的表。表名可以是 filter ,nat ,mangle (小写)</p>
<p>⑵  命令 （iptables的子命令）</p>
<p> -A        在指定链中添加规则</p>
<p> -D        在指定链中删除指定规则</p>
<p> -R        修改指定链中指定规则</p>
<p> -I         在指定规则前插入规则</p>
<p> -L        显示链中的规则</p>
<p> -N        建立用户链</p>
<p> -F        清空链中的规则</p>
<p> -X        删除用户自定义链</p>
<p> -P         设置链的默认规则</p>
<p> -C         用具体的规则链来检查在规则中的数据包</p>
<p> -h        显示帮助</p>
<span id="more"></span>
<pre><code> ⑶ 条件
</code></pre>
<p>–i 接口名                        指定接收数据包接口</p>
<p>-o 接口名                        指定发送数据包接口</p>
<p>-p [!]协议名                       指定匹配的协议 (tcp , udp , icmp , all )</p>
<p>-s [!]ip地址 [&#x2F;mask]                指定匹配的源地址</p>
<p>–sport [!]端口号 [：端口号]         指定匹配的源端口或范围</p>
<p>-d [!]ip地址 [&#x2F;mask]                指定匹配的目标地址</p>
<p>–dport [!]端口号 [：端口号]         指定匹配的目标端口或范围</p>
<p>–icmp –type [!]类型号&#x2F;类型名        指定icmp包的类型</p>
<p>注：8 表示request      0 表示relay （应答）</p>
<pre><code> -m  port  --multiport         指定多个匹配端口

     limit  --limit             指定传输速度

     mac  --mac-source       指定匹配MAC地址

     sate  --state NEW,ESTABLISHED,RELATED,INVALID   指定包的状态
</code></pre>
<p>注：以上选项用于定义扩展规则</p>
<p>-j  规则                           指定规则的处理方法</p>
<pre><code>      ⑷  规则

       ACCEPT   ：接受匹配条件的数据包（应用于I NPUT ,OUTPUT ,FORWARD ）

       DROP      ：丢弃匹配的数据包（应用于INPUT ,OUTPUT ,FORWARD ）

       REJECT    ：丢弃匹配的数据包且返回确认的数据包

       MASQUERADE ：伪装数据包的源地址（应用于POSTROUTING且外网地址
</code></pre>
<p>为动态地址，作用于NAT ）</p>
<pre><code>       REDIRECT  ：包重定向 （作用于NAT表中PREROUTING ,OUTPUT,使用要加上--to-port  端口号 ）

       TOS        ：  设置数据包的TOS字段（应用于MANGLE,要加上--set-tos 值）

       SNAT       ：  伪装数据包的源地址（应用于NAT表中POSTROUTING链，要加上--to-source  ip地址 [ip地址] ）

       DNAT       ：  伪装数据包的目标地址（应用于NAT表中PREROUTING链，要加上--to-destination ip地址 ）

       LOG        ：使用syslog记录的日志

       RETURN    ：直接跳出当前规则链
</code></pre>
<p>3． iptables子命令的使用实例</p>
<p>⑴   添加规则</p>
<p>#iptables –A INPUT –p icmp –-icmp-type 8 –s 192.168.0.3 –j DROP</p>
<p>(拒绝192.168.0.3主机发送icmp请求)</p>
<h1 id="iptables-–A-INPUT-–p-icmp-–-icmp-type-8-–s-192-168-0-0-24-–j-DROP"><a href="#iptables-–A-INPUT-–p-icmp-–-icmp-type-8-–s-192-168-0-0-24-–j-DROP" class="headerlink" title="iptables –A INPUT –p icmp –-icmp-type 8 –s 192.168.0.0&#x2F;24 –j DROP"></a>iptables –A INPUT –p icmp –-icmp-type 8 –s 192.168.0.0&#x2F;24 –j DROP</h1><p>(拒绝192.168.0.0网段ping 防火墙主机，但允许防火墙主机ping 其他主机)</p>
<h1 id="iptables-–A-OUTPUT-–p-icmp-–-icmp-type-0-–d-192-168-0-0-24-–j-DROP"><a href="#iptables-–A-OUTPUT-–p-icmp-–-icmp-type-0-–d-192-168-0-0-24-–j-DROP" class="headerlink" title="iptables –A OUTPUT –p icmp –-icmp-type 0 –d 192.168.0.0&#x2F;24 –j DROP"></a>iptables –A OUTPUT –p icmp –-icmp-type 0 –d 192.168.0.0&#x2F;24 –j DROP</h1><p>(拒绝防火墙主机向192.168.0.0网段发送icmp应答，等同于上一条指令)</p>
<h1 id="iptables-–A-FORWARD-–d-j-DROP"><a href="#iptables-–A-FORWARD-–d-j-DROP" class="headerlink" title="iptables –A FORWARD –d  -j DROP"></a>iptables –A FORWARD –d  -j DROP</h1><p>(拒绝转发数据包到,前提是必须被解析)</p>
<h1 id="iptables-–t-nat-–A-POSTROUTING-–s-192-168-0-0-24-–j-SNAT-–-to-source-211-162-11-1"><a href="#iptables-–t-nat-–A-POSTROUTING-–s-192-168-0-0-24-–j-SNAT-–-to-source-211-162-11-1" class="headerlink" title="iptables –t nat –A POSTROUTING –s 192.168.0.0&#x2F;24 –j SNAT –-to-source 211.162.11.1"></a>iptables –t nat –A POSTROUTING –s 192.168.0.0&#x2F;24 –j SNAT –-to-source 211.162.11.1</h1><p>(NAT，伪装内网192.168.0.0网段的的主机地址为外网211.162.11.1,这个公有地址，使内网通过NAT上网，前提是启用了路由转发)</p>
<h1 id="iptables-–t-nat-–A-PREROUTING-–p-tcp-–dport-80-–d-211-162-11-1-–j-DNAT-–to-destination-192-168-0-5"><a href="#iptables-–t-nat-–A-PREROUTING-–p-tcp-–dport-80-–d-211-162-11-1-–j-DNAT-–to-destination-192-168-0-5" class="headerlink" title="iptables –t nat –A PREROUTING –p tcp –dport 80 –d 211.162.11.1 –j DNAT -–to-destination 192.168.0.5"></a>iptables –t nat –A PREROUTING –p tcp –dport 80 –d 211.162.11.1 –j DNAT -–to-destination 192.168.0.5</h1><p>(把internet上通过80端口访问211.168.11.1的请求伪装到内网192.168.0.5这台WEB服务器，即在iptables中发布WEB服务器，前提是启用路由转发)</p>
<h1 id="iptables-–A-FORWARD-–s-192-168-0-4-–m-mac-–mac-source-00-E0-4C-45-3A-38-–j-ACCEPT"><a href="#iptables-–A-FORWARD-–s-192-168-0-4-–m-mac-–mac-source-00-E0-4C-45-3A-38-–j-ACCEPT" class="headerlink" title="iptables –A FORWARD –s 192.168.0.4 –m mac –mac-source 00:E0:4C:45:3A:38 –j ACCEPT"></a>iptables –A FORWARD –s 192.168.0.4 –m mac –mac-source 00:E0:4C:45:3A:38 –j ACCEPT</h1><p>(保留IP地址，绑定 IP地址与MAC地址)</p>
<p>⑵删除规则</p>
<h1 id="iptables-–D-INPUT-3"><a href="#iptables-–D-INPUT-3" class="headerlink" title="iptables –D INPUT  3"></a>iptables –D INPUT  3</h1><h1 id="iptables-–t-nat-–D-OUTPUT-–d-192-168-0-3-–j-ACCEPT"><a href="#iptables-–t-nat-–D-OUTPUT-–d-192-168-0-3-–j-ACCEPT" class="headerlink" title="iptables –t nat –D OUTPUT –d 192.168.0.3  –j  ACCEPT"></a>iptables –t nat –D OUTPUT –d 192.168.0.3  –j  ACCEPT</h1><p>⑶插入规则</p>
<h1 id="iptables-–I-FORWARD-3-–s-192-168-0-3-–j-DROP"><a href="#iptables-–I-FORWARD-3-–s-192-168-0-3-–j-DROP" class="headerlink" title="iptables –I FORWARD 3 –s 192.168.0.3  –j DROP"></a>iptables –I FORWARD 3 –s 192.168.0.3  –j DROP</h1><h1 id="iptables-–t-nat-–I-POSTROUTING-2-–s-192-168-0-0-24-–j-DROP"><a href="#iptables-–t-nat-–I-POSTROUTING-2-–s-192-168-0-0-24-–j-DROP" class="headerlink" title="iptables –t nat –I POSTROUTING 2 –s 192.168.0.0&#x2F;24 –j DROP"></a>iptables –t nat –I POSTROUTING 2 –s 192.168.0.0&#x2F;24 –j DROP</h1><p>⑷修改规则</p>
<h1 id="iptables-–R-INPUT-1-–s-192-168-0-2-–j-DROP"><a href="#iptables-–R-INPUT-1-–s-192-168-0-2-–j-DROP" class="headerlink" title="iptables –R INPUT 1 –s 192.168.0.2 –j DROP"></a>iptables –R INPUT 1 –s 192.168.0.2 –j DROP</h1><p>⑸显示规则</p>
<h1 id="iptables-–L-默认表中的所有规则"><a href="#iptables-–L-默认表中的所有规则" class="headerlink" title="iptables –L (默认表中的所有规则)"></a>iptables –L (默认表中的所有规则)</h1><h1 id="iptables-–t-nat-–L-POSTROUTING"><a href="#iptables-–t-nat-–L-POSTROUTING" class="headerlink" title="iptables –t nat –L POSTROUTING"></a>iptables –t nat –L POSTROUTING</h1><p>⑹清空规则</p>
<h1 id="iptables-–F"><a href="#iptables-–F" class="headerlink" title="iptables –F"></a>iptables –F</h1><h1 id="iptables-–t-nat-–F-PREROUTING"><a href="#iptables-–t-nat-–F-PREROUTING" class="headerlink" title="iptables –t nat –F PREROUTING"></a>iptables –t nat –F PREROUTING</h1><p>⑺设置默认规则</p>
<h1 id="iptables-–P-INPUT-ACCEPT"><a href="#iptables-–P-INPUT-ACCEPT" class="headerlink" title="iptables –P INPUT ACCEPT"></a>iptables –P INPUT ACCEPT</h1><h1 id="iptables-–t-nat-–P-OUTPUT-DROP"><a href="#iptables-–t-nat-–P-OUTPUT-DROP" class="headerlink" title="iptables –t nat –P OUTPUT DROP"></a>iptables –t nat –P OUTPUT DROP</h1><p>(注：默认规则可以设置为拒绝所有数据包通过，然后通过规则使允许的数据包通过，这种防火墙称为堡垒防火墙，它安全级别高，但不容易实现；也可以把默认规则设置为允许所有数据包通过，即鱼网防火墙，它的安全级别低，实用性较差。）<br>⑻建立自定义链</p>
<h1 id="iptables-–N-wangkai"><a href="#iptables-–N-wangkai" class="headerlink" title="iptables –N wangkai"></a>iptables –N wangkai</h1><p>⑼删除自定义链</p>
<h1 id="iptables-–X-wangkai"><a href="#iptables-–X-wangkai" class="headerlink" title="iptables –X wangkai"></a>iptables –X wangkai</h1><p>⑽应用自定义链</p>
<h1 id="iptables-–A-wangkai-–s-192-168-0-8-–j-DROP"><a href="#iptables-–A-wangkai-–s-192-168-0-8-–j-DROP" class="headerlink" title="iptables –A wangkai –s 192.168.0.8  –j DROP"></a>iptables –A wangkai –s 192.168.0.8  –j DROP</h1><h1 id="iptables-–A-INPUT-–j-wangkai"><a href="#iptables-–A-INPUT-–j-wangkai" class="headerlink" title="iptables –A INPUT –j wangkai"></a>iptables –A INPUT –j wangkai</h1><p>(注：要删除自定义链，必须要确保该链不被引用,而且该链必须为空，如要删除上例定义的自定义链方法为：</p>
<h1 id="iptables-–D-INPUT-–j-wangkai"><a href="#iptables-–D-INPUT-–j-wangkai" class="headerlink" title="iptables –D INPUT –j wangkai"></a>iptables –D INPUT –j wangkai</h1><h1 id="iptables-F-wangkai"><a href="#iptables-F-wangkai" class="headerlink" title="iptables  -F wangkai"></a>iptables  -F wangkai</h1><h1 id="iptables-X-wangkai"><a href="#iptables-X-wangkai" class="headerlink" title="iptables  -X wangkai"></a>iptables  -X wangkai</h1>]]></content>
      <tags>
        <tag>Server&amp;OS</tag>
      </tags>
  </entry>
  <entry>
    <title>博客调整</title>
    <url>/2013/02/06/blog-change.html</url>
    <content><![CDATA[<p>本来计划这个假期对博客大整，但感觉实在没有折腾的必要，于是主题没换，调整了原来的栏目划分，准备以后多更新些非技术文档，即随笔类的内容。</p>
<p>另外调整了博客的服务器。</p>
]]></content>
      <tags>
        <tag>网站日志</tag>
      </tags>
  </entry>
  <entry>
    <title>Javascript小括号“()”的多义性</title>
    <url>/2013/01/30/javascript-parentheses-ambiguity.html</url>
    <content><![CDATA[<p>今天研究了下匿名函数的自执行，对于匿名函数为什么要用括号括起来，甚是不解，于是做了下实验，如下：</p>
<pre><code>function()&#123;
    alert(1);
&#125;
();
</code></pre>
<p>另一组：</p>
<pre><code>var a = function() &#123;
    alert(1);
&#125;
a();
</code></pre>
<p>第一组在执行的时候是会报错的，而对匿名函数加上小括号，或者是赋给一个变量后，再调用就不会再有错误，这就可以看出来，在匿名函数自执行的时候，匿名函数外的小括号的作用其实是进行了一次运算。另外function是一个表达式，这一点在犀牛书的第五章一开始有说到。</p>
<p>关于括号的运算的意义在这篇博文里面的第五点也有提到：<a href="http://www.cnblogs.com/snandy/archive/2011/03/08/1977112.html">http://www.cnblogs.com/snandy/archive/2011/03/08/1977112.html</a>。</p>
]]></content>
      <tags>
        <tag>前端</tag>
      </tags>
  </entry>
  <entry>
    <title>archlinux+nginx+php+mysql+pptpd+freeradius</title>
    <url>/2013/01/22/archlinux-nginx-php-mysql-pptpd-freeradius.html</url>
    <content><![CDATA[<p>折腾了一天终于可以实现freeradius认证登录的pptp vpn了，总结一下。</p>
<p>其实整个过程分为三步，第一步：</p>
<p>分别搭建nmp环境（主要为了能用phpmyadmin，后期可以再找找看有没有其他php管理radius的软件，实在不行就自己写一个）、pptp vpn环境、radius认证环境</p>
<p>第二步：</p>
<p>整合radius和mysql</p>
<p>第三步：</p>
<p>整合radius和pptp vpn。</p>
<p><strong>开始：</strong></p>
<p>1、由于之前已经搭建好了pptpd的vpn了，所以vpn搭建这块就跳过了。</p>
<p>vpn搭建好以后，自己测试一下是否可用。具体的可以参照arch wiki，wiki上有详细的配置，地址：<a href="https://wiki.archlinux.org/index.php/PPTP_Server_(%E7%AE%80%E4%BD%93%E4%B8%AD%E6%96%87)">https://wiki.archlinux.org/index.php/PPTP_Server_(%E7%AE%80%E4%BD%93%E4%B8%AD%E6%96%87)</a></p>
<p>2、安装freeradius服务端和客户端。</p>
<h1 id="pacman-S-freeradius-freeradius-client"><a href="#pacman-S-freeradius-freeradius-client" class="headerlink" title="pacman -S freeradius freeradius-client"></a>pacman -S freeradius freeradius-client<span id="more"></span></h1><p>之所以安装客户端，是因为当用户拨号到服务器的时候，服务器的pptp其实调用了radius客户端去连接radius服务端进行认证。</p>
<p>安装完以后，我们先修改下这个文件</p>
<pre><code>vim /etc/raddb/users
# 找到 steve Cleartext-Password := “testing” , 取消该段的相关注释
steve Cleartext-Password := &quot;testing&quot;
Service-Type = Framed-User,
Framed-Protocol = PPP,
Framed-IP-Address = 172.16.3.33,
Framed-IP-Netmask = 255.255.255.0,
Framed-Routing = Broadcast-Listen,
Framed-Filter-Id = &quot;std.ppp&quot;,
Framed-MTU = 1500,
Framed-Compression = Van-Jacobsen-TCP-IP
</code></pre>
<p>把文本形式的用户认证数据取消掉注释，然后执行下面的命令：</p>
<pre><code>radiusd -X

# 进入debug日志输出模式
# 如果有出现
Listening on authentication address * port 1812
Listening on accounting address * port 1813
Listening on command file /usr/local/var/run/radiusd/radiusd.sock
Listening on proxy address * port 1814
Ready to process requests.
# 这些字样说明正常启动成功了

# 重新打开一个窗口，执行下面这条命令
radtest steve testing localhost 1812 testing123 # 用户名steve 密码testing , 连接密钥testing123
# 出现 rad_recv: Access-Accept packet 字样说明验证成功
</code></pre>
<p>3、安装配置LNMP环境，这个也跳过，网上已经很多说明了，我是用pacman逐个安装然后配置的。安装好以后，把phpmyadmin放到网站根目录下面，然后登录，<br>把&#x2F;etc&#x2F;raddb&#x2F;sql&#x2F;mysql&#x2F;下面的sql全部导入进去，再在sql执行器中执行下面的SQL语句：</p>
<pre><code>GRANT SELECT ON radius.* TO &#39;radius&#39;@&#39;localhost&#39; IDENTIFIED BY &#39;radpass&#39;;
GRANT ALL on radius.radacct TO &#39;radius&#39;@&#39;localhost&#39;;
GRANT ALL on radius.radpostauth TO &#39;radius&#39;@&#39;localhost&#39;;
# 加入组信息，本例中的组名为user
insert into radgroupreply (groupname,attribute,op,value) values (&#39;user&#39;,&#39;Auth-Type&#39;,&#39;:=&#39;,&#39;Local&#39;);
insert into radgroupreply (groupname,attribute,op,value) values (&#39;user&#39;,&#39;Service-Type&#39;,&#39;=&#39;,&#39;Framed-User&#39;);
insert into radgroupreply (groupname,attribute,op,value) values (&#39;user&#39;,&#39;Framed-IP-Netmask&#39;,&#39;:=&#39;,&#39;255.255.255.0&#39;);
# 加入用户信息
INSERT INTO radcheck (UserName, Attribute, Value) VALUES (&#39;ety001&#39;, &#39;Password&#39;, &#39;domyself&#39;);
# 用户加到组里
insert into radusergroup(username,groupname) values(&#39;sqltest&#39;,&#39;user&#39;);
# 限制账户同时登陆次数
INSERT INTO radgroupcheck (GroupName, Attribute, op, Value) values(&quot;user&quot;, &quot;Simultaneous-Use&quot;, &quot;:=&quot;, &quot;1&quot;);
</code></pre>
<p>4、关联radius和mysql</p>
<p>先设置radius客户端，</p>
<pre><code>vim /etc/radiusclient/radiusclient.conf
#如果不存在的话，就cp -r /etc/radiusclient.default /etc/radiusclient
#找到 authserver 和 acctserver 将值改为 localhost
#将 radius_deadtime 0 和 bindaddr * 将这两项注释掉

vim /etc/radiusclient/servers
#添加通信密码
localhost testing123

# 增加字典。这一步很重要！否则在win下会一直报691错误
wget -c http://hello-linux.googlecode.com/files/dictionary.microsoft
mv ./dictionary.microsoft /usr/local/etc/radiusclient/
cat &gt;&gt;/usr/local/etc/radiusclient/dictionary&lt;
</code></pre>
<p>然后设置radius服务端：</p>
<pre><code>vim /etc/raddb/sql.conf
# 设定数据库类型,帐号,密码,数据库,根据实际情况修改
# 找到 readclients = yes 取消前面的注释，取消该注释主要是启用nas表查询，clients.conf就可以不需要了

vim /etc/raddb/radiusd.conf
# 查找$INCLUDE sql.conf（第700行），去掉#号，很重要，如果这个地方不改掉，启动的时候会报找不到sql模块，即sql.conf中的sql&#123;&#125;

vim /etc/raddb/sites-enabled/default
# 找到authorize &#123;&#125;模块，注释掉files（170行），去掉sql前的#号（177行）
# 找到accounting &#123;&#125;模块，注释掉radutmp(396行)，去掉sql前面的#号(406行)
# 找到session &#123;&#125;模块，注释掉radutmp（450行），去掉sql前面的#号（454行）
# 找到post-auth &#123;&#125;模块，去掉sql前的#号（475行），去掉sql前的#号（563行）

vim /usr/local/etc/raddb/sites-enabled/inner-tunnel
# 找到authorize &#123;&#125;模块，注释掉files（125行），去掉sql前的#号（132行）
# 找到session &#123;&#125;模块，注释掉radutmp（252行），去掉sql前面的#号（256行）
# 找到post-auth &#123;&#125;模块，去掉sql前的#号（278行）,去掉sql前的#号（302行）
</code></pre>
<p>上面的工作做完后，重启freeradius，启动成功后，执行下面的操作：</p>
<pre><code># 用刚才插入数据库的用户名和密码来检验
radtest ety001 domyself localhost 1812 testing123
# 出现 rad_recv: Access-Accept packet 字样说明安装已经成功
</code></pre>
<p>5、关联pptp和radius<br>在pptp的配置文件中，即&#x2F;etc&#x2F;ppp&#x2F;pptpd-options中，添加如下两行：</p>
<pre><code>plugin /usr/lib/pppd/2.4.5/radius.so
radius-config-file /etc/radiusclient/radiusclient.conf
</code></pre>
<p>一切搞定，重启下pptp，你就可以去尝试从别的电脑上来连接你的vpn了。</p>
<p>本文参考了：<a href="http://www.zhukun.net/archives/5375">http://www.zhukun.net/archives/5375</a></p>
]]></content>
      <tags>
        <tag>Server&amp;OS</tag>
      </tags>
  </entry>
  <entry>
    <title>【日记】2011.4.16 由鲁大学生网上线仪式想到的</title>
    <url>/2011/04/16/diary.html</url>
    <content><![CDATA[<p>今天这一天，我们的确是等了很久，可能从建波那一批提出要建自己的网站开始吧，我们就一直在为能有一个自己的网站而努力。今天就是这么一天，我们的梦想终于实现了。我现在不想说这个过程是多么的艰难，我只是想说点别的什么有用的东西。</p>
<p>这阵子我算是一直在跟班打杂。我想说因为我爱这里，因为我在这里投入了我大学的绝大多数精力，因为我把这里当作是自己的东西自己的家，所以我才如此的放不下，所以我才会过来跟班，所以我才会愿意协助09级的忙前忙后。</p>
<p>今天的发布会结束我也是思索了很多事情。比如说我们为什么进入社团，为什么进入学生会？我现在才算是找到社团和学生会的本质。学生会教给你的是为人处世的法则，而社团教给你的是如何实事求是的全身心的做事。学生会没有进过，我也不想多说，但是有一点是肯定的，学生会出来的人都很赶眼神，至少他们知道领导来视察应该礼貌一下。下面就说说我现在对于社团的理解。其实社团就是有点像企业的，你有能力你就发挥出来，没能力你就走人，你能拿出成绩来你就留下，拿不出成绩来你就走人，有时候的做事就是像企业这样没有情感的。但是有些时候，社团是需要情感的，因为毕竟不是企业，大家进入这个团队后，很快就会离开这个团队，到时候带走的除了曾经一起做过的成果外，无非就是在做这些事情的时候建立的深厚的友谊！如何把握这个度，则是一个团队领导人需要做的事情了。</p>
<p>社团如果想要发展好，需要均衡各种内部力量，这对于这个团队的领导层有很大的要求，这不是一个人所能做出来想出来的。就像今天的上线仪式发布会，这就是整个社团的事情，是整个社团的荣誉。在这个事情当中，每个人都相当于是一台战争机器的零件，然后一帮人通过一定的组织结构构成了一个战争机器来把眼前的所有困难击碎。而在这个过程中，只要有一个零件跟不上，那就成为了整个机器的短板，成为了敌人打击的软肋，然后被敌人打击后，除了这个零件被打击外，其他的零件一样跟着遭殃。这就是团队，这也是一个团队该怎样发展好，首先应该考虑的。作为团队一员，只有把这个地方的东西真正当作自己的东西的时候，这个地方所获得的荣誉你才有资格分享，只有把这个地方的东西真正当作自己的东西的时候，这个地方才会无时无刻的让你牵挂！</p>
<p>最后再说说这次的上线发布会。从今下午的整体来看，整个过程比较流畅，没有出现很大的纰漏，这一点我很欣慰，毕竟09级的团队再上一年后半年几乎一个学期被迫停止工作，缺少必要的磨合，另外也是这个团队第一次搞这样的大型晚会类型的项目，能做到今天的样子已经很满意了。我作为站长，也代表08级，非常的感谢每位成员的奉献与努力，尤其是让我感动的几个画面，一个是舞蹈排练人员的排练场面，一个是各种默默无闻工作在角落里的甘于寂寞的成员的画面。无论怎么说，你们的付出使得这次的发布会顺利的完成，各位，辛苦了！</p>
<p>但是，我觉得作为现在的管理层，09级的各位成员，你们应该利用这两天的休息的时间再回顾一下这次发布会，从一开始到最后的结束收尾，你们每个人哪里做的还不足，好好的用文字总结一下（我一直相信写东西，会使你自己更加能完善你自己的思想），这个总结对于你们来说很重要，对于团队来说也很重要（传到团队博客上），因为这些都是经验，因为这些都是文化的一部分。</p>
<p>也许现在可能还有成员因为兴奋或者因为在思考还没有入睡，但是我想说，各位尽快理顺思路平静下来吧，因为团队的挑战现在才刚刚开始，我们从去年到今年只活过来半口气，我们需要做的事情还有很多很多，我们需要付出更多的努力才能有所收获，各位，加油，拿出点实际行动来！！！</p>
]]></content>
      <tags>
        <tag>随笔</tag>
      </tags>
  </entry>
  <entry>
    <title>岁末寄语</title>
    <url>/2013/02/08/the-message-in-the-end-of-the-year.html</url>
    <content><![CDATA[<p>新的一年又要开始了，真不知道该如何去开这篇文章的头，2012年是各种纠结错杂的一年，我也反思了很多，尤其是对于我的这个博客的名字的反思，其实也是对于我自己的一个反思。因此，我觉得我就从我的博客名字开始吧。</p>
<p>我的博客叫做Do Myself，做自己，我还清楚的记得，当年开始搞我自己的博客的时候，是多么信誓旦旦的认为自己一定就可以做自己，但是回看博客建立后的两年多，我发现我并没有比以前做的更好，反而已经开始失去自我。</p>
<p>每天都会觉得很累，之前一直百思不得其解，直到2012年的某一天，看了大冰的一期节目后才醒悟，之所以觉得自己每天都过的累，是因为我们一直都是在做别人眼中的自己。这就意味着你要不断的去猜测别人是怎么看待你的，去观察别人是怎么评论这个世界的，然后思考你要怎样去做才能掩饰掉自己的缺点，最后把自己觉得别人会认为是正确的东西表演给别人看。正所谓人生如戏，原来就是这样的意思啊。</p>
<span id="more"></span>
<p>演戏给别人看其实是一种妥协，而这种妥协，很多人跟我说这是成熟的表现，但我觉得我宁可不要这样的成熟，因为我在我已经度过的24年里面，已经因为妥协失去了很多。尽管我常常把有失必有得这样的话挂在嘴边，那其实只不过也就是一个自我安慰罢了。我觉得我现在已经不知道了我到底是应该去做什么，我开始迷失方向，开始随波逐流，这不是我，我觉得我已经认不出我自己了。</p>
<p>假若我的博客的名字是一个招牌的话，我现在都非常有冲动想把我自己的这块招牌砸烂 。因为我感觉我自己就像是在卖假药，每天都要跟别人传播你要做自己的信念，而其实，我自己却是一年不如一年像自己，更不用说做自己了。这种厌恶感，让我觉得很彷徨，甚至是对自己的一种声嘶力竭。岁末的卫生扫除，翻看了放在书橱上的相册，看了小时候的照片，我觉得照片里的那个人很陌生，我一点也不认识，我只是在大脑里的某个区域记录着这个相册是我的相册，里面放的是我的相片，然后我才知道里面的那个人是我。如果单独拿出来给我看，我一定看不出来那个人是我。我不知道这是怎么了，难道我真的迷失了自己吗？</p>
<p>2012，所谓的世界末日没有到来，倒是使我经常的重新看日和系列动画中世界末日那一集。我觉得这个动画片已经可以说明些什么了。人们一直在演戏，活着可能也不知道为了什么。总说时间是一把杀猪刀，其实生活才更像一把杀猪刀。繁琐的生活和社会使人们失去了激情，失去了梦想，失去了创造力，失去了自我。毕业半年，我发现我已经在每天上班，下班，加班中没有创造力，没有了激情，我找不到了那个在校园中总是会有疯狂想法的自己。</p>
<p>也许2013年将是一个寻找自己的时间，在这人生第二个本命年里面，找回自己，去跟自己生活中不喜欢的事情说不，要有信心去争取自己认为生活中美好的东西，要对自己有信心，虽然12年来自各个方面的各种打击已经让自己信心全无，但是13年将是一个新的开始。我应该说服我自己去相信这是一个新的开始，再去愣头青一回。</p>
<p>活着，就要去努力的活着，要让自己的活着变的精彩一些！</p>
<p>后记：记得原来高中写作文总喜欢写前记或者后记，因为目的很简单就是凑字数，但是我觉得这次我应该不是为了凑字数，因为的确不知道这些话应该放到文章的什么位置了。</p>
<p>许久不写文章，发现真的是写起来很困难了，话不成话，句不成句，各种不通。一篇文章前前后后写和改进行了两天，也终究是在2012年的除夕的凌晨能接近完稿。说到写文章，最近认识了一个把我一直当陌生人看待的女生，曾在一次聊天中说到了作文和文章这两个词，她说南方人喜欢叫写作文为写文章，这让人听着很呕吐，我也不知我的这跎应该算是作文还是算是文章，还是仅是一些文字。呵呵，估计她也看不到这篇乌糟的东西。不过聊了一个多月，却一直把我当作陌生人看待，这也的确是让我感到些许的不快。</p>
<p>也不知写到这个位置了，上面是否有出现错字和别字。2012年，在跟我qq上聊天的部分人总是喜欢打别字，我不得不说这不是个好习惯，尤其是你准备要跟我讨论些技术问题的时候，请认真的敲打你要说的每句话和每个字，谨慎使用输入法的联想功能，谢谢。</p>
<p>除了发掘自己找不到自己外，还发现自己很讨厌无谓的压力，所以希望新的一年里不要有什么无谓的压力，我希望我能集中26岁前的大好时光做点什么事情。</p>
<p>我勒个去，后记快赶上正文了，收笔。</p>
]]></content>
      <tags>
        <tag>随笔</tag>
      </tags>
  </entry>
  <entry>
    <title>如何让普通用户不用sudo就可以写入/dev/input/event</title>
    <url>/2013/03/14/make-the-users-can-write-dev-input-event-not-using-sudo.html</url>
    <content><![CDATA[<p>最近在做的一个项目中，有一个细节是需要用C实现模拟键盘输入，发现每次执行程序的时候，都需要用sudo，因为默认情况下&#x2F;dev&#x2F;input&#x2F;下的event都是root属主和属组，并且权限是640。如果要实现普通用户直接可以写的话，可以去做一个udev的规则，比如用root用户创建一个如下位置的规则文件：</p>
<pre><code>/etc/udev/rules.d/99-input.rules:
</code></pre>
<p>内容如下：</p>
<pre><code>KERNEL==&quot;event*&quot;, NAME=&quot;input/%k&quot;, MODE=&quot;660&quot;, GROUP=&quot;input&quot;
</code></pre>
<p>重启机器后，就会发现那些event都是input组的了，现在需要去创建个input的用户组，并把想要允许能写event的用户加入input组即可。</p>
]]></content>
      <tags>
        <tag>编程语言</tag>
        <tag>Server&amp;OS</tag>
      </tags>
  </entry>
  <entry>
    <title>ffmpeg参数</title>
    <url>/2013/04/02/ffmpeg-parameters.html</url>
    <content><![CDATA[<p>下列为较常使用的参数。</p>
<p>主要参数<br>    -i 设定输入档名。<br>    -f 设定输出格式。<br>    -y 若输出档案已存在时则覆盖档案。<br>    -fs 超过指定的档案大小时则结束转换。<br>    -ss 从指定时间开始转换。<br>    -title 设定标题。<br>    -timestamp 设定时间戳。<br>    -vsync 增减Frame使影音同步。</p>
<p>影像参数<br>    -b 设定影像流量，默认为200Kbit&#x2F;秒。（ 单位请参照下方注意事项 ）<br>    -r 设定FrameRate值，默认为25。<br>    -s 设定画面的宽与高。<br>    -aspect 设定画面的比例。<br>    -vn 不处理影像，于仅针对声音做处理时使用。<br>    -vcodec 设定影像影像编解码器，未设定时则使用与输入档案相同之编解码器。</p>
<p>声音参数<br>    -ab 设定每Channel （最近的SVN 版为所有Channel的总合）的流量。（ 单位 请参照下方注意事项 ）<br>    -ar 设定采样率。<br>    -ac 设定声音的Channel数。<br>    -acodec 设定声音编解码器，未设定时与影像相同，使用与输入档案相同之编解码器。<br>    -an 不处理声音，于仅针对影像做处理时使用。<br>    -vol 设定音量大小，256为标准音量。(要设定成两倍音量时则输入512，依此类推。)</p>
<p>注意事项<br>以-b及ab参数设定流量时，根据使用的ffmpeg版本，须注意单位会有kbits&#x2F;sec与bits&#x2F;sec的不同。（可用ffmpeg -h显示说明来确认单位。）<br>例如，单位为bits&#x2F;sec的情况时，欲指定流量64kbps时需输入‘ -ab 64k ’；单位为kbits&#x2F;sec的情况时则需输入‘ -ab 64 ’。<br>以-acodec及-vcodec所指定的编解码器名称，会根据使用的ffmpeg版本而有所不同。例如使用AAC编解码器时，会有输入aac与 libfaac的情况。此外，编解码器有分为仅供解码时使用与仅供编码时使用，因此一定要利用ffmpeg -formats 确 认输入的编解码器是否能运作。</p>
<p>范例<br>将MPEG-1影片转换成MPEG-4格式之范例<br>ffmpeg -i inputfile.mpg -f mp4 -acodec libfaac -vcodec mpeg4 -b 256k -ab 64k outputfile.mp4</p>
<p>将MP3声音转换成MPEG-4格式之范例<br>ffmpeg -i inputfile.mp3 -f mp4 -acodec libaac -vn -ab 64k outputfile.mp4</p>
<p>将DVD的VOB档转换成VideoCD格式的MPEG-1档之范例<br>ffmpeg -i inputfile.vob -f mpeg -acodec mp2 -vcodec mpeg1video -s 352x240 -b 1152k -ab 128k outputfile.mpg<br>将AVI影片转换成H.264格式的M4V档之范例<br>ffmpeg -i inputfile.avi -f mp4　-acodec libfaac -vcodec libx264 -b 512k -ab 320k outputfile.m4v<br>将任何影片转换成东芝REGZA可辨识的MPEG2格式之范例<br>ffmpeg -i inputfile -target ntsc-svcd -ab 128k -aspect 4:3 -s 720x480 outputfile.mpg<br>连接复数的AVI影片档之范例（在此范例中须一度暂时将AVI档转换成MPEG-1档(MPEG-1, MPEG-2 PS<br>DV格式亦可连接)、</p>
<p>ffmpeg -i input1.avi -sameq inputfile_01.mpg</p>
<p>ffmpeg -i input2.avi -sameq inputfile_02.mpg</p>
<p>cat inputfile_01.mpg inputfile_02.mpg &gt; inputfile_all.mpg</p>
<p>ffmpeg -i inputfile_all.mpg -sameq outputfile.avi</p>
]]></content>
      <tags>
        <tag>理论</tag>
      </tags>
  </entry>
  <entry>
    <title>centos5.x格式化ext4</title>
    <url>/2013/04/07/centos5-x-ext4.html</url>
    <content><![CDATA[<p>1、去&#x2F;lib&#x2F;modules&#x2F;2.6.18-308.el5xen&#x2F;kernel&#x2F;fs&#x2F;ext4&#x2F;，看一下是ext4.ko还是ext4dev.ko，<br>然后modprobe ext4或者modprobe ext4dev</p>
<p>2、然后需要安装一个包</p>
<figure class="highlight plaintext"><table><tr><td class="code"><pre><span class="line"># yum install -y e4fsprogs</span><br></pre></td></tr></table></figure>
<p>之后就可以使用mkfs.ext4了。</p>
]]></content>
      <tags>
        <tag>Server&amp;OS</tag>
      </tags>
  </entry>
  <entry>
    <title>Kickstart文件中的主要项目及参数介绍</title>
    <url>/2013/04/07/kickstart-params-introduction.html</url>
    <content><![CDATA[<p>Kickstart文件中的主要项目及参数介绍：</p>
<p>每个项目都由关键字来识别；关键字可跟一个或多个参数；如果某选项后面跟随了一个等号（&#x3D;），它后面就必须指定一个值。</p>
<p>install   (可选)<br>明确指定系统次次进行的是全新安装系统；是默认项；</p>
<p>cdrom  （可选）<br>以本地CD-ROM为源安装系统；</p>
<p>harddrive  (可选)<br>以硬盘分区中包含的镜像为源（安装树）安装新系统；当以该种方式安装系统时，即使指定clearpart –all项，源所在分区也不会被重新抹去；<br>–partition&#x3D;    指定分区<br>–dir&#x3D;        指定包含镜像的目录<br>例：<br>harddrive  –partition&#x3D;&#x2F;dev&#x2F;sdb2  –dir&#x3D;&#x2F;data&#x2F;iso</p>
<span id="more"></span>
<p>nfs   (可选)<br>指定从NFS服务器上获取安装树；<br>–server&#x3D;    指定NFS服务器，主机名称或IP<br>–dir&#x3D;        包含安装树的目录<br>–opts&#x3D;        可以指定挂载NFS的目录时的挂载选项<br>例：<br>nfs  –server&#x3D;192.168.1.254  –dir&#x3D;&#x2F;data&#x2F;iso</p>
<p>url   (可选)<br>指定通过FTP或HTTP从网络获取安装树；<br>–url    指定资源位置<br>例：<br>url  –url  ftp:&#x2F;&#x2F;<username>:<password>@install.example.com&#x2F;iso<br>url  –url  <a href="http://install.example.com/iso">http://install.example.com/iso</a></p>
<p>bootloader （必需）<br>设定boot loader安装选项；<br>–append&#x3D;        可以指定内核参数<br>–driveorder&#x3D;    设定设备BIOS中的开机设备启动顺序<br>–location&#x3D;        设定引导记录的位置； mbr：默认值；partition：将boot loader安装于包含kernel的分区超级快中；none：不安装boot loder。<br>示例：<br>bootloader  –location&#x3D;mbr  –append&#x3D;“rhgb quiet” –driveorder&#x3D;sda,sdb</p>
<p>clearpart （可选）<br>在建立新分区前清空系统上原有的分区表，默认不删除分区；<br>–all      擦除系统上原有所有分区；<br>–drives    删除指定驱动器上的分区<br>–initlabel    初始化磁盘卷标为系统架构的默认卷标<br>–linux        擦除所有的linux分区<br>–none（default）不移除任何分区<br>例：<br>clearpart  –drives&#x3D;hda,hdb –all  –initlabel</p>
<p>zerombr  （可选）<br>清除mbr信息，会同时清空系统用原有分区表</p>
<p>drivedisk （可选）<br>如果使用特殊存储方式时，需要指定驱动程序盘位置以便加载存储驱动；<br>1.  将驱动盘拷贝到本地硬盘某分区根目录：<br>drivedisk <partition> [ –type&#x3D;<fstype> ]<br>2.  也可以指定一个网络位置加载驱动程序盘<br>drivedisk  –source&#x3D;<a href="ftp://path/to/drive.img">ftp://path/to/drive.img</a><br>drivedisk  –source&#x3D;<a href="http://path/to/drive.img">http://path/to/drive.img</a><br>drivedisk  –source&#x3D;nfs:host:&#x2F;&#x2F;path&#x2F;to&#x2F;drive.img</p>
<p>firewall （可选）<br>配置系统防火墙选项；<br>firewall –enable|–disable  [ –trust ] <device> [ –port&#x3D; ]<br>–enable        拒绝外部发起的任何主动连接；<br>–disable        不配置任何iptables防御规则；<br>–trust        指定完全信任网卡设备；<br>–port        使用port:protocol格式指定可以通过防火墙的服务；<br>示例：<br>firewall –enable –trust eth0  –trust eth1  –port&#x3D;80:tcp</p>
<p>selinux （可选）<br>设置系统selinux状态；默认为启用并处于enforcing模式；<br>selinux [ –disabled|–enforcing|–premissive ]</p>
<p>reboot （可选）<br>在系统成功安装完成后默认自动重启系统（kickstart方法时）；在收到你敢装系统完成后，会提示按任意键进行重启；<br>在本文件中没有明确指明其他方法时就默认完成方式为reboot；<br>使用 reboot 选项可能会导致安装的死循环，这依赖于安装介质和方法。需要特别注意；</p>
<p>halt  （可选）<br>在系统成功安装完成后关机；默认为reboot；<br>其他选项还有shutdown、poweroff，需要使用请自行参考官方文档。</p>
<p>graphical （可选）<br>默认值，在图形模式下进行kickstart方式安装；</p>
<p>text （可选）<br>以文本方式进行kickstart安装；默认为图形界面</p>
<p>key  (可选)<br>设置一个安装码(installration number)，用于获取redhat官方的支持服务；<br>–skip    跳过key设置，不进行设置；如果不设置可能跳转到交互模式让用户选取动作；</p>
<p>keyboard （必需）<br>设置键盘类型；一般设置为us；</p>
<p>lang （必需）<br>设置安装过程使用的语言及系统的缺省语言；文本模式安装时可能不支持某些语言（中、韩…），所以可能仍以默认的英文方式安装；默认en_us，装中文时，需要后期%packages部分装上中文支持组件；<br>例：<br>lang en_US</p>
<p>timezone （可选）<br>设置系统的时区；<br>timezone  [ –utc ]  <timezone><br>例：<br>timezone  –utc  Asia&#x2F;Shanghai</p>
<p>auth&#x2F;authconfig  (必需)<br>设置系统的认证方式；默认为加密但不隐藏(shadow)；<br>–enablemd5    使用MD5加密方式<br>–useshadow或—enableshadow    使用隐藏密码；<br>–enablenis&#x3D;     使用NIS认证方式<br>–nisdomain&#x3D;    NIS域<br>–nisserver&#x3D;       NIS服务器<br>还可以设置LDAP、SMB及Kerberos 5认证方式，详细请参考官方文档；<br>例：<br>authconfig  –useshadow  –enablemd5</p>
<p>rootpw （必需）<br>设置系统root账号的密码；<br>rootpw [ –iscrypted ]  <passwd><br>–iscrypted    表示设置的密码为加密过的串；<br>例：<br>rootpw  pa4word<br>rootpw –iscrypted  $1$RPYyxobb$&#x2F;LtxMNLJC7euEARg2Vu2s1</p>
<p>network （可选）<br>配置网络信息；在网络安装（NFS&#x2F;HTTP&#x2F;FTP）时必须指定；<br>–bootproto&#x3D;dhcp|bootp|static    指定ip获取方式，默认为dhcp&#x2F;bootp;<br>–device&#x3D;    设置安装时激活来进行系统安装的网卡设备；该参数只在kickstart文件为本地文件时有效；若kickstart配置文件在网络上，安装程序会先初始化网卡然后去寻找kickstart文件；<br>–ip&#x3D;    ip设置<br>–gateway&#x3D;   网关<br>–nameserver&#x3D;  DNS设置<br>–nodns         不设置DNS<br>–netmask&#x3D;   掩码<br>–hostname&#x3D; 设置安装后主机名称<br>–onboot&#x3D;    设置是否在系统启动时激活网卡<br>–class&#x3D;        设置DHCP的class值<br>–noipv4        禁用该设备的ipv4功能<br>–noipv6        禁用该设备的ipv6功能<br>如将网络模式设置为静态模式，则必须在一行内写上ip，netmask、dns、gateway等信息；<br>例：<br>network –bootproto&#x3D;static –ip&#x3D;1.1.1.1 –metmask&#x3D;255.0.0.0 –gateway&#x3D;1.1.1.254 –nameserver&#x3D;1.1.1.2<br>netmask –bootproto&#x3D;dhcp  –device&#x3D;eth0</p>
<p>skipx （可选）<br>如果该项存在，就不对系统的X进行设置；</p>
<p>xconfig （可选）<br>配置X window ；如果不给出选项，在安装过程中需要手动调整设置；当然不安装X时不应该添加该项；<br>–driver            为显卡设置X驱动<br>–videoram&#x3D;    设置显卡的RAM大小<br>–defaultdesktop&#x3D;    设置GNOME&#x2F;KDE作为默认桌面；假定这两个桌面环境在%packages例已经安装<br>–startxonboot   使用图形界面登录系统<br>–resolution&#x3D;     设置图形界面的分辨率；可用值有640<em>480、800</em>600、1024<em>768等；确保设置指适合于显示卡及显示器；<br>–depth&#x3D;           设置显示色深；可用值有8&#x2F;16&#x2F;24&#x2F;32；确保设置值适合于显示设备；<br>例:<br>xconfig    –startxonboot  –resolution&#x3D;800</em>600 –depth&#x3D;16</p>
<p>services （可选）<br>设置禁用或允许列出的服务；<br>–disabled 设置服务为禁用<br>–enabled  启动服务<br>例：<br>services –disabled autid,cups,smartd,nfslock  服务之间用逗号隔开，不能有空格</p>
<p>iscsi（可选）<br>指定额外的ISCSI设备；<br>issci –ipaddr&#x3D; ipaddr  [options].<br>–target<br>–port&#x3D;<br>–user&#x3D;<br>–password&#x3D;</p>
<p>part&#x2F;partition  （install模式必须）<br>建立新分区；<br>part  <mntpoint>|swap|pv.id|rdid.id  options<br>mntpoint:挂载点，是在创建普通分区时指定新分区挂载位置的项；挂载点需要格式正确<br>swap： 创建swap分区；<br>raid.id:  表示创建的分区类型为raid型；必须用id号进行唯一区别；<br>pv.id：  表示所创建的分区类型为LVM型；必须用唯一id号进行区别；<br>–size&#x3D;  设置分区的最小值，默认单位为M，但是不能写单位；<br>–grow  让分区自动增长利用可用的磁盘空间，或是增长到设置的maxsize值；<br>–maxsize 设置分区自动增长(grow)时的最大容量值，以M为单位，但不能写单位；<br>–onpart&#x3D;&#x2F;–usepart&#x3D;     设置使用原有的分区；<br>–noformat    设置不格式化指定的分区，在跟—onpart一同使用时，可以避免删除原有分区上的数据，在新安装的系统中保留使用数据；<br>–asprimary    强制制定该分区为主分区；若指定失败，分区会失败，导致安装停止；<br>–fstype&#x3D;    新增普通分区时指定分区的类型，可以为ext2、ext3、ext4、swap、vfat及hfs；<br>–ondisk&#x3D;&#x2F;–ondrive&#x3D;     设定该分区创建在一个具体的磁盘上；<br>–start   指定分区以磁盘上那个磁道开始；需要跟–ondisk参数一块使用；<br>–end    指定分区以磁盘上那个磁道结束；需要跟上述两个参数一起使用；<br>–recommended：让系统自行决定分区的大小；在创建swap分区时，若RAM&lt;2G，则分区大小为2*RAM；若RAM&gt;&#x3D;2G时，分区大小为RAM+2G；<br>–bytes-pre-inode&#x3D;    指定分区格式化时inode的大小；默认值为4096<br>–fsoptions&#x3D;    指定创建fstab文件时该分区挂载参数项；<br>例：<br>part  &#x2F;boot  –fstype&#x3D;“ext3” –size&#x3D;100<br>part  swap  –fstype&#x3D;“swap” –size&#x3D;512<br>part  &#x2F;  –bytes-pre-inode&#x3D;4096  –fstype&#x3D;“ext4”–size&#x3D;10000<br>part  &#x2F;data    –onpart&#x3D;&#x2F;dev&#x2F;sdb1  –noformat<br>part  raid.100  –size&#x3D;2000<br>part  pv.100     –size&#x3D;1000</p>
<p>raid  (可选)<br>设置RAID。<br>raid 挂载点  –level&#x3D;<level>  –device&#x3D;<mddevices_name>  &lt;raid组成分区&gt;<br>挂载点：    选取根&#x2F;时，注意尽量避免&#x2F;boot在RAID内，除非为RAID1；<br>–level&#x3D;     设置RAID级别<br>–device&#x3D;  RAID设备名称，如md0，md1…<br>–byte-pre-inode&#x3D;    设置该RAID分区上inode大小；若分区文件系统类型不支持该参数，会静默忽略参数；<br>–spares&#x3D;  设置RAID的热备盘<br>–fstype&#x3D;  设置文件系统类型<br>–fsoptions&#x3D;  设置挂载该文件系统时自定义的一些参数，参数写入fstab文件；<br>–useexisting  使用现有的RAID设备并且重新格式化原设备<br>–noformat     在使用现有的RAID设备时不格式化原有RAID设备<br>例：完整创建一个RAID1设备示例；<br>part  raid.10  –size&#x3D;1000  –ondisk&#x3D;&#x2F;dev&#x2F;sdb<br>part  raid.11  –size&#x3D;1000  –ondisk&#x3D;&#x2F;dev&#x2F;sdc<br>raid  &#x2F;data  –level&#x3D;1  –device&#x3D;md0  raid.10  raid.11</p>
<p>volgroup  (可选)<br>创建一个LVM卷组VG；<br>volgroup  vg_name  partition  [options]<br>–useexiting   使用现有的VG并且重新格式化<br>–noformat    使用现有的VG时不做格式化<br>–pesize          设置PE（physical extents）块大小<br>例：<br>part pv.11  –size&#x3D;2000<br>volgroup  myvg  pv.11</p>
<p>logvol  (可选)<br>创建一个LVM逻辑卷LV；<br>logvel  mnt_point  –vgname&#x3D;vg_name  –size&#x3D;lv_size  –name&#x3D;lv_name  [options]<br>–useexiting  使用现有的LV并且重新格式化<br>–noformat   使用现有的LV时不做格式化<br>–fstype&#x3D;      指定RAID分区类型<br>–fsoptions&#x3D;  设置挂载该文件系统时自定义的一些参数，参数写入fstab文件；<br>–byte-pre-inode&#x3D;    设置该RAID分区上inode大小；<br>–precent&#x3D;    设定LV大小为VG可用空间的比例；<br>例：<br>part pv.20  –size&#x3D;5000<br>volgroup  mvvg  pv.20<br>logvol    &#x2F;data  –vgname&#x3D;myvg  –size&#x3D;3000  –name&#x3D;mydata</p>
<p>原文地址：<a href="http://www.qianshoublog.com/post/7528.html"><strong>http://www.qianshoublog.com/post/7528.html</strong></a><br>本文标题：<a href="http://www.qianshoublog.com/post/7528.html"><strong>ks.cfg 文件，参数讲解</strong></a></p>
]]></content>
      <tags>
        <tag>Server&amp;OS</tag>
      </tags>
  </entry>
  <entry>
    <title>三天的推廣經歷與思考</title>
    <url>/2013/05/10/three-day-promotion-experience-and-thinking.html</url>
    <content><![CDATA[<p>五一的時候寫了一個小應用，關於網絡存儲的，這個應用的想法是大三的時候就有了，只不過一直沒有去做。</p>
<p>這個應用的出發點是為了解決去打印店打印東西不再需要帶U盤的，後來工作後，經常遇到一些在Linux和windows之間傳輸文件的情況，有時會用U盤，但是有時候Linux服務器不一定就在你可以摸得到的地方，那就只能走網絡了。而走網絡顯然就意味著要安裝軟件，有時候就為了傳一個不到10M的文件再折騰一遍服務或者軟件安裝配置，著實的覺得不值得。</p>
<p>接下來回到正題，對於已經過去的3天，小範圍的推廣讓我思考了許多，以前只是聽別的大牛在交流會說到的一些情況，這次也是有了自己的體悟，真的是只有自己親自去嘗試才會有收獲。</p>
<span id="more"></span>
<p>由於我的應用思路來自校園打印，因此我的第一推廣陣地就是校園。考慮到現在正處在畢業季，應該會有很多畢業生需要打印東西，由於我已不在校園中，所以無法實地去跑推廣或者印發傳單，只能依託原來加入的QQ群散播廣告，通過在人人網，QQ空間和騰訊微博發信息@校園內的大的社團公共帳號，寄希望於這些媒介來實現社交化傳播。</p>
<p>結果很失敗！除了自己班的兄弟們在群裏頂了下，帶來了十幾個點擊量，再就是我帶過的社團的孩紙們給我面子帶來些許點擊，其他的都石沈大海！思考原因，應該是我太把社團的公共帳號當回事了，真的以為他們是社交體系的節點、意見領袖。可能這樣的思考結果有些太主觀，那反觀自己，應用為什麼沒有給用戶一種有用的感覺，進而主動分享該應用給他的好友？這些都應該是需要進一步思考的。</p>
<p>推廣第二天晚上，決定增加一個陣地，再看一下效果。去<a href="http://v2ex.com/">v2ex.com</a>站，發了個帖子，簡述了開發這個應用的目的和作用（），截止到現在，反響不錯（至少半天的推廣比前兩天的校內推廣效果好30倍以上）。v2ex這個社區是以程序員和喜歡IT的人組成，這可能是應用在這裏推廣效果較好的主要原因。另外就是用戶的確也是遇到了我所遇到的傳文件的窘境，也的確，多數人總是會在遇到困難的時候才開始捉急，也許作為工具類應用開發者，推廣的時機選擇的確很重要，當人們捉急的時候，你以救世主身份出現了，那就真的是救世主了，笑～</p>
<p>針對兩個不同群體的推廣也多少可以反觀用戶群體的表現，這篇日誌就先不討論了，因為數據太少還太局限，尤其是校內的推廣這個事。不過校內推廣這事還是有待再觀察，因為畢竟這次涉及的群體範圍局限性太高，並且有很大的外界干擾因素（群體幾乎都認識我）。</p>
<p>貌似一直沒有提到我的應用的地址，<a href="http://upan.pro/">http://upan.pro</a>，就是這個地址了，當時註冊域名的時候實在是想不出什麼花哨的名字了，直接就上大白話了。。。另外說明一點就是，我的這個應用目的在於慶量化，簡化上傳和下載，提供中轉服務而不是存儲服務，因為個人感覺再做個網盤出來沒什麽意義，關鍵是沒有燒錢的資本，笑～</p>
]]></content>
      <tags>
        <tag>随笔</tag>
      </tags>
  </entry>
  <entry>
    <title>PHP FPM设置</title>
    <url>/2013/04/24/php-fpm-config.html</url>
    <content><![CDATA[<p>php-fpm目前主要又两个分支，分别对应于php-5.2.x的版本和php-5.3.x的版本。在5.2.x的版本中，php-fpm.conf使用的是xml格式，而在新的5.3.x版本中，则是和php.ini一样的配置风格。</p>
<p>在5.2.x版本中，php-fpm.conf中对于进程管理号称是有两种风格，一种是静态(static)的，一种是类似于apache风格(apache-like)的。</p>
<p><code>Process manager settings</code></p>
<value name=”pm”>

<p>Sets style of controling worker process count.<br>Valid values are ’static’ and ‘apache-like’<br><value name=”style”>static</value></p>
<p>按照文档的说明，如果pm的style采用apache-like，启动的进程数应该是和StartServers指定的一样。不过经过数次的尝 试，会发 现，实际上在这里将pm的style配置成apache-like没有起任何作用。也就是说，这里的apache-like并没有被实现。</p>
<p>不过，在最新的5.3.x的配套php-fpm中，apache风格的进程管理已经被实现了。</p>
<p><code>; Choose how the process manager will control the number of child processes. ; Possible Values: ; static - a fixed number (pm.max_children) of child processes; ; dynamic - the number of child processes are set dynamically based on the ; following directives: ; pm.max_children - the maximum number of children that can ; be alive at the same time. ; pm.start_servers - the number of children created on startup. ; pm.min_spare_servers - the minimum number of children in &#39;idle&#39; ; state (waiting to process). If the number ; of &#39;idle&#39; processes is less than this ; number then some children will be created. ; pm.max_spare_servers - the maximum number of children in &#39;idle&#39; ; state (waiting to process). If the number ; of &#39;idle&#39; processes is greater than this ; number then some children will be killed. ; Note: This value is mandatory. ;pm = dynamic pm = static </code></p>
<p>由上面一段文字可知，对于进程的管理存在两种风格——static和dynamic。和之前的版本的进程管理其实还是一样的，只是将apache-like改成了dynamic，这样更容易理解。</p>
<p>如果设置成static，php-fpm进程数自始至终都是pm.max_children指定的数量，不再增加或减少。如果设置成 dynamic，则php-fpm进程数是动态的，最开始是pm.start_servers指定的数量，如果请求较多，则会自动增加， 保证空闲的进程数不小于pm.min_spare_servers，如果进程数较多，也会进行相应清理，保证多余的进程数不多于 pm.max_spare_servers。</p>
<p><strong>这两种不同的进程管理方式，可以根据服务器的实际需求来进行调整。</strong></p>
<p>这里先说一下涉及到这个的几个参数，他们分别是<strong>pm、pm.max_children、pm.start_servers、pm.min_spare_servers</strong>和<strong>pm.max_spare_servers</strong>。</p>
<p>pm表示使用那种方式，有两个值可以选择，就是static（静态）或者dynamic（动态）。在更老一些的版本中，dynamic被称作apache-like。这个要注意看配置文件的说明。</p>
<p>下面4个参数的意思分别为：<br>pm.max_children：静态方式下开启的php-fpm进程数量。<br>pm.start_servers：动态方式下的起始php-fpm进程数量。<br>pm.min_spare_servers：动态方式下的最小php-fpm进程数量。<br>pm.max_spare_servers：动态方式下的最大php-fpm进程数量。</p>
<p>如果dm设置为static，那么其实只有pm.max_children这个参数生效。系统会开启设置数量的php-fpm进程。如果dm设置为 dynamic，那么pm.max_children参数失效，后面3个参数生效。系统会在php-fpm运行开始 的时候启动pm.start_servers个php-fpm进程，然后根据系统的需求动态在pm.min_spare_servers和 pm.max_spare_servers之间调整php-fpm进程数。</p>
<p>那么，对于我们的服务器，选择哪种执行方式比较好呢？事实上，跟Apache一样，运行的PHP程序在执行完成后，或多或少会有内存泄露的问题。这也是为什么开始的时候一个php-fpm进程只占用3M左右内存，运行一段时间后就会上升到20-30M的原因了。</p>
<p>对于内存大的服务器（比如8G以上）来说，指定静态的max_children实际上更为妥当，因为这样不需要进行额外的进程数目控制，会提高效 率。因为频繁开关php-fpm进程也会有时滞，所以内存够大的情况下开静态效果会更好。数量也可以根据 内存&#x2F;30M 得到，比如8GB内存可以设置为100，那么php-fpm耗费的内存就能控制在 2G-3G的样子。如果内存稍微小点，比如1G，那么指定静态的进程数量更加有利于服务器的稳定。这样可以保证php-fpm只获取够用的内存，将不多的 内存分配给其他应用去使用，会使系统的运行更加畅通。</p>
<p>对于小内存的服务器来说，比如256M内存的VPS，即使按照一个20M的内存量来算，10个php-cgi进程就将耗掉200M内存，那系统的崩 溃就应该很正常了。因此应该尽量地控制php-fpm进程的数量，大体明确其他应用占用的内存后，给它指定一个静态的小数量，会让系统更加平稳一些。或者 使用动态方式，因为动态方式会结束掉多余的进程，可以回收释放一些内存，所以推荐在内存较少的服务器或VPS上使用。具体最大数量根据 内存&#x2F;20M 得到。比如说512M的VPS，建议pm.max_spare_servers设置为20。至于pm.min_spare_servers，则建议根据服 务器的负载情况来设置，比较合适的值在5~10之间。</p>
]]></content>
      <tags>
        <tag>后端</tag>
        <tag>Server&amp;OS</tag>
      </tags>
  </entry>
  <entry>
    <title>Herzog</title>
    <url>/2013/05/20/herzog.html</url>
    <content><![CDATA[<p>記錄下:</p>
<p>《赫索格》深刻地反映了中产阶级知识分子在现代资本主义条件下信仰的失落和对前途的迷惘。赫索格本是尊崇理性主义的大学教授，但到60年代，他突然发现整个世界变得不可理喻。首先是传统家庭关系的崩溃，他最信赖的朋友居然和他的妻子私通，他被迫离婚，还失去了女儿。接着，当他把视野拓展到社会，发现了贫困、犯罪和种族冲突等社会问题，这使他心目中理性化的美国社会变得分崩离析、危机四伏。由此他反思到自己数十年来撰文鼓吹的那一套理想主义的东西毫不中用，一钱不值。他处在精神崩溃的边缘，自闭在屋子里给虚拟中的数不清的古人今人写了许多不寄发的信。赫索格是现代西方文学中一个典型的“反英雄”形象。</p>
]]></content>
      <tags>
        <tag>随笔</tag>
      </tags>
  </entry>
  <entry>
    <title>xen双网卡桥接配置脚本</title>
    <url>/2013/05/14/xen-multi-bridges-shell.html</url>
    <content><![CDATA[<p>轉自：<a href="http://hi.baidu.com/changzheng2008/item/6162ba0fc47936d8dce5b015">http://hi.baidu.com/changzheng2008/item/6162ba0fc47936d8dce5b015</a></p>
<p>编写脚本my-briges.sh</p>
<p>&#96;<br>#!&#x2F;bin&#x2F;sh</p>
<h1 id="network-xen-multi-bridge"><a href="#network-xen-multi-bridge" class="headerlink" title="network-xen-multi-bridge"></a>network-xen-multi-bridge</h1><h1 id="Exit-if-anything-goes-wrong"><a href="#Exit-if-anything-goes-wrong" class="headerlink" title="Exit if anything goes wrong."></a>Exit if anything goes wrong.</h1><p>set -e</p>
<h1 id="First-arg-is-the-operation"><a href="#First-arg-is-the-operation" class="headerlink" title="First arg is the operation."></a>First arg is the operation.</h1><p>OP&#x3D;$1<br>shift<br>script&#x3D;&#x2F;etc&#x2F;xen&#x2F;scripts&#x2F;network-bridge&#96;</p>
<p>case ${OP} in<br>start)<br>$script start vifnum&#x3D;1 bridge&#x3D;xenbr1 netdev&#x3D;eth1<br>$script start vifnum&#x3D;0 bridge&#x3D;xenbr0 netdev&#x3D;eth0<br>;;<br>stop)<br>$script stop vifnum&#x3D;1 bridge&#x3D;xenbr1 netdev&#x3D;eth1<br>$script stop vifnum&#x3D;0 bridge&#x3D;xenbr0 netdev&#x3D;eth0<br>;;<br>status)<br>$script status vifnum&#x3D;1 bridge&#x3D;xenbr1 netdev&#x3D;eth1<br>$script status vifnum&#x3D;0 bridge&#x3D;xenbr0 netdev&#x3D;eth0<br>;;<br>*)<br>echo ‘Unknown command: ‘ ${OP}<br>echo ‘Valid commands are: start, stop, status’<br>exit 1<br>esac</p>
<p>chmod u+x my-briges.sh</p>
<p>#my-briges.sh start 创建虚拟网桥</p>
<p>#my-briges.sh status 查看虚拟网桥等相关信息</p>
<p>#my-briges.sh stop 删除虚拟网桥</p>
]]></content>
      <tags>
        <tag>Server&amp;OS</tag>
      </tags>
  </entry>
  <entry>
    <title>Archlinux开机自动同步时间脚本</title>
    <url>/2013/06/04/archlinux-auto-ntp-once-shell.html</url>
    <content><![CDATA[<p>Write a <em>oneshot</em> <a href="https://wiki.archlinux.org/index.php/Systemd">systemd</a> unit:</p>
<pre><code>/usr/lib/systemd/system/ntp-once.service
[Unit]
Description=Network Time Service (once)
After=network.target nss-lookup.target

[Service]
Type=oneshot
ExecStart=/usr/bin/ntpd -q -g -u ntp:ntp ; /sbin/hwclock -w

[Install]
WantedBy=multi-user.target
</code></pre>
<p>and enable it:</p>
<pre><code># systemctl enable ntp-once
</code></pre>
]]></content>
      <tags>
        <tag>Server&amp;OS</tag>
      </tags>
  </entry>
  <entry>
    <title>The Act of Killing</title>
    <url>/2013/05/20/the-act-of-killing.html</url>
    <content><![CDATA[<p>應該說是第一次看這樣的紀錄片,太震撼,從昨天看完到現在還沒有回過神來,自己著實寫不出什麽像樣的東西來,所以還是轉一下別人的影評吧.</p>
<p>轉自:<a href="http://movie.douban.com/review/5829007/">http://movie.douban.com/review/5829007/</a></p>
<p>《杀戮行动》是今年香港国际电影节我看过的最棒的一部作品，不仅仅是因为题材的惊世骇俗，也不仅仅是因为导演为了拍这部纪录片在印尼呆了整整七年半，还学会了印尼语。</p>
<p>观影过程中，不停地听见观众席中发出不屑愤怒和讥笑的声音，这还是我第一次碰到：“流氓（gangster），它在英文中的原意是自由的人（free man），所以流氓是正义的，他们捍卫着这个国家的自由，不被共产主义侵蚀”，这些手上沾染着无辜者鲜血四十多年还趾高气扬的侩子手，竟然还好意思把这句荒谬无比的谎言，四处宣扬，在镜头前，在大会中，在电视节目上，厚颜无耻地炫耀自己当年的屠杀行径，“在我们这些遵纪守法的文明人看来，简直荒唐透顶”！</p>
<p>1965-66年，印尼军政府的“反共”清洗中，一百多万印尼共产党、左派人士、知识分子和华人遭到屠杀，为规避责任，印尼军方将屠杀任务交给当地流氓执行。至今过去四十余年，那些参与屠杀的流氓和他们的家人都成了当地位高权重的要人，称霸一方，权与利双收；而幸存者与受害者的家人，仍对那段往事噤若寒蝉，即便对门就住着当年杀害自己父亲或祖父的凶手，却只有沉默。</p>
<p>当导演Joshua Oppenheimer刚开始拍摄这部纪录片，采访当年大屠杀的幸存者与受难者家属的时候，却发现大多采访者都不敢谈论那段往事，而拍摄也不断受到政府和警察的阻扰，最后，那些受访者说，你们不如去找那些杀人者吧，他们都很乐意跟你们吹嘘那些事的。然后Joshua就开始一个一个寻访苏门答腊那些臭名昭著的屠杀者，他采访了四十个屠杀者，听他们炫耀往事，带他重游当年施行屠杀的地点，而第四十一个，便是纪录片的主角，喜爱好莱坞黑帮片，崇拜Al Pachino的流氓安瓦尔·冈戈。</p>
<span id="more"></span>
<p>其实到这里我想大多人都已经想到导演有两条路径可走，绝对能拍出一部涤荡人心的历史纪录片。一则继续跟随受害者进行惊心动魄的拍摄，伴随着政府和军方的追逼压迫，满是血泪的往事被慢慢揭开，站在这个绝对弱势群体的立场为他们呼吁，让他们被强权压抑紧闭的口第一次向世界发出自己的声音，既正义又感人肺腑；或者是听从建议转而采访安瓦尔·冈戈和其他的杀人者，展现他们日常普通的生活与那些被害者实则无异，随着拍摄的深入渐渐揭示他们夜晚的噩梦与良心的折磨，在杀人如麻的外表之下也有着一颗肉长的人心，以此来博取观众的同情与历史的谅解。这两种叙述方式都并不少见，想象起来，用在这个黑白分明的题材上无论用哪一个角度效果一定不差。</p>
<p>然而这些思考在导演执镜之前都已经完成，他见识到了受害者们累累伤痕的内心与恐惧，也从那四十个屠杀者的身上了解到，他们不是想象中的恶魔，像普通人一样，有着一份工作，一个家庭，甚至已经儿孙绕膝，过着平常的日子，即便是流氓混黑道又怎样，不是每个上街收保护费的小混混都下得了手砍了一千多个人的脑袋还心安理得。所以，在他遇见安瓦尔·冈戈的时候，他带着更多的疑问，做了一些不一样的尝试。</p>
<p>他把舞台和镜头交给了他们，这些屠杀者，让他们用自己的方式，来重现这段历史，表达他们对这段历史的理解，对历史中的自己的想象。一开始，我想安瓦尔和他的同僚们并没有想太多，他们早就习惯了自己鼓吹的那套，自己所理解的正义，正如年复一年印尼播放的反共宣传电影，共产党是恶魔，当年的屠杀保护了国家，是正义的实施者，所以尽管有时晚上睡不着觉，会发恶梦梦见那些他曾砍下的脑袋，安瓦尔也不觉得有什么大不了，毕竟他是好人，他的刀下鬼都是恶人。开始拍摄时，安瓦尔和他的手下赫尔曼几乎像是在嬉闹一样，带着些戏谑夸张地表演被他追杀的村民，抱着母亲哭泣的孩子。</p>
<p>然而，随着他们让自己的想象不断丰富展开的时候，冠冕堂皇的理由背后就像是被撕开了一道道口子，犹疑与恐惧不断流泻而出，他们笑不出来了。拍摄焚烧村落和强奸妇女儿童的场面时，火光熊熊惨叫凄厉之间，安瓦尔茫然地在镜头前晃过，那些只是群众演员，不过逼真地回应着扮演施暴者的“五戒青年团”的追赶和暴行，但已经足够震撼，拍摄完成之后，赫尔曼哄着那些被吓哭的儿童演员，抹干他们的眼泪，告诉他们不过是拍戏，也许那一刻安瓦尔想到的是，连做戏都能让人吓破胆，更何况那些经历真实历史的当事人呢？而连抹干一个儿童演员的眼泪都如此之难，更何况堵住那百万失去家人的受害者的口呢？他们一定在诅咒我们，一直在诅咒我们。以往安瓦尔也会这么说，因为这些共产党员都是恶人，所以会诅咒仇敌，而如今他恐慌，因那诅咒是出于真实的伤害与痛苦。</p>
<p>最后，他选择扮演曾被自己审讯杀害的受害者的角色，体验坐在办公桌前被审问虐打，被自己极其高明的发明，钢丝勒脖而死的感受，他根本无法继续拍摄。那一刻我感受到自己丧失了所有的尊严，充满恐惧，他说，我想我体会到了我所杀害的人的感受。我们的感受是一样的。安瓦尔最后这么说。</p>
<p>导演说，不，那些受害者跟你的感受不会一样，因为你只是在排戏，等喊cut就结束了，而那些受害者知道自己是真的就要死了。</p>
<p>从最初活在杀人无罪的好人的想象中，直到想象中他和受害者相差无几，安瓦尔已经被自己想象的演绎逼得步步退让，但是导演却给了最后一击，无论你如何想象，在你的想象与你亲手造成的现实之间，仍有着一条巨大的鸿沟。</p>
<p>想象中，你是好人，而他们是恶人，所以你血刃上千性命仍值得歌颂；而现实却并非如此。这现实不是导演铺垫塑造的现实，而是活在这些人心中的现实，他们知道也许他们才是恶人，或许正因为无法接受这现实，他们制造出一个又一个谎言，以想象代替现实。并非是想象建构出现实，而是想象因现实而存在，因不愿面对现实而存在，只不过因为一再被重复，就显得好像是现实还真实了。</p>
<p>安瓦尔最终是否接受现实，他所接受的现实是怎样的，他又如何面对现实，无从而知。也许我们会简单地想象，他的现实从“我是好人，而他们是恶人”，变成“我是恶人，而他们是好人”，又或者变成“谁都不是好人或恶人，大家都是人”。然而这终究只是我们的想象，无论是煽情还是冷静，促发人的正义感或者同情心总是轻而易举的事情，但这部纪录片让我惶恐。</p>
<p>“你們有禍了！因為你們修造先知的墳墓，那先知正是你們的祖宗所殺的。可見你們祖宗所做的事，你們又證明又喜歡；因為他們殺了先知，你們修造先知的墳墓。所以，神用智慧曾說：我要差遣先知和使徒到他們那裡去，有的他們要殺害，有的他們要逼迫，使創世以來所流眾先知血的罪都要問在這世代的人身上，就是從亞伯的血起，直到被殺在壇和殿中間撒迦利亞的血為止。我實在告訴你們，這都要問在這世代的人身上。”（路加福音11:47-51）</p>
<p>今日我们在观众席上发出不屑一顾的啧啧声，因为与这些杀人狂魔相比，我们正义凛然，当回顾历史，我们为受难者哀悼。但我怕有一天我们发现，原来我们不一定永远是好人，原来我们和我们以为的恶人一样，不过都是人；我怕有一天我们意识到，原来在我们的想象与现实中间，有着那么大一道鸿沟；而我更怕的是，当我们一路逃避一路合理化直到被逼到墙角的那一天，一切都已经太晚了。</p>
]]></content>
      <tags>
        <tag>随笔</tag>
      </tags>
  </entry>
  <entry>
    <title>sublime text 2 配置笔记</title>
    <url>/2013/06/06/sublime-text-2-config-notes.html</url>
    <content><![CDATA[<p>1、首先就是关于破解的问题，这个在网上一搜一大把，多数是windows下的，这里贴一个linux下的（build 2217），用vim打开主程序，然后转化为16进制查看</p>
<p><code>:%!xdd</code></p>
<p>搜索3342，找到一处3342的地方大致是这个样子 ……4333 3342 3032……，右边显示的内容也有licence之类的字样，把3342改成3242，再执行</p>
<p><code>:%!xdd -r</code></p>
<p>:wq</p>
<p>打开程序，贴入下面的序列号</p>
<p><code>—–BEGIN LICENSE—– hiwanz Unlimited User License EA7E-26838 5B320641E6E11F5C6E16553C438A6839 72BA70FE439203367920D70E7DEB0E92 436D756177BBE49EFC9FBBB3420DB9D3 6AA8307E845B6AB8AF99D81734EEA961 02402C853F1FFF9854D94799D1317F37 1DAB52730F6CADDE701BF3BE03C34EF2 85E053D2B5E16502F4B009DE413591DE 0840D6E2CBF0A3049E2FAD940A53FF67 —–END LICENSE—–</code></p>
<p>就ok了。</p>
<p>其实我想说，如果400多块钱我能很轻松的掏出来的话，我就买个license了。<span id="more"></span></p>
<p>2、安装package control，按Ctrl+&#96;调出console，粘贴以下代码到底部命令行并回车：</p>
<p><code>import urllib2,os;pf=&#39;Package Control.sublime-package&#39;;ipp=sublime.installed_packages_path();os.makedirs(ipp) if not os.path.exists(ipp) else None;open(os.path.join(ipp,pf),&#39;wb&#39;).write(urllib2.urlopen(&#39;http://sublime.wbond.net/&#39;+pf.replace(&#39; &#39;,&#39;%20&#39;)).read())</code></p>
<p>重启Sublime Text 2。</p>
<p>如果在Perferences-&gt;package settings中看到package control这一项，则安装成功。</p>
<p>（随时补充）</p>
]]></content>
      <tags>
        <tag>配置</tag>
      </tags>
  </entry>
  <entry>
    <title>nginx中解决pathinfo问题</title>
    <url>/2013/06/18/nginx-solve-the-pathinfo-problem.html</url>
    <content><![CDATA[<p>&#96;<br>location &#x2F; {<br>    if (!-e $request_filename) {<br>        rewrite  ^(.*)$  &#x2F;index.php&#x2F;$1  last;<br>        break;<br>    }<br>}</p>
<p>location ~ .php($|&#x2F;) {<br>     fastcgi_pass  unix:&#x2F;tmp&#x2F;php-cgi.sock;<br>     fastcgi_index  index.php;</p>
<pre><code> set $script    $uri;
 set $path_info &quot;&quot;;
 if ($uri ~ &quot;^(.+\.php)(/.*)&quot;) &#123;
      set  $script     $1;
      set  $path_info  $2;
 &#125;

 include       fastcgi.conf;
 fastcgi_param SCRIPT_FILENAME   $document_root$script;
 fastcgi_param SCRIPT_NAME       $script;
 fastcgi_param PATH_INFO         $path_info;
</code></pre>
<p>}<br>&#96;</p>
]]></content>
      <tags>
        <tag>Server&amp;OS</tag>
      </tags>
  </entry>
  <entry>
    <title>網絡U盤（暫定這個名字）</title>
    <url>/2013/06/08/upan.html</url>
    <content><![CDATA[<p><strong>What’s New</strong></p>
<p>已經完成基本功能。<br>下一步計劃可能更多的還是在上傳功能的優化上面，實現多終端的上傳功能。</p>
<p><strong>Description</strong></p>
<p><strong>有時候就是想傳一個小文件到另一台機器上面，</strong><br><strong>有網絡，</strong><br><strong>但系統里沒有安裝可以用來傳輸的軟件（比如在windows和linux之間），</strong><br><strong>又不想來回插拔U盤，</strong><br><strong>因此就有了這麼個小應用。</strong></p>
<hr>
<p><strong>其實最早思路來源是因為在學校的時候，</strong><br><strong>去打印東西，</strong><br><strong>覺得用U盤容易感染病毒，</strong><br><strong>用郵箱嫌登陸麻煩。</strong></p>
<p><strong>弱化用戶系統概念</strong><br><strong>限制文件上傳大小，因為應用針對的就是小文件</strong><br><strong>限制文件的存儲時間，畢竟應用的目的在於臨時中轉</strong></p>
<p>個人按照我自己的平時的需要開發的小工具，一開始可能就沒有在考慮是否能盈利，關鍵還是要小而有用。</p>
<p>地址：<a href="https://u.mypi.win/">http://u.mypi.win</a></p>
]]></content>
      <tags>
        <tag>DM实验室</tag>
      </tags>
  </entry>
  <entry>
    <title>crontab按秒执行</title>
    <url>/2013/06/19/crontab-do-something-every-second.html</url>
    <content><![CDATA[<figure class="highlight plaintext"><table><tr><td class="code"><pre><span class="line">每分钟执行一次：*/1 * * * * (加可执行脚本)</span><br><span class="line">每10秒执行一次：*:10 * * * * （加可执行脚本）</span><br></pre></td></tr></table></figure>

]]></content>
      <tags>
        <tag>Server&amp;OS</tag>
      </tags>
  </entry>
  <entry>
    <title>rewrite rule</title>
    <url>/2013/06/18/rewrite-rule.html</url>
    <content><![CDATA[<p>之前总是懒得记，每次用都得查，这次记录下：</p>
<figure class="highlight plaintext"><table><tr><td class="code"><pre><span class="line">RewriteCond %&#123;REQUEST_FILENAME&#125; !-f</span><br><span class="line">如果文件存在，就直接访问文件，不进行下面的RewriteRule.</span><br><span class="line"></span><br><span class="line">RewriteCond %&#123;REQUEST_FILENAME&#125; !-d</span><br><span class="line">如果目录存在就直接访问目录不进行RewriteRule</span><br><span class="line"></span><br><span class="line">RewriteCond %&#123;REQUEST_URI&#125; !^.*(\.css|\.js|\.gif|\.png|\.jpg|\.jpeg)$</span><br><span class="line">如果是这些后缀的文件，就直接访问文件，不进行Rewrite</span><br></pre></td></tr></table></figure>

]]></content>
      <tags>
        <tag>Server&amp;OS</tag>
      </tags>
  </entry>
  <entry>
    <title>技術遇到瓶頸</title>
    <url>/2013/06/30/some-troubles-in-my-work.html</url>
    <content><![CDATA[<p>生活混亂感了好幾個月，最近貌似是有點頭緒了，應該是多個棘手的事情摻雑在了一起，並且還都暫時無解。</p>
<p>今天算是理了理工作上的混亂，感覺很大程度上還是自己的技術遇到了瓶頸，並且看不到未來，沒有指路的人，只能自己摸索，關鍵摸索的是別人已經走過的路，自己還不知道怎麼摸索，這就更讓我窩火。總結總結現在的水平，發現自己應該處於一個PHP初級到中級的進化的路上。</p>
<p>我對於PHP的劃分差不多就是四級，入門、初級、中級、高級。所謂的入門就是CRUD了。</p>
<p>初級就是框架使用，接觸過一些項目。</p>
<p>中級就是對中型或者大型的項目有實施經驗，這裡面就包括了怎麼應對大數據和大訪問量的問題，而這些東西要積累經驗，我覺得也就是得去像百度、淘寶這樣的地方，才有機會接觸到什麽是大數據。</p>
<p>高級就是通讀過php的源代碼，能寫出不錯的php擴展，對於php的內存管理等一系列核心的東西了如指掌。</p>
<p>進化總是伴隨著痛苦和迷茫，就像現在，技術上處於孤立的狀態，雖然這種狀態從我小學開始接觸計算機的時候就已經是這樣的了，一直自己一個人在摸索，估計要是沒有搜索引擎的話，我也許早就跳槽學別的了，現在想想還真是有些痛恨搜索引擎能讓我找到我之前遇到的問題的答案，不過貌似凡是能搜索到答案的問題都不是問題。。</p>
<p>對於技術瓶頸怎么克服，表示暫時還沒有啥好的解決方案，先完成幾個手頭想做的事情吧，一個是仿IFTTT（儘管這個想法是我在IFTTT出現前我就有的，誰讓IFTTT先出現了，只能叫做仿IFTTT了），一個是仿Mailinator。。。</p>
]]></content>
      <tags>
        <tag>随笔</tag>
      </tags>
  </entry>
  <entry>
    <title>js載入順序問題</title>
    <url>/2013/07/02/js-load-order.html</url>
    <content><![CDATA[<p>最近遇到一個bug,調試了很久了,沒找到原因,現象就是一個input框綁定了change事件,但是事件在IE9下面不觸發,不過如果用F12的工具逐行執行,卻又能觸發.後來因為無意中調出一個報警,報警內容如下:</p>
<pre><code>SCRIPT5007: 无法获取未定义或 null 引用的属性“b”
</code></pre>
<p>才想到可能是js載入早於input框的載入，導致的事件綁定失敗，調整載入順序后，問題解決。</p>
]]></content>
      <tags>
        <tag>前端</tag>
      </tags>
  </entry>
  <entry>
    <title>[转]理解proc文件系统</title>
    <url>/2013/06/21/the-proc-file-system.html</url>
    <content><![CDATA[<p>转自：<a href="http://linux.chinaunix.net/doc/2004-10-05/16.shtml">http://linux.chinaunix.net/doc/2004-10-05/16.shtml</a></p>
<h2 id="proc-—-一个虚拟文件系统"><a href="#proc-—-一个虚拟文件系统" class="headerlink" title="&#x2F;proc — 一个虚拟文件系统"></a>&#x2F;proc — 一个虚拟文件系统</h2><p>&#x2F;proc 文件系统是一种内核和内核模块用来向进程 (process) 发送信息的机制 (所以叫做 &#x2F;proc)。这个伪文件系统让你可以和内核内部数据结构进行交互，获取 有关进程的有用信息，在运行中 (on the fly) 改变设置 (通过改变内核参数)。 与其他文件系统不同，&#x2F;proc 存在于内存之中而不是硬盘上。如果你察看文件 &#x2F;proc&#x2F;mounts (和 mount 命令一样列出所有已经加载的文件系统)，你会看到其中 一行是这样的：</p>
<pre><code>grep proc /proc/mounts
/proc /proc proc rw 0 0
</code></pre>
<p>&#x2F;proc 由内核控制，没有承载 &#x2F;proc 的设备。因为 &#x2F;proc 主要存放由内核控制 的状态信息，所以大部分这些信息的逻辑位置位于内核控制的内存。对 &#x2F;proc 进行 一次 ‘ls -l’ 可以看到大部分文件都是 0 字节大的；不过察看这些文件的时候，确 实可以看到一些信息。这怎么可能？这是因为 &#x2F;proc 文件系统和其他常规的文件系 统一样把自己注册到虚拟文件系统层 (VFS) 了。然而，直到当 VFS 调用它，请求 文件、目录的 i-node 的时候，&#x2F;proc 文件系统才根据内核中的信息建立相应的文件 和目录。</p>
<span id="more"></span>


<h2 id="加载-proc-文件系统"><a href="#加载-proc-文件系统" class="headerlink" title="加载 proc 文件系统"></a>加载 proc 文件系统</h2><p>如果系统中还没有加载 proc 文件系统，可以通过如下命令加载 proc 文件系统：</p>
<p>mount -t proc proc &#x2F;proc</p>
<p>上述命令将成功加载你的 proc 文件系统。更多细节请阅读 mount 命令的 man page。</p>
<h2 id="察看-proc-的文件"><a href="#察看-proc-的文件" class="headerlink" title="察看 &#x2F;proc 的文件"></a>察看 &#x2F;proc 的文件</h2><p>&#x2F;proc 的文件可以用于访问有关内核的状态、计算机的属性、正在运行的进程的 状态等信息。大部分 &#x2F;proc 中的文件和目录提供系统物理环境最新的信息。尽管 &#x2F;proc 中的文件是虚拟的，但它们仍可以使用任何文件编辑器或像’more’, ‘less’或 ‘cat’这样的程序来查看。当编辑程序试图打开一个虚拟文件时，这个文件就通过内核 中的信息被凭空地 (on the fly) 创建了。这是一些我从我的系统中得到的一些有趣 结果：</p>
<pre><code>$ ls -l /proc/cpuinfo
-r--r--r-- 1 root root 0 Dec 25 11:01 /proc/cpuinfo

$ file /proc/cpuinfo
/proc/cpuinfo: empty

$ cat /proc/cpuinfo

processor       : 0
vendor_id       : GenuineIntel
cpu family      : 6
model           : 8
model name      : Pentium III (Coppermine)
stepping        : 6
cpu MHz         : 1000.119
cache size      : 256 KB
fdiv_bug        : no
hlt_bug         : no
sep_bug         : no
f00f_bug        : no
coma_bug        : no
fpu             : yes
fpu_exception   : yes
cpuid level     : 2
wp              : yes
flags           : fpu vme de pse tsc msr pae mce cx8 apic sep mtrr pge mca
cmov pat pse36 mmx fxsr xmm
bogomips        : 1998.85

processor       : 3
vendor_id       : GenuineIntel
cpu family      : 6
model           : 8
model name      : Pentium III (Coppermine)
stepping        : 6
cpu MHz         : 1000.119
cache size      : 256 KB
fdiv_bug        : no
hlt_bug         : no
sep_bug         : no
f00f_bug        : no
coma_bug        : no
fpu             : yes
fpu_exception   : yes
cpuid level     : 2
wp              : yes
flags           : fpu vme de pse tsc msr pae mce cx8 apic sep mtrr pge mca
cmov pat pse36 mmx fxsr xmm
bogomips        : 1992.29
</code></pre>
<p>这是一个从双 CPU 的系统中得到的结果，上述大部分的信息十分清楚地给出了这个系 统的有用的硬件信息。有些 &#x2F;proc 的文件是经过编码的，不同的工具可以被用来解释 这些编码过的信息并输出成可读的形式。这样的工具包括：’top’, ‘ps’, ‘apm’ 等。</p>
<h2 id="得到有用的系统-内核信息"><a href="#得到有用的系统-内核信息" class="headerlink" title="得到有用的系统&#x2F;内核信息"></a>得到有用的系统&#x2F;内核信息</h2><p>proc 文件系统可以被用于收集有用的关于系统和运行中的内核的信息。下面是一些重要 的文件：</p>
<ul>
<li><p>&#x2F;proc&#x2F;cpuinfo - CPU 的信息 (型号, 家族, 缓存大小等)</p>
</li>
<li><p>&#x2F;proc&#x2F;meminfo - 物理内存、交换空间等的信息</p>
</li>
<li><p>&#x2F;proc&#x2F;mounts - 已加载的文件系统的列表</p>
</li>
<li><p>&#x2F;proc&#x2F;devices - 可用设备的列表</p>
</li>
<li><p>&#x2F;proc&#x2F;filesystems - 被支持的文件系统</p>
</li>
<li><p>&#x2F;proc&#x2F;modules - 已加载的模块</p>
</li>
<li><p>&#x2F;proc&#x2F;version - 内核版本</p>
</li>
<li><p>&#x2F;proc&#x2F;cmdline - 系统启动时输入的内核命令行参数</p>
</li>
</ul>
<p>proc 中的文件远不止上面列出的这么多。想要进一步了解的读者可以对 &#x2F;proc 的每一个 文件都’more’一下或读参考文献[1]获取更多的有关 &#x2F;proc 目录中的文件的信息。我建议 使用’more’而不是’cat’，除非你知道这个文件很小，因为有些文件 (比如 kcore) 可能 会非常长。</p>
<h2 id="有关运行中的进程的信息"><a href="#有关运行中的进程的信息" class="headerlink" title="有关运行中的进程的信息"></a>有关运行中的进程的信息</h2><p>&#x2F;proc 文件系统可以用于获取运行中的进程的信息。在 &#x2F;proc 中有一些编号的子目录。每个编号的目录对应一个进程 id (PID)。这样，每一个运行中的进程 &#x2F;proc 中都有一个用它的 PID 命名的目录。这些子目录中包含可以提供有关进程的状态和环境的重要细节信息的文件。让我们试着查找一个运行中的进程。</p>
<pre><code>$ ps -aef | grep mozilla
root 32558 32425 8  22:53 pts/1  00:01:23  /usr/bin/mozilla
</code></pre>
<p>上述命令显示有一个正在运行的 mozilla 进程的 PID 是 32558。相对应的，&#x2F;proc 中应该有一个名叫 32558 的目录</p>
<pre><code>$ ls -l /proc/32558
total 0
-r--r--r--    1 root  root            0 Dec 25 22:59 cmdline
-r--r--r--    1 root  root            0 Dec 25 22:59 cpu
lrwxrwxrwx    1 root  root            0 Dec 25 22:59 cwd -&gt; /proc/
-r--------    1 root  root            0 Dec 25 22:59 environ
lrwxrwxrwx    1 root  root            0 Dec 25 22:59 exe -&gt; /usr/bin/mozilla*
dr-x------    2 root  root            0 Dec 25 22:59 fd/
-r--r--r--    1 root  root            0 Dec 25 22:59 maps
-rw-------    1 root  root            0 Dec 25 22:59 mem
-r--r--r--    1 root  root            0 Dec 25 22:59 mounts
lrwxrwxrwx    1 root  root            0 Dec 25 22:59 root -&gt; //
-r--r--r--    1 root  root            0 Dec 25 22:59 stat
-r--r--r--    1 root  root            0 Dec 25 22:59 statm
-r--r--r--    1 root  root            0 Dec 25 22:59 status
</code></pre>
<p>文件 “cmdline” 包含启动进程时调用的命令行。”envir” 进程的环境变两。 “status” 是进程的状态信息，包括启动进程的用户的用户ID (UID) 和组ID(GID) ， 父进程ID (PPID)，还有进程当前的状态，比如”Sleelping”和”Running”。 每个进程的目录都有几个符号链接，”cwd”是指向进程当前工作目录的符号 链接，”exe”指向运行的进程的可执行程序，”root”指向被这个进程看作是 根目录的目录 (通常是”&#x2F;“)。目录”fd”包含指向进程使用的文件描述符的链接。 “cpu”仅在运行 SMP 内核时出现，里面是按 CPU 划分的进程时间。</p>
<p>&#x2F;proc&#x2F;self 是一个有趣的子目录，它使得程序可以方便地使用 &#x2F;proc 查找本进程地信息。&#x2F;proc&#x2F;self 是一个链接到 &#x2F;proc 中访问 &#x2F;proc 的进程所对应的 PID 的目录的符号链接。</p>
<h2 id="通过-proc-与内核交互"><a href="#通过-proc-与内核交互" class="headerlink" title="通过 &#x2F;proc 与内核交互"></a>通过 &#x2F;proc 与内核交互</h2><p>上面讨论的大部分 &#x2F;proc 的文件是只读的。而实际上 &#x2F;proc 文件系统通过 &#x2F;proc 中可读写的文件提供了对内核的交互机制。写这些文件可以改变内核 的状态，因而要慎重改动这些文件。&#x2F;proc&#x2F;sys 目录存放所有可读写的文件 的目录，可以被用于改变内核行为。</p>
<p>&#x2F;proc&#x2F;sys&#x2F;kernel - 这个目录包含反通用内核行为的信息。 &#x2F;proc&#x2F;sys&#x2F;kernel&#x2F;{domainname, hostname} 存放着机器&#x2F;网络的域名和主机名。 这些文件可以用于修改这些名字。</p>
<pre><code>$ hostname
machinename.domainname.com

$ cat /proc/sys/kernel/domainname
domainname.com

$ cat /proc/sys/kernel/hostname
machinename

$ echo &quot;new-machinename&quot;  &gt; /proc/sys/kernel/hostname

$ hostname
new-machinename.domainname.com
</code></pre>
<p>这样，通过修改 &#x2F;proc 文件系统中的文件，我们可以修改主机名。很多其 他可配置的文件存在于 &#x2F;proc&#x2F;sys&#x2F;kernel&#x2F;。这里不可能列出所有这些文件， 读者可以自己去这个目录查看以得到更多细节信息。<br>另一个可配置的目录是 &#x2F;proc&#x2F;sys&#x2F;net。这个目录中的文件可以 用于修改机器&#x2F;网络的网络属性。比如，简单修改一个文件，你可以在网络 上瘾藏匿的计算机。</p>
<pre><code>$ echo 1 &gt; /proc/sys/net/ipv4/icmp_echo_ignore_all
</code></pre>
<p>这将在网络上瘾藏你的机器，因为它不响应 icmp_echo。主机将不会响应其 他主机发出的 ping 查询。</p>
<pre><code>$ ping machinename.domainname.com
no answer from machinename.domainname.com
</code></pre>
<p>要改回缺省设置，只要</p>
<pre><code>$ echo 0 &gt; /proc/sys/net/ipv4/icmp_echo_ignore_all
</code></pre>
<p>&#x2F;proc&#x2F;sys 下还有许多其它可以用于改变内核属性。读者可以通过参考文献 [1], [2] 获取更多信息。</p>
<h2 id="结论"><a href="#结论" class="headerlink" title="结论"></a>结论</h2><p>&#x2F;proc 文件系统提供了一个基于文件的 Linux 内部接口。它可以用于确定系统 的各种不同设备和进程的状态。对他们进行配置。因而，理解和应用有关这个 文件系统的知识是理解你的 Linux 系统的关键。</p>
<h2 id="参考文献"><a href="#参考文献" class="headerlink" title="参考文献"></a>参考文献</h2><ul>
<li><p>[1] 有关Linux proc 文件系统的文档位于: &#x2F;usr&#x2F;src&#x2F;linux&#x2F;Documentation&#x2F;filesystems&#x2F;proc.txt</p>
</li>
<li><p>[2] RedHat Guide: The &#x2F;proc File System: <a href="http://www.redhat.com/docs/manuals/linux/RHL-7.3-Manual/ref-guide/ch-proc.html">http://www.redhat.com/docs/manuals/linux/RHL-7.3-Manual/ref-guide/ch-proc.html</a></p>
</li>
<li></li>
</ul>
]]></content>
      <tags>
        <tag>Server&amp;OS</tag>
        <tag>理论</tag>
      </tags>
  </entry>
  <entry>
    <title>服务器转移</title>
    <url>/2013/07/19/blog-server-moved.html</url>
    <content><![CDATA[<p>我的个人blog服务器已经成功从digital ocean转移到aws ec2 micro。</p>
<p>试用一年后再转回digital ocean。</p>
]]></content>
      <tags>
        <tag>网站日志</tag>
      </tags>
  </entry>
  <entry>
    <title>简单记录下入侵过程</title>
    <url>/2013/07/21/simple-note-the-process-of-inbreak.html</url>
    <content><![CDATA[<p>很久没有入侵过服务器了。这次入侵的起因是学校社团的服务器页面遭到挂马了，但是有意思的是，挂马的iframe代码时有时无，在服务器上查看源代码也没有问题。于是排除了直接改源文件的可能和DNS遭到劫持的可能。</p>
<p>看了下挂马的地址是跟自己服务器同C段的，因此猜测可能是遭到了ARP欺骗攻击，但是不确定是有人故意攻击我的服务器还是属于批量攻击。于是目标就先锁定这台挂马的服务器。</p>
<p>扫描了端口，开了不少，21,80,3389一些常见的端口都开着，3389了下，看到是win2003。百度了下IP，么有有用信息，google了下，发下了这个IP上绑定了的域名，对该域名进行whois，发现了很多信息，逐步的又发现了很多关于这个域名注册者的信息，有gmail邮箱，居住地信息，在网络上的活动痕迹，可能还有工作地点信息和生日年份，简单的尝试猜解gmail邮箱失败。换个思路，访问下IP看看下面是什么站，由于运营商封掉了直接访问IP，因此我用我自己的域名绑定了下这个IP，访问发现是个N点虚拟主机管理系统，果断搜索引擎看看默认后台和账号，然后运气很好的就进入了N点的后台。</p>
<p>接下来就是建立个虚拟主机，配置他支持.net，这样果断上一个webshell，然后就是一通提权尝试。。。经过了6个小时的尝试失败了，常用的提权的路都试过了，由于很久没有搞过了，手头也没有能用的本地溢出，已是凌晨两点多，睡觉先。。</p>
<p>一觉醒来，回到N点看了下，发现貌似我可以配置应用池，果断配置成本地，然后再去webshell里执行添加用户的命令，成功，拿到administrator权限了。</p>
<p>剩下的事情就是简单清理下战场，然后上3389，下载360急救箱进行查毒（尼玛，100多个病毒啊。。还是两个用户的，看来至少进来过两个人了。。），自己写个C程，替换掉粘滞键那个程序，修改N点的默认密码，添加了个N点的隐藏管理员，收工，貌似清完病毒后，我的网站没有再出现过挂马代码，再观察段时间吧，到QQ安全管家网站申诉下网址安全了。</p>
<p>最后总结下：</p>
<p>1、尽量避免用windows主机吧，虽然配置下也挺安全，但是真正下工夫配置的有几个呢，很多人都是保持默认的，相比在默认情况下，linux可能会相对安全些。</p>
<p>2、即使买了服务器空间不用，或者只是买了测试，也不要保持默认的密码好吧，你这是对于自己邻居的危害啊！</p>
<p>3、这次不是个针对我的网站的定向的攻击，因为在尝试提权的6个小时里，我看过netstat和进程，发现这台机器还在尝试批量攻击别的服务器，所以应该是病毒行为。</p>
<p>4、没有了，就是不要再遇到这种蛋疼的事情了，大好的周末又泡汤了。。。看书去。。。。</p>
]]></content>
      <tags>
        <tag>Hacker</tag>
      </tags>
  </entry>
  <entry>
    <title>呼吸灯</title>
    <url>/2013/08/12/breath-lamp.html</url>
    <content><![CDATA[<p>知道我最喜欢我的808除了拍照以外的另一个功能是什么吗？那就是呼吸灯。从5800w开始我就很喜欢那个呼吸灯，以至于后来买雷蛇的鼠标也是买的带CF标识的呼吸灯的那款，再后来就有了808。</p>
<p>开始有人琢磨我到底是要在写些什么了。其实我也不知道我自己要写些什么，那为何不随着自己的思绪，跟着呼吸灯微弱的节奏慢慢感受自己的心跳，随心所欲想到哪就写到哪呢？</p>
<p>这也许就是为何我喜欢呼吸灯的缘故吧，在漆黑的夜晚，能有一个微弱的灯光点亮，实在是多了一分细腻的感觉在里面。跟着呼吸灯让自己放慢节奏，感受下自己的内心的所思所想。有时候就是会这样慢慢开始胡思乱想，开始做各种假设。假如，我在初二没有选择接触黑客的自由的思想，那现在的我是否还会有当下的烦恼？假如，我当时选择了去上国防生，那是不是现在我的人生又会有别样的烦恼？假如……这样的假如真的太多了，但是既然我选择了自己的道路，那就坚定的把他走下去吧，谁能知道将来呢？就让我像呼吸灯一样，不知道自己什么时刻就会没电灭掉，但是依旧按照自己的节奏，慢慢的，安静的去完成自己的事情。</p>
<p>但是，也许这就是人类思想的强大之处，可以给一个物体赋予生命，让它变的像人一样会思考，其实这只不过是人类自己在思考自己罢了。就像我现在说的呼吸灯，也许就是我的一个缩影，在自己选择的道路上坚持，虽然天资不聪颖但是懂得努力，知道笨鸟先飞，但也有不懂的变通的致命弱点。突然间发现了自己是在写什么了会觉得再写下去就已经很无聊了，也许这就是我的一种生活态度。</p>
<p>让自己过的不一样些，逐渐的把自己拨回到表盘的应该位置，想想如何修理下已经程序化的大脑让它更近人类而不是机械！</p>
]]></content>
      <tags>
        <tag>随笔</tag>
      </tags>
  </entry>
  <entry>
    <title>爱情，奢侈而廉价</title>
    <url>/2013/08/25/love-luxurious-but-inexpensive.html</url>
    <content><![CDATA[<p>首先PS一句：出差加班的节奏真心不适合同时看着电视，尤其是看到一部戳中软肋的情感片。</p>
<p>忘记哪次去看电影的时候，记的电影开始前的预告片中看到过《分手合约》的，不过印象中预告片给我的感觉更像是爱情喜剧，但显然我是错了。</p>
<p>电影讲述了一个爱情故事，头20分钟各种无力，但是也正是这些无力的铺垫，使得爱情看上去如此的奢侈。女孩提出分手合约，大家都认为是女孩太势利，貌似有些映射当前的意思，可能大家都认为爱情是一件奢侈品，你有时候不得不放弃。</p>
<p>但也许爱太深，男孩并没有放弃，他在努力，努力去完成女孩想要的。合约马上到期，眼看一切都顺理成章的向着幸福滑行的时候，真相才接踵而至，女孩之所以5年前选择离开是因为自己得了癌症。也许你和我一样在感慨剧情的狗血，这么容易就被猜到了，但是我觉得我们有时候的确有些理智了，为什么非要把一件艺术品用理性的思维去思考呢？</p>
<span id="more"></span>

<p>我一直觉得绝症其实是象征着一种命运的不可抗力，也正式这种不可抗力使得爱情由一种通俗的奢侈变成了高级的奢侈。试问有多少人是因为一些不可抗拒的力量没有走到一起？这有时候的确会让我们觉得爱情是如此的奢侈，以致于觉得爱情是一种奢求。</p>
<p>其实爱情不是这么复杂，电影的最后很平淡，很安静，没有大的情绪波动。爱情就是要懂的分享、沟通。当相爱的两个人把自己做的一样样的，为了对方的事情告诉彼此后，你才会发现原来爱情其实是可以廉价的，也许不会那么累，但是这就是爱情的力量，即使再累再苦你也愿意去承受，直到不可抗拒的力量到来，也不会发生改变。我爱过你，你爱过我，这不是任何力量可以改变的 ，尽管外力改变了表象。</p>
<p>爱情也许就是这样一个拥有奢侈外表的廉价品，对于相爱的人来说奢侈也是廉价，相反，不相爱的人廉价也是奢侈！</p>
<p>背景音乐：All We Are – One Republic</p>
]]></content>
      <tags>
        <tag>随笔</tag>
      </tags>
  </entry>
  <entry>
    <title>柔性数组</title>
    <url>/2013/09/01/flexible-array.html</url>
    <content><![CDATA[<p>转自：<a href="http://hi.baidu.com/piaoshi111/item/9ffdb6ddbe2ca24adcf9be38">http://hi.baidu.com/piaoshi111/item/9ffdb6ddbe2ca24adcf9be38</a></p>
<p>也许你从来没有听说过柔性数组（flexible array）这个概念，但是它确实是存在的。<br>C99中，结构中的最后一个元素允许是未知大小的数组，这就叫做柔性数组成员，但结<br>构中的柔性数组成员前面必须至少一个其他成员。 柔性数组成员允许结构中包含一个大小可<br>变的数组。sizeof返回的这种结构大小不包括柔性数组的内存。包含柔性数组成员的结构用<br>malloc ()函数进行内存的动态分配，并且分配的内存应该大于结构的大小，以适应柔性数组<br>的预期大小。<span id="more"></span><br>柔性数组到底如何使用呢？看下面例子：<br>typedef struct st_type<br>{<br>int i;<br>int a[0];<br>}type_a;<br>有些编译器会报错无法编译可以改成：<br>typedef struct st_type<br>{<br>int i;<br>int a[];<br>}type_a;<br>这样我们就可以定义一个可变长的结构体，用 sizeof(type_a)得到的只有 4，就是<br>sizeof(i)&#x3D;sizeof(int)。那个 0 个元素的数组没有占用空间，而后我们可以进行变长操作了。通<br>过如下表达式给结构体分配内存：<br>type_a <em>p &#x3D; (type_a</em>)malloc(sizeof(type_a)+100<em>sizeof(int));这样我们为结构体指针 p 分配了一块内存。用 p-&gt;item[n]就能简单地访问可变长元素。<br>但是这时候我们再用 sizeof（</em>p）测试结构体的大小，发现仍然为 4。是不是很诡异？我们<br>不是给这个数组分配了空间么？<br>别急，先回忆一下我们前面讲过的“模子” 。在定义这个结构体的时候，模子的大小就<br>已经确定不包含柔性数组的内存大小。柔性数组只是编外人员，不占结构体的编制。只是说<br>在使用柔性数组时需要把它当作结构体的一个成员，仅此而已。再说白点，柔性数组其实与<br>结构体没什么关系，只是“挂羊头卖狗肉”而已，算不得结构体的正式成员。<br>需要说明的是：C89不支持这种东西，C99把它作为一种特例加入了标准。但是，C99<br>所支持的是 incomplete type，而不是 zero array，形同 int item[0];这种形式是非法的，C99支<br>持的形式是形同 int item[];只不过有些编译器把 int item[0];作为非标准扩展来支持，而且在<br>C99发布之前已经有了这种非标准扩展了，C99发布之后，有些编译器把两者合而为一了。<br>当然，上面既然用 malloc函数分配了内存，肯定就需要用 free函数来释放内存：<br>free(p);<br>经过上面的讲解，相信你已经掌握了这个看起来似乎很神秘的东西。不过实在要是没<br>掌握也无所谓，这个东西实在很少用。</p>
]]></content>
      <tags>
        <tag>编程语言</tag>
        <tag>理论</tag>
      </tags>
  </entry>
  <entry>
    <title>gtk程序中用ctrl+空格无法呼出fcitx</title>
    <url>/2013/09/02/gtk-fcitx.html</url>
    <content><![CDATA[<p>archlinux更新了下，居然在firefox中用不了了，在qt程序中都能使用。我的桌面环境是xfce</p>
<figure class="highlight plaintext"><table><tr><td class="code"><pre><span class="line">http://fcitx.github.com/handbook/faq.html#ctrl_space</span><br></pre></td></tr></table></figure>

<p>发现是&#x2F;etc&#x2F;gtk-2.0&#x2F;gtk.immodules和gtk-query-immodules-2.0的内容不一样，里面是空的！估计是更新的时候被清空了…</p>
<p>解决方法将gtk-query-immodules-2.0的输出弄到&#x2F;etc&#x2F;gtk-2.0&#x2F;gtk.immodules中。</p>
<figure class="highlight plaintext"><table><tr><td class="code"><pre><span class="line">gtk-query-immodules-2.0 | sudo tee /etc/gtk-2.0/gtk.immodules</span><br></pre></td></tr></table></figure>

<p>logout,再login，ok了</p>
<p>轉自：<a href="http://hi.baidu.com/zechen11/item/c1f6ff0e46c678e3fe240d2f">http://hi.baidu.com/zechen11/item/c1f6ff0e46c678e3fe240d2f</a></p>
<p>參考下這裏：<a href="https://fcitx-im.org/wiki/Input_method_related_environment_variables/zh-cn">https://fcitx-im.org/wiki/Input_method_related_environment_variables&#x2F;zh-cn</a></p>
<p>另外，在archlinux下安裝時，安裝fcitx-im即可，另外安裝fcitx-configtool可以使用界面模式來配置fcitx。</p>
]]></content>
      <tags>
        <tag>Server&amp;OS</tag>
      </tags>
  </entry>
  <entry>
    <title>群发“站内信”的实现</title>
    <url>/2013/09/01/message-system-design.html</url>
    <content><![CDATA[<p>转自：<a href="http://www.cnblogs.com/grenet/archive/2010/03/08/1680655.html%EF%BC%88%E6%96%87%E7%AB%A0%E5%90%8E%E9%9D%A2%E7%9A%84%E8%AF%84%E8%AE%BA%E4%B9%9F%E4%B8%8D%E9%94%99%EF%BC%89">http://www.cnblogs.com/grenet/archive/2010/03/08/1680655.html（文章后面的评论也不错）</a></p>
<p>在很多网站系统（如CMS系统，SNS系统等），都有“站内信”的功能。</p>
<p>“站内信”不同于电子邮件，电子邮件通过专门的邮件服务器发送、保存。而“站内信”是系统内的消息，说白了，“站内信”的实现，就是通过数据库插入记录来实现的。</p>
<p>“站内信”有两个基本功能。一：点到点的消息传送。用户给用户发送站内信；管理员给用户发送站内信。二：点到面的消息传送。管理员给用户（指定满足某一条件的用户群）群发消息。点到点的消息传送很容易实现，本文不再详述。下面将根据不同的情况，来说说“站内信”的群发是如何实现的。</p>
<p>第一种情况，站内的用户是少量级别的。（几十到上百）</p>
<p>这种情况，由于用户的数量非常少，因此，没有必要过多的考虑数据库的优化，采用简单的表格，对系统的设计也来的简单，后期也比较容易维护，是典型的用空间换时间的做法。</p>
<p>数据库的设计如下：表名：Message</p>
<p>ID：编号；SendID：发送者编号；RecID：接受者编号（如为0，则接受者为所有人）；Message：站内信内容；Statue：站内信的查看状态；PDate：站内信发送时间；</p>
<p>如果，某一个管理员要给所有人发站内信，则先遍历用户表，再按照用户表中的所有用户依次将站内信插入到Message表中。这样，如果有56个用户，则群发一条站内信要执行56个插入操作。这个理解上比较简单，比较耗损空间。</p>
<p>某一个用户登陆后，查看站内信的语句则为：</p>
<p>Select * FROM Message Where RecID&#x3D;‘ID’ OR RecID&#x3D;0</p>
<p>第二种情况，站内的用户中量级别的（上千到上万）。</p>
<p>如果还是按照第一种情况的思路。那发一条站内信的后果基本上就是后台崩溃了。因为，发一条站内信，得重复上千个插入记录，这还不是最主要的，关键是上千乃至上万条记录，Message字段的内容是一样的，而Message有大量的占用存储空间。比方说，Message字段有100个汉字，占用200个字节，那么5万条，就占用200×50000&#x3D;10000000个字节&#x3D;10M。简单的一份站内信，就占用10M，这还让不让人活了。</p>
<p>因此，将原先的表格拆分为两个表，将Message的主体放在一个表内，节省空间的占用</p>
<p>数据库的设计如下：</p>
<p>表名：Message</p>
<p>ID：编号；SendID：发送者编号；RecID：接受者编号（如为0，则接受者为所有人）；MessageID：站内信编号；Statue：站内信的查看状态；</p>
<p>表名：MessageText</p>
<p>ID：编号；Message：站内信的内容；PDate：站内信发送时间；</p>
<p>在管理员发一封站内信的时候，执行两步操作。先在MessageText表中，插入站内信的内容。然后在Message表中给所有的用户插入一条记录，标识有一封站内信。</p>
<p>这样的设计，将重复的站内信的主体信息（站内信的内容，发送时间）放在一个表内，大量的节省存储空间。不过，在查询的时候，要比第一种情况来的复杂。</p>
<p>第三种情况，站内的用户是大量级的（上百万），并且活跃的用户只占其中的一部分。</p>
<p>大家都有这样的经历，某日看一个网站比较好，一时心情澎湃，就注册了一个用户。过了一段时间，由于种种原因，就忘记了注册时的用户名和密码，也就不再登陆了。那么这个用户就称为不活跃的。从实际来看，不活跃的用户占着不小的比例。</p>
<p>我们以注册用户2百万，其中活跃用户只占其中的10%。</p>
<p>就算是按照第二种的情况，发一封“站内信”，那得执行2百万个插入操作。但是其中的有效操作只有10%，因为另外的90%的用户可能永远都不会再登陆了。</p>
<p>在这种情况下，我们还得把思路换换。</p>
<p>数据库的设计和第二种情况一样：</p>
<p>表名：Message</p>
<p>ID：编号；SendID：发送者编号；RecID：接受者编号（如为0，则接受者为所有人）；MessageID：站内信编号；Statue：站内信的查看状态；</p>
<p>表名：MessageText</p>
<p>ID：编号；Message：站内信的内容；PDate：站内信发送时间；</p>
<p>管理员发站内信的时候，只在MessageText插入站内信的主体内容。Message里不插入记录。</p>
<p>那么，用户在登录以后，首先查询MessageText中的那些没有在Message中有记录的记录，表示是未读的站内信。在查阅站内信的内容时，再将相关的记录插入到Message中。</p>
<p>这个方法和第二种的比较起来。如果，活跃用户是100%。两者效率是一样的。而活跃用户的比例越低，越能体现第三种的优越来。只插入有效的记录，那些不活跃的，就不再占用空间了。</p>
<p>以上，是我对群发“站内信”的实现的想法。也欢迎各位提出自己的建议，大家互相借鉴，共同进步。</p>
]]></content>
      <tags>
        <tag>编程语言</tag>
        <tag>后端</tag>
      </tags>
  </entry>
  <entry>
    <title>I&#39;m trying</title>
    <url>/2013/09/06/im-trying.html</url>
    <content><![CDATA[<p><a href="/2013/09/imtrying.png"><img src="/2013/09/imtrying.png" alt="尔湾市"></a></p>
]]></content>
      <tags>
        <tag>杂七杂八</tag>
      </tags>
  </entry>
  <entry>
    <title>AnonymousDiscussions上线第二天功能更新</title>
    <url>/2013/09/04/anonymous-discussions-the-second-day-update.html</url>
    <content><![CDATA[<p>在经过昨天的3小时马拉松出炉基础版 AnonymousDiscussions 后，今天进行了以下的功能完善和bug修正：</p>
<ol>
<li><p>首页所有OS已经有了分页功能</p>
</li>
<li><p>评论也有了分页功能</p>
</li>
<li><p>增加了OS的点击数统计</p>
</li>
<li><p>首页可以看到每个OS的评论数</p>
</li>
<li><p>调整了首页OS列表的样式</p>
</li>
<li><p>OS详情页加入了点击数显示</p>
</li>
<li><p>OS详情页加入了回到页顶部功能</p>
</li>
<li><p>使用伪静态，URL显示优化</p>
</li>
<li><p>修改了部分文字语法和文字表述</p>
</li>
<li><p>新发布评论后的跳转问题</p>
</li>
<li><p>OS的发布时间显示方式进行了调整</p>
</li>
</ol>
<p>欢迎继续来发OS，网址很好记：<a href="http://ohshit.cc/">http://ohshit.cc</a>  ~~~</p>
]]></content>
      <tags>
        <tag>杂七杂八</tag>
        <tag>网站日志</tag>
      </tags>
  </entry>
  <entry>
    <title>nginx的proxy相关配置</title>
    <url>/2013/09/10/nginx-proxy-some-configures.html</url>
    <content><![CDATA[<hr>
<p>最近在做的一个项目的web服务器是放在内网环境中的，使用lnmp，在整个网络的出口通过nginx进行proxy到这台web服务器。不过有时候访问的时候，会出现502错误，因此在出口处的nginx中增加了以下配置，有待观察效果：</p>
<figure class="highlight plaintext"><table><tr><td class="code"><pre><span class="line">proxy_connect_timeout 600;</span><br><span class="line">proxy_read_timeout 600;</span><br><span class="line">proxy_send_timeout 600;</span><br><span class="line">proxy_buffer_size 16k;</span><br><span class="line">proxy_buffers 4 32k;</span><br><span class="line">proxy_busy_buffers_size 64k;</span><br><span class="line">proxy_temp_file_write_size 64k;</span><br><span class="line">proxy_temp_path /data/nginx_temp_path;</span><br><span class="line">proxy_cache_path /data/nginx_cache_path levels=1:2 keys_zone=cac</span><br><span class="line">he_one:2000m inactive=1d max_size=5m;</span><br></pre></td></tr></table></figure>
]]></content>
      <tags>
        <tag>Server&amp;OS</tag>
      </tags>
  </entry>
  <entry>
    <title>How to converting Microsoft Access MDB into CSV or Mysql in linux</title>
    <url>/2013/09/06/how-to-converting-microsoft-access-mdb-into-csv-or-mysql-in-linux.html</url>
    <content><![CDATA[<p>安装一个工具，mdbtools，地址：<a href="http://mdbtools.sourceforge.net/%EF%BC%8Cubuntu%E5%BA%94%E8%AF%A5%E5%8F%AF%E4%BB%A5%E7%9B%B4%E6%8E%A5%E5%AE%89%E8%A3%85%EF%BC%8Carchlinux%E5%9C%A8aur%E4%B8%AD%E6%9C%89%E3%80%82">http://mdbtools.sourceforge.net/，ubuntu应该可以直接安装，archlinux在aur中有。</a></p>
<p>具体使用方法：</p>
<p>To get the list of tables, you run the following command:</p>
<blockquote>mdb-tables database.mdb</blockquote>


<p>You can then get a CSV version for each table using:</p>
<blockquote>mdb-export database.mdb table_name</blockquote>


<p>You can also convert the mdb into a format required by MySQL. First you must get the put the table schema into the database using the following command:</p>
<blockquote>mdb-schema database.mdb | mysql -u username -p database_name</blockquote>


<p>You then import each table by running:</p>
<blockquote>mdb-export -I database.mdb table_name | sed -e 's/)$/)\;/' | mysql -u username -p database_name</blockquote>

]]></content>
      <tags>
        <tag>后端</tag>
        <tag>Server&amp;OS</tag>
      </tags>
  </entry>
  <entry>
    <title>关于php控制进程</title>
    <url>/2013/09/17/about-php-control-the-process.html</url>
    <content><![CDATA[<p>最近在做的一个东西需要用到php去调用一个应用程序，而程序却不一定会第一时间就返回结果（执行效果有点像top命令），这就导致如果用php直接exec执行这个程序的话，php页面将会处于一直等待的状态中，直到最大超时时间到了后，会返回网关错误（我用的nginx做前端）。我自己曾试过在要执行的命令后面加&amp;，使其变成后台程序，这样php就会立即返回了，不过用grep进程列表获取该程序的进程的时候，就发现如果多个空格就会导致搜索不到指定的进程，这样就没法kill掉这个进程了。于是又写了一个C程序，以实现这个C程序可以把一条命令转成守护进程执行，并且返回该守护进程的pid，这样我就可以直接在php里把返回的pid存起来，到时候直接kill掉就OK啦~</p>
<p>如果你以为这样就结束了，那你就错了，我在v2ex上发帖子希望能让大家帮我看看这个程序是否有安全隐患，没想到还有很多的解决措施，尤其是php自带的一些函数方法之前是不知道的。</p>
<p>1、pcntl系的函数。不过这个需要自己先安装这个扩展，在ext&#x2F;pcntl下面，自己编译下就ok了，得到的so文件放到扩展目录，在php.ini中配置下就ok。不过就我刚才的测试来看，貌似还达不到我要的效果，pid的返回有些问题。</p>
<p>2、php-childprocess ：项目地址，<a href="https://github.com/hfcorriez/php-childprocess">https://github.com/hfcorriez/php-childprocess</a>，这个还没有时间仔细来看是如何实现以及该怎么用，不过看上去是很强大的样子。</p>
<p>如果还有回复的话，我会再补充到这里。</p>
<p>我写的那段C程地址在这里：<a href="https://github.com/ety001/mytools/tree/master/daemonRun">https://github.com/ety001/mytools/tree/master/daemonRun</a></p>
<p>补充：</p>
<p>最后用shell脚本完爆啊。。</p>
<p>ffmpeg ******** &gt;&#x2F;dev&#x2F;null 2&gt;1 &amp; echo $!</p>
]]></content>
      <tags>
        <tag>编程语言</tag>
        <tag>后端</tag>
      </tags>
  </entry>
  <entry>
    <title>Linux下的c语言网络编程-将普通进程转换为守护进程</title>
    <url>/2013/09/16/linux-c-change-normal-progress-to-daemon-progress.html</url>
    <content><![CDATA[<p>Linux下的网络编程分为两部分：服务器编程和客户机编程。一般服务器程序在接收客户机连接请求之前，都要创建一个守护进程。守护进程是linux&#x2F;Unix编程中一个非常重要的概念，因为在创建一个守护进程的时候，我们要接触到子进程、进程组、会晤期、信号机制以及文件、目录、控制终端等多个概念，因此详细地讨论一下守护进程，对初学者学习进程间关系是非常有帮助的。</p>
<p>首先看一段将普通进程转换为守护进程的代码：</p>
<figure class="highlight plaintext"><table><tr><td class="code"><pre><span class="line">/****************************************************************</span><br><span class="line">function: 　　daemonize</span><br><span class="line">description:　detach the server process from the current context, creating a pristine, predictable 　　　　　　　environment in which it will execute.</span><br><span class="line">arguments:　　servfd file descriptor in use by server.</span><br><span class="line">return value: none.</span><br><span class="line">calls:　　　　none.</span><br><span class="line">globals:　　　none.</span><br><span class="line">****************************************************************/</span><br><span class="line">void daemonize (servfd)</span><br><span class="line">int servfd;</span><br><span class="line">&#123;</span><br><span class="line">int childpid, fd, fdtablesize;</span><br><span class="line">/* ignore terminal I/O, stop signals */</span><br><span class="line">signal(SIGTTOU,SIG_IGN);</span><br><span class="line">signal(SIGTTIN,SIG_IGN);</span><br><span class="line">signal(SIGTSTP,SIG_IGN);</span><br><span class="line">/* fork to put us in the background (whether or not the user</span><br><span class="line">specified &#x27;&amp;&#x27; on the command line */</span><br><span class="line">if ((childpid = fork()) &lt; 0) &#123;</span><br><span class="line">fputs(&quot;failed to fork first childrn&quot;,stderr);</span><br><span class="line">exit(1);</span><br><span class="line">&#125;</span><br><span class="line">else if (childpid &gt; 0)</span><br><span class="line">exit(0); /* terminate parent, continue in child */</span><br><span class="line">/* dissociate from process group */</span><br><span class="line">if (setpgrp(0,getpid())&lt;0) &#123;</span><br><span class="line">fputs(&quot;failed to become process group leaderrn&quot;,stderr);</span><br><span class="line">exit(1);</span><br><span class="line">&#125;</span><br><span class="line">/* lose controlling terminal */</span><br><span class="line">if ((fd = open(&quot;/dev/tty&quot;,O_RDWR)) &gt;= 0) &#123;</span><br><span class="line">ioctl(fd,TIOCNOTTY,NULL);</span><br><span class="line">close(fd);</span><br><span class="line">&#125;</span><br><span class="line">/* close any open file descriptors */</span><br><span class="line">for (fd = 0, fdtablesize = getdtablesize(); fd &lt; fdtablesize; fd++)</span><br><span class="line">if (fd != servfd)</span><br><span class="line">close(fd);</span><br><span class="line">/* set working directory to allow filesystems to be unmounted */</span><br><span class="line">chdir(&quot;/&quot;);</span><br><span class="line">/* clear the inherited umask */</span><br><span class="line">umask(0);</span><br><span class="line">/* setup zombie prevention */</span><br><span class="line">signal(SIGCLD,(Sigfunc *)reap_status);</span><br><span class="line">&#125;</span><br></pre></td></tr></table></figure>

<p>在linux系统中，如果要将一个普通进程转换为守护进程，需要执行的步骤如下：</p>
<p>1、调用fork（）函数创建子进程，然后中止父进程，保留子进程继续运行。因为，当一个进程是以前台进程的方式由shell启动时，如果中止了父进程，子进程就会自动转为后台进程。另外，在下一步时，我们需要创建一个新的会晤期，这就要求创建会晤期的进程不是一个进程组的组长进程。当父进程中止，子进程继续运行时，就保证了进程组的组ID与子进程的进程ID不会相等。<br>fork（）函数的定义为：</p>
<figure class="highlight plaintext"><table><tr><td class="code"><pre><span class="line">#include &lt;sys/types.h&gt;</span><br><span class="line">#include &lt;unistd.h&gt;</span><br><span class="line">pid_t fork(void);</span><br></pre></td></tr></table></figure>

<p>fork（）函数被调用一次，会返回两次值。这两次返回的值分别是子进程的返回值和父进程的返回值，子进程的返回值为“0”，父进程的返回值为子进程的进程ID。如果出错返回“－1”。</p>
<p>1、保证进程不会获得任何控制终端。这是为了避免在关闭某些终端时会显示有程序正在运行而无法关闭的情况。这一步通常的做法是：调用函数setsid（）创建一个新的会晤期。<br>setsid（）函数的定义为：</p>
<figure class="highlight plaintext"><table><tr><td class="code"><pre><span class="line">#include &lt;sys/types.h&gt;</span><br><span class="line">#include &lt;unistd.h&gt;</span><br><span class="line">pid_t setsid(void);</span><br></pre></td></tr></table></figure>

<p>在第一步里我们已经保证了调用此函数的进程不是进程组的组长，那么调用此函数将创建一个新的会晤。其结果是：首先，此进程编程该会晤期的首进程（session leader，系统默认会晤期的首进程是创建该会晤期的进程）。而且，此进程是该会晤期中的唯一进程。然后，此进程将成为一个新的进程组的组长，新进程组的组ID就是该进程的进程ID。最后，保证此进程没有控制终端，即使在调用setsid（）之前此进程拥有控制终端，在创建会晤期后这种联系也将被解除。如果调用该函数的进程是一个进程组的组长，那么函数将返回出错信息“－1”。</p>
<p>还有一个方法可以让进程无法获得控制终端，如下：</p>
<figure class="highlight plaintext"><table><tr><td class="code"><pre><span class="line">if((fd = fopen(&quot;/dev/tty&quot;,0_RDWR)) &gt;= 0)&#123;</span><br><span class="line">ioctl(fd,TIOCNOTTY,NULL);</span><br><span class="line">close(fd);</span><br><span class="line">&#125;</span><br></pre></td></tr></table></figure>

<p>其中&#x2F;dev&#x2F;tty是一个流设备，也是我们的终端映射。调用close（）函数将终端关闭。</p>
<p>3、信号处理。一般要忽略掉某些信号。信号相当于软件中断，Linux&#x2F;Unix下的信号机制提供了一种处理异步事件的方法，终端用户键入引发中断的键，或是系统发出信号，这都会通过信号处理机制终止一个或多个程序的运行。</p>
<p>不同情况下引发的信号不同，所有的信号都有自己的名字，这些名字都是以“SIG”开头的，只是后面有所不同。我们可以通过这些名字了解到系统中到底发生了什么事。当信号出现时，我们可以要求系统进行一下三种操作：</p>
<p>a、忽略信号。大多数信号都采用这种处理方法，但是对SIGKILL和SIGSTOP信号不能做忽略处理。</p>
<p>b、捕捉信号。这是一种最为灵活的操作方式。这种处理方式的意思就是：当某种信号发生时，我们可以调用一个函数对这种情况进行响应的处理。最常见的情况是：如果捕捉到SIGCHID信号，则表示子进程已经终止，然后可作此信号的捕捉函数中调用waitpid（）函数取得该子进程的进程ID已经他的终止状态。如果进程创建了临时文件，那么就要为进程终止信号SIGTERM编写一个信号捕捉函数来清除这些临时文件。</p>
<p>c、执行系统的默认动作。对绝大多数信号而言，系统的默认动作都是终止该进程。</p>
<p>在Linux下，信号有很多种，我在这里就不一一介绍了，如果想详细地对这些信号进行了解，可以查看头文件&lt;sigal.h&gt;，这些信号都被定义为正整数，也就是它们的信号编号。在对信号进行处理时，必须要用到函数signal()，此函数的详细描述为：</p>
<figure class="highlight plaintext"><table><tr><td class="code"><pre><span class="line">#include &lt;signal.h&gt;</span><br><span class="line">void (*signal (int signo, void (*func)(int)))(int);</span><br></pre></td></tr></table></figure>

<p>其中参数signo为信号名，参数func的值根据我们的需要可以是以下几种情况：（1）常数SIG_DFL,表示执行系统的默认动作。（2）常数SIG_IGN，表示忽略信号。（3）收到信号后需要调用的处理函数的地址，此信号捕捉程序应该有一个整型参数但是没有返回值。signal()函数返回一个函数指针，而该指针指向的函数应该无返回值（void），这个指针其实指向以前的信号捕捉程序。</p>
<p>下面 回到我们的daemonize()函数上来。这个函数在创建守护进程时忽略了三个信号：</p>
<figure class="highlight plaintext"><table><tr><td class="code"><pre><span class="line">signal(SIGTTOU,SIG_IGN);</span><br><span class="line">signal(SIGTTIN,SIG_IGN);</span><br><span class="line">signal(SIGTSTP,SIG_IGN);</span><br></pre></td></tr></table></figure>

<p>这三个信号的含义分别是：SIGTTOU表示后台进程写控制终端，SIGTTIN表示后台进程读控制终端，SIGTSTP表示终端挂起。</p>
<p>4．关闭不再需要的文件描述符，并为标准输入、标准输出和标准错误输出打开新的文件描述符（也可以继承父进程的标准输入、标准输出和标准错误输出文件描述符，这个操作是可选的）。在我们这段例程中，因为是代理服务器程序，而且是在执行了listen()函数之后执行这个daemonize()的，所以要保留已经转换成功的倾听套接字，所以我们可以见到这样的语句：<br>if (fd !&#x3D; servfd)<br>close(fd);</p>
<p>5．调用函数chdir(“&#x2F;“)将当前工作目录更改为根目录。这是为了保证我们的进程不使用任何目录。否则我们的守护进程将一直占用某个目录，这可能会造成超级用户不能卸载一个文件系统。</p>
<p>6．调用函数umask(0)将文件方式创建屏蔽字设置为”0”。这是因为由继承得来的文件创建方式屏蔽字可能会禁止某些许可权。例如我们的守护进程需要创建一组可读可写的文件，而此守护进程从父进程那里继承来的文件创建方式屏蔽字却有可能屏蔽掉了这两种许可权，则新创建的一组文件其读或写操作就不能生效。因此要将文件方式创建屏蔽字设置为”0”。<br>在daemonize()函数的最后，我们可以看到这样的信号捕捉处理语句：</p>
<figure class="highlight plaintext"><table><tr><td class="code"><pre><span class="line">signal(SIGCLD,(Sigfunc *)reap_status);</span><br></pre></td></tr></table></figure>

<p>这不是创建守护进程过程中必须的一步，它的作用是调用我们自定义的reap_status()函数来处理僵死进程。reap_status()在例程中的定义为：</p>
<figure class="highlight plaintext"><table><tr><td class="code"><pre><span class="line">/****************************************************************</span><br><span class="line">function: 　　　reap_status</span><br><span class="line">description: 　 handle a SIGCLD signal by reaping the exit status of the perished child, and 　　　　　　　　　　　discarding it.</span><br><span class="line">arguments: 　　 none.</span><br><span class="line">return value: 　none.</span><br><span class="line">calls: 　　　　 none.</span><br><span class="line">globals: 　　　 none.</span><br><span class="line">****************************************************************/</span><br><span class="line">void reap_status()</span><br><span class="line">&#123;</span><br><span class="line">int pid;</span><br><span class="line">union wait status;</span><br><span class="line">while ((pid = wait3(&amp;status,WNOHANG,NULL)) &gt; 0)</span><br><span class="line">; /* loop while there are more dead children */</span><br><span class="line">&#125;</span><br></pre></td></tr></table></figure>

<p>上面信号捕捉语句的原文为：<br>signal(SIGCLD, reap_status);<br>我们刚才说过，signal()函数的第二个参数一定要有有一个整型参数但是没有返回值。而reap_status()是没有参数的，所以原来的语句在编译时无法通过。所以我在预编译部分加入了对Sigfunc()的类型定义，在这里用做对reap_status进行强制类型转换。而且在BSD系统中通常都使用SIGCHLD信号来处理子进程终止的有关信息，SIGCLD是System V中定义的一个信号名，如果将SIGCLD信号的处理方式设定为捕捉，那么内核将马上检查系统中是否存在已经终止等待处理的子进程，如果有，则立即调用信号捕捉处理程序。<br>一般在信号捕捉处理程序中都要调用wait()、waitpid()、wait3()或是wait4()来返回子进程的终止状态。这些”等待”函数的区别是，当要求函数”等待”的子进程还没有终止时，wait()将使其调用者阻塞；而在waitpid()的参数中可以设定使调用者不发生阻塞，wait()函数不被设置为等待哪个具体的子进程，它等待调用者所有子进程中首先终止的那个，而在调用waitpid()时却必须在参数中设定被等待的子进程ID。而wait3()和wait4()的参数分别比wait()和waitpid()还要多一个”rusage”。例程中的reap_status()就调用了函数wait3()，这个函数是BSD系统支持的，我们把它和wait4()的定义一起列出来：</p>
<figure class="highlight plaintext"><table><tr><td class="code"><pre><span class="line">#include &lt;sys/types.h&gt;</span><br><span class="line">#include &lt;sys/wait.h&gt;</span><br><span class="line">#include &lt;sys/time.h&gt;</span><br><span class="line">#include &lt;sys/resource.h&gt;</span><br><span class="line">pid_t wait3(int *statloc, int options, struct rusage *rusage);</span><br><span class="line">pid_t wait4(pid_t pid, int *statloc, int options, struct rusage *rusage);</span><br></pre></td></tr></table></figure>

<p>其中指针statloc如果不为”NULL”，那么它将指向返回的子进程终止状态。参数pid是我们指定的被等待的子进程的进程ID。参数options是我们的控制选择项，一般为WNOHANG或是WUNTRACED。例程中使用了选项WNOHANG，意即如果不能立即返回子进程的终止状态（譬如由于子进程还未结束），那么等待函数不阻塞，此时返回”0”。 　　　　　WUNTRACED选项的意思是如果系统支持作业控制，如果要等待的子进程的状态已经暂停，而且其状态自从暂停以来还从未报告过，则返回其状态。参数rusage如果不为”NULL”，则它将指向内核返回的由终止进程及其所有子进程使用的资源摘要，该摘要包括用户CPU时间总量、缺页次数、接收到信号的次数等。</p>
]]></content>
      <tags>
        <tag>编程语言</tag>
      </tags>
  </entry>
  <entry>
    <title>archlinux访问windows共享需要安装的软件</title>
    <url>/2013/09/23/archlinux-visit-the-windows-share-needed-softwares.html</url>
    <content><![CDATA[<p>1、smbclient</p>
<p>2、gvfs-smb(xfce4下面)</p>
]]></content>
      <tags>
        <tag>Server&amp;OS</tag>
      </tags>
  </entry>
  <entry>
    <title>MYSQL–事务处理</title>
    <url>/2013/09/24/mysql-transaction.html</url>
    <content><![CDATA[<p>转自：<a href="http://levi.cg.am/?p=3023">http://levi.cg.am/?p=3023</a></p>
<p>事务处理在各种管理系统中都有着广泛的应用，比如人员管理系统，很多同步数据库操作大都需要用到事务处理。<strong>比如说，在人员管理系统中，你删除一个人员，你即需要删除人员的基本资料，也要删除和该人员相关的信息，如信箱，文章等等</strong>，这样，这些数据库操作语句就构成一个事务！<br>删除的SQL语句</p>
<pre><code>delete from userinfo where ~~~
delete from mail where ~~
delete from article where~~
~~
</code></pre>
<p>如果没有事务处理，在你删除的过程中，假设出错了，只执行了第一句，那么其后果是难以想象的！<br>但用事务处理。如果删除出错，你只要rollback就可以取消删除操作（其实是只要你没有commit你就没有确实的执行该删除操作）</p>
<p>一般来说，在商务级的应用中，都必须考虑事务处理的！<span id="more"></span></p>
<h2 id="查看inodb信息"><a href="#查看inodb信息" class="headerlink" title="查看inodb信息"></a>查看inodb信息</h2><table cellpadding="0" cellspacing="0" border="0" >
<tbody >
<tr >

<td >


<p>1</p>
<p>2</p>
</td>

<td >


<p><code>shell&gt; ``/usr/local/mysql</code> <code>-u root -p</code></p>
<p><code>mysql&gt; show variables like ``&quot;have_%&quot;</code></p>
</td>
</tr>
</tbody>
</table>


<p><strong>系统会提示：</strong></p>
<table cellpadding="0" cellspacing="0" border="0" >
<tbody >
<tr >

<td >


<p>1</p>
<p>2</p>
<p>3</p>
<p>4</p>
<p>5</p>
<p>6</p>
<p>7</p>
<p>8</p>
<p>9</p>
<p>10</p>
<p>11</p>
<p>12</p>
<p>13</p>
</td>

<td >


<p><code>+-------------------+--------+</code></p>
<p><code>| Variable_name     | Value |</code></p>
<p><code>+-------------------+--------+</code></p>
<p><code>| have_bdb          | YES    |</code></p>
<p><code>| have_crypt        | YES    |</code></p>
<p><code>| have_innodb       | YES    |</code></p>
<p><code>| have_isam         | YES    |</code></p>
<p><code>| have_raid         | YES    |</code></p>
<p><code>| have_symlink      | YES    |</code></p>
<p><code>| have_openssl      | NO     |</code></p>
<p><code>| have_query_cache  | YES    |</code></p>
<p><code>+-------------------+--------+</code></p>
<p><code>8 rows ``in</code> <code>set</code> <code>(0.05 sec)</code></p>
</td>
</tr>
</tbody>
</table>


<p>如果是这样的，那么我们就可以创建一张支持事务处理的表来试试了。</p>
<h2 id="MYSQL的事务处理功能！"><a href="#MYSQL的事务处理功能！" class="headerlink" title="MYSQL的事务处理功能！"></a>MYSQL的事务处理功能！</h2><p>一直以来我都以为MYSQL不支持事务处理，所以在处理多个数据表的数据时，一直都很麻烦（我是不得不将其写入文本文件，在系统重新加载得时候才写入数据库以防出错）～今天发现MYSQL数据库从4.1就开始支持事务功能，5.0引入了存储过程^_^</p>
<p>先简单介绍一下事务吧！事务是DBMS得执行单位。它由有限得数据库操作序列组成得。但不是任意得数据库操作序列都能成为事务。</p>
<p><strong>一般来说，事务是必须满足4个条件（ACID）：</strong></p>
<ol>
<li><p>原子性（Autmic）：事务在执行性，要做到“要么不做，要么全做！”，就是说不允许事务部分得执行。即使因为故障而使事务不能完成，在rollback时也要消除对数据库得影响！</p>
</li>
<li><p>一致性（Consistency）：事务得操作应该使使数据库从一个一致状态转变倒另一个一致得状态！就拿网上购物来说吧，你只有即让商品出库，又让商品进入顾客得购物篮才能构成事务！</p>
</li>
<li><p>隔离性（Isolation）：如果多个事务并发执行，应象各个事务独立执行一样！</p>
</li>
<li><p>持久性（Durability）：一个成功执行得事务对数据库得作用是持久得，即使数据库应故障出错，也应该能够恢复！</p>
</li>
</ol>
<p><strong>MYSQL的事务处理主要有两种方法：</strong></p>
<ol>
<li>用begin, rollback, commit来实现：</li>
</ol>
<pre><code>* begin 开始一个事务


* rollback 事务回滚


* commit  事务确认
</code></pre>
<ol start="2">
<li>直接用set来改变mysql的自动提交模式：<br>MYSQL默认是自动提交的，也就是你提交一个QUERY，它就直接执行！我们可以通过</li>
</ol>
<pre><code>* set autocommit=0   禁止自动提交


* set autocommit=1 开启自动提交
</code></pre>
<blockquote>但注意当你用 set autocommit=0 的时候，你以后所有的SQL都将做为事务处理，直到你用commit确认或rollback结束，注意当你结束这个事务的同时也开启了个新的事务！按第一种方法只将当前的作为一个事务！
**个人推荐使用第一种方法！**
MYSQL中只有INNODB和BDB类型的数据表才能支持事务处理！其他的类型是不支持的！（切记！）</blockquote>


<h2 id="测试："><a href="#测试：" class="headerlink" title="测试："></a>测试：</h2><p><strong>SQL代码：</strong></p>
<table cellpadding="0" cellspacing="0" border="0" >
<tbody >
<tr >

<td >


<p>1</p>
<p>2</p>
<p>3</p>
<p>4</p>
<p>5</p>
<p>6</p>
<p>7</p>
<p>8</p>
<p>9</p>
<p>10</p>
<p>11</p>
<p>12</p>
<p>13</p>
<p>14</p>
<p>15</p>
<p>16</p>
<p>17</p>
<p>18</p>
<p>19</p>
<p>20</p>
<p>21</p>
<p>22</p>
<p>23</p>
<p>24</p>
<p>25</p>
<p>26</p>
<p>27</p>
<p>28</p>
<p>29</p>
<p>30</p>
<p>31</p>
<p>32</p>
<p>33</p>
<p>34</p>
<p>35</p>
<p>36</p>
<p>37</p>
<p>38</p>
<p>39</p>
<p>40</p>
<p>41</p>
<p>42</p>
<p>43</p>
<p>44</p>
<p>45</p>
<p>46</p>
<p>47</p>
<p>48</p>
<p>49</p>
<p>50</p>
<p>51</p>
</td>

<td >


<p><code>mysql&gt; use ``test``;</code></p>
<p><code>Database changed</code></p>
<p><code>mysql&gt; CREATE TABLE </code>dbtest<code>(</code></p>
<p><code>    ``-&gt; ``id</code> <code>int(4)</code></p>
<p><code>    ``-&gt; ) TYPE=INNODB;</code></p>
<p><code>Query OK, 0 rows affected, 1 warning (0.05 sec)</code></p>
<p><code>mysql&gt; SELECT * FROM </code>dbtest<code>;</code></p>
<p><code>Empty ``set</code> <code>(0.01 sec)</code></p>
<p><code>mysql&gt; begin;</code></p>
<p><code>Query OK, 0 rows affected (0.00 sec)</code></p>
<p><code>mysql&gt; INSERT INTO </code>dbtest<code> VALUES(5);</code></p>
<p><code>Query OK, 1 row affected (0.00 sec)</code></p>
<p><code>mysql&gt; INSERT INTO </code>dbtest<code> VALUES(6);</code></p>
<p><code>Query OK, 1 row affected (0.00 sec)</code></p>
<p><code>mysql&gt; commit;</code></p>
<p><code>Query OK, 0 rows affected (0.00 sec)</code></p>
<p><code>mysql&gt; ``select</code> <code>* from dbtest;</code></p>
<p><code>+------+</code></p>
<p><code>| ``id</code>   <code>|</code></p>
<p><code>+------+</code></p>
<p><code>|  5   |</code></p>
<p><code>|  6   |</code></p>
<p><code>+------+</code></p>
<p><code>2 rows ``in</code> <code>set</code> <code>(0.00 sec)</code></p>
<p><code>mysql&gt; begin;</code></p>
<p><code>Query OK, 0 rows affected (0.00 sec)</code></p>
<p><code>mysql&gt; INSERT INTO </code>dbtest<code> VALUES(7);</code></p>
<p><code>Query OK, 1 row affected (0.00 sec)</code></p>
<p><code>mysql&gt; rollback;</code></p>
<p><code>Query OK, 0 rows affected (0.00 sec)</code></p>
<p><code>mysql&gt; ``select</code> <code>* from dbtest;</code></p>
<p><code>+------+</code></p>
<p><code>| ``id</code>   <code>|</code></p>
<p><code>+------+</code></p>
<p><code>|  5   |</code></p>
<p><code>|  6   |</code></p>
<p><code>+------+</code></p>
<p><code>2 rows ``in</code> <code>set</code> <code>(0.00 sec)</code></p>
<p><code>mysql&gt;</code></p>
</td>
</tr>
</tbody>
</table>


<p><strong>php函数：</strong></p>
<table cellpadding="0" cellspacing="0" border="0" >
<tbody >
<tr >

<td >


<p>1</p>
<p>2</p>
<p>3</p>
<p>4</p>
<p>5</p>
<p>6</p>
<p>7</p>
<p>8</p>
<p>9</p>
<p>10</p>
<p>11</p>
<p>12</p>
<p>13</p>
<p>14</p>
<p>15</p>
<p>16</p>
<p>17</p>
<p>18</p>
<p>19</p>
<p>20</p>
<p>21</p>
<p>22</p>
<p>23</p>
</td>

<td >


<p><code>function</code> <code>Tran (``$sql``)</code></p>
<p><code>&#123;</code></p>
<p><code>    ``$judge</code> <code>= 1;</code></p>
<p><code>    ``mysql_query(``&#39;begin&#39;``);</code></p>
<p><code>    ``foreach</code> <code>(``$sql</code> <code>as</code> <code>$v``)</code></p>
<p><code>    ``&#123;</code></p>
<p><code>        ``if</code> <code>(!mysql_query(``$v``))</code></p>
<p><code>        ``&#123;</code></p>
<p><code>            ``$judge</code> <code>= 0;</code></p>
<p><code>        ``&#125;</code></p>
<p><code>    ``&#125;</code></p>
<p><code>    ``if</code> <code>(``$judge</code> <code>== 0)</code></p>
<p><code>    ``&#123;</code></p>
<p><code>        ``mysql_query(``&#39;rollback&#39;``);</code></p>
<p><code>        ``return</code> <code>false;</code></p>
<p><code>    ``&#125;</code></p>
<p><code>    ``elseif</code> <code>(``$judge</code> <code>== 1)</code></p>
<p><code>    ``&#123;</code></p>
<p><code>        ``mysql_query(``&#39;commit&#39;``);</code></p>
<p><code>        ``return</code> <code>true;</code></p>
<p><code>    ``&#125;</code></p>
<p><code>&#125;</code></p>
</td>
</tr>
</tbody>
</table>


<p><strong>PHP：回滚</strong></p>
<table cellpadding="0" cellspacing="0" border="0" >
<tbody >
<tr >

<td >


<p>1</p>
<p>2</p>
<p>3</p>
<p>4</p>
<p>5</p>
<p>6</p>
<p>7</p>
<p>8</p>
<p>9</p>
<p>10</p>
<p>11</p>
<p>12</p>
<p>13</p>
<p>14</p>
<p>15</p>
<p>16</p>
<p>17</p>
<p>18</p>
<p>19</p>
</td>

<td >


<p><code>&lt;?php</code></p>
<p><code>$handler</code> <code>= mysql_connect(``&#39;localhost&#39;``, ``&#39;root&#39;``, ``&#39;&#39;``);</code></p>
<p><code>mysql_select_db(``&#39;task&#39;``);</code></p>
<p><code>mysql_query(``&#39;SET AUTOCOMMIT=0&#39;``);    ``//设置为不自动提交，因为MYSQL默认立即执行</code></p>
<p><code>mysql_query(``&#39;BEGIN&#39;``);               ``//开始事务定义</code></p>
<p><code>if``(!mysql_query(``&#39;INSERT INTO </code>trans<code> (</code>id<code>) VALUES (2);&#39;``))</code></p>
<p><code>&#123;</code></p>
<p><code>    ``mysql_query(``&#39;ROOLBACK&#39;``);        ``//判断当执行失败时回滚</code></p>
<p><code>&#125;</code></p>
<p><code>if``(!mysql_query(``&#39;INSERT INTO </code>trans<code> (</code>id<code>) VALUES (4);&#39;``))</code></p>
<p><code>&#123;</code></p>
<p><code>    ``mysql_query(``&#39;ROOLBACK&#39;``);        ``//判断执行失败回滚</code></p>
<p><code>&#125;</code></p>
<p><code>mysql_query(``&#39;COMMIT&#39;``);              ``//执行事务</code></p>
<p><code>mysql_close(``$handler``);</code></p>
<p><code>?&gt;</code></p>
</td>
</tr>
</tbody>
</table>


<p>下次有空说下MYSQL的数据表的锁定和解锁！</p>
]]></content>
      <tags>
        <tag>理论</tag>
      </tags>
  </entry>
  <entry>
    <title>php PHP_EOL</title>
    <url>/2013/09/29/php-php_eol.html</url>
    <content><![CDATA[<p>换行符<br>unix系列用 \n<br>windows系列用 \r\n<br>mac用 \r<br>PHP中可以用PHP_EOL来替代，以提高代码的源代码级可移植性</p>
<p>如：<br><?php
echoPHP_EOL;
//windows平台相当于    echo "\r\n";
//unix\linux平台相当于    echo "\n";
//mac平台相当于    echo "\r";
?><br>类似常用的还有<br>DIRECTORY_SEPARATOR</p>
<p>可以用函数get_defined_constants()来获取所有PHP常量</p>
<p>转： <a href="http://www.cnblogs.com/codefor/archive/2011/06/18/2084300.html">http://www.cnblogs.com/codefor/archive/2011/06/18/2084300.html</a></p>
]]></content>
      <tags>
        <tag>后端</tag>
        <tag>Server&amp;OS</tag>
      </tags>
  </entry>
  <entry>
    <title>PHP位运算详细说明</title>
    <url>/2013/09/24/php-bit-operation.html</url>
    <content><![CDATA[<p>转自：<a href="http://www.oschina.net/code/snippet_856191_23751">http://www.oschina.net/code/snippet_856191_23751</a></p>
<p>在实际应用中可以做用户权限的应用<br>我这里说到的权限管理办法是一个普遍采用的方法，主要是使用到”位运行符”操作，&amp; 位与运算符、| 位或运行符。参与运算的如果是10进制数，则会被转换至2进制数参与运算，然后计算结果会再转换为10进制数输出。<br>它的权限值是这样的</p>
<figure class="highlight plaintext"><table><tr><td class="code"><pre><span class="line">2^0=1，相应2进数为”0001″(在这里^我表示成”次方”，即：2的0次方，下同)</span><br><span class="line">2^1=2，相应2进数为”0010″</span><br><span class="line">2^2=4，相应2进数为”0100″</span><br><span class="line">2^3=8，相应2进数为”1000″</span><br></pre></td></tr></table></figure>

<p>要判断一个数在某些数范围内就可以使用 &amp; 运算符(数值从上面的表中得来)<br>如：7&#x3D;4|2|1　(你也可以简单理解成7&#x3D;4+2+1)<br>用 &amp; 来操作，可以知道7&amp;4、7&amp;2、7&amp;1都是真的，而如果7&amp;8则是假的<br>&amp;、|　不熟悉的就要去查查手册，看看是怎么用的了<br>下面来看例子吧：</p>
<figure class="highlight plaintext"><table><tr><td class="code"><pre><span class="line">// 赋予权限值--&gt;删除：8、上传：4、写入：2、只读：1</span><br><span class="line">define(“mDELETE”,8);</span><br><span class="line">define(“mUPLOAD”,4);</span><br><span class="line">define(“mWRITE”,2);</span><br><span class="line">define(“mREAD”,1);</span><br><span class="line">//vvvvvvvvvvvvv使用说明vvvvvvvvvvvvv</span><br><span class="line">//部门经理的权限为(假设它拥有此部门的所有权限)，| 是位或运行符，不熟悉的就查查资料</span><br><span class="line">echo mDELETE|mUPLOAD|mWRITE|mREAD ,&#x27;&#x27;;// 相当于是把上面的权限值加起来：8+4+2+1=15</span><br><span class="line">// 设我只有 upload 和 read 权限，则</span><br><span class="line">echo mUPLOAD|mREAD ,&#x27;&#x27;;//相当于是把上传、只读的权限值分别相加：4+1=5</span><br><span class="line">/*</span><br><span class="line">*赋予它多个权限就分别取得权限值相加，又比如某位员工拥有除了删除外的权限其余都拥有，那它的权限值是多少?</span><br><span class="line">*应该是：4+2+1＝7</span><br><span class="line">*明白了怎么赋值给权限吧?</span><br><span class="line">*/</span><br><span class="line">//^^^^^^^^^^^^^^^^^^^^^^^^^^^^^^^^^^</span><br><span class="line">//判断某人的权限可用，设权限值在$key中</span><br><span class="line">/*</span><br><span class="line">*判断权限用&amp;位与符，</span><br><span class="line">*/</span><br><span class="line">$key = 13;//13＝8+4+1</span><br><span class="line">if($key &amp; mDELETE) echo &#x27;有删除权限&#x27;; //8</span><br><span class="line">if($key &amp; mUPLOAD) echo &#x27;有上传权限&#x27;; //4</span><br><span class="line">$a=$key &amp; mWRITE; echo &#x27;有写权限&#x27;.$a; //无此权限</span><br><span class="line">if($key &amp; mREAD) echo &#x27;有读权限&#x27;; //1</span><br><span class="line">?&gt;</span><br></pre></td></tr></table></figure>

<p>　　OK，权限分值的这其中一个算法就是这样的，可以说是简单高效。也不知大家明白没有，不明白也没关系，记住例子就行了。前提就是做好权限值的分布，即那个1、2、4、8、16….(这里还有个顺序问题，越高级的权限就要越高的权限值，比如上面的例子所演示的删除权限)。有了权限分布表就可以确定给某个人什么权限了，你简单的理解成要哪个权限就加上相应的权限值吧。<br>　　这个方法很好用的，缺点就是如果权限分布得细的话，那么权限值会越来越大，你自己想想，2的几次方、如果所有的权限都要则是全部相加。不过对于一般的权限来说这个已经足够了。</p>
<p>下面是些简单应用举例</p>
<p>(1) 判断int型变量a是奇数还是偶数</p>
<p>a&amp;1 &#x3D; 0 偶数</p>
<p>a&amp;1 &#x3D; 1 奇数</p>
<p>(2) 取int型变量a的第k位 (k&#x3D;0,1,2……sizeof(int))，即a&gt;&gt;k&amp;1</p>
<p>(3) 将int型变量a的第k位清0，即a&#x3D;a&amp;~(1&lt;</p>
<p>&lt;&gt;</p>
<p>(4) 将int型变量a的第k位置1， 即a&#x3D;a|(1&lt;</p>
<p>&lt;&gt;</p>
<p>(5) int型变量循环左移k次，即a&#x3D;a&lt;&gt;16-k (设sizeof(int)&#x3D;16)</p>
<p>(6) int型变量a循环右移k次，即a&#x3D;a&gt;&gt;k|a&lt;&lt;16-k (设sizeof(int)&#x3D;16)</p>
<p>(7)整数的平均值</p>
<p>对于两个整数x,y，如果用 (x+y)&#x2F;2 求平均值，会产生溢出，因为 x+y 可能会大于INT_MAX，但是我们知道它们的平均值是肯定不会溢出的，我们用如下算法：</p>
<p>int average(int x, int y) &#x2F;&#x2F;返回X,Y 的平均值</p>
<p>{</p>
<p>return (x&amp;y)+((x^y)&gt;&gt;1);</p>
<p>}</p>
<p>(8)判断一个整数是不是2的幂,对于一个数 x &gt;&#x3D; 0，判断他是不是2的幂</p>
<p>boolean power2(int x)</p>
<p>{</p>
<p>return ((x&amp;(x-1))&#x3D;&#x3D;0)&amp;&amp;(x!&#x3D;0)；</p>
<p>}</p>
<p>(9)不用temp交换两个整数</p>
<p>void swap(int x , int y)</p>
<p>{</p>
<p>x ^&#x3D; y;</p>
<p>y ^&#x3D; x;</p>
<p>x ^&#x3D; y;</p>
<p>}</p>
<p>(10)计算绝对值</p>
<p>int abs( int x )</p>
<p>{</p>
<p>int y ;</p>
<p>y &#x3D; x &gt;&gt; 31 ;</p>
<p>return (x^y)-y ; &#x2F;&#x2F;or: (x+y)^y</p>
<p>}</p>
<p>(11)取模运算转化成位运算 (在不产生溢出的情况下)</p>
<p>a % (2^n) 等价于 a &amp; (2^n – 1)</p>
<p>(12)乘法运算转化成位运算 (在不产生溢出的情况下)</p>
<p>a * (2^n) 等价于 a&lt;&lt; n</p>
<p>(13)除法运算转化成位运算 (在不产生溢出的情况下)</p>
<p>a &#x2F; (2^n) 等价于 a&gt;&gt; n</p>
<p>例: 12&#x2F;8 &#x3D;&#x3D; 12&gt;&gt;3</p>
<p>(14) a % 2 等价于 a &amp; 1</p>
<p>(15) if (x &#x3D;&#x3D; a) x&#x3D; b;</p>
<p>　　 else x&#x3D; a;</p>
<p>　　 等价于 x&#x3D; a ^ b ^ x;</p>
<p>(16) x 的 相反数 表示为 (~x+1)</p>
<p>在32位系统上不要右移超过32位,不要在结果可能超过 32 位的情况下左移</p>
]]></content>
      <tags>
        <tag>编程语言</tag>
        <tag>理论</tag>
      </tags>
  </entry>
  <entry>
    <title>linux下进程权限分析</title>
    <url>/2013/10/08/analysis-of-linux-process-authority.html</url>
    <content><![CDATA[<p>转自：<a href="http://blog.chinaunix.net/uid-27105712-id-3349522.html">http://blog.chinaunix.net/uid-27105712-id-3349522.html</a></p>
<p>在linux下，关于文件权限，大部分人接触比较多，也比较熟悉了解.但是对进程权限一般知之甚少。本文总结一下linux系统下进程权限问题和现象。</p>
<p>需要强调的是，本文是linux系统下讨论，因为linux和unix有很多不同的地方，并且各个不同的unix系统也有很多不同。</p>
<p>先开门见山的列出本文讨论对象：ruid(实际用户id： real userid)、euid(有效用户用户:effective userid), suid(保存用户id:saved userid)、fuid(文件系统用户id)。</p>
<p>除了上面4个，还涉及到一个位 设置用户id位(set user id bit),，即我们通常所说的处rwx之外那个s标志位。</p>
<p>另外，本文主要讨论userid，groupid规则基本一样，例如rgid, egid, sgid, fgid等，本文就不做组id方面的重复讨论了。</p>
<p>首先，查看这几个uid的方法有两种方式：一是ps 命令 (ps -ax -o ruid -o euid -o suid -o fuid -o pid -o fname)列出这几个uid；二是查看status文件，（cat &#x2F;proc&#x2F;2495&#x2F;status | grep Uid）。</p>
<p>本文创建5个test用户 test1~test5用来做本文中sample讨论使用，代表常见普通权限用户。<span id="more"></span></p>
<p>一：文件所有者用户和程序执行者用户是同一用户的情况<br>int main(int argc, char *argv[])<br>{<br>while(1)sleep(1);<br>}<br>$&gt;g++ main.cpp -o a.out</p>
<p>$&gt;ll<br>-rwxr-xr-x. 1 test1 test 6780 Sep 16 15:32 a.out<br>文件所有者是test1，我们用test1用户执行a.out程序<br>$&gt;su test1<br>$&gt;.&#x2F;a.out &amp;<br>$&gt;ps -ax -o ruid -o euid -o suid -o fuid -o pid -o fname | grep a.out<br>502 502 502 502 3192 a.out<br>(看到结果是4个uid全是test1；)<br>现在我们用test2用户执行test1的程序看看结果<br>$su test2<br>503 503 503 503 3234 a.out<br>再用root用户执行<br>0 0 0 0 3257 a.out</p>
<p>看到这个结果，我们基本可以总结：在常见情况下。这四个id只受执行用户影响，不受文件owner用户影响。并且四个uid全部等于执行用户的id；</p>
<p>上面是我们碰到最常见最多的情况，所以导致大部分技术人员很少关心这个四个uid的区别和含义。让我们继续看看更多场景</p>
<p>二、出让权限给其它用户。非root用户是无法出让权限给其它用户，只有root用户才能出让。</p>
<p>int main(int argc, char *argv[])<br>{<br>if( setuid(503) &lt; 0) perror (“setuid error”); while(1)sleep(1); } $&gt;ll<br>-rwxr-xr-x. 1 test1 test 6780 Sep 16 15:32 a.out<br>使用root用户执行<br>$&gt;.&#x2F;a.out<br>查看状态，所有uid都变成test2用户。<br>503 503 503 503 3592 a.out</p>
<p>把代码中setuid改成seteuid函数，会把euid和fuid改成test2用户<br>0 503 0 503 3614 a.out</p>
<p>把代码中setuid改成setfsuid函数，会把fuid改成test2用户<br>0 0 0 503 3636 a.out</p>
<p>当把代码改成下面样子<br>if( seteuid(503) &lt; 0) perror (“seteuid error”);<br>if( setfsuid(504) &lt; 0) perror (“setfsuid error”);<br>while(1)sleep(1);<br>或者<br>if( setfsuid(504) &lt; 0) perror (“setfsuid error”);<br>if( setfeuid(503) &lt; 0) perror (“seteuid error”); while(1)sleep(1); 用root用户执行，得到都是一样的结果 0 503 0 503 3614 a.out 到了这里我来总结一下：1、setuid和seteuid是有区别的，setuid是永久的放弃root用户权限，转让给非root用户后，无法再restore到root用户，seteuid是临时放弃root用户权限，可以通过seteuid(0),restore到root权限。这点应该是总所周知的特点，本文就不举例子演示。2、seteuid 会同时改变euid和fuid都为设置的euid值。3、root用户可以通过调用setxxuid 来改变权限用户。非root用户是无法改变和转让权限用户。 权限出让使用最多的场景是类似apache或mysql程序，启动的时候使用root用户启动，设置一些root用户才能操作的系统配置。创建子进程时候通过setuid降级为nobody用户。 继续看一下s权限位对进程权限的影响 三、s标志位影响的是euid，suid，和fuid int main(int argc, char *argv[]) { while(1)sleep(1); } $&gt;g++ main.cpp<br>$&gt;ll<br>-rwxr-xr-x. 1 test1 test 6780 Sep 16 18:18 a.out<br>$&gt;chmod u+s a.out<br>$&gt;ll<br>-rwsr-xr-x. 1 test1 test 6780 Sep 16 18:18 a.out</p>
<p>使用root用户执行，查看用户ID为<br>0 502 502 502 4133 a.out<br>s权限位使用最经典的案例是passwd命令</p>
<p>下面我们看看他们对文件权限的影响，构建一个ruid，euid，和fuid都不同，看看创建出来的文件所有者是哪个uid</p>
<p>四、影响用户文件权限的是fuid，不是euid，该uid是linux特有的属性，unix系统是靠euid来判定用户权限。</p>
<p>int main(int argc, char *argv[])<br>{<br>if( setfsuid(503) &lt; 0) perror (“setfsuid error”); FILE * fp &#x3D; fopen(“test.log”, “a+”); if(fp &#x3D;&#x3D; NULL) { perror (“fopen error”); } else { fclose(fp); } while(1)sleep(1); } 使用s权限位，文件所有者为root，执行者为test1，改变fuid为test2，这样就构造出3个uid各部相同，方便观察效果 $&gt;ll<br>-rws—r-x. 1 root root 7397 Sep 16 18:53 a.out<br>运行查看状态，ruid为test1，euid为root，fuid为test2<br>502 0 0 503 4240 a.out<br>$&gt;ll<br>-rws—r-x. 1 root root 7397 Sep 16 18:53 a.out<br>-rw-rw-r–. 1 test2 test 0 Sep 16 18:54 test.log</p>
<p>五、权限的继承，当使用fork子进程的时候，子进程全部继承父进程四个uid，和父进程uid相同；<br>当使用exec系列函数时候，会把suid置为euid。</p>
]]></content>
      <tags>
        <tag>编程语言</tag>
        <tag>Server&amp;OS</tag>
      </tags>
  </entry>
  <entry>
    <title>pxelinux中default配置文件的注释</title>
    <url>/2013/10/10/pxelinux-default-config-comment.html</url>
    <content><![CDATA[<figure class="highlight plaintext"><table><tr><td class="code"><pre><span class="line"># 默认启动的是 &#x27;label linux&#x27; 中标记的内核</span><br><span class="line">default linux</span><br><span class="line"></span><br><span class="line"># 显示 &#x27;boot: &#x27; 提示符。</span><br><span class="line"># 为 &#x27;0&#x27; 时则不提示，将会直接启动 &#x27;default&#x27; 参数中指定的内容。</span><br><span class="line">prompt 1</span><br><span class="line"></span><br><span class="line"># 在用户输入之前的超时时间，单位为 1/10 秒。</span><br><span class="line">timeout 600</span><br><span class="line"></span><br><span class="line"># 显示某个文件的内容，注意文件的路径。默认是在 /tftpboot 目录下。</span><br><span class="line"># 也可以指定位类似 &#x27;install/rhel4.4-inst/boot.msg&#x27; 这样的，路径+文件名。</span><br><span class="line">display boot.msg</span><br><span class="line"></span><br><span class="line"># 按下 &#x27;F1&#x27; 这样的键后显示的文件。注意路径。默认是 /tftpboot。</span><br><span class="line"># 注：syslinux 官方网站上说目前只能使用 F1-F10。</span><br><span class="line">F1 install/rhel4.4-inst/boot.msg</span><br><span class="line">F2 install/rhel4.4-inst/options.msg</span><br><span class="line">#...</span><br><span class="line">F10 install/rhel4.4-inst/snake.msg</span><br><span class="line"></span><br><span class="line"># &#x27;label&#x27; 指定你在 &#x27;boot:&#x27; 提示符下输入的关键字。</span><br><span class="line"># 比如：</span><br><span class="line">#     boot: linux[ENTER]</span><br><span class="line"># 这个会启动 &#x27;label linux&#x27; 下标记的 kernel 和 initrd.img 文件。</span><br><span class="line"># 这里还定义了其它几个关键字：</span><br><span class="line">#     boot: text</span><br><span class="line">#     boot: ks</span><br><span class="line">#</span><br><span class="line"># kernel 参数指定要启动的内核。同样要注意路径，默认是 /tftpboot 目录。</span><br><span class="line"># append 指定追加给内核的参数，能够在 gurb 里使用的追加给内核的参数，在这里也</span><br><span class="line">#        都可以使用。</span><br><span class="line">label linux</span><br><span class="line">  kernel install/rhel4.4-inst/vmlinuz</span><br><span class="line">  append initrd=install/rhel4.4-inst/initrd.img ramdisk_size=8192</span><br><span class="line"></span><br><span class="line">label text</span><br><span class="line">  kernel vmlinuz</span><br><span class="line">  append initrd=install/rhel4.4-inst/initrd.img text ramdisk_size=8192</span><br><span class="line">label expert</span><br><span class="line">  kernel vmlinuz</span><br><span class="line">  append expert initrd=install/rhel4.4-inst/initrd.img ramdisk_size=8192</span><br><span class="line"></span><br><span class="line"># 使用 kickstart 安装。</span><br><span class="line"># 可以在 ks 参数后直接指定 kickstart 文件的位置。</span><br><span class="line"># 关于 kickstart 的更多参数和设置，请参考各版本的 RHEL 的 Installation Guide：</span><br><span class="line"># * http://www.redhat.com/docs/manuals/enterprise/</span><br><span class="line">#     Installation Guide --&gt; Advanced Installation and Deployment</span><br><span class="line"></span><br><span class="line">label ks basic</span><br><span class="line">  kernel install/rhel4.4-inst/vmlinuz</span><br><span class="line">  append ks=ftp://192.168.10.251/install/rhel4.4_basic.cfg initrd=install/rhel4.4-inst/initrd.img ramdisk_size=8192</span><br><span class="line"></span><br><span class="line">label lowres</span><br><span class="line">  kernel vmlinuz</span><br><span class="line">  append initrd=install/rhel4.4-inst/initrd.img lowres ramdisk_size=8192</span><br><span class="line">label local</span><br><span class="line">  localboot 1</span><br><span class="line">label memtest86</span><br><span class="line">  kernel memtest</span><br><span class="line">  append -</span><br></pre></td></tr></table></figure>

]]></content>
      <tags>
        <tag>Server&amp;OS</tag>
      </tags>
  </entry>
  <entry>
    <title>关于php执行root权限的命令的实现要点</title>
    <url>/2013/10/09/the-point-to-run-a-roots-program-in-php-env.html</url>
    <content><![CDATA[<p>网上说的方法都是写一个C程来实现一个中间件，但是貌似好像我看到的文章漏掉了一个比较关键的点，那就是关于S标记位的设置。如果对于s标记位很熟悉的话，那么我觉得文章漏掉了这个点应该不会对自己调试有影响，但是像我这样还不了的人来说，这就是致命的了。s标记位的目的就是在于让一个非程序的拥有者用户临时具有程序拥有者的权限，这一点由于网上的文章没有指明，所以如果只是在普通用户下进行chmod u+s 的话，程序肯定不会执行成功，因为还缺少chown这一步，得先把编译出来的程序的属主修改成root用户，然后这个s标记位才会起到应用的作用，这样程序中的geteuid获取到的值才是root的uid。</p>
<p>最后附上代码：</p>
<figure class="highlight plaintext"><table><tr><td class="code"><pre><span class="line">#include &lt;stdio.h&gt;</span><br><span class="line">#include &lt;stdlib.h&gt;</span><br><span class="line">#include &lt;sys/types.h&gt;</span><br><span class="line">#include &lt;unistd.h&gt;</span><br><span class="line">#include &lt;string.h&gt;</span><br><span class="line"></span><br><span class="line">int main(int argc, char** argv)</span><br><span class="line">&#123;</span><br><span class="line">    uid_t uid ,euid;</span><br><span class="line"></span><br><span class="line">    uid = getuid() ;</span><br><span class="line">    euid = geteuid();</span><br><span class="line"></span><br><span class="line">    if(setreuid(euid, uid))  //交换这两个id</span><br><span class="line">        perror(&quot;setreuid&quot;);</span><br><span class="line"></span><br><span class="line">    system(&#x27;iptables -L&#x27;);</span><br><span class="line">    return 0;</span><br><span class="line">&#125;</span><br></pre></td></tr></table></figure>

]]></content>
      <tags>
        <tag>编程语言</tag>
        <tag>Server&amp;OS</tag>
      </tags>
  </entry>
  <entry>
    <title>Debian/Ubuntu的Network-Manager</title>
    <url>/2013/10/11/debian-ubuntu-network-manager.html</url>
    <content><![CDATA[<p>debian&#x2F;ubuntu管理网络连接的有两个东西，图形化的NetworkManager和文字的 ifup&#x2F;ifdown，如果在 &#x2F;etc&#x2F;network&#x2F;interfaces里设置了网卡信息，那么NetworkManager就不会接管该网卡，如果没有设置NetworkManager默认是会接管网卡的。</p>
<p>当使用 NetworkManager的时候，可以注释掉所有&#x2F;etc&#x2F;network&#x2F;interfaces 里的内容，仅仅保留本地回环网络：<br>auto lo<br>iface lo inet loopback<br>这两句。设置固定ip，可以在NetworkManager图形界面里配置。</p>
<p>关闭NetworkManager<br>关闭命令：sudo &#x2F;etc&#x2F;init.d&#x2F;network-manager stop<br>取消开机启动：update-rc.d -f network-manager remove<br>重启网络：&#x2F;etc&#x2F;init.d&#x2F;networking restart</p>
<p>修改 &#x2F;etc&#x2F;network&#x2F;interfaces 文件，<br>系统配置部分：本地回环网络。</p>
<figure class="highlight plaintext"><table><tr><td class="code"><pre><span class="line">auto lo</span><br><span class="line">iface lo inet loopback</span><br></pre></td></tr></table></figure>
<p>有线配置部分：</p>
<figure class="highlight plaintext"><table><tr><td class="code"><pre><span class="line">auto eth0</span><br><span class="line">#iface eth0 inet dhcp # 如果你不想用固定ip的话，推荐用固定ip，这样可以省去请求路由分配的时间</span><br><span class="line">iface eth0 inet static</span><br><span class="line">netmask 255.255.255.0</span><br><span class="line">gateway 192.168.0.1 #gateway 0.0.0.0 # 拨号上网请把 gateway全部设置为0</span><br><span class="line">address 192.168.0.112</span><br></pre></td></tr></table></figure>

<p>无线配置部分：</p>
<figure class="highlight plaintext"><table><tr><td class="code"><pre><span class="line">auto wlan0</span><br><span class="line">iface wlan0 inet static</span><br><span class="line">netmask 255.255.255.0</span><br><span class="line">gateway 192.168.0.1</span><br><span class="line">address 192.168.0.113</span><br><span class="line">pre-up ip link set wlan0 up</span><br><span class="line">pre-up iwconfig wlan0 essid ssid</span><br><span class="line">wpa-ssid TP-Link # 这里的ssid为路由里设置的无线名称</span><br><span class="line">wpa-psk 12345678 # 无线密码</span><br></pre></td></tr></table></figure>

<p>adsl拨号上网：</p>
<figure class="highlight plaintext"><table><tr><td class="code"><pre><span class="line">auto dsl-provider</span><br><span class="line">iface dsl-provider inet ppp # dsl-provider 为之前配置好的拨号名称</span><br><span class="line">provider dsl-provider</span><br></pre></td></tr></table></figure>

]]></content>
      <tags>
        <tag>Server&amp;OS</tag>
      </tags>
  </entry>
  <entry>
    <title>linux/unix下setuid/seteuid/setreuid/setresuid</title>
    <url>/2013/10/12/linux-unix-setuid-seteuid-setreuid-setresuid.html</url>
    <content><![CDATA[<p>转自：<a href="http://blog.csdn.net/scutth/article/details/6980758">http://blog.csdn.net/scutth/article/details/6980758</a></p>
<p>其中setresuid()具有最清晰的语法：<br>setresuid()被执行的条件有：<br>①当前进程的euid是root<br>②三个参数，每一个等于原来某个id中的一个<br>如果满足以上条件的任意一个，setresuid()都可以正常调用，并执行，将<br>进程的ID设置成对应的ID。<br>例子：<br>如果ruid&#x3D;100,euid&#x3D;0,suid&#x3D;300<br>则setresuid(200,300,100)可以执行，因为原来的euid&#x3D;0.<br>如果ruid&#x3D;100,euid&#x3D;300,suid&#x3D;200<br>则setresuid(200,300,100)也可以执行，因为这三个新的id都是原来id中的某一个。<br>但是setresuid(100,200,400)就不能执行，因为400不等于原来三个id中的任意一个。</p>
<p>setresuid()有个性质，英文名称是all-or-nothing effect，意思是，如果setresuid()<br>对某一个ID设置成功了，其他的失败了，比如只改变了ruid，suid和euid都改失败了<br>那么程序会将ruid改回原来的值，即保证要么三个ID都能成功修改，要么三个都没能修改成功。<br>PS：FreeBSD和Linux支持setresuid，Solaris不支持setresuid，但有自己的实现方式。<span id="more"></span></p>
<p>seteuid()也有较清晰的语法：<br>无论什么情况，它只改变进程euid，而不改变ruid和suid。<br>如果原来的euid&#x3D;&#x3D;0，则新的euid随意设，都可以成功改变。<br>如果原来的euid!&#x3D;0，不同的系统的处理方式是不一样的：<br>-Solaris和Linux只允许新的euid等于原来三个id中的任意一个；<br>-但是FreeBSD只允许新的euid等于ruid和suid中的一个；<br>貌似FreeBSD这个限制是多余的，因为新的euid&#x3D;&#x3D;原来的euid的时候应该是可以的，但是它会报错，不允许。</p>
<p>setreuid()有点小复杂：<br>它会修改ruid和euid，也某些情况下，也会修改suid。<br>而且不同的系统对setreuid也有不同的处理方式：<br>-在Solaris和Linux中，setreuid(geteuid(),getuid())可以实现ruid和euid的交换<br>-FreeBSD则会失败；</p>
<p>setuid()：<br>如果原来的euid&#x3D;&#x3D;0，则该函数将会设置所有的id都等于新的id。<br>如果原来的三个id为：ruid&#x3D;300,euid&#x3D;0,suid&#x3D;100<br>则setuid(200)执行以后，ruid&#x3D;200,euid&#x3D;200,suid&#x3D;200</p>
<p>如果原来的euid!&#x3D;0，但是新的id等于原来ruid和suid中的一个，那么也是可以执行的。否则就不能执行。<br>比如原来的三个id为：ruid&#x3D;100，euid&#x3D;200，suid&#x3D;300<br>则setuid(300)可以执行，执行结束以后ruid&#x3D;100,euid&#x3D;300,suid&#x3D;300（也就是说只改变了euid）。<br>setuid(400)就不能执行。</p>
<p>不同的系统有不同的处理方式：<br>-Linux和Solaris：如果euid不等于0，那么新的id必须等于ruid或者suid中的一个（就是我们上面说的）；<br>-FreeBSD待定，还没搞清楚；<br>setuid()的行为不仅取决于系统，还取决于进程的优先级：<br>-Linux和Solaris：如果euid&#x3D;&#x3D;0，那么将三个id都设置为新的id；否则，只设置euid；<br>-FreeBSD：不管euid值，如果执行成功，直接设置所有的id都为新的id；</p>
]]></content>
      <tags>
        <tag>Server&amp;OS</tag>
      </tags>
  </entry>
  <entry>
    <title>文本模式下实现U盘自动挂载</title>
    <url>/2013/10/22/usb-storage-device-auto-mounts-under-the-linux-text-mode.html</url>
    <content><![CDATA[<p>参考：<a href="http://forum.ubuntu.org.cn/viewtopic.php?t=296420">http://forum.ubuntu.org.cn/viewtopic.php?t=296420</a></p>
<p>使用udev来实现，udev是linux2.6内核以上的功能，read more：<a href="/2013/10/22/some-nifty-udev-rules-and-examples.html">&#x2F;2013&#x2F;10&#x2F;22&#x2F;some-nifty-udev-rules-and-examples.html</a></p>
<p>具体实现方法：</p>
<p>如实现U盘自动挂载<br>Vim 11-add-usb.rules</p>
<p>添加如下内容<br>ACTION!&#x3D;”add”,GOTO&#x3D;”farsight”<br>KERNEL&#x3D;&#x3D;”sd[a-z][0-9]”,RUN+&#x3D;”&#x2F;sbin&#x2F;mount-usb.sh %k”<br>LABEL&#x3D;”farsight”</p>
<p>这个文件中ACTION后是说明是什么事件，KERNEL后是说明是什么设备比如sda1，mmcblk0p1 等，RUN这个设备插入后去执行哪个程序%k是传入这个程序的参数，这里%k&#x3D;KERNEL的值也就是sda1等。</p>
<p>在&#x2F;sbin&#x2F;下创建mount-usb.sh文件添加如下内容<br>#!&#x2F;bin&#x2F;sh<br>&#x2F;bin&#x2F;mount -t vfat &#x2F;dev&#x2F;$1 &#x2F;tmp<br>sync</p>
<p>修改文件权限为其添加可执行的权限。</p>
<p>这样就实现了U盘的自动挂载，下面附上U盘的卸载规则文件和sd卡的文件</p>
<p>Usb卸载</p>
<p>11-add-remove.rules<br>ACTION !&#x3D;”remove”,GOTO&#x3D;”farsight”<br>SUBSYSTEM!&#x3D;”block”,GOTO&#x3D;”farsight”<br>KERNEL&#x3D;&#x3D;”sd[a-z][0-9]”,RUN+&#x3D;”&#x2F;sbin&#x2F;umount-usb.sh”<br>LABEL&#x3D;”farsight”</p>
<p>umount-usb.sh<br>#!&#x2F;bin&#x2F;sh<br>sync<br>umount &#x2F;tmp&#x2F;</p>
<p>需要注意的是rule文件中的一些符号，比如!&#x3D;和&#x3D;&#x3D;，在ubuntu下，如果你的符号有问题，文字的显示颜色会是白色的。</p>
]]></content>
      <tags>
        <tag>Server&amp;OS</tag>
      </tags>
  </entry>
  <entry>
    <title>Ubuntu 12.04 不启动GUI直接进入命令行</title>
    <url>/2013/10/18/ubuntu-12-04-not-start-gui-but-start-the-text-mode.html</url>
    <content><![CDATA[<p>修改&#x2F;etc&#x2F;default&#x2F;grub文件中的GRUB_CMDLINE_LINUX_DEFAULT参数值为 text，再执行下update-grub 重启即可。</p>
]]></content>
      <tags>
        <tag>Server&amp;OS</tag>
      </tags>
  </entry>
  <entry>
    <title>解决vbox桥接网卡时的报错问题</title>
    <url>/2013/11/03/solve-the-problem-when-selecting-the-bridge-network-card-in-the-vbox.html</url>
    <content><![CDATA[<p>升级了下Archlinux后，发现vbox启动不起来了，具体报错跟这个帖子很像</p>
<p><a href="https://bbs.archlinux.org/viewtopic.php?id=85956">https://bbs.archlinux.org/viewtopic.php?id=85956</a></p>
<p>解决方法是按照4L的方法加载了个驱动就好了。。。</p>
<pre><code>&lt;code&gt;sudo modprobe vboxnetflt&lt;/code&gt;
</code></pre>
]]></content>
      <tags>
        <tag>Server&amp;OS</tag>
      </tags>
  </entry>
  <entry>
    <title>MySQL --read-only</title>
    <url>/2013/10/30/mysql-read-only.html</url>
    <content><![CDATA[<p>转自：<a href="http://blog.csdn.net/cindy9902/article/details/5886355">http://blog.csdn.net/cindy9902/article/details/5886355</a></p>
<p>以前在用MMM管理multi master 作failover是看到过MMM使用read-only选项来控制对其读写角色的分配，当时尝试过加上这个选项，然后对其进行update，insert操作，发现也是可以的。。所以觉得这个选项没有什么实际意义。。。现在想想当时是用管理员的帐户去执行的，肯定是有super权限的，所以才可以进行update和insert操作。</p>
<p>今天在测试过程中也遇到了read-only的问题，发现写操作因为read-only 这个选项的开启，而不能够成功执行。找了下资料，才了解read-only的真正含义和用法：</p>
<span id="more"></span>

<p>**  –read_only**         Make all non-temporary tables read-only, with the<br>exception for replication (slave) threads and users with<br>the SUPER privilege</p>
<p><strong>SUPER privilege</strong> :</p>
<p>The <a href="http://dev.mysql.com/doc/refman/5.0/en/privileges-provided.html#priv_super"><code>SUPER</code> </a>privilege enables an account to use <a href="http://dev.mysql.com/doc/refman/5.0/en/change-master-to.html"><code>CHANGE MASTER TO</code> </a>, <a href="http://dev.mysql.com/doc/refman/5.0/en/kill.html"><code>KILL</code> </a>or <a href="http://dev.mysql.com/doc/refman/5.0/en/mysqladmin.html"><strong>mysqladmin kill</strong> </a>to kill threads belonging to other accounts (you can always kill your own threads), <a href="http://dev.mysql.com/doc/refman/5.0/en/purge-binary-logs.html"><code>PURGE BINARY LOGS</code> </a>, configuration changes using <a href="http://dev.mysql.com/doc/refman/5.0/en/set-option.html"><code>SET GLOBAL</code> </a>to modify global system variables, the <a href="http://dev.mysql.com/doc/refman/5.0/en/mysqladmin.html"><strong>mysqladmin debug</strong> </a>command, enabling or disabling logging, performing updates even if the <a href="http://dev.mysql.com/doc/refman/5.0/en/server-system-variables.html#sysvar_read_only"><code>read_only</code> </a>system variable is enabled, starting and stopping replication on slave servers, specification of any account in the <code>DEFINER</code> attribute of stored programs and views, and enables you to connect (once) even if the connection limit controlled by the <a href="http://dev.mysql.com/doc/refman/5.0/en/server-system-variables.html#sysvar_max_connections"><code>max_connections</code></a>system variable is reached.</p>
<p>To create or alter stored routines if binary logging is enabled, you may also need the <a href="http://dev.mysql.com/doc/refman/5.0/en/privileges-provided.html#priv_super"><code>SUPER</code> </a>privilege, as described in <a href="http://dev.mysql.com/doc/refman/5.0/en/stored-programs-logging.html">Section 18.6, “Binary Logging of Stored Programs”</a> .</p>
<p>read-only选项：对所有的非临时表进行只读控制。但是有两种情况例外：</p>
<ol>
<li><p>对replication threads例外，以保证slave能够正常的进行replication。</p>
</li>
<li><p>对于拥有super权限的用户，可以ignore这个选项。</p>
</li>
</ol>
<p>SUPER 权限 ： 1. 可以有change master to, kill其他用户的线程的权限。</p>
<ol start="2">
<li><p>Purge binary logs 来删除binary log, set global来动态设置变量的权限。</p>
</li>
<li><p>执行mysqladmin debug命令，开启或者关闭log，在read-only打开时执行update&#x2F;insert操作。</p>
</li>
<li><p>执行start slave, stop slave.</p>
</li>
<li><p>当连接数已经达到max_connections的最大值时，也可以连接到server。</p>
</li>
</ol>
]]></content>
      <tags>
        <tag>后端</tag>
      </tags>
  </entry>
  <entry>
    <title>mysqli_pconnect is not exist</title>
    <url>/2013/12/03/mysqli_pconnect-is-not-exist.html</url>
    <content><![CDATA[<p>This function not exists for mysqli db extension. For Persistent Connections can use p: prefix by hostname at php 5.3.</p>
<p>fix:</p>
<pre><code>function mysqli_pconnect($host, $username, $password, $new_link = false, $port = 0)
&#123;
    if($port)
    &#123;
        mysqli_connect(&quot;p:&quot;.$host, $username, $password, $new_link, $port);
    &#125;
    else
    &#123;
        mysqli_connect(&quot;p:&quot;.$host, $username, $password, $new_link);
    &#125;
&#125;
</code></pre>
<p>for more infomation:<a href="http://us1.php.net/manual/zh/mysqli.construct.php">http://us1.php.net/manual/zh/mysqli.construct.php</a></p>
]]></content>
      <tags>
        <tag>编程语言</tag>
        <tag>Server&amp;OS</tag>
      </tags>
  </entry>
  <entry>
    <title>浮点数运算问题</title>
    <url>/2013/12/03/float-caculate-problem.html</url>
    <content><![CDATA[<p>今天在写程序的时候，发现运算浮点数的时候，总是带着一串随机的小数尾巴，查资料知道，浮点数不能做精确计算，如果要是做精确计算，需要用decimal类型的字段，而不是单精或者双精。</p>
<p>附：<a href="http://my.oschina.net/miaoyushun/blog/12684">http://my.oschina.net/miaoyushun/blog/12684</a></p>
<p>对于这个问题的发现源于一个计时器程序，先看下这段代码吧。</p>
<figure class="highlight plaintext"><table><tr><td class="code"><pre><span class="line">&lt;?php</span><br><span class="line">$s = gettime();</span><br><span class="line">usleep(10000);</span><br><span class="line">$e = gettime();</span><br><span class="line">var_dump($s);</span><br><span class="line">var_dump($e);</span><br><span class="line">echo $e-$s.&quot;\n&quot;;</span><br><span class="line">function gettime()&#123;</span><br><span class="line">    list($sec, $uses) = explode(&#x27; &#x27;, microtime());</span><br><span class="line">    return $sec + $usec;</span><br><span class="line">&#125;</span><br><span class="line">?&gt;</span><br></pre></td></tr></table></figure>

<p>输出结果为：</p>
<figure class="highlight plaintext"><table><tr><td class="code"><pre><span class="line">float(1296098836.2033)</span><br><span class="line">float(1296098836.2135)</span><br><span class="line">0.010126113891602</span><br></pre></td></tr></table></figure>

<p>有没有发现一个很诡异的现象？被减数和减数整数部分是相同的，小数点后都只是四位，<br>但是这两个数相减之后得出的结果，小数点后的位数却要大于4。<br>其实想解释也不难，因为被减数和减数的精度都为14，所以为不造成精度损失，所以结果的精度也必须是14位的。</p>
<p>但出现这种现象的根本原因在哪？</p>
<p>所以我去网上逛了逛，看了些东西后，得到了一些启发。所以又写了一段测试代码：</p>
<figure class="highlight plaintext"><table><tr><td class="code"><pre><span class="line">&lt;?php</span><br><span class="line">ini_set(&#x27;precision&#x27;, 14);</span><br><span class="line">$a = 0.3;</span><br><span class="line">$b = 0.1+0.2;</span><br><span class="line">var_dump($a);</span><br><span class="line">var_dump($b);</span><br><span class="line">$a == $b ? print &quot;equals\n&quot; : print &quot;not equals\n&quot;;</span><br><span class="line">?&gt;</span><br></pre></td></tr></table></figure>

<p>输出的结果是：</p>
<figure class="highlight plaintext"><table><tr><td class="code"><pre><span class="line">float(0.3);</span><br><span class="line">float(0.3);</span><br><span class="line">not equals</span><br></pre></td></tr></table></figure>

<p>大家是不是感觉很奇怪，两个变量都是浮点型的，都是0.3，为什么不相等呢？</p>
<p>使用序列化函数serialize查看一下两个数的实际值：</p>
<figure class="highlight plaintext"><table><tr><td class="code"><pre><span class="line">&lt;?php</span><br><span class="line">echo serialize(0.3).&quot;\n&quot;;</span><br><span class="line">echo serialize(0.1+0.2).&quot;\n&quot;;</span><br><span class="line">?&gt;</span><br></pre></td></tr></table></figure>

<p>输出结果：</p>
<figure class="highlight plaintext"><table><tr><td class="code"><pre><span class="line">d:0.299999999999999988897769753748434595763683319091796875;</span><br><span class="line">d:0.3000000000000000444089209850062616169452667236328125;</span><br></pre></td></tr></table></figure>

<p>你会发现这两个数实际上都不是真正的0.3，为什么这样呢？</p>
<p>其实这个问题要追溯到微机原理（也有可能是计算机组成原理，记不清楚是哪一本书了），<br>这里面讲了计算机是如何用二进制来存储定点小数。大致是这样的：如果用一个字节的长度来表示一个定点小数，<br>第一位表示小数的符号，0为正，1为负；后面7位表示小数的值，第2位至第8位的位权分别是1&#x2F;2,1&#x2F;4,1&#x2F;8,1&#x2F;16,1&#x2F;32,1&#x2F;64,1&#x2F;128，<br>然后用这些权值的和来表示所有的小数。如何表示0.625呢？</p>
<p>这个有固定的算法：</p>
<p>首先，将小数点左侧的整数部分变换为其二进制形式，处理小数部分的算法是将我们的小数部分乘以基数 2，<br>记录乘积结果的整数部分，接着将结果的小数部分继续乘以 2，并不断继续该过程。</p>
<figure class="highlight plaintext"><table><tr><td class="code"><pre><span class="line">0.625 × 2  =  1.25    1</span><br><span class="line">0.25  × 2  =  0.5     0</span><br><span class="line">0.5   × 2  =  1       1</span><br></pre></td></tr></table></figure>

<p>当最后的结果为1时，结束这个过程。这时右侧的一列数字就是我们所需的二进制小数部分，即 0.101。<br>这样，我们就得到了完整的二进制形式 0.101 ，按阶展开：1x1&#x2F;2+0x1&#x2F;4+1x1&#x2F;8&#x3D;0.5+0.125&#x3D;0.625。</p>
<p>我们上面先的例子比较特殊，这个数只需要三次运算就能够结束。那会不会有无法结束的情况，不难想象，<br>很多小数根本不能经过有限次这样的过程而得到结 果（比如最简单的0.1）。</p>
<p>但浮点数尾数域的位数是有限的，为此，浮点数的处理办法是持续该过程直到由此得到的尾数足以填满尾数域，<br>之后对多余的位进行舍入。也就是说，十进制到二进制的变换也并不能保证总是精确的，而只能是近似值。</p>
<p>事实上，只有很少一部分十进制小数具有精确的二进制浮点数表达。再加上浮点数运算过程中的误差累积，<br>结果是很多我们看来非常简单的十进制运算在计算机上却往往出人意料。这就是最常见的浮点运算的”不准确”问题。</p>
<p>所以，在计算机里表示的浮点数只是一个近似的数，并不是像表示整数那样精确没有偏差。既然它只是一个约数，那么你用精确的&#x3D;&#x3D;来比较两位不精确的约数就没有太大意义了。如果一定要比较两个浮点数，可以考虑先转换成字符串，然后再去比较。</p>
<p>我在Linux下使用c编写了一段类似的浮点数比较的代码，结果也是不相等的。实际上在所有的语言里都会存在此问题，<br>因为这是计算机原理所决定的。但也不排除一些语言做了些后期处理，可以直接比较两个浮点数。</p>
<p>以上仅是个人理解，不保证绝对正确，有错误还请多多谅解。</p>
]]></content>
      <tags>
        <tag>编程语言</tag>
        <tag>理论</tag>
      </tags>
  </entry>
  <entry>
    <title>关于javascript中的异步回调函数</title>
    <url>/2013/12/14/about-the-asynchronous-callback-in-javascript.html</url>
    <content><![CDATA[<p>在参加一个48小时的创客活动时，做了一个应用，用到了html5中的canvas，其中有一个步骤是读取9张图片画在canvas上，我遇到的难题就是onload函数的异步回调问题。最初的部分代码如下：</p>
<figure class="highlight plaintext"><table><tr><td class="code"><pre><span class="line">function fillJPG(ctx, el , width , height , i)&#123;</span><br><span class="line">  var img;</span><br><span class="line">  for(var i=0;i&lt;MAX;i++)&#123;</span><br><span class="line">    img = new Image();</span><br><span class="line">    img.onload = function()&#123;</span><br><span class="line">      ctx.drawImage(img,width*i,0,width,height);</span><br><span class="line">      /* console.log(i); */</span><br><span class="line">    &#125;</span><br><span class="line">    img.src = el[i];</span><br><span class="line">  &#125;</span><br><span class="line">&#125;</span><br></pre></td></tr></table></figure>

<p>这个代码中ctx是画布，el是图片url的数组，width和height分别是单张图片的宽和高，同时也可以用于计算坐标和图片大小压缩。<br>问题出现就是本来应该横向并排出现的9张图片一张都没有出现。把MAX调整为1后，发现，图片显示出来了，就一张，但是位置却出现在了第二张图片应该出现的问题，经过一晚上的调试，发现问题出现在回调函数。回调函数的执行时间是发生在图片载入结束，而循环体的执行是一直的，也就是i是一直在累加的，可以发现的就是i的累加速度快于图片载入的速度，所以，第一张图片载入完成的时候，i已经是1了（在MAX为1的情况下，其实也就是i为MAX了），也就是说图片是出现在了第MAX+1的位置上面了。</p>
<p>尝试过了一些方法，都避免不了这个异步，最终使用递归的方法来实现了这个功能，代码如下：</p>
<figure class="highlight plaintext"><table><tr><td class="code"><pre><span class="line">function fillJPG(ctx, el , width , height , i)&#123;</span><br><span class="line">  var img = new Image();</span><br><span class="line">  img.onload = function()&#123;</span><br><span class="line">    ctx.drawImage(img,width*i,0,width,height);</span><br><span class="line">    i++;</span><br><span class="line">    if(i&lt;MAX)&#123;</span><br><span class="line">      fillJPG(ctx,el,width,height,i);</span><br><span class="line">    &#125; else &#123;</span><br><span class="line">      return;</span><br><span class="line">    &#125;</span><br><span class="line">  &#125;</span><br><span class="line">  img.src = el[i];</span><br><span class="line">&#125;</span><br></pre></td></tr></table></figure>

]]></content>
      <tags>
        <tag>前端</tag>
      </tags>
  </entry>
  <entry>
    <title>关于Can&#39;t connect to MySQL server on &#39;localhost&#39; (10061)</title>
    <url>/2014/01/07/about-cant-connect-to-mysql-server-on-localhost-10061.html</url>
    <content><![CDATA[<p>今天晚上大约10点左右，实验室的OA服务器莫名重启，然后mysql就一直是连不上的样子，经过各种尝试无果后，用搜索引擎找到了解决方法，其实也怨我不仔细，在用netstat查端口开放的时候，忽略了ipv6的端口，在my.ini的mysqld下面设置bind-address为0.0.0.0或者127.0.0.1即可解决问题了。睡觉。。。</p>
<p><a href="/img/2014/01/QQ20140108-1.png"><img src="/img/2014/01/QQ20140108-1-300x13.png" alt="ipv6-port"></a></p>
]]></content>
      <tags>
        <tag>Server&amp;OS</tag>
      </tags>
  </entry>
  <entry>
    <title>SQL防注入:使用base64构建安全查询</title>
    <url>/2013/12/19/sql-safe.html</url>
    <content><![CDATA[<p>转载请注明：<a href="http://www.turen.me/">土人的国度</a> » <a href="http://www.turen.me/archives/388">SQL防注入:使用base64构建安全查询</a></p>
<p>SQL注入，主要是通过加入特殊字符，使用特殊编码将非法SQL语句注入到查询中，并得到返回数据</p>
<p>看到了一些防SQL注入的手段，自己也经过思考总结了一下，得到了一个流程：</p>
<p><strong>1.查询前强制转换输入</strong></p>
<p>对于提交的输入：</p>
<p>特定类型int, date等：进行强制类型转换，如intval, date_create；</p>
<p>字符串一律使用mysql_real_escape_string过滤</p>
<p>有格式的使用正则表达式进行验证</p>
<p>对于不需要模糊查询的字段，建议使用base64编码后再进一步处理并存入数据库，下文详述<span id="more"></span></p>
<p><strong>2.使用预定义查询，不使用动态查询</strong></p>
<p>预定义查询可以通过重用参数和执行计划来破坏SQL注入。不过它的深层次原理我还是没太明白。。。以后有空再研究下。。。关键问题是，参数在进行查询时是不是参与了SQL语义的识别，参数是否二进制安全。</p>
<p><strong>3.查询后关闭错误输出</strong></p>
<p>关闭错误输出，即使注入成功也不输出错误信息，让注入得不到结果。</p>
<p><strong>4.针对不同查询，使用不同权限的SQL用户</strong></p>
<p>最小化权限，使查询只能针对指定的表，指定的操作(select, update, insert, delete, alter)。防止注入后SQL代码获取权限之外的数据。这一点估计很少有注意的，甚至很多系统都用dbo甚至管理员权限的账户来进行数据库操作。</p>
<p><strong>5.针对关键操作添加触发器记录日志</strong></p>
<p>对于关键表关键字段的操作，添加触发器，并在日志中加以记录，做到被SQL注入后也可以追踪。亡羊补牢，为时未晚。</p>
<p><strong>6.使用SQL语义安全的编码处理字符串</strong></p>
<p>做到了上面五步，在整个查询过程中，就像加了5道牢固的锁，已经非常安全了。估计全世界没有几个人还能用SQL注入方式入侵这样的数据库拿到数据。不过，还是有SQL注入风险存在的，以php+mysql为例讲，主要问题出在经过mysql_real_escape_string过滤的字符串上。因为输入经过过滤，并不能100%保证过滤后的安全性，虽然出问题的概率很小，但在根本上还是有风险的。而对于经过intval或者date强制转换的字段，则在语义上保证了安全性。使用强制转换的数据再进行查询，可以完全避免SQL注入问题。</p>
<p>针对这个问题，我想到了一个使用base64编码不需要模糊查询字段再进行处理的方法。</p>
<p>例如登录时验证用户名密码这个注入的重灾区，这样处理：</p>
<ol>
<li><?php

</li>
<li></li>
<li><p>$username &#x3D; base64_encode($_POST[‘username’]);</p>
</li>
<li><p>$password &#x3D; md5($_POST[‘password’] + $salt);</p>
</li>
<li><p>?&gt;</p>
</li>
<li></li>
</ol>
<p>接下来通过SQL查询验证的步骤完全一样。</p>
<p>那么为什么通过base64编码方式来避免SQL注入?</p>
<p>因为base64编码使用的字符包括大小写字母各26个，加上10个数字，和加号“+”，斜杠“&#x2F;”，一共64个字符，等号“&#x3D;”用来作为后缀用途。不管你输入任何内容，包括注入非法的字符，都会被转化成上述这些对SQL语义绝对不会产生任何影响的安全字符。</p>
<p>看一个例子，如果在username里输入”or 1&#x3D;1″会变成什么?结果是”b3IgMT0x”。这样在查询用户名时，不管输入了任何非法字符，经过base64都会变成对SQL语义不产生影响的安全字符，再经过查询或者进一步处理就十分安全了。而密码经过了加盐和md5处理，也会产生安全字符，所以查询起来也是安全的。</p>
<p>那我们可以不可以把所有内容都使用base64编码呢?答案是否定的。因为base64编码后的内容难以进行模糊查询，这跟base64使用4字节表示3字节内容导致的字节无法对齐有关。所以，base64可以用来处理长度不是很长的不需要模糊查询的字符串字段。例如用户名。为什么建议存储长度不长的内容呢？因为使用base64存储，占空间一般也会增长40%左右。</p>
<p>那么有没有一劳永逸既从根本上避免字符串的SQL注入(使用安全字符)又能进行模糊查询的方法呢?</p>
<p>我想了好久发现只有使用16进制编码最合适了，因为能让字符串每个字节对齐的最高效的产生安全编码的方式，只有使用a-e和0-9进行16进制编码了，不过代价高昂，需要多使用一倍的存储空间。</p>
<p>根据utf8编码的定义，如果使用汉字字符和全角标点，每个字的编码长度正好是3字节。所以，针对只有全角字符的字符串，就可以用base64编码来达到既可以防止SQL注入又能模糊查询的目的了，而且空间开销增加也不是很大。因为每个字都会转换成对应的4字节base64代码，查询时每4字节对齐查询即可。</p>
<p>防止SQL注入和处理很多其他安全问题一样，最根本的一条，永远不要相信从用户端提交的数据是正确的，永远都要验证用户提交的数据。最根本的验证不是模式匹配或者过滤，而是强制类型转换。做好这一点，网站安全性就进了一大步。</p>
]]></content>
      <tags>
        <tag>Hacker</tag>
      </tags>
  </entry>
  <entry>
    <title>使用g++编译OpenCV程序</title>
    <url>/2014/01/15/compile-opencv-program.html</url>
    <content><![CDATA[<p>转自：<a href="http://blog.csdn.net/denghp83/article/details/16951437">http://blog.csdn.net/denghp83/article/details/16951437</a></p>
<p>源码：</p>
<figure class="highlight plaintext"><table><tr><td class="code"><pre><span class="line">#include</span><br><span class="line">#include</span><br><span class="line">#include &quot;opencv2/core/core.hpp&quot;</span><br><span class="line">#include &quot;opencv2/features2d/features2d.hpp&quot;</span><br><span class="line">#include &quot;opencv2/highgui/highgui.hpp&quot;</span><br><span class="line">#include &lt;opencv2/opencv.hpp&gt;</span><br><span class="line">#include using namespace cv;</span><br><span class="line">using namespace std;</span><br><span class="line">int main()</span><br><span class="line">&#123;</span><br><span class="line">Mat a;</span><br><span class="line">return 1;</span><br><span class="line">&#125;</span><br></pre></td></tr></table></figure>

<p>Makefile：</p>
<figure class="highlight plaintext"><table><tr><td class="code"><pre><span class="line">main: reg.cpp</span><br><span class="line">g++ -o $&#123;@&#125; $&lt; `pkg-config opencv --cflags --libs `</span><br></pre></td></tr></table></figure>

<p>注意，g++语句一定要按照如上顺序来，pkg-config opencv –flags –libs(依赖文件) 一定要放在后面。（放在前面的话会出现莫名奇妙的错误）<br>pkg-config的解释见博文：PKG_CONFIG_PATH变量 与 ld.so.conf 文件</p>
<p>PKG_CONFIG_PATH变量 与 ld.so.conf 文件</p>
<p>文章来源：<a href="http://hi.baidu.com/dexinmeng/item/73768319cb45edf864eabf2c">http://hi.baidu.com/dexinmeng/item/73768319cb45edf864eabf2c</a><br>一、编译和连接<br>一般来说，如果库的头文件不在 &#x2F;usr&#x2F;include 目录中，那么在编译的时候需要用 -I 参数指定其路径。由于同一个库在不同系统上可能位于不同的目录下，用户安装库的时候也可以将库安装在不同的目录下，所以即使使用同一个库，由于库的路径的不同，造成了用 -I 参数指定的头文件的路径也可能不同，其结果就是造成了编译命令界面的不统一。如果使用 -L 参数，也会造成连接界面的不统一。编译和连接界面不统一会为库的使用带来麻烦。<br>为了解决编译和连接界面不统一的问题，人们找到了一些解决办法。其基本思想就是：事先把库的位置信息等保存起来，需要的时候再通过特定的工具将其中有用的信息提取出来供编译和连接使用。这样，就可以做到编译和连接界面的一致性。其中，目前最为常用的库信息提取工具就是下面介绍的 pkg-config。<br>pkg-config 是通过库提供的一个 .pc 文件获得库的各种必要信息的，包括版本信息、编译和连接需要的参数等。这些信息可以通过 pkg-config 提供的参数单独提取出来直接供编译器和连接器使用。<br>The pkgconfig package contains tools for passing the include path and&#x2F;or library paths to build tools during the make file execution.<br>pkg-config is a function that returns meta information for the specified library.<br>The default setting for PKG_CONFIG_PATH is &#x2F;usr&#x2F;lib&#x2F;pkgconfig because of the prefix we use to install pkgconfig. You may add to PKG_CONFIG_PATH by exporting additional paths on your system where pkgconfig files are installed. Note that PKG_CONFIG_PATH is only needed when compiling packages, not during run-time.<br>在默认情况下，每个支持 pkg-config 的库对应的 .pc 文件在安装后都位于安装目录中的 lib&#x2F;pkgconfig 目录下。例如，我们在上面已经将 Glib 安装在 &#x2F;opt&#x2F;gtk 目录下了，那么这个 Glib 库对应的 .pc 文件是 &#x2F;opt&#x2F;gtk&#x2F;lib&#x2F;pkgconfig 目录下一个叫 glib-2.0.pc 的文件：</p>
<p>prefix&#x3D;&#x2F;opt&#x2F;gtk&#x2F;<br>exec_prefix&#x3D;${prefix}<br>libdir&#x3D;${exec_prefix}&#x2F;lib<br>includedir&#x3D;${prefix}&#x2F;include</p>
<p>glib_genmarshal&#x3D;glib-genmarshal<br>gobject_query&#x3D;gobject-query<br>glib_mkenums&#x3D;glib-mkenums</p>
<p>Name: GLib<br>Description: C Utility Library<br>Version: 2.12.13<br>Libs: -L${libdir} -lglib-2.0<br>Cflags: -I${includedir}&#x2F;glib-2.0 -I${libdir}&#x2F;glib-2.0&#x2F;include</p>
<p>使用 pkg-config 的 –cflags 参数可以给出在编译时所需要的选项，而 –libs 参数可以给出连接时的选项。例如，假设一个 sample.c 的程序用到了 Glib 库，就可以这样编译：<br>$ gcc -c <code>pkg-config --cflags glib-2.0</code> sample.c<br>然后这样连接：<br>$ gcc sample.o -o sample <code>pkg-config --libs glib-2.0</code><br>或者上面两步也可以合并为以下一步：<br>$ gcc sample.c -o sample <code>pkg-config --cflags --libs glib-2.0</code><br>可以看到：由于使用了 pkg-config 工具来获得库的选项，所以不论库安装在什么目录下，都可以使用相同的编译和连接命令，带来了编译和连接界面的统一。<br>使用 pkg-config 工具提取库的编译和连接参数有两个基本的前提：</p>
<p>库本身在安装的时候必须提供一个相应的 .pc 文件。不这样做的库说明不支持 pkg-config 工具的使用。<br>pkg-config 必须知道要到哪里去寻找此 .pc 文件。<br>GTK+ 及其依赖库支持使用 pkg-config 工具，所以剩下的问题就是如何告诉 pkg-config 到哪里去寻找库对应的 .pc 文件，这也是通过设置搜索路径来解决的。<br>对于支持 pkg-config 工具的 GTK+ 及其依赖库来说，库的头文件的搜索路径的设置变成了对 .pc 文件搜索路径的设置。.pc 文件的搜索路径是通过环境变量 PKG_CONFIG_PATH 来设置的，pkg-config 将按照设置路径的先后顺序进行搜索，直到找到指定的 .pc 文件为止。</p>
<p>安装完 Glib 后，在 bash 中应该进行如下设置：<br>$ export PKG_CONFIG_PATH&#x3D;&#x2F;opt&#x2F;gtk&#x2F;lib&#x2F;pkgconfig:$PKG_CONFIG_PATH<br>可以执行下面的命令检查是否 &#x2F;opt&#x2F;gtk&#x2F;lib&#x2F;pkgconfig 路径已经设置在 PKG_CONFIG_PATH 环境变量中：<br>$ echo $PKG_CONFIG_PATH<br>这样设置之后，使用 Glib 库的其它程序或库在编译的时候 pkg-config 就知道首先要到 &#x2F;opt&#x2F;gtk&#x2F;lib&#x2F;pkgconfig 这个目录中去寻找 glib-2.0.pc 了（GTK+ 和其它的依赖库的 .pc 文件也将拷贝到这里，也会首先到这里搜索它们对应的 .pc 文件）。之后，通过 pkg-config 就可以把其中库的编译和连接参数提取出来供程序在编译和连接时使用。<br>另外还需要注意的是：环境变量的设置只对当前的终端窗口有效。如果到了没有进行上述设置的终端窗口中，pkg-config 将找不到新安装的 glib-2.0.pc 文件、从而可能使后面进行的安装（如 Glib 之后的 Atk 的安装）无法进行。</p>
<p>在我们采用的安装方案中，由于是使用环境变量对 GTK+ 及其依赖库进行的设置，所以当系统重新启动、或者新开一个终端窗口之后，如果想使用新安装的 GTK+ 库，需要如上面那样重新设置 PKG_CONFIG_PATH 和 LD_LIBRARY_PATH 环境变量。<br>这种使用 GTK+ 的方法，在使用之前多了一个对库进行设置的过程。虽然显得稍微繁琐了一些，但却是一种最安全的使用 GTK+ 库的方式，不会对系统上已经存在的使用了 GTK+ 库的程序（比如 GNOME 桌面）带来任何冲击。<br>为了使库的设置变得简单一些，可以把下面的这两句设置保存到一个文件中（比如 set_gtk-2.10 文件）:</p>
<p>export PKG_CONFIG_PATH&#x3D;&#x2F;opt&#x2F;gtk&#x2F;lib&#x2F;pkgconfig:$PKG_CONFIG_PATH<br>export LD_LIBRARY_PATH&#x3D;&#x2F;opt&#x2F;gtk&#x2F;lib:$LD_LIBRARY_PATH<br>之后，就可以用下面的方法进行库的设置了（其中的 source 命令也可以用 . 代替）：<br>$ source set_gtk-2.10<br>只有在用新版的 GTK+ 库开发应用程序、或者运行使用了新版 GTK+ 库的程序的时候，才有必要进行上述设置。</p>
<p>如果想避免使用 GTK+ 库之前上述设置的麻烦，可以把上面两个环境变量的设置在系统的配置文件中（如 &#x2F;etc&#x2F;profile）或者自己的用户配置文件中（如 <del>&#x2F;.bash_profile） ；库的搜索路径也可以设置在 &#x2F;etc&#x2F;ld.so.conf 文件中，等等。这种设置在系统启动时会生效，从而会导致使用 GTK+ 的程序使用新版的 GTK+ 运行库，这有可能会带来一些问题。当然，如果你发现用新版的 GTK+ 代替旧版没有什么问题的话，使用这种设置方式是比较方便的。加入到</del>&#x2F;.bashrc中，例如：<br>PKG_CONFIG_PATH&#x3D;&#x2F;opt&#x2F;gtk&#x2F;lib&#x2F;pkgconfig<br>重启之后：<br>[root@localhost ~]# echo $PKG_CONFIG_PATH<br>&#x2F;opt&#x2F;gtk&#x2F;lib&#x2F;pkgconfig</p>
<p>二、运行时</p>
<p>库文件在连接（静态库和共享库）和运行（仅限于使用共享库的程序）时被使用，其搜索路径是在系统中进行设置的。一般 Linux 系统把 &#x2F;lib 和 &#x2F;usr&#x2F;lib 两个目录作为默认的库搜索路径，所以使用这两个目录中的库时不需要进行设置搜索路径即可直接使用。对于处于默认库搜索路径之外的库，需要将库的位置添加到库的搜索路径之中。设置库文件的搜索路径有下列两种方式，可任选其一使用：<br>在环境变量 LD_LIBRARY_PATH 中指明库的搜索路径。<br>在 &#x2F;etc&#x2F;ld.so.conf 文件中添加库的搜索路径。<br>将自己可能存放库文件的路径都加入到&#x2F;etc&#x2F;ld.so.conf中是明智的选择 ^_^<br>添加方法也极其简单，将库文件的绝对路径直接写进去就OK了，一行一个。例如：<br>&#x2F;usr&#x2F;X11R6&#x2F;lib<br>&#x2F;usr&#x2F;local&#x2F;lib<br>&#x2F;opt&#x2F;lib<br>需要注意的是：第二种搜索路径的设置方式对于程序连接时的库（包括共享库和静态库）的定位已经足够了，但是对于使用了共享库的程序的执行还是不够的。这是因为为了加快程序执行时对共享库的定位速度，避免使用搜索路径查找共享库的低效率，所以是直接读取库列表文件 &#x2F;etc&#x2F;ld.so.cache 从中进行搜索的。&#x2F;etc&#x2F;ld.so.cache 是一个非文本的数据文件，不能直接编辑，它是根据 &#x2F;etc&#x2F;ld.so.conf 中设置的搜索路径由 &#x2F;sbin&#x2F;ldconfig 命令将这些搜索路径下的共享库文件集中在一起而生成的（ldconfig 命令要以 root 权限执行）。因此，为了保证程序执行时对库的定位，在 &#x2F;etc&#x2F;ld.so.conf 中进行了库搜索路径的设置之后，还必须要运行 &#x2F;sbin&#x2F;ldconfig 命令更新 &#x2F;etc&#x2F;ld.so.cache 文件之后才可以。ldconfig ,简单的说，它的作用就是将&#x2F;etc&#x2F;ld.so.conf列出的路径下的库文件 缓存到&#x2F;etc&#x2F;ld.so.cache 以供使用。因此当安装完一些库文件，(例如刚安装好glib)，或者修改ld.so.conf增加新的库路径后，需要运行一下 &#x2F;sbin&#x2F;ldconfig使所有的库文件都被缓存到ld.so.cache中，如果没做，即使库文件明明就在&#x2F;usr&#x2F;lib下的，也是不会被使用的，结果编译过程中抱错，缺少xxx库，去查看发现明明就在那放着，搞的想大骂computer蠢猪一个。 ^_^<br>在程序连接时，对于库文件（静态库和共享库）的搜索路径，除了上面的设置方式之外，还可以通过 -L 参数显式指定。因为用 -L 设置的路径将被优先搜索，所以在连接的时候通常都会以这种方式直接指定要连接的库的路径。</p>
<p>前面已经说明过了，库搜索路径的设置有两种方式：在环境变量 LD_LIBRARY_PATH 中设置以及在 &#x2F;etc&#x2F;ld.so.conf 文件中设置。其中，第二种设置方式需要 root 权限，以改变 &#x2F;etc&#x2F;ld.so.conf 文件并执行 &#x2F;sbin&#x2F;ldconfig 命令。而且，当系统重新启动后，所有的基于 GTK2 的程序在运行时都将使用新安装的 GTK+ 库。不幸的是，由于 GTK+ 版本的改变，这有时会给应用程序带来兼容性的问题，造成某些程序运行不正常。为了避免出现上面的这些情况，在 GTK+ 及其依赖库的安装过程中对于库的搜索路径的设置将采用第一种方式进行。这种设置方式不需要 root 权限，设置也简单：<br>$ export LD_LIBRARY_PATH&#x3D;&#x2F;opt&#x2F;gtk&#x2F;lib:$LD_LIBRARY_PATH<br>可以用下面的命令查看 LD_LIBRAY_PATH 的设置内容：<br>$ echo $LD_LIBRARY_PATH<br>至此，库的两种设置就完成了。</p>
]]></content>
      <tags>
        <tag>编程语言</tag>
      </tags>
  </entry>
  <entry>
    <title>三种强大的物体识别算法——SIFT/SURF、haar特征、广义hough变换的特性对比分析</title>
    <url>/2014/01/03/sift-surf-haar-hough.html</url>
    <content><![CDATA[<p>转自：<a href="http://blog.csdn.net/cy513/article/details/4285579">http://blog.csdn.net/cy513/article/details/4285579</a></p>
<p>SIFT&#x2F;SURF基于灰度图，</p>
<p>一、首先建立图像金字塔，形成三维的图像空间，通过Hessian矩阵获取每一层的局部极大值，然后进行在极值点周围26个点进行NMS，从而得到粗略的特征点，再使用二次插值法得到精确特征点所在的层（尺度），即完成了尺度不变。</p>
<p>二、在特征点选取一个与尺度相应的邻域，求出主方向，其中SIFT采用在一个正方形邻域内统计所有点的梯度方向，找到占80%以上的方向作为主方向；而SURF则选择圆形邻域，并且使用活动扇形的方法求出特征点主方向，以主方向对齐即完成旋转不变。</p>
<p>三、以主方向为轴可以在每个特征点建立坐标，SIFT在特征点选择一块大小与尺度相应的方形区域，分成16块，统计每一块沿着八个方向占的比例，于是特征点形成了128维特征向量，对图像进行归一化则完成强度不变；而SURF分成64块，统计每一块的dx，dy，|dx|，|dy|的累积和，同样形成128维向量，再进行归一化则完成了对比度不变与强度不变。</p>
<span id="more"></span>

<p>haar特征也是基于灰度图，</p>
<p>首先通过大量的具有比较明显的haar特征（矩形）的物体图像用模式识别的方法训练出分类器，分类器是个级联的，每级都以大概相同的识别率保留进入下一级的具有物体特征的候选物体，而每一级的子分类器则由许多haar特征构成（由积分图像计算得到，并保存下位置），有水平的、竖直的、倾斜的，并且每个特征带一个阈值和两个分支值，每级子分类器带一个总的阈值。识别物体的时候，同样计算积分图像为后面计算haar特征做准备，然后采用与训练的时候有物体的窗口同样大小的窗口遍历整幅图像，以后逐渐放大窗口，同样做遍历搜索物体；每当窗口移动到一个位置，即计算该窗口内的haar特征，加权后与分类器中haar特征的阈值比较从而选择左或者右分支值，累加一个级的分支值与相应级的阈值比较，大于该阈值才可以通过进入下一轮筛选。当通过分类器所以级的时候说明这个物体以大概率被识别。</p>
<p>广义hough变换同样基于灰度图，</p>
<p>使用轮廓作为特征，融合了梯度信息，以投票的方式识别物体，在本blog的另一篇文章中有详细讨论，这里不再赘述。</p>
<p>特点异同对比及其适用场合：</p>
<p>三种算法都只是基于强度（灰度）信息，都是特征方法，但SIFT&#x2F;SURF的特征是一种具有强烈方向性及亮度性的特征，这使得它适用于刚性形变，稍有透视形变的场合；haar特征识别方法带有一点人工智能的意味，对于像人脸这种有明显的、稳定结构的haar特征的物体最适用，只要结构相对固定即使发生扭曲等非线性形变依然可识别；广义hough变换完全是精确的匹配，可得到物体的位置方向等参数信息。前两种方法基本都是通过先获取局部特征然后再逐个匹配，只是局部特征的计算方法不同，SIFT&#x2F;SURF比较复杂也相对稳定，haar方法比较简单，偏向一种统计的方法形成特征，这也使其具有一定的模糊弹性；广义hough变换则是一种全局的特征——轮廓梯度，但也可以看做整个轮廓的每一个点的位置和梯度都是特征，每个点都对识别有贡献，用直观的投票，看票数多少去确定是否识别出物体。</p>
]]></content>
      <tags>
        <tag>编程语言</tag>
        <tag>理论</tag>
      </tags>
  </entry>
  <entry>
    <title>Linux 技巧：让进程在后台可靠运行的几种方法</title>
    <url>/2014/01/22/nohup.html</url>
    <content><![CDATA[<p>转自：<a href="https://www.ibm.com/developerworks/cn/linux/l-cn-nohup/">https://www.ibm.com/developerworks/cn/linux/l-cn-nohup/</a></p>
<p>我们经常会碰到这样的问题，用 telnet&#x2F;ssh 登录了远程的 Linux 服务器，运行了一些耗时较长的任务， 结果却由于网络的不稳定导致任务中途失败。如何让命令提交后不受本地关闭终端窗口&#x2F;网络断开连接的干扰呢？下面举了一些例子， 您可以针对不同的场景选择不同的方式来处理这个问题。</p>
<h2 id="nohup-setsid"><a href="#nohup-setsid" class="headerlink" title="nohup&#x2F;setsid&#x2F;&amp;"></a>nohup&#x2F;setsid&#x2F;&amp;</h2><h3 id="场景："><a href="#场景：" class="headerlink" title="场景："></a>场景：</h3><p>如果只是临时有一个命令需要长时间运行，什么方法能最简便的保证它在后台稳定运行呢？</p>
<h2 id="hangup-名称的来由"><a href="#hangup-名称的来由" class="headerlink" title="hangup 名称的来由"></a>hangup 名称的来由</h2><p>在 Unix 的早期版本中，每个终端都会通过 modem 和系统通讯。当用户 logout 时，modem 就会挂断（hang up）电话。 同理，当 modem 断开连接时，就会给终端发送 hangup 信号来通知其关闭所有子进程。<span id="more"></span></p>
<h3 id="解决方法："><a href="#解决方法：" class="headerlink" title="解决方法："></a>解决方法：</h3><p>我们知道，当用户注销（logout）或者网络断开时，终端会收到 HUP（hangup）信号从而关闭其所有子进程。因此，我们的解决办法就有两种途径：要么让进程忽略 HUP 信号，要么让进程运行在新的会话里从而成为不属于此终端的子进程。</p>
<p><strong>1. nohup</strong></p>
<p>nohup 无疑是我们首先想到的办法。顾名思义，nohup 的用途就是让提交的命令忽略 hangup 信号。让我们先来看一下 nohup 的帮助信息：</p>
<pre><code>NOHUP(1)                        User Commands                        NOHUP(1)

NAME
       nohup - run a command immune to hangups, with output to a non-tty

SYNOPSIS
       nohup COMMAND [ARG]...
       nohup OPTION

DESCRIPTION
       Run COMMAND, ignoring hangup signals.

       --help display this help and exit

       --version
              output version information and exit
</code></pre>
<p>可见，nohup 的使用是十分方便的，只需在要处理的命令前加上 nohup 即可，标准输出和标准错误缺省会被重定向到 nohup.out 文件中。一般我们可在结尾加上**”&amp;”**来将命令同时放入后台运行，也可用<code>&quot;&gt;_filename_ 2&gt;&amp;1&quot;</code>来更改缺省的重定向文件名。</p>
<h5 id="nohup-示例"><a href="#nohup-示例" class="headerlink" title="nohup 示例"></a>nohup 示例</h5><pre><code>[root@pvcent107 ~]# nohup ping www.ibm.com &amp;
[1] 3059
nohup: appending output to `nohup.out&#39;
[root@pvcent107 ~]# ps -ef |grep 3059
root      3059   &lt;strong&gt;984&lt;/strong&gt;  0 21:06 pts/3    00:00:00 ping www.ibm.com
root      3067   984  0 21:06 pts/3    00:00:00 grep 3059
[root@pvcent107 ~]#
</code></pre>
<p><strong>2。setsid</strong></p>
<p>nohup 无疑能通过忽略 HUP 信号来使我们的进程避免中途被中断，但如果我们换个角度思考，如果我们的进程不属于接受 HUP 信号的终端的子进程，那么自然也就不会受到 HUP 信号的影响了。setsid 就能帮助我们做到这一点。让我们先来看一下 setsid 的帮助信息：</p>
<pre><code>SETSID(8)                 Linux Programmer’s Manual                 SETSID(8)

NAME
       setsid - run a program in a new session

SYNOPSIS
       setsid program [ arg ... ]

DESCRIPTION
       setsid runs a program in a new session.
</code></pre>
<p>可见 setsid 的使用也是非常方便的，也只需在要处理的命令前加上 setsid 即可。</p>
<h5 id="setsid-示例"><a href="#setsid-示例" class="headerlink" title="setsid 示例"></a>setsid 示例</h5><pre><code>[root@pvcent107 ~]# setsid ping www.ibm.com
[root@pvcent107 ~]# ps -ef |grep www.ibm.com
root     31094     &lt;strong&gt;1&lt;/strong&gt;  0 07:28 ?        00:00:00 ping www.ibm.com
root     31102 29217  0 07:29 pts/4    00:00:00 grep www.ibm.com
[root@pvcent107 ~]#
</code></pre>
<p>值得注意的是，上例中我们的进程 ID(PID)为31094，而它的父 ID（PPID）为1（即为 init 进程 ID），并不是当前终端的进程 ID。请将此例与<a href="https://www.ibm.com/developerworks/cn/linux/l-cn-nohup/#nohup">nohup 例</a>中的父 ID 做比较。</p>
<p><strong>3。&amp;</strong></p>
<p>这里还有一个关于 subshell 的小技巧。我们知道，将一个或多个命名包含在“()”中就能让这些命令在子 shell 中运行中，从而扩展出很多有趣的功能，我们现在要讨论的就是其中之一。</p>
<p>当我们将”&amp;”也放入“()”内之后，我们就会发现所提交的作业并不在作业列表中，也就是说，是无法通过<code>jobs</code>来查看的。让我们来看看为什么这样就能躲过 HUP 信号的影响吧。</p>
<h5 id="subshell-示例"><a href="#subshell-示例" class="headerlink" title="subshell 示例"></a>subshell 示例</h5><pre><code>[root@pvcent107 ~]# (ping www.ibm.com &amp;)
[root@pvcent107 ~]# ps -ef |grep www.ibm.com
root     16270     &lt;strong&gt;1&lt;/strong&gt;  0 14:13 pts/4    00:00:00 ping www.ibm.com
root     16278 15362  0 14:13 pts/4    00:00:00 grep www.ibm.com
[root@pvcent107 ~]#
</code></pre>
<p>从上例中可以看出，新提交的进程的父 ID（PPID）为1（init 进程的 PID），并不是当前终端的进程 ID。因此并不属于当前终端的子进程，从而也就不会受到当前终端的 HUP 信号的影响了。</p>
<p><a href="https://www.ibm.com/developerworks/cn/linux/l-cn-nohup/#ibm-pcon">回页首</a></p>
<h2 id="disown"><a href="#disown" class="headerlink" title="disown"></a>disown</h2><h3 id="场景：-1"><a href="#场景：-1" class="headerlink" title="场景："></a>场景：</h3><p>我们已经知道，如果事先在命令前加上 nohup 或者 setsid 就可以避免 HUP 信号的影响。但是如果我们未加任何处理就已经提交了命令，该如何补救才能让它避免 HUP 信号的影响呢？</p>
<h3 id="解决方法：-1"><a href="#解决方法：-1" class="headerlink" title="解决方法："></a>解决方法：</h3><p>这时想加 nohup 或者 setsid 已经为时已晚，只能通过作业调度和 disown 来解决这个问题了。让我们来看一下 disown 的帮助信息：</p>
<pre><code>disown [-ar] [-h] [jobspec ...]
    Without options, each jobspec is  removed  from  the  table  of
    active  jobs.   If  the -h option is given, each jobspec is not
    removed from the table, but is marked so  that  SIGHUP  is  not
    sent  to the job if the shell receives a SIGHUP.  If no jobspec
    is present, and neither the -a nor the -r option  is  supplied,
    the  current  job  is  used.  If no jobspec is supplied, the -a
    option means to remove or mark all jobs; the -r option  without
    a  jobspec  argument  restricts operation to running jobs.  The
    return value is 0 unless a jobspec does  not  specify  a  valid
    job.
</code></pre>
<p>可以看出，我们可以用如下方式来达成我们的目的。</p>
<h2 id="灵活运用-CTRL-z"><a href="#灵活运用-CTRL-z" class="headerlink" title="灵活运用 CTRL-z"></a>灵活运用 CTRL-z</h2><p>在我们的日常工作中，我们可以用 CTRL-z 来将当前进程挂起到后台暂停运行，执行一些别的操作，然后再用 fg 来将挂起的进程重新放回前台（也可用 bg 来将挂起的进程放在后台）继续运行。这样我们就可以在一个终端内灵活切换运行多个任务，这一点在调试代码时尤为有用。因为将代码编辑器挂起到后台再重新放回时，光标定位仍然停留在上次挂起时的位置，避免了重新定位的麻烦。</p>
<ul>
<li><p>用<code>disown -h _jobspec_</code>来使<strong>某个作业</strong>忽略HUP信号。</p>
</li>
<li><p>用<code>disown -ah </code>来使<strong>所有的作业</strong>都忽略HUP信号。</p>
</li>
<li><p>用<code>disown -rh </code>来使<strong>正在运行的作业</strong>忽略HUP信号。</p>
</li>
</ul>
<p>需要注意的是，当使用过 disown 之后，会将把目标作业从作业列表中移除，我们将不能再使用<code>jobs</code>来查看它，但是依然能够用<code>ps -ef</code>查找到它。</p>
<p>但是还有一个问题，这种方法的操作对象是作业，如果我们在运行命令时在结尾加了**”&amp;”**来使它成为一个作业并在后台运行，那么就万事大吉了，我们可以通过<code>jobs</code>命令来得到所有作业的列表。但是如果并没有把当前命令作为作业来运行，如何才能得到它的作业号呢？答案就是用 CTRL-z（按住Ctrl键的同时按住z键）了！</p>
<p>CTRL-z 的用途就是将当前进程挂起（Suspend），然后我们就可以用<code>jobs</code>命令来查询它的作业号，再用<code>bg _jobspec_</code>来将它放入后台并继续运行。需要注意的是，如果挂起会影响当前进程的运行结果，请慎用此方法。</p>
<h5 id="disown-示例1（如果提交命令时已经用“-”将命令放入后台运行，则可以直接使用“disown”）"><a href="#disown-示例1（如果提交命令时已经用“-”将命令放入后台运行，则可以直接使用“disown”）" class="headerlink" title="disown 示例1（如果提交命令时已经用“&amp;”将命令放入后台运行，则可以直接使用“disown”）"></a>disown 示例1（如果提交命令时已经用“&amp;”将命令放入后台运行，则可以直接使用“disown”）</h5><pre><code>[root@pvcent107 build]# cp -r testLargeFile largeFile &amp;
[1] 4825
[root@pvcent107 build]# jobs
[1]+  Running                 cp -i -r testLargeFile largeFile &amp;
[root@pvcent107 build]# disown -h %1
[root@pvcent107 build]# ps -ef |grep largeFile
root      4825   968  1 09:46 pts/4    00:00:00 cp -i -r testLargeFile largeFile
root      4853   968  0 09:46 pts/4    00:00:00 grep largeFile
[root@pvcent107 build]# logout
</code></pre>
<h5 id="disown-示例2（如果提交命令时未使用“-”将命令放入后台运行，可使用-CTRL-z-和“bg”将其放入后台，再使用“disown”）"><a href="#disown-示例2（如果提交命令时未使用“-”将命令放入后台运行，可使用-CTRL-z-和“bg”将其放入后台，再使用“disown”）" class="headerlink" title="disown 示例2（如果提交命令时未使用“&amp;”将命令放入后台运行，可使用 CTRL-z 和“bg”将其放入后台，再使用“disown”）"></a>disown 示例2（如果提交命令时未使用“&amp;”将命令放入后台运行，可使用 CTRL-z 和“bg”将其放入后台，再使用“disown”）</h5><pre><code>[root@pvcent107 build]# cp -r testLargeFile largeFile2

[1]+  Stopped                 cp -i -r testLargeFile largeFile2
[root@pvcent107 build]# bg %1
[1]+ cp -i -r testLargeFile largeFile2 &amp;
[root@pvcent107 build]# jobs
[1]+  Running                 cp -i -r testLargeFile largeFile2 &amp;
[root@pvcent107 build]# disown -h %1
[root@pvcent107 build]# ps -ef |grep largeFile2
root      5790  5577  1 10:04 pts/3    00:00:00 cp -i -r testLargeFile largeFile2
root      5824  5577  0 10:05 pts/3    00:00:00 grep largeFile2
[root@pvcent107 build]#
</code></pre>
<p><a href="https://www.ibm.com/developerworks/cn/linux/l-cn-nohup/#ibm-pcon">回页首</a></p>
<h2 id="screen"><a href="#screen" class="headerlink" title="screen"></a>screen</h2><h3 id="场景：-2"><a href="#场景：-2" class="headerlink" title="场景："></a>场景：</h3><p>我们已经知道了如何让进程免受 HUP 信号的影响，但是如果有大量这种命令需要在稳定的后台里运行，如何避免对每条命令都做这样的操作呢？</p>
<h3 id="解决方法：-2"><a href="#解决方法：-2" class="headerlink" title="解决方法："></a>解决方法：</h3><p>此时最方便的方法就是 screen 了。简单的说，screen 提供了 ANSI&#x2F;VT100 的终端模拟器，使它能够在一个真实终端下运行多个全屏的伪终端。screen 的参数很多，具有很强大的功能，我们在此仅介绍其常用功能以及简要分析一下为什么使用 screen 能够避免 HUP 信号的影响。我们先看一下 screen 的帮助信息：</p>
<pre><code>SCREEN(1)                                                           SCREEN(1)

NAME
       screen - screen manager with VT100/ANSI terminal emulation

SYNOPSIS
       screen [ -options ] [ cmd [ args ] ]
       screen -r [[pid.]tty[.host]]
       screen -r sessionowner/[[pid.]tty[.host]]

DESCRIPTION
       Screen  is  a  full-screen  window manager that multiplexes a physical
       terminal between several  processes  (typically  interactive  shells).
       Each  virtual  terminal provides the functions of a DEC VT100 terminal
       and, in addition, several control functions from the  ISO  6429  (ECMA
       48,  ANSI  X3.64)  and ISO 2022 standards (e.g. insert/delete line and
       support for multiple character sets).  There is a  scrollback  history
       buffer  for  each virtual terminal and a copy-and-paste mechanism that
       allows moving text regions between windows.
</code></pre>
<p>使用 screen 很方便，有以下几个常用选项：</p>
<ul>
<li><p>用<code>screen -dmS _session name_</code>来建立一个处于断开模式下的会话（并指定其会话名）。</p>
</li>
<li><p>用<code>screen -list </code>来列出所有会话。</p>
</li>
<li><p>用<code>screen -r _session name_</code>来重新连接指定会话。</p>
</li>
<li><p>用快捷键<code>CTRL-a d </code>来暂时断开当前会话。</p>
</li>
</ul>
<h5 id="screen-示例"><a href="#screen-示例" class="headerlink" title="screen 示例"></a>screen 示例</h5><pre><code>[root@pvcent107 ~]# screen -dmS Urumchi
[root@pvcent107 ~]# screen -list
There is a screen on:
        12842.Urumchi   (Detached)
1 Socket in /tmp/screens/S-root.

[root@pvcent107 ~]# screen -r Urumchi
</code></pre>
<p>当我们用“-r”连接到 screen 会话后，我们就可以在这个伪终端里面为所欲为，再也不用担心 HUP 信号会对我们的进程造成影响，也不用给每个命令前都加上“nohup”或者“setsid”了。这是为什么呢？让我来看一下下面两个例子吧。</p>
<h5 id="1-未使用-screen-时新进程的进程树"><a href="#1-未使用-screen-时新进程的进程树" class="headerlink" title="1. 未使用 screen 时新进程的进程树"></a>1. 未使用 screen 时新进程的进程树</h5><pre><code>[root@pvcent107 ~]# ping www.google.com &amp;
[1] 9499
[root@pvcent107 ~]# pstree -H 9499
init─┬─Xvnc
     ├─acpid
     ├─atd
     ├─2*[sendmail]
     &lt;strong&gt;├─sshd─┬&lt;/strong&gt;─sshd───bash───pstree
     │      &lt;strong&gt; └─sshd───bash───ping&lt;/strong&gt;
</code></pre>
<p>我们可以看出，未使用 screen 时我们所处的 bash 是 sshd 的子进程，当 ssh 断开连接时，HUP 信号自然会影响到它下面的所有子进程（包括我们新建立的 ping 进程）。</p>
<h5 id="2-使用了-screen-后新进程的进程树"><a href="#2-使用了-screen-后新进程的进程树" class="headerlink" title="2. 使用了 screen 后新进程的进程树"></a>2. 使用了 screen 后新进程的进程树</h5><pre><code>[root@pvcent107 ~]# screen -r Urumchi
[root@pvcent107 ~]# ping www.ibm.com &amp;
[1] 9488
[root@pvcent107 ~]# pstree -H 9488
init─┬─Xvnc
     ├─acpid
     ├─atd
     &lt;strong&gt;├─screen───bash───ping&lt;/strong&gt;
     ├─2*[sendmail]
</code></pre>
<p>而使用了 screen 后就不同了，此时 bash 是 screen 的子进程，而 screen 是 init（PID为1）的子进程。那么当 ssh 断开连接时，HUP 信号自然不会影响到 screen 下面的子进程了。</p>
<p><a href="https://www.ibm.com/developerworks/cn/linux/l-cn-nohup/#ibm-pcon">回页首</a></p>
<h2 id="总结"><a href="#总结" class="headerlink" title="总结"></a>总结</h2><p>现在几种方法已经介绍完毕，我们可以根据不同的场景来选择不同的方案。nohup&#x2F;setsid 无疑是临时需要时最方便的方法，disown 能帮助我们来事后补救当前已经在运行了的作业，而 screen 则是在大批量操作时不二的选择了。</p>
]]></content>
      <tags>
        <tag>Server&amp;OS</tag>
      </tags>
  </entry>
  <entry>
    <title>opencv程序编译后执行找不到库</title>
    <url>/2014/01/19/opencv-program-cannot-find-lib-after-compile.html</url>
    <content><![CDATA[<p>在ubuntu下编译opencv程序后，执行报下面到错误：</p>
<p>error while loading shared libraries: libopencv_core.so.2.4: cannot open shared object file: No such file or directory</p>
<p>解决方法：找到libopencv_开头到库的目录，在&#x2F;usr&#x2F;local&#x2F;lib下面，在&#x2F;etc&#x2F;ld.so.conf.d&#x2F;下面新建一个opencv.conf，里面写入&#x2F;usr&#x2F;local&#x2F;lib，最后执行下sudo ldconfig -v即可。</p>
<p>参考：<a href="http://stackoverflow.com/questions/12335848/opencv-program-compile-error-libopencv-core-so-2-4-cannot-open-shared-object-f">http://stackoverflow.com/questions/12335848/opencv-program-compile-error-libopencv-core-so-2-4-cannot-open-shared-object-f</a></p>
]]></content>
      <tags>
        <tag>编程语言</tag>
        <tag>Server&amp;OS</tag>
      </tags>
  </entry>
  <entry>
    <title>centos下安装dm9601驱动</title>
    <url>/2014/02/12/centos-setup-dm9601-driver.html</url>
    <content><![CDATA[<p>新安装了centos6.2，要使用一个usb网卡，但是插上后没有反映，执行lsusb如下：<br><code>[root@pangu dm9601]# lsusb Bus 001 Device 001: ID 1d6b:0002 Linux Foundation 2.0 root hub Bus 002 Device 001: ID 1d6b:0001 Linux Foundation 1.1 root hub Bus 003 Device 001: ID 1d6b:0001 Linux Foundation 1.1 root hub Bus 004 Device 001: ID 1d6b:0001 Linux Foundation 1.1 root hub Bus 005 Device 001: ID 1d6b:0001 Linux Foundation 1.1 root hub Bus 003 Device 004: ID 0fe6:9700 Kontron (Industrial Computer Source / ICS Advent) DM9601 Fast Ethernet Adapter Bus 003 Device 003: ID 04b3:3025 IBM Corp. NetVista Full Width Keyboard Bus 005 Device 002: ID 1d57:0008 Xenta </code></p>
<span id="more"></span>
<p>可以看到网卡的ID为0fe6:9700，</p>
<p>执行modinfo，查看dm9601，如下：<br><code>[root@pangu dm9601]# modinfo dm9601 filename:       /lib/modules/2.6.32-431.el6.x86_64/kernel/drivers/net/usb/dm9601.ko license:        GPL description:    Davicom DM9601 USB 1.1 ethernet devices author:         Peter Korsgaard &lt;jacmet@sunsite.dk&gt; srcversion:     4F5EB9E08E2E987CF777DB0 alias:          usb:v0A46p9000d*dc*dsc*dp*ic*isc*ip* alias:          usb:v0FE6p8101d*dc*dsc*dp*ic*isc*ip* alias:          usb:v0A47p9601d*dc*dsc*dp*ic*isc*ip* alias:          usb:v0A46p8515d*dc*dsc*dp*ic*isc*ip* alias:          usb:v0A46p0268d*dc*dsc*dp*ic*isc*ip* alias:          usb:v0A46p6688d*dc*dsc*dp*ic*isc*ip* alias:          usb:v0A46p9601d*dc*dsc*dp*ic*isc*ip* alias:          usb:v07AAp9601d*dc*dsc*dp*ic*isc*ip* depends:        mii,usbnet vermagic:       2.6.32-431.el6.x86_64 SMP mod_unload modversions </code></p>
<p>其中，有一个alias: usb:v0FE6p8101d<em>dc</em>dsc<em>dp</em>ic<em>isc</em>ip*，驱动已知设备中缺少我们的设备id，尝试下升级，yum update。<br>没有成功。</p>
<p>按照网上说的，手动添加也失败了。折腾了一天后，发现可以在centos5.3下直接编译成功，果断放弃centos6。。</p>
<p>参考：<a href="http://tech.firdooze.com/2011/11/16/how-to-instal-davicom-9601-drivers-dm9601-on-linux/">http://tech.firdooze.com/2011/11/16/how-to-instal-davicom-9601-drivers-dm9601-on-linux/</a></p>
<p>2月13号补充：如何让dm9601驱动在centos5.3上开机自动加载</p>
<p>编辑&#x2F;etc&#x2F;modprobe.conf<br>增加以下内容<br>alias eth1 dm9601<br>install dm9601 &#x2F;sbin&#x2F;insmod &#x2F;lib&#x2F;modules&#x2F;2.6.18-128.el5&#x2F;kernel&#x2F;drivers&#x2F;net&#x2F;dm9601.ko</p>
<p>在&#x2F;etc&#x2F;sysconfig&#x2F;network-scripts&#x2F;目录下增加一个ifcfg-eth1的配置文件，把其中的ip等信息设置好（如果是复制的eth0的配置文件，不要忘记修改mac地址），重启网络看看是否成功，如果成功，重启电脑看下，是否可以自动加载。</p>
<p>modprobe的手册文件：<a href="http://www.linuxmanpages.com/man5/modprobe.conf.5.php">http://www.linuxmanpages.com/man5/modprobe.conf.5.php</a></p>
]]></content>
      <tags>
        <tag>Server&amp;OS</tag>
      </tags>
  </entry>
  <entry>
    <title>如何使用iptables的NAT功能把Linux作为一台路由器使用？</title>
    <url>/2014/02/14/iptables-nat-route.html</url>
    <content><![CDATA[<p>近期做cobbler服务器，由于就一块网卡，前几天折腾了一个usb的网卡的驱动，也算是折腾好了，再后来忘记什么原因了，就又回到了单网卡，做虚拟ip的方法，但是出现的情况是虚拟网卡做完后，上不了网，因为虚拟出来的ip段是没法上网的，估计是电脑走的网关错了，route -n看了下，果然，把虚拟网卡配置文件中的GATEWAY去掉，重启网络就可以了，另外附上在解决这个问题时找到的关于做NAT的方法。</p>
<p>方法:</p>
<p>提示: 以下方法只适用于红帽企业版Linux 3 以上。</p>
<p>1、打开包转发功能:</p>
<p>echo “1” &gt; &#x2F;proc&#x2F;sys&#x2F;net&#x2F;ipv4&#x2F;ip_forward</p>
<p>2、修改&#x2F;etc&#x2F;sysctl.conf文件，让包转发功能在系统启动时自动生效:</p>
<h1 id="Controls-IP-packet-forwarding"><a href="#Controls-IP-packet-forwarding" class="headerlink" title="Controls IP packet forwarding"></a>Controls IP packet forwarding</h1><p>net.ipv4.ip_forward &#x3D; 1</p>
<p>3、打开iptables的NAT功能:</p>
<p>&#x2F;sbin&#x2F;iptables -t nat -A POSTROUTING -o eth0 -j MASQUERADE</p>
<p>说明：上面的语句中eth0是连接外网或者连接Internet的网卡. 执行下面的命令，保存iptables的规则: service iptables save</p>
<p>4、查看路由表:</p>
<p>netstat -rn 或 route -n</p>
<p>5、查看iptables规则:</p>
<p>iptables -L</p>
<p>查看nat表</p>
<p>iptables -t nat -vnL POSTROUTING –line-number</p>
]]></content>
      <tags>
        <tag>Server&amp;OS</tag>
        <tag>配置</tag>
      </tags>
  </entry>
  <entry>
    <title>centos安装epel</title>
    <url>/2014/01/26/setup-epel.html</url>
    <content><![CDATA[<p>#2016.08.13更新</p>
<figure class="highlight plaintext"><table><tr><td class="code"><pre><span class="line">yum install epel-release</span><br></pre></td></tr></table></figure>

<hr>
<p><a href="http://mirrors.fedoraproject.org/publiclist/EPEL/">http://mirrors.fedoraproject.org/publiclist/EPEL/</a></p>
<p><a href="http://www.codesky.net/article/201110/170019.html">http://www.codesky.net/article/201110/170019.html</a></p>
<p>64位系统选择：</p>
<p>rpm  -ivh  epel-release-6-5.noarch.rpm</p>
<p>导入key：</p>
<p>rpm –import &#x2F;etc&#x2F;pki&#x2F;rpm-gpg&#x2F;RPM-GPG-KEY-EPEL-6</p>
<p>如果用比较新的软件，用epel-test.repo这个文件就行了</p>
<p>别忘了安装yum install yum-priorities</p>
]]></content>
      <tags>
        <tag>Server&amp;OS</tag>
      </tags>
  </entry>
  <entry>
    <title>u盘安装linux，将grub安装到了u盘，导致没U盘系统无法引导启动的解决方法</title>
    <url>/2014/02/12/grub-setup-to-the-flash-storage.html</url>
    <content><![CDATA[<p>转自：<a href="http://blog.csdn.net/xhu_eternalcc/article/details/13632643">http://blog.csdn.net/xhu_eternalcc/article/details/13632643</a></p>
<p>今天用U盘装linux时候不小心将grub安装到了U盘上，导致每次启动系统都得插U盘，下面是解决办法，拷贝时忘了记下转载出处，实在不好意思。</p>
<hr>
<p>装CentOS的时候用的是u盘安装，不小心把grub装在了u盘上，然后每次都要从u盘启动，当然不能容忍这样子，以下就是修复grub的过程：</p>
<span id="more"></span>
<p>u盘引导进入系统后,首先查看系统安装位置，也就是执行df -k 查看系统盘&#x2F;boot位置</p>
<p>[root@localhost &#x2F;]#df -k        #可能会得到&#x2F;dev&#x2F;hda1</p>
<p>[root@localhost &#x2F;]#&#x2F;sbin&#x2F;grub   #进入grub命令行模式</p>
<p>grub&gt; find &#x2F;boot&#x2F;grub&#x2F;stage1    find &#x2F;grub&#x2F;stage1      find stage1 #命令行下输入下列三条命令，总有一条会返回一个正确的grub位置</p>
<p>grub&gt; find &#x2F;grub&#x2F;stage1</p>
<p>find &#x2F;grub&#x2F;stage1</p>
<p>（hd1,1）</p>
<p>grub&gt;root （hd0,0）        #第一条<br>grub&gt;setup （hd0）         #第二条<br>grub&gt;quit                  #第三条   grub环境下连续执行这三条命令返回SHELL</p>
<p>最后修改grub.conf和menu.lst里面的（hd1,1）为（hd0,0）重新启动即可。<br>[root@localhost &#x2F;]#vi &#x2F;boot&#x2F;grub&#x2F;grub.conf …   vi &#x2F;boot&#x2F;grub&#x2F;menu.1st …</p>
<p>[root@localhost &#x2F;]init 6</p>
<h1 id="大功告成！"><a href="#大功告成！" class="headerlink" title="大功告成！"></a>大功告成！</h1><p>后记：<br>需要特别说明的是，CENTOS 默认在VG上把BOOT分为一个独立的分区，所以开始启动的时候和系统启动开的根目录是不一样的，也就是说系统引导的时候的&#x2F;，就是LINUX里的&#x2F;BOOT,所以，GRUB的配置文件在系统里的位置应该在&#x2F;BOOT&#x2F;BOOT&#x2F;GRUB&#x2F;GRUB.CONF.</p>
<hr>
<p>说明：你可能在find &#x2F;boot&#x2F;grub&#x2F;stage1 的时候发现就是 (hd0,0)，那就可能是grub.conf和menu.lst里面有hd(1,1)，同样按作者的方法也能解决。</p>
]]></content>
      <tags>
        <tag>Server&amp;OS</tag>
      </tags>
  </entry>
  <entry>
    <title>解决RouterOS上vpn互访问题</title>
    <url>/2014/02/18/solve-vpn-user-cannot-connect-each-other-on-routeros.html</url>
    <content><![CDATA[<p>今天，在所里跟同事同时登陆vpn，测试能不能互访，结果成功了，但是晚上，都回家后，再测试却不成功，tracert一下后，发现第一跳路由是WAN口的IP，显然就是这里的问题了，在PPP项目下，修改profiles配置中的localAddress为LAN口IP，问题即可解决。</p>
]]></content>
      <tags>
        <tag>Server&amp;OS</tag>
        <tag>配置</tag>
      </tags>
  </entry>
  <entry>
    <title>JavaScript函数调用模式</title>
    <url>/2014/03/05/four-patterns-of-invocation-in-javascript.html</url>
    <content><![CDATA[<p>转自：<a href="http://www.cnblogs.com/chanruida/archive/2011/04/19/invocation.html">http://www.cnblogs.com/chanruida/archive/2011/04/19/invocation.html</a></p>
<p>调用一个函数将会挂起当前函数的执行，并传递控制权与参数给新的函数。 除了声明的参数，每个函数会接收到两个新的附加参数：this和arguments。 this是个很重要的参数，并且它的值是由调用模式决定的。</p>
<p>以下是JavaScript中很重要的4个调用模式：</p>
<p>a. 方法调用模式the method invocation pattern</p>
<p>b. 函数调用模式the function invocation pattern</p>
<p>c. 构造器调用模式the constructor invocation pattern</p>
<p>d. Apply调用模式the apply invocation pattern</p>
<span id="more"></span>

<ol>
<li>方法调用模式the method invocation method</li>
</ol>
<p>当函数作为对象的方法的时候，我们就叫函数为方法。当一个方法被调用的时候，this绑定到调用的对象。</p>
<p>var myObj&#x3D;{</p>
<p>val:0,</p>
<p>increment:function(inc){ this.val+&#x3D;typeof inc &#x3D;&#x3D;&#x3D;”number”?inc:1;},</p>
<p>get_val:function(){return this.val;}</p>
<p>}</p>
<p>myObj.increment();&#x2F;&#x2F; 1</p>
<p>myObj<a href="2">“increment”</a>;&#x2F;&#x2F;3</p>
<p>小结：当用 .或者下标表达式 来使用一个函数的时候，就是方法调用模式，this对象绑定到前面的对象。</p>
<p>一个函数可以使用this来访问对象，所以它能检索对象的值或者更改对象的值。绑定this到对象发生在调用的时候。</p>
<ol start="2">
<li>函数调用模式the function invocation pattern</li>
</ol>
<p>当一个函数不是一个对象的属性，那么它就是作为函数来调用的。当一个函数作为函数调用模式来调用的时候，this绑定到全局对象。这是JavaScript设计时的错误并延续了下来。</p>
<p>function add(x,y){</p>
<pre><code>return x+y;
</code></pre>
<p>}</p>
<p>myObj.double&#x3D;function(){</p>
<pre><code>var that=this;

var helper=function()&#123;

    that.val=add(that.value,that.value);

    /*错误的写法可能是这样，为什么错呢？因为函数作为内部函数调用的时候，this已经绑定到了错误的对象，全局对象并没有val属性，所以返回不正确的值。

    this.val = this.val+this.val;

    */
</code></pre>
<p>}</p>
<pre><code>helper();
</code></pre>
<p>}</p>
<p>myObj.double();&#x2F;&#x2F;6</p>
<ol start="3">
<li>构造器调用模式the constructor invocation pattern</li>
</ol>
<p>JavaScript是一门基于原型继承的语言，这意味着对象可以直接继承属性从其它的对象，该语言是无类别的。</p>
<p>如果在一个函数前面带上new来调用，那么将得到一个隐藏连接到该函数的prototype成员的新对象，同时this也将会绑定到该新对象。</p>
<p>new前缀也会改变return语句的行为。这也不是推荐的编程方式。</p>
<p>var Foo &#x3D; function(status){</p>
<pre><code>this.status = status;
</code></pre>
<p>}</p>
<p>Foo.prototype.get_status &#x3D; function(){</p>
<pre><code>return this.status;
</code></pre>
<p>}</p>
<p>&#x2F;&#x2F;构造一个Foo实例</p>
<p>var myFoo &#x3D; new Foo(“bar”);</p>
<p>myFoo.get_status();&#x2F;&#x2F;“bar”</p>
<ol start="4">
<li>Apply调用模式the apply invocation pattern</li>
</ol>
<p>因为JavaScript是一个函数式的面向对象语言，所以函数可以拥有方法。</p>
<p>Apply方法拥有两个参数，第一个是将绑定到this的值，第二个是参数数组，也就是说Apply方法让我们构建一个数组并用其去调用函数，即允许我们选择this的值，也允许我们选择数组的值。</p>
<p>var array &#x3D; [3,4];</p>
<p>var sum &#x3D; add.apply(null,array); &#x2F;&#x2F; 7</p>
<p>var statusObj &#x3D; {status:”ABCDEFG”};</p>
<p>Foo.prototype.pro_get_status &#x3D; function(prefix){</p>
<pre><code>return prefix +&quot;-&quot;+this.status;
</code></pre>
<p>}</p>
<p>var status &#x3D; Foo.prototype.get_status.apply(statusObj);&#x2F;&#x2F; “ABCDEFG”</p>
<p>var pro_status &#x3D; Foo.prototype.get_status.apply(statusObj,[“prefix”]);&#x2F;&#x2F; “prefix -ABCDEFG”</p>
<p>最后的牢骚：</p>
<p>函数调用：foo();，这种情况下this永远为undefined，但由于js标准规定this必须是个有效对象，所以会被绑到window</p>
<p>方法调用：foo.bar();，这种情况下，.前面的是啥，this就是啥。</p>
<p>构造器：new foo();这种情况下，this就是new出来的对象。</p>
<p>apply：foo.apply(thisObject, [xxx]);，这种情况下，apply指定this为thisObject</p>
]]></content>
      <tags>
        <tag>前端</tag>
      </tags>
  </entry>
  <entry>
    <title>Big Endian 和 Little Endian</title>
    <url>/2014/03/11/big-endian-and-little-endian.html</url>
    <content><![CDATA[<p>一、字节序<br>来自：<a href="http://ayazh.gjjblog.com/archives/1058846/">http://ayazh.gjjblog.com/archives/1058846/</a></p>
<p>谈到字节序的问题，必然牵涉到两大CPU派系。那就是Motorola的PowerPC系列CPU和Intel的x86系列CPU。PowerPC系列采用big endian方式存储数据，而x86系列则采用little endian方式存储数据。那么究竟什么是big endian，什么又是little endian呢？</p>
<pre><code> 其实big endian是指低地址存放最高有效字节（MSB），而little endian则是低地址存放最低有效字节（LSB）。

 用文字说明可能比较抽象，下面用图像加以说明。比如数字0x12345678在两种不同字节序CPU中的存储顺序如下所示：
</code></pre>
<figure class="highlight plaintext"><table><tr><td class="code"><pre><span class="line">Big Endian</span><br><span class="line"></span><br><span class="line">   低地址                                            高地址</span><br><span class="line">   -----------------------------------------&gt;</span><br><span class="line">   +-+-+-+-+-+-+-+-+-+-+-+-+-+-+-+-+-+-+</span><br><span class="line">   |     12     |      34    |     56      |     78    |</span><br><span class="line">   +-+-+-+-+-+-+-+-+-+-+-+-+-+-+-+-+-+-+</span><br><span class="line"></span><br><span class="line">Little Endian</span><br><span class="line"></span><br><span class="line">   低地址                                            高地址</span><br><span class="line">   -----------------------------------------&gt;</span><br><span class="line">   +-+-+-+-+-+-+-+-+-+-+-+-+-+-+-+-+-+-+</span><br><span class="line">   |     78     |      56    |     34      |     12    |</span><br><span class="line">   +-+-+-+-+-+-+-+-+-+-+-+-+-+-+-+-+-+-+</span><br></pre></td></tr></table></figure>
<pre><code> 从上面两图可以看出，采用big endian方式存储数据是符合我们人类的思维习惯的。而little endian，!@#$%^&amp;，见鬼去吧 `-_-|||`

 为什么要注意字节序的问题呢？你可能这么问。当然，如果你写的程序只在单机环境下面运行，并且不和别人的程序打交道，那么你完全可以忽略字节序的存在。但是，如果你的程序要跟别人的程序产生交互呢？在这里我想说说两种语言。C/C++语言编写的程序里数据存储顺序是跟编译平台所在的CPU相关的，而JAVA编写的程序则唯一采用big endian方式来存储数据。试想，如果你用C/C++语言在x86平台下编写的程序跟别人的JAVA程序互通时会产生什么结果？就拿上面的0x12345678来说，你的程序传递给别人的一个数据，将指向0x12345678的指针传给了JAVA程序，由于JAVA采取big endian方式存储数据，很自然的它会将你的数据翻译为0x78563412。什么？竟然变成另外一个数字了？是的，就是这种后果。因此，在你的C程序传给JAVA程序之前有必要进行字节序的转换工作。

 无独有偶，所有网络协议也都是采用big endian的方式来传输数据的。所以有时我们也会把big endian方式称之为网络字节序。当两台采用不同字节序的主机通信时，在发送数据之前都必须经过字节序的转换成为网络字节序后再进行传输。ANSI C中提供了下面四个转换字节序的宏。
</code></pre>
<p>big endian：最高字节在地址最低位，最低字节在地址最高位，依次排列。<br>little endian：最低字节在最低位，最高字节在最高位，反序排列。</p>
<p>endian指的是当物理上的最小单元比逻辑上的最小单元小时，逻辑到物理的单元排布关系。咱们接触到的物理单元最小都是byte，在通信领域中，这里往往是bit，不过原理也是类似的。</p>
<p>一个例子：<br>如果我们将0x1234abcd写入到以0x0000开始的内存中，则结果为</p>
<figure class="highlight plaintext"><table><tr><td class="code"><pre><span class="line">                big-endian     little-endian</span><br><span class="line">0x0000     0x12              0xcd</span><br><span class="line">0x0001     0x34              0xab</span><br><span class="line">0x0002     0xab              0x34</span><br><span class="line">0x0003     0xcd              0x12</span><br></pre></td></tr></table></figure>

<p>目前应该little endian是主流，因为在数据类型转换的时候（尤其是指针转换）不用考虑地址问题。</p>
<p>二、Big Endian 和 Little Endian名词的由来<br>这两个术语来自于 Jonathan Swift 的《《格利佛游记》其中交战的两个派别无法就应该从哪一端－－小端还是大端－－打开一个半熟的鸡蛋达成一致。：）<br>“endian”这个词出自《格列佛游记》。小人国的内战就源于吃鸡蛋时是究竟从大头(Big-Endian)敲开还是从小头(Little-Endian)敲开，由此曾发生过六次叛乱，其中一个皇帝送了命，另一个丢了王位。<br>我们一般将endian翻译成“字节序”，将big endian和little endian称作“大尾”和“小尾”。</p>
<p>在那个时代，Swift是在讽刺英国和法国之间的持续冲突，Danny Cohen，一位网络协议的早期开创者，第一次使用这两个术语来指代字节顺序，后来这个术语被广泛接纳了</p>
<p>三、Big Endian 和 Little Endian优劣<br>来自：Dr. William T. Verts, April 19, 1996<br>Big Endian<br>判别一个数的正负很容易，只要取offset0处的一个字节就能确认。<br>Little Endian<br>长度为1，2，4字节的数，排列方式都是一样的，数据类型转换非常方便。</p>
<p>四、一些常见文件的字节序<br>来自：Dr. William T. Verts, April 19, 1996</p>
<p>Common file formats and their endian order are as follows:<br>Adobe Photoshop – Big Endian<br>BMP (Windows and OS&#x2F;2 Bitmaps) – Little Endian<br>DXF (AutoCad) – Variable<br>GIF – Little Endian<br>IMG (GEM Raster) – Big Endian<br>JPEG – Big Endian<br>FLI (Autodesk Animator) – Little Endian<br>MacPaint – Big Endian<br>PCX (PC Paintbrush) – Little Endian<br>PostScript – Not Applicable (text!)<br>POV (Persistence of Vision ray-tracer) – Not Applicable (text!)<br>QTM (Quicktime Movies) – Little Endian (on a Mac!) （PeterLee注Big Endian in my opinion）<br>Microsoft RIFF (.WAV &amp; .AVI) – Both<br>Microsoft RTF (Rich Text Format) – Little Endian<br>SGI (Silicon Graphics) – Big Endian<br>Sun Raster – Big Endian<br>TGA (Targa) – Little Endian<br>TIFF – Both, Endian identifier encoded into file<br>WPG (WordPerfect Graphics Metafile) – Big Endian (on a PC!)<br>XWD (X Window Dump) – Both, Endian identifier encoded into file</p>
<p>五、比特序<br>来自：<a href="http://ayazh.gjjblog.com/archives/1058846/">http://ayazh.gjjblog.com/archives/1058846/</a></p>
<p>我在8月9号的《Big Endian和Little Endian》一文中谈了字节序的问题。可是有朋友仍然会问，CPU存储一个字节的数据时其字节内的8个比特之间的顺序是否也有big endian和little endian之分？或者说是否有比特序的不同？</p>
<pre><code> 实际上，这个比特序是同样存在的。下面以数字0xB4（10110100）用图加以说明。
</code></pre>
<figure class="highlight plaintext"><table><tr><td class="code"><pre><span class="line">Big Endian</span><br><span class="line"></span><br><span class="line">   msb                                                         lsb</span><br><span class="line">   ----------------------------------------------&gt;</span><br><span class="line">   +-+-+-+-+-+-+-+-+-+-+-+-+-+-+-+-+-+-+-+-+</span><br><span class="line">   |   1  |   0  |   1  |   1  |   0  |   1  |   0  |   0  |</span><br><span class="line">   +-+-+-+-+-+-+-+-+-+-+-+-+-+-+-+-+-+-+-+-+</span><br><span class="line"></span><br><span class="line">Little Endian</span><br><span class="line"></span><br><span class="line">   lsb                                                         msb</span><br><span class="line">   ----------------------------------------------&gt;</span><br><span class="line">   +-+-+-+-+-+-+-+-+-+-+-+-+-+-+-+-+-+-+-+-+</span><br><span class="line">   |   0  |   0  |   1  |   0  |   1  |   1  |   0  |   1  |</span><br><span class="line">   +-+-+-+-+-+-+-+-+-+-+-+-+-+-+-+-+-+-+-+-+</span><br></pre></td></tr></table></figure>
<pre><code> 实际上，由于CPU存储数据操作的最小单位是一个字节，其内部的比特序是什么样对我们的程序来说是一个黑盒子。也就是说，你给我一个指向0xB4这个数的指针，对于big endian方式的CPU来说，它是从左往右依次读取这个数的8个比特；而对于little endian方式的CPU来说，则正好相反，是从右往左依次读取这个数的8个比特。而我们的程序通过这个指针访问后得到的数就是0xB4，字节内部的比特序对于程序来说是不可见的，其实这点对于单机上的字节序来说也是一样的。

 那可能有人又会问，如果是网络传输呢？会不会出问题？是不是也要通过什么函数转换一下比特序？嗯，这个问题提得很好。假设little endian方式的CPU要传给big endian方式CPU一个字节的话，其本身在传输之前会在本地就读出这个8比特的数，然后再按照网络字节序的顺序来传输这8个比特，这样的话到了接收端不会出现任何问题。而假如要传输一个32比特的数的话，由于这个数在littel endian方存储时占了4个字节，而网络传输是以字节为单位进行的，little endian方的CPU读出第一个字节后发送，实际上这个字节是原数的LSB，到了接收方反倒成了MSB从而发生混乱。
</code></pre>
]]></content>
      <tags>
        <tag>编程语言</tag>
        <tag>理论</tag>
      </tags>
  </entry>
  <entry>
    <title>MAC规则</title>
    <url>/2014/03/12/mac-rulers.html</url>
    <content><![CDATA[<p>MAC地址规则</p>
<p>版权声明：转载时请以超链接形式标明文章原始出处和作者信息及本声明<br><a href="http://www.blogbus.com/herren0167-logs/221441607.html">http://www.blogbus.com/herren0167-logs/221441607.html</a></p>
<p><strong>MAC 地址第二位数字必须是偶数。</strong>以下是详细介绍。</p>
<p>MAC 地 址通常表示为12 个16 进制数，每2 个16 进制数之间用冒号隔开，如：08:00:20:0A:8C:6D 就是一个MAC 地址，其中前6 位16 进制数 08:00:20 代表网络硬件制造商的编号，它由IEEE 分配，而后3 位16 进制数0A:8C:6D 代表该制造商所制造的某个网络产品（如网卡）的系列 号。每个网络制造商必须确保它所制造的每个以太网设备都具有相同的前三字节以及不同的后三个字节。这样就可保证世界上每个以太网设备都具有唯一的MAC 地 址。</p>
<span id="more"></span>
<pre><code>我们需要注意的是以太网地址的第32 位是组播地址的标志位：
</code></pre>
<p>位            47 ～33      制造厂商标识<br>               32               组播标识位<br>               31 ～24       制造厂商标识<br>               23 ～0        系列号</p>
<pre><code>当组播标识位为1 时表示该MAC 地址是一个组播地址。对于网卡MAC ，这一位必须是0 ，表示一个单播MAC 地址。以下：

X0:XX:XX:XX:XX:XX
X2:XX:XX:XX:XX:XX
X4:XX:XX:XX:XX:XX
X6:XX:XX:XX:XX:XX
X8:XX:XX:XX:XX:XX
XA:XX:XX:XX:XX:XX
XC:XX:XX:XX:XX:XX
XE:XX:XX:XX:XX:XX

为合法的以太网网卡地址。上面的X 代表0 －F 中的任一个。如果你不是购买网卡，而是自己购买芯片制造，那么地址怎么办？可以自己使用一个还没有被ieee 分配的厂商编号就可以了。就算是使用已经分配的厂商编号也没有不可，只要你能保证在你使用的局域网内，任何两个网卡的地址不一样就可以了。地址 FF:FF:FF:FF:FF:FF 为广播地址，只能用在目的地址段，不能作为源地址段。目的地址为广播地址的数据包，可以被一个局域网内的所有网卡接收 到。

地址：

X1:XX:XX:XX:XX:XX
X3:XX:XX:XX:XX:XX
X5:XX:XX:XX:XX:XX
X7:XX:XX:XX:XX:XX
X9:XX:XX:XX:XX:XX
XB:XX:XX:XX:XX:XX
XD:XX:XX:XX:XX:XX
XF:XX:XX:XX:XX:XX

为组播地址，只能作为目的地址，不能作为源地址。组播地址可以被支持该组播地址的一组网卡接收到。组播地址主要用在视频广播，远程唤醒（通过发一个特殊的 数据包使网卡产生一个中断信号，启动电脑），游戏（多个人在局域网里联机打游戏）里等。下面是一些具体的组播地址，其他组播地址跟TCP/IP 无关，不做 介绍：

地址                                                             范围
01:00:5E:00:00:00 ～ 01:00:5E:7F:FF:FF 用于ip 地址的组播

网卡可以接收以下3 种地址的数据包：
 1 目的地址跟自己的网卡地址是一样的数据包
 2 目的地址为FF:FF:FF:FF:FF:FF 广播地址的数据包
 3 目的地址为跟自己的组播地址范围相同的数据包

那么在以太网的应用当中，如果你希望你的数据包只发给一个网卡，目的地址用对方的网卡地址；如果你想把数据包发给所有的网卡，目的地址用广播地址；如果你想把数据包发给一组网卡，目的地址用组播地址。
</code></pre>
<p>组播IP 与组播MAC 的映射</p>
<pre><code>二层组播MAC 定义为：01:00:5e:xx:xx:xx ，其中 xx 由三层的IP 组播组确定。组播地址：组播流使用的 IP 是D 类IP 地址（二进制1110 开始），从224.0.0.0 ～239.255.255.255 。由于组播MAC 地址是一个虚拟的地址，并不是真实网卡的MAC 地址，那么网卡在发送报文时二层MAC 地址怎么确定呢？答案是采用地址映射的方法将三层IP 地址映射到MAC 地址。映射关系如下：


从上面的映射关系可以看出IP 地址的五个bit 无法映射到MAC 层，因为MAC 层的这五个bit 已经确定。也就是说有32 个IP 组播组会被映射为同一个MAC 地址。
</code></pre>
<p>查询网卡MAC地址所属生产厂商(ieee.org)</p>
<p>网卡MAC码是由全球惟一的一个固定组织来分配的，未经认证和授权的厂家无权生产网卡。<br>每块网卡都有一个固定的卡号，并且任何正规厂家生产的网卡上都直接标明了卡号，<br>一般为一组12位的16进制数。其中前6位代表网卡的生产厂商（Intel为00-07-F6)</p>
<p>全部厂商列表：<br><a href="http://standards.ieee.org/regauth/oui/oui.txt">http://standards.ieee.org/regauth/oui/oui.txt</a></p>
<p>网页查询地址：<br><a href="http://standards.ieee.org/regauth/oui/index.shtml">http://standards.ieee.org/regauth/oui/index.shtml</a><br>在Search the public OUI listing . . .输入网卡MAC地址前三位即可，如00-0D-65<br>得到结果：<br>00-0D-65   (hex)        Cisco Systems<br>000D65     (base 16)        Cisco Systems<br>                80 West Tasman Dr.<br>                SJ-M&#x2F;1<br>                San Jose CA 95134<br>                UNITED STATES</p>
]]></content>
      <tags>
        <tag>理论</tag>
      </tags>
  </entry>
  <entry>
    <title>shell重定向和管道</title>
    <url>/2014/03/24/shell-redirect-and-pipe.html</url>
    <content><![CDATA[<p>今天在调一个命令的时候遇到的问题，有一个capture程序，有一个处理程序（就叫做abc吧），执行命令差不多类似于下面这样：<br><code>capture -r 1 -f pipe:1 | abc -v 5 -r 3 &gt; /dev/null 2&gt; /dev/null &amp;</code><br>但是执行的时候，有时候成功有时候失败，失败的时候，abc报错内容大致就是没有收到capture程序的标准输出的数据。<br>网上查了下重定向和管道，发现了一篇文章，讲两者的区别，里面有个例子跟我这个类似，但是例子中多加了个括号，于是模仿一下，执行就成功了。<br><code>(capture -r 1 -f pipe:1 | abc -v 5 -r 3) &gt; /dev/null 2&gt; /dev/null &amp;</code><br>于是猜测可能原因是重定向导致abc拿不到capture的数据了。</p>
<p>参考文章：<a href="http://www.cnblogs.com/chengmo/archive/2010/10/21/1856577.html">http://www.cnblogs.com/chengmo/archive/2010/10/21/1856577.html</a></p>
]]></content>
      <tags>
        <tag>编程语言</tag>
        <tag>Server&amp;OS</tag>
      </tags>
  </entry>
  <entry>
    <title>nginx ssl</title>
    <url>/2014/04/10/nginx-ssl.html</url>
    <content><![CDATA[<p>首先生成必要的密钥文件，需要四步：</p>
<pre><code>1、openssl genrsa -des3 -out server.key 1024
2、openssl req -new -key server.key -out server.csr
3、openssl rsa -in server.key -out server_nopass.key
4、openssl x509 -req -days 365 -in server.csr -signkey server.key -out server.crt
</code></pre>
<p>执行以上四步的时候，把目录切到nginx的配置文件目录下面，然后再新建一个ssl的目录，便于管理。比如我的目录是&#x2F;etc&#x2F;nginx&#x2F;ssl。</p>
<p>关于nginx的配置，贴一份我自己的：</p>
<pre><code>server &#123;
    listen          443 ssl;
    server_name     localhost;
    ### SSL cert files ###
    ssl on;
    ssl_certificate      ssl/server.crt;
    ssl_certificate_key  ssl/server_nopass.key;
    keepalive_timeout    60;
    index index.html index.htm index.php;
    root /home/ety001/wwwroot/localhost;
    location ~ \.php$ &#123;
        fastcgi_pass   unix:/run/php-fpm/php-fpm.sock;
        fastcgi_index  index.php;
        include        fastcgi.conf;
    &#125;
&#125;
</code></pre>
]]></content>
      <tags>
        <tag>Server&amp;OS</tag>
      </tags>
  </entry>
  <entry>
    <title>python动态加载类和方法</title>
    <url>/2014/03/25/python-dynamic-import-class-and-function.html</url>
    <content><![CDATA[<figure class="highlight plaintext"><table><tr><td class="code"><pre><span class="line">def _importCls(self,model,action,params):</span><br><span class="line">    obj = __import__(model)</span><br><span class="line">    entrance = getattr(obj,action)</span><br><span class="line">    if params == &#x27;&#x27;:</span><br><span class="line">        entrance()</span><br><span class="line">    else:</span><br><span class="line">        entrance(params)</span><br></pre></td></tr></table></figure>

]]></content>
      <tags>
        <tag>编程语言</tag>
      </tags>
  </entry>
  <entry>
    <title>关于以chunked方式传输的HTTP响应报文的解码C语言实现</title>
    <url>/2014/04/12/chunked_http_c.html</url>
    <content><![CDATA[<h4 id="注意："><a href="#注意：" class="headerlink" title="注意："></a>注意：</h4><p>该文转载出处已不可访问，找到一篇相似的文章，可以参考：<br><a href="https://blog.csdn.net/liuchonge/article/details/50061331">https://blog.csdn.net/liuchonge/article/details/50061331</a></p>
<p>– 2019-11-28 更新</p>
<hr>
<p>转自：<a href="http://www.devdiv.com/chunked_http_c_-article-2473-1.html">http://www.devdiv.com/chunked_http_c_-article-2473-1.html</a></p>
<p>今天的主要内容还是不会偏离帖子的标题，关于HTTP采用chunked方式传输数据的解码问题。相信“在座”的各位有不少是搞过web系统的哈，但考虑到其他没接触过的XDJMs，这里还是简要的介绍一下：</p>
<p>chunked编码的基本方法是将大块数据分解成多块小数据，每块都可以自指定长度，其具体格式RFC文档中是这样描述的(<a href="http://www.w3.org/Protocols/rfc2616/rfc2616-sec3.html)%EF%BC%9A">http://www.w3.org/Protocols/rfc2616/rfc2616-sec3.html)：</a></p>
<figure class="highlight plaintext"><table><tr><td class="code"><pre><span class="line">Chunked-Body   = *chunk</span><br><span class="line">                 last-chunk</span><br><span class="line">                 trailer</span><br><span class="line">                 CRLF</span><br><span class="line">chunk          = chunk-size [ chunk-extension ] CRLF</span><br><span class="line">                 chunk-data CRLF</span><br><span class="line">chunk-size     = 1*HEX</span><br><span class="line">last-chunk     = 1*(&quot;0&quot;) [ chunk-extension ] CRLF</span><br><span class="line">chunk-extension= *( &quot;;&quot; chunk-ext-name [ &quot;=&quot; chunk-ext-val ] )</span><br><span class="line">chunk-ext-name = token</span><br><span class="line">chunk-ext-val  = token | quoted-string</span><br><span class="line">chunk-data     = chunk-size(OCTET)</span><br><span class="line">trailer        = *(entity-header CRLF)</span><br></pre></td></tr></table></figure>

<p>这个据说是BNF文法，我本人有点陌生，于是又去维基百科里面找了下，里面有报文举例，这样就一目了然了(<a href="http://en.wikipedia.org/wiki/Chunked_transfer_encoding)%EF%BC%8C%E6%88%91%E6%91%98%E4%B8%80%E6%AE%B5%E6%8A%A5%E6%96%87%E5%A6%82%E4%B8%8B%EF%BC%9A">http://en.wikipedia.org/wiki/Chunked_transfer_encoding)，我摘一段报文如下：</a></p>
<figure class="highlight plaintext"><table><tr><td class="code"><pre><span class="line">HTTP/1.1 200 OK</span><br><span class="line">Content-Type: text/plain</span><br><span class="line">Transfer-Encoding: chunked</span><br><span class="line"></span><br><span class="line">25</span><br><span class="line">This is the data in the first chunk</span><br><span class="line"></span><br><span class="line">1C</span><br><span class="line">and this is the second one</span><br><span class="line"></span><br><span class="line">3</span><br><span class="line">con</span><br><span class="line">8</span><br><span class="line">sequence</span><br><span class="line">0</span><br></pre></td></tr></table></figure>

<p>总而言之呢，就是说，这种方式的HTTP响应，头字段中不会带上我们常见的Content-Length字段，而是带上了Transfer-Encoding: chunked的字样。这种响应是未知长度的，有很多段自定义长度的块组合而成，每个块以一个十六进制数开头，该数字表示这块chunk数据的长度(包括数据段末尾的CRLF，但不包括十六进制数后面的CRLF)。</p>
<p>于是，众多Coders在发现了这个真相以后就开始在互联网上共享各种语言的解码代码。我看了C、PHP和Python那几个版本的代码，发现了一个问题就是，他们解析的数据是完整的，也就是说，他们所操纵的数据是假定已经在解码前在外部完成了拼装的，但是这完全不符合我的使用场景，Why？因为我的数据都是直接从Socket里面拿出来的，Socket里面的数据绝对不会有如此漂亮的格式，它们在那个时候都是散装的，当然我也可以选择将他们组装好然后再去解，但是以我粗浅的认识认为，那样子无论是从时间还是从空间的效率上来讲都是极为低下的(当你开发了一个kext程序，就明白我的苦衷了)。于是我又继续搜索，以期待能有高手已经提前帮我解决了这些问题，不过很遗憾，我没能找到。</p>
<p>没办法，自己做吧，比较重要的地方无非就是一个结尾的判断、一个chunk长度的读取、chunk之间的分段问题。看起来貌似比较轻松，不过代码写起来还是花费了不少时间的，今天又单独从项目中提取了这部分功能用C重写了一下。接下来就结合部分代码来说明一下整个过程。</p>
<ol>
<li>先看dechunk.h这个文件</li>
</ol>
<figure class="highlight plaintext"><table><tr><td class="code"><pre><span class="line">#define DCE_OK              0</span><br><span class="line">#define DCE_ISRUNNING       1</span><br><span class="line">#define DCE_FORMAT          2</span><br><span class="line">#define DCE_ARGUMENT        3</span><br><span class="line">#define DCE_MEM             4</span><br><span class="line">#define DCE_LOCK            5</span><br><span class="line"></span><br><span class="line">int dechunk_init();</span><br><span class="line">int dechunk(void *input, size_t inlen);</span><br><span class="line">int dechunk_getbuff(void **buff, size_t *buf_size);</span><br><span class="line">int dechunk_free();</span><br><span class="line"></span><br><span class="line">void *memstr(void *src, size_t src_len, char *sub);</span><br></pre></td></tr></table></figure>

<p>宏定义就不用说了，都是一些错误码定义。函数一共有5个。dechunk_init、dechunk、dechunk_free这三个是解码的主要流程，dechunk_getbuff则是获取数据的接口。接下来看memstr，这是个很奇怪的名字，也是代码中唯一值得重点提醒一下的地方，其主要功能是在一块内存中寻找能匹配sub表示的字符串的地址。有人肯定要问了，不是有strstr么？对，我也这样想过，并且对于一些chunked网站也是实用的，但是，它不是通用的。主要是因为还有一些网站不仅使用了chunked传输方式，还采用了gzip的内容编码方式。当你碰到这种网站的时候，你再想使用strstr就等着郁闷吧，因为strstr会以字符串中的’\0’字符作为结尾标识，而恰巧经过gzip编码后的数据会有大量的这种字符。</p>
<ol start="2">
<li>接下来看dechunk.c<figure class="highlight plaintext"><table><tr><td class="code"><pre><span class="line">int dechunk(void *input, size_t inlen)</span><br><span class="line">&#123;</span><br><span class="line">    if (!g_is_running)</span><br><span class="line">    &#123;</span><br><span class="line">        return DCE_LOCK;</span><br><span class="line">    &#125;</span><br><span class="line"></span><br><span class="line">    if (NULL == input || inlen &lt;= 0)</span><br><span class="line">    &#123;</span><br><span class="line">        return DCE_ARGUMENT;</span><br><span class="line">    &#125;</span><br><span class="line"></span><br><span class="line">    void *data_start = input;</span><br><span class="line">    size_t data_len = inlen;</span><br><span class="line"></span><br><span class="line">    if (g_is_first)</span><br><span class="line">    &#123;</span><br><span class="line">        data_start = memstr(data_start, data_len, &quot;\r\n\r\n&quot;);</span><br><span class="line">        if (NULL == data_start)</span><br><span class="line">        &#123;</span><br><span class="line">            return DCE_FORMAT;</span><br><span class="line">        &#125;</span><br><span class="line"></span><br><span class="line">        data_start += 4;</span><br><span class="line">        data_len -= (data_start - input);</span><br><span class="line"></span><br><span class="line">        g_is_first = 0;</span><br><span class="line">    &#125;</span><br><span class="line"></span><br><span class="line">    if (!g_is_chunkbegin)</span><br><span class="line">    &#123;</span><br><span class="line">        char *stmp = data_start;</span><br><span class="line">        int itmp = 0;</span><br><span class="line"></span><br><span class="line">        sscanf(stmp, &quot;%x&quot;, &amp;itmp;);</span><br><span class="line">        itmp = (itmp &gt; 0 ? itmp - 2 : itmp);          // exclude the terminate &quot;\r\n&quot;</span><br><span class="line"></span><br><span class="line">        data_start = memstr(stmp, data_len, &quot;\r\n&quot;);</span><br><span class="line">        data_start += 2;    // strlen(&quot;\r\n&quot;)</span><br><span class="line"></span><br><span class="line">        data_len        -=  (data_start - (void *)stmp);</span><br><span class="line">        g_chunk_len     =   itmp;</span><br><span class="line">        g_buff_outlen   +=  g_chunk_len;</span><br><span class="line">        g_is_chunkbegin =   1;</span><br><span class="line">        g_chunk_read    =   0;</span><br><span class="line"></span><br><span class="line">        if (g_chunk_len &gt; 0 &amp;&amp; 0 != g_buff_outlen)</span><br><span class="line">        &#123;</span><br><span class="line">            if (NULL == g_buff_out)</span><br><span class="line">            &#123;</span><br><span class="line">                g_buff_out = (char *)malloc(g_buff_outlen);</span><br><span class="line">                g_buff_pt = g_buff_out;</span><br><span class="line">            &#125;</span><br><span class="line">            else</span><br><span class="line">            &#123;</span><br><span class="line">                g_buff_out = realloc(g_buff_out, g_buff_outlen);</span><br><span class="line">            &#125;</span><br><span class="line"></span><br><span class="line">            if (NULL == g_buff_out)</span><br><span class="line">            &#123;</span><br><span class="line">                return DCE_MEM;</span><br><span class="line">            &#125;</span><br><span class="line">        &#125;</span><br><span class="line">    &#125;</span><br><span class="line"></span><br><span class="line">#define CHUNK_INIT() \</span><br><span class="line">do \</span><br><span class="line">&#123; \</span><br><span class="line">g_is_chunkbegin = 0; \</span><br><span class="line">g_chunk_len = 0; \</span><br><span class="line">g_chunk_read = 0; \</span><br><span class="line">&#125; while (0)</span><br><span class="line"></span><br><span class="line">    if (g_chunk_read &lt; g_chunk_len)</span><br><span class="line">    &#123;</span><br><span class="line">        size_t cpsize = DC_MIN(g_chunk_len - g_chunk_read, data_len);</span><br><span class="line">        memcpy(g_buff_pt, data_start, cpsize);</span><br><span class="line"></span><br><span class="line">        g_buff_pt       += cpsize;</span><br><span class="line">        g_chunk_read    += cpsize;</span><br><span class="line">        data_len        -= (cpsize + 2);</span><br><span class="line">        data_start      += (cpsize + 2);</span><br><span class="line"></span><br><span class="line">        if (g_chunk_read &gt;= g_chunk_len)</span><br><span class="line">        &#123;</span><br><span class="line">            CHUNK_INIT();</span><br><span class="line"></span><br><span class="line">            if (data_len &gt; 0)</span><br><span class="line">            &#123;</span><br><span class="line">                return dechunk(data_start, data_len);</span><br><span class="line">            &#125;</span><br><span class="line">        &#125;</span><br><span class="line">    &#125;</span><br><span class="line">    else</span><br><span class="line">    &#123;</span><br><span class="line">        CHUNK_INIT();</span><br><span class="line">    &#125;</span><br><span class="line"></span><br><span class="line">#undef CHUNK_INIT()</span><br><span class="line"></span><br><span class="line">    return DCE_OK;</span><br><span class="line">&#125;</span><br></pre></td></tr></table></figure></li>
</ol>
<p>其他函数没什么好说的，主要就只是把dechunk这个函数的流程讲一下(本来要是写了注释，我就不啰嗦这么多了，没办法，我们还是要对自己写的代码负责的不是)。</p>
<p>首先判断是否初始化过，全局变量g_is_running的唯一用途就只是用来防止多线程的调用，这只是一种很低级的保护，大家可以在实际使用中仁者见仁，智者见智。接下来，判断是否是http响应的第一个包，因为第一个包中包含有http的相应头，我们必须把这部分内容给过滤掉，判断的依据就是寻找两个连续的CRLF，也就是”\r\n\r\n”。<br>响应body的第一行，毫无疑问是第一个chunk的size字段，读取出来，设置状态，设置计数器，分配内存(如果不是第一个chunk的时候，通过realloc方法动态改变我们所分配的内存)。紧接着，就是一个对数据完整性的判断，如果input中的剩余数据的大小比我们还未读取到缓冲区中的chunk的size要小，这很明显说明了这个chunk分成了好几次被收到，那么我们直接按顺序拷贝到我们的chunk缓冲区中即可。反之，如果input中的剩余数据比未读取的size大，则说明了当前这个input数据包含了不止一个chunk，此时，使用了一个递归来保证把数据读取完。这里值得注意的一点是读取数据的时候要把表示数据结束的CRLF字符忽略掉。<br>总的流程基本就是这个样子，外部调用者通过循环把socket获取到的数据丢进来dechunk，外部循环结束条件就是socket接受完数据或者判断到表示chunk结束的0数据chunk。</p>
<ol start="3">
<li>最后看一下main.c</li>
</ol>
<figure class="highlight plaintext"><table><tr><td class="code"><pre><span class="line">int main (int argc, const char * argv[])</span><br><span class="line">&#123;</span><br><span class="line">    const char              *server_ipstr   = &quot;59.151.32.20&quot;;   // the host address of &quot;www.mtime.com&quot;</span><br><span class="line">                                                                // you can also use function gethostbyname</span><br><span class="line">                                                                // to get the address</span><br><span class="line">    const unsigned short    server_port     = 80;               // default port of http protocol</span><br><span class="line"></span><br><span class="line">    int sock_http_get = -1;</span><br><span class="line"></span><br><span class="line">    do</span><br><span class="line">    &#123;</span><br><span class="line">        sock_http_get = socket(PF_INET, SOCK_STREAM, 0);</span><br><span class="line"></span><br><span class="line">        if (-1 == sock_http_get)</span><br><span class="line">        &#123;</span><br><span class="line">            printf(&quot;socket() error %d.\n&quot;, errno);</span><br><span class="line">            break;</span><br><span class="line">        &#125;</span><br><span class="line"></span><br><span class="line">        struct sockaddr_in addr_server;</span><br><span class="line">        bzero(&amp;addr;_server, sizeof(addr_server));</span><br><span class="line"></span><br><span class="line">        addr_server.sin_family          = AF_INET;</span><br><span class="line">        addr_server.sin_addr.s_addr     = inet_addr(server_ipstr);</span><br><span class="line">        addr_server.sin_port            = htons(server_port);</span><br><span class="line"></span><br><span class="line">        if (-1 == connect(sock_http_get, (struct sockaddr *)&amp;addr;_server, sizeof(addr_server)))</span><br><span class="line">        &#123;</span><br><span class="line">            printf(&quot;connect() error %d.\n&quot;, errno);</span><br><span class="line">            break;</span><br><span class="line">        &#125;</span><br><span class="line"></span><br><span class="line">        printf(&quot;connected...\n&quot;);</span><br><span class="line"></span><br><span class="line">        char *request =</span><br><span class="line">        &quot;GET / HTTP/1.1\r\n&quot;</span><br><span class="line">        &quot;Host: www.mtime.com\r\n&quot;</span><br><span class="line">        &quot;Connection: keep-alive\r\n&quot;</span><br><span class="line">        &quot;User-Agent: Mozilla/5.0 (Macintosh; Intel Mac OS X 10_6_8) AppleWebKit/535.1 (KHTML, like Gecko) Chrome/13.0.782.220 Safari/535.1\r\n&quot;</span><br><span class="line">        &quot;Accept: text/html,application/xhtml+xml,application/xml;q=0.9,*/*;q=0.8\r\n&quot;</span><br><span class="line">        &quot;Accept-Encoding: gzip,deflate,sdch\r\n&quot;</span><br><span class="line">        &quot;Accept-Language: zh-CN,zh;q=0.8\r\n&quot;</span><br><span class="line">        &quot;Accept-Charset: GBK,utf-8;q=0.7,*;q=0.3\r\n&quot;</span><br><span class="line">        &quot;Cookie: DefaultCity-CookieKey=561; DefaultDistrict-CookieKey=0; _userCode_=2011725182104293; _userIdentity_=2011725182109188; _movies_=105799.87871.91873.68867; __utma=196937584.1484842614.1299113024.1314613017.1315205344.4; __utmz=196937584.1299113024.1.1.utmcsr=(direct)|utmccn=(direct)|utmcmd=(none); _urm=0%7C0%7C0%7C0%7C0; _urmt=Mon%2C%2005%20Sep%202011%2006%3A49%3A04%20GMT\r\n&quot;</span><br><span class="line">        &quot;\r\n&quot;;</span><br><span class="line"></span><br><span class="line">        if (-1 == send(sock_http_get, request, strlen(request), 0))</span><br><span class="line">        &#123;</span><br><span class="line">            printf(&quot;send() error %d.\n&quot;, errno);</span><br><span class="line">            break;</span><br><span class="line">        &#125;</span><br><span class="line"></span><br><span class="line">#define MY_BUF_SIZE     1024</span><br><span class="line">        char buff[MY_BUF_SIZE] = &#123;0&#125;;</span><br><span class="line">        int recv_bytes = 0;</span><br><span class="line">        int chunkret = DCE_OK;</span><br><span class="line"></span><br><span class="line">        if (DCE_OK == dechunk_init())</span><br><span class="line">        &#123;</span><br><span class="line">            while (-1 != (recv_bytes = recv(sock_http_get, buff, MY_BUF_SIZE, 0))</span><br><span class="line">                   &amp;&amp; 0 != recv_bytes)</span><br><span class="line">            &#123;</span><br><span class="line">                printf(&quot;%s&quot;, buff);</span><br><span class="line">                if (DCE_OK != (chunkret = dechunk(buff, recv_bytes)))</span><br><span class="line">                &#123;</span><br><span class="line">                    printf(&quot;\nchunkret = %d\n&quot;, chunkret);</span><br><span class="line">                    break;</span><br><span class="line">                &#125;</span><br><span class="line"></span><br><span class="line">                if (NULL != memstr(buff, recv_bytes, &quot;\r\n0\r\n&quot;))</span><br><span class="line">                &#123;</span><br><span class="line">                    break;</span><br><span class="line">                &#125;</span><br><span class="line"></span><br><span class="line">                bzero(buff, MY_BUF_SIZE);</span><br><span class="line">            &#125;</span><br><span class="line"></span><br><span class="line">            printf(&quot;\n*********************************\n&quot;);</span><br><span class="line">            printf(&quot;receive finished.\n&quot;);</span><br><span class="line">            printf(&quot;*********************************\n&quot;);</span><br><span class="line"></span><br><span class="line">            void *zipbuf = NULL;</span><br><span class="line">            size_t zipsize = 0;</span><br><span class="line">            dechunk_getbuff(&amp;zipbuf;, &amp;zipsize;);</span><br><span class="line"></span><br><span class="line">            printf(&quot;\n%s\n&quot;, (char *)zipbuf);</span><br><span class="line"></span><br><span class="line">            z_stream strm;</span><br><span class="line">            bzero(&amp;strm;, sizeof(strm));</span><br><span class="line"></span><br><span class="line">            printf(&quot;BEGIN:decompress...\n&quot;);</span><br><span class="line">            printf(&quot;*********************************\n&quot;);</span><br><span class="line"></span><br><span class="line">            if (Z_OK == inflateInit2(&amp;strm;, 31))    // 31:decompress gzip</span><br><span class="line">            &#123;</span><br><span class="line">                strm.next_in    = zipbuf;</span><br><span class="line">                strm.avail_in   = zipsize;</span><br><span class="line"></span><br><span class="line">                char zbuff[MY_BUF_SIZE] = &#123;0&#125;;</span><br><span class="line"></span><br><span class="line">                do</span><br><span class="line">                &#123;</span><br><span class="line">                    bzero(zbuff, MY_BUF_SIZE);</span><br><span class="line">                    strm.next_out = (Bytef *)zbuff;</span><br><span class="line">                    strm.avail_out = MY_BUF_SIZE;</span><br><span class="line"></span><br><span class="line">                    int zlibret = inflate(&amp;strm;, Z_NO_FLUSH);</span><br><span class="line"></span><br><span class="line">                    if (zlibret != Z_OK &amp;&amp; zlibret != Z_STREAM_END)</span><br><span class="line">                    &#123;</span><br><span class="line">                        printf(&quot;\ninflate ret = %d\n&quot;, zlibret);</span><br><span class="line">                        break;</span><br><span class="line">                    &#125;</span><br><span class="line"></span><br><span class="line">                    printf(&quot;%s&quot;, zbuff);</span><br><span class="line"></span><br><span class="line">                &#125; while (strm.avail_out == 0);</span><br><span class="line">            &#125;</span><br><span class="line"></span><br><span class="line">            printf(&quot;\n&quot;);</span><br><span class="line">            printf(&quot;*********************************\n&quot;);</span><br><span class="line"></span><br><span class="line">            dechunk_free();</span><br><span class="line">        &#125;</span><br><span class="line">#undef MY_BUF_SIZE</span><br><span class="line"></span><br><span class="line">    &#125; while (0);</span><br><span class="line"></span><br><span class="line">    close(sock_http_get);</span><br><span class="line"></span><br><span class="line">    return 0;</span><br><span class="line">&#125;</span><br></pre></td></tr></table></figure>


<p>按照惯例，main函数是我们用来测试的函数。</p>
<p>这个函数中，我们首先使用socket创建了跟服务器之间的连接，紧接着我手动构造了一个请求报文，通过socket发送出去，然后循环获取数据。然后通过使用zlib库来对dechunk出来的数据进行解码以确定数据是否正确。关于zlib的使用跟本次讨论的话题不太沾边，这里就不详述，有兴趣的我们可以另行讨论。</p>
<p>解码前和解码后的数据都会被打印到控制台中去，日志比较庞大，这里就不给出具体信息了，大家可以自行调试观察。<br>关于这个文件我说明一下，网站选的是<a href="http://www.mtime.com,因为它采用的就是chunked/">www.mtime.com，因为它采用的就是chunked</a> + gzip的方式，是一种相对难处理的数据。该网站的IP地址信息，相信各位有不下于100种方法去找到，所以我就没有使用gethostbyname那个方法了，因为那个方法返回的结构体使用起来实在不怎么方便。另外就是关于手动拼装的请求报文哪里来，千万不要告诉我你去用各种专业抓包工具去抓。没那么麻烦，打开你的Chrome，右键选择审查元素，然后访问你要访问的网站，OK，所有请求都会被记录在案。</p>
<p>&#x2F;**<em><strong><strong><strong><strong><strong><strong><strong><strong><strong><strong><strong><strong><strong><strong>分割一下吧</strong></strong></strong></strong></strong></strong></strong></strong></strong></strong></strong></strong></strong></strong></em>&#x2F;</p>
<p>关于代码就说这么多，不过我还是声明一下，因为没多少时间，所以我只能尽力把代码写的不那么难看，注释不多，但我在这里也有所弥补，各个函数功能的实现也许有效率方面的问题抑或是各种bug，这个属于我的编程能力不足，大家可以提出宝贵的修改意见，我一定虚心接受。如果有不明白的地方(我这只是以防万一哈^_^)也可以跟帖一起讨论。根据设计的原则，每个函数的功能应该尽量的单一和完整，调用者应该确保传递的数据符合函数的要求，但是我的main函数中却没有一些必要的判断(比如http响应是否是chunked的，是否是gzip的)，因为我准备的测试数据已经确定好了的。</p>
<p>写了那么多，也该结尾了，不过还是要送上源码工程以祝大家天天晚上睡好觉！<br>源码在这里 —&gt;<br>Vincent，如果您要查看本帖隐藏内容请回复</p>
<p>doors.du说：“我觉得明天起床这个帖子会火的，不管你们信不信，我反正信了……”</p>
<p>  http_chunk_demo.zip (19.35 KB, 下载次数: 2742)</p>
]]></content>
      <tags>
        <tag>编程语言</tag>
        <tag>理论</tag>
      </tags>
  </entry>
  <entry>
    <title>python urlopen报错</title>
    <url>/2014/04/12/python-urlopen-err.html</url>
    <content><![CDATA[<p>&lt;urlopen error [Errno -2] Name or service not known&gt;报错，<br>原因是域名解析有问题。</p>
]]></content>
      <tags>
        <tag>编程语言</tag>
      </tags>
  </entry>
  <entry>
    <title>手动扩容LVM容量</title>
    <url>/2014/04/25/manual-extend-the-lvm-volume.html</url>
    <content><![CDATA[<p>1、创建PV</p>
<p>pvcreate  &#x2F;dev&#x2F;vdb</p>
<p>2、检查是否创建</p>
<p>pvscan</p>
<p>3、在已有的VG中加入新的PV</p>
<p>vgextend   [vg name]  &#x2F;dev&#x2F;vdb</p>
<p>4、检查VG</p>
<p>vgdisplay</p>
<p>得到Free PE&#x2F;Size 中的PE数量</p>
<p>5、放大LV</p>
<p>lvresize  -l  +[PE数量]  [LV的物理地址]</p>
<p>例如：lvresize  -l  +25599   &#x2F;dev&#x2F;vg_livedvd&#x2F;lv_root</p>
<p>6、完整的将LV扩容到整个文件系统</p>
<p>resize2fs  [LV的物理地址]</p>
]]></content>
      <tags>
        <tag>Server&amp;OS</tag>
      </tags>
  </entry>
  <entry>
    <title>PHP中foreach与引用的坑</title>
    <url>/2014/06/01/foreach-point-in-php.html</url>
    <content><![CDATA[<figure class="highlight plaintext"><table><tr><td class="code"><pre><span class="line">&lt;?php</span><br><span class="line">$a = array(1,2,3);</span><br><span class="line">foreach($a as $k =&gt; &amp;$v)&#123;</span><br><span class="line">    echo $v;</span><br><span class="line">&#125;</span><br><span class="line">foreach($a as $k =&gt; $v)&#123;</span><br><span class="line">    echo $v;</span><br><span class="line">&#125;</span><br><span class="line">?&gt;</span><br></pre></td></tr></table></figure>

<p>这段程序的最终输出结果是123122.</p>
<p>原因解释：因为第一次foreach的时候使用了引用，所以，$v依次指向了$a[0],$a[1],$a[2]这几个空间，而foreach结束的时候，对于$v引用最后的一个值是不处理的，这个在php官方手册foreach部分有warning。因此这就导致了，第二次没有引用的循环的时候，$a[0]赋值给$v的时候，其实是赋值到了$v在上一次循环结束时引用的空间里的，也就是$a[2]指向的空间，第二遍循环的第一次结束后，数组$a的值就是1\2\1，第二次是1\2\2，第三次是1\2\2。</p>
]]></content>
      <tags>
        <tag>编程语言</tag>
      </tags>
  </entry>
  <entry>
    <title>《DON&#39;T MAKE ME THINK》笔记</title>
    <url>/2014/05/09/dont-make-me-think-note.html</url>
    <content><![CDATA[<p>昨天下午花了3个小时，把《DON’T MAKE ME THINK》读完了，收获很多，虽然这并不是一本讲后端开发的书，但是还是对我现在的工作和兴趣很有启发。</p>
<p>最开心的第一件事就是在开篇的导读中，有一点的旁白注释很让我激动。作者在阐述“你不需要面面俱到”这个思路的时候，举了《血字的研究》中一段来当例子，当华生得知福尔摩斯不知道地球围绕太阳旋转时很震惊，而福尔摩斯对华生则说到“这与我有什么关系呢？你说我们在围着太阳转，就算我们事在围着月亮转，对我或我的工作也不会有半毛钱的影响。”这就是我从初中就在坚持的东西，可惜因为中国的教育制度还是要学很多别的东西，但也并不是坏事，只是耽误了很多时间罢了。</p>
<p>关于设计方面，最重要的一点就是作者一直强调的，不要让用户去思考，因为毕竟互联网时代，用户打开浏览器后，要面临的选择太多了。其次还要注意不要轻易去挑战习惯用法。再就是要保持整站的页面风格统一，以及一些必要的元素的位置必须要注意，比如站点ID，页面名称，栏目和下一级栏目，页内导航，“你在这里”指示器，搜索。</p>
<p>最后讲到的就是关于可用性测试。这一部分其实是对我影响最大的地方。主要还是要做到，测试先行，而不是几个开发人员坐在一起争论或者意淫用户的需求。其实作者根据他的经验，表达了这么一个意思，一千个读者就有一千个哈姆雷特。所以说，用户的需求并不是统一的，但是我们可以做的是让大部分用户的体验及格，而不是让大部分用户的体验全都是满分。</p>
<p>另外还有一句话，我很喜欢，“不要太看重人们对新功能的要求”。这一点我是经历过了不止一次，因为我经常做一些大家看来是半成品的小玩意，大家总是再说你应该要有这个功能，你应该有那个功能。就像作者说的，细问一下，的确是他们已经找到了一个很好的网站，能做到他们所谓的我应该添加的功能，而我即使做出了这样的功能，也不大可能会让他们切换到我这里来的。“他们只是在告诉你他们的喜好而已”。这让我想起了另外一句从别的地方看到的话，“有时候用户其实也不知道他自己需要什么”，所以有时候，我们可以听取用户的声音，但是不要被用户的声音带着走。</p>
]]></content>
      <tags>
        <tag>随笔</tag>
      </tags>
  </entry>
  <entry>
    <title>php中++和%的优先级</title>
    <url>/2014/05/26/summation-and-modular-s-priority-in-php.html</url>
    <content><![CDATA[<p>设计了个小实验，代码如下：</p>
<figure class="highlight plaintext"><table><tr><td class="code"><pre><span class="line">&lt;?php</span><br><span class="line">$i=1;</span><br><span class="line">print $i++;</span><br><span class="line">print $i;</span><br><span class="line">print $i%4;</span><br><span class="line">print $i++%4;</span><br><span class="line">print ++$i%4;</span><br><span class="line">print 4%++$i;</span><br><span class="line">print 4%$i++;</span><br><span class="line">?&gt;</span><br></pre></td></tr></table></figure>

<p>执行结果是1222044. 然后我就跟妹子说书上说的对，果然是++优先，然后自己还在茫然的时候，妹纸说，其实问你这个是因为不明白6和9。。。。然后我又一看，果然第9行，又是个++。。。。 我重新看了遍我的代码，发现了我最后的一行其实是错误的设计，最后一行的取值收到了上一行的影响，我重新设计了一下，如下：</p>
<figure class="highlight plaintext"><table><tr><td class="code"><pre><span class="line">&lt;?php</span><br><span class="line">$i=1;</span><br><span class="line">print $i++;</span><br><span class="line">print $i;</span><br><span class="line">print $i%4;</span><br><span class="line">print $i++%4;</span><br><span class="line">print ++$i%4;</span><br><span class="line">print 4%++$i;</span><br><span class="line">$i=4;</span><br><span class="line">print 4%$i++;</span><br><span class="line">print $i;</span><br><span class="line">?&gt;</span><br></pre></td></tr></table></figure>

<p>重新执行，结果是12220405.<br>问题其实就是出在<br>4%++$i 执行前，$i&#x3D;&#x3D;5，导致4%$i++变成了4%5++，<strong>这就出现了，4%5和4%6的结果都是4，没法判断到底是%优先还是++优先了。。。</strong>修正后的试验就是4%4++，试验说明，先执行了%，然后才是++。</p>
<p>好蛋疼的东西，最后我跟妹纸说，实际开发的时候，都是直接上小括号了，对己对伙伴都有好处，不要埋坑。。</p>
]]></content>
      <tags>
        <tag>编程语言</tag>
        <tag>理论</tag>
      </tags>
  </entry>
  <entry>
    <title>sublime在linux下无法输入中文</title>
    <url>/2014/07/03/sublime-cannot-input-chinese-in-linux.html</url>
    <content><![CDATA[<p><a href="http://www.sublimetext.com/forum/viewtopic.php?f=3&t=7006&start=10#p41343">http://www.sublimetext.com/forum/viewtopic.php?f=3&t=7006&start=10#p41343</a></p>
]]></content>
      <tags>
        <tag>Server&amp;OS</tag>
      </tags>
  </entry>
  <entry>
    <title>svn常用命令</title>
    <url>/2014/07/09/svn-usual-command.html</url>
    <content><![CDATA[<p>1、</p>
<p>cl  &#x3D;&#x3D;  checklist</p>
<p>增加新的checklist</p>
<p>svn cl [list name] [file lists]</p>
<p>从checklist中删除</p>
<p>svn cl –remove [file name]</p>
<p>2、</p>
<p>列出某版本变动的文件列表</p>
<p>svn diff -r XX:YY –summarize</p>
]]></content>
      <tags>
        <tag>理论</tag>
      </tags>
  </entry>
  <entry>
    <title>远程开启3389</title>
    <url>/2014/07/12/open-remote-sevice.html</url>
    <content><![CDATA[<p>前提，开启了23.</p>
<figure class="highlight plaintext"><table><tr><td class="code"><pre><span class="line">REG ADD HKLM\SYSTEM\CurrentControlSet\Control\Terminal&quot; &quot;Server /v fDenyTSConnections /t REG_DWORD /d 00000000 /f</span><br></pre></td></tr></table></figure>

]]></content>
      <tags>
        <tag>Hacker</tag>
      </tags>
  </entry>
  <entry>
    <title>关于canvas的线宽</title>
    <url>/2014/09/14/sth-about-canvas-line-width.html</url>
    <content><![CDATA[<p>关于在canvas中的线宽，需要注意的是，线的宽度是以线的起点坐标，向两边各半个线宽值形成的。</p>
]]></content>
      <tags>
        <tag>前端</tag>
      </tags>
  </entry>
  <entry>
    <title>关于PHP中的超时研究</title>
    <url>/2014/09/26/something-about-php-timeout.html</url>
    <content><![CDATA[<p>在PHP脚本中可以使用 set_time_limit 来设置脚本的执行最大时间限制，但是用于网络连接的时间则不会计算在这里面。下面我们看两个例子，来验证一下。</p>
<p><strong>例一：</strong><br>    &lt;?php<br>    set_time_limit(2);<br>    for($i&#x3D;1;$i&lt;100000000000000;$i++){<br>        $a &#x3D; array(12,34,123,3412,1234123,12341234,12341234,123412341,1234123);<br>        $v &#x3D; array(‘dfsdfasdfasdfsadf’,’fasdfsadfasdf’,’fasdfasdf’,’fasdfasdfasdfasd’);<br>        array_merge($a,$v);<br>    }</p>
<p>该例子是一个纯运行的php脚本，执行结果</p>
<pre><code>Fatal error: Maximum execution time of 2 seconds exceeded in /home/ety001/wwwroot/localhost/time.php on line 6
</code></pre>
<p>可见，我们设置的set_time_limit(2)生效了，在脚本执行到两秒的时候，虽然没有运行结束，但是php还是强制停止了脚本的运行。</p>
<p><strong>但是我们还需要捕获到这个异常情况，并进行相应的处理。</strong></p>
<p><strong>PHP异常处理中可以通过set_error_handler来捕获.，但是却只能捕获 NOTICE&#x2F;WARNING 级别的错误， 对于 E_ERROR 是无能为力的。</strong></p>
<p><strong>register_shutdown_function 能解决 set_error_handler 的不足.</strong></p>
<span id="more"></span>通过此函数注册好程序结束回调函数，就可以捕获平时捕获不到的错误了，再通过 error_get_last 对错误进行判断，就容易找出难以定位的问题了。

<p>修改完善后的代码如下：</p>
<pre><code>&lt;?php
set_time_limit(2);
register_shutdown_function(&#39;shutdown_function&#39;);
for( $i=1;$i&lt;100000000000000;$i++)&#123;
    $a = array(12,34,123,3412,1234123,12341234,12341234,123412341,1234123);
    $v = array(&#39;dfsdfasdfasdfsadf&#39;,&#39;fasdfsadfasdf&#39;,&#39;fasdfasdf&#39;,&#39;fasdfasdfasdfasd&#39;);
    array_merge($a,$v);
&#125;
function shutdown_function()  
&#123;  
        $error_no_arr = array(1=&gt;&#39;ERROR&#39;, 2=&gt;&#39;WARNING&#39;, 4=&gt;&#39;PARSE&#39;, 8=&gt;&#39;NOTICE&#39;, 16=&gt;&#39;CORE_ERROR&#39;, 32=&gt;&#39;CORE_WARNING&#39;, 64=&gt;&#39;COMPILE_ERROR&#39;, 128=&gt;&#39;COMPILE_WARNING&#39;, 256=&gt;&#39;USER_ERROR&#39;, 512=&gt;&#39;USER_WARNING&#39;, 1024=&gt;&#39;USER_NOTICE&#39;, 2047=&gt;&#39;ALL&#39;, 2048=&gt;&#39;STRICT&#39;);
        $e = error_get_last();    
        print_r($e);
        echo $error_no_arr[$e[&#39;type&#39;]];
&#125;
</code></pre>
<p><strong>例二：</strong></p>
<p>文件time.php</p>
<pre><code>&lt;?php
set_time_limit(2);
$url = &quot;http://localhost/aaa.php&quot;;  
$ch = curl_init($url); 
$html = &#39;&#39;;  
curl_setopt($ch, CURLOPT_TIMEOUT, 10);  
curl_setopt($ch, CURLOPT_RETURNTRANSFER, true);  
$html = curl_exec($ch);  
curl_close($ch);  
echo &#39;test1&#39;.$html;
</code></pre>
<p>文件aaa.php</p>
<pre><code>&lt;?php
sleep(10000);
echo &#39;test2&#39;;
</code></pre>
<p>访问time.php，得到的结果如下，</p>
<pre><code>1411753875

test1

1411753885
</code></pre>
<p>可见，set_time_limit 对于网络连接是无法限制的，如果要是有数据来自于网络服务接口，那么需要设置相应的网络超时时间。</p>
]]></content>
      <tags>
        <tag>编程语言</tag>
      </tags>
  </entry>
  <entry>
    <title>nfs的一些配置项介绍</title>
    <url>/2014/07/20/nfs-configure-description.html</url>
    <content><![CDATA[<p>简单理解rw就是可以写，前面要加上主机信息或者*表示所以的主机都可以写<br>ro就是只读的表示<br>至于权限方面 (就是小括号内的参数) 常见的参数则有：<br>•        rw：read-write，可擦写的权限；<br>•        ro：read-only，只读的权限；<br>•        sync：数据同步写入到内存与硬盘当中；<br>•        async：数据会先暂存于内存当中，而非直接写入硬盘！<br>•        no_root_squash：<br>登入 NFS 主机使用分享目录的使用者，如果是 root 的话，那么对于这个分享的目录来说，他就具有 root 的权限！ 这个项目『极不安全』，不建议使用！<br>•        root_squash：<br>在登入 NFS 主机使用分享之目录的使用者如果是 root 时，那么这个使用者的权限将被压缩成为匿名使用者，通常他的 UID 与 GID 都会变成 nobody(nfsnobody) 那个系统账号的身份；<br>•        all_squash：<br>不论登入 NFS 的使用者身份为何， 他的身份都会被压缩成为匿名使用者，通常也就是 nobody(nfsnobody) 啦！<br>•        anonuid：<br>anon 意指 anonymous (匿名者) 前面关于 *_squash 提到的匿名使用者的 UID 设定值，通常为 nobody(nfsnobody)，但是您可以自行设定这个 UID 的值！当然，这个 UID 必需要存在于您的 &#x2F;etc&#x2F;passwd 当中！<br>•        anongid：同 anonuid ，但是变成 group ID 就是了！</p>
]]></content>
      <tags>
        <tag>Server&amp;OS</tag>
      </tags>
  </entry>
  <entry>
    <title>把博客从wordpress转移到gitpage了，新的开始</title>
    <url>/2014/11/22/move-blog-to-git-page.html</url>
    <content><![CDATA[<p>想换gitpage已经想了很久了，但是嫌麻烦就一直拖着，不过这次是真的要换了，因为我的vps快到期了，而手头不充裕的资金也决定了只能放弃vps了。</p>
<p>从上周就已经开始转移服务器上的博客数据了，今天把域名做好了解析，也算是真正的转移完了博客，接下来要做的事情就是找时间把vps上其他的网站数据开始转移，由于网站太多，转移起来还真是太麻烦。</p>
<p>暂且放下这一支不表，说一说博客转移后该如何来写博客。从2010年开始写博客已经有四年的时光了，但是貌似没有真正的在写博客，而只是拿wordpress这个程序当做是一个记事本。每年花钱买了个服务器来当记事本用，现在想想也是醉了。博客，应该是一个记录思想的地方，那么就要注重文字的质量、和大脑的思考过程。现在我选择了Jekyll，而Jekyll也正是专注于文字本身的，因此以后希望自己真正可以记录下些很赞的思考过程。那么接下来要花些时间把原来博客的多数分类砍掉，删掉若干不需要的文章，慢慢浓缩自己博客中的精华内容。</p>
<p>新的选择，心的开始！</p>
]]></content>
      <tags>
        <tag>网站日志</tag>
      </tags>
  </entry>
  <entry>
    <title>解决ios设备iframe无法拖动问题</title>
    <url>/2014/10/23/fix-ios-cannot-drag-webpage-in-iframe.html</url>
    <content><![CDATA[<p>需要在iframe 外面的div加上</p>
<figure class="highlight plaintext"><table><tr><td class="code"><pre><span class="line">overflow: auto;</span><br><span class="line">-webkit-overflow-scrolling: touch;</span><br></pre></td></tr></table></figure>

]]></content>
      <tags>
        <tag>前端</tag>
      </tags>
  </entry>
  <entry>
    <title>一种新的设置Centos开机服务的方法</title>
    <url>/2014/11/27/centos-service-startup.html</url>
    <content><![CDATA[<p>我平时用的最多的就是</p>
<blockquote>
<p>chkconfig –add XXX</p>
</blockquote>
<p>今天看到一个新的命令：</p>
<blockquote>
<p>ntsysv</p>
</blockquote>
<p>另外，如果系统上没有安装crontab，那么安装命令是：</p>
<blockquote>
<p>yum install vixie-cron</p>
</blockquote>
]]></content>
      <tags>
        <tag>Server&amp;OS</tag>
      </tags>
  </entry>
  <entry>
    <title>在vbox的linux虚拟机中挂载vbox共享</title>
    <url>/2014/12/01/mount-vbox-share-in-the-virtual-machine.html</url>
    <content><![CDATA[<p>只需要一条命令即可：</p>
<blockquote>
<p>mount -t vboxsf home_wwwroot &#x2F;home&#x2F;wwwroot&#x2F;</p>
</blockquote>
<p>其中，home_wwwroot是在vbox中设置的共享的名字，&#x2F;home&#x2F;wwwroot是在虚拟机中要挂载到的路径。</p>
]]></content>
      <tags>
        <tag>Server&amp;OS</tag>
      </tags>
  </entry>
  <entry>
    <title>努力和刻苦可以决定你的下限，但天赋和智商才能决定你的上限</title>
    <url>/2015/01/14/do-what-i-need-to-do.html</url>
    <content><![CDATA[<p>本来中国队赢球，提前一轮小组头名出现，挺高兴的，去新浪微博看看评论吧。结果扫到了一条微博，心情直接就不好了，<br>我想我还是好好开发代码去吧，不逛微博了。。。。内容如下：</p>
<img src="/assets/img/20150114.jpg">

]]></content>
      <tags>
        <tag>随笔</tag>
      </tags>
  </entry>
  <entry>
    <title>vagrant中的nginx对于静态文件的乱码问题</title>
    <url>/2014/12/30/vagrant-nginx-js-css-messy-code.html</url>
    <content><![CDATA[<p>把nginx.conf中的sendfile修改为off即可。</p>
]]></content>
      <tags>
        <tag>前端</tag>
        <tag>Server&amp;OS</tag>
      </tags>
  </entry>
  <entry>
    <title>孤独，渴望，被爱</title>
    <url>/2014/12/12/think-after-seeing-the-film-her.html</url>
    <content><![CDATA[<p>本来要睡了，哥们突然在群里发了个电影名字，说，这就是我们要做的东西。<br>好奇心驱使，就看了，然后就一发不可收拾。</p>
<p>这个电影叫做《her》，第86届奥斯卡最佳原创剧本奖，而这些都是看完才知道的。<br>本以为是部科幻片，结果两个小时结束，发现牛逼的科技只是一个工具，它只是一根线索，<br>串起了整个故事。这是个触动心灵，引人深思而又值得回味的文艺片。<br>影片的节奏很慢，没有大起大落的情节，几曲舒缓的音乐，几幅美好的画面，几个愉快的场景，几段淡淡忧伤的故事，却紧紧抓住人心，正是因为片子对于人与人在心灵层面上的情感交流的细腻描述，让我们感觉到了我们一直期望得到的东西就在那里。<br>也正是这一系列的描述与画面，让我们随着影片故事的推进，一直在思考，思考我们现在的生活到底缺失的东西是什么？</p>
<p>我们希望我们爱的人，无时不在，什么时候都能听到对方的声音，希望我们爱的人，只关注自己，稍微有点风吹草动，就会吃醋。希望我们爱的人，能够理解自己，希望我们爱的人，成为我们想象中的样子，只是因为自己觉得我们自己非常爱对方，也正是因为这些事情而常常出现争吵，甚至最后分手。我们总觉的我们是有多么爱对方，选择自己认为对的方式来表达自己的爱，而这也许就是现在的我们。</p>
<p>我们总是害怕黑暗，其实我们只是害怕自己一个人在黑暗中的那丝孤独感。被爱，这也许就是我们最想得到的，因为这样就不再孤独。一起经历美好的事情，一起笑过、哭过，一起度过生命的每一天，这也许就是我们真正期望得到的东西。</p>
]]></content>
      <tags>
        <tag>随笔</tag>
      </tags>
  </entry>
  <entry>
    <title>nokia 808 相机拍摄技巧</title>
    <url>/2015/01/07/nokia-camara-trick.html</url>
    <content><![CDATA[<p>目前市场上的拍照手机，真的是非常多但毋庸置疑的是稳坐第一的是诺基亚808 pureview，不过光有好手机是没用的，近期诺基亚官方博客推出了拍照教程，我们赶紧来学习下吧！</p>
<h2 id="一、拍摄模式"><a href="#一、拍摄模式" class="headerlink" title="一、拍摄模式"></a>一、拍摄模式</h2><p>这是每部先进的拍照手机都应当具备的功能，所支持的拍摄模式有：</p>
<ul>
<li>自动模式：这是默认模式，适用于大部分场景和拍摄需要。</li>
<li>场景模式：<br>提供多种预设场景的选择，包括人像、风光、微距、运动、雪地、夜景人像、聚光灯模式。每种场景的参数已进行了最佳设置。</li>
<li>创意模式：允许用户手动设置所有影响成品质量的关键参数。</li>
</ul>
<p>我们会在创意模式上多花些功夫，因为用户一旦熟练掌握了这一模式，就能拍出比以前更新颖、更俏气的照片。</p>
<h2 id="二、曝光和白平衡"><a href="#二、曝光和白平衡" class="headerlink" title="二、曝光和白平衡"></a>二、曝光和白平衡</h2><p>为了获得色彩逼真的图片，创意模式提供了多种现成的白平衡设置：阳光、自动、多云、白炽和荧光。曝光是指拍照过程中相机所采集到的光量。摄影爱好者都知晓，巧妙利用曝光能拍出引人驻足的图片。创意模式中，按下屏幕左侧的曝光图标来显示动态直方图，该图有助于评测成像的曝光程度。为获得最佳效果，建议选择拍摄主体最亮的部分来曝光，让相机相应降低曝光值，来防止白色区域因曝光过度丢失太多细节，形成不理想的效果。</p>
<p>当拍摄场景中的光线存在巨大反差时，即一部分非常亮另一部分非常暗，那么建议使用补光灯&#x2F;填充式闪光灯。半按手机顶端的机械快门键，可以锁定自动曝光。</p>
<h3 id="弱光下拍摄"><a href="#弱光下拍摄" class="headerlink" title="弱光下拍摄"></a>弱光下拍摄</h3><ul>
<li><p>ISO（感光度）是用来评测照相机对光的敏感程度。<br>通常来说，ISO越高，在弱光条件下（如黄昏）拍出的图片就越亮。</p>
</li>
<li><p>ISO 可以设置为“自动”，创意模式中ISO可以在 50 到 1600范围内任意调整。<br>在弱光条件下，使用“纯景 PureView”感应器模式，以200、300、500 或 800万像素尺寸输出，均可获得品质良好的图像。如果将曝光时间延长至 2.7秒，同时降低ISO值（如50），则可得到基本没有噪点的图像。<br>在光线较暗的情况下，还建议使用三脚架或“夜间”模式来拍摄。</p>
</li>
</ul>
<h2 id="三、减光镜"><a href="#三、减光镜" class="headerlink" title="三、减光镜"></a>三、减光镜</h2><p>使用减光镜（ND镜）可以拍出运动模糊效果。创意模式下支持减光镜功能。减光镜选项打开后，手动降低ISO值（如50），相机便能进行长时间曝光（长达 2.7 秒），甚至在强光条件下也做得到。这些设置有助于实现下图中惊涛拍岸、浪花飘逸的效果。</p>
<ul>
<li>1、变焦</li>
</ul>
<p>用手指垂直在手机屏幕上划动来进行变焦。相机分辨率只有设置在200、300、500或800万像素时变焦才能使用。变焦倍数取决于分辨率的大小，对于500万像素的输出分辨率，相机可实现最大3倍变焦，而且这一操作并不降低成像质量或引起画面细节丢失。要获得最佳的成像质量，建议仅在白天使用变焦功能。</p>
<ul>
<li>2、特写</li>
</ul>
<p>在“场景”拍摄模式下，使用预定义设置就能拍出很好的特写照片（自动模式和创意模式之前做过介绍），或者在“创意”模式下，长按住手机屏幕也可打开“特写”。为了得到最好的特写图片，建议使用 500万像素的“纯景PureView”模式，同时用上最大3倍的变焦。注意闪光灯仅适合在15厘米的距离范围内使用。</p>
<ul>
<li>3、“散景”效果</li>
</ul>
<p>清晰地对焦于前景物体，而将背景大大虚化是专业摄影师常用到的技法，即所谓的“散景”效果(The Bokeh Effect)。808 PureView的焦距长达8.02mm，而普通拍照手机的焦距仅为4mm，所以808能够拍出接近于单反相机上的散景效果。要得到漂亮的散景效果，拍摄物体应该在808 PureView前方半米之内，而且背景离物体越远，虚化效果就越好。</p>
<h2 id="四、视频"><a href="#四、视频" class="headerlink" title="四、视频"></a>四、视频</h2><p>诺基亚808 PureView不仅能拍出好照片，还能录制高清视频。</p>
<p>当手机处于拍照模式时，可以从屏幕右上方选择视频模式。同样，在屏幕上滑动手指可实现变焦，视频中的变焦操作对画面质量也无任何影响，输出支持三种分辨率（包括全高清）。</p>
<p>屏幕的左下角是“连续自动对焦”，若选择的话，视频镜头就会自动对准画面中心的物体。另外，点按屏幕任意一点，可选择并锁定其为对焦区域。在弱光条件下，可以使用辅助LED视频灯光，该灯光有效范围在1米左右。</p>
<h3 id="是否可以调整手机相机的曝光时间-快门速度-？"><a href="#是否可以调整手机相机的曝光时间-快门速度-？" class="headerlink" title="是否可以调整手机相机的曝光时间 (快门速度)？"></a>是否可以调整手机相机的曝光时间 (快门速度)？</h3><p>您无法直接调整曝光时间，但是可以通过多种途径间接影响曝光时间。</p>
<p>在场景拍摄模式中，某些场景模式对曝光时间进行了调整。</p>
<p>运动照片场景模式和聚光灯照片场景模式使用较短的曝光时间，以便拍摄出清晰的动作照片。</p>
<p>夜间照片场景模式和夜间肖像照片场景模式的曝光时间比自动模式或其他场景模式的曝光时间都要长。</p>
<p>在使用这些夜间模式时，您需要让相机保持相当平稳的状态，才能拍摄出清晰的照片。</p>
<p>在创意拍摄模式中，您可以使用 ISO、ND 滤光镜和曝光补偿设置来影响曝光时间。 此外，闪光灯模式也对曝光时间有影响。</p>
<h3 id="什么是-ISO？它如何影响照片效果？"><a href="#什么是-ISO？它如何影响照片效果？" class="headerlink" title="什么是 ISO？它如何影响照片效果？"></a>什么是 ISO？它如何影响照片效果？</h3><p>ISO 感光度相当于模拟摄影中的胶卷感光速度。</p>
<p>ISO 值越小，相机胶卷或感应器对光线的敏感度就越低。</p>
<p>ISO 值越大，相机胶卷或感应器对光线的敏感度就越高。 较高的 ISO 值支持在昏暗的光线环境中拍摄照片。</p>
<p>ISO 值会影响曝光时间 (快门速度)。</p>
<p>如果光圈恒定，ISO 的值增加一倍 (例如从 100 增加到 200)，曝光时间将减为一半 (快门速度更快)。</p>
<p>在大多数情况下，使用自动 ISO 设置即可获得最佳的拍摄效果。</p>
<p>如果使用的 ISO 值较高 (如 400、800 或 1600)，照片中的噪点会比 ISO 值较低时多。 但是，曝光时间比 ISO 值较低时要短。</p>
<p>此外，移动对象的模糊度会降低，因相机抖动造成的照片模糊程度也可能有所降低。<br>与较高的 ISO 值相比，ISO 值较低时 (例如 50 和 100)，照片的图像质量更好，即噪点更少，允许的动态范围也更大。 但是，与 ISO 值较高时相比，曝光时间则更长。 此外，移动对象的模糊度会升高，因相机抖动造成的照片模糊度也可能更高。<br>要更改 ISO 设置，请务必处于创意拍摄模式中，然后选中左侧的 ISO 图标。</p>
<h3 id="如何获得较长的曝光时间？"><a href="#如何获得较长的曝光时间？" class="headerlink" title="如何获得较长的曝光时间？"></a>如何获得较长的曝光时间？</h3><p>在创意拍摄模式中，选择较低的 ISO 值 (如 50 或 100)。此外，您还可以打开 ND 滤光镜。 这可以帮助您在明亮的光线下 (例如白天光线明亮的户外) 获得更长的曝光时间。</p>
<h3 id="如何使用手机相机的不同场景模式？其中都包括哪些设置？"><a href="#如何使用手机相机的不同场景模式？其中都包括哪些设置？" class="headerlink" title="如何使用手机相机的不同场景模式？其中都包括哪些设置？"></a>如何使用手机相机的不同场景模式？其中都包括哪些设置？</h3><p>####*** 用于照片拍摄的场景模式一共有九种。</p>
<pre><code>风景： 对焦模式被设置为无限远。 与自动场景模式相比，白平衡和锐化程度都进行了调整。 面部检测功能处于关闭状态。

自动： 自动设置曝光、对焦、白平衡、面部检测和 ISO 感光度。 闪光灯也预设为自动模式。 与自动拍摄模式相比，色彩饱和度略低。

特写： 自动对焦针对短距离进行了调整。 对焦范围为 15 厘米至 50 厘米左右。

肖像： 使用了消除红眼的闪光灯设置。 曝光程序和照片锐化程度已经过调整，适合拍摄肖像照片。 面部检测功能处于启用状态。 如果相机检测到一张或多张面部，会根据面部区域调整自动对焦、自动调整白平衡和自动曝光。

运动： 焦距固定且被设为超焦距，这样一来，从几米之外开始到无穷远的地方，就都可以获得最佳对焦效果。 曝光时间很短。 面部检测功能处于关闭状态。 由于这种场景模式的对焦方式是超焦距对焦，因此不适合拍摄特写照片。

夜间： 曝光设置专用于较暗光线下的拍摄。 闪光灯处于关闭状态。

夜间肖像： 这种模式与夜间模式类似，但闪光灯被设置为消除红眼模式。

聚光灯： 采用了负向曝光补偿 (EV)。 此模式最适合具有巨大反差的环境 (例如音乐会)，表演者位于聚光灯下而背景昏暗。

雪景： 此模式可用于在非常亮白的雪景中拍摄美丽的照片。 此模式的设置与自动模式类似，但曝光值有所增加，采用了一定的正向曝光补偿 (EV)。对于视频录制来说，有五种适用的场景模式。

自动： 采用自动曝光、对焦、白平衡、面部检测和 ISO 感光度。 与自动拍摄模式相比，色彩饱和度略低。

弱光： 这种模式专用于在弱光和暗光环境下录制视频。 视频灯处于打开状态。 帧速率为 15 帧/秒。

运动： 焦距被固定为超焦距，这样一来，从几米之外开始到无穷远的地方，就都可以获得最佳对焦效果。 此模式不适合录制特写视频。

聚光灯： 采用了负曝光补偿 (EV)。 此模式最适合具有巨大反差的环境 (例如音乐会)，表演者位于聚光灯下而背景昏暗。

雪景： 此模式可用于在非常亮白的雪景中拍摄美丽的照片。此模式的设置与自动模式类似，但曝光值有所增加，采用了一定的正曝光补偿 (EV)。要选择某种场景模式，请确保手机处于场景拍摄模式中。 要切换拍摄模式，请选择设置图标，然后选择场景。 然后点击取景窗口左下角的场景图标，选择一个场景模式。
</code></pre>
<h3 id="诺基亚套件里面找到的关于相机中的对焦模式有哪些？如何使用？"><a href="#诺基亚套件里面找到的关于相机中的对焦模式有哪些？如何使用？" class="headerlink" title="诺基亚套件里面找到的关于相机中的对焦模式有哪些？如何使用？"></a>诺基亚套件里面找到的关于相机中的对焦模式有哪些？如何使用？</h3><p>对焦模式决定了相机针对拍摄目标进行对焦的方式。</p>
<h4 id="手机相机中有四种对焦模式："><a href="#手机相机中有四种对焦模式：" class="headerlink" title="手机相机中有四种对焦模式："></a>手机相机中有四种对焦模式：</h4><p>*** 无限远。</p>
<pre><code>当您想要拍摄极远处对象的清晰照片时，可以使用无限远对焦模式。
这是拍摄风景照时最常用的模式。
还有一个优势就是，这种模式不会发生自动对焦中容易存在的延时现象。
此对焦模式只适用于拍摄照片。
</code></pre>
<p>*** 超焦距 (HF)。</p>
<pre><code>使用超焦距对焦可以获得最大的景深 (DOF)，
即从几米之外的地方开始到远处都能拍摄出清晰的照片。
例如，您或许想要透过车窗拍摄照片或录制视频。
采用超焦距对焦，您可避免相机对焦在车窗上。
这种对焦模式的另一个好处是，不会发生自动对焦延时，
这在拍摄运动照片或动作照片时是个优势。
由于对焦始终稳定，您可以在特定情况下使用超焦距对焦。
超焦距对焦不适合拍摄特写照片或录制特写视频。
</code></pre>
<p>*** 特写。</p>
<pre><code>在特写对焦模式下，
自动对焦被调整为针对较短的距离 (约 15 厘米 - 50 厘米) 进行对焦。
如果您想要获得最佳短距离拍摄效果，
并计划拍摄一组特写照片，则可以使用这种对焦模式。
使用这种对焦模式录制视频时，
连续自动对焦 (CAF) 的适用距离为 15 厘米至 80 厘米左右。
</code></pre>
<p>*** 自动。</p>
<pre><code>如果您不想作任何调整，
那么对于大部分的照片和视频来说，
自动对焦模式的效果就相当不错。
用拍摄键拍摄照片时，
自动对焦的适用距离为 25 厘米左右到无限远，即整个变焦范围。
触摸对焦适用整个距离范围，
即从 15 厘米左右到无限远，同样是整个变焦范围。
使用自动模式录制视频时，
连续自动对焦 (CAF) 的适用距离为 50 厘米左右至无限远。
拍摄照片或录制视频时，
如果想要获得浅景深 (DOF) 和漂亮柔和的背景虚化效果，
可选择近距离对焦。
要在拍摄照片时更改对焦模式，
请务必处于创意拍摄模式中，然后点击并按住屏幕选择对焦模式。
要在录制视频时更改对焦模式，请务必处于创意拍摄模式中，
然后点击取景窗口左下角的连续自动对焦 (CAF) 图标，
关闭连续自动对焦。
用于视频录制的连续自动对焦被关闭后，
相机将使用超焦距对焦模式。
</code></pre>
<p> C1：</p>
<pre><code>PureView纯景模式（像素联合），
分辨率通常为5百万（单张文件约为2mb以内）
或者8百万（单张文件约为3mb）。
可以随时依靠滑动屏幕调整变焦，
感光度通常设置为自动，
色彩为艳丽模式。
</code></pre>
<p>C2：</p>
<pre><code>全像素模式，
根据画幅的不同，
分辨率在3360w（16:9）和3800w（4：3)之间，不可变焦。
单张文件大约在12-13mb上下。
通常设置为最低感光度ISO 50，
其他各类设置都为默认；
</code></pre>
<p>C3：</p>
<pre><code>PureView纯景、黑白色彩模式。
</code></pre>
<h2 id="如何拍路灯"><a href="#如何拍路灯" class="headerlink" title="如何拍路灯"></a>如何拍路灯</h2><pre><code>ISO 50最好。
长按屏幕选择超焦模式。
拍摄标准选择定时10秒或者30秒由你定。
没有三角架的话找个可以依托的物体把手机固定不要让它动就好。
还有要把ND 打开最好。以便可以长时间曝光
如果没带架子，又怕抖，就根据环境随时寻找可以依托手机的物体，
然后开ND，低iso（从50开始，根据不同的情况，适当往上调）。。。
如果也实在找不着可以依托手机的物体，只能纯手持，那就不要开ND，
不要动iso，直接降低曝光补偿即可。。。
</code></pre>
<h2 id="拍日出"><a href="#拍日出" class="headerlink" title="拍日出"></a>拍日出</h2><pre><code>开了ND，
ISO设到50，
+—4EV包围曝光来拍
</code></pre>
<h2 id="拍日落"><a href="#拍日落" class="headerlink" title="拍日落"></a>拍日落</h2><pre><code>饱和度、对比度、锐化程度均设为最高（5),
加点曝光
</code></pre>
<h2 id="拍运动物体"><a href="#拍运动物体" class="headerlink" title="拍运动物体"></a>拍运动物体</h2><pre><code>创意
快门速度 nd
ISO 400，
EV减低，
pv
5mp，
超焦
开闪光灯，
如果还想高就提高ISO。建议200或以下。400就开始有明显的噪点了

设置曝光2.7
滤镜Auto就行了，
主要是ISO要自定义，
关闪光灯，
对焦的点处于弱光环境（周围环境再黑，
你对着LCD屏幕对焦，是不会开启开曝光的），
满足这三个条件，808会自动开启长曝光设置。
</code></pre>
<h2 id="水滴拍摄"><a href="#水滴拍摄" class="headerlink" title="水滴拍摄"></a>水滴拍摄</h2><pre><code>在PV微距模式下
开闪光
开ND，其它不用多设置，
水滴较小，
建议用500W或200W模式拉近，
这样主体才会在画面中占一定美感的比例
</code></pre>
<h2 id="如何使用无损变焦拍摄"><a href="#如何使用无损变焦拍摄" class="headerlink" title="如何使用无损变焦拍摄"></a>如何使用无损变焦拍摄</h2><pre><code>设置 |创意模式
感应器模式 |纯景PureView
分辨率 |800万或500万或300万随意
宽高比 |4:3
JPEG品质 |超精细
</code></pre>
<h2 id="如何拍摄流光溢彩的夜景"><a href="#如何拍摄流光溢彩的夜景" class="headerlink" title="如何拍摄流光溢彩的夜景"></a>如何拍摄流光溢彩的夜景</h2><pre><code>ISO	50
ND滤镜	开
闪光灯	关闭
三脚架	需要（或者用其他物品代替）
如何拍摄微距
设置	创意模式
感应器设置	纯景PureView
对焦模式	长按拍照界面选择“特写模式&quot;
构图技巧	被拍摄物体身后的景物一定是呈现一条直线或者曲线，而不是一个平面，否则无法表现出画面的纵深感
</code></pre>
<h2 id="如何拍摄集体合照"><a href="#如何拍摄集体合照" class="headerlink" title="如何拍摄集体合照"></a>如何拍摄集体合照</h2><pre><code>设置	创意模式
感应器模式	全分辨率模式
宽高比	16:9
色调	鲜艳
如何在逆光下拍摄
ISO	自动
ND滤镜	开
JPEG品质	超精细
曝光补偿	可根据拍照界面中画面的明暗适当降低
</code></pre>
<h2 id="如何拍摄人像或运动物体"><a href="#如何拍摄人像或运动物体" class="headerlink" title="如何拍摄人像或运动物体"></a>如何拍摄人像或运动物体</h2><pre><code>设置	创意模式
感应器模式	纯景PureView
宽高比	4;3
JPEG品质	超精细
对焦模式	长按拍照界面选择&quot;快速&quot;或&quot;自动&quot;
如何拍摄自然风光
设置	创意模式
感应器模式	全分辨率
宽高比	16:9
JPEG品质	超精细
对焦模式	长按拍照模式选择&quot;无穷远&quot;
</code></pre>
<h2 id="如何在弱光下拍摄"><a href="#如何在弱光下拍摄" class="headerlink" title="如何在弱光下拍摄"></a>如何在弱光下拍摄</h2><pre><code>ISO	自动
ND滤镜	关
JPEG	超精细
闪光灯	依据情况选择开或者关
曝光补偿	可根据拍照界面中画面的明暗适当增加
</code></pre>
<p>夜间拍照开启闪光消除红眼的设置下红眼还是明显的话可以使用ND滤镜调节进光度，还有拍摄照片用闪光灯的情况下会照片变红的话也可以用ND滤镜试试！</p>
]]></content>
      <tags>
        <tag>杂七杂八</tag>
      </tags>
  </entry>
  <entry>
    <title>背景图片拉伸</title>
    <url>/2015/01/16/full-screen-background-img.html</url>
    <content><![CDATA[<p>需要做一个页面让背景图片能全屏平铺，对于现代浏览器来说很简单，使用下面的代码即可：</p>
<figure class="highlight plaintext"><table><tr><td class="code"><pre><span class="line">body&#123;</span><br><span class="line">    background:url(../../img/user/user_bg_2.jpg) no-repeat center center fixed;</span><br><span class="line">    -webkit-background-size: cover;</span><br><span class="line">    -moz-background-size: cover;</span><br><span class="line">    -c-background-size: cover;</span><br><span class="line">    background-size: cover;</span><br><span class="line">&#125;</span><br></pre></td></tr></table></figure>

<p>这个方式可以兼容的浏览器有</p>
<pre><code>* Safari 3+
* Chrome
* IE 9+
* Opera 10+ (Opera 9.5 支持background-size属性 但是不支持cover)
* Firefox 3.6+
</code></pre>
<p>但是蛋疼的IE浏览器，就是不给你面子，当你的背景图片宽度小于当前的浏览器宽度的时候，就会有留白，<br>那么就需要再加上两句，如下</p>
<figure class="highlight plaintext"><table><tr><td class="code"><pre><span class="line">body&#123;</span><br><span class="line">    background:url(../../img/user/user_bg_2.jpg) no-repeat center center fixed;</span><br><span class="line">    -webkit-background-size: cover;</span><br><span class="line">    -moz-background-size: cover;</span><br><span class="line">    -c-background-size: cover;</span><br><span class="line">    background-size: cover;</span><br><span class="line"></span><br><span class="line">    filter: progid:DXImageTransform.Microsoft.AlphaImageLoader(src=&#x27;/res/img/user/user_bg_2.jpg&#x27;, sizingMethod=&#x27;scale&#x27;);</span><br><span class="line">    -ms-filter: &quot;progid:DXImageTransform.Microsoft.AlphaImageLoader(src=&#x27;/res/img/user/user_bg_2.jpg&#x27;, sizingMethod=&#x27;scale&#x27;)&quot;;</span><br><span class="line">&#125;</span><br></pre></td></tr></table></figure>

<p>需要注意的是，需要使用绝对路径。用滤镜硬拉伸，可能需要图片做点高斯模糊，要不然效果会很糟糕。</p>
<p>另外还有用img标签来实现的，可以参照<a href="http://huilang.me/perfect-full-page-background-image/">这篇文章</a>。</p>
]]></content>
      <tags>
        <tag>前端</tag>
      </tags>
  </entry>
  <entry>
    <title>如何自适应高度</title>
    <url>/2015/01/16/auto-detect-height-by-css.html</url>
    <content><![CDATA[<p>今天在做前端页面的时候，想要做一个高度自适应的页面，在css中设置height为100%一直不成功，后来经过调试发现，<br>只需要在父容器中按照以下设置，则可以使用height为100%来动态自适应浏览器的大小变化。</p>
<figure class="highlight plaintext"><table><tr><td class="code"><pre><span class="line">body&#123;</span><br><span class="line">    position: absolute;</span><br><span class="line">    top: 0;</span><br><span class="line">    left: 0;</span><br><span class="line">    right: 0;</span><br><span class="line">    bottom: 0;</span><br><span class="line">&#125;</span><br></pre></td></tr></table></figure>

]]></content>
      <tags>
        <tag>前端</tag>
      </tags>
  </entry>
  <entry>
    <title>bootstrap的modal打开后立即自动关闭</title>
    <url>/2015/01/17/when-click-bootstrap-modal-open-and-auto-close-immediately.html</url>
    <content><![CDATA[<p>今天遇到了一个bootstrap的问题，就是modal打开后，自动又关闭了，感觉像是toggle方法被触发了两次的感觉，<br>最终查到原因是因为modal的js代码加载了两次，去掉多加载的那一遍即可解决问题。</p>
]]></content>
      <tags>
        <tag>前端</tag>
      </tags>
  </entry>
  <entry>
    <title>CentOS mini下安装fat</title>
    <url>/2015/01/22/install-fat-on-centos-mini.html</url>
    <content><![CDATA[<p>CentOS mini下面是没有fat格式的，如果要是想格式化fat格式，所以需要安装下，fat在dosfstools包里面。</p>
<pre><code>yum install dosfstools
</code></pre>
]]></content>
      <tags>
        <tag>Server&amp;OS</tag>
      </tags>
  </entry>
  <entry>
    <title>制作树莓派的镜像</title>
    <url>/2015/01/22/make-image-of-raspberry-pi.html</url>
    <content><![CDATA[<p>今天想用树莓派的时候，发现树莓派的ArchLinux系统坏了，于是就准备重新下载安装，但是发现官网好像已经不再提供现成的镜像了，需要自己手动制作镜像。。。<a href="http://archlinuxarm.org/platforms/armv6/raspberry-pi">点击这里</a>查看官方提供的制作方法，<a href="http://archlinuxarm.org/developers/downloads">下载地址</a>。</p>
<p>由于我用的是OSX，而官方给的教程是在Linux下的操作，于是我就开我的虚拟机操作，但是发现读卡器在虚拟机里的识别有些问题，于是相当要自己做个镜像包。</p>
<p>####第一步 建立空的镜像文件</p>
<pre><code>dd if=/dev/zero of=new.img bs=2M count=512
</code></pre>
<p>因为ArchLinux本身不大，所以建立个1G的镜像文件足够了。</p>
<p>####第二步 用fdisk对new.img进行分区操作</p>
<pre><code>fdisk new.img
</code></pre>
<ul>
<li>输入n进入建立新分区</li>
<li>输入p，选择分区为主分区</li>
<li>回车，默认1</li>
<li>回车，默认开始扇区位置</li>
<li>输入 +100M (引导分区100M足够)</li>
</ul>
<p>这时，第一个分区建立完毕，回到主目录，输入t，再输入c，设置引导分区类型为W95 FAT32（LBA）。（<strong><strong>刚开始烧了4遍，都引导树莓派失败了，就是因为忘记这一步操作了。。</strong></strong>）</p>
<ul>
<li>再输入n进入建立新分区</li>
<li>输入p，选择分区为主分区</li>
<li>回车，默认2</li>
<li>回车，默认开始扇区位置</li>
<li>回车，默认使用剩下所有空间。</li>
</ul>
<p>这样两个分区搞定，输入w，保存分区表，并退出fdisk。</p>
<p>####第三步 挂载new.img成为设备</p>
<pre><code>kpartx -av new.img
</code></pre>
<p>之前的两步都是我会的，但是第三步，我着实的折腾了一番，只是知道可以把img挂成设备用，但是不知道怎么搞，从网上搜索的结果，第一个搜索的是用losetup命令，但是出现的问题是，losetup是可以把镜像文件挂载为&#x2F;dev&#x2F;loop0，但是里面的分区一直在&#x2F;dev中找不到。后来搜索 <strong>如何挂载虚拟机镜像</strong> 这个关键词，才找到了这条命令。这条命令执行后，会有以下设备出现</p>
<ul>
<li>&#x2F;dev&#x2F;loop0</li>
<li>&#x2F;dev&#x2F;mapper&#x2F;loop0p1</li>
<li>&#x2F;dev&#x2F;mapper&#x2F;loop0p2</li>
</ul>
<p>####第四步 格式化，挂载，并写入文件</p>
<pre><code>mkfs.vfat /dev/mapper/loop0p1
mkdir /mnt/boot
mount /dev/mapper/loop0p1 /mnt/boot
mkfs.ext4 /dev/mapper/loop0p2
mkdir /mnt/root
mount /dev/mapper/loop0p2 /mnt/root

#去官网下载ARMv6 Raspberry Pi这个包
#下载后的文件是ArchLinuxARM-rpi-latest.tar.gz

#bsdtar 可能需要自己安装，yum install bsdtar即可
bsdtar -xpf ArchLinuxARM-rpi-latest.tar.gz -C /mnt/root/

#强制缓存写入
sync

#引导文件
mv /mnt/root/boot/* /mnt/boot/

#卸载
umount /mnt/boot/ /mnt/root/
kpartx -d new.img
</code></pre>
<p>这样一个新镜像就做好了，把new.img从虚拟机传出来，用dd直接写入SD卡，成功启动树莓派！</p>
<p>附带两个国内的ArchLinux ARM 的源：</p>
<pre><code>#中科大
Server = http://mirrors.ustc.edu.cn/archlinuxarm/$arch/$repo
#清华
Server = http://mirrors.tuna.tsinghua.edu.cn/archlinuxarm/$arch/$repo
</code></pre>
<p>参考文章：<a href="http://dgc.uchicago.edu/20130530/mounting-a-kvm-disk-image-without-kvm/">Mounting a KVM disk image without KVM</a></p>
<p><strong>码字不易，见好就分享~</strong></p>
]]></content>
      <tags>
        <tag>Server&amp;OS</tag>
      </tags>
  </entry>
  <entry>
    <title>python中str和unicode转换问题</title>
    <url>/2015/02/16/python-str-unicode-transfer.html</url>
    <content><![CDATA[<p>这两天在写一个python脚本，以实现把数据从多个excel导入进一个mdb中，遇到了比较纠结的问题，</p>
<p>下面的代码是我把问题简化后的代码：</p>
<figure class="highlight plaintext"><table><tr><td class="code"><pre><span class="line">test = u&#x27;测试&#x27;</span><br><span class="line">print(str(test))</span><br></pre></td></tr></table></figure>

<p>执行后的报错信息如下：</p>
<figure class="highlight plaintext"><table><tr><td class="code"><pre><span class="line">Traceback (most recent call last):</span><br><span class="line">  File &quot;&lt;stdin&gt;&quot;, line 1, in &lt;module&gt;</span><br><span class="line">UnicodeEncodeError: &#x27;ascii&#x27; codec can&#x27;t encode characters in position 0-1: ordinal not in range(128)</span><br></pre></td></tr></table></figure>

<p>在python下两者的转化需要使用decode和encode，具体情况如下：</p>
<figure class="highlight plaintext"><table><tr><td class="code"><pre><span class="line">a = &#x27;测试&#x27; # str类型</span><br><span class="line">b = u&#x27;测试&#x27; # unicode类型</span><br><span class="line"></span><br><span class="line">a.decode() # 把str类型解码，即为unicode类型</span><br><span class="line">b.encode(&#x27;utf-8&#x27;)  # 把unicode类型编码，即为str类型</span><br></pre></td></tr></table></figure>


]]></content>
      <tags>
        <tag>编程语言</tag>
      </tags>
  </entry>
  <entry>
    <title>扩容树莓派SD卡分区空间</title>
    <url>/2015/01/23/expand-raspberry-pi-sd-card-space.html</url>
    <content><![CDATA[<p>每次装完树莓派上的系统，第一件事就是要把没有利用的SD卡空间利用上，因为img镜像一般都是最小化的，所以用dd还原镜像到SD卡后，SD卡都还会有一部分未使用的空间。<br>之前我一直都是装完系统，把SD卡笔记本上的gparted这种图形界面的软件进行扩容操作，由于现在笔记本上没有Archlinux系统了，所以这次就直接在树莓派上操作了。</p>
<pre><code>[root@alarmpi ~]# fdisk /dev/mmcblk0

Welcome to fdisk (util-linux 2.25.2).
Changes will remain in memory only, until you decide to write them.
Be careful before using the write command.


Command (m for help): p
Disk /dev/mmcblk0: 14.9 GiB, 15931539456 bytes, 31116288 sectors
Units: sectors of 1 * 512 = 512 bytes
Sector size (logical/physical): 512 bytes / 512 bytes
I/O size (minimum/optimal): 512 bytes / 512 bytes
Disklabel type: dos
Disk identifier: 0x0e8c6e83

Device         Boot  Start     End Sectors  Size Id Type
/dev/mmcblk0p1        2048  206847  204800  100M  c W95 FAT32 (LBA)
/dev/mmcblk0p2      206848 2097151 1890304  923M 83 Linux

Command (m for help): d
Partition number (1,2, default 2): 2

Partition 2 has been deleted.
</code></pre>
<p>注意第二个分区的Start，记录下来。然后删掉第二个分区。</p>
<pre><code>Command (m for help): n
Partition type
   p   primary (1 primary, 0 extended, 3 free)
   e   extended (container for logical partitions)
Select (default p): p
Partition number (2-4, default 2): 2
First sector (206848-31116287, default 206848):
Last sector, +sectors or +size&#123;K,M,G,T,P&#125; (206848-31116287, default 31116287):

Created a new partition 2 of type &#39;Linux&#39; and of size 14.8 GiB.

Command (m for help): p
Disk /dev/mmcblk0: 14.9 GiB, 15931539456 bytes, 31116288 sectors
Units: sectors of 1 * 512 = 512 bytes
Sector size (logical/physical): 512 bytes / 512 bytes
I/O size (minimum/optimal): 512 bytes / 512 bytes
Disklabel type: dos
Disk identifier: 0x0e8c6e83

Device         Boot  Start      End  Sectors  Size Id Type
/dev/mmcblk0p1        2048   206847   204800  100M  c W95 FAT32 (LBA)
/dev/mmcblk0p2      206848 31116287 30909440 14.8G 83 Linux
</code></pre>
<p>创建个新的主分区，First sector输入第一步记录下来的那个值，也就是我这里的Default的值。新建好后，输入p查看，第二个分区的size已经调整完毕。</p>
<pre><code>Command (m for help): w
The partition table has been altered.
Calling ioctl() to re-read partition table.
Re-reading the partition table failed.: Device or resource busy

The kernel still uses the old table. The new table will be used at the next reboot or after you run partprobe(8) or kpartx(8).

[root@alarmpi ~]# reboot
</code></pre>
<p>输入w，保存分区表并退出，会提示分区表写入失败，因为设备正忙，直接重启即可。</p>
<pre><code>[root@alarmpi ~]# resize2fs /dev/mmcblk0p2
resize2fs 1.42.12 (29-Aug-2014)
Filesystem at /dev/mmcblk0p2 is mounted on /; on-line resizing required
old_desc_blocks = 1, new_desc_blocks = 2
The filesystem on /dev/mmcblk0p2 is now 3863680 (4k) blocks long.

[root@alarmpi ~]# df -h
Filesystem      Size  Used Avail Use% Mounted on
/dev/root        15G  647M   14G   5% /
devtmpfs        214M     0  214M   0% /dev
tmpfs           218M     0  218M   0% /dev/shm
tmpfs           218M  260K  218M   1% /run
tmpfs           218M     0  218M   0% /sys/fs/cgroup
tmpfs           218M     0  218M   0% /tmp
/dev/mmcblk0p1  100M   17M   84M  17% /boot
tmpfs            44M     0   44M   0% /run/user/0
</code></pre>
<p>重启后，立即执行resize2fs命令，df查看容量，Avail已经是14G啦，搞定，收工。</p>
<p><strong>码字不易，见好就分享~</strong></p>
]]></content>
      <tags>
        <tag>Server&amp;OS</tag>
      </tags>
  </entry>
  <entry>
    <title>file_put_content也可以post提交数据</title>
    <url>/2015/03/07/file-put-content-can-post.html</url>
    <content><![CDATA[<p>这算是file_put_content的高级用法了吧~</p>
<figure class="highlight plaintext"><table><tr><td class="code"><pre><span class="line">$params     = array(</span><br><span class="line">    &#x27;access_token&#x27;      =&gt; $access_token</span><br><span class="line">);</span><br><span class="line">$options            = array(</span><br><span class="line">    &#x27;http&#x27; =&gt; array(</span><br><span class="line">        &#x27;method&#x27;  =&gt; &#x27;POST&#x27;,</span><br><span class="line">        &#x27;content&#x27; =&gt; http_build_query($params)</span><br><span class="line">    )</span><br><span class="line">);</span><br><span class="line">$context    = stream_context_create($options);</span><br><span class="line">$r          = file_get_contents($url, false, $context);</span><br></pre></td></tr></table></figure>

]]></content>
      <tags>
        <tag>编程语言</tag>
      </tags>
  </entry>
  <entry>
    <title>nginx反向代理配置</title>
    <url>/2015/03/09/nginx-proxy-config.html</url>
    <content><![CDATA[<p><strong>2019-11-09 补充</strong><br>websocket 的反代</p>
<figure class="highlight plaintext"><table><tr><td class="code"><pre><span class="line">map $http_upgrade $connection_upgrade &#123;</span><br><span class="line">    default upgrade;</span><br><span class="line">    &#x27;&#x27; close;</span><br><span class="line">&#125;</span><br><span class="line"></span><br><span class="line">upstream websocket &#123;</span><br><span class="line">    server 172.20.0.1:8090;</span><br><span class="line">&#125;</span><br><span class="line"></span><br><span class="line">server &#123;</span><br><span class="line">    listen 443 ssl;</span><br><span class="line">    server_name test.com;</span><br><span class="line">    ssl_certificate /etc/nginx/ssl/test.com.fullchain.cer;</span><br><span class="line">    ssl_certificate_key /etc/nginx/ssl/test.com.key;</span><br><span class="line">    ssl_ciphers &quot;EECDH+AESGCM:EDH+AESGCM:AES256+EECDH:AES256+EDH&quot;;</span><br><span class="line">    ssl_protocols TLSv1 TLSv1.1 TLSv1.2;</span><br><span class="line">    ssl_prefer_server_ciphers on;</span><br><span class="line">    ssl_session_cache shared:SSL:10m;</span><br><span class="line">    location / &#123;</span><br><span class="line">        proxy_pass http://websocket;</span><br><span class="line">        proxy_http_version 1.1;</span><br><span class="line">        proxy_set_header Upgrade $http_upgrade;</span><br><span class="line">        proxy_set_header Connection $connection_upgrade;</span><br><span class="line">    &#125;</span><br><span class="line">&#125;</span><br></pre></td></tr></table></figure>

<hr>
<p>下面是简单的一个nginx反向代理的配置，只需要替换掉<code>proxy_pass</code>中的配置内容即可。</p>
<figure class="highlight plaintext"><table><tr><td class="code"><pre><span class="line">server</span><br><span class="line">&#123;</span><br><span class="line">    listen 80;</span><br><span class="line">    server_name fuckspam.in;</span><br><span class="line">    location / &#123;</span><br><span class="line">        proxy_redirect off;</span><br><span class="line">        proxy_set_header Host $host;</span><br><span class="line">        proxy_set_header X-Real-IP $remote_addr;</span><br><span class="line">        proxy_set_header X-Forwarded-For $proxy_add_x_forwarded_for;</span><br><span class="line">        proxy_pass http://192.168.10.1:3000;</span><br><span class="line">    &#125;</span><br><span class="line">&#125;</span><br><span class="line"></span><br></pre></td></tr></table></figure>
]]></content>
      <tags>
        <tag>Server&amp;OS</tag>
      </tags>
  </entry>
  <entry>
    <title>从Thinkphp框架Sae版Log中提取ERR日志</title>
    <url>/2015/03/14/get-err-lines-from-thinkphp-sae-log.html</url>
    <content><![CDATA[<p>今天线上遇到一个bug无法解决，于是去查Log，发现Thinkphp的Log设置的全开，很详细。<br>但是里面掺杂着很多无用的信息，于是需要写个脚本提取下，也为了日后高效处理日志。</p>
<p>脚本如下：</p>
<figure class="highlight plaintext"><table><tr><td class="code"><pre><span class="line">#!/bin/bash</span><br><span class="line">read -p &quot;Enter Filename: &quot; filename</span><br><span class="line">read -p &quot;Enter Output Filename: &quot; outputfilename</span><br><span class="line">awk &#x27;BEGIN&#123;</span><br><span class="line">    linestart=1;</span><br><span class="line">    lineend=0;</span><br><span class="line">    iserr=0;</span><br><span class="line">    total=0;</span><br><span class="line">&#125;</span><br><span class="line">&#123;</span><br><span class="line">    arr[NR]=$0;</span><br><span class="line">    if($0 ~/ERR/)&#123;</span><br><span class="line">        iserr=1;</span><br><span class="line">    &#125;</span><br><span class="line">    if($9 ~/^###/)&#123;</span><br><span class="line">        lineend=NR-1;</span><br><span class="line">        if(lineend!=0)&#123;</span><br><span class="line">            if(iserr==1)&#123;</span><br><span class="line">                for(i=linestart;i&lt;=lineend;i++)&#123;</span><br><span class="line">                    print arr[i];</span><br><span class="line">                    delete arr[i];</span><br><span class="line">                &#125;</span><br><span class="line">                print &quot;&quot;;</span><br><span class="line">                total++;</span><br><span class="line">                iserr=0;</span><br><span class="line">            &#125; else &#123;</span><br><span class="line">                for(i=linestart;i&lt;=lineend;i++)&#123;</span><br><span class="line">                    delete arr[i];</span><br><span class="line">                &#125;</span><br><span class="line">            &#125;</span><br><span class="line">            linestart=NR;</span><br><span class="line">        &#125;</span><br><span class="line">    &#125;</span><br><span class="line">&#125;</span><br><span class="line">END&#123;</span><br><span class="line">    if(iserr==1)&#123;</span><br><span class="line">        for(i=linestart;i&lt;=NR;i++)&#123;</span><br><span class="line">            print arr[i];</span><br><span class="line">            delete arr[i];</span><br><span class="line">        &#125;</span><br><span class="line">        print &quot;&quot;;</span><br><span class="line">        total++;</span><br><span class="line">    &#125; else &#123;</span><br><span class="line">        for(i=linestart;i&lt;=NR;i++)&#123;</span><br><span class="line">            delete arr[i];</span><br><span class="line">        &#125;</span><br><span class="line">    &#125;</span><br><span class="line">    print &quot;Total ERR:&quot;,total;</span><br><span class="line">&#125;&#x27; $filename &gt; $outputfilename</span><br><span class="line"></span><br></pre></td></tr></table></figure>

<p>样例数据：</p>
<p><a href="/upload/20150314/samplefile">点击这里下载样例数据</a></p>
]]></content>
      <tags>
        <tag>Server&amp;OS</tag>
      </tags>
  </entry>
  <entry>
    <title>file_get_content抓取数据为false，但浏览器可以访问</title>
    <url>/2015/03/07/file-get-content-cannot-catch-the-webpage-but-explorer-can-get-it.html</url>
    <content><![CDATA[<p>这两天在写第三方登录的SDK，其中遇到了一个有意思的问题，就是用file_get_content去读取github的接口的时候，<br>发现一直是false，而浏览器访问则没有问题。经过搜索，发现需要设置下user-agent，只要在php.ini中打开user-agent，<br>即可正常返回数据了。</p>
]]></content>
      <tags>
        <tag>编程语言</tag>
      </tags>
  </entry>
  <entry>
    <title>解决树莓派Archlinux的Volume was not properly unmounted问题</title>
    <url>/2015/03/30/raspberry-pi-resolved-volume-not-properly-unmounted.html</url>
    <content><![CDATA[<p>回到家后整理完所有的行李后，第一件事，就是把我的树莓派上电，但是系统起来后，发现分区是read-only的状态，<br>于是输入下面的命令，发现了错误：</p>
<figure class="highlight plaintext"><table><tr><td class="code"><pre><span class="line">[root@alarmpi ~]# mount</span><br><span class="line">/dev/mmcblk0p2 on / type ext4 (ro,relatime,data=ordered)</span><br><span class="line">devtmpfs on /dev type devtmpfs (rw,relatime,size=217368k,nr_inodes=54342,mode=755)</span><br><span class="line">sysfs on /sys type sysfs (rw,nosuid,nodev,noexec,relatime)</span><br><span class="line">proc on /proc type proc (rw,nosuid,nodev,noexec,relatime)</span><br><span class="line">securityfs on /sys/kernel/security type securityfs (rw,nosuid,nodev,noexec,relatime)</span><br><span class="line">tmpfs on /dev/shm type tmpfs (rw,nosuid,nodev)</span><br><span class="line">devpts on /dev/pts type devpts (rw,nosuid,noexec,relatime,gid=5,mode=620,ptmxmode=000)</span><br><span class="line">tmpfs on /run type tmpfs (rw,nosuid,nodev,mode=755)</span><br><span class="line">tmpfs on /sys/fs/cgroup type tmpfs (ro,nosuid,nodev,noexec,mode=755)</span><br><span class="line">cgroup on /sys/fs/cgroup/systemd type cgroup (rw,nosuid,nodev,noexec,relatime,xattr,release_agent=/usr/lib/systemd/systemd-cgroups-agent,name=systemd)</span><br><span class="line">cgroup on /sys/fs/cgroup/net_cls,net_prio type cgroup (rw,nosuid,nodev,noexec,relatime,net_cls,net_prio)</span><br><span class="line">cgroup on /sys/fs/cgroup/devices type cgroup (rw,nosuid,nodev,noexec,relatime,devices)</span><br><span class="line">cgroup on /sys/fs/cgroup/cpu,cpuacct type cgroup (rw,nosuid,nodev,noexec,relatime,cpu,cpuacct)</span><br><span class="line">cgroup on /sys/fs/cgroup/freezer type cgroup (rw,nosuid,nodev,noexec,relatime,freezer)</span><br><span class="line">cgroup on /sys/fs/cgroup/perf_event type cgroup (rw,nosuid,nodev,noexec,relatime,perf_event)</span><br><span class="line">cgroup on /sys/fs/cgroup/bfqio type cgroup (rw,nosuid,nodev,noexec,relatime,bfqio)</span><br><span class="line">cgroup on /sys/fs/cgroup/blkio type cgroup (rw,nosuid,nodev,noexec,relatime,blkio)</span><br><span class="line">cgroup on /sys/fs/cgroup/cpuset type cgroup (rw,nosuid,nodev,noexec,relatime,cpuset)</span><br><span class="line">systemd-1 on /proc/sys/fs/binfmt_misc type autofs (rw,relatime,fd=22,pgrp=1,timeout=300,minproto=5,maxproto=5,direct)</span><br><span class="line">tmpfs on /tmp type tmpfs (rw)</span><br><span class="line">mqueue on /dev/mqueue type mqueue (rw,relatime)</span><br><span class="line">debugfs on /sys/kernel/debug type debugfs (rw,relatime)</span><br><span class="line">configfs on /sys/kernel/config type configfs (rw,relatime)</span><br><span class="line">/dev/mmcblk0p1 on /boot type vfat (rw,relatime,fmask=0022,dmask=0022,codepage=437,iocharset=ascii,shortname=mixed,errors=remount-ro)</span><br><span class="line">/dev/sda1 on /pan type ext4 (rw,relatime,data=ordered)</span><br><span class="line">tmpfs on /run/user/0 type tmpfs (rw,nosuid,nodev,relatime,size=44324k,mode=700)</span><br><span class="line"></span><br><span class="line">[root@alarmpi ~]# dmesg | tail</span><br><span class="line">[    7.324417] systemd[1]: Started udev Coldplug all Devices.</span><br><span class="line">[    8.018313] systemd[1]: Started Journal Service.</span><br><span class="line">[    8.866288] systemd-journald[95]: Received request to flush runtime journal from PID 1</span><br><span class="line">[   10.234796] random: nonblocking pool is initialized</span><br><span class="line">[   10.244188] FAT-fs (mmcblk0p1): Volume was not properly unmounted. Some data may be corrupt. Please run fsck.</span><br><span class="line">[   11.250720] EXT4-fs (sda1): mounted filesystem with ordered data mode. Opts: (null)</span><br><span class="line">[   12.784305] smsc95xx 1-1.1:1.0 eth0: hardware isn&#x27;t capable of remote wakeup</span><br><span class="line">[   12.793837] IPv6: ADDRCONF(NETDEV_UP): eth0: link is not ready</span><br><span class="line">[   14.203803] smsc95xx 1-1.1:1.0 eth0: link up, 100Mbps, full-duplex, lpa 0x4DE1</span><br><span class="line">[   14.288086] IPv6: ADDRCONF(NETDEV_CHANGE): eth0: link becomes ready</span><br></pre></td></tr></table></figure>

<p>发现&#x2F;dev&#x2F;mmcblk0p2是以ro模式挂载的，而mmcblk0p1分区可能有数据corrupt。执行下面的命令，把根目录重新挂载，<br>然后安装下fsck.fat，并修复&#x2F;boot分区的data corrupt。</p>
<figure class="highlight plaintext"><table><tr><td class="code"><pre><span class="line">[root@alarmpi ~]# mount -o remount,rw /</span><br><span class="line"></span><br><span class="line">[root@alarmpi ~]# pacman -S dosfstools</span><br><span class="line">resolving dependencies...</span><br><span class="line">looking for conflicting packages...</span><br><span class="line"></span><br><span class="line">Packages (1) dosfstools-3.0.27-1</span><br><span class="line"></span><br><span class="line">Total Download Size:   0.07 MiB</span><br><span class="line">Total Installed Size:  0.24 MiB</span><br><span class="line"></span><br><span class="line">:: Proceed with installation? [Y/n] y</span><br><span class="line">:: Retrieving packages ...</span><br><span class="line"> dosfstools-3.0.27-1-armv6h                                                        69.1 KiB   691K/s 00:00 [################################################################] 100%</span><br><span class="line">(1/1) checking keys in keyring                                                                             [################################################################] 100%</span><br><span class="line">(1/1) checking package integrity                                                                           [################################################################] 100%</span><br><span class="line">(1/1) loading package files                                                                                [################################################################] 100%</span><br><span class="line">(1/1) checking for file conflicts                                                                          [################################################################] 100%</span><br><span class="line">(1/1) checking available disk space                                                                        [################################################################] 100%</span><br><span class="line">(1/1) installing dosfstools                                                                                [################################################################] 100%</span><br><span class="line"></span><br><span class="line">[root@alarmpi ~]# umount /boot</span><br><span class="line"></span><br><span class="line">[root@alarmpi ~]fsck.fat -V /dev/mmcblk0p1</span><br><span class="line">fsck.fat 3.0.27 (2014-11-12)</span><br><span class="line">Starting check/repair pass.</span><br><span class="line">Starting verification pass.</span><br><span class="line">/dev/mmcblk0p1: 130 files, 7556/51091 clusters</span><br><span class="line"></span><br><span class="line">[root@alarmpi ~]# fsck.fat -a /dev/mmcblk0p1</span><br><span class="line">fsck.fat 3.0.27 (2014-11-12)</span><br><span class="line">/dev/mmcblk0p1: 130 files, 7556/51091 clusters</span><br><span class="line"></span><br><span class="line">[root@alarmpi ~]# mount /boot/</span><br><span class="line"></span><br></pre></td></tr></table></figure>

<p>修复后，重启，发现&#x2F;目录的挂载还是ro，于是看了下&#x2F;boot&#x2F;cmdline.txt</p>
<figure class="highlight plaintext"><table><tr><td class="code"><pre><span class="line">[root@alarmpi ~]# cat /boot/cmdline.txt</span><br><span class="line">selinux=0 plymouth.enable=0 smsc95xx.turbo_mode=N dwc_otg.lpm_enable=0 console=ttyAMA0,115200 kgdboc=ttyAMA0,115200 console=tty1 root=/dev/mmcblk0p2 rootfstype=ext4 elevator=noop rootwait</span><br></pre></td></tr></table></figure>

<p>在该文件的mmcblk0p2后面加入rw，如下</p>
<figure class="highlight plaintext"><table><tr><td class="code"><pre><span class="line">[root@alarmpi ~]# cat /boot/cmdline.txt</span><br><span class="line">selinux=0 plymouth.enable=0 smsc95xx.turbo_mode=N dwc_otg.lpm_enable=0 console=ttyAMA0,115200 kgdboc=ttyAMA0,115200 console=tty1 root=/dev/mmcblk0p2 rw rootfstype=ext4 elevator=noop rootwait</span><br></pre></td></tr></table></figure>

<p>重启后，一切正常了。不过这到底是啥原因导致的呢？经过google，发现是由于意外掉电频度太高，导致的数据损坏，<a href="http://ruiabreu.org/2013-06-02-booting-raspberry-pi-in-readonly.html">参考这里</a>。貌似好几篇文章都提到了，要把分区做成read-only，需要升级的时候再打开。由于现在我的树莓派内的软件还都没有完全调好，<br>所以就先不做成read-only了。以后做好bt下载机和家庭数据中心后，再来设置下。</p>
]]></content>
      <tags>
        <tag>Server&amp;OS</tag>
      </tags>
  </entry>
  <entry>
    <title>解决aria2c无法开机自启动问题</title>
    <url>/2015/04/01/resolve-aria2c-start-failed-on-boot.html</url>
    <content><![CDATA[<p>好的吧，终于搞定了aria2c的开机自启动问题。No zuo no die，离开计算所后，好像很久没有这么折腾了，<br>一个配置的问题引发的一系列的问题。</p>
<p>简单说下我的环境是树莓派 + Archlinux，看着 ArchWiki 上面关于 aria2c 的<a href="https://wiki.archlinux.org/index.php/Aria2#Start_aria2c_on_system_boot">相关页面</a>，<br>很快就安装配置ok了，不过，重启后，发现 aria2c 根本就没有启动起来。报错信息如下：</p>
<figure class="highlight plaintext"><table><tr><td class="code"><pre><span class="line">Mar 31 22:31:40 alarmpi aria2c[150]: 03/31 22:31:40 [ERROR] IPv4 RPC: failed to bind TCP port 6800</span><br><span class="line">Mar 31 22:31:40 alarmpi aria2c[150]: Exception: [SocketCore.cc:293] errorCode=1 Failed to bind a socket, cause: Name or service not known</span><br></pre></td></tr></table></figure>

<p>绑定失败？怎么破？</p>
<p>再看下 Wiki 上 &#x2F;etc&#x2F;systemd&#x2F;system&#x2F;aria2c.service 这个配置文件，貌似没啥问题，然后又手动启动了下，也失败了。<br>执行 systemctl status aria2c 发现程序成功返回0，systemctl显示也是正在执行，但是ps一下，没有aria2c的进程。</p>
<p>见鬼了！</p>
<p>继续看 wiki ，发现里面说到</p>
<figure class="highlight plaintext"><table><tr><td class="code"><pre><span class="line">Ensure your config is set to deamonize (use daemon=true).</span><br></pre></td></tr></table></figure>

<p>我的配置文件没问题，已经加了daemon&#x3D;true。。。恍惚了好久，在wiki上看到了<a href="https://wiki.archlinux.org/index.php/Systemd#Service_types">systemd的页面</a>，看到里面有这么一句话，</p>
<figure class="highlight plaintext"><table><tr><td class="code"><pre><span class="line">Type=forking: systemd considers the service started up once the process forks and the parent has exited. For classic daemons use this type unless you know that it is not necessary.</span><br></pre></td></tr></table></figure>

<p>然后我在原来的wiki给出的那个配置的基础上加上了一行 Type&#x3D;forking（也就是你们现在在wiki中看到的那样，我已经提交修改到wiki了）。</p>
<p>添加好以后，手动启动 systemctl start aria2c 成功！赶紧重启试试。结果还是不行，依旧报错，还是绑定的问题。</p>
<p>后来，就又继续看systemd的配置，尝试添加wants和requires之类的配置，但是都不管用，不过看了这么一段话，在<a href="https://wiki.archlinux.org/index.php/Systemd#Service_types">这个页面</a>，</p>
<figure class="highlight plaintext"><table><tr><td class="code"><pre><span class="line">The most typical case is that the unit A requires the unit B to be running before A is started. In that case add Requires=B and After=B to the [Unit] section of A. If the dependency is optional, add Wants=B and After=B instead. Note that Wants= and Requires= do not imply After=, meaning that if After= is not specified, the two units will be started in parallel.</span><br></pre></td></tr></table></figure>

<p>好吧，wiki给出的那个配置还不是很完善，我又加上了一行，最终配置如下</p>
<figure class="highlight plaintext"><table><tr><td class="code"><pre><span class="line">file path:</span><br><span class="line">/etc/systemd/system/aria2c.service</span><br><span class="line"></span><br><span class="line">file content:</span><br><span class="line">[Unit]</span><br><span class="line">Description=Aria2c download manager</span><br><span class="line">Requires=network.target</span><br><span class="line">After=network.target</span><br><span class="line"></span><br><span class="line">[Service]</span><br><span class="line">User=aria2</span><br><span class="line">Type=forking</span><br><span class="line">ExecStart=/usr/bin/aria2c --conf-path=/home/aria2/.aria2/aria2.daemon</span><br><span class="line"></span><br><span class="line">[Install]</span><br><span class="line">WantedBy=multi-user.target</span><br></pre></td></tr></table></figure>

<p>再次重启试试，还是不行。。。继续看配置，发现 systemd 还可以配置 timer，我想，既然开机启动不成功，<br>而开机后手动启动可以，就证明有什么依赖的程序没有启动，系统就启动 aria2c 了，那我延时执行不久可以了么。<br>于是看文档学习下，写了个针对 aria2c 的 timer，代码如下：</p>
<figure class="highlight plaintext"><table><tr><td class="code"><pre><span class="line">file path:</span><br><span class="line">/etc/systemd/system/aria2c.timer</span><br><span class="line"></span><br><span class="line">file content:</span><br><span class="line">[Unit]</span><br><span class="line">Description=Run on boot</span><br><span class="line"></span><br><span class="line">[Timer]</span><br><span class="line">#10 seconds</span><br><span class="line">OnBootSec=10</span><br><span class="line"></span><br><span class="line">[Install]</span><br><span class="line">WantedBy=timers.target</span><br></pre></td></tr></table></figure>

<p>重启成功。这里我忽略了我测试OnBootSec的步骤，其实刚开始是1，结果有时候能启动，有时候启动不起来，才改成10的。</p>
<p>本来以为这就告一段落了，但是突然不知道怎么想的，脑子里闪现静态ip这个词，于是，也就顺带看看systemd的网络配置怎么搞的。<br>配置好静态ip后，就手贱的把这个 timer 关掉了，然后奇迹发生，aria2c 启动成功！好的吧，原来是这个地方的坑啊。。</p>
<p>收拾下战场，完善下 ArchWiki 的 Start aria2c on system boot 这一节的内容，顺带着去ArchBBS上把一个帖子也回复了<br>（我放狗搜遍网络，就这一个哥们跟我遇到了同样的问题，却没有被解决）。</p>
<p>就在我快要写完这篇博文的时候，收到了 ArchWiki 管理员的回复，关于daemon&#x3D;true与Type&#x3D;forking的这个修改接受了，<br>不过，对于failed to bind errors则没有接受，可能再接下来的版本会修复这个bug。（PS：庆幸我写的英文，管理员看懂了。）</p>
<p>最后放出我的 aria2 的网页管理界面，终于完工了，下载个Glee 3D Concert测试下：</p>
<p><img src="/upload/20150401/20150401-1.png" alt="aria2"></p>
]]></content>
      <tags>
        <tag>Server&amp;OS</tag>
      </tags>
  </entry>
  <entry>
    <title>安装proxychains</title>
    <url>/2015/05/19/install-proxychains.html</url>
    <content><![CDATA[<p>在终端下翻墙的重要性，当你使用composer之类的东西的时候就体现出来了。<br>安装proxychains可以实现执行指定的命令的时候，使用代理去访问。</p>
<figure class="highlight plaintext"><table><tr><td class="code"><pre><span class="line">brew install proxychains-ng</span><br><span class="line"></span><br><span class="line">vim /usr/local/etc/proxychains.conf</span><br><span class="line"></span><br><span class="line">proxychains4 php composer.phar update</span><br><span class="line"></span><br></pre></td></tr></table></figure>

]]></content>
      <tags>
        <tag>Server&amp;OS</tag>
      </tags>
  </entry>
  <entry>
    <title>如何设置Kali的外接显示器分辨率</title>
    <url>/2015/05/30/how-to-config-the-vga-resolution.html</url>
    <content><![CDATA[<p>首先打开终端输入</p>
<figure class="highlight plaintext"><table><tr><td class="code"><pre><span class="line">xrandr</span><br></pre></td></tr></table></figure>

<p>得到如下信息</p>
<figure class="highlight plaintext"><table><tr><td class="code"><pre><span class="line">ety001@ETYkali:~$ xrandr</span><br><span class="line">Screen 0: minimum 320 x 200, current 1920 x 1080, maximum 8192 x 8192</span><br><span class="line">LVDS1 connected (normal left inverted right x axis y axis)</span><br><span class="line">   1920x1080      60.0 +   59.9     40.0  </span><br><span class="line">   1680x1050      60.0     59.9  </span><br><span class="line">   1600x1024      60.2  </span><br><span class="line">   1400x1050      60.0  </span><br><span class="line">   1280x1024      60.0  </span><br><span class="line">   1440x900       59.9  </span><br><span class="line">   1280x960       60.0  </span><br><span class="line">   1360x768       59.8     60.0  </span><br><span class="line">   1152x864       60.0  </span><br><span class="line">   1024x768       60.0  </span><br><span class="line">   800x600        60.3     56.2  </span><br><span class="line">   640x480        59.9  </span><br><span class="line">VGA1 connected 1920x1080+0+0 (normal left inverted right x axis y axis) 0mm x 0mm</span><br><span class="line">   1024x768       60.0  </span><br><span class="line">   800x600        60.3     56.2  </span><br><span class="line">   848x480        60.0  </span><br><span class="line">   640x480        59.9  </span><br><span class="line">HDMI1 disconnected (normal left inverted right x axis y axis)</span><br><span class="line">DP1 disconnected (normal left inverted right x axis y axis)</span><br></pre></td></tr></table></figure>

<p>其中，LVDS1即为笔记本的显示屏幕，VGA1为外接显示器。</p>
<p>输入如下命令，</p>
<figure class="highlight plaintext"><table><tr><td class="code"><pre><span class="line">cvt 1920 1080</span><br></pre></td></tr></table></figure>

<p>可以得到相关的分辨率配置信息，如下</p>
<figure class="highlight plaintext"><table><tr><td class="code"><pre><span class="line">ety001@ETYkali:~$ cvt 1920 1080</span><br><span class="line"># 1920x1080 59.96 Hz (CVT 2.07M9) hsync: 67.16 kHz; pclk: 173.00 MHz</span><br><span class="line">Modeline &quot;1920x1080_60.00&quot;  173.00  1920 2048 2248 2576  1080 1083 1088 1120 -hsync +vsync</span><br></pre></td></tr></table></figure>

<p>新建模式</p>
<figure class="highlight plaintext"><table><tr><td class="code"><pre><span class="line">xrandr --newmode &quot;1920x1080_60.00&quot;  173.00  1920 2048 2248 2576  1080 1083 1088 1120 -hsync +vsync</span><br></pre></td></tr></table></figure>

<p>增加模式</p>
<figure class="highlight plaintext"><table><tr><td class="code"><pre><span class="line">xrandr --addmode VGA1 &quot;1920x1080_60.00&quot;</span><br></pre></td></tr></table></figure>

<p>接下来就能在显示配置列表中看到1920x1080的选项了。</p>
<p>如果希望下次开机也能自动设置，配置下家目录下面的.profile，加入下面三行即可</p>
<figure class="highlight plaintext"><table><tr><td class="code"><pre><span class="line">cvt 1920 1080</span><br><span class="line">xrandr --newmode &quot;1920x1080_60.00&quot;  173.00  1920 2048 2248 2576  1080 1083 1088 1120 -hsync +vsync</span><br><span class="line">xrandr --addmode VGA1 &quot;1920x1080_60.00&quot;</span><br></pre></td></tr></table></figure>

<p>参考：<a href="http://www.ahlinux.com/ubuntu/6728.html">http://www.ahlinux.com/ubuntu/6728.html</a></p>
]]></content>
      <tags>
        <tag>Server&amp;OS</tag>
      </tags>
  </entry>
  <entry>
    <title>安装Ruby on Rails</title>
    <url>/2015/04/26/setup-ruby-on-rails.html</url>
    <content><![CDATA[<p>安装ROR真费劲。。</p>
<ol>
<li>安装ruby</li>
</ol>
<figure class="highlight plaintext"><table><tr><td class="code"><pre><span class="line">sudo yum install ruby</span><br></pre></td></tr></table></figure>

<ol start="2">
<li>安装ruby-devel</li>
</ol>
<figure class="highlight plaintext"><table><tr><td class="code"><pre><span class="line">sudo yum install ruby=devel</span><br></pre></td></tr></table></figure>

<ol start="3">
<li>安装rails</li>
</ol>
<figure class="highlight plaintext"><table><tr><td class="code"><pre><span class="line">sudo gem install rails</span><br></pre></td></tr></table></figure>

<p>可能需要设置gem的资源服务器为淘宝的。</p>
<p>最好再安装上，mechanize，</p>
<figure class="highlight plaintext"><table><tr><td class="code"><pre><span class="line">sudo gem install mechanize</span><br></pre></td></tr></table></figure>

]]></content>
      <tags>
        <tag>Server&amp;OS</tag>
      </tags>
  </entry>
  <entry>
    <title>docker常用基础命令</title>
    <url>/2015/06/12/docker-common-commands.html</url>
    <content><![CDATA[<h3 id="拉取docker-hub上的已有镜像"><a href="#拉取docker-hub上的已有镜像" class="headerlink" title="拉取docker hub上的已有镜像"></a>拉取docker hub上的已有镜像</h3><pre><code>docker pull base/archlinux
</code></pre>
<h3 id="列出本地的镜像"><a href="#列出本地的镜像" class="headerlink" title="列出本地的镜像"></a>列出本地的镜像</h3><pre><code>docker images
</code></pre>
<h3 id="搜索镜像"><a href="#搜索镜像" class="headerlink" title="搜索镜像"></a>搜索镜像</h3><pre><code>docker search image_name
</code></pre>
<h3 id="列出容器"><a href="#列出容器" class="headerlink" title="列出容器"></a>列出容器</h3><pre><code># 显示所有的container
docker ps -a

# 显示最新的container
docker ps -l
</code></pre>
<h3 id="从一个镜像启动容器并进入terminal"><a href="#从一个镜像启动容器并进入terminal" class="headerlink" title="从一个镜像启动容器并进入terminal"></a>从一个镜像启动容器并进入terminal</h3><pre><code>docker run -ti IMAGE /bin/bash
docker run -it --rm IMAGE /bin/bash #运行完删除容器, 建议调试时使用
</code></pre>
<h3 id="停止一个容器"><a href="#停止一个容器" class="headerlink" title="停止一个容器"></a>停止一个容器</h3><pre><code># CONTAINER为容器的名字，从 docker ps -a 中可以看到
docker stop CONTAINER
</code></pre>
<h3 id="删除容器"><a href="#删除容器" class="headerlink" title="删除容器"></a>删除容器</h3><pre><code># CONTAINER为容器的名字，从 docker ps -a 中可以看到
docker rm CONTAINER
</code></pre>
<h3 id="删除本地的镜像"><a href="#删除本地的镜像" class="headerlink" title="删除本地的镜像"></a>删除本地的镜像</h3><pre><code>docker rmi IMAGE
</code></pre>
<h3 id="提交容器成为新的镜像"><a href="#提交容器成为新的镜像" class="headerlink" title="提交容器成为新的镜像"></a>提交容器成为新的镜像</h3><pre><code>docker commit -m &quot;some log&quot; &lt;container_id&gt; &lt;some_name&gt;
</code></pre>
<h3 id="进入一个正在运行的容器"><a href="#进入一个正在运行的容器" class="headerlink" title="进入一个正在运行的容器"></a>进入一个正在运行的容器</h3><pre><code>docker attach &lt;容器id&gt; #通过容器id进入, 不推荐该方法
docker exec -i -t &lt;容器id&gt; /bin/bash  #通过容器id进入, 推荐该方法
</code></pre>
<h3 id="基于Dockerfile编译"><a href="#基于Dockerfile编译" class="headerlink" title="基于Dockerfile编译"></a>基于Dockerfile编译</h3><pre><code>docker build -t &lt;镜像名&gt; .
</code></pre>
<h3 id="容器自动重启"><a href="#容器自动重启" class="headerlink" title="容器自动重启"></a>容器自动重启</h3><pre><code>docker run -it --restart on-failure:10 IMAGE
# no 不自动重启容器 (默认)
# on-failure 容器发生error而退出(容器退出状态为0)重启容器
# unless-stopped 在容器已经stop掉或docker stopped/restarted 的时候才重启容器
# always 在容器已经stop掉或docker stopped / restarted 的时候重启容器
</code></pre>
<p>另外附加一篇参考：<a href="http://blog.chinaunix.net/uid-10915175-id-4443127.html">http://blog.chinaunix.net/uid-10915175-id-4443127.html</a></p>
]]></content>
      <tags>
        <tag>Server&amp;OS</tag>
      </tags>
  </entry>
  <entry>
    <title>OpenWRT的wifi掉线问题及其它配置</title>
    <url>/2015/06/12/openwrt-config-wifi-smb-oray.html</url>
    <content><![CDATA[<p>##WiFi经常掉线问题</p>
<p>相关报错:</p>
<figure class="highlight plaintext"><table><tr><td class="code"><pre><span class="line">daemon.info hostapd: wlan0: STA 4c:8d:79:f2:53:9c IEEE 802.11: disconnected due to excessive missing ACKs</span><br></pre></td></tr></table></figure>

<p>在把极壹刷成OpenWRT后，使用了半周多了，稳定性还是不错的，今天用极壹替换掉了家里的总入口的TpLink，<br>发现接上网线后，wifi在刚开始就连不上，后来连上了，用了2个多小时后，就总是掉线，到最后就连不上了。<br>不过重启路由后，又好了。看了日志发现好像验证相关的问题，经过搜索，发现大家的解决方案都是把组密钥更新关掉了，<br>我也先关掉再看下吧，配置如下：</p>
<figure class="highlight plaintext"><table><tr><td class="code"><pre><span class="line">#修改/etc/config/wireless</span><br><span class="line">config wifi-iface</span><br><span class="line">        option device &#x27;radio0&#x27;</span><br><span class="line">        option ssid &#x27;yourssid&#x27;</span><br><span class="line">        option key &#x27;yourpassword&#x27;</span><br><span class="line">        option mode &#x27;ap&#x27;</span><br><span class="line">        option encryption &#x27;psk-mixed&#x27;</span><br><span class="line">        option network &#x27;lan&#x27;</span><br><span class="line">        option wmm &#x27;0&#x27;</span><br><span class="line">        option wpa_group_rekey &#x27;0&#x27; #把组密钥更新关掉</span><br><span class="line">        option &#x27;wpa_pair_rekey&#x27; &#x27;0&#x27;</span><br><span class="line">        option &#x27;wpa_master_rekey&#x27; &#x27;0&#x27;</span><br></pre></td></tr></table></figure>

<p>保存后，重启网络</p>
<figure class="highlight plaintext"><table><tr><td class="code"><pre><span class="line">root@ETYOpenWrt:~# /etc/init.d/network restart</span><br></pre></td></tr></table></figure>

<h2 id="2015-06-12-10-00-update"><a href="#2015-06-12-10-00-update" class="headerlink" title="####2015-06-12 10:00 update"></a>####2015-06-12 10:00 update</h2><p>貌似这是个不简单的bug，<a href="https://dev.openwrt.org/ticket/12372">https://dev.openwrt.org/ticket/12372</a></p>
<h2 id="2015-06-12-14-27-update"><a href="#2015-06-12-14-27-update" class="headerlink" title="####2015-06-12 14:27 update"></a>####2015-06-12 14:27 update</h2><p>找到了个解决方案，<a href="https://forum.openwrt.org/viewtopic.php?id=43188">https://forum.openwrt.org/viewtopic.php?id=43188</a>，<br>按照6楼的方法，加个 <code>option disassoc_low_ack 0</code> 配置再试试。</p>
<h2 id="2015-06-12-15-00-update"><a href="#2015-06-12-15-00-update" class="headerlink" title="####2015-06-12 15:00 update"></a>####2015-06-12 15:00 update</h2><p>上一个方案不成功。</p>
<p>####2015-06-12 16:58 update<br>另外一个方法，再试试 <a href="https://www.bungie.net/en/Forum/Post/69319415/0/0/1">https://www.bungie.net/en/Forum/Post/69319415/0/0/1</a></p>
<figure class="highlight plaintext"><table><tr><td class="code"><pre><span class="line">root@ETYOpenWrt:~# cat /sys/kernel/debug/ieee80211/phy0/ath9k/ani</span><br><span class="line">            ANI: ENABLED</span><br><span class="line">      ANI RESET: 63</span><br><span class="line">     OFDM LEVEL: 0</span><br><span class="line">      CCK LEVEL: 0</span><br><span class="line">        SPUR UP: 0</span><br><span class="line">      SPUR DOWN: 0</span><br><span class="line"> OFDM WS-DET ON: 0</span><br><span class="line">OFDM WS-DET OFF: 0</span><br><span class="line">     MRC-CCK ON: 0</span><br><span class="line">    MRC-CCK OFF: 0</span><br><span class="line">    FIR-STEP UP: 12</span><br><span class="line">  FIR-STEP DOWN: 14</span><br><span class="line"> INV LISTENTIME: 0</span><br><span class="line">    OFDM ERRORS: 8792</span><br><span class="line">     CCK ERRORS: 11634</span><br><span class="line">root@ETYOpenWrt:~# echo 0 &gt; /sys/kernel/debug/ieee80211/phy0/ath9k/ani</span><br><span class="line">root@ETYOpenWrt:~# cat /sys/kernel/debug/ieee80211/phy0/ath9k/ani</span><br><span class="line">            ANI: DISABLED</span><br><span class="line">root@ETYOpenWrt:~#</span><br></pre></td></tr></table></figure>


<p>##Samba配置</p>
<p>先从&#x2F;etc&#x2F;passwd中添加一个用户ety001，然后再新加一个samba用户，命令如下：</p>
<figure class="highlight plaintext"><table><tr><td class="code"><pre><span class="line">root@ETYOpenWrt:~# smbpasswd -a ety001</span><br></pre></td></tr></table></figure>

<p>把ety001换成你自己的用户名，然后再到luci界面里配置下samba就可以了，也可以直接写下面的配置文件：</p>
<figure class="highlight plaintext"><table><tr><td class="code"><pre><span class="line">#文件位置:/etc/config/samba</span><br><span class="line">config samba</span><br><span class="line">        option workgroup &#x27;WORKGROUP&#x27;  #组名</span><br><span class="line">        option homes &#x27;0&#x27;  #是否共享家目录</span><br><span class="line">        option name &#x27;ety001_hiwifi&#x27; #计算机名</span><br><span class="line">        option description &#x27;ety001_hiwifi&#x27; #计算机描述</span><br><span class="line"></span><br><span class="line">config sambashare</span><br><span class="line">        option name &#x27;hiwifi&#x27;  #共享名</span><br><span class="line">        option path &#x27;/upan&#x27;  #要共享的目录</span><br><span class="line">        option create_mask &#x27;0700&#x27;  #文件权限</span><br><span class="line">        option dir_mask &#x27;0700&#x27;  #目录权限</span><br><span class="line">        option read_only &#x27;no&#x27;  #只读</span><br><span class="line">        option guest_ok &#x27;no&#x27;  #是否允许匿名登陆</span><br><span class="line">        option users &#x27;ety001&#x27;  #可允许操作的用户</span><br></pre></td></tr></table></figure>
<p>重启samba即可</p>
<p>##花生壳配置</p>
<p>由于是动态公网IP，所以需要弄个花生壳，要不然多麻烦。需要下载个插件就能搞定了，<br>地址：<a href="http://www.domyself.me/assets/upload/20150612/luci-app-oray.ipk">http://www.domyself.me/assets/upload/20150612/luci-app-oray.ipk</a>,下载后传到路由器root用户家目录下，执行：</p>
<figure class="highlight plaintext"><table><tr><td class="code"><pre><span class="line">opkg install luci-app-oray.ipk</span><br></pre></td></tr></table></figure>

<p>安装好以后，就可以在luci界面看到相关的配置页面了，配置很简单，这里略过。</p>
]]></content>
      <tags>
        <tag>Server&amp;OS</tag>
      </tags>
  </entry>
  <entry>
    <title>在Kali Linux下安装Nodejs和npm</title>
    <url>/2015/05/30/installing-nodejs-and-npm-in-kali-linux.html</url>
    <content><![CDATA[<p>按照下面的命令输入即可</p>
<figure class="highlight plaintext"><table><tr><td class="code"><pre><span class="line">sudo apt-get install python g++ make checkinstall fakeroot</span><br><span class="line"></span><br><span class="line">src=$(mktemp -d) &amp;&amp; cd $src</span><br><span class="line"></span><br><span class="line">wget -N http://nodejs.org/dist/node-latest.tar.gz</span><br><span class="line"></span><br><span class="line">tar xzvf node-latest.tar.gz &amp;&amp; cd node-v*</span><br><span class="line"></span><br><span class="line">./configure</span><br><span class="line"></span><br><span class="line">sudo fakeroot checkinstall -y --install=no --pkgversion $(echo $(pwd) | sed -n -re&#x27;s/.+node-v(.+)$/\1/p&#x27;) make -j$(($(nproc)+1)) install</span><br><span class="line"></span><br><span class="line">sudo dpkg -i node_*</span><br><span class="line"></span><br></pre></td></tr></table></figure>

<p>转自：<a href="http://www.free4net.com/2014/06/installing-nodejs-and-npm-in-kali-linux.html">http://www.free4net.com/2014/06/installing-nodejs-and-npm-in-kali-linux.html</a></p>
]]></content>
      <tags>
        <tag>Server&amp;OS</tag>
      </tags>
  </entry>
  <entry>
    <title>制作swoole的docker</title>
    <url>/2015/06/13/make-swoole-docker.html</url>
    <content><![CDATA[<p>1、由于使用的是docker hub 中的 <code>centos:6</code> ，因此一上来需要先安装开发包，<br>为了省事，我直接就用下面这条命令了：</p>
<pre><code>yum groupinstall &quot;Development Libraries&quot; &quot;Development Tools&quot;
</code></pre>
<p>2、去下载php官网比较新的源码，我下载的是 <code>php-5.6.10</code>。</p>
<p>3、安装libxml2-devel</p>
<pre><code>yum install libxml2-devel
</code></pre>
<p>4、解压下载后的php源码包，直接 <code>./configure</code> 然后结束后执行 <code>make &amp;&amp; make install</code>。</p>
<p>5、编译安装结束后，下载swoole的源码，我下载的是 <code>swoole-1.7.17</code> ，解压，然后依次执行：<br><code>phpize</code> <code>./configure</code> <code>make &amp;&amp; make install</code></p>
<p>6、编辑php.ini，加入 <code>extension=swoole.so</code></p>
<p>7、安装完毕，开始瘦身，我主要是删掉 <code>/usr/share</code> <code>/usr/local</code> <code>/usr/src</code><br>下面的一些文件，最终初步瘦身从800M到300M。</p>
<p>8、删除完文件后，回到根目录，执行</p>
<pre><code>mkdir /rootfs
mkdir bin etc dev dev/pts lib usr proc sys tmp
mkdir -p usr/lib64 usr/bin usr/local/bin
wget http://busybox.net/downloads/binaries/1.21.1/busybox-x86_64 /sbin/busybox
chmod +x /sbin/busybox
cp /sbin/busybox bin
busybox –install -s bin
cp -r /bin /rootfs/bin
cp -r /etc /rootfs/etc
cp -r /lib /rootfs/lib
cp -r /usr /rootfs/usr
cd /rootfs
tar cf /rootfs.tar .
</code></pre>
<p>9、把生成的 rootfs.tar 从 container 中 scp 出来，在放置 rootfs.tar 的目录下，<br>新建个 Dockerfile 文件，内容如下：</p>
<pre><code>FROM scratch
MAINTAINER ety001 &lt;work@akawa.ink&gt;
ADD rootfs.tar /
</code></pre>
<p>10、等待完成后，就可以用 <code>docker images</code> 命令看到新做的这个镜像了。</p>
]]></content>
      <tags>
        <tag>Server&amp;OS</tag>
      </tags>
  </entry>
  <entry>
    <title>tmux 常用命令</title>
    <url>/2015/06/17/common-tmux-commands.html</url>
    <content><![CDATA[<pre><code>C-b ? 显示快捷键帮助
C-b C-o 调换窗口位置，类似与vim 里的C-w
C-b 空格键 采用下一个内置布局
C-b ! 把当前窗口变为新窗口
C-b &quot; 模向分隔窗口
C-b % 纵向分隔窗口
C-b q 显示分隔窗口的编号
C-b o 跳到下一个分隔窗口
C-b 上下键 上一个及下一个分隔窗口
C-b C-方向键 调整分隔窗口大小
C-b c 创建新窗口
C-b 0~9 选择几号窗口
C-b c 创建新窗口
C-b n 选择下一个窗口
C-b l 切换到最后使用的窗口
C-b p 选择前一个窗口
C-b w 以菜单方式显示及选择窗口
C-b t 显示时钟
C-b ; 切换到最后一个使用的面板
C-b x 关闭面板
C-b &amp; 关闭窗口
C-b s 以菜单方式显示和选择会话
C-b d 退出tumx，并保存当前会话，这时，tmux仍在后台运行，可以通过tmux attach进入 到指定的会话
</code></pre>
]]></content>
      <tags>
        <tag>Server&amp;OS</tag>
        <tag>配置</tag>
      </tags>
  </entry>
  <entry>
    <title>终于又填了一个坑，Chrome Extension -- Review Bookmarks</title>
    <url>/2015/07/07/review-bookmarks.html</url>
    <content><![CDATA[<p>经过两周业余时间的努力，终于把三年前的一个坑填上了。</p>
<p>这是2012年年中的时候的一个想法，<a href="http://gurudigger.com/ideas/522">http://gurudigger.com/ideas/522</a>，<br>简单来说就是利用零碎的时间来整理我们的收藏夹。</p>
<p>附上应用地址：<a href="https://chrome.google.com/webstore/detail/review-bookmarks/oacajkekkegmjcnccaeijghfodogjnom">https://chrome.google.com/webstore/detail/review-bookmarks/oacajkekkegmjcnccaeijghfodogjnom</a></p>
<p>如果你觉得这个工具对你有帮助，欢迎 <a href="/donate">捐助我</a> ~~</p>
]]></content>
      <tags>
        <tag>DM实验室</tag>
      </tags>
  </entry>
  <entry>
    <title>用swoole + redis 实现一个网络剪切板</title>
    <url>/2015/06/22/make-an-online-clipboard-with-swoole-and-redis.html</url>
    <content><![CDATA[<p>应用地址：<a href="https://oc.mypi.win/">https://oc.mypi.win</a></p>
<p>之前一直计划接触下 swoole 、redis 、docker。最近时间稍微宽裕些，于是就把这三者揉到一起，<br>把之前自己用的剪切板重新写了一遍，之前的那个是个nodejs版的。</p>
<p>redis在上一个公司有过接触，但是由于都是封装在底层的，平时用的时候，也只是调用方法，所以认识不够深刻。<br>这次读了些资料，主要是看了下redis提供的数据结构。现在我对这货的核心功能的认识就是，用C实现了一个安全操作层，<br>用来对内存进行读取写入操作，并且实现了几种数据结构，用于存储结构化的数据。</p>
<p>开发目标是应用要能允许建立多个剪切板，每个剪切板有个唯一标示，每个剪切板的容量是50条。因此先想到了队列，<br>于是最后用的是redis的list的数据结构，用户提供剪切板的name和进入剪切板的password，产生唯一标示的方法如下：</p>
<figure class="highlight plaintext"><table><tr><td class="code"><pre><span class="line">$hash = md5($password . $name);</span><br></pre></td></tr></table></figure>

<p>然后用$hash作为这个剪切板list的key。</p>
<p>另外一个问题就是如何把websocket的frame_id 和 $hash 关联起来。<br>frame_id其实就是client_id，即连入到服务器的客户端的唯一标示，$hash和client的关系是，一对多的，<br>即一个剪切板，可能会有多台终端接入。</p>
<p>最后考虑了下，使用redis的hash数据结构和list数据结构来完成这个对应关系。hash数据结构用来存储<br>frame_id 到 hash 的关系，即通过该结构，提供 frame_id 即可找到 对应的剪切板list的key，即 $hash 值。</p>
<p>那么list结构是用来做什么的呢？list中存储的是 $hash 做key，每个 list 里面存储着当前连接到该剪切板的<br>所有终端的 frame_id，这个list的作用就是用来广播的，即同一个剪切板内的某个终端更新剪切板后，通知其他终端更新。</p>
<p>关于制作swoole的docker镜像，可以看这里 <a href="https://akawa.ink/2015/06/13/make-swoole-docker.html">https://akawa.ink/2015/06/13/make-swoole-docker.html</a></p>
<p>代码：<a href="https://github.com/ety001/online-clipboard">https://github.com/ety001/online-clipboard</a></p>
<p>swoole-docker：<a href="https://registry.hub.docker.com/u/ety001/min_swoole/">https://registry.hub.docker.com/u/ety001/min_swoole/</a></p>
]]></content>
      <tags>
        <tag>DM实验室</tag>
        <tag>后端</tag>
      </tags>
  </entry>
  <entry>
    <title>用jquery判断checkbox是否选中</title>
    <url>/2015/06/26/checkbox-jquery-checked.html</url>
    <content><![CDATA[<figure class="highlight plaintext"><table><tr><td class="code"><pre><span class="line">$(&#x27;checkbox&#x27;).is(&#x27;:checked&#x27;)</span><br></pre></td></tr></table></figure>

]]></content>
      <tags>
        <tag>前端</tag>
      </tags>
  </entry>
  <entry>
    <title>手动安装crx扩展</title>
    <url>/2015/07/11/manual-setup-crx.html</url>
    <content><![CDATA[<p>自 Chrome 21.x 开始默认只允许从 Chrome Web Store （Chrome 网上应用店）安装扩展、应用及脚本，<br>虽然此举增强了安全性但也给众多依赖油猴及 Stylish 脚本的用户造成了很大的不便，<br>那么现在应当如何在谷歌浏览器安装 Web Store 外的第三方扩展程序呢？</p>
<p>以下三种方法将可解决“只可添加来自Chrome网上应用店的扩展程序、应用和用户脚本”的问题。</p>
<p>方法一、本地拖放安装</p>
<pre><code>1. 下载扩展程序/脚本程序至本地计算机；
2. 将其直接拖拽到浏览器的“扩展程序”页面（设置-扩展程序）即 chrome://chrome/extensions 页面。
</code></pre>
<p>方法二、开启浏览器支持</p>
<pre><code>右击 Chrome 桌面快捷方式，选择-”属性”-”快捷方式”，
然后在”目标”一栏尾部添加参数 -enable-easy-off-store-extension-install ，
然后再运行浏览器
就可以像以前那样正常安装 Web Store 之外的第三方扩展应用及脚本程序了。
</code></pre>
<p>方法三、开发模式安装</p>
<pre><code>也是先将扩展程序下载保存到本地，
然后将下载来的文件后缀名*.crx 改成*.rar，
这样你就得到了一个压缩文件，
然后右键解压这个压缩文件得到一个文件夹。
然后在浏览器里打开扩展程序页面（ chrome://settings/extensions），
选中右上方开发人员模式复选框，
然后再点击左上方的”载入正在开发的扩展程序“按钮，
选中刚刚解压出来的文件夹然后点确定即可
</code></pre>
]]></content>
      <tags>
        <tag>配置</tag>
      </tags>
  </entry>
  <entry>
    <title>鼠标滚轮控制页面切换</title>
    <url>/2015/07/19/mouse-wheel-control-page-change.html</url>
    <content><![CDATA[<p>最近项目需要做一个欢迎页，效果差不多就是有点PPT的样子，然后用鼠标滚轮可以控制页面切换。</p>
<p>在实施过程中，遇到的问题就是jquery的 mousewheel 事件触发的机制让人太纠结了。</p>
<p>由于我们一般滚动了 x° 的圆心角才认为是滚动了一次，而计算机在滚动 x° 的过程中，只要有度数的变化，<br>就会触发一次事件。这个在回调事件的第二个参数即可看出来，第二个参数叫做 delta，即变化量。<br>也就是说这个变量其实是存储的从开始滚动到当前滚动位置，滚动过的一个类似圆心角的值。</p>
<p>那么我们就需要在这个回调函数里面去做文章，让我们意识中的滚动一次能实现出来。</p>
<p>具体的方法是，加入一个全局变量，来记录每一次的滚动开始，并且每次开始后的一秒内，<br>不再执行回调函数，直到1秒钟的时候重置这个全局变量。之所以设置一秒是因为我们平时的习惯，<br>差不多就是1秒钟滚动一次滚轮。代码差不多就是下面的这个样子：</p>
<pre><code>window.is_wheel = false;
$(&#39;body&#39;).bind(&#39;mousewheel&#39;, function(event, delta) &#123;
  if(window.is_wheel==true)return;
  window.is_wheel = true;
  setTimeout(function()&#123;
    window.is_wheel = false;
  &#125;, 1000);

  if(delta &gt; 0)&#123;
    next_page();
  &#125; else &#123;
    prev_page();
  &#125;
  return false;
&#125;);
</code></pre>
<p>这样，频繁触发的问题就解决了。<b style="color:red;">另外需要注意的是</b>，如果翻页是个动画效果，那么请把翻页动画效果的时间设置在一秒内，<br>因为可以保证每次滚动滚轮只执行了一次翻页操作，即翻页动画的回调函数也会按照预期顺序执行。</p>
]]></content>
      <tags>
        <tag>前端</tag>
      </tags>
  </entry>
  <entry>
    <title>Mac下Launchctl无法启动80端口的nginx解决方案</title>
    <url>/2015/08/22/mac-launchctl-nginx-on-port-80.html</url>
    <content><![CDATA[<p>使用 brew 安装完 nginx 后，想用 launchctl 来实现 nginx 的开机自启动。<br>但是由于 80 端口属于 1–1024 间的端口，需要 root 权限，于是执行下面两条命令，<br>即可让普通用户也可以建立80端口。该方法其实就是给 nginx 加上 s 操作权限。<br>让普通用户可以以 root 权限执行。</p>
<figure class="highlight bash"><table><tr><td class="code"><pre><span class="line">sudo <span class="built_in">chown</span> root:wheel /usr/local/Cellar/nginx/1.2.6/sbin/nginx</span><br><span class="line">sudo <span class="built_in">chmod</span> u+s /usr/local/Cellar/nginx/1.2.6/sbin/nginx</span><br></pre></td></tr></table></figure>

]]></content>
      <tags>
        <tag>Server&amp;OS</tag>
      </tags>
  </entry>
  <entry>
    <title>ubuntu的apt-get安装Nginx+PHP时的配置</title>
    <url>/2015/08/11/ubuntu-apt-get-install-php-config.html</url>
    <content><![CDATA[<p>在使用ubuntu的apt-get安装php-fpm的时候，默认的nginx配置文件的php相关部分少了如下一行代码</p>
<figure class="highlight plaintext"><table><tr><td class="code"><pre><span class="line">fastcgi_param SCRIPT_FILENAME $document_root$fastcgi_script_name;</span><br></pre></td></tr></table></figure>

<p>把这行代码加在 <code>include fastcgi_params;</code> 之前即可。</p>
]]></content>
      <tags>
        <tag>Server&amp;OS</tag>
      </tags>
  </entry>
  <entry>
    <title>编译安装shadowsocks-libev</title>
    <url>/2015/09/08/setup-shadowsocks-libev.html</url>
    <content><![CDATA[<p>在centos下编译安装shadowsocks-libev，需要先安装必要的依赖，命令如下：</p>
<figure class="highlight plaintext"><table><tr><td class="code"><pre><span class="line">yum install -y gcc automake autoconf libtool make build-essential autoconf libtool gcc curl curl-devel zlib-devel openssl-devel perl perl-devel cpio expat-devel gettext-devel git asciidoc xmlto</span><br></pre></td></tr></table></figure>

<p>然后克隆下源代码，</p>
<figure class="highlight plaintext"><table><tr><td class="code"><pre><span class="line">git clone https://github.com/madeye/shadowsocks-libev.git</span><br></pre></td></tr></table></figure>

<p>从源码编译安装</p>
<figure class="highlight plaintext"><table><tr><td class="code"><pre><span class="line">cd shadowsocks-libev</span><br><span class="line">./configure</span><br><span class="line">make &amp;&amp; make install</span><br></pre></td></tr></table></figure>
<p>这样即可编译好一个新的ss，所有程序是以ss-开头，其他系统下面的编译安装，请参考<br><a href="https://github.com/madeye/shadowsocks-libev">https://github.com/madeye/shadowsocks-libev</a>。</p>
]]></content>
      <tags>
        <tag>配置</tag>
      </tags>
  </entry>
  <entry>
    <title>PHP下把阿拉伯数字转换成大写汉字</title>
    <url>/2015/09/08/upcase-number-to-chinese.html</url>
    <content><![CDATA[<script src="//gist.github.com/f0458e43343953ba5b52.js"></script>
]]></content>
      <tags>
        <tag>编程语言</tag>
      </tags>
  </entry>
  <entry>
    <title>使用dompdf时，关掉xdebug</title>
    <url>/2015/09/08/when-using-dompdf-close-xdebug.html</url>
    <content><![CDATA[<p>在使用 dompdf 的时候，需要关闭 xdebug，否则会报下面的错误：</p>
<figure class="highlight php"><table><tr><td class="code"><pre><span class="line"><span class="title class_">DOMElement</span>::<span class="title function_ invoke__">setAttribute</span>(): Not yet implemented</span><br></pre></td></tr></table></figure>

<p>详情：<a href="http://www.phpdocx.com/en/forum/default/topic/985">http://www.phpdocx.com/en/forum/default/topic/985</a></p>
]]></content>
      <tags>
        <tag>编程语言</tag>
      </tags>
  </entry>
  <entry>
    <title>ssh端口转发</title>
    <url>/2015/09/17/ssh-port-forward.html</url>
    <content><![CDATA[<h2 id="基本参数："><a href="#基本参数：" class="headerlink" title="基本参数："></a>基本参数：</h2><pre><code>* -L [bind_address:]port:host:hostport
* -L [bind_address:]port:remote_socket
* -L local_socket:host:hostport
* -L local_socket:remote_socket
* -R [bind_address:]port:host:hostport
* -R [bind_address:]port:local_socket
* -R remote_socket:host:hostport
* -R remote_socket:local_socket
* -C 压缩
* -g global forward 全局转发，否则只能绑定到127.0.0.1
* -R 远程转发
* -L 本地转发
* -f 后台认证用户/密码，通常和-N连用，不用登录到远程主机
* -N 不执行脚本或命令，通常与-f连用。
</code></pre>
<h2 id="前置配置"><a href="#前置配置" class="headerlink" title="前置配置"></a>前置配置</h2><p>如果用的是 <em>openssh</em> ，先设置 <strong>远端服务器</strong> 的 <em>GatewayPorts</em> 为 <em>yes</em>，否则 <strong>远程映射</strong> 时，<br>在远端无法绑定到 <em>0.0.0.0</em> 。</p>
<h2 id="本地映射"><a href="#本地映射" class="headerlink" title="本地映射"></a>本地映射</h2><p>通过参数可以看到，除了端口外，还支持socket文件映射，所以有四种方式。</p>
<p>理解起来，就是把远程的端口映射到本地，我们的访问是从本地的端口开始的，最终目的地是远程端口。</p>
<p>解决的问题是，远程主机的防火墙只开放了 <code>22</code> 端口，而我们要访问远程主机的其他端口，比如 <code>5900</code>。</p>
<p>参考命令:</p>
<figure class="highlight plaintext"><table><tr><td class="code"><pre><span class="line"># 192.168.1.1 是远程主机的内网IP</span><br><span class="line"># 1.1.1.1 是远程主机的公网IP</span><br><span class="line">ssh -CfNgL 15900:192.168.1.1:5900 root@1.1.1.1</span><br></pre></td></tr></table></figure>

<h2 id="远程映射"><a href="#远程映射" class="headerlink" title="远程映射"></a>远程映射</h2><p>通过参数可以看到，除了端口外，还支持socket文件映射，所以也有四种方式。</p>
<p>理解起来，就是把本地的端口映射到远端，我们的访问是从远端的端口开始的，最终目的地是本地端口。</p>
<p>解决的问题是，本地主机没有公网IP，而我们需要从公网访问到本地的某个服务。</p>
<blockquote>
<p>需要在远程主机端的 sshd_config 中启用 GatewayPorts。</p>
</blockquote>
<p>参考命令:</p>
<figure class="highlight plaintext"><table><tr><td class="code"><pre><span class="line"># 192.168.1.1 是本地主机的内网IP</span><br><span class="line"># 1.1.1.1 是远程主机的公网IP</span><br><span class="line"># 访问远程主机的12222端口相当于直接访问了本地22</span><br><span class="line">ssh -CfNgR 12222:192.168.1.1:22 root@1.1.1.1</span><br></pre></td></tr></table></figure>

<h2 id="其他"><a href="#其他" class="headerlink" title="其他"></a>其他</h2><p>如果你的远程服务器的 <code>ssh</code> 端口不是默认的　<code>22</code>，比如是　<code>2233</code>，　<br>那么直接加上　<code>-p 2233</code> 参数即可。</p>
]]></content>
      <tags>
        <tag>Server&amp;OS</tag>
      </tags>
  </entry>
  <entry>
    <title>在树莓派Archlinux的Cli下连接Wifi</title>
    <url>/2015/10/07/connect-to-wifi-under-archlinux-cli.html</url>
    <content><![CDATA[<p>今天弄到一个360的随身wifi，就想给树莓派安装上，这样就不用再用有线连接了。<br>由于我的 <code>Archlinux</code> 没有安装桌面环境，所以只能在命令行下配置。Arch在最近的版本中，<br>开始使用 <code>systemd-networkd</code> 进行网络管理了，具体可以看 <a href="https://wiki.archlinux.org/index.php/Systemd-networkd">Arch Wiki</a>。</p>
<h4 id="检查驱动"><a href="#检查驱动" class="headerlink" title="检查驱动"></a>检查驱动</h4><p>分别执行 lsusb 和 lsmod 后，发现需要自己安装mod。<br>但是pacman包管理中的是 MT7601 的驱动，而 360wifi 的是 MT7601U，尝试安装了 MT7601，<br>使用 <code>dmesg | grep mt7601</code> 发现有err。于是看了下 Aur，发现 Aur 下有 MT7601U 的驱动，<br>于是又安装了下 yaourt 。使用 <code>yaourt -S mt7601u-dkms</code> ，安装后即可。</p>
<h4 id="安装-wpa-supplicant"><a href="#安装-wpa-supplicant" class="headerlink" title="安装 wpa_supplicant"></a>安装 wpa_supplicant</h4><figure class="highlight plaintext"><table><tr><td class="code"><pre><span class="line">pacman -S wpa_supplicant</span><br></pre></td></tr></table></figure>

<h4 id="配置-wpa-supplicant"><a href="#配置-wpa-supplicant" class="headerlink" title="配置 wpa_supplicant"></a>配置 wpa_supplicant</h4><figure class="highlight plaintext"><table><tr><td class="code"><pre><span class="line">[root@alarmpi ~]# cat /etc/wpa_supplicant/wpa_supplicant-wlan0.conf</span><br><span class="line">ctrl_interface=/var/run/wpa_supplicant</span><br><span class="line">ap_scan=1</span><br><span class="line">fast_reauth=0</span><br><span class="line">network=&#123;</span><br><span class="line">   ssid=&quot;your ssid&quot;</span><br><span class="line">   key_mgmt=WPA-PSK</span><br><span class="line">   psk=&quot;your password&quot;</span><br><span class="line">   priority=5</span><br><span class="line">&#125;</span><br></pre></td></tr></table></figure>

<p>其中 <code>your ssid</code> 就是热点名称了，<code>your password</code> 就是热点的密码了。</p>
<h4 id="配置-systemd-networkd"><a href="#配置-systemd-networkd" class="headerlink" title="配置 systemd-networkd"></a>配置 systemd-networkd</h4><figure class="highlight plaintext"><table><tr><td class="code"><pre><span class="line">[root@alarmpi ~]# cat /etc/systemd/network/wlan0.network</span><br><span class="line">[Match]</span><br><span class="line">Name=wlan0</span><br><span class="line"></span><br><span class="line">[Network]</span><br><span class="line">DHCP=ipv4</span><br></pre></td></tr></table></figure>

<p>其中 <code>wlan0</code> 是我的设备名称，请替换成你自己的。</p>
<h4 id="设置为开机自启-并-启动"><a href="#设置为开机自启-并-启动" class="headerlink" title="设置为开机自启 并 启动"></a>设置为开机自启 并 启动</h4><figure class="highlight plaintext"><table><tr><td class="code"><pre><span class="line">systemctl enable wpa_supplicant@wlan0.service</span><br><span class="line">systemctl start wpa_supplicant@wlan0.service</span><br></pre></td></tr></table></figure>

<h4 id="其他内容"><a href="#其他内容" class="headerlink" title="其他内容"></a>其他内容</h4><p>如果你使用的是 RTL8188CUS 这个芯片的 wifi，那么可能会遇到下面的错误，</p>
<figure class="highlight plaintext"><table><tr><td class="code"><pre><span class="line">nl80211: Driver does not support authentication/association or connect commands</span><br></pre></td></tr></table></figure>

<p>请先尝试下面的命令</p>
<figure class="highlight plaintext"><table><tr><td class="code"><pre><span class="line"># wpa_supplicant -B -i wlan0 -D wext -c /etc/wpa_supplicant/wpa_supplicant-wlan0.conf</span><br><span class="line"># dhcpcd wlan0</span><br></pre></td></tr></table></figure>

<p>如果 wlan0 成功获取到 ip 地址，则证明需要使用wext模式，那么 systemd 的配置如下：</p>
<figure class="highlight plaintext"><table><tr><td class="code"><pre><span class="line"># vim /etc/systemd/system/wpa_supplicant@.service.d/wext.conf</span><br><span class="line">-----</span><br><span class="line">[Service]</span><br><span class="line">ExecStart=</span><br><span class="line">ExecStart=/usr/bin/wpa_supplicant -c/etc/wpa_supplicant/wpa_supplicant-%I.conf -i%I -Dwext</span><br></pre></td></tr></table></figure>

]]></content>
      <tags>
        <tag>Server&amp;OS</tag>
      </tags>
  </entry>
  <entry>
    <title>用grep剔除掉配置文件空白行和注释</title>
    <url>/2015/11/29/grep-config-file-without-space-lines-and-anotation.html</url>
    <content><![CDATA[<figure class="highlight plaintext"><table><tr><td class="code"><pre><span class="line">grep -ve &quot;^[[:space:]]*[#;]\|^$\|^[[:space:]]*$&quot; /etc/samba/smb.conf</span><br></pre></td></tr></table></figure>

]]></content>
      <tags>
        <tag>Server&amp;OS</tag>
      </tags>
  </entry>
  <entry>
    <title>树莓派Archlinux初始化安装软件清单</title>
    <url>/2015/10/09/archlinux-arm-raspberry-pi-setup-softwares-list.html</url>
    <content><![CDATA[<h4 id="添加国内的源"><a href="#添加国内的源" class="headerlink" title="添加国内的源"></a>添加国内的源</h4><figure class="highlight plaintext"><table><tr><td class="code"><pre><span class="line">Server = http://mirrors.ustc.edu.cn/archlinuxarm/$arch/$repo</span><br></pre></td></tr></table></figure>

<h4 id="增加ssh配置，允许root用户登陆"><a href="#增加ssh配置，允许root用户登陆" class="headerlink" title="增加ssh配置，允许root用户登陆"></a>增加ssh配置，允许root用户登陆</h4><figure class="highlight plaintext"><table><tr><td class="code"><pre><span class="line"># 配置文件是 /etc/ssh/sshd_config</span><br><span class="line">PermitRootLogin yes</span><br></pre></td></tr></table></figure>

<h4 id="更新系统"><a href="#更新系统" class="headerlink" title="更新系统"></a>更新系统</h4><figure class="highlight plaintext"><table><tr><td class="code"><pre><span class="line">pacman -Syy</span><br><span class="line">pacman -Syu</span><br></pre></td></tr></table></figure>

<h4 id="安装-vim-base-devel-wpa-supplicant-net-tools"><a href="#安装-vim-base-devel-wpa-supplicant-net-tools" class="headerlink" title="安装 vim , base-devel , wpa_supplicant , net-tools"></a>安装 vim , base-devel , wpa_supplicant , net-tools</h4><figure class="highlight plaintext"><table><tr><td class="code"><pre><span class="line">pacman -S vim base-devel wpa_supplicant net-tools iw dialog wget git</span><br></pre></td></tr></table></figure>

<h4 id="安装yaourt"><a href="#安装yaourt" class="headerlink" title="安装yaourt"></a>安装yaourt</h4><p>首先安装软件包组 <code>base-devel</code> , 以及 <code>fakeroot</code> 和 <code>sudo</code> 软件包，这样就不会在编译时缺少 gcc 或者 make 的问题。<br>安装 package-query：</p>
<figure class="highlight plaintext"><table><tr><td class="code"><pre><span class="line">$ wget http://mir.archlinux.fr/~tuxce/releases/package-query/package-query-1.7.tar.gz</span><br><span class="line">$ tar zxvf package-query-1.7.tar.gz</span><br><span class="line">$ cd package-query-1.7</span><br><span class="line">$ wget https://aur.archlinux.org/cgit/aur.git/plain/PKGBUILD?h=package-query</span><br><span class="line">$ mv PKGBUILD?h=package-query PKGBUILD</span><br><span class="line">$ makepkg -si</span><br><span class="line">$ cd ..</span><br></pre></td></tr></table></figure>

<p>安装 yaourtAUR：</p>
<figure class="highlight plaintext"><table><tr><td class="code"><pre><span class="line">$ wget http://mir.archlinux.fr/~tuxce/releases/yaourt/yaourt-1.7.tar.gz</span><br><span class="line">$ tar zxvf yaourt-1.7.tar.gz</span><br><span class="line">$ cd yaourt-1.7</span><br><span class="line">$ wget https://aur.archlinux.org/cgit/aur.git/plain/PKGBUILD?h=yaourt</span><br><span class="line">$ mv PKGBUILD?h=yaourt PKGBUILD</span><br><span class="line">$ makepkg -si</span><br><span class="line">$ cd ..</span><br></pre></td></tr></table></figure>

]]></content>
      <tags>
        <tag>Server&amp;OS</tag>
      </tags>
  </entry>
  <entry>
    <title>在OSX El Captian下安装CH340(CH341)的驱动</title>
    <url>/2015/12/04/install-ch340-driver-on-osx-el-capitan.html</url>
    <content><![CDATA[<p>由于 El Capitan 强制 kext driver 进行签名，导致了驱动安装失败，<br>所以，得先重启机器，按住 Commond + R 进入恢复模式，然后打开终端，<br>输入以下命令</p>
<figure class="highlight plaintext"><table><tr><td class="code"><pre><span class="line">csrutil enable --without kext</span><br></pre></td></tr></table></figure>

<p>重启后，再执行驱动安装即可。</p>
<p>参考：<a href="http://tzapu.com/making-ch340-ch341-serial-adapters-work-under-el-capitan-os-x/">http://tzapu.com/making-ch340-ch341-serial-adapters-work-under-el-capitan-os-x/</a></p>
]]></content>
      <tags>
        <tag>Server&amp;OS</tag>
      </tags>
  </entry>
  <entry>
    <title>解决百度爬虫无法爬取github page问题 2</title>
    <url>/2015/12/23/fix-baidu-spider-cannot-reads-github-page-2.html</url>
    <content><![CDATA[<p>继上次我按照<a href="!--swig%EF%BF%BC0--">《解决百度爬虫无法爬取github page问题》</a>中的方案实施后，我自己博客的搜索量在逐步的恢复中，如下图：</p>
<p><img src="/upload/20151223/index-quote.png" alt="索引量在恢复"></p>
<p>今天调整了我的vps上更新的方式。把之前的 jekyll 服务器关掉了，直接把 nginx 指向了 <code>_site</code> 目录，然后使用 github 的 webhook ，实现了本地 push 代码到远端的时候，可以让 vps 上的 jekyll 重新 build 新的静态文件。</p>
<p>这样就可以减少一个端口的开放和服务的运行了。</p>
]]></content>
      <tags>
        <tag>网站日志</tag>
        <tag>Server&amp;OS</tag>
      </tags>
  </entry>
  <entry>
    <title>解决百度爬虫无法爬取github page问题</title>
    <url>/2015/12/08/fix-baidu-spider-cannot-reads-github-page.html</url>
    <content><![CDATA[<p>最近发现百度已经不收录我的博客了，感觉很奇怪，搞了一个星期的SEO都失败了，<br>最后在百度站长工具里，看到经常抓取失败，于是放到搜索引擎里搜了下，发现原来是github屏蔽了百度爬虫。</p>
<p>于是只能自己利用DNSPod来搭建个面向百度爬虫的子站了。</p>
<p>首先登陆自己的vps，然后安装ruby和gem，</p>
<figure class="highlight plaintext"><table><tr><td class="code"><pre><span class="line">yum install ruby ruby-devel rubygems</span><br></pre></td></tr></table></figure>

<p>安装jekyll</p>
<figure class="highlight plaintext"><table><tr><td class="code"><pre><span class="line">gem install jekyll</span><br></pre></td></tr></table></figure>

<p>结果报错，说ruby版本不够，妹的。。。卸载掉，从ruby官网下载源代码，进行编译安装，</p>
<figure class="highlight plaintext"><table><tr><td class="code"><pre><span class="line">#这里就只写编译命令了，基本依赖自己搞定吧</span><br><span class="line">./configure --prefix=/usr/local --disable-install-doc --with-opt-dir=/usr/local/lib</span><br><span class="line">make &amp;&amp; make isntall</span><br></pre></td></tr></table></figure>

<p>再次安装jekyll，成功，再安装各种扩展</p>
<figure class="highlight plaintext"><table><tr><td class="code"><pre><span class="line">gem install jekyll-gist jekyll-paginate redcarpet</span><br><span class="line">pip install pygments</span><br><span class="line">gem install pygments.rb</span><br></pre></td></tr></table></figure>

<p>从github上pull博客的代码，启动jekyll，测试下看看能不能访问。<br>由于我这台vps上开着nginx，所以jekyll是启动在4000端口上了，那么在nginx上做个反向代理即可，<br>可以参照我之前写的这篇博文来配置：<a href="https://akawa.ink/2015/03/09/nginx-proxy-config.html">https://akawa.ink/2015/03/09/nginx-proxy-config.html</a>.</p>
<p>接下来再配置crontab，让系统能自己pull代码</p>
<figure class="highlight plaintext"><table><tr><td class="code"><pre><span class="line">crontab -e</span><br><span class="line">*/1 * * * * cd /home/wwwroot/blog; git pull &gt; /dev/null 2&gt;&amp;1;</span><br></pre></td></tr></table></figure>

<p>  这里有个小插曲，由于我的vps空间是5G的，安装ruby的时候提示空间不足，<br>  查了下发现，&#x2F;var&#x2F;spool&#x2F;clientmqueue目录有2.9G之大，原因就是由于没有开启sendmail，<br>  crontab执行后的结果输出无法发送邮件，就全部dump到这里了，解决方案就是在写crontab命令的时候，<br>  如果需要输出结果，就指定到一个文件去，否则就直接用 <code>&gt;2&gt;&amp;1</code> 丢掉即可。</p>
<p>最后一步，在DNSPod里面增加新的记录，记的把线路类型选择为 <code>百度</code> 。</p>
<p>这样再用百度抓取下，就成功了。</p>
]]></content>
      <tags>
        <tag>网站日志</tag>
        <tag>Server&amp;OS</tag>
      </tags>
  </entry>
  <entry>
    <title>注入绕过防御方法</title>
    <url>/2016/01/14/injection-type-to-avoid-killing.html</url>
    <content><![CDATA[<p>** 1、运用编码技术绕过</p>
<p>如URLEncode编码，ASCII编码绕过。例如or 1&#x3D;1即%6f%72%20%31%3d%31，而Test也可以为CHAR(101)+CHAR(97)+CHAR(115)+CHAR(116)。</p>
<p>** 2、通过空格绕过</p>
<p>如两个空格代替一个空格，用Tab代替空格等，或者删除所有空格，如<br>or swords &#x3D;‘swords，由于mssql的松散性，我们可以把or swords 之间的空格去掉，并不影响运行。</p>
<p>** 3、运用字符串判断代替</p>
<p>用经典的or 1&#x3D;1判断绕过,如or swords &#x3D;swords，这个方法就是网上在讨论的。</p>
<p>** 4、通过类型转换修饰符N绕过</p>
<p>可以说这是一个不错的想法，他除了能在某种程度上绕过限制，而且还有别的作用，大家自己好好想想吧。关于利用，如or swords &#x3D; N swords ，大写的N告诉mssql server 字符串作为nvarchar类型，它起到类型转换的作用，并不影响注射语句本身，但是可以避过基于知识的模式匹配IDS。</p>
<p>** 5、通过+号拆解字符串绕过</p>
<p>效果值得考证，但毕竟是一种方法。如or swords &#x3D;‘sw + ords ；EXEC(‘IN + SERT INTO + ….. )</p>
<p>** 6、通过LIKE绕过</p>
<p>以前怎么就没想到呢？如orswords LIKE sw！！！显然可以很轻松的绕过“&#x3D;”“&gt;”的限制……</p>
<p>** 7、通过IN绕过</p>
<p>与上面的LIKE的思路差不多,如or swords IN (swords)</p>
<p>** 8、通过BETWEEN绕过</p>
<p>如or swords BETWEEN rw AND tw</p>
<p>** 9、通过&gt;或者&lt;绕过</p>
<p>or swords &gt; sw<br>or swords &lt; tw<br>or 1&lt;3<br>……</p>
<p>** 10、运用注释语句绕过</p>
<p>用&#x2F;<strong>&#x2F;代替空格，如：UNION &#x2F;</strong>&#x2F; Select &#x2F;**&#x2F;user，pwd，from tbluser</p>
<p>用&#x2F;<strong>&#x2F;分割敏感词，如：U&#x2F;</strong>&#x2F; NION &#x2F;<strong>&#x2F; SE&#x2F;</strong>&#x2F; LECT &#x2F;**&#x2F;user，pwd from tbluser</p>
<p>** 11、用HEX绕过，一般的IDS都无法检测出来</p>
<p>0x730079007300610064006D0069006E00 &#x3D;hex(sysadmin)</p>
<p>0x640062005F006F0077006E0065007200 &#x3D;hex(db_owner)</p>
<p>** 12、大小写互换绕过</p>
<p>select 可以写成 SelEct</p>
<p>union 可以写成 UnIoN</p>
<p>** 13、多种编码组合绕过</p>
<p>常用的有BASE64、ASC、SQL、HEX、URL编码</p>
<p>** 14、利用中转工具绕过</p>
<p>可以利用刺猬的中转工具来绕过</p>
<p>** 15、利用特殊字符填充绕过</p>
<p>这些特殊字符，会被解释成空格，方式和通过空格绕过一样的，一般用来绕过第三方防火墙软件</p>
<p>** 16、改变攻击方式</p>
<p>如果get提交实在无法绕过，可以尝试改变攻击方式。如；post注入、寻找子站、旁站……等，如有疑问可以随时联系我QQ814360954哦，我很乐意和大家交流黑客技术。</p>
]]></content>
      <tags>
        <tag>Hacker</tag>
      </tags>
  </entry>
  <entry>
    <title>新年来了</title>
    <url>/2016/01/01/the-new-year-comes.html</url>
    <content><![CDATA[<p>今晚风很大，今晚是2015年最后一个夜晚，2016年的第一个夜晚。</p>
<p>过去的2015年，对于我，是回归的一年，也是发生了许多事的一年：</p>
<ul>
<li>第一次创业结束</li>
<li>离开帝都，返回老家</li>
<li>上半年结束了一段短暂的感情，下半年又开始了一段新的历程</li>
<li>开始了远程工作模式</li>
<li>注册了一个域名，希望可以写点文字性的东西</li>
<li>埋了一个毕业的时候的坑</li>
<li>重新关注起了比特币</li>
<li>第二次创业开始</li>
</ul>
<h4 id="第一次创业结束"><a href="#第一次创业结束" class="headerlink" title="第一次创业结束"></a>第一次创业结束</h4><p>第一次创业，经历了很多的事情，曾经在那段全职创业搞产品的阶段，每天工作到凌晨。<br>有时可能是直接通宵，清晨出门吃个早饭回来补个觉，继续开工。</p>
<p>而在产品拿投资不顺利的时候，每天起床后，思考的最多的问题就是，我自己为什么要创业，以及生活的目的是什么。</p>
<p>最终，在尝试了多个方向后，融资失败，第一次创业结束。虽然这段旅程结束了，但是，<br>我想明白了我的问题的答案，于是我打点了下北京的事情，就回来了。</p>
<p>可能大家都觉得我是奔着感情回来的，其实，这里面的原因还是很多的。我想明白了生活的目的，所以我觉得在哪里都不再那么重要了。既然空间不再最重要，那么就回来多陪陪父母吧，也让父母安心。</p>
<h4 id="离开帝都，返回老家"><a href="#离开帝都，返回老家" class="headerlink" title="离开帝都，返回老家"></a>离开帝都，返回老家</h4><p>当在帝都的所有行李被我哥拉走时，我在帝都的最后一晚，在入睡前还是觉得不舍与怀念。怀念奋斗过的日子，怀念一起奋斗的人。回忆是美好的，但终究是不应该阻碍前进的脚步，生活还有很多东西等待去发现与经历。当回到老家的那刻起，新的生活就开始了。</p>
<p>我是无论如何也不会想到，最终还是要回到这个小地方。虽然人们常说造化弄人，其实还是我们自己选择了我们自己的生活态度和方式。</p>
<p>既来之，则安之，更何况是自己的老家，困难是会有的，但一定会被解决的。</p>
<h4 id="感情"><a href="#感情" class="headerlink" title="感情"></a>感情</h4><p>有时候，感情这个事情就是很奇妙。本以为回来后，可能就会顺顺利利的，但实际上还是很曲折的。有时候你在感情上付出了，不一定就会得到回报，也就是俗话说的热恋贴冷屁股。</p>
<p>没有想到，回来后没多久，就结束了一个也不怎么长时间的感情。之后，也闷闷不乐了许久。期间每天都在家做无器械健身，摆弄些之前毕业时想要开发的东西来消遣和调整自己。效果还是挺不错的：体重减轻了不少；<a href="http://bm.to0l.cn/">开发了一个计划了3年的工具</a>，也算埋了之前的坑；买了个<a href="http://novels.pw/">http://novels.pw</a>的域名，想着在这上面写点小说；<a href="http://to0l.cn/">整理下自己开发过的工具</a>；成立了4年前想要成立的<a href="https://github.com/ldsn/inner-foundation">社团基金会</a>，重新开始关注了比特币。</p>
<p>就当我在认为短时间不会再恋爱的时候，我购买了单反，计划着要去云南待一段时间，去实现下边工作边旅游的梦想。</p>
<p>她，出现了。</p>
<p>生活重新回到了一个正常的轨道上，愿一切都能顺顺利利。</p>
<h4 id="工作"><a href="#工作" class="headerlink" title="工作"></a>工作</h4><p>回老家后，首要任务就是工作。对于不喜欢公务员的我来说，继续本行工作是最大的目标。无奈的是，在这个三四线的小城市，一个程序员要干所有活且不说，却拿着比餐厅服务生高不了多少的薪水，实在是让人接受不了。最终，走上了远程工作的道路。</p>
<p>但是这条道，在小城市走起来也是很辛苦的，最重要的问题就是在老一辈的人群中，得不到认同，普遍不认为天天窝在家里是在工作挣钱。其实问题也很好办，那就是能稳定的挣很多钱，大家也就不会再说些什么了。</p>
<p>于是，还是要再上路，准备二次创业。折腾了两个多月注册了个公司，脑海中有几个备选方案，跟朋友讨论后，最终决定，把当年在计算所的时候，内部孵化夭折的一个项目重新拾起来。接下来的2016年就是折腾这个货了，愿我能在2016开张大吉，希望在6月份能完成100个天使用户的目标。</p>
<h4 id="感谢"><a href="#感谢" class="headerlink" title="感谢"></a>感谢</h4><p>感谢爸妈一直对我的支持，无论我选择了什么，都支持我坚持下去。感谢我的她，在我最好的时间认识了你。感谢在帝都曾经帮助过我的人，因为你们我才在帝都顺风顺水。感谢社团的孩子们，有时候正是因为你们，我才有继续坚持下去的斗志。</p>
<p>2015结束。2016开始。</p>
]]></content>
      <tags>
        <tag>随笔</tag>
      </tags>
  </entry>
  <entry>
    <title>最近升级了我的『温故知新』Chrome插件，现在写写心路历程</title>
    <url>/2016/02/18/update-my-chrome-extension-review-bookmarks.html</url>
    <content><![CDATA[<p>春节假期快结束的时候，终于是找到了些时间来埋一埋去年的坑。经过2.2.0到2.2.6几个版本，终于把新版完成了。</p>
<p>在去年年中的时候，我开发了一款chrome应用，目的是为了方便自己整理自己的书签栏。想法很简单，就是利用零碎的时间去review自己的书签栏，没有用的就可以删除掉了。毕竟，单独拿出时间去整理书签栏，是个很累人的活，把这个活分散成零碎的时间去完成，倒也惬意。</p>
<p>这个想法其实是四年前的，只不过一直没去做罢了。每当自己的书签栏迫切需要整理的时候，就会想起来这个想法。终于在去年7月左右开始动工了。</p>
<p>不过开发进展不是很顺利，毕竟自己不是个专业前端，英语水平也一般，看chrome的文档就耗费了很多精力。先是把整个的chrome的文档页面的结构理顺了一下。真的是很想吐槽下chrome开发的文档组织的很糟糕，Api接口的列表的进入放在了一个三级的目录中，几乎每次要找一个Api接口的时候，都要翻好久，主要是找一级菜单就要花好久。</p>
<p>后来习惯后，也就习惯了。。。</p>
<p>最初的计划是能够每次打开新标签页的时候，自动提醒一次，提醒的数据是随机从书签栏里获取，使用 Chrome 的 Notification 接口显示书签名和地址，并提供打开和删除按钮。（原始想法，雏形）</p>
<p>但是在开发的过程中，首先发现的问题是，随机获取一个书签并不是像自己想的那样。<br>本来计划是扩展安装的时候，自动把书签一次性读入到html5的本地存储中去，然后从本地存储中随机获取。但是这里面涉及到几个点：</p>
<figure class="highlight plaintext"><table><tr><td class="code"><pre><span class="line">1、使用何种本地存储能方便的检索数据？</span><br><span class="line">2、用户变动书签信息（增加、删除）的时候，还需要同步到本地存储中。</span><br></pre></td></tr></table></figure>

<p>考虑到后期可能会迁移到 Firefox 和 Safari，于是选择本地存储的时候，我除了考虑数据的获取外，还参考过兼容列表。最终觉得还是先不要想那么远了，先把chrome版本的做好再说其他的。于是选择了IndexedDB。</p>
<p>然后的问题就是如何随机。在考虑这个问题的时候，我最先想到的就是获取本地存储中的书签列表的索引范围，然后写个方法来从这个索引范围中随机一个数。但是后来觉得这样不是很妥，如果随机性不是很好的话，那么可能某些书签被随机到的概率很大，那么效果就不理想了，或者是某个书签连续几次都被随机到，那么用户体验也是不好的。</p>
<p>那么能不能加个访问量的字段，然后把这个字段纳入到随机数的计算中呢？倒是可以，不过貌似这样程序就复杂了太多了，我也不知道最后做出来的效果是否满意，所以最后就放弃了随机一条书签的计划，改成顺次提取一条书签了。实验证明，这个方案至少我自己是满意的。</p>
<p>另外的就是找到书签的监听接口，在用户操作书签的时候，能把数据同步到本地存储中。不过这里当时为了赶时间尽快做出来看效果，就省掉了数据同步，而是每次打开新标签页获取一条书签的时候，都会读一遍全部的书签列表，然后把索引记录在本地存储中，以及这次访问的索引值存储在本地存储中。</p>
<p>第一版差不多就这样勉强的上线了。</p>
<p>上线后，发现还是有不少人来安装，真的是很感谢这些初期的用户。但是貌似我没有具体的运营数据。于是又研究了下 Google Analytics，在扩展中加入了一些操作事件的记录，依次来看一下，现在有多少人在用，提醒了多少次书签，删除了多少次书签。依次来判断我的扩展的价值。</p>
<p>之后，有用户开始反馈。反馈的主要问题就是弹出框和不再提醒机制。</p>
<p>弹出框的第一个问题，主要就是各个操作系统的 notification 差异性导致的。在 Win 下，notification 是在右下角弹出，而 Mac 和 Linux 下是在右上角。我的开发环境是 Mac，所以最初在右上角弹出，我觉得可以，就没有多留意。后来 Win 用户提出来能不能把提醒从右下角放到右上角，我才发现了这个问题。</p>
<p>弹出框第二个问题，右上角弹出的时候，有时候可能正好挡住了标签页的关闭按钮（在标签页打开了很多的时候），这样进行关闭标签页的操作时，要先关闭 notification ，才能点击标签页的关闭，显得很不方便。</p>
<p>弹出框的第三个问题，chrome升级某个版本后，notification 不再自动关闭了，只能手动关闭了。</p>
<p>弹出框的第四个问题，chrome 的 notification 只支持添加最多两个按钮，而当前已经有『打开标签页』和『删除』两个了，想再增加『不再提醒』按钮是不可能了。</p>
<p>关于『不再提醒』功能，是用户提出来的，希望能够把一些书签设置为『不再提醒』。</p>
<p>针对用户提出来的这些问题，我一直都很想处理，最后还是拖到了年后。</p>
<p>年后第一版v2.2.0，重构了本地存储部分，把书签存储在了 localStorage 中，并且完成了用户变动书签后，自动同步到 localStorage 中，这样每次取数据的时候，只需要从 localStorage 中获取 bookmark_id ，然后再调用 Api 取详细信息即可。这样也便于以后向 Firefox 和 Safari 迁移。</p>
<p>v2.2.0 – v2.2.2 还弃用了 notification 接口，使用替换『新标签页』的方式，我自己写了一个 html 页面，可以显示书签标题和网址，带 iframe 预览功能，带『新标签页打开』，『删除』，『不再提醒』等按钮。</p>
<p>上线后，好几个用户反馈能不能不替换新标签页。其实我最初也是不想替换的，但是无奈 chrome 应该处于安全考虑，不允许向 chrome:&#x2F;&#x2F;newtab&#x2F; 插入js代码，所以我也是不得已为之啊。</p>
<p>不过经过思考，觉得没必要非要在『新标签页』中进行提醒呀。于是开始开发迷你模式，即把弹层放到了正常的网页中去，也就是现在 v2.2.6 版本大家所看到的。</p>
<p>到此，这个扩展应该基本上就完成了。估计短时间内是不需要增加或者修改什么功能了。</p>
<p>总结一下，开发扩展基本上就跟开发传统软件是一样的了，应该要遵循传统的流程。平时自己写 PHP 网站写习惯了，遇到问题随时修改随时上线。现在扩展出个bug，至少要60分钟才能发布完毕，等用户升级到新版本还不知道什么时间。我在开发的时候，经常遇到的就是这个问题，某个版本发布前已经测试的很不错了，结果在商店点击完发布了，又用了几次就发现新问题了，导致自己不得不增加版本号，重新上传修复bug后的版本进行发布。</p>
<p>另外就是需要加强与用户的沟通和交流，现在感觉做的最不足的就是这一点。其次就是交流后，用户反馈的哪些该采纳，哪些该舍弃，还是个很让我迷惑的问题。这个还需要再思考思考。</p>
<p>最后，附上扩展地址和反馈地址：</p>
<p><a href="http://bm.to0l.cn/">http://bm.to0l.cn/</a></p>
<p><a href="https://gitter.im/ety001/bookmark-extension">https://gitter.im/ety001/bookmark-extension</a></p>
]]></content>
      <tags>
        <tag>随笔</tag>
      </tags>
  </entry>
  <entry>
    <title>解决 xl2tpd.service start request repeated too quickly refusing to start</title>
    <url>/2016/01/22/fixed-xl2tp-service-start-request-repeated-too-quickly-refusing-to-start-problem.html</url>
    <content><![CDATA[<p>今天在CentOS7中安装部署L2TP，但是用<code>systemctl</code>启动的时候，总是报下面的错误:</p>
<figure class="highlight plaintext"><table><tr><td class="code"><pre><span class="line">xl2tpd.service start request repeated too quickly refusing to start</span><br></pre></td></tr></table></figure>

<p>直接使用<code>xl2tpd -D</code>就能启动成功，于是把重点检查对象放在了<code>/usr/lib/systemd/system/xl2tpd.service</code>这个文件上。</p>
<p>通过多次试验，发现把下面的这行注释掉后，就能正常使用了</p>
<figure class="highlight plaintext"><table><tr><td class="code"><pre><span class="line">#ExecStartPre=/sbin/modprobe -q l2tp_ppp</span><br></pre></td></tr></table></figure>

<p>另外再附带上iptables的配置：</p>
<figure class="highlight plaintext"><table><tr><td class="code"><pre><span class="line">iptables --table nat --append POSTROUTING --jump MASQUERADE</span><br></pre></td></tr></table></figure>

]]></content>
      <tags>
        <tag>Server&amp;OS</tag>
      </tags>
  </entry>
  <entry>
    <title>更换了新的主题，对文章重新分类</title>
    <url>/2016/03/08/change-my-jekyll-blog-theme.html</url>
    <content><![CDATA[<p>昨天下午开始到今天上午，终于是把博客的主题换好，并对文章重新进行了分类整理。<br>从<code>Wordpress</code>到<code>Jekyll</code>后，一直沿用<code>Jekyll</code>自带的主题，没有时间去更换，<br>文章也是用脚本从<code>Wordpress</code>搬过来的，所以导致分类也是乱糟糟的。</p>
<p>更换主题的起因是，原来自带的主题在手机下的访问体验很不好。为了能保证之后顺利的在<br>朋友圈分享自己博客的内容，所以就决定换一个对手机访问体验友好的主题。</p>
<p>另外，糟糕的分类也是不便于查找和阅读，因此几乎花了大半天的时间在这里整理自己之前的博文。</p>
<p>在整理的过程中，其实也在快速的review下之前的东西。</p>
<p>发现自己从记博客开始，很大的时间比例是花在<a href="/tags/#Server&OS">服务器环境的搭建和操作系统</a>的配置上面了。<br>感觉自己更像是网管，而不是程序员。如果按照自己原来想做一个架构师的目标来看，<br>方向还是偏离了很多。发生这个偏差的原因，我分析除了我自我的兴趣点比较多以外，<br>那就是在计算所的工作内容和工作环境了。</p>
<p>从时间角度来看，我2010年开始建立博客，那时候是大二，到2011年底去计算所开始实习，<br>这段时间更多的内容是转载。从2012年–2013年是高产的两年，更多的是因为项目推进需要新的知识，<br>以及项目中遇到了各种各样的问题。这也再次证明了，加入一个项目去动手实践才能推动自己的技术积累。</p>
<p>从质量角度来看，转载的比例过大。虽然在2014年开始已经开始注意减少转载，<br>但是自己动手写的东西，更多的还是像流水账，像是备忘录。行文组织乱，文笔缺少亮点，<br>这应该得慢慢的去练，最终形成一个自己风格的文体。</p>
<p>从生活角度来看，由于最初对于博客的定位是技术笔记，但是慢慢的发现，我们的生活是丰富多彩的，<br>作为个人博客，还是应该把自己的一些所思所想记录下来，让博客看上去更有生气，而不是一堆堆的代码。</p>
<p>注重生活，注重思考，注重总结应该是下个阶段的目标。</p>
]]></content>
      <tags>
        <tag>随笔</tag>
      </tags>
  </entry>
  <entry>
    <title>解决MacOS的Sed报invalid command错误</title>
    <url>/2016/03/08/sed-invalid-command-problem-fixed-in-mac-os.html</url>
    <content><![CDATA[<p>这两天再更换博客的主题，顺便把博客内的文章分类重新整理下。</p>
<p>由于有一部分的tag的更改具有重复性，为了省力气，就用sed来完成批量替换。<br>进入<code>_post</code>文件件后执行下面的命令，遇到了<code>invalid command</code>的错误,</p>
<figure class="highlight plaintext"><table><tr><td class="code"><pre><span class="line">➜  _posts git:(new_theme) sed -i &quot;s/categories/tags/g&quot; `grep &quot;categories&quot; -rl ./`</span><br><span class="line"></span><br><span class="line">sed: 1: &quot;.//2010-11-19-16-days-r ...&quot;: invalid command code .</span><br></pre></td></tr></table></figure>

<p>对命令修改了好几个样子，都是报<code>invalid command code</code>，最后在stackoverflow找到了答案，<br><a href="http://stackoverflow.com/a/7573438/2086146">http://stackoverflow.com/a/7573438/2086146</a>，原来是需要再增加个参数来选择是否备份源文件。</p>
<p>即命令可以修改成下面的样子：</p>
<figure class="highlight plaintext"><table><tr><td class="code"><pre><span class="line">➜  _posts git:(new_theme) sed -i.back &quot;s/categories/tags/g&quot; `grep &quot;categories&quot; -rl ./`</span><br></pre></td></tr></table></figure>

<p>这样，<code>sed</code>命令会把源文件备份出一个后缀为<code>.back</code>的文件，然后在源文件里进行修改。<br>如果想直接替换源文件，可以修改成下面的样子：</p>
<figure class="highlight plaintext"><table><tr><td class="code"><pre><span class="line">➜  _posts git:(new_theme) sed &#x27;&#x27; -i &quot;s/categories/tags/g&quot; `grep &quot;categories&quot; -rl ./`</span><br></pre></td></tr></table></figure>

<p>最后打印了下<code>sed</code>的<code>help</code>，的确是有个参数，不过没有写怎么用。。</p>
<figure class="highlight plaintext"><table><tr><td class="code"><pre><span class="line">➜  ety001.github.io git:(master) ✗ sed --help</span><br><span class="line">sed: illegal option -- -</span><br><span class="line">usage: sed script [-Ealn] [-i extension] [file ...]</span><br><span class="line">       sed [-Ealn] [-i extension] [-e script] ... [-f script_file] ... [file ...]</span><br></pre></td></tr></table></figure>

]]></content>
      <tags>
        <tag>Server&amp;OS</tag>
      </tags>
  </entry>
  <entry>
    <title>Macbook Air内置麦克风奇怪问题解决</title>
    <url>/2016/03/18/solve-the--intenal-microphone-problems.html</url>
    <content><![CDATA[<p>2014年年底的某一天，在家跟来爷通QQ电话讨论项目，发现我的Mac内置麦克风采集不到我说话的声音了。<br>前一天还是好好的，怎么突然就不能用了呢？刚开始以为可能是某个地方配置出问题了，把麦克风静音了。<br>但是查看系统配置，没有任何问题，不过有一个很奇怪的现象，就是配置中的电瓶显示能采集到我敲击外壳和键盘的声音。<br>我又试了几次，并且用录音软件试了下，果然是能录下来敲击键盘和外壳的声音，而说话的声音，必须要极端的大，<br>才能录制上蚊子的声音。</p>
<p>我在考虑是不是驱动因为当晚安装内录软件有问题了，于是卸载了内录软件，也没有效果，于是放狗开搜。<br>不要问我为啥不用百度，因为百度根本就屁毛都没有。。</p>
<p>于是搜到了很多麦克风的问题，大家都说到了要<code>重置SMC</code>和<code>重置PRAM</code>，但是试过后也是无果。<br>不过他们跟我遇到的情况也不大一致，直到找到下面这个帖子：</p>
<p><a href="http://forums.macrumors.com/threads/how-i-fixed-my-internal-microphone.410734/">http://forums.macrumors.com/threads/how-i-fixed-my-internal-microphone.410734/</a></p>
<p>不得不说，关键词的力量，之前一直用click来描述我的问题，换成flick后，就找到了这篇帖子。</p>
<p>这个帖子的楼主看来遇到了和我一样的问题，且时间很早，都是2008年的老帖子了。。。</p>
<p>不过楼主的解决方法很奇葩，就是敲了敲麦克风位置，然后。。。。然后就特么好了。。。</p>
<p>然后楼下好多人都成功了。。。</p>
<p>关键是，我都把手指头快敲断了，毛线效果都没有看到，这是闹哪样，难道是我的姿势不对？</p>
<p>又折腾了一天，于是放弃了。。。</p>
<p>时间回到当下，最近又想折腾下我的麦克风了（突然想到了一句歌：是谁抢走了我的麦克风。。。），于是继续google。</p>
<p>这次巧合的是，我又找到了当年的那个帖子，抱着侥幸的心理，又当当当的敲到手疼。。。。。然并卵。。。</p>
<p>不过我又找到了下面的一个帖子：</p>
<p><a href="http://apple.stackexchange.com/questions/90123/internal-mic-stopped-recording-voice-but-hears-case-keyboard-touching">http://apple.stackexchange.com/questions/90123/internal-mic-stopped-recording-voice-but-hears-case-keyboard-touching</a></p>
<p>其中有人说到，用针戳一戳就好了。。。话说我当时也想到了这个问题，但是我仔细看过了麦克风的孔，很细，<br>也没有堆积灰尘，至少在肉眼看来是这样的。但是现在也没有办法了，就去找了根很细的针，轻轻的把针尖插入，<br>也仅仅只是能插入一毫米的针尖。转动了下，拿出来，针头上居然有灰！！！！！！</p>
<p>毫不夸张的说，这个灰的体积也就是1立方毫米！！！</p>
<p>然后我对着麦克风说话，看到配置界面的电瓶居然有反应了！！！！！</p>
<p>立马清理了所有的小孔，然后用Skype测试了下，麦克风终于恢复正常了！！！</p>
<p>真心觉得这个是个Bug，太丧心病狂的Bug了，心里真的是有一万匹草泥马奔驰而过呀。。。</p>
]]></content>
      <tags>
        <tag>杂七杂八</tag>
        <tag>Macbook</tag>
      </tags>
  </entry>
  <entry>
    <title>我的土壤湿度检测实验总结</title>
    <url>/2016/03/16/my-lab-report-of-soil-moisture-detection.html</url>
    <content><![CDATA[<p>去年下半年花了很久的时间从零开始，然后搞了个土壤湿度检测的东西，成品就是下图的样子：</p>
<p><img src="/upload/20160316/1.jpg" alt="成品"></p>
<p>本计划是想直接把土壤湿度检测装置安装到树莓派上，然后用python之类的脚本语言去采集数据，<br>并发布到网络收集器上，同时提供低于阈值微信提醒。但是后来才知道，原来树莓派只接收数字信号，<br>不接受模拟信号，买到的土壤检测装置，如果想要提供具体的值的话，需要采集模拟信号。<br>对于一个非电子专业的人来说，终于借这个机会大体知道了什么是数电，什么是模电了。</p>
<p>既然没法直接搞，就看看中间加个转换，试了试之前那个不能用的<code>arduino</code>，好吧依旧不能用。<br>就花钱买了个<a href="http://s.click.taobao.com/t?e=m=2&s=qA85UWS+XH0cQipKwQzePOeEDrYVVa64K7Vc7tFgwiFRAdhuF14FMVDjrG2n328J1aH1Hk3GeOgVbLnG1O55J2SP5rc5nVXRcJs+Ui7DM+cVMhb0U1nahcPwu+7SsJVXr5teog9dlPBYDLVnbiU7U8YOae24fhW0&pvid=50_222.134.110.205_351_1458109566534"><code>ADC</code></a>，结果搞了两个月也没有搞明白该怎么接线，就更不用说怎么写个支持树莓派的驱动了。。</p>
<p>于是重新回过头来研究<code>arduino</code>吧，看看到底能不能修好。最终发现原来是某些烧写配置不对，<br>重新配置后，烧写测试通过。关于烧写<code>A8M</code>的配置就放在了gist，<a href="https://gist.github.com/ety001/d44bd7c770b2d2937cfb">https://gist.github.com/ety001/d44bd7c770b2d2937cfb</a>。</p>
<p>最终就是树莓派通过<code>arduino</code>来读取采集器的数据，并走<code>wifi</code>把数据上报，达到阈值就发微信提醒。<br>下面的链接就是采集的湿度数据了：</p>
<p><a href="http://www.yeelink.net/devices/343089/#sensor_380664">http://www.yeelink.net/devices/343089/#sensor_380664</a></p>
<p>今天开始就关停这套设备了，因为插入土壤的探测部分，真心的不耐腐蚀。<br>所以现在经过实验后来看，当下淘宝上卖的<a href="http://s.click.taobao.com/t?e=m=2&s=NrvJUDEwXF4cQipKwQzePOeEDrYVVa64K7Vc7tFgwiFRAdhuF14FMV3Ck+JX8eppMMgx22UI05YVbLnG1O55J2SP5rc5nVXRcJs+Ui7DM+c4FWg0oS8KwV3vdPHYA5wck8nwxyyLVFUYpKhITPjCd8YOae24fhW0&pvid=50_222.134.110.205_218_1458100341042">类似这样的土壤湿度检测元件</a>，<br>也就是进行下实验而已，想要长时间使用则是不行的。</p>
<p>长时间使用的话，就像下图的样子了：</p>
<p><img src="/upload/20160316/2.jpg" alt="长时间使用的土壤检测装置被腐蚀"></p>
<p>可以看到PCB板上的金属多部分都已经被腐蚀了，这也是导致有段时间的数据一直为零的原因。<br>由于我设置了当湿度低于40%就进行微信提醒，每天至多提醒一次，所以那段时间天天都有微信报警。。。<br>当时还纳闷，是什么原因导致的，后来一个周末，把上图的那个装置从土里拔出来，才知道原来是这样。</p>
<p>于是又更换了新的探测装置——不锈钢小条，结果稳定使用3个月后，又被腐蚀了，</p>
<p><img src="/upload/20160316/3.jpg" alt="不锈钢都被腐蚀了"></p>
<p>可以看到有一根被腐蚀断了。我观察到断的位置是这根不锈钢条插在土里面时，土壤与空气交界的地方以上的部位。<br>这就引发了新的思考，为啥一根完好无损，另一根就被腐蚀的很严重呢。刚开始以为可能是土壤的问题，<br>但是后来看了最早的那个原装的探测装置的腐蚀情况，发现腐蚀也是不对称的。</p>
<p>一阳一阴，一正一负，突然间就想到了原来化学课上学过的电解。如果用电解的思路来考虑的话，<br>就能解释为什么只有一根腐蚀严重了，土壤应该只是提供了潮湿的环境和土壤中的离子，也就是土壤充当了电解质。<br>由于<code>arduino</code>的电流很微弱，所以化学反应进行的很缓慢。另外腐蚀严重的一端应该就是正极，<br>这个在拆下来的时候也没有仔细看看。。</p>
<p>总之，就当做是做了个实验吧。</p>
]]></content>
      <tags>
        <tag>DM实验室</tag>
        <tag>杂七杂八</tag>
      </tags>
  </entry>
  <entry>
    <title>在树莓派3B上安装archlinux arm</title>
    <url>/2016/05/11/the-right-way-to-setup-archlinux-arm-on-the-raspberry-pi-3-b.html</url>
    <content><![CDATA[<p>新买了树莓派3B，由于树莓派3B是arm v8的64位cpu，所以之前树莓派2B的archlinux包显然是不能用了。</p>
<p>从 <a href="https://archlinuxarm.org/platforms/armv8/broadcom/raspberry-pi-3#installation">https://archlinuxarm.org/platforms/armv8/broadcom/raspberry-pi-3#installation</a><br>这个页面可以看到，</p>
<figure class="highlight plaintext"><table><tr><td class="code"><pre><span class="line">The current installation uses the 32-bit Raspberry Pi 2 armv7h root filesystem. This will be changing eventually to use our AArch64 repository to take full advantage of the ARMv8 Cortex-A53 cores.</span><br></pre></td></tr></table></figure>

<p>当前只能安装arm v7，v8的还没有。</p>
<p>所以按照该页面的教程操作即可。</p>
<p>注意在下载filesystem的时候，下载下面的这个包</p>
<figure class="highlight plaintext"><table><tr><td class="code"><pre><span class="line">http://archlinuxarm.org/os/ArchLinuxARM-rpi-2-latest.tar.gz</span><br></pre></td></tr></table></figure>


]]></content>
      <tags>
        <tag>Server&amp;OS</tag>
      </tags>
  </entry>
  <entry>
    <title>如何启用树莓派3b的蓝牙</title>
    <url>/2016/05/11/the-right-way-to-setup-bluetooth-on-raspberry-pi-3-b.html</url>
    <content><![CDATA[<p>表示这次买的树莓派3的坑太多了，蓝牙在Arch下都找不到，最终在论坛搜到了一篇<a href="https://archlinuxarm.org/forum/viewtopic.php?f=65&t=9961">帖子</a>，</p>
<figure class="highlight plaintext"><table><tr><td class="code"><pre><span class="line">That too, is not yet finished by the people at the Pi Foundation.</span><br></pre></td></tr></table></figure>

<p>原来基金会的人还没有彻底开发完。。。。WTF。。。。</p>
<p>不过好在有国外网友自己根据 Raspbian 下的包，做了个 Arch 下面的。不过是放在了Aur上，<br>需要用 <code>yaourt</code> 来安装下，这就好办了，<a href="https://archlinuxarm.org/forum/viewtopic.php?f=67&t=10017">这是原贴</a></p>
<pre><code>注意：是在非root下执行的
</code></pre>
<figure class="highlight plaintext"><table><tr><td class="code"><pre><span class="line">$ yaourt -S pi-bluetooth</span><br><span class="line">$ sudo systemctl enable brcm43438.service</span><br><span class="line">$ sudo reboot</span><br></pre></td></tr></table></figure>

<p>重启后，可以看到已经启动成功了，</p>
<figure class="highlight plaintext"><table><tr><td class="code"><pre><span class="line">[ety001@docker ~]$ sudo systemctl status brcm43438.service</span><br><span class="line">[sudo] password for ety001:</span><br><span class="line">* brcm43438.service - Broadcom BCM43438 bluetooth HCI</span><br><span class="line">   Loaded: loaded (/usr/lib/systemd/system/brcm43438.service; enabled; vendor pr</span><br><span class="line">   Active: active (running) since Wed 2016-05-11 15:53:51 UTC; 1min 9s ago</span><br><span class="line"> Main PID: 273 (hciattach-rpi3)</span><br><span class="line">    Tasks: 1 (limit: 512)</span><br><span class="line">   CGroup: /system.slice/brcm43438.service</span><br><span class="line">           `-273 /usr/bin/hciattach-rpi3 -n /dev/ttyAMA0 bcm43xx 921600 noflow -</span><br><span class="line"></span><br><span class="line">May 11 15:53:51 docker systemd[1]: Started Broadcom BCM43438 bluetooth HCI.</span><br></pre></td></tr></table></figure>

<p>接下来安装管理工具</p>
<figure class="highlight plaintext"><table><tr><td class="code"><pre><span class="line">$ sudo pacman -S bluez bluez-utils</span><br></pre></td></tr></table></figure>

<p>加载mod</p>
<figure class="highlight plaintext"><table><tr><td class="code"><pre><span class="line">[root@docker ~]# modprobe btusb</span><br></pre></td></tr></table></figure>

<p>启动设备</p>
<figure class="highlight plaintext"><table><tr><td class="code"><pre><span class="line">[root@docker ~]# hciconfig hci0 up</span><br></pre></td></tr></table></figure>

<p>增加配置，可以让设备开机自启动</p>
<figure class="highlight plaintext"><table><tr><td class="code"><pre><span class="line">[root@docker ~]# cat /etc/udev/rules.d/10-local.rules</span><br><span class="line"># Set bluetooth power up</span><br><span class="line">ACTION==&quot;add&quot;, KERNEL==&quot;hci0&quot;, RUN+=&quot;/usr/bin/hciconfig hci0 up&quot;</span><br></pre></td></tr></table></figure>

<figure class="highlight plaintext"><table><tr><td class="code"><pre><span class="line"> cat /etc/systemd/system/bluetooth-auto-power@.service</span><br><span class="line">[Unit]</span><br><span class="line">Description=Bluetooth auto power on</span><br><span class="line">After=bluetooth.service sys-subsystem-bluetooth-devices-%i.device suspend.target</span><br><span class="line"></span><br><span class="line">[Service]</span><br><span class="line">Type=oneshot</span><br><span class="line">ExecStartPre=/usr/bin/sleep 1</span><br><span class="line">ExecStart=/usr/bin/dbus-send --system --type=method_call --dest=org.bluez /org/bluez/%I org.freedesktop.DBus.Properties.Set string:org.bluez.Adapter1 string:Powered variant:boolean:true</span><br><span class="line"></span><br><span class="line">[Install]</span><br><span class="line">WantedBy=suspend.target</span><br></pre></td></tr></table></figure>

<figure class="highlight plaintext"><table><tr><td class="code"><pre><span class="line">[root@docker ~]# systemctl enable bluetooth</span><br><span class="line">[root@docker ~]# systemctl enable bluetooth-auto-power@hci0.service</span><br><span class="line">[root@docker ~]# reboot</span><br></pre></td></tr></table></figure>

<p>重启后，执行 <code>bluetoothctl</code> ，</p>
<figure class="highlight plaintext"><table><tr><td class="code"><pre><span class="line">[root@docker ~]# bluetoothctl</span><br><span class="line">[NEW] Controller B8:27:EB:B7:AF:FA docker [default]</span><br><span class="line">[NEW] Device 0C:FC:85:B0:08:78 Bluetooth Keyboard</span><br><span class="line">[bluetooth]#</span><br></pre></td></tr></table></figure>

<p>开始配对</p>
<figure class="highlight plaintext"><table><tr><td class="code"><pre><span class="line">[bluetooth]# agent on</span><br><span class="line">Agent registered</span><br><span class="line">[bluetooth]# default-agent</span><br><span class="line">Default agent request successful</span><br><span class="line">[bluetooth]# scan on</span><br><span class="line">Discovery started</span><br><span class="line">[CHG] Controller B8:27:EB:B7:AF:FA Discovering: yes</span><br><span class="line">[NEW] Device 5F:7A:78:E1:2A:0B 5F-7A-78-E1-2A-0B</span><br><span class="line">[bluetooth]# scan on</span><br><span class="line">Failed to start discovery: org.bluez.Error.InProgress</span><br><span class="line">[CHG] Device 0C:FC:85:B0:08:78 RSSI: -54</span><br><span class="line">[bluetooth]# pair 0C:FC:85:B0:08:78</span><br><span class="line">Attempting to pair with 0C:FC:85:B0:08:78</span><br><span class="line">[CHG] Device 0C:FC:85:B0:08:78 Connected: yes</span><br><span class="line">[agent] PIN code: 547945</span><br><span class="line">[CHG] Device 0C:FC:85:B0:08:78 Connected: no</span><br><span class="line">[CHG] Device 0C:FC:85:B0:08:78 Connected: yes</span><br><span class="line">[CHG] Device 0C:FC:85:B0:08:78 Connected: no</span><br><span class="line">[CHG] Device 0C:FC:85:B0:08:78 Connected: yes</span><br><span class="line">[agent] PIN code: 744661</span><br><span class="line">[CHG] Device 0C:FC:85:B0:08:78 Paired: yes</span><br><span class="line">Pairing successful</span><br><span class="line">[CHG] Device 0C:FC:85:B0:08:78 Connected: no</span><br><span class="line">[bluetooth]# trust 0C:FC:85:B0:08:78</span><br><span class="line">Changing 0C:FC:85:B0:08:78 trust succeeded</span><br><span class="line">[bluetooth]# connect 0C:FC:85:B0:08:78</span><br><span class="line">Attempting to connect to 0C:FC:85:B0:08:78</span><br><span class="line">[CHG] Device 0C:FC:85:B0:08:78 Connected: yes</span><br><span class="line">Connection successful</span><br><span class="line">[Bluetooth Keyboard]#</span><br></pre></td></tr></table></figure>

<p>终于可以使用我的蓝牙键盘了~ 赞赞赞！</p>
]]></content>
      <tags>
        <tag>Server&amp;OS</tag>
      </tags>
  </entry>
  <entry>
    <title>在archlinux上安装yaourt</title>
    <url>/2016/05/11/the-right-way-to-setup-yaourt-on-the-archlinux.html</url>
    <content><![CDATA[<p><code>Yaourt</code> 全称 <code>Yet Another User Repository Tool 用户的另一个软件仓库管理工具</code>，是玩 <code>Archlinux</code> 必备的工具，<br>之前一直没有好好总结下该如何安装，因为之前的wiki有简单的安装步骤足够用，但是貌似现在找不到了，那就只能从 <code>makepkg</code> 一步一步去安装了。</p>
<ul>
<li>首先，安装基础开发环境， <code>base-devel</code> 主要提供了编译环境</li>
</ul>
<figure class="highlight plaintext"><table><tr><td class="code"><pre><span class="line"># pacman -S base-devel</span><br></pre></td></tr></table></figure>

<ul>
<li>安装 <code>yajl</code></li>
</ul>
<figure class="highlight plaintext"><table><tr><td class="code"><pre><span class="line"># pacman -S yajl</span><br></pre></td></tr></table></figure>

<ul>
<li><p>安装 <code>package-query</code>,</p>
<p>  注意：使用 makepkg 的时候，要用非root用户; 去 <a href="https://aur.archlinux.org/packages/">https://aur.archlinux.org/packages/</a> 找需要的 PKGBUILD</p>
</li>
</ul>
<figure class="highlight plaintext"><table><tr><td class="code"><pre><span class="line">$ wget https://aur.archlinux.org/cgit/aur.git/plain/PKGBUILD?h=package-query -O PKGBUILD</span><br><span class="line"></span><br><span class="line">$ makepkg</span><br><span class="line"></span><br><span class="line">$ sudo pacman -U package-query-1.8-2-armv7h.pkg.tar.xz</span><br></pre></td></tr></table></figure>

<ul>
<li>安装 <code>yaourt</code>,</li>
</ul>
<figure class="highlight plaintext"><table><tr><td class="code"><pre><span class="line">$ wget https://aur.archlinux.org/cgit/aur.git/plain/PKGBUILD?h=yaourt -O PKGBUILD</span><br><span class="line"></span><br><span class="line">$ makepkg</span><br><span class="line"></span><br><span class="line">$ sudo pacman -U yaourt-1.8.1-1-any.pkg.tar.xz</span><br></pre></td></tr></table></figure>


]]></content>
      <tags>
        <tag>Server&amp;OS</tag>
      </tags>
  </entry>
  <entry>
    <title>网站从jekyll更换为hexo了，又是一个新的开始</title>
    <url>/2016/12/02/fresher-to-hexo.html</url>
    <content><![CDATA[<p>博客从大上周开始已经更换为 <strong>hexo</strong> 了。更好的主题，更好的阅读体验，感谢主题的作者，<br>已经微信打赏了~</p>
<p>同时，也不再使用 <strong>github pages</strong> 的空间了，把域名备了案迁回了国内的服务器上了，<br>真的是为了提升访问体验(尤其是微信访问未备案域名的体验)和搜索引擎收录不利，不得不搬回来。</p>
<p>之所以今天才写总结，是因为整个10月、11月都是魔鬼的加班。。。真心没有什么时间。</p>
<h2 id="起因"><a href="#起因" class="headerlink" title="起因"></a>起因</h2><p>开门见山的来说，觊觎 <strong>hexo</strong> 的主题已经很久了，好的文字排版能很好的提升阅读体验。<br>然而自己懒所以一直没有折腾更换到 <strong>hexo</strong>。而这次 <strong>jekyll</strong> 莫名其妙的出现异常，<br>所有的 <strong>&#96;</strong> 包含的代码都出现了排版混乱，google搜索未果，再加上之前的一些使用体验不爽，<br>促成了这次的更换。</p>
<h2 id="过程"><a href="#过程" class="headerlink" title="过程"></a>过程</h2><p>其实转移的过程还是比较痛苦，主要是有一些 <strong>jekyll</strong> 的标记在 <strong>hexo</strong> 下面不工作。<br>本来是想要用 <strong>sed</strong> 来批量处理的，在折腾了半个小时未果后，果断放弃了，改为一篇篇手改。<br>这样也让我在上次从 <strong>wordpress</strong> 转 <strong>jekyll</strong> 时的大删除后，又进行了一次大扫除。<br>并且对部分文章的排版进行了调整。</p>
<p>除了标记问题外，还有个坑就是引用文章功能。官网给了两个方法如下：</p>
<figure class="highlight plaintext"><table><tr><td class="code"><pre><span class="line">&#123;% post_path slug %&#125;</span><br><span class="line">&#123;% post_link slug [title] %&#125;</span><br></pre></td></tr></table></figure>

<p>其中 <strong>post_path</strong> 生成的是 类似 <strong>\2011\12\22\xxx-xxx-xxx.html</strong> 的东西，<br>而 <strong>post_link</strong> 生成的才是真正的 <strong>link</strong>，并且如果要生成超链接，必须按照下面的方法写：</p>
<figure class="highlight plaintext"><table><tr><td class="code"><pre><span class="line">[&#123;% post_link your-slug %&#125;](&#123;% post_link your-slug %&#125;)</span><br></pre></td></tr></table></figure>

<p>另外使用 <strong>post_path</strong> 和 <strong>post_link</strong> 的时候，不能在段前开头直接用，在这个之前得有文字，<br>否则也会有问题。</p>
<h2 id="展望"><a href="#展望" class="headerlink" title="展望"></a>展望</h2><p>换了高大上的主题了，清理了很多无用的博文了，备案了网站域名了，这下都齐活了，剩下的就是好好的写了。<br>还是之前的目的，要慢慢的提升网站文字内容的质量了。每篇文章都赤裸裸的加入了 <strong>打赏</strong> 按钮，<br>希望这个不是摆设。</p>
<p>另外对于 <strong>markdown</strong> 的语法之前也是混乱的，导致写出来的东西也是混乱的，是时候提升下自己的文字排版水平了。</p>
<p>PS：感觉自己写的东西越来越像流水账了。。。</p>
]]></content>
      <tags>
        <tag>网站日志</tag>
      </tags>
  </entry>
  <entry>
    <title>2016总结</title>
    <url>/2017/02/10/the-summarize-of-2016.html</url>
    <content><![CDATA[<p>本打算在从清迈回国的路上，把年终总结写了，结果也是因为懒的可以了，也就放弃了。<br>回来后一直在忙着各种聚会，也就放下了，好在现在又能挤出时间来完整这篇总结。</p>
<p>2016年是最繁忙的一年了，也是人生最重要的一年。这一年无论是生活还是工作，都有比较多的事情发生。</p>
<p>首先，结婚了，不再单身。这意味以前一个人吃饱即可万事大吉的生活不再返了。新的开始，新的责任，<br>新的生活。一切都在新的节奏中慢慢去调整自己，适应当前的生活。</p>
<p>最大的感受可能就是个人研究东西的时间大幅减少了。再就是做一些决定的时候，要考虑担忧的方面也多起来了。<br>这也许就是一种成长。我们不可能永远都是个孩子，总有一天要长大，亲自挑起自己该肩负的担子。</p>
<p>现在回想之前的创业，就觉得的确是做什么事情要趁年轻呀。无论是在精力还是时间方面，都有很大的优势。<br>越长大，可能羁绊就越多了。</p>
<p>而我就是在这种羁绊的状态中，思考着工作的下一步该如何进展。</p>
<p>总结一年下来的工作，只能用碌碌无为而形容。而过去的多年，现在来看也算称得上碌碌无为了。<br>工作近5年了，但感觉自己进步甚微，不得不感慨，有个指路人的必要性。有时候，也许指路人的一句话，<br>就可以点醒自己，或者让自己少走弯路，而我却很少碰到这样的指路人。</p>
<p>越是焦急反而就越是混乱，真的不知道，这样状态什么时候是个了结。</p>
<p>当下，无论做什么，都感觉心有余而力不足。经常的去开导别人的我，现在回过头来看看自己，才发觉自己<br>才是个可笑之人。只能说，自己想办法开导开导自己，让自己快点走出泥潭吧。</p>
<p>2017，是乱？是迷？还是破？</p>
]]></content>
      <tags>
        <tag>随笔</tag>
      </tags>
  </entry>
  <entry>
    <title>修复Archlinux下Google Chrome的Flash插件不是最新版本的问题</title>
    <url>/2016/12/09/fix-the-archlinux-google-chrome-flash-plugin-out-of-date.html</url>
    <content><![CDATA[<p>最近重新把我的Dell本换回了 <em>Archlinux</em>，不过安装了 <em>chrome</em> 后发现 <em>flash</em> 插件不能正常使用。<br>使用 <em>chrome:&#x2F;&#x2F;plugins</em> 看到 <em>flash</em> 的 <em>location</em> 是 <em>internal-not-yet-present</em>，<br>这应该是没有安装的样子。从 <em>google</em> 上搜索了下，发现 <em>chrome</em> 不再自带 <em>flash</em> 插件了，<br>需要自己安装。。。</p>
<p>找了下方法，首先需要翻越 <em>GFW</em>，方法可以是 <em>VPN</em>，也可以 <em>shadowsocks</em>。使用代理的话，<br>在命令行里执行下面的命令：</p>
<figure class="highlight plaintext"><table><tr><td class="code"><pre><span class="line">$ google-chrome-stable --proxy-server=&quot;127.0.0.1:8888&quot;</span><br></pre></td></tr></table></figure>

<p>默认使用 <em>http代理</em>。打开 <em>chrome</em> 后，访问 <em>chrome:&#x2F;&#x2F;components</em>，<br>点击 <em>Flash</em> 下面的检查更新，之后就可以安装成功了。</p>
]]></content>
      <tags>
        <tag>Server&amp;OS</tag>
        <tag>配置</tag>
      </tags>
  </entry>
  <entry>
    <title>MySQL中如何检索值为null的记录</title>
    <url>/2017/02/11/find-null-in-mysql.html</url>
    <content><![CDATA[<p>起因，在代码上线过程中发现了一个bug，列表中缺失的值为 <em>NULL</em> 的记录。<br>于是检查 <em>SQL</em> 语句，自己感觉没有什么问题。就是列表中不要显示值为 <em>sample</em> 的记录。</p>
<p>原有的SQL大致是这么写的</p>
<figure class="highlight plaintext"><table><tr><td class="code"><pre><span class="line">select * from tableA where key != &#x27;sample&#x27;;</span><br></pre></td></tr></table></figure>

<p>其中还有很多 <em>key</em> 为 <em>NULL</em> 的记录没有检索出来。</p>
<p>经过搜索引擎的查找，发现原来普通的运算符不能用在 <em>NULL</em> 上。。。</p>
<p>真是惭愧。。居然不知道这个。。。</p>
<p>改为下面的语句后就可以了</p>
<figure class="highlight plaintext"><table><tr><td class="code"><pre><span class="line">select * from tableA where key != &#x27;sample&#x27; or key is null;</span><br></pre></td></tr></table></figure>
]]></content>
      <tags>
        <tag>后端</tag>
      </tags>
  </entry>
  <entry>
    <title>JS中的时区问题</title>
    <url>/2017/02/11/js-timezone-problem.html</url>
    <content><![CDATA[<p>昨天项目中的一个js的时间间隔计算的bug，真的是被搞的焦头烂额。<br>最终无奈，只能把js计算过程中的每一步都 <em>console.log</em> 出来，<br>然后才发现，原来是同事的机器本地时间涉及到冬令时和夏令时。</p>
<p>源代码大致是这样：</p>
<figure class="highlight plaintext"><table><tr><td class="code"><pre><span class="line">var start_date = &#x27;2017/02/10&#x27;;</span><br><span class="line">var end_date = &#x27;2017/05/20&#x27;;</span><br><span class="line">var tmp = new Date(start_date);</span><br><span class="line">start_time = tmp.getTime();</span><br><span class="line">tmp = new Date(end_date);</span><br><span class="line">end_time = tmp.getTime();</span><br><span class="line">//时间戳相减求间隔的代码就不写了。。。</span><br></pre></td></tr></table></figure>

<p>由于存在夏令时和冬令时的缘故，两次的 <em>tmp</em> 对象的时区其实是不一样的，<br>这就导致最终的时间戳做差就会少一天。</p>
<p>最终的解决方案是，把时间都统一到 <em>UTC</em> 后，然后再计算。</p>
<p>具体的获取时间戳的方法是：</p>
<figure class="highlight plaintext"><table><tr><td class="code"><pre><span class="line">var timestamp = Date.UTC(year, month-1, day);</span><br></pre></td></tr></table></figure>

<p><strong>一定要注意的是 js 中的 month 是从 0 开始的！！！</strong></p>
]]></content>
      <tags>
        <tag>前端</tag>
      </tags>
  </entry>
  <entry>
    <title>Linux中的locale报错问题</title>
    <url>/2017/03/02/linux-locale-error.html</url>
    <content><![CDATA[<p>最近好几个服务器，ssh登录的时候，都有同一个报错，</p>
<figure class="highlight plaintext"><table><tr><td class="code"><pre><span class="line">setlocale: LC_CTYPE: cannot change locale (UTF-8): No such file or directory</span><br></pre></td></tr></table></figure>

<p>经过搜索，找到了解决方案</p>
<figure class="highlight plaintext"><table><tr><td class="code"><pre><span class="line"># tee /etc/environment &lt;&lt;- &#x27;EOF&#x27;</span><br><span class="line"> LANG=en_US.utf-8</span><br><span class="line"> LC_ALL=en_US.utf-8</span><br><span class="line"> EOF</span><br><span class="line"></span><br><span class="line"># source /etc/environment</span><br><span class="line"></span><br><span class="line">/* 生成 en_US.UTF-8 locale文件 CentOS没有locale-gen命令*/</span><br><span class="line"># localedef -v -c -i en_US -f UTF-8 en_US.UTF-8</span><br></pre></td></tr></table></figure>
]]></content>
      <tags>
        <tag>Server&amp;OS</tag>
      </tags>
  </entry>
  <entry>
    <title>3g无线网卡上的AT指令总结</title>
    <url>/2016/12/02/3g-dongle-at-commands.html</url>
    <content><![CDATA[<h2 id="前言"><a href="#前言" class="headerlink" title="前言"></a>前言</h2><p>之前6月份搞过树莓派外加3G网卡接打电话，一直想要写份关于 <strong>asterisk</strong> 的菜鸟教程。<br>话说目录都拟好了，就是没有时间。另外也是因为其中还有些 <strong>NAT的问题</strong> 没有完全攻克。</p>
<p>复杂的既然没时间搞，那么就先总结下简单的东西吧，从AT指令开始。</p>
<h2 id="概念"><a href="#概念" class="headerlink" title="概念"></a>概念</h2><p><strong>AT</strong> 即 <strong>Attention</strong> ，<strong>AT指令集</strong> 是从 <strong>终端设备(Terminal Equipment，TE)</strong><br>或 <strong>数据终端设备(Data Terminal Equipment，DTE)</strong> 向 <strong>终端适配器(Terminal Adapter， TA)</strong><br>或 <strong>数据电路终端设备(Data Circuit Terminal Equipment，DCE)</strong> 发送的。</p>
<p>通过TA，TE发送 <strong>AT指令</strong> 来控制 <strong>移动台(Mobile Station，MS)</strong> 的功能，<br>与 <strong>GSM 网络业务</strong> 进行交互。用户可以通过AT指令进行呼叫、短信、电话本、数据业务、传真等方面的控制。</p>
<p>具体的概念参考百度百科吧 <a href="http://baike.baidu.com/link?url=h5HIp9nrv3c5YUwrdBPJsiAzeifMIlvpowj2FprSP5_vmWuZLteVAlbPrf-oBIYZs6_zPVkYagLFV0clhTYZmK">http://baike.baidu.com/link?url=h5HIp9nrv3c5YUwrdBPJsiAzeifMIlvpowj2FprSP5_vmWuZLteVAlbPrf-oBIYZs6_zPVkYagLFV0clhTYZmK</a>。</p>
<h2 id="常用指令总结"><a href="#常用指令总结" class="headerlink" title="常用指令总结"></a>常用指令总结</h2><p>指令是以 <strong>AT</strong> 开头的，切记！！！</p>
<p>国内貌似这方面的总结文章不多，我在折腾那套设备的时候，主要参考的是国外的文章。<br>其中很多文章写指令的时候，都省略了 <strong>AT</strong> ， 这也使我刚开始是一头雾水。</p>
<p>下面就是我总结的常用的指令</p>
<ul>
<li><p><strong>AT+CGMI</strong></p>
<p>  <em>获取生产商名字</em></p>
</li>
<li><p><strong>AT+CGMR</strong></p>
<p>  <em>获取软件版本</em></p>
</li>
<li><p><strong>AT+CIMI</strong></p>
<p>  <em>获取 SIM 卡的 IMSI</em></p>
</li>
<li><p><strong>AT+CGSN</strong></p>
<p>  <em>获取设备的 IMEI</em></p>
</li>
<li><p><strong>AT^HWVER</strong></p>
<p>  <em>获取硬件版本</em></p>
</li>
<li><p><strong>AT+CPWD&#x3D;SC,old pin, new pin</strong></p>
<p>  <em>改变 pin</em></p>
</li>
<li><p><strong>AT+CLCK&#x3D;SC,mode,pin</strong></p>
<p>  <em>Enable PIN</em></p>
  <figure class="highlight plaintext"><table><tr><td class="code"><pre><span class="line">Mode: 0=unlock, 1=lock, 2=query state</span><br></pre></td></tr></table></figure>
</li>
<li><p><strong>AT+CGDCONT&#x3D;1,”IP”,”apn name”</strong></p>
<p>  <em>选择APN</em></p>
  <figure class="highlight plaintext"><table><tr><td class="code"><pre><span class="line">对于中国联通的SIM卡</span><br><span class="line">AT+CGDCONT=1,”IP”,”internet”</span><br></pre></td></tr></table></figure></li>
<li><p><strong>AT+CFUN&#x3D;1,1</strong></p>
<p>  <em>重启设备</em></p>
</li>
<li><p><strong>AT^u2diag&#x3D;mode</strong></p>
<p>  <em>设置设备模式</em></p>
  <figure class="highlight plaintext"><table><tr><td class="code"><pre><span class="line">mode的可选值</span><br><span class="line">* 1, modem+cdrom</span><br><span class="line">* 255, modem+cdrom+cardreader</span><br><span class="line">* 256, modem+cardreader</span><br></pre></td></tr></table></figure>
</li>
<li><p><strong>AT^CVOICE&#x3D;?</strong></p>
<p>  <em>查询语音功能是否可用</em></p>
</li>
<li><p><strong>AT^CVOICE&#x3D;0</strong></p>
<p>  <em>激活语音功能</em></p>
</li>
<li><p><strong>AT+CSQ</strong></p>
<p>  <em>获取信号质量</em></p>
</li>
<li><p><strong>AT^SYSINFO</strong></p>
<p>  <em>获取系统信息</em></p>
<p>  <em>返回信息包含: status, domain, roaming status, mode, SIM state</em></p>
  <figure class="highlight plaintext"><table><tr><td class="code"><pre><span class="line">其中返回值的各个数值的意义如下:</span><br><span class="line"></span><br><span class="line">* Status</span><br><span class="line">    0 No service.</span><br><span class="line">    1 Restricted service</span><br><span class="line">    2 Valid service</span><br><span class="line">    3 Restricted regional service.</span><br><span class="line">    4 Power-saving and deep sleep state</span><br><span class="line">* Domain</span><br><span class="line">    0 No service.</span><br><span class="line">    1 Only CS service</span><br><span class="line">    2 Only PS service</span><br><span class="line">    3 PS+CS service</span><br><span class="line">    4 CS and PS not registered, searching</span><br><span class="line">* Roaming</span><br><span class="line">    0 Non roaming state</span><br><span class="line">    1 Roaming state</span><br><span class="line">* Mode</span><br><span class="line">    0 No service.</span><br><span class="line">    1 AMPS mode (not in use currently)</span><br><span class="line">    2 CDMA mode (not in use currently)</span><br><span class="line">    3 GSM/GPRS mode</span><br><span class="line">    4 HDR mode</span><br><span class="line">    5 WCDMA mode</span><br><span class="line">    6 GPS mode</span><br><span class="line">* SIM state</span><br><span class="line">    0 Invalid USIM card state or pin code locked</span><br><span class="line">    1 Valid USIM card state</span><br><span class="line">    2 USIM is invalid in case of CS</span><br><span class="line">    3 USIM is invalid in case of PS</span><br><span class="line">    4 USIM is invalid in case of either CS or PS</span><br><span class="line">    255 USIM card is not existent</span><br></pre></td></tr></table></figure>
</li>
<li><p><strong>AT^SYSCFG&#x3D;mode, order, band, roaming, domain</strong></p>
<p>  <em>设置系统</em></p>
  <figure class="highlight plaintext"><table><tr><td class="code"><pre><span class="line">设置为 GPRS Only</span><br><span class="line">AT^SYSCFG=13,1,3FFFFFFF,2,4</span><br><span class="line"></span><br><span class="line">设置为 3G only</span><br><span class="line">AT^SYSCFG=14,2,3FFFFFFF,2,4</span><br><span class="line"></span><br><span class="line">设置为 GPRS 优先</span><br><span class="line">AT^SYSCFG=2,1,3FFFFFFF,2,4</span><br><span class="line"></span><br><span class="line">设置为 3G 优先</span><br><span class="line">AT^SYSCFG=2,2,3FFFFFFF,2,4</span><br></pre></td></tr></table></figure>

<p>  <em>具体参数意义</em></p>
  <figure class="highlight plaintext"><table><tr><td class="code"><pre><span class="line">* Mode</span><br><span class="line">    2 Automatic search</span><br><span class="line">    13 2G ONLY</span><br><span class="line">    14 3G ONLY</span><br><span class="line">    16 No change</span><br><span class="line">* Order</span><br><span class="line">    0 Automatic search</span><br><span class="line">    1 2G first, then 3G</span><br><span class="line">    2 3G first, then 2G</span><br><span class="line">    3 No change</span><br><span class="line">* Band</span><br><span class="line">    80 GSM DCS systems</span><br><span class="line">    100 Extended GSM 900</span><br><span class="line">    200 Primary GSM 900</span><br><span class="line">    200000 GSM PCS</span><br><span class="line">    400000 WCDMA IMT 2000</span><br><span class="line">    3FFFFFFF Any band</span><br><span class="line">    40000000 No change of band</span><br><span class="line">* Roaming</span><br><span class="line">    0 Not supported</span><br><span class="line">    1 Roaming is supported</span><br><span class="line">    2 No change</span><br><span class="line">* Domain</span><br><span class="line">    0 CS_ONLY</span><br><span class="line">    1 PS_ONLY</span><br><span class="line">    2 CS_PS</span><br><span class="line">    3 ANY</span><br><span class="line">    4 No change</span><br></pre></td></tr></table></figure></li>
<li><p><strong>AT+COPS&#x3D;mode, format, operator</strong></p>
<p>  <em>设置网络</em></p>
<p>  <em>其中 AT+COPS&#x3D;? 可以用来列出所有网络(注意: 该命令执行时间较长)</em></p>
<p>  <em>具体参数如下</em></p>
  <figure class="highlight plaintext"><table><tr><td class="code"><pre><span class="line">Mode</span><br><span class="line">    0 Automatic</span><br><span class="line">    1 Manual</span><br><span class="line">    4 If manual fails, try automatic</span><br><span class="line">Format</span><br><span class="line">    1 Long alpha</span><br><span class="line">    2 Short alpha</span><br><span class="line">    3 Numeric</span><br><span class="line">Operator</span><br><span class="line">    Either the long alpha name, the short operator alpha code or the numeric code</span><br><span class="line">    Status</span><br><span class="line">    0 unknown</span><br><span class="line">    1 available</span><br><span class="line">    2 current</span><br><span class="line">    3 forbidden</span><br></pre></td></tr></table></figure>
</li>
<li><p><strong>AT+CUSD&#x3D;1,”USSD-Command”</strong></p>
<p>  <em>发送 USSD 指令</em></p>
<p>  <em>例如</em></p>
  <figure class="highlight plaintext"><table><tr><td class="code"><pre><span class="line">AT+CUSD=1,&quot;*100#&quot;</span><br></pre></td></tr></table></figure>

<p>  <em>对于某些设备你可能需要在指令最后附加上 “,15” 防止出现异常，例如：</em></p>
  <figure class="highlight plaintext"><table><tr><td class="code"><pre><span class="line">AT+CUSD=1,&quot;*100#&quot;,15</span><br></pre></td></tr></table></figure>
</li>
<li><p><strong>ATD10086;</strong></p>
<p>  <em>拨打10086，注意分号不能缺少，另外前提你的设备支持voice</em></p>
</li>
<li><p><strong>ATH</strong></p>
<p>  <em>挂掉电话</em></p>
</li>
<li><p><strong>ATA</strong></p>
<p>  <em>接听电话</em></p>
</li>
<li><p><strong>发送短信</strong></p>
  <figure class="highlight plaintext"><table><tr><td class="code"><pre><span class="line">首先设置成文本模式：</span><br><span class="line">AT+CMGF=1</span><br><span class="line">设置使用模块默认的国际标准字母字符集发送短信</span><br><span class="line">AT+CSCS?</span><br><span class="line">发送目标号码</span><br><span class="line">AT+CMGS=”10086″（回车）</span><br><span class="line">此时系统会出现“&gt;”提示符，直接输入短信内容</span><br><span class="line">&gt; YE</span><br><span class="line">这条短信的目的是发送给10086，用来查询余额。</span><br><span class="line">0x1A （16进制发送）</span><br><span class="line">发送成功以后会收到系统如下提示，后面的数字表示发送短信的编号。</span><br><span class="line">+CMGS: 115</span><br><span class="line">OK</span><br><span class="line">接收短信</span><br><span class="line">如果接收到了短信，则系统会在串口输出如下的提示，后面的数字表示短信收件箱里的短信数目：</span><br><span class="line">+CMTI: “SM”,2</span><br><span class="line">发送如下AT指令，后面的数字是短信索引号。由于使用的是IRA编码，中文短信不能显示，可以发英文短信用来测试。</span><br><span class="line">AT+CMGR=2</span><br></pre></td></tr></table></figure></li>
<li><p><strong>AT+CPIN?</strong></p>
<p>  <em>返回sim卡状态，返回 READY OK 即为正常</em></p>
</li>
</ul>
<hr>
<p>以下是摘自他人的博客(<a href="http://zhan.renren.com/cxymst?gid=3602888498030665972&amp;from=template&amp;checked=true">http://zhan.renren.com/cxymst?gid=3602888498030665972&amp;from=template&amp;checked=true</a>)：</p>
<figure class="highlight plaintext"><table><tr><td class="code"><pre><span class="line">最近在调试与 MODEM 通信相关的一个产品，主要是借助 MODEM 的链路实现数话同传（数据是专有格式）,故从网上收集于此以供学习。</span><br><span class="line"></span><br><span class="line">AT命令集</span><br><span class="line">AT命令使计算机或终端与调制解调器通讯。通讯软件是你与调制解调器间的交接口方法,请阅读这一章您可以按照自己的需要设置您的调制解调器</span><br><span class="line">装入通讯软件包并进入终端或交互模式后,就可以发出工业标准AT指令了,(请参阅通讯软件手册)。所有命令行必须由ASCII字符“AT”开始并由 &lt;Enter&gt; 结束。除了A/指令和推出(缺省为+++)。这些将在后面讨论。字母&quot;AT&quot;用以提醒调制解调器注意，其后将有一条或多条命令出现, &quot;AT&quot;及其后的字母可以是大写或小写。</span><br><span class="line">AT必须同为大写或小写。如&quot;At&quot;或&quot;aT&quot;是不允许的。</span><br><span class="line">一串命令可以写在一行里。为了便于阅读可以加或不加空格。命令中或命令间的空格会被忽略，命令行的最多字符数为39(包括&quot;AT&quot;)。在输入一条命令期间，可以用退格键(backspace)改正除&quot;AT&quot;以外的错误。</span><br><span class="line">若命令行中任一处出现语法错误，本行其后的内容将被忽略，并返回ERROR。大数带有超出正常范围的参数的命令将不被接收并返回 ERROR.</span><br><span class="line">本章列出所有设置调制解调器的命令。包括控制ACTIVE调制解调器的贺氏标准AT命令集。贺氏V系列命令集和扩展命令集</span><br><span class="line">AT命令集的描述</span><br><span class="line">符号 * 表明该命令的设置可用AT&amp;Wn命令存于两个用户方案中的一个</span><br><span class="line">A/        重执行命令</span><br><span class="line">重执行前一AT命令行，主要用于连接时占线，无应答或号码错误。这一命令必须单独构成一命令行并由&quot;/&quot;字符结束,(&lt;Enter&gt; 不能用于结束命令)。</span><br><span class="line">+++       退出字符 缺省:+</span><br><span class="line">切换调制解调器从在线状态到命令状态，而不会中断数据连接。可以通过改变S寄存器S2的值来改变这一字符。</span><br><span class="line">AT=x      写入被选的S寄存器</span><br><span class="line">这一命令将数值x写入当前被选的S寄存器，一个S寄存器可由ATSn命令选择，若 x 是一个数字,所有S 寄存器将返回 OK 响应。</span><br><span class="line">AT?       读被选的S寄存器</span><br><span class="line">这一命令读并且显示被选的S寄存器的内容。一个S寄存器可由ATSn命令选择。</span><br><span class="line">ATA       应答</span><br><span class="line">它必须是命令行中的最后一条指令。调制解调器在应答方式下继续执行连接程序。在与远端调制解调器交换载波后进入连接状态,如果在由寄存器S7规定的时间内(缺省值=50秒)没有检测到载波, 调制解调器将挂机。在连接过程中，通过DTE输入的任何一个字母都将中断这一命令。</span><br><span class="line">ATBn*     选择ITU-T或Bell模式 缺省=0</span><br><span class="line">ATB0 选择在1200和300bps速率下通讯的ITU-T V.22和V.21协议</span><br><span class="line">ATB1 选择在1200和300bps速率下通讯的Bell 212A和103协议</span><br><span class="line">ATCn      载波控制缺省=1</span><br><span class="line">包含这一命令只是为了保证兼容性，执行号只是返回一结果码而没有其它作用。</span><br><span class="line">ATC1 正常传输载波切换</span><br><span class="line">ATDn      拨号</span><br><span class="line">它必须是命令行中的最后一条指令, ATD命令使调制解调器摘机后, 根据输入的参数拨号,以建立连接。</span><br><span class="line">如果不带参数，调制解调器摘机后，不拨号进入发起方式。</span><br><span class="line">使用标点可使命令更易读懂。圆括号,连字符和空格符会被忽略。拔号命令行中如果出现了非法字符，则该字符及其后的内容将被忽略。调制解调器允许的拨号命令长度为36个字符。</span><br><span class="line">参数：0-9 A B C D * # L P T R ! @ W , ; ^ S=n</span><br><span class="line">0-9     DTMF 符号0到9</span><br><span class="line">A-D     DTMF 符号A,B,C和D。在一些国家中不使用这些符号</span><br><span class="line">*       &quot;星&quot;号(仅用于音频拨号)</span><br><span class="line">#       &quot;#&quot;号(仅用于音频拨号)</span><br><span class="line">J       为本次呼叫执行在可提供的最高速率下的MNP10链路协商(可选)</span><br><span class="line">K       使本次呼叫MNP10链路协商期间电源电平可调(可选)</span><br><span class="line">L       重拨上一次拨过的号码</span><br><span class="line">P       脉冲拨号</span><br><span class="line">T       双音频拨号</span><br><span class="line">R       逆叫方式。允许调制解调器使用应答方式呼叫只能作为发起使用的调制解调器, 必须作为命令行中的最后一个字符输入。</span><br><span class="line">!       使调制解调器按照S29中规定的值挂机一段时间再摘机。</span><br><span class="line">@       使调制解调器等待5秒钟的无声回答</span><br><span class="line">w       按照寄存器S7中规定的时间，在拨号前等待拨号音。</span><br><span class="line">,       在拨号过程中，按照寄存器S8中规定的时间,暂停</span><br><span class="line">;       拨号后返回命令状态</span><br><span class="line">^       打开呼叫音</span><br><span class="line">()      被忽视，用于格式化号码串</span><br><span class="line">-       被忽视，用于格式化号码串</span><br><span class="line">&lt;space&gt; 被忽视,用于格式化号码串</span><br><span class="line">S=n     用AT&amp;Zn 命令存在地址n处的号码拨号</span><br><span class="line">ATE*     命令回应           缺省:1</span><br><span class="line">ATE0 关闭命令回应</span><br><span class="line">ATE1 打开 命令回应</span><br><span class="line">ATHn     摘挂机控制       缺省:0</span><br><span class="line">ATH0 使调制解调器挂机</span><br><span class="line">ATH1 当调制解调器处于挂机状态，使调制解调器摘机，返回响 OK，等待进一步的命令。</span><br><span class="line">ATIn     识别</span><br><span class="line">I0 报告产品代码</span><br><span class="line">I1 报告ROM中预先计算的校验和</span><br><span class="line">I2 计算校验和并与ROM中的校验和比较,返回&quot;OK&quot;或&quot;ERROR&quot;结果码</span><br><span class="line">I3 报告固件修正</span><br><span class="line">I4 报告OEM定义的识别串</span><br><span class="line">I5 报告国家代码参数</span><br><span class="line">I6 报告固件修正</span><br><span class="line">I7 报告调制解调器数据泵类型</span><br><span class="line">ATLn*    扬声器音量       缺省:2</span><br><span class="line">ATL0 扬声器低音量</span><br><span class="line">ATL1 扬声器低音量</span><br><span class="line">ATL2 扬声器中音量</span><br><span class="line">ATL3 扬声器高音量</span><br><span class="line">ATMn*    扬声器控制       缺省:1</span><br><span class="line">ATM0 关闭扬声器</span><br><span class="line">ATM1 扬声器在呼叫建立握手阶段打开至检测到来自于远端调制解调器的载波后关闭</span><br><span class="line">ATM2 扬声器持续开</span><br><span class="line">ATM3 扬声器在应答期间打开。当检测到来自于远端的调制解调器的载波和拨号时关闭</span><br><span class="line">ATNn*     调制握手       缺省:1</span><br><span class="line">ATN0 要求调制解调器S37选择连接速率,若S37＝0,则连接速率必须与发出的上一条AT命令的速率相匹配。如果所选择的速率可用不止一个通讯标准实现(如Bell212A或ITU-T V.22 速率在 1200bps)调制解调器同时参考ATB 命令选择。</span><br><span class="line">ATN1 允许时使用双方调制解调器都支持的任一速率握手，使能够自动检测。在这一方式下，ATB命令被忽视，调制解调器只用ITU-T方式连接。</span><br><span class="line">ATOn     进入数据在现状态 缺省:0</span><br><span class="line">ATO0 使调制解调器从命令在现状态直接返回数据在线状态,不经过自动均衡。</span><br><span class="line">ATO1 使调制解调器从命令在现状态返回数据在状态,经过自动均衡。</span><br><span class="line">ATP*     设脉冲拨号为缺省</span><br><span class="line">ATQn*    结果码显示        缺省:0</span><br><span class="line">ATQ0 调制解调器向DTE发送结果码</span><br><span class="line">ATQ1 禁止调制解调器向DTE发送结果码</span><br><span class="line"> 参阅调制解调器结果码一节的详细说明</span><br><span class="line">ATSn     设S寄存器n为缺省寄存器</span><br><span class="line">ATSn?    读S寄存器</span><br><span class="line">读S寄存器中的内容，所有的S寄存器都可以读</span><br><span class="line">ATSn=x   写入S寄存器</span><br><span class="line">将 x值写入指定的S寄存器n</span><br><span class="line">ATT*     设音频拔号为缺省</span><br><span class="line">ATVn*    结束码类型 (消息控制)        缺省:1</span><br><span class="line">ATV0 发送短型 (数字型) 结果码</span><br><span class="line">ATV1 发送长型 (字符型) 结果码</span><br><span class="line">ATWn*    协商进程报告                缺省:0</span><br><span class="line">ATW0 不报告纠错呼叫进程</span><br><span class="line">ATW1 报告纠错呼叫进程</span><br><span class="line">ATW2 不报告纠错呼叫进程，CONNECT xxxx指示DCE速率。</span><br><span class="line">ATXn*     扩展结果码            缺省:4</span><br><span class="line">ATX0 调制解调器忽视拨号音和忙音。当由盲拨建立连接时，发送CONNECT信息。</span><br><span class="line">ATX1 调制解调器忽视拨号音和忙音。当由盲拨建立连接时，CONNECT XXXX 反映的是比特速率</span><br><span class="line">ATX2 调制解调器忽视忙音，但在拨号前等待拨号音，如果5秒钟内检测不到拨号音，则发送NO DIAL TONE 信息，连接建立后 发送 CONNECT xxxx反映比特速率。</span><br><span class="line">ATX3 调制解调器忽视拨号音,若检测到忙音,发送BUSY信息,当由盲拨建立起连接时, CONNECT XXXX 反映的是比特速率。</span><br><span class="line">ATX4 如果5秒钟内检测不到拨号音，发送NO DIAL TONE 讯息,检测到忙音, 发送BUSY信息。连接建立后发送CONNECT XXXX 反映比特速率。</span><br><span class="line">ATYn*     控制长间隔拆接         缺省:0</span><br><span class="line">ATY0 不允许长间隔拆接</span><br><span class="line">ATY1 允许长间隔拆接</span><br><span class="line">ATZn      复位                缺省:0</span><br><span class="line">重新调出由用户方案规定的动态配置</span><br><span class="line">ATZ0 软复位并重新调出用户方案0</span><br><span class="line">ATZ1 软复位并重新调出用户方案1</span><br><span class="line">AT&amp;An*    握手异常终止(备选)    缺省:1</span><br><span class="line">AT&amp;A0 在握手时禁止用户进行异常终止。当拨号或应答时，握手不能异常终止,只有DTR 信号下降。</span><br><span class="line">AT&amp;A1 用户可以在握手时进行异常终止.在接收到DTE的字符后,发起和应答可以在握手期间随时进行异常终止.</span><br><span class="line">AT&amp;Cn*     RS232-C DCD          设置缺省:1</span><br><span class="line">AT&amp;C0 DCD为ON，不论来自远端的调制解调器的数据载波的状态为何。</span><br><span class="line">AT&amp;C1 DCD 跟随来自于远端调制解调器的数据载波的状态</span><br><span class="line">AT&amp;Dn*    RS232-C DTR          设置缺省:2</span><br><span class="line">决定了调制解调器与来自串口的DTR信号相关的操作。由于跟踪DTR的下降引起的操作在下表列出:</span><br><span class="line"></span><br><span class="line">&amp;D0</span><br><span class="line">&amp;D1</span><br><span class="line">&amp;D2</span><br><span class="line">&amp;D3</span><br><span class="line">&amp;Q0</span><br><span class="line">NONE</span><br><span class="line">2</span><br><span class="line">3</span><br><span class="line">4</span><br><span class="line">&amp;Q1</span><br><span class="line">1</span><br><span class="line">2</span><br><span class="line">3</span><br><span class="line">4</span><br><span class="line">&amp;Q2</span><br><span class="line">3</span><br><span class="line">3</span><br><span class="line">3</span><br><span class="line">3</span><br><span class="line">&amp;Q3</span><br><span class="line">3</span><br><span class="line">3</span><br><span class="line">3</span><br><span class="line">3</span><br><span class="line">&amp;Q4</span><br><span class="line">1</span><br><span class="line">2</span><br><span class="line">3</span><br><span class="line">4</span><br><span class="line">&amp;Q5</span><br><span class="line">NONE</span><br><span class="line">2</span><br><span class="line">3</span><br><span class="line">4</span><br><span class="line">&amp;Q6</span><br><span class="line">NONE</span><br><span class="line">2</span><br><span class="line">3</span><br><span class="line">4</span><br><span class="line">1 调制解调器断开连接并发送结果码OK</span><br><span class="line">2 若在数据状态下,则进入命令状态,并发送结果码OK</span><br><span class="line">3 调制解调器断开连接并发送结果码OK, DTR 为 OFF时不能自动应答</span><br><span class="line">4 调制解调器执行热启动(即与ATZ命令相同)</span><br><span class="line">AT&amp;Fn     重新调用工厂            设置缺省:0</span><br><span class="line">&amp;F0 重新调用作为V.42bis自动可靠方式的出厂缺省设置</span><br><span class="line">&amp;F1 重新调用作为MNP5自动可靠方式的出厂缺省设置</span><br><span class="line">&amp;F2 重新调用作为DIRECT方式的出厂缺省设置</span><br><span class="line">&amp;F3 重新调用作为MNP10方式自动可靠方式的出厂缺省设置(可选)</span><br><span class="line">AT&amp;Gn*    设置保护音            缺省:0</span><br><span class="line">AT&amp;G0 无保护音</span><br><span class="line">AT&amp;G1 无保护音</span><br><span class="line">AT&amp;G2 1800HZ保护音</span><br><span class="line">AT&amp;Jn*    电话插头选择          缺省:0</span><br><span class="line">包含这一命令只是基于兼容性的考虑，没有任何功能</span><br><span class="line">AT&amp;J0 不操作任何功能</span><br><span class="line">AT&amp;J1 不操作任何功能</span><br><span class="line">AT&amp;Kn*    DTE/调制解调器流    控制缺省:3</span><br><span class="line">AT&amp;K0 关闭流控制</span><br><span class="line">AT&amp;K3 使用RTS/CTS流控</span><br><span class="line">AT&amp;K4 使用XON/XOFF流控</span><br><span class="line">AT&amp;K5 使用透明XON/XOFF流控</span><br><span class="line">AT&amp;K6 使用RTS/CTS和XON/XOFF流控(作为传真方式下的缺省)</span><br><span class="line">AT&amp;Ln*    传输线类型            缺省:0</span><br><span class="line">AT&amp;L0 拨号线</span><br><span class="line">AT&amp;L1 二线专线 （备选）</span><br><span class="line">AT&amp;L2 四线专线 （备选）</span><br><span class="line">AT&amp;Mn*    通讯方式</span><br><span class="line">与AT&amp;Q0-3相同</span><br><span class="line">AT&amp;Pn*    拨号脉冲占空比        缺省:0</span><br><span class="line">AT&amp;P0 39％61％占空比@10PPS</span><br><span class="line">AT&amp;P1 33％67％占空比@10PPS</span><br><span class="line">AT&amp;P2 39％61％占空比@20PPS</span><br><span class="line">AT&amp;P3 33％67％占空比@20PPS</span><br><span class="line">AT&amp;Qn*    通讯方式             缺省:5</span><br><span class="line">AT&amp;Q0 选择直接异步操作</span><br><span class="line">AT&amp;Q1 选择同步模式一操作</span><br><span class="line">AT&amp;Q2 选择同步模式二操作</span><br><span class="line">AT&amp;Q3 选择同步模式三操作</span><br><span class="line">AT&amp;Q4 选择自动同步模式操作</span><br><span class="line">AT&amp;Q5 选择纠错模式操作</span><br><span class="line">AT&amp;Q6 选择标准模式下的异步操作</span><br><span class="line">AT&amp;Rn*    RS232-C RTS/CTS   设置缺省:0</span><br><span class="line">AT&amp;R0 CTS跟踪RTS, 本地DTE发送的RTS由OFF变为ON经过由寄存器S26所规定的以10微秒为增量的延迟后,CTS变为ON</span><br><span class="line">AT&amp;R1 调制解调器忽视RTS,除非使用了AT&amp;K3命令,CTS保持为ON</span><br><span class="line">AT&amp;Sn*    RS232-C DSR       设置缺省:0</span><br><span class="line">AT&amp;S0 DSR始终为ON</span><br><span class="line">AT&amp;S1 DSR根据EIA-232-C的规定操作</span><br><span class="line">AT&amp;Tn*    测试和诊断            缺省:4</span><br><span class="line">测试只能在非纠错方式下(标准或直接模式)下的异步操作中进行，除参数7和8以外，要中止正在进行中的测试必须首先敲入退出符。若S18非零，则测试经由S18规定的时间后自动中止并显示OK。</span><br><span class="line">AT&amp;T0 终止进行中的测试</span><br><span class="line">AT&amp;T1 启动本地模拟回环</span><br><span class="line">AT&amp;T3 在本地启动远端数字回环·,若连接未建通,返回ERROR</span><br><span class="line">AT&amp;T4 允许调制解调器响应来自远端的进行远程数字环回测试的请求</span><br><span class="line">AT&amp;T5 拒绝调制解调器响应来自远端的进行远程数字环回测试的求</span><br><span class="line">AT&amp;T6 启动远端数字环回测试,若连接未通,返回ERROR</span><br><span class="line">T&amp;T7 启动远端数字环回自测试,若连接未建通,返回ERROR</span><br><span class="line">AT&amp;T8 启动本地模拟环回自测试</span><br><span class="line">AT&amp;V     看当今配置及用户参数</span><br><span class="line">AT&amp;V0 查看当前配置、用户方案和存储的电话号码</span><br><span class="line">AT&amp;V1 显示最后一次数据连接的详细情况</span><br><span class="line">AT&amp;Wn    储存用户参数              缺省：0</span><br><span class="line">AT&amp;W0 作为用户0存贮</span><br><span class="line">AT&amp;W1 作为用户1存贮</span><br><span class="line">AT&amp;Xn*    选择同步时钟源             缺省：0</span><br><span class="line">AT&amp;X0 调制解调器提供传输时钟，内部时钟。 AT&amp;X1 DTE提供传输时钟，外部时钟。</span><br><span class="line">AT&amp;X2 由调制解调器从接外载波信号中提供传输时钟，从属接收时钟</span><br><span class="line">AT&amp;Yn*    指示缺省用户参数            缺省：0</span><br><span class="line">在硬复位后可选择将使用的用户方案。</span><br><span class="line">AT&amp;Y0 选择用户方案0</span><br><span class="line">AT&amp;Y1 选择用户方案1</span><br><span class="line">AT&amp;Zn=x   储存电话号码(n=0-3)         缺省：0</span><br><span class="line">将一36位数字电话号码(x)存放在一指定电话号码表中(n), 作以后拨号用(参见命令ATDS=n)</span><br><span class="line">AT\An 最大MNP块的大小缺省:2</span><br><span class="line">AT\A0 设最大块为64个字符</span><br><span class="line">AT\A1 设最大块为128个字符</span><br><span class="line">AT\A2 设最大块为192个字符</span><br><span class="line">AT\A3 设最大块为256个字符</span><br><span class="line">AT\Bn     发送中断信号(n=1-9)        缺省:3</span><br><span class="line">当在非MNP连接期间输入此命令,调制解调器向远端调制解器发送一中断信号,中断信号长度参数为n值的100倍（以毫秒为单位）,在MNP模式下,输入此命令,调制解调器向远端调制解调器发送一链路注意码PDU</span><br><span class="line">AT\Gn     调制解调器到调制解调器的流控制    缺省:0</span><br><span class="line">AT\G0 关闭流控(XON/XOFF)</span><br><span class="line">AT\G1 打开流控(XON/XOFF)</span><br><span class="line">AT\Jn     DTE速率自动调整控制            缺省:0</span><br><span class="line">AT\J0 关闭匹配线路速率的DTE速率调整功能</span><br><span class="line">AT\J1 打开匹配线路速率的DTE速率调整功能</span><br><span class="line">AT\Kn     中断控制                     缺省:5</span><br><span class="line">在数据传输期间收到来自DTE的中断信号时,调制解调器作出如下响应</span><br><span class="line">AT\K0,2,4 调制解调器进入连机命令状态,而不向远端发送中断信号</span><br><span class="line">AT\K1 调制解调器清空终端的缓冲器并向远端调制解调器发送中断信号</span><br><span class="line">AT\K3 调制解调器不清空终端的缓冲器,但向远端调制解调器发送中断信号</span><br><span class="line">AT\K5 调制解调器随发送的数据发送中断信号. 调制解调器在连机命令状态时数据传输过程中，做如下操作</span><br><span class="line">AT\K0,1 调制解调器清空终端的缓冲器，并向远端调制解调器发送中断信号</span><br><span class="line">AT\K2,3 调制解调器不清空缓冲器，但向远端调制解调器发送中断信号</span><br><span class="line">AT\K4,5 调制解调器随传输的数据按顺序发送中断信号 在非纠错模式下收到来自DTE的中断信号时,调制解调器做如下操作</span><br><span class="line">AT\K0,1 调制解调器清除终端的缓冲器,并向本地DTE发送中断信号</span><br><span class="line">AT\K2,3 调制解调器不清除缓冲器,但向本地DTE发送中断信号</span><br><span class="line">AT\K4,5 调制解调器随接收的数据按顺序发送中断信号</span><br><span class="line">AT\Ln     MNP块传输控制                 缺省:0</span><br><span class="line">AT\L0 对于MNP链路连接使用流模式</span><br><span class="line">AT\L1 对于MNP链路连接使用块模式</span><br><span class="line">AT\Nn     操作模式控制                 缺省:3</span><br><span class="line">AT\N0 选择标准速度缓存模式(无纠错)</span><br><span class="line">AT\N1 选择直接模式(等效于&amp;M0,&amp;Q0)</span><br><span class="line">AT\N2 选择可靠模式,可靠连接失败会使调制解调器挂机</span><br><span class="line">AT\N3 选择自动可靠模式</span><br><span class="line">AT\N4 选择LAPM纠错模式,LAPM纠错连接失败会使调制解调器挂机</span><br><span class="line">AT\N5 选择MNP纠错模式,MNP纠错连接失败会使调制解调器挂机</span><br><span class="line">AT\Vn     单线连接信息                 缺省：0</span><br><span class="line">AT\V0 关闭单线连接信息。</span><br><span class="line">AT\V1 打开单线连接信息。</span><br><span class="line">AT％C*    压缩控制                    缺省: 3</span><br><span class="line">AT%C0 关闭数据压缩 AT%C1 打开MNP5数据压缩</span><br><span class="line">AT%C2 打开V.42bis数据压缩</span><br><span class="line">AT%C3 打开MNP5和V.42bis数据压缩</span><br><span class="line">AT％En    开/关自动均衡                缺省：2</span><br><span class="line">控制是使调制解调器自动监听线路质量并请求均衡(％E1)还是当线路质量不好时降速，线路质量好时升速。</span><br><span class="line">AT%E0 关闭线路质量监听和自动均衡。</span><br><span class="line">AT%E1 打开线路质量监听和自动均衡。</span><br><span class="line">AT%E2 打开线路质量监听和速率自动调整上升或下降。</span><br><span class="line">AT%E3 打开线路质量监听和采用快速挂机的自动均衡。</span><br><span class="line">AT％L     报告接收灵敏度</span><br><span class="line">返回接收信号的电平值,提供以下数值</span><br><span class="line">001=-1dBm接收电平</span><br><span class="line">002=-2dBm接收电平</span><br><span class="line">: :</span><br><span class="line">043=-43dBm接收电平</span><br><span class="line">AT%On     选择应答或呼叫模式             缺省：1</span><br><span class="line">AT%O0 选择应答式模</span><br><span class="line">AT%O1 选择发起式模</span><br><span class="line">AT%Rn     选择接收灵敏度 (适用於专线型号) 缺省：0</span><br><span class="line">AT%R0 -43dBm</span><br><span class="line">AT%R1 -33dBm</span><br><span class="line">备选：适用於拔号线型号,JP2跳线：-33dBM 连接1-2 针；-43 连接2-3针</span><br><span class="line">AT％Q     显示线路信号质量</span><br><span class="line">返回眼图指标(EQM)值的高字节,该字节的表示范围为0到127,当这一数值为70DC±10(依赖于线路速率)或更大时,若已使用了AT％E1命令则调制解调器将自动均衡,标准连接时这一数在0到15之间。到60时则为较差连接。</span><br><span class="line">AT#CIDn   呼叫者身份鉴定                 缺省：0</span><br><span class="line">AT#CID=0关闭呼叫者身份鉴定</span><br><span class="line">AT#CID=1打开DTE格式化形式的呼叫者身份鉴定</span><br><span class="line">AT#CID=2打开DTE非格式化形式的呼叫者身份鉴定</span><br><span class="line">AT#CID? 从调制解调器中恢复当前呼叫者身份鉴定方式</span><br><span class="line">AT#CID=? 返回调制解调器允许模式的列表,表中各部分间用逗号隔开</span><br><span class="line">AT-SDR=n  鉴别性振铃                    缺省：0</span><br><span class="line">AT-SDR=0 允许任何振铃、并报告&quot;RING&quot;</span><br><span class="line">AT-SDR=1 允许一类型振铃</span><br><span class="line">AT-SDR=2 允许二类型振铃</span><br><span class="line">AT-SDR=3 允许一及二类型振铃</span><br><span class="line">AT-SDR=4 允许三类型振铃</span><br><span class="line">AT-SDR=5 允许一及三类型振铃</span><br><span class="line">AT-SDR=6 允许二及三类型振铃</span><br><span class="line">AT-SDR=7 允许一、二及三类型振铃</span><br><span class="line">振铃类型</span><br><span class="line">振铃时段模式</span><br><span class="line">1</span><br><span class="line">响2秒、停4秒</span><br><span class="line">2</span><br><span class="line">响0.8秒、停0.4秒、响0.8秒、停4秒</span><br><span class="line">3</span><br><span class="line">响0.4秒、停0.2秒、响0.4秒、停0.2秒、响0.8秒、停4秒</span><br><span class="line">AT+MS*     选择线路调制方式</span><br><span class="line">命令格式为（336型号）:</span><br><span class="line">AT+MS=&lt;模式&gt;,&lt;自动模式&gt;,&lt;最小速率&gt;,&lt;最大速率&gt;</span><br><span class="line">缺省值为 AT+MS=11,1,300,33600 （336型号）</span><br><span class="line">命令格式为（560型号）:</span><br><span class="line">AT+MS=&lt;模式&gt;,&lt;自动模式&gt;,&lt;最小速率&gt;,&lt;最大速率&gt;,</span><br><span class="line">&lt;x_law&gt;,&lt;rb_signal&gt;,&lt;maxup_rate&gt;</span><br><span class="line">缺省值为 AT+MS=12,1,300,56000,33600 （560型号）</span><br><span class="line">AT+MS?  向包含所选选项的DTE发送一信息流</span><br><span class="line">AT+MS=? 向包含所提供选项的DTE发送一信息流</span><br><span class="line">自动模式</span><br><span class="line">选 项</span><br><span class="line">0</span><br><span class="line">关闭自动模式</span><br><span class="line">1</span><br><span class="line">打开自动模式</span><br><span class="line"></span><br><span class="line">模式</span><br><span class="line">调制方式选择</span><br><span class="line">可能 波特率(bps) &lt;最小 波特率&gt; &lt;最大 波特率&gt;</span><br><span class="line">0</span><br><span class="line">V.21</span><br><span class="line">300</span><br><span class="line">1</span><br><span class="line">V.22</span><br><span class="line">1200</span><br><span class="line">2</span><br><span class="line">V.22bis</span><br><span class="line">2400或1200</span><br><span class="line">3</span><br><span class="line">V.23</span><br><span class="line">1200</span><br><span class="line">9</span><br><span class="line">V.32</span><br><span class="line">9600或4800</span><br><span class="line">10</span><br><span class="line">V.32bis</span><br><span class="line">14400,12000,9600,7200 或4800</span><br><span class="line">11</span><br><span class="line"></span><br><span class="line">V.34</span><br><span class="line">33600,31200,28800,26400,24000,21600,19200, 16800,14400,12000,  </span><br><span class="line">9600,7200,4800或2400</span><br><span class="line">12</span><br><span class="line"></span><br><span class="line">V.90</span><br><span class="line">56000,54667,53333,52000,50667,49333,48000,46667,45333,42667,</span><br><span class="line">41333,40000,38667,37333,36000,34667,33333,32000,30667,29333,</span><br><span class="line">28000 (560型号适用)</span><br><span class="line">56</span><br><span class="line"></span><br><span class="line">K56flex</span><br><span class="line">56000,54000,52000,50000,48000,46000,44000,42000,40000,38000,</span><br><span class="line">36000,34000,32000 (560型号适用)</span><br><span class="line">64</span><br><span class="line">Bell 103</span><br><span class="line">300</span><br><span class="line">69</span><br><span class="line">Bell 212</span><br><span class="line">1200</span><br><span class="line">&lt;x_law&gt; 是一个可选的数字，用来确定码类型，选择是：</span><br><span class="line">0 = u-Law 1 = A-Law</span><br><span class="line">注意：ATZ命令将复位&lt;x_law&gt;值为0 (u-Law)。</span><br><span class="line">&lt;rb_signaling&gt; 是一个可选的数字，用于配置一个发送数据的调制解调器产生“丢失位”信号或不产生“丢               失位”信号；或配置一台接收数据的调制解调器检测“丢失位”信号或不检测“丢失位”信               号。选择是：</span><br><span class="line">0 = 发送数据的调制解调器产生丢失位信号。接收数据的调制解调器检测丢失位信号。</span><br><span class="line">1= 发送数据的调制解调器不产生丢失位信号。接收数据的调制解调器不检测丢失位信号。</span><br><span class="line">注意：ATZ命令将复位&lt;rb_signaling&gt;值为0。</span><br><span class="line">Maxup_rate : 连接速率的最大值。</span><br><span class="line">AT COMMAND的命令集</span><br><span class="line">MODEM AT COMMAND 指令集</span><br><span class="line">-------------------------------------------------------------------</span><br><span class="line">Modem RS-232C 说明 :</span><br><span class="line">接脚      名称      功能      方向</span><br><span class="line">----------------------------------------------------</span><br><span class="line">1          AGND      安全接地</span><br><span class="line">2          TD        传送资料  PC TO MODEM</span><br><span class="line">3          RD        接收资料  MODEM TO PC</span><br><span class="line">4          RTS        控制线    PC TO MODEM</span><br><span class="line">5          CTS        控制线    MODEM TO PC</span><br><span class="line">7          DGND      信号接地</span><br><span class="line">8          DCD        信号侦测  MODEM TO PC</span><br><span class="line">12        HI        高速指示  MODEM TO PC</span><br><span class="line">15        TXC        传送时脉  MODEM TO PC *</span><br><span class="line">17        RXC        接收时脉  MODEM TO PC *</span><br><span class="line">20        DTR        控制线    PC TO MODEM</span><br><span class="line">22        RI        铃声指示  MODEM TO PC</span><br><span class="line">----------------------------------------------------</span><br><span class="line">注 : * 号为同步传输时才使用</span><br><span class="line">MODEM 灯号</span><br><span class="line">PWR : 电源指示             亮时表示电源接通</span><br><span class="line">MR  : 数据机备妥指示       亮时表示数据机在备用状态 (MODEM READY)</span><br><span class="line">DTR : 电脑连线指示          亮时表示电脑与数据机连线 (DATA TERMINALREADY)</span><br><span class="line">DCD : 数据机接通指示       亮时表示两台数据机连线成功(DATA CARRIER                      DETECTOR)</span><br><span class="line">OH  : 占线指示              亮时表示数据机占用电话线 (OFF HOCK)</span><br><span class="line">HS  : 高速指示              亮时表示数据机在高速状态 (HIGH SPEED)</span><br><span class="line">AA  : 应答指示              亮时表示数据机自动应答  (AUTO ANSWER)</span><br><span class="line">TD  : 传输指示 (TXD)        亮时表示数据机传送资料  (TRANSMITTERDATA)</span><br><span class="line">RD  : 接收指示 (RXD)        亮时表示数据机接收资料  (RECEIVED DATA)</span><br><span class="line">MODEM AT 指令说明:</span><br><span class="line">AT指令除了指令本身以外尚包括S-Register及Result code</span><br><span class="line">S-Register是用来记录Modem的参数的暂存器,与有关的指</span><br><span class="line">令执行完毕後,Modem会去改变这些参数,但Modem由指令状</span><br><span class="line">态进入连线时,Modem会依照这些参数而决定Modem的功能,</span><br><span class="line">S-Register可由指令之执行而改变,或者也可以由直接改变</span><br><span class="line">S-Register而改变其内容.</span><br><span class="line">Modem的基本指令如下:</span><br><span class="line">AT指令可以为下列几款:(1)非同步指令(2)立即动作指令</span><br><span class="line">(3)MNP错误修正指令(4)拨号修饰指令</span><br><span class="line">.</span><br><span class="line">非同步指令:</span><br><span class="line">B  BELL/CCITT协定设定</span><br><span class="line">B0:设定Modem为CCITT协定</span><br><span class="line">B1:设定Modme为BELL协定</span><br><span class="line">E  回应指令:</span><br><span class="line">此指令可以让使用者选择是否把输入的指令回应显示在</span><br><span class="line">萤幕上.</span><br><span class="line">E0:不回应指令</span><br><span class="line">E1:回应指令</span><br><span class="line">L  喇叭音量控制</span><br><span class="line">L指令控制喇叭的音量</span><br><span class="line">L0:喇叭不响</span><br><span class="line">L1:低音量</span><br><span class="line">L2:中音量</span><br><span class="line">L3:高音量</span><br><span class="line">M  喇叭控制</span><br><span class="line">此指令控制喇叭的开关</span><br><span class="line">M0:喇叭不响</span><br><span class="line">M1:Modem在拨号时,喇叭打开,在连线後,喇叭关掉</span><br><span class="line">M2:喇叭永远ON</span><br><span class="line">Q  Result code 控制指令</span><br><span class="line">Q指令决定Modem要不要送出Result code 到电脑上</span><br><span class="line">Q0:显示Result code</span><br><span class="line">Q1:不显示Result code</span><br><span class="line">Sr= 写入S暂存器</span><br><span class="line">Sr=n 把 n 数据写入第 r 个S暂存器内</span><br><span class="line">Sr? 读取S暂存器</span><br><span class="line">Sr?读取第 r 个S暂存器</span><br><span class="line">V  决定Result code 的格式</span><br><span class="line">V指令选择Result code 的格式</span><br><span class="line">V0:选择数字式的Result code</span><br><span class="line">V1:选择文字式的Result code</span><br><span class="line">X  控制拨号的过程及结果显示</span><br><span class="line">X指令用来控制Modem在拨号过程中是否要辨识拨号音,</span><br><span class="line">忙音及显示结果是否包括速度显示等</span><br><span class="line">X0:Modem在拨号时不辨识号音及忙音,结果也只显示</span><br><span class="line">CONNECT,不显示Modem的速度</span><br><span class="line">X1:Modme拨号时不辨识拨号音及忙音,但结果显示速度,如</span><br><span class="line">CONNECT 1200,CONNECT 2400等</span><br><span class="line">X2:Modem拨号时辨识拨号音,但不辨识忙音,结果显示速度</span><br><span class="line">X3:Modem不辨识拨号音,但是辨识忙音及结果显示速度</span><br><span class="line">X4:Modem辨识拨号音,忙音及结果显示速度</span><br><span class="line">Y  Long Space Break 中止连线</span><br><span class="line">Y指令指使Modem在收到Long Space Break 信号时是否</span><br><span class="line">要中止Modem连线</span><br><span class="line">Y0:在收到Long Space Break时,不中止连线</span><br><span class="line">Y1:在收到Long Space Break时,中止连线</span><br><span class="line">&amp;C 设定RS-232C介面DCD Pin的状态</span><br><span class="line">&amp;C0:设定RS-232C介面DCD Pin(第八Pin)永远ON</span><br><span class="line">&amp;C1:RS-232C介面DCD Pin由信号来决定,当侦测到信号时</span><br><span class="line">DCD ON,否则OFF</span><br><span class="line">.</span><br><span class="line">&amp;D 设定RS-232C介面DTR Pin的状态</span><br><span class="line">&amp;D0:DTR Pin(20pin)永远ON，不理会DTR的控制</span><br><span class="line">&amp;D1:DTR由ON变到OFF时，Modem由连线状态回到到指令状态</span><br><span class="line">&amp;D2:DTR由ON变到OFF时，Modem切断电话线，取消自动回</span><br><span class="line">答及回到指令状态</span><br><span class="line">&amp;D3:DTR由ON变到OFF时，Modem切断电话线，取消自动回</span><br><span class="line">答，并且回到Modem的起始状态</span><br><span class="line">&amp;G Guard Tone的设定</span><br><span class="line">&amp;G0:Modem不送出Guard Tone</span><br><span class="line">&amp;G1:选择Guard Tone为550HZ</span><br><span class="line">&amp;G2:选择Guard Tone为1800HZ</span><br><span class="line">&amp;L 选择拨接或者专线的工作模式</span><br><span class="line">&amp;L0选择Modem为拨接式工作模式</span><br><span class="line">&amp;L1选择Modem为专线式工作模式</span><br><span class="line">&amp;P 选择脉冲式拨号的M/B值</span><br><span class="line">&amp;P0:M/B值为40/60</span><br><span class="line">&amp;P1:M/B值为33/67</span><br><span class="line">&amp;S 控制RS-232C介面DSR Pin的状态</span><br><span class="line">&amp;S0:RS-232C介面DSR Pin(第六Pin)始终为ON</span><br><span class="line">&amp;S1:RS-232C介面DSR Pin由DCD Pin(第八Pin)来决定</span><br><span class="line">.</span><br><span class="line">立即动作指令</span><br><span class="line">A  立即回答</span><br><span class="line">当Modem执行此指令以後，Modem开始侦测Carrier，如果</span><br><span class="line">Carrier侦测到，则进入连线状态</span><br><span class="line">A/ 重覆执行指令</span><br><span class="line">A/指令是唯一前面下必加&quot;AT&quot;的指令.Modem执行此</span><br><span class="line">指令以後，Modem执行上一次已经执行过而且尚暂存在</span><br><span class="line">Command Buffer的指令</span><br><span class="line">D  拨号指令</span><br><span class="line">Modem执行此指令，Modem会依跟在D指令之後的拨号修饰</span><br><span class="line">指令来拨号</span><br><span class="line">H  电话线切换控制</span><br><span class="line">H0:指使Modem切断电话线</span><br><span class="line">H1:指使Modem连线</span><br><span class="line">O  回到连线状态</span><br><span class="line">当Modem因执行ESC code 而回到指令状态时，Modem 可以</span><br><span class="line">由O指令而回到连线状态</span><br><span class="line">Z  重置指令 (RESET)</span><br><span class="line">此指令用来Reset Modem的现行状态</span><br><span class="line">Z指令会使Modem回复到开机起始状态</span><br><span class="line">&amp;F 读取出厂组态设定</span><br><span class="line">&amp;F用来存在ROM中的出厂设定的，载入到Modem的动作组态</span><br><span class="line">区域，而使Modem会执行出厂设定的状态</span><br><span class="line">&amp;W 将动作组态写入非挥发性记忆体中</span><br><span class="line">&amp;W把现在的动作组态写入非挥发性(NN-RAM)记忆体中</span><br><span class="line">等下次开机时，Modem会执行此动作组态</span><br><span class="line">&amp;Z 储存电话号码</span><br><span class="line">此指令是用来将电话号码储存到非挥发性记忆体中，</span><br><span class="line">下次拨号时，可以由S指令而把此电话号码重拨出去</span><br><span class="line">***此指令勿用,以免导至错误动作***</span><br><span class="line">.</span><br><span class="line">拨号修饰指令</span><br><span class="line">P  脉冲拨号</span><br><span class="line">P 指令选择拨号为脉冲式拨号(即转盘式拨号)</span><br><span class="line">T  在复频式拨号</span><br><span class="line">T 指令选择拨号方式为复频式拨号(接键式拨号)</span><br><span class="line">R  在拨号後处於Answer mode</span><br><span class="line">R 指令使Modem在拨号以後进入Answer mode</span><br><span class="line">原来 D 指令使 MODEM 在拨号以後进入 Originate mode,但是</span><br><span class="line">有些Modem的频道只有一个频道,不论拨号或回答皆</span><br><span class="line">只有Originate mode，所以如此种Modem连线即只有用</span><br><span class="line">Answer mode ，在拨号时加入 R 指令，可以使Modem在拨号以</span><br><span class="line">後进入Answer mode.</span><br><span class="line">语法:ATRDT3910324(CR)</span><br><span class="line">W  拨号前等待拨号音</span><br><span class="line">W 指令使Modem在拨号前等待号音，其等待时间由S7来决定.语法:ATDT3210324W123(CR)Modem 在拨123数字之前会先等待拨号音，在等到了拨号音以後才继续拨123，不然会送出&quot;NODIALTONE&quot;，表示等不到拨号音.</span><br><span class="line">@  拨号前等待静音</span><br><span class="line">@指令使Modme在拨号以後,开始等待回铃声,在侦测到回铃声以後,再等5秒钟的静音,然後再继续执行指令,等待回铃声的时间由S7来决定语法:ATDT30221234@123(CR)Modem在拨号302123以後,等待回铃声,在侦测到回铃声以後,再等5秒钟的静音,侦测等5秒钟的静音以後再继续拨号123.</span><br><span class="line">!  闪动</span><br><span class="line">!指令使Modem断线0.5秒,然後再继续拨号</span><br><span class="line">;  拨号後回到指令状态</span><br><span class="line">; 指令使Modem在拨完电话号码以後回到指令状态,继续接受下一个指令.</span><br><span class="line">S  拨存在记忆中的电话号码</span><br><span class="line">S 指令和拨号指令一起用,使Modem拨上次由&amp;Z指令存起来的电话号码</span><br><span class="line">语法:ATDS(CR)</span><br><span class="line">.</span><br><span class="line">主要S暂存器摘要:</span><br><span class="line">暂存器    出厂设定值    范围    单位    功能</span><br><span class="line">--------------------------------------------------------</span><br><span class="line">S0            0        0-255    RING    设定铃响次数回应电话</span><br><span class="line">S1            0        0-255    RING    计算铃响次数</span><br><span class="line">S2          43        0-127  ASCII    ESC code</span><br><span class="line">S3          13        0-127  ASCII    输入字元(CarriageReturn)</span><br><span class="line">S4          10        0-127  ASCII    跳行字元</span><br><span class="line">S5            8        0-127  ASCII    退回字元 (Backspace)</span><br><span class="line">S6            2        0-255    秒      等侯拨号音时间</span><br><span class="line">S7          30        1-60    秒      拨号後等待信时间</span><br><span class="line">S8            2        0-255    秒      逗号暂停时间</span><br><span class="line">S9            6        0-255    0.1秒  信号侦测反应时间</span><br><span class="line">S10          14        0-255    0.1秒  信号消失至挂断电话反应时间</span><br><span class="line">S11        保 留</span><br><span class="line">S12          50        20-255    0.02秒  ESC code前後</span><br><span class="line">S13        保 留</span><br><span class="line">S14至S27 Modem内部状态设定</span><br><span class="line">.</span><br><span class="line">回应码</span><br><span class="line">AT指令相容Modem在执行完指令以後会回应一个码,告诉使用者执行的结果,使用者也只有在收到Modem的回应以後才能继续下达下一个指令,或者继续下一步的动作,所以回应码也是指使使用者下一步要如何进行的指标,如CONNECT及CONNECT 1200就可以告欣使用者须在Modem是在300BPS或者1200BPS传输速度,使用者必须依照此指示送出资料,不然资料传输会发生错误.</span><br><span class="line">回应码摘要:</span><br><span class="line">英 文          代号      意义</span><br><span class="line">-----------------------------------------------------</span><br><span class="line">OK            0      指令执行无误</span><br><span class="line">CONNECT        1      X1状态下表示两台Modem连线成功X2,X3.X4状态下,表示两台MODEM连线成功,而且速度为300BPS</span><br><span class="line">RING          2      铃声进来</span><br><span class="line">NO CARRIER    3      两台 MODEM 连线失败</span><br><span class="line">ERROR          4      指令错误或指令行太长超过40个字</span><br><span class="line">CONNECT 1200  5      两台 MODEM 连线成功,而且速度为1200BPS</span><br><span class="line">NO DIALTONE    6      未侦测到拨号音</span><br><span class="line">BUSY          7      电话线忙碌</span><br><span class="line">NO ANSWER  8  在 @ 指令下, MODEM 在侦测到回铃声以後未侦测到5秒钟的静音</span><br><span class="line">CONNECT 2400  10    两台 MODEM 2400BPS连线成功</span><br><span class="line">一、 一般命令</span><br><span class="line">1、 AT+CGMI 给出模块厂商的标识。</span><br><span class="line">2、 AT+CGMM 获得模块标识。这个命令用来得到支持的频带（GSM 900，DCS 1800 或PCS 1900）。当模块有多频带时，回应可能是不同频带的结合。</span><br><span class="line">3、 AT+CGMR 获得改订的软件版本。</span><br><span class="line">4、 AT+CGSN 获得GSM模块的IMEI（国际移动设备标识）序列号。</span><br><span class="line">5、 AT+CSCS 选择TE特征设定。这个命令报告TE用的是哪个状态设定上的ME。ME于是可以转换每一个输入的或显示的字母。这个是用来发送、读取或者撰写短信。</span><br><span class="line">6、 AT+WPCS 设定电话簿状态。这个特殊的命令报告通过TE电话簿所用的状态的ME。ME于是可以转换每一个输入的或者显示的字符串字母。这个用来读或者写电话簿的入口。</span><br><span class="line">7、 AT+CIMI 获得IMSI。这命令用来读取或者识别SIM卡的IMSI（国际移动签署者标识）。在读取IMSI之前应该先输入PIN（如果需要PIN的话）。</span><br><span class="line">8、 AT+CCID 获得SIM卡的标识。这个命令使模块读取SIM卡上的EF-CCID文件。</span><br><span class="line">9、 AT+GCAP 获得能力表。（支持的功能）</span><br><span class="line">10、 A/ 重复上次命令。只有A/命令不能重复。这命令重复前一个执行的命令。</span><br><span class="line">11、 AT+CPOF 关机。这个特殊的命令停止GSM软件堆栈和硬件层。命令AT+CFUN=0的功能与+CPOF相同。</span><br><span class="line">12、 AT+CFUN 设定电话机能。这个命令选择移动站点的机能水平。</span><br><span class="line">13、 AT+CPAS 返回移动设备的活动状态。</span><br><span class="line">14、 AT+CMEE 报告移动设备的错误。这个命令决定允许或不允许用结果码“+CME ERROR:&lt;xxx&gt;”或者“+CMS ERROR:&lt;xxx&gt;”代替简单的“ERROR”。</span><br><span class="line">15、 AT+CKPD 小键盘控制。仿真ME小键盘执行命令。</span><br><span class="line">16、 AT+CCLK 时钟管理。这个命令用来设置或者获得ME真实时钟的当前日期和时间。</span><br><span class="line">17、 AT+CALA 警报管理。这个命令用来设定在ME中的警报日期/时间。（闹铃）</span><br><span class="line">18、 AT+CRMP 铃声旋律播放。这个命令在模块的蜂鸣器上播放一段旋律。有两种旋律可用：到来语音、数据或传真呼叫旋律和到来短信声音。</span><br><span class="line">19、 AT+CRSL 设定或获得到来的电话铃声的声音级别。</span><br><span class="line">二、 呼叫控制命令</span><br><span class="line">1、 ATD 拨号命令。这个命令用来设置通话、数据或传真呼叫。</span><br><span class="line">2、 ATH 挂机命令。</span><br><span class="line">3、 ATA 接电话。</span><br><span class="line">4、 AT+CEER 扩展错误报告。这个命令给出当上一次通话设置失败后中断通话的原因。</span><br><span class="line">5、 AT+VTD 给用户提供应用GSM网络发送DTMF（双音多频）双音频。这个命令用来定义双音频的长度（默认值是300毫秒）。</span><br><span class="line">6、 AT+VTS 给用户提供应用GSM网络发送DTMF双音频。这个命令允许传送双音频。</span><br><span class="line">7、 ATDL 重拨上次电话号码。</span><br><span class="line">8、 AT%Dn 数据终端就绪（DTR）时自动拨号。</span><br><span class="line">9、 ATS0 自动应答。</span><br><span class="line">10、 AT+CICB 来电信差。</span><br><span class="line">11、 AT+CSNS 单一编号方案。</span><br><span class="line">12、 AT+VGR，AT+VGT 增益控制。这个命令应用于调节喇叭的接收增益和麦克风的传输增益。</span><br><span class="line">13、 AT+CMUT 麦克风静音控制。</span><br><span class="line">14、 AT+SPEAKER 喇叭/麦克风选择。这个特殊命令用来选择喇叭和麦克风。</span><br><span class="line">15、 AT+ECHO 回音取消。</span><br><span class="line">16、 AT+SIDET 侧音修正。</span><br><span class="line">17、 AT+VIP 初始化声音参数。</span><br><span class="line">18、 AT+DUI 用附加的用户信息拨号。</span><br><span class="line">19、 AT+HUI 用附加的用户信息挂机。</span><br><span class="line">20、 AT+RUI 接收附加用户信息。</span><br><span class="line">三、 网络服务命令</span><br><span class="line">1、 AT+CSQ 信号质量。</span><br><span class="line">2、 AT+COPS 服务商选择。</span><br><span class="line">3、 AT+CREG 网络注册。获得手机的注册状态。</span><br><span class="line">4、 AT+WOPN 读取操作员名字。</span><br><span class="line">5、 AT+CPOL 优先操作员列表。</span><br><span class="line">四、 安全命令</span><br><span class="line">1、 AT+CPIN 输入PIN。</span><br><span class="line">2、 AT+CPIN2 输入PIN2。</span><br><span class="line">3、 AT+CPINC PIN的剩余的尝试号码。</span><br><span class="line">4、 AT+CLCK 设备锁。</span><br><span class="line">5、 AT+CPWD 改变密码。</span><br><span class="line">五、 电话簿命令</span><br><span class="line">1、 AT+CPBS 选择电话簿记忆存储。</span><br><span class="line">2、 AT+CPBR 读取电话簿表目。</span><br><span class="line">3、 AT+CPBF 查找电话簿表目。</span><br><span class="line">4、 AT+CPBW 写电话簿表目。</span><br><span class="line">5、 AT+CPBP 电话簿电话查询。</span><br><span class="line">6、 AT+CPBN 电话簿移动动作。这个特殊命令使电话簿中的条目前移或后移（按字母顺序）</span><br><span class="line">7、 AT+CNUM 签署者号码。</span><br><span class="line">8、 AT+WAIP 防止在下一次重起时初始化所有的电话簿。</span><br><span class="line">9、 AT+WDCP 删除呼叫电话号码。</span><br><span class="line">10、 AT+CSVM 设置语音邮件号码。</span><br><span class="line">六、 短消息命令</span><br><span class="line">1、 AT+CSMS 选择消息服务。支持的服务有GSM-MO、SMS-MT、SMS-CB。</span><br><span class="line">2、 AT+CNMA 新信息确认应答。</span><br><span class="line">3、 AT+CPMS 优先信息存储。这个命令定义用来读写信息的存储区域。</span><br><span class="line">4、 AT+CMGF 优先信息格式。执行格式有TEXT方式和PDU方式。</span><br><span class="line">5、 AT+CSAS 保存设置。保存+CSAS和+CSMP的参数。</span><br><span class="line">6、 AT+CRES 恢复设置。</span><br><span class="line">7、 AT+CSDH 显示文本方式的参数。</span><br><span class="line">8、 AT+CNMI 新信息指示。这个命令选择如何从网络上接收短信息。</span><br><span class="line">9、 AT+CMGR 读短信。信息从+CPMS命令设定的存储器读取。</span><br><span class="line">10、 AT+CMGL 列出存储的信息。</span><br><span class="line">11、 AT+CMGS 发送信息。</span><br><span class="line">12、 AT+CMGW 写短信息并存储。</span><br><span class="line">13、 AT+CMSS 从存储器中发送信息。</span><br><span class="line">14、 AT+CSMP 设置文本模式的参数。</span><br><span class="line">15、 AT+CMGD 删除短信息。删除一个或多个短信息。</span><br><span class="line">16、 AT+CSCA 短信服务中心地址。</span><br><span class="line">17、 AT+CSCB 选择单元广播信息类型。</span><br><span class="line">18、 AT+WCBM 单元广播信息标识。</span><br><span class="line">19、 AT+WMSC 信息状态（是否读过、是否发送等等）修正。</span><br><span class="line">20、 AT+WMGO 信息覆盖写入。</span><br><span class="line">21、 AT+WUSS 不改变SMS状态。在执行+CMGR或+CMGL后仍保持UNREAD。</span><br><span class="line">七、 追加服务命令</span><br><span class="line">1、 AT+CCFC 呼叫继续。</span><br><span class="line">2、 AT+CLCK 呼叫禁止。</span><br><span class="line">3、 AT+CPWD 改变追加服务密码。</span><br><span class="line">4、 AT+CCWA 呼叫等待。</span><br><span class="line">5、 AT+CLIR 呼叫线确认限制。</span><br><span class="line">6、 AT+CLIP 呼叫线确认陈述。</span><br><span class="line">7、 AT+COLP 联络线确认陈述。</span><br><span class="line">8、 AT+CAOC 费用报告。</span><br><span class="line">9、 AT+CACM 累计呼叫计量。</span><br><span class="line">10、 AT+CAMM 累计呼叫计量最大值。</span><br><span class="line">11、 AT+CPUC 单价和货币表。</span><br><span class="line">12、 AT+CHLD 呼叫相关的追加服务。</span><br><span class="line">13、 AT+CLCC 列出当前的呼叫。</span><br><span class="line">14、 AT+CSSN 追加服务通知。</span><br><span class="line">15、 AT+CUSD 无组织的追加服务数据。</span><br><span class="line">16、 AT+CCUG 关闭的用户组。</span><br><span class="line">八、 数据命令</span><br><span class="line">1、 AT+CBST 信差类型选择。</span><br><span class="line">2、 AT+FCLASS 选择模式。这个命令把模块设置成数据或传真操作的特殊模式。</span><br><span class="line">3、 AT+CR 服务报告控制。这个命令允许更为详细的服务报告。</span><br><span class="line">4、 AT+CRC 划分的结果代码。这个命令在呼叫到来时允许更为详细的铃声指示。</span><br><span class="line">5、 AT+ILRR 本地DTE-DCE速率报告。</span><br><span class="line">6、 AT+CRLP 无线电通信线路协议参数。</span><br><span class="line">7、 AT+DOPT 其他无线电通信线路参数。</span><br><span class="line">8、 AT%C 数据压缩选择。</span><br><span class="line">9、 AT+DS 是否允许V42二度数据压缩。</span><br><span class="line">10、 AT+DR 是否报告V42二度数据压缩。</span><br><span class="line">11、 AT\N 数据纠错选择。</span><br><span class="line">九、 传真命令</span><br><span class="line">1、 AT+FTM 传送速率。</span><br><span class="line">2、 AT+FRM 接收速率</span><br><span class="line">3、 AT+FTH 用HDLC协议设置传真传送速率。</span><br><span class="line">4、 AT+FRH 用HDLC协议设置传真接收速率。</span><br><span class="line">5、 AT+FTS 停止特定时期的传送并等待。</span><br><span class="line">6、 AT+FRS 接收沉默。</span><br><span class="line">十、 第二类传真命令</span><br><span class="line">1、 AT+FDT 传送数据。</span><br><span class="line">2、 AT+FDR 接收数据。</span><br><span class="line">3、 AT+FET 传送页标点。</span><br><span class="line">4、 AT+FPTS 页转换状态参数。</span><br><span class="line">5、 AT+FK 终止会议。</span><br><span class="line">6、 AT+FBOR 页转换字节顺序。</span><br><span class="line">7、 AT+FBUF 缓冲大小报告。</span><br><span class="line">8、 AT+FCQ 控制拷贝质量检验。</span><br><span class="line">9、 AT+FCR 控制接收传真的能力。</span><br><span class="line">10、 AT+FDIS 当前会议参数。</span><br><span class="line">11、 AT+FDCC 设置DCE功能参数。</span><br><span class="line">12、 AT+FLID 定义本地ID串。</span><br><span class="line">13、 AT+FPHCTO 页转换超时参数。</span><br><span class="line">十一、V24-V25命令</span><br><span class="line">1、 AT+IPR 确定DTE速率。</span><br><span class="line">2、 AT+ICF 确定DTE-DCE特征结构。</span><br><span class="line">3、 AT+IFC 控制DTE-DCE本地流量。</span><br><span class="line">4、 AT&amp;C 设置DCD（数据携带检测）信号。</span><br><span class="line">5、 AT&amp;D 设置DTR（数据终端就绪）信号。</span><br><span class="line">6、 AT&amp;S 设置DST（数据设置就绪）信号。</span><br><span class="line">7、 ATO 回到联机模式。</span><br><span class="line">8、 ATQ 决定手机是否发送结果代码。</span><br><span class="line">9、 ATV 决定DCE响应格式。</span><br><span class="line">10、 ATZ 恢复为缺省设置。</span><br><span class="line">11、 AT&amp;W 保存设置。</span><br><span class="line">12、 AT&amp;T 自动测试。</span><br><span class="line">13、 ATE 决定是否回显字符。</span><br><span class="line">14、 AT&amp;F 回到出厂时的设定。</span><br><span class="line">15、 AT&amp;V 显示模块设置情况。</span><br><span class="line">16、 ATI 要求确认信息。这命令使GSM模块传送一行或多行特定的信息文字。</span><br><span class="line">17、 AT+WMUX 数据/命令多路复用。</span><br><span class="line">十二、特殊AT命令</span><br><span class="line">1、 AT+CCED 电池环境描述。</span><br><span class="line">2、 AT+CCED 自动RxLev指示。</span><br><span class="line">3、 AT+WIND 一般指示。</span><br><span class="line">4、 AT+ALEA 在ME和MSC之间的数据密码模式。</span><br><span class="line">5、 AT+CRYPT 数据密码模式。</span><br><span class="line">6、 AT+EXPKEY 键管理。</span><br><span class="line">7、 AT+CPLMN 在PLMN上的信息。</span><br><span class="line">8、 AT+ADC 模拟数字转换度量。</span><br><span class="line">9、 AT+CMER 移动设备事件报告。这个命令决定是否允许在键按下时是否主动发送结果代码。</span><br><span class="line">10、 AT+WLPR 读取语言偏好。</span><br><span class="line">11、 AT+WLPW 写语言偏好。</span><br><span class="line">12、 AT+WIOR 读取GPIO值。</span><br><span class="line">13、 AT+WIOW 写GPIO值。</span><br><span class="line">14、 AT+WIOM 输入/输出管理。</span><br><span class="line">15、 AT+WAC 忽略命令。这个特殊命令允许忽略SMS、SS和可用的PLMN。</span><br><span class="line">16、 AT+WTONE 播放旋律。</span><br><span class="line">17、 AT+WDTMF 播放DTMF旋律。</span><br><span class="line">18、 AT+WDWL 下载模式。</span><br><span class="line">19、 AT+WVR 配置信差的声音速率。</span><br><span class="line">20、 AT+WDR 配置数据速率。</span><br><span class="line">21、 AT+WHWV 显示硬件的版本。</span><br><span class="line">22、 AT+WDOP 显示产品的出厂日期。</span><br><span class="line">23、 AT+WSVG 声音增益选择。</span><br><span class="line">24、 AT+WSTR 返回指定状态的状态。</span><br><span class="line">25、 AT+WSCAN 扫描。</span><br><span class="line">26、 AT+WRIM 设置或返回铃声指示模式。</span><br><span class="line">27、 AT+W32K 是否允许32kHz掉电方式。</span><br><span class="line">28、 AT+WCDM 改变缺省旋律。</span><br><span class="line">29、 AT+WSSW 显示内部软件版本。</span><br><span class="line">30、 AT+WCCS 编辑或显示订制性质设置表。</span><br><span class="line">31、 AT+WLCK 允许在特定的操作符上个性化ME。</span><br><span class="line">32、 AT+CPHS 设置CPHS命令。</span><br><span class="line">33、 AT+WBCM 电池充电管理。</span><br><span class="line">34、 AT+WFM 特性管理。是否允许模块的某些特性，如带宽模式、SIM卡电压等。</span><br><span class="line">35、 AT+WCFM 商业特性管理。是否允许Wavecom特殊特性。</span><br><span class="line">36、 AT+WMIR 允许从当前存储的参数值创建定制的存储镜像。</span><br><span class="line">37、 AT+WCDP 改变旋律的缺省播放器。</span><br><span class="line">38、 AT+WMBN 设置SIM卡中的不同邮箱号码。</span><br><span class="line">十三、SIM卡工具箱命令</span><br><span class="line">1、 AT+STSF 配置工具箱实用程序。</span><br><span class="line">2、 AT+STIN 工具箱指示。</span><br><span class="line">3、 AT+STGI 获得从SIM卡发来的预期命令的信息。</span><br><span class="line">4、 AT+STCR 主动提供的结果：工具箱控制反应。</span><br></pre></td></tr></table></figure>
]]></content>
      <tags>
        <tag>理论</tag>
        <tag>配置</tag>
      </tags>
  </entry>
  <entry>
    <title>Symfony部署命令</title>
    <url>/2017/04/05/symfony-deploy-command.html</url>
    <content><![CDATA[<ol>
<li><p>composer 更新代码</p>
<figure class="highlight bash"><table><tr><td class="code"><pre><span class="line">php composer.phar install --no-dev --optimize-autoloader</span><br></pre></td></tr></table></figure>
</li>
<li><p>Symfony 清空cache</p>
<figure class="highlight shell"><table><tr><td class="code"><pre><span class="line">php bin/console cache:clear --env=prod --no-debug</span><br></pre></td></tr></table></figure>
</li>
<li><p>生成 Assets</p>
<figure class="highlight shell"><table><tr><td class="code"><pre><span class="line">php bin/console assetic:dump --env=prod --no-debug</span><br></pre></td></tr></table></figure></li>
</ol>
<h4 id="其他的总结"><a href="#其他的总结" class="headerlink" title="其他的总结"></a>其他的总结</h4><figure class="highlight shell"><table><tr><td class="code"><pre><span class="line">rm -rf bin/cache/* #手动清空缓存</span><br><span class="line">php bin/console route:debug  # 查看哪些路由已经注册</span><br></pre></td></tr></table></figure>
]]></content>
      <tags>
        <tag>后端</tag>
      </tags>
  </entry>
  <entry>
    <title>5分钟用EasyAdminBundle创建简易博客后台</title>
    <url>/2017/04/09/create-a-simple-blog-in-5-minutes-with-symfony-easy-admin-bundle.html</url>
    <content><![CDATA[<p>最近需要做一个快速上线的项目，要求使用 <code>Symfony</code> 框架。</p>
<p>久闻 <em>Symfony</em> 的 <em>Bundle</em> 很丰富，于是搜索了下现成的后台系统。<br>首先发现的是 <em>Sonata Admin Panel</em>，是个老牌的系统了，可惜经过研究发现，<br>它对于 <em>Symfony3</em> 下的新版本的 <em>FOS Bundle(一个用户系统)</em> 不支持。于是又找了一个，<br>名字是 <a href="https://github.com/javiereguiluz/EasyAdminBundle">EasyAdminBundle</a>。</p>
<p>这篇博客会用最短最快的方式，让你建立一个简易的博客后台，其中的各个步骤则不解释。</p>
<p>体验环境：MacOS X 或 Linux (注意 <em>php</em> 的 <em>pdo_mysql.so</em> 请打开)</p>
<ul>
<li><p>安装 Symfony</p>
<figure class="highlight bash"><table><tr><td class="code"><pre><span class="line">$ sudo <span class="built_in">mkdir</span> -p /usr/local/bin</span><br><span class="line">$ sudo curl -LsS https://symfony.com/installer -o /usr/local/bin/symfony</span><br><span class="line">$ sudo <span class="built_in">chmod</span> a+x /usr/local/bin/symfony</span><br></pre></td></tr></table></figure>
</li>
<li><p>创建 Symfony 项目 并启动服务</p>
<figure class="highlight shell"><table><tr><td class="code"><pre><span class="line"><span class="meta prompt_">$ </span><span class="language-bash">symfony new blog</span></span><br><span class="line"><span class="meta prompt_">$ </span><span class="language-bash"><span class="built_in">cd</span> blog</span></span><br><span class="line"><span class="meta prompt_">$ </span><span class="language-bash">php bin/console server:start</span></span><br></pre></td></tr></table></figure></li>
</ul>
<p>访问下 <a href="http://127.0.0.1:8000/">http://127.0.0.1:8000</a> 看是否正常启动。</p>
<ul>
<li><p>如需停止服务，执行下面的命令</p>
<figure class="highlight shell"><table><tr><td class="code"><pre><span class="line"><span class="meta prompt_">$ </span><span class="language-bash">php bin/console server:stop</span></span><br></pre></td></tr></table></figure>
</li>
<li><p>下载安装 EasyAdmin</p>
<figure class="highlight bash"><table><tr><td class="code"><pre><span class="line">$ composer require javiereguiluz/easyadmin-bundle</span><br></pre></td></tr></table></figure>
</li>
<li><p>激活插件</p>
<figure class="highlight php"><table><tr><td class="code"><pre><span class="line"><span class="meta">&lt;?php</span></span><br><span class="line"><span class="comment">// app/AppKernel.php</span></span><br><span class="line"><span class="comment">// ...</span></span><br><span class="line"><span class="class"><span class="keyword">class</span> <span class="title">AppKernel</span> <span class="keyword">extends</span> <span class="title">Kernel</span></span></span><br><span class="line"><span class="class"></span>&#123;</span><br><span class="line">    <span class="keyword">public</span> <span class="function"><span class="keyword">function</span> <span class="title">registerBundles</span>(<span class="params"></span>)</span></span><br><span class="line"><span class="function">    </span>&#123;</span><br><span class="line">        <span class="variable">$bundles</span> = <span class="keyword">array</span>(</span><br><span class="line">            <span class="comment">// ...</span></span><br><span class="line">            <span class="keyword">new</span> <span class="title class_">JavierEguiluz\Bundle\EasyAdminBundle\EasyAdminBundle</span>(),</span><br><span class="line">        );</span><br><span class="line">    &#125;</span><br><span class="line">    <span class="comment">// ...</span></span><br><span class="line">&#125;</span><br></pre></td></tr></table></figure>
</li>
<li><p>载入路由</p>
<figure class="highlight plaintext"><table><tr><td class="code"><pre><span class="line"># app/config/routing.yml</span><br><span class="line">easy_admin_bundle:</span><br><span class="line">    resource: &quot;@EasyAdminBundle/Controller/&quot;</span><br><span class="line">    type:     annotation</span><br><span class="line">    prefix:   /admin</span><br></pre></td></tr></table></figure>
</li>
<li><p>载入静态资源</p>
<figure class="highlight plaintext"><table><tr><td class="code"><pre><span class="line"># Symfony 3</span><br><span class="line">php bin/console assets:install --symlink</span><br></pre></td></tr></table></figure>
</li>
<li><p>在 <em>app&#x2F;config&#x2F;parameters.yml</em> 中配置数据库连接</p>
</li>
<li><p>创建 <em>Entity</em></p>
<figure class="highlight bash"><table><tr><td class="code"><pre><span class="line">$ php bin/console doctrine:generate:entity --entity=<span class="string">&quot;AppBundle:Category&quot;</span> --fields=<span class="string">&quot;name:string(255) enabled:boolean&quot;</span> --no-interaction</span><br><span class="line">$ php bin/console doctrine:generate:entity --entity=<span class="string">&quot;AppBundle:Posts&quot;</span> --fields=<span class="string">&quot;title:string(255) contents:text() enabled:boolean&quot;</span> --no-interaction</span><br></pre></td></tr></table></figure>
</li>
<li><p>在 <em>src&#x2F;AppBundle&#x2F;Entity&#x2F;PostsEntity.php</em> 中增加关联关系</p>
<figure class="highlight php"><table><tr><td class="code"><pre><span class="line"><span class="meta">&lt;?php</span></span><br><span class="line"><span class="comment">// ...</span></span><br><span class="line"><span class="class"><span class="keyword">class</span> <span class="title">Posts</span></span></span><br><span class="line"><span class="class"></span>&#123;</span><br><span class="line">    <span class="comment">// ...</span></span><br><span class="line">    <span class="comment">/**</span></span><br><span class="line"><span class="comment">     * <span class="doctag">@ORM</span>\ManyToOne(targetEntity=&quot;Category&quot;, inversedBy=&quot;posts&quot;)</span></span><br><span class="line"><span class="comment">     * <span class="doctag">@ORM</span>\JoinColumn(name=&quot;category_id&quot;, referencedColumnName=&quot;id&quot;)</span></span><br><span class="line"><span class="comment">     */</span></span><br><span class="line">    <span class="keyword">private</span> <span class="variable">$category</span>;</span><br><span class="line">&#125;</span><br></pre></td></tr></table></figure>
</li>
<li><p>在 <em>src&#x2F;AppBundle&#x2F;Entity&#x2F;Category.php</em> 中增加对应的关联关系(新增代码如下)</p>
<figure class="highlight php"><table><tr><td class="code"><pre><span class="line"><span class="comment">// src/AppBundle/Entity/Category.php</span></span><br><span class="line"></span><br><span class="line"><span class="comment">// ...</span></span><br><span class="line"><span class="keyword">use</span> <span class="title">Doctrine</span>\<span class="title">Common</span>\<span class="title">Collections</span>\<span class="title">ArrayCollection</span>;</span><br><span class="line"></span><br><span class="line"><span class="class"><span class="keyword">class</span> <span class="title">Category</span></span></span><br><span class="line"><span class="class"></span>&#123;</span><br><span class="line">    <span class="comment">// ...</span></span><br><span class="line"></span><br><span class="line">    <span class="comment">/**</span></span><br><span class="line"><span class="comment">     * <span class="doctag">@ORM</span>\OneToMany(targetEntity=&quot;Posts&quot;, mappedBy=&quot;category&quot;)</span></span><br><span class="line"><span class="comment">     */</span></span><br><span class="line">    <span class="keyword">private</span> <span class="variable">$posts</span>;</span><br><span class="line"></span><br><span class="line">    <span class="keyword">public</span> <span class="function"><span class="keyword">function</span> <span class="title">__construct</span>(<span class="params"></span>)</span></span><br><span class="line"><span class="function">    </span>&#123;</span><br><span class="line">        <span class="variable language_">$this</span>-&gt;posts = <span class="keyword">new</span> <span class="title class_">ArrayCollection</span>();</span><br><span class="line">    &#125;</span><br><span class="line">&#125;</span><br></pre></td></tr></table></figure>
</li>
<li><p>执行以下命令，完善对应属性的方法</p>
<figure class="highlight bash"><table><tr><td class="code"><pre><span class="line">$ composer update</span><br><span class="line">$ php bin/console doctrine:generate:entities AppBundle --no-backup</span><br></pre></td></tr></table></figure>
</li>
<li><p>执行以下命令，生成数据表</p>
<figure class="highlight php"><table><tr><td class="code"><pre><span class="line">$ php bin/console doctrine:schema:update --force</span><br></pre></td></tr></table></figure>
</li>
<li><p>配置后台</p>
<figure class="highlight plaintext"><table><tr><td class="code"><pre><span class="line"># app/config/config.yml</span><br><span class="line">easy_admin:</span><br><span class="line">    entities:</span><br><span class="line">        Category:</span><br><span class="line">            class: AppBundle\Entity\Category</span><br><span class="line">            form:</span><br><span class="line">                fields:</span><br><span class="line">                    - name</span><br><span class="line">        Posts:</span><br><span class="line">            class: AppBundle\Entity\Posts</span><br><span class="line">            form:</span><br><span class="line">                fields:</span><br><span class="line">                    - title</span><br><span class="line">                    - &#123; property: &#x27;category&#x27;, type: &#x27;easyadmin_autocomplete&#x27; &#125;</span><br><span class="line">                    - contents</span><br></pre></td></tr></table></figure>
</li>
<li><p>配置语言</p>
<figure class="highlight plaintext"><table><tr><td class="code"><pre><span class="line"># app/config/config.yml</span><br><span class="line">framework:</span><br><span class="line">    translator: &#123; fallbacks: [&#x27;%locale%&#x27;] &#125;</span><br></pre></td></tr></table></figure></li>
</ul>
<p>这时，访问 <a href="http://127.0.0.1:8000/admin">http://127.0.0.1:8000/admin</a>，就能看到我们的后台了。</p>
<p>下面是集成 FOS Bundle 的操作。</p>
<ol>
<li><p>安装 FOS</p>
<figure class="highlight bash"><table><tr><td class="code"><pre><span class="line">$ composer require friendsofsymfony/user-bundle <span class="string">&quot;~2.0&quot;</span></span><br></pre></td></tr></table></figure>
</li>
<li><p>启用 FOS</p>
<figure class="highlight php"><table><tr><td class="code"><pre><span class="line"><span class="meta">&lt;?php</span></span><br><span class="line"><span class="comment">// app/AppKernel.php</span></span><br><span class="line"></span><br><span class="line"><span class="keyword">public</span> <span class="function"><span class="keyword">function</span> <span class="title">registerBundles</span>(<span class="params"></span>)</span></span><br><span class="line"><span class="function"></span>&#123;</span><br><span class="line">    <span class="variable">$bundles</span> = <span class="keyword">array</span>(</span><br><span class="line">        <span class="comment">// ...</span></span><br><span class="line">        <span class="keyword">new</span> FOS\UserBundle\<span class="title function_ invoke__">FOSUserBundle</span>(),</span><br><span class="line">        <span class="comment">// ...</span></span><br><span class="line">    );</span><br><span class="line">&#125;</span><br></pre></td></tr></table></figure>
</li>
<li><p>创建 User Class</p>
<figure class="highlight php"><table><tr><td class="code"><pre><span class="line"><span class="meta">&lt;?php</span></span><br><span class="line"><span class="comment">// src/AppBundle/Entity/User.php</span></span><br><span class="line"></span><br><span class="line"><span class="keyword">namespace</span> <span class="title class_">AppBundle</span>\<span class="title class_">Entity</span>;</span><br><span class="line"></span><br><span class="line"><span class="keyword">use</span> <span class="title">FOS</span>\<span class="title">UserBundle</span>\<span class="title">Model</span>\<span class="title">User</span> <span class="keyword">as</span> <span class="title">BaseUser</span>;</span><br><span class="line"><span class="keyword">use</span> <span class="title">Doctrine</span>\<span class="title">ORM</span>\<span class="title">Mapping</span> <span class="keyword">as</span> <span class="title">ORM</span>;</span><br><span class="line"></span><br><span class="line"><span class="comment">/**</span></span><br><span class="line"><span class="comment"> * <span class="doctag">@ORM</span>\Entity</span></span><br><span class="line"><span class="comment"> * <span class="doctag">@ORM</span>\Table(name=&quot;fos_user&quot;)</span></span><br><span class="line"><span class="comment"> */</span></span><br><span class="line"><span class="class"><span class="keyword">class</span> <span class="title">User</span> <span class="keyword">extends</span> <span class="title">BaseUser</span></span></span><br><span class="line"><span class="class"></span>&#123;</span><br><span class="line">    <span class="comment">/**</span></span><br><span class="line"><span class="comment">     * <span class="doctag">@ORM</span>\Id</span></span><br><span class="line"><span class="comment">     * <span class="doctag">@ORM</span>\Column(type=&quot;integer&quot;)</span></span><br><span class="line"><span class="comment">     * <span class="doctag">@ORM</span>\GeneratedValue(strategy=&quot;AUTO&quot;)</span></span><br><span class="line"><span class="comment">     */</span></span><br><span class="line">    <span class="keyword">protected</span> <span class="variable">$id</span>;</span><br><span class="line"></span><br><span class="line">    <span class="keyword">public</span> <span class="function"><span class="keyword">function</span> <span class="title">__construct</span>(<span class="params"></span>)</span></span><br><span class="line"><span class="function">    </span>&#123;</span><br><span class="line">        <span class="built_in">parent</span>::<span class="title function_ invoke__">__construct</span>();</span><br><span class="line">        <span class="comment">// your own logic</span></span><br><span class="line">    &#125;</span><br><span class="line">&#125;</span><br></pre></td></tr></table></figure>
</li>
<li><p>增加防火墙配置(全部替换原有内容)</p>
<figure class="highlight plaintext"><table><tr><td class="code"><pre><span class="line"># app/config/security.yml</span><br><span class="line">security:</span><br><span class="line">    encoders:</span><br><span class="line">        FOS\UserBundle\Model\UserInterface: bcrypt</span><br><span class="line"></span><br><span class="line">    role_hierarchy:</span><br><span class="line">        ROLE_ADMIN:       ROLE_USER</span><br><span class="line">        ROLE_SUPER_ADMIN: ROLE_ADMIN</span><br><span class="line"></span><br><span class="line">    providers:</span><br><span class="line">        fos_userbundle:</span><br><span class="line">            id: fos_user.user_provider.username</span><br><span class="line"></span><br><span class="line">    firewalls:</span><br><span class="line">        main:</span><br><span class="line">            pattern: ^/</span><br><span class="line">            form_login:</span><br><span class="line">                provider: fos_userbundle</span><br><span class="line">                csrf_token_generator: security.csrf.token_manager</span><br><span class="line">                # if you are using Symfony &lt; 2.8, use the following config instead:</span><br><span class="line">                # csrf_provider: form.csrf_provider</span><br><span class="line"></span><br><span class="line">            logout:       true</span><br><span class="line">            anonymous:    true</span><br><span class="line"></span><br><span class="line">    access_control:</span><br><span class="line">        - &#123; path: ^/login$, role: IS_AUTHENTICATED_ANONYMOUSLY &#125;</span><br><span class="line">        - &#123; path: ^/register, role: IS_AUTHENTICATED_ANONYMOUSLY &#125;</span><br><span class="line">        - &#123; path: ^/resetting, role: IS_AUTHENTICATED_ANONYMOUSLY &#125;</span><br><span class="line">        - &#123; path: ^/admin/, role: ROLE_ADMIN &#125;</span><br></pre></td></tr></table></figure>
</li>
<li><p>配置 FOS</p>
<figure class="highlight plaintext"><table><tr><td class="code"><pre><span class="line"># app/config/config.yml</span><br><span class="line">fos_user:</span><br><span class="line">    db_driver: orm # other valid values are &#x27;mongodb&#x27; and &#x27;couchdb&#x27;</span><br><span class="line">    firewall_name: main</span><br><span class="line">    user_class: AppBundle\Entity\User</span><br><span class="line">    from_email:</span><br><span class="line">        address: &quot;%mailer_user%&quot;</span><br><span class="line">        sender_name: &quot;%mailer_user%&quot;</span><br></pre></td></tr></table></figure>
</li>
<li><p>在 <em>app&#x2F;config&#x2F;parameters.yml</em> 中配置第5步中的 <em>mailer_user</em> 参数</p>
</li>
<li><p>导入 FOS 的路由配置</p>
<figure class="highlight plaintext"><table><tr><td class="code"><pre><span class="line"># app/config/routing.yml</span><br><span class="line">fos_user:</span><br><span class="line">    resource: &quot;@FOSUserBundle/Resources/config/routing/all.xml&quot;</span><br></pre></td></tr></table></figure>
</li>
<li><p>更新数据库</p>
<figure class="highlight bash"><table><tr><td class="code"><pre><span class="line">$ php bin/console doctrine:schema:update --force</span><br></pre></td></tr></table></figure>
</li>
<li><p>创建新的控制器</p>
<figure class="highlight php"><table><tr><td class="code"><pre><span class="line"><span class="comment">// src/AppBundle/Controller/AdminController.php</span></span><br><span class="line"><span class="keyword">namespace</span> <span class="title class_">AppBundle</span>\<span class="title class_">Controller</span>;</span><br><span class="line"></span><br><span class="line"><span class="keyword">use</span> <span class="title">JavierEguiluz</span>\<span class="title">Bundle</span>\<span class="title">EasyAdminBundle</span>\<span class="title">Controller</span>\<span class="title">AdminController</span> <span class="keyword">as</span> <span class="title">BaseAdminController</span>;</span><br><span class="line"></span><br><span class="line"><span class="class"><span class="keyword">class</span> <span class="title">AdminController</span> <span class="keyword">extends</span> <span class="title">BaseAdminController</span></span></span><br><span class="line"><span class="class"></span>&#123;</span><br><span class="line">    <span class="keyword">public</span> <span class="function"><span class="keyword">function</span> <span class="title">createNewUserEntity</span>(<span class="params"></span>)</span></span><br><span class="line"><span class="function">    </span>&#123;</span><br><span class="line">        <span class="keyword">return</span> <span class="variable language_">$this</span>-&gt;<span class="title function_ invoke__">get</span>(<span class="string">&#x27;fos_user.user_manager&#x27;</span>)-&gt;<span class="title function_ invoke__">createUser</span>();</span><br><span class="line">    &#125;</span><br><span class="line"></span><br><span class="line">    <span class="keyword">public</span> <span class="function"><span class="keyword">function</span> <span class="title">prePersistUserEntity</span>(<span class="params"><span class="variable">$user</span></span>)</span></span><br><span class="line"><span class="function">    </span>&#123;</span><br><span class="line">        <span class="variable language_">$this</span>-&gt;<span class="title function_ invoke__">get</span>(<span class="string">&#x27;fos_user.user_manager&#x27;</span>)-&gt;<span class="title function_ invoke__">updateUser</span>(<span class="variable">$user</span>, <span class="literal">false</span>);</span><br><span class="line">    &#125;</span><br><span class="line"></span><br><span class="line">    <span class="keyword">public</span> <span class="function"><span class="keyword">function</span> <span class="title">preUpdateUserEntity</span>(<span class="params"><span class="variable">$user</span></span>)</span></span><br><span class="line"><span class="function">    </span>&#123;</span><br><span class="line">        <span class="variable language_">$this</span>-&gt;<span class="title function_ invoke__">get</span>(<span class="string">&#x27;fos_user.user_manager&#x27;</span>)-&gt;<span class="title function_ invoke__">updateUser</span>(<span class="variable">$user</span>, <span class="literal">false</span>);</span><br><span class="line">    &#125;</span><br><span class="line">&#125;</span><br></pre></td></tr></table></figure>
</li>
<li><p>在 config.yml 中增加 User 的配置</p>
<figure class="highlight plaintext"><table><tr><td class="code"><pre><span class="line">easy_admin:</span><br><span class="line">    entities:</span><br><span class="line">        User:</span><br><span class="line">            class: AppBundle\Entity\User</span><br><span class="line">            form:</span><br><span class="line">                fields:</span><br><span class="line">                    - username</span><br><span class="line">                    - email</span><br><span class="line">                    - enabled</span><br><span class="line">                    - lastLogin</span><br><span class="line">                    # if administrators are allowed to edit users&#x27; passwords and roles, add this:</span><br><span class="line">                    - &#123; property: &#x27;plainPassword&#x27;, type: &#x27;text&#x27;, type_options: &#123; required: false &#125; &#125;</span><br><span class="line">                    - &#123; property: &#x27;roles&#x27;, type: &#x27;choice&#x27;, type_options: &#123; multiple: true, choices: &#123; &#x27;ROLE_USER&#x27;: &#x27;ROLE_USER&#x27;, &#x27;ROLE_ADMIN&#x27;: &#x27;ROLE_ADMIN&#x27; &#125; &#125; &#125;</span><br></pre></td></tr></table></figure></li>
</ol>
<p>此时你再访问的时候，就会弹出来一个很丑的登陆界面（因为FOS默认不带皮肤）。<br>使用下面的命令创建一个管理员账号</p>
<figure class="highlight bash"><table><tr><td class="code"><pre><span class="line">$ php bin/console fos:user:create admin --super-admin</span><br></pre></td></tr></table></figure>

<p>按照提示，即可完成管理员创建的工作。回到网页上，登陆即可。</p>
<p>至此，一个简单的后台就搭建完毕了。</p>
<p>接下来还有很多的工作可以做，这个以后再来完善补充。</p>
]]></content>
      <tags>
        <tag>后端</tag>
      </tags>
  </entry>
  <entry>
    <title>SSL23_GET_SERVER_HELLO:unknown protocol</title>
    <url>/2017/07/25/SSL23_GET_SERVER_HELLO-unknown-protocol.html</url>
    <content><![CDATA[<p>今天配置服务器的https，结果配置完后，浏览器访问报错，显示</p>
<figure class="highlight plaintext"><table><tr><td class="code"><pre><span class="line">This site can’t provide a secure connection</span><br><span class="line">1hour.win sent an invalid response.</span><br></pre></td></tr></table></figure>

<p>用 <em>openssl</em> 看了下，发现报错如下</p>
<figure class="highlight plaintext"><table><tr><td class="code"><pre><span class="line">[root@host wwwroot]# openssl s_client -connect 1hour.win:443 -debug</span><br><span class="line">CONNECTED(00000003)</span><br><span class="line">write to 0x1d66480 [0x1e64440] (247 bytes =&gt; 247 (0xF7))</span><br><span class="line">0000 - 16 03 01 00 f2 01 00 00-ee 03 03 59 77 63 d6 28   ...........Ywc.(</span><br><span class="line">0010 - 1e d6 5a c6 ba ef 29 51-7a 37 7f 93 4b 6d 05 e1   ..Z...)Qz7..Km..</span><br><span class="line">0020 - 1c 45 37 ba c2 11 3e 12-1d 36 2a 00 00 84 c0 30   .E7...&gt;..6*....0</span><br><span class="line">0030 - c0 2c c0 28 c0 24 c0 14-c0 0a 00 a3 00 9f 00 6b   .,.(.$.........k</span><br><span class="line">0040 - 00 6a 00 39 00 38 00 88-00 87 c0 32 c0 2e c0 2a   .j.9.8.....2...*</span><br><span class="line">0050 - c0 26 c0 0f c0 05 00 9d-00 3d 00 35 00 84 c0 2f   .&amp;.......=.5.../</span><br><span class="line">0060 - c0 2b c0 27 c0 23 c0 13-c0 09 00 a2 00 9e 00 67   .+.&#x27;.#.........g</span><br><span class="line">0070 - 00 40 00 33 00 32 00 9a-00 99 00 45 00 44 c0 31   .@.3.2.....E.D.1</span><br><span class="line">0080 - c0 2d c0 29 c0 25 c0 0e-c0 04 00 9c 00 3c 00 2f   .-.).%.......&lt;./</span><br><span class="line">0090 - 00 96 00 41 c0 12 c0 08-00 16 00 13 c0 0d c0 03   ...A............</span><br><span class="line">00a0 - 00 0a 00 07 c0 11 c0 07-c0 0c c0 02 00 05 00 04   ................</span><br><span class="line">00b0 - 00 ff 01 00 00 41 00 0b-00 04 03 00 01 02 00 0a   .....A..........</span><br><span class="line">00c0 - 00 08 00 06 00 19 00 18-00 17 00 23 00 00 00 0d   ...........#....</span><br><span class="line">00d0 - 00 20 00 1e 06 01 06 02-06 03 05 01 05 02 05 03   . ..............</span><br><span class="line">00e0 - 04 01 04 02 04 03 03 01-03 02 03 03 02 01 02 02   ................</span><br><span class="line">00f0 - 02 03 00 0f 00 01 01                              .......</span><br><span class="line">read from 0x1d66480 [0x1e699a0] (7 bytes =&gt; 7 (0x7))</span><br><span class="line">0000 - 48 54 54 50 2f 31 2e                              HTTP/1.</span><br><span class="line">140304408045472:error:140770FC:SSL routines:SSL23_GET_SERVER_HELLO:unknown protocol:s23_clnt.c:769:</span><br><span class="line">---</span><br><span class="line">no peer certificate available</span><br><span class="line">---</span><br><span class="line">No client certificate CA names sent</span><br><span class="line">---</span><br><span class="line">SSL handshake has read 7 bytes and written 247 bytes</span><br><span class="line">---</span><br><span class="line">New, (NONE), Cipher is (NONE)</span><br><span class="line">Secure Renegotiation IS NOT supported</span><br><span class="line">Compression: NONE</span><br><span class="line">Expansion: NONE</span><br><span class="line">---</span><br></pre></td></tr></table></figure>

<p>unknown protocol? 这是啥情况，仔细比对配置，发现原来是在 <em>listen</em> 配置项中掉了 <em>ssl</em> ，<br>正确配置应该是</p>
<figure class="highlight plaintext"><table><tr><td class="code"><pre><span class="line">listen 443 ssl;</span><br></pre></td></tr></table></figure>

<p>之前写成了</p>
<figure class="highlight plaintext"><table><tr><td class="code"><pre><span class="line">listen 443;</span><br></pre></td></tr></table></figure>
]]></content>
      <tags>
        <tag>Server&amp;OS</tag>
      </tags>
  </entry>
  <entry>
    <title>解决frp在Archlinux下安装时文件验证失败的方法</title>
    <url>/2017/12/13/solve-frp-installation-validationg-err-on-the-archlinux.html</url>
    <content><![CDATA[<p>使用 <code>yaourt</code> 安装 <code>frp</code> 的时候，报告以下的错误:</p>
<figure class="highlight plaintext"><table><tr><td class="code"><pre><span class="line">==&gt; Validating source files with sha256sums...</span><br><span class="line">    frps.service ... FAILED</span><br><span class="line">    frpc.service ... FAILED</span><br><span class="line">    frps@.service ... FAILED</span><br><span class="line">    frpc@.service ... FAILED</span><br><span class="line">==&gt; ERROR: One or more files did not pass the validity check!</span><br><span class="line">:: failed to verify frp integrity</span><br></pre></td></tr></table></figure>

<p>解决方案，重新自己生成 <code>PKGBUILD</code> 文件:</p>
<figure class="highlight plaintext"><table><tr><td class="code"><pre><span class="line">$ yaourt -G frp</span><br><span class="line">$ cd frp</span><br><span class="line">$ makepkg -g &gt;&gt; PKGBUILD</span><br><span class="line">$ makepkg</span><br><span class="line">$ sudo pacman -S frp-0.14.0-2-x86_64.pkg.tar.xz</span><br></pre></td></tr></table></figure>

<p>使用方法:</p>
<figure class="highlight plaintext"><table><tr><td class="code"><pre><span class="line">To start the client, simply modify /etc/frp/frpc.ini, and start the service by:</span><br><span class="line"></span><br><span class="line">    systemctl start frpc</span><br><span class="line"></span><br><span class="line">or create your own config file, for example myconf.ini, and start the service by:</span><br><span class="line"></span><br><span class="line">    systemctl start frpc@myconf</span><br><span class="line"></span><br><span class="line">You can also start frps the same way</span><br></pre></td></tr></table></figure>

<p>具体配置参数见 <a href="https://github.com/fatedier/frp">https://github.com/fatedier/frp</a></p>
]]></content>
      <tags>
        <tag>Server&amp;OS</tag>
      </tags>
  </entry>
  <entry>
    <title>生产环境以非root使用composer</title>
    <url>/2017/04/15/on-prod-env-use-composer-command.html</url>
    <content><![CDATA[<p>在服务器端部署代码的时候，新版本的 <em>composer</em> 不再支持 <em>root</em> 用户来运行。因为会带来潜在的安全问题，<br>这导致 <em>composer update</em> 之后，不会再执行 <em>scripts</em> 里的脚本命令。</p>
<p>但是一般服务器上的web服务都是运行在 <em>www</em> 之类的用户下面的，且这些用户是不允许登陆的，那么我们该咋整？</p>
<p>经过搜索和实验后，发现 <em>runuser</em> 不好使，可以使用 <em>sudo</em>，具体命令如下：</p>
<figure class="highlight shell"><table><tr><td class="code"><pre><span class="line">sudo -u www /usr/local/bin/composer update</span><br></pre></td></tr></table></figure>

<h6 id="注意要执行的命令需要完整路径。"><a href="#注意要执行的命令需要完整路径。" class="headerlink" title="注意要执行的命令需要完整路径。"></a><em>注意要执行的命令需要完整路径。</em></h6>]]></content>
      <tags>
        <tag>Server&amp;OS</tag>
      </tags>
  </entry>
  <entry>
    <title>用postfix和sasl搭建一个简易的发邮件服务器</title>
    <url>/2018/01/08/create-a-simple-smtp-server-by-postfix-and-sasl.html</url>
    <content><![CDATA[<p>有时候为了发送一定量的邮件，而使用类似QQ邮箱这样厂商的产品就会受到各种限制。<br>为此，需要自己搭建个简易的发邮件的服务器。需求很简单：服务器只需要能发邮件，<br>不需要接收邮件，且发邮件可以使用 <code>smtp</code> 登陆验证来使用。</p>
<h1 id="安装MTA服务器"><a href="#安装MTA服务器" class="headerlink" title="安装MTA服务器"></a>安装MTA服务器</h1><p>我的VPS是 <code>centos7</code> ，系统自带了 <code>postfix</code>，然后还需要安装 <code>sasl</code>，<br>这个是为了实现 <code>smtp</code> 验证必备的软件。</p>
<figure class="highlight plaintext"><table><tr><td class="code"><pre><span class="line">yum install cyrus*</span><br></pre></td></tr></table></figure>

<p>如果你的服务器上没有 <code>postfix</code> ，而是 <code>sendmail</code>，你需要先卸载再安装。</p>
<figure class="highlight plaintext"><table><tr><td class="code"><pre><span class="line">rpm -e sendmail</span><br><span class="line">yum install postfix</span><br></pre></td></tr></table></figure>

<h1 id="配置DNS"><a href="#配置DNS" class="headerlink" title="配置DNS"></a>配置DNS</h1><p>我用的是DNSPOD，要配置的域名为 <code>mypi.win</code>，也就是我希望发邮件的地址是<br><code>username@mypi.win</code>。需要在DNSPOD做以下三条配置</p>
<p><img src="/upload/20180108/1.png" alt="dns配置"></p>
<p>其中 <code>SPF</code> 配置中的内容为 <code>v=spf1 a mx ip4:x.x.x.x -all</code>，把其中的<br><code>x.x.x.x</code> 换成你的服务器IP，也就是你的主域名指向的IP。</p>
<p><code>SPF</code> 的作用是为了降低邮件被识别为垃圾邮件的概率，配置好以后，可以去<a href="http://www.kitterman.com/spf/validate.html">这里</a><br>测试下是否配置正确了。</p>
<h1 id="配置postfix"><a href="#配置postfix" class="headerlink" title="配置postfix"></a>配置postfix</h1><p>修改 <code>/etc/postfix/main.cf</code> 的内容。</p>
<figure class="highlight plaintext"><table><tr><td class="code"><pre><span class="line">##将下面的配置项注释取消，后面填上合适值##</span><br><span class="line">myhostname = mypi.win</span><br><span class="line">#大约在75行，postfix主机名，修改成你的域名 此项需要添加A记录并指向postfix所在主机公网IP</span><br><span class="line">mydomain = mypi.win</span><br><span class="line">#大约在83行，后面为主机域名</span><br><span class="line">myorigin = $mydomain</span><br><span class="line">#大约在100行，设置postfix邮箱的域名后缀为$mydomain，即mypi.win</span><br><span class="line">inet_interfaces = localhost</span><br><span class="line">#大约在117行</span><br><span class="line">#指定postfix系统监听的网络接口 此处必须是localhost或127.0.0.1或内网ip</span><br><span class="line">#若注释或填入公网ip  服务器的25端口将对公网开放</span><br><span class="line">#默认值为all 即监听所有网络接口</span><br><span class="line">#此项指定localhost后 本机postfix就只能发邮件不能接收邮件</span><br><span class="line">inet_protocols = ipv4</span><br><span class="line">#大约在120行,指定网络协议</span><br><span class="line">mydestination = $myhostname, localhost.$mydomain, localhost, $mydomain</span><br><span class="line">#大约在165行</span><br><span class="line">#指定postfix接收邮件时收件人的域名，换句话说，也就是你的postfix系统要接收什么样的邮件。</span><br><span class="line">#此项配置中$myhostname表示postfix接受@$myhostname为后缀的邮箱的邮件 逗号分割支持指多项</span><br><span class="line">#此项默认值使用myhostname</span><br><span class="line">local_recipient_maps =</span><br><span class="line">#此项制定接收邮件的规则 可以是hash文件 此项对本次配置无意义 可以直接注释</span><br><span class="line">mynetworks = x.x.x.x, 172.17.0.1, 127.0.0.1</span><br><span class="line">#大约在266行</span><br><span class="line">#指定你所在的网络的网络地址</span><br><span class="line">#本服务器的公网IP x.x.x.x、内网ip 172.17.0.1、以及localhost的ip127.0.0.1</span><br><span class="line">#请依据实际情况修改</span><br><span class="line">smtpd_banner = ETY001 Steemit Mention Server</span><br><span class="line">#大约在571行</span><br><span class="line">#指定MUA通过smtp连接postfix时返回的header头信息</span><br><span class="line"></span><br><span class="line">#SMTP Config</span><br><span class="line">broken_sasl_auth_clients = yes</span><br><span class="line">#指定postfix兼容MUA使用不规则的smtp协议--主要针对老版本的outlook 此项对于本次配置无意义</span><br><span class="line">smtpd_client_restrictions = permit_sasl_authenticated</span><br><span class="line">#指定可以向postfix发起SMTP连接的客户端的主机名或ip地址</span><br><span class="line">#此处permit_sasl_authenticated意思是允许通过sasl认证（也就是smtp链接时通过了账号、密码效验的用户）的所有用户</span><br><span class="line">smtpd_recipient_restrictions = permit_mynetworks, permit_sasl_authenticated, reject_unauth_destination</span><br><span class="line">#发件人在执行RCPT TO命令时提供的地址进行限制规则 此处照搬复制即可</span><br><span class="line">smtpd_sasl_auth_enable = yes</span><br><span class="line">#指定postfix使用sasl验证 通俗的将就是启用smtp并要求进行账号、密码效验</span><br><span class="line">smtpd_sasl_local_domain = $mydomain</span><br><span class="line">#指定SMTP认证的本地域名 本次配置可以使用 smtpd_sasl_local_domain = &#x27;&#x27; 或干脆注释掉 默认为空</span><br><span class="line">smtpd_sasl_security_options = noanonymous</span><br><span class="line">#取消smtp的匿名登录 此项默认值为noanonymous smtp若能匿名登录危害非常大 此项请务必指定为noanonymous</span><br><span class="line">message_size_limit = 5242880</span><br><span class="line">#指定通过postfix发送邮件的体积大小 此处表示5M</span><br></pre></td></tr></table></figure>

<h1 id="配置-SMTP"><a href="#配置-SMTP" class="headerlink" title="配置 SMTP"></a>配置 SMTP</h1><p>配置 <code>postfix</code> 启用 <code>sasldb2</code> 的账号密码验证方式：</p>
<figure class="highlight plaintext"><table><tr><td class="code"><pre><span class="line">vim /etc/sasl2/smtpd.conf</span><br><span class="line">#向这个文件写入如下的内容（这个文件的路径为64位系统的，如果是32位系统应该在/usr/lib/sasl2/smtpd.cof）</span><br><span class="line"></span><br><span class="line">pwcheck_method: auxprop</span><br><span class="line">auxprop_plugin: sasldb</span><br><span class="line">mech_list: plain login CRAM-MD5 DIGEST-MD5</span><br></pre></td></tr></table></figure>

<p>接下来新建一个连接stmp服务的用户名和密码：</p>
<figure class="highlight plaintext"><table><tr><td class="code"><pre><span class="line">[root@mypi ~]# saslpasswd2 -c -u `postconf -h mydomain` steemit</span><br></pre></td></tr></table></figure>

<p>这条命令会新建一个 <code>steemit@mypi.win</code> 的用户，接着会让你输入密码，假设密码为 <code>123456789</code>。</p>
<p>新建完成后，可以使用 <code>sasldblistusers2</code> 命令 来查看 已经添加了哪些用户（密码使用userPassword代替）：</p>
<figure class="highlight plaintext"><table><tr><td class="code"><pre><span class="line">[root@mypi ~]# sasldblistusers2</span><br><span class="line">steemit@mypi.win: userPassword</span><br></pre></td></tr></table></figure>

<p>修改 <code>sasldb</code> 的权限，让 <code>postfix</code> 可以读取其中的内容</p>
<figure class="highlight plaintext"><table><tr><td class="code"><pre><span class="line">[root@mypi ~]# chgrp postfix /etc/sasldb2</span><br><span class="line">[root@mypi ~]# chmod 640 /etc/sasldb2</span><br></pre></td></tr></table></figure>

<h1 id="启动-postfix-并添加开机启动"><a href="#启动-postfix-并添加开机启动" class="headerlink" title="启动 postfix 并添加开机启动"></a>启动 postfix 并添加开机启动</h1><p>如果是 centos7 ，执行下面的命令</p>
<figure class="highlight plaintext"><table><tr><td class="code"><pre><span class="line">systemctl start postfix</span><br><span class="line">systemctl enable postfix</span><br></pre></td></tr></table></figure>

<h1 id="测试smtp"><a href="#测试smtp" class="headerlink" title="测试smtp"></a>测试smtp</h1><p>在另外的电脑上执行下面的命令</p>
<figure class="highlight plaintext"><table><tr><td class="code"><pre><span class="line">/ # nc mypi.win 25</span><br><span class="line">220 ETY001 Steemit Mention Server</span><br><span class="line">auth login</span><br><span class="line">334 VXNlcm5hbWU6</span><br><span class="line">c3RlZW1pdEBteXBpLndpbg==</span><br><span class="line">334 UGFzc3dvcmQ6</span><br><span class="line">MTIzNDU2Nzg5</span><br><span class="line">235 2.7.0 Authentication successful</span><br></pre></td></tr></table></figure>

<p>其中 <code>auth login</code> 为登陆验证指令， <code>c3RlZW1pdEBteXBpLndpbg==</code> 是邮箱地址<br><code>steemit@mypi.win</code> 的 <code>base64</code> 编码后字符串，<code>MTIzNDU2Nzg5</code> 是密码<br><code>123456789</code> 的 <code>base64</code> 编码后字符串。</p>
]]></content>
      <tags>
        <tag>Server&amp;OS</tag>
      </tags>
  </entry>
  <entry>
    <title>Build a dockerized LNMP environment by portainer / 通过portainer搭建docker化的LNMP环境</title>
    <url>/2018/01/16/build-a-dockerized-lnmp-environment-by-portainer.html</url>
    <content><![CDATA[<p><a href="https://portainer.io/">Portainer</a> is a simple UI management for docker. It’s easy to use and all your resources will show you friendly. It’s very light especially using a VPS which has only 512MB RAM.</p>
<p>In this tutorial, we will make a LNMP server over the docker container by Portainer.</p>
<h1 id="What-Will-I-Learn"><a href="#What-Will-I-Learn" class="headerlink" title="What Will I Learn?"></a>What Will I Learn?</h1><ul>
<li>You will learn how to setup <code>portainer</code></li>
<li>You will learn how to create a custom network with the <code>docker</code></li>
<li>You will learn how to create a <code>container</code></li>
</ul>
<h1 id="Requirements"><a href="#Requirements" class="headerlink" title="Requirements"></a>Requirements</h1><ul>
<li>Ubuntu 16.04 (64-bit)</li>
<li>Base bash knowledge</li>
<li>Base docker knowledge</li>
<li>Built a normal LNMP environment before</li>
</ul>
<h1 id="Difficulty"><a href="#Difficulty" class="headerlink" title="Difficulty"></a>Difficulty</h1><ul>
<li>Intermediate</li>
</ul>
<h1 id="Tutorial-Contents"><a href="#Tutorial-Contents" class="headerlink" title="Tutorial Contents"></a>Tutorial Contents</h1><h2 id="Setup-Portainer"><a href="#Setup-Portainer" class="headerlink" title="Setup Portainer"></a>Setup Portainer</h2><p>1.Create a volume to save the portainer data. You also can bind a folder.</p>
<figure class="highlight plaintext"><table><tr><td class="code"><pre><span class="line">$ docker volume create portainer_data</span><br></pre></td></tr></table></figure>

<p>2.Run the <code>Portainer</code> docker.</p>
<figure class="highlight plaintext"><table><tr><td class="code"><pre><span class="line">$ docker run -d -p 9000:9000 --name portainer -v /var/run/docker.sock:/var/run/docker.sock -v portainer_data:/data --restart always portainer/portainer</span><br></pre></td></tr></table></figure>

<ul>
<li><code>-d</code> means run as daemon</li>
<li><code>-p 9000:9000</code> means making a port map. Portainer needs port 9000 opening.</li>
<li><code>-v /var/run/docker.sock:/var/run/docker.sock</code> This parameter is important if you want portainer to manage your local docker.</li>
</ul>
<p>3.Visit <code>http://localhost:9000</code> in your browser and input your username and password to create the administrator user.</p>
<p><img src="https://steemitimages.com/DQmT9JTGErJC2n36RdZd4Lm2TLZHRDexXob8wBtqfL7yjWE/1.png" alt="1.png"></p>
<p>4.In next step select the <code>Local</code> option and press <code>Connect</code> button to finish setup.</p>
<p><img src="https://steemitimages.com/DQmYPejiNcH4D2eSP5SyDFv4mV12NJ2wd8oTyHHTmGCHf4r/2.png" alt="2.png"></p>
<p>5.When you see the main page, the installation is over.</p>
<p><img src="https://steemitimages.com/DQmbux3arsXknHxnaFuGX2a7N9K4h7NR6VQgEo91QRo6JqA/3.png" alt="3.png"></p>
<h2 id="Create-a-new-network"><a href="#Create-a-new-network" class="headerlink" title="Create a new network"></a>Create a new network</h2><p>The <a href="https://docs.docker.com/engine/userguide/networking/default_network/dockerlinks/">container link</a>  is out of date now. The portainer doesn’t support the container link any more. So we need to create a new bridge network and bind  static IPs to every container we create. Then each container can communicate with each other through the static IPs.</p>
<p>1.Get in the <code>Networks</code> page and click the <code>Add network</code> button.</p>
<p><img src="https://steemitimages.com/DQmQ7y7TZ9Bvik92P25aZgqi4rBgHGZG1NK5GQGfkM6t3hg/4.png" alt="4.png"></p>
<p>2.Input the required information like the snapshot and then click the <code>Create the network</code> button.</p>
<p><img src="https://steemitimages.com/DQmcr61fzmxMr56qj44oLjLntR5Hb2qp8afpntUW4xbjHr8/5.png" alt="5.png"></p>
<h2 id="Add-MariaDB-container"><a href="#Add-MariaDB-container" class="headerlink" title="Add MariaDB container"></a>Add MariaDB container</h2><p>In this tutorial, we use the <code>App Template</code> to create the MariaDB container.</p>
<p>1.Create a folder to storage the MariaDB database file</p>
<figure class="highlight plaintext"><table><tr><td class="code"><pre><span class="line">$ sudo mkdir -p /data/mariadb</span><br></pre></td></tr></table></figure>

<p>2.Enter the <code>App Template</code> page and select the <code>MariaDB</code> option.</p>
<p><img src="https://steemitimages.com/DQmRdiSeJMQvHNDu84TAPpqP2GUuTy4cTENnfuRSMD9DddA/6.png" alt="6.png"></p>
<p>3.Input required information with snapshot (When you clicked the <code>Deploy the container</code> button, you need waiting a while. Because docker is pulling the portainer image.)</p>
<p><img src="https://steemitimages.com/DQmX9tReX9ism2Uj4BXVLviJrWpf6sgASivb2iet7p4mrQ5/7.png" alt="7.png"></p>
<p>4.Because the <code>App Template</code> doesn’t set the static IP, we need set it with editing the container configurations manually. Open the container detail page:</p>
<p><img src="https://steemitimages.com/DQmTBfjkF4ArnAzH1G3NAk7Zignj8hgMc88ekZ6yr2XAR3U/8.png" alt="8.png"></p>
<p>5.Click the <code>Duplicate/Edit</code> button</p>
<p><img src="https://steemitimages.com/DQmQaLzKXbKv8HtjRPLtXHKyakF2WB6uHemhFHWX4Wb41M2/9.png" alt="9.png"></p>
<p>6.Find the <code>Advanced container settings</code> section, select the <code>Network</code> tab, input a static IP into the <code>IPv4 address</code>, click <code>Deploy the container</code>.</p>
<p><img src="https://steemitimages.com/DQmUVXxDHssU3dPq5eSVX6mV3dH3RBruKzWVNJFsLMewpcS/10.png" alt="10.png"></p>
<p>7.Portainer will mention you whether if to replace the original container. Click <code>Replace</code>.</p>
<p><img src="https://steemitimages.com/DQmZ2Ffs8trHvqLtCuqBKNccZbyiPkPQzDzcPTXjvxkcX8C/11.png" alt="11.png"></p>
<p>8.If we want to connect to the database on the host, we can run this command</p>
<figure class="highlight plaintext"><table><tr><td class="code"><pre><span class="line">$ docker run -it --rm --name mariadb_client --network mynet mariadb /usr/bin/mysql -h 172.20.0.2 -uroot -p</span><br></pre></td></tr></table></figure>

<ul>
<li><code>--network mynet</code> is needed. You must put the client container into your MariaDB server container’s network.</li>
<li><code>--rm</code> will destroy this client container when it ends.</li>
</ul>
<p>OR</p>
<figure class="highlight plaintext"><table><tr><td class="code"><pre><span class="line">$ docker exec -it mariadb /usr/bin/mysql -h 172.20.0.2 -uroot -p</span><br></pre></td></tr></table></figure>

<h2 id="Add-nginx-container"><a href="#Add-nginx-container" class="headerlink" title="Add nginx container"></a>Add nginx container</h2><p>In this example, we use the <code>App Template</code> to create the nginx container.</p>
<p>1.Deploy a nginx container from <code>App Template</code> and bind  container <code>/data</code> to host <code>/data</code>.</p>
<p><img src="https://steemitimages.com/DQmYogHmVTx7PPR1Ecr17V6NLAQJgkrf7WMrMvYhDGQkQZq/12.png" alt="12.png"></p>
<p>2.Open the <code>Containers</code> list and find the container you just created and click the third icon to get in the container console.</p>
<p><img src="https://steemitimages.com/DQmbAbmCCHRNX9T9fmdpEYSH5QDUFFdGGCcZfXkuB1CH1gE/13.png" alt="13.png"></p>
<p>3.Run this command to copy nginx configurations to your host.</p>
<figure class="highlight plaintext"><table><tr><td class="code"><pre><span class="line"># cp -r /etc/nginx /data</span><br></pre></td></tr></table></figure>

<p><img src="https://steemitimages.com/DQmVUK9h2GTjj2LMFURrGC1seWCp37vy551iYQaom8B29ki/14.png" alt="14.png"></p>
<p>4.On the host terminal run this command</p>
<figure class="highlight plaintext"><table><tr><td class="code"><pre><span class="line">$ sudo cp -r /data/nginx /etc/nginx</span><br></pre></td></tr></table></figure>

<p>5.Edit the exist nginx container with these snapshots</p>
<p><img src="https://steemitimages.com/DQmVurkWMPWeeyREZHrZ6LSEdrrZ8fWVN3onKFHK5vSAWq4/16.png" alt="16.png"></p>
<p><img src="https://steemitimages.com/DQmYL7XGcDgZMrRRQzoXrzt7jdfjMXdYg8kGoGFSrQ6K6Ve/17.png" alt="17.png"></p>
<p><img src="https://steemitimages.com/DQmf5LhNHxjErnCahun7yN1VCcaUHhqo45d6HJvjjcEX7LR/18.png" alt="18.png"></p>
<h2 id="Add-a-php-fpm7-container"><a href="#Add-a-php-fpm7-container" class="headerlink" title="Add a php-fpm7 container"></a>Add a php-fpm7 container</h2><p>1.Create a php-fpm7 image<br>I refer to this <a href="https://github.com/Yavin/docker-alpine-php-fpm">repo</a> to create the image. This image is based on Alpine so it’s light enough.</p>
<figure class="highlight plaintext"><table><tr><td class="code"><pre><span class="line">$ git clone https://github.com/Yavin/docker-alpine-php-fpm.git</span><br><span class="line">$ cd docker-alpine-php-fpm</span><br></pre></td></tr></table></figure>

<p>2.Edit the <code>php-fpm.conf</code>:</p>
<figure class="highlight plaintext"><table><tr><td class="code"><pre><span class="line">[www]</span><br><span class="line">user = nobody</span><br><span class="line">group = nobody</span><br><span class="line">listen = [::]:9000</span><br><span class="line">chdir = /data/wwwroot  # Change the chdir</span><br><span class="line">pm = dynamic</span><br><span class="line">pm.max_children = 5</span><br><span class="line">pm.start_servers = 2</span><br><span class="line">pm.min_spare_servers = 1</span><br><span class="line">pm.max_spare_servers = 3</span><br><span class="line">catch_workers_output = Yes</span><br></pre></td></tr></table></figure>

<p>3.Build image</p>
<figure class="highlight plaintext"><table><tr><td class="code"><pre><span class="line">$ docker build -t php-fpm7:latest .</span><br></pre></td></tr></table></figure>

<p>4.Add a new container</p>
<p><img src="https://steemitimages.com/DQmeYjkN7y2ycQvTur4JfXXmffZWc97rHwXUcYAmo8bqTCD/19.png" alt="19.png"></p>
<p>5.Configure step by step with thees snapshots:</p>
<p><img src="https://steemitimages.com/DQmNdRgfEF7xbg7KHenVoQpVvQK3kbCQ8w2LdwXgjUdDgds/20.png" alt="20.png"></p>
<p><img src="https://steemitimages.com/DQmXRr5jjH2JiYdXXYkK5rp12uXPj3Bq7DPscUvAwtpGCub/21.png" alt="21.png"></p>
<p><img src="https://steemitimages.com/DQmTGq6FY68GDZwgYa7pe1KBA6ZDeVTnWV8sspNBnVneFXy/22.png" alt="22.png"></p>
<p><img src="https://steemitimages.com/DQmXgjisbnJK1WBKQd9cZ9T1PjZpixQ4LcvNpt3LPLENgZB/23.png" alt="23.png"></p>
<h2 id="Final-Config"><a href="#Final-Config" class="headerlink" title="Final Config"></a>Final Config</h2><p>1.At last, we need to edit the <code>/etc/nginx/conf.d/default.conf</code> on host like this:</p>
<figure class="highlight plaintext"><table><tr><td class="code"><pre><span class="line">$ sudo vim /etc/nginx/conf.d/default.conf</span><br><span class="line"></span><br><span class="line">server &#123;</span><br><span class="line">    listen       80;</span><br><span class="line">    server_name  localhost;</span><br><span class="line"></span><br><span class="line">    location / &#123;</span><br><span class="line">        root   /data/wwwroot/default;</span><br><span class="line">        index  index.html index.htm index.php;</span><br><span class="line">    &#125;</span><br><span class="line"></span><br><span class="line">    # pass the PHP scripts to FastCGI server listening on 127.0.0.1:9000</span><br><span class="line">    location ~ \.php$ &#123;</span><br><span class="line">        root           /data/wwwroot/default;</span><br><span class="line">        fastcgi_pass   172.20.0.4:9000;</span><br><span class="line">        fastcgi_index  index.php;</span><br><span class="line">        fastcgi_param  SCRIPT_FILENAME $document_root$fastcgi_script_name;</span><br><span class="line">        include        fastcgi_params;</span><br><span class="line">    &#125;</span><br><span class="line"></span><br><span class="line">&#125;</span><br></pre></td></tr></table></figure>

<p>2.Create <code>index.php</code> for testing</p>
<figure class="highlight plaintext"><table><tr><td class="code"><pre><span class="line">$ sudo mkdir /data/wwwroot/default</span><br><span class="line">$ sudo echo &quot;&lt;?php phpinfo();?&gt;&quot; &gt; /data/wwwroot/default/index.php</span><br></pre></td></tr></table></figure>

<p>3.Restart nginx container</p>
<p><img src="https://steemitimages.com/DQmZRZdRXGXHYxYrLHHbHF8WWiacefJ6AfmHGSAMJA3zthD/24.png" alt="24.png"></p>
<h2 id="Visit-the-test-page"><a href="#Visit-the-test-page" class="headerlink" title="Visit the test page"></a>Visit the test page</h2><p><img src="https://steemitimages.com/DQmTo7GRPcZzWLvdpBNhi289sFvpujVPgThhR78vzjp6VuH/25.png" alt="25.png"></p>
<h1 id="Summary"><a href="#Summary" class="headerlink" title="Summary"></a>Summary</h1><p>Using dockerized apps is a trend. If you want to run dockerized apps on your personal VPS, Portainer is a good choice. It’s easy and light.</p>
<hr>
<p><a href="https://portainer.io/">Portainer</a> 是一个为  <code>Docker</code>  设计的简易 <code>UI</code> 管理界面. 通过 <code>Portainer</code> 可以轻松管理你的 <code>Docker</code> 的各种资源. 它是轻量级的, 你甚至可以在一台只有 <code>512MB</code> 内存的 <code>VPS</code> 上部署使用.</p>
<p>在这个教程中, 我们将通过使用 <code>Portainer</code> 部署一套 <code>LNMP</code> 环境, 来学习如何使用 <code>Portainer</code>.</p>
<h1 id="将会学到"><a href="#将会学到" class="headerlink" title="将会学到?"></a>将会学到?</h1><ul>
<li>你将学到如何安装 <code>Portainer</code></li>
<li>你将学到如何在 <code>Portainer</code> 中创建自定义的网络</li>
<li>你将学到如何用 <code>Portainer</code> 创建容器</li>
</ul>
<h1 id="准备工作"><a href="#准备工作" class="headerlink" title="准备工作"></a>准备工作</h1><ul>
<li>Ubuntu 16.04 (64-bit)</li>
<li><code>Bash</code> 基础知识</li>
<li><code>Docker</code> 基础知识</li>
<li>曾搭建过普通环境的 <code>LNMP</code></li>
</ul>
<h1 id="困难度"><a href="#困难度" class="headerlink" title="困难度"></a>困难度</h1><ul>
<li>中等</li>
</ul>
<h1 id="教程内容"><a href="#教程内容" class="headerlink" title="教程内容"></a>教程内容</h1><h2 id="安装-Portainer"><a href="#安装-Portainer" class="headerlink" title="安装 Portainer"></a>安装 Portainer</h2><p>1.创建一个卷来存储 <code>Portainer</code> 的数据, 你同样也可以使用主机的目录来存储</p>
<figure class="highlight plaintext"><table><tr><td class="code"><pre><span class="line">$ docker volume create portainer_data</span><br></pre></td></tr></table></figure>

<p>2.使用 <code>Docker</code> 运行 <code>Portainer</code>.</p>
<figure class="highlight plaintext"><table><tr><td class="code"><pre><span class="line">$ docker run -d -p 9000:9000 --name portainer -v /var/run/docker.sock:/var/run/docker.sock -v portainer_data:/data --restart always portainer/portainer</span><br></pre></td></tr></table></figure>

<ul>
<li><code>-d</code> 已后台方式运行</li>
<li><code>-p 9000:9000</code> 映射容器9000端口.</li>
<li><code>-v /var/run/docker.sock:/var/run/docker.sock</code> 映射出 <code>docker socket</code> 使 <code>Portainer</code> 容器可以管理 <code>Docker</code>.</li>
</ul>
<p>3.使用浏览器访问 <code>http://localhost:9000</code> 进入安装界面, 输入用户名和密码完成管理员创建.</p>
<p><img src="https://steemitimages.com/DQmT9JTGErJC2n36RdZd4Lm2TLZHRDexXob8wBtqfL7yjWE/1.png" alt="1.png"></p>
<p>4.选择 <code>Local</code> 选项后点击 <code>Connect</code> 按钮完成安装.</p>
<p><img src="https://steemitimages.com/DQmYPejiNcH4D2eSP5SyDFv4mV12NJ2wd8oTyHHTmGCHf4r/2.png" alt="2.png"></p>
<p>5.当你看到管理主页的时候, 安装完成.</p>
<p><img src="https://steemitimages.com/DQmbux3arsXknHxnaFuGX2a7N9K4h7NR6VQgEo91QRo6JqA/3.png" alt="3.png"></p>
<h2 id="创建新的网络"><a href="#创建新的网络" class="headerlink" title="创建新的网络"></a>创建新的网络</h2><p><a href="https://docs.docker.com/engine/userguide/networking/default_network/dockerlinks/">container link</a>  连接容器的方法已经过时了, 并且 <code>Portainer</code> 也不支持 <code>link</code>. 因此为了让容器间可以通讯, 我们需要建立自定义网络, 并手动分配静态IP给每个容器.</p>
<p>1.进入 <code>Networks</code> 页面并点击 <code>Add network</code> 按钮.</p>
<p><img src="https://steemitimages.com/DQmQ7y7TZ9Bvik92P25aZgqi4rBgHGZG1NK5GQGfkM6t3hg/4.png" alt="4.png"></p>
<p>2.按照截图提示输入必要信息并点击 <code>Create the network</code> 按钮.</p>
<p><img src="https://steemitimages.com/DQmcr61fzmxMr56qj44oLjLntR5Hb2qp8afpntUW4xbjHr8/5.png" alt="5.png"></p>
<h2 id="添加-MariaDB-容器"><a href="#添加-MariaDB-容器" class="headerlink" title="添加 MariaDB 容器"></a>添加 MariaDB 容器</h2><p>在这个教程中我们使用 <code>App Template</code> 来创建 <code>MariaDB</code> 容器.</p>
<p>1.创建一个目录来存储数据库数据</p>
<figure class="highlight plaintext"><table><tr><td class="code"><pre><span class="line">$ sudo mkdir -p /data/mariadb</span><br></pre></td></tr></table></figure>

<p>2.进入 <code>App Template</code> 页面后选择 <code>MariaDB</code> 选项.</p>
<p><img src="https://steemitimages.com/DQmRdiSeJMQvHNDu84TAPpqP2GUuTy4cTENnfuRSMD9DddA/6.png" alt="6.png"></p>
<p>3.按照截图填写配置信息 (当你点击完 <code>Deploy the container</code> 按钮后, 你需要等待一段时间, 因为 <code>Docker</code> 正在后台帮你拉取镜像.)</p>
<p><img src="https://steemitimages.com/DQmX9tReX9ism2Uj4BXVLviJrWpf6sgASivb2iet7p4mrQ5/7.png" alt="7.png"></p>
<p>4.由于 <code>App Template</code> 没有设置静态IP, 我们需要手动配置下. 打开容器的详情页:</p>
<p><img src="https://steemitimages.com/DQmTBfjkF4ArnAzH1G3NAk7Zignj8hgMc88ekZ6yr2XAR3U/8.png" alt="8.png"></p>
<p>5.点击 <code>Duplicate/Edit</code> 按钮</p>
<p><img src="https://steemitimages.com/DQmQaLzKXbKv8HtjRPLtXHKyakF2WB6uHemhFHWX4Wb41M2/9.png" alt="9.png"></p>
<p>6.找到 <code>Advanced container settings</code> 部分, 选择 <code>Network</code> 选项卡, 在 <code>IPv4 address</code> 中输入一个静态IP, 点击 <code>Deploy the container</code> 完成.</p>
<p><img src="https://steemitimages.com/DQmUVXxDHssU3dPq5eSVX6mV3dH3RBruKzWVNJFsLMewpcS/10.png" alt="10.png"></p>
<p>7.<code>Portainer</code> 将会提示你是否替换原有容器. 点击 <code>Replace</code>.</p>
<p><img src="https://steemitimages.com/DQmZ2Ffs8trHvqLtCuqBKNccZbyiPkPQzDzcPTXjvxkcX8C/11.png" alt="11.png"></p>
<p>8.如果想在主机上连接访问数据库, 可以执行下面的命令:</p>
<figure class="highlight plaintext"><table><tr><td class="code"><pre><span class="line">$ docker run -it --rm --name mariadb_client --network mynet mariadb /usr/bin/mysql -h 172.20.0.2 -uroot -p</span><br></pre></td></tr></table></figure>

<ul>
<li><code>--network mynet</code> 这个选项是必须的, 你必须把客户端容器放置在服务端容器的网络中才可以访问到.</li>
<li><code>--rm</code> 这个配置可以使这个容器在执行完毕后立即删除.</li>
</ul>
<p>或者</p>
<figure class="highlight plaintext"><table><tr><td class="code"><pre><span class="line">$ docker exec -it mariadb /usr/bin/mysql -h 172.20.0.2 -uroot -p</span><br></pre></td></tr></table></figure>

<h2 id="创建-Nginx-容器"><a href="#创建-Nginx-容器" class="headerlink" title="创建 Nginx 容器"></a>创建 Nginx 容器</h2><p>在本教程中我们使用 <code>App Template</code> 创建 <code>Nginx</code> 容器.</p>
<p>1.从 <code>App Template</code> 中部署一个 <code>Nginx</code> 容器, 并把容器中的 <code>/data</code> 绑定到主机的 <code>/data</code> 上.</p>
<p><img src="https://steemitimages.com/DQmYogHmVTx7PPR1Ecr17V6NLAQJgkrf7WMrMvYhDGQkQZq/12.png" alt="12.png"></p>
<p>2.打开 <code>Containers</code> 列表, 找到你刚才创建的容器并点击第三个图标, 进入容器的 <code>console</code> 界面.</p>
<p><img src="https://steemitimages.com/DQmbAbmCCHRNX9T9fmdpEYSH5QDUFFdGGCcZfXkuB1CH1gE/13.png" alt="13.png"></p>
<p>3.执行下面的命令, 把容器中 <code>Nginx</code> 的配置文件复制到主机下.</p>
<figure class="highlight plaintext"><table><tr><td class="code"><pre><span class="line"># cp -r /etc/nginx /data</span><br></pre></td></tr></table></figure>

<p><img src="https://steemitimages.com/DQmVUK9h2GTjj2LMFURrGC1seWCp37vy551iYQaom8B29ki/14.png" alt="14.png"></p>
<p>5.在主机上执行下面的命令</p>
<figure class="highlight plaintext"><table><tr><td class="code"><pre><span class="line">$ sudo cp -r /data/nginx /etc/nginx</span><br></pre></td></tr></table></figure>

<p>6.按照截图的指示修改容器配置, 完成 <code>Nginx</code> 容器部署</p>
<p><img src="https://steemitimages.com/DQmVurkWMPWeeyREZHrZ6LSEdrrZ8fWVN3onKFHK5vSAWq4/16.png" alt="16.png"></p>
<p><img src="https://steemitimages.com/DQmYL7XGcDgZMrRRQzoXrzt7jdfjMXdYg8kGoGFSrQ6K6Ve/17.png" alt="17.png"></p>
<p><img src="https://steemitimages.com/DQmf5LhNHxjErnCahun7yN1VCcaUHhqo45d6HJvjjcEX7LR/18.png" alt="18.png"></p>
<h2 id="创建-php-fpm7-容器"><a href="#创建-php-fpm7-容器" class="headerlink" title="创建 php-fpm7 容器"></a>创建 php-fpm7 容器</h2><p>1.创建一个 <code>php-fpm7</code> 的镜像<br>我参考了这个 <a href="https://github.com/Yavin/docker-alpine-php-fpm">repo</a> 来创建镜像. 这个镜像的好处是基于 <code>Alpine</code> 创建, 非常轻量.</p>
<figure class="highlight plaintext"><table><tr><td class="code"><pre><span class="line">$ git clone https://github.com/Yavin/docker-alpine-php-fpm.git</span><br><span class="line">$ cd docker-alpine-php-fpm</span><br></pre></td></tr></table></figure>

<p>2.修改 <code>php-fpm.conf</code>:</p>
<figure class="highlight plaintext"><table><tr><td class="code"><pre><span class="line">[www]</span><br><span class="line">user = nobody</span><br><span class="line">group = nobody</span><br><span class="line">listen = [::]:9000</span><br><span class="line">chdir = /data/wwwroot  # 修改 chdir</span><br><span class="line">pm = dynamic</span><br><span class="line">pm.max_children = 5</span><br><span class="line">pm.start_servers = 2</span><br><span class="line">pm.min_spare_servers = 1</span><br><span class="line">pm.max_spare_servers = 3</span><br><span class="line">catch_workers_output = Yes</span><br></pre></td></tr></table></figure>

<p>3.构建镜像</p>
<figure class="highlight plaintext"><table><tr><td class="code"><pre><span class="line">$ docker build -t php-fpm7:latest .</span><br></pre></td></tr></table></figure>

<p>4.创建新容器</p>
<p><img src="https://steemitimages.com/DQmeYjkN7y2ycQvTur4JfXXmffZWc97rHwXUcYAmo8bqTCD/19.png" alt="19.png"></p>
<p>5.按照截图一步一步操作, 完成容器创建:</p>
<p><img src="https://steemitimages.com/DQmNdRgfEF7xbg7KHenVoQpVvQK3kbCQ8w2LdwXgjUdDgds/20.png" alt="20.png"></p>
<p><img src="https://steemitimages.com/DQmXRr5jjH2JiYdXXYkK5rp12uXPj3Bq7DPscUvAwtpGCub/21.png" alt="21.png"></p>
<p><img src="https://steemitimages.com/DQmTGq6FY68GDZwgYa7pe1KBA6ZDeVTnWV8sspNBnVneFXy/22.png" alt="22.png"></p>
<p><img src="https://steemitimages.com/DQmXgjisbnJK1WBKQd9cZ9T1PjZpixQ4LcvNpt3LPLENgZB/23.png" alt="23.png"></p>
<h2 id="最后的配置"><a href="#最后的配置" class="headerlink" title="最后的配置"></a>最后的配置</h2><p>1.最后我们需要修改下主机上的 <code>Nginx</code> 配置文件 <code>/etc/nginx/conf.d/default.conf</code>:</p>
<figure class="highlight plaintext"><table><tr><td class="code"><pre><span class="line">$ sudo vim /etc/nginx/conf.d/default.conf</span><br><span class="line"></span><br><span class="line">server &#123;</span><br><span class="line">    listen       80;</span><br><span class="line">    server_name  localhost;</span><br><span class="line"></span><br><span class="line">    location / &#123;</span><br><span class="line">        root   /data/wwwroot/default;</span><br><span class="line">        index  index.html index.htm index.php;</span><br><span class="line">    &#125;</span><br><span class="line"></span><br><span class="line">    # pass the PHP scripts to FastCGI server listening on 127.0.0.1:9000</span><br><span class="line">    location ~ \.php$ &#123;</span><br><span class="line">        root           /data/wwwroot/default;</span><br><span class="line">        fastcgi_pass   172.20.0.4:9000;</span><br><span class="line">        fastcgi_index  index.php;</span><br><span class="line">        fastcgi_param  SCRIPT_FILENAME $document_root$fastcgi_script_name;</span><br><span class="line">        include        fastcgi_params;</span><br><span class="line">    &#125;</span><br><span class="line"></span><br><span class="line">&#125;</span><br></pre></td></tr></table></figure>

<p>2.创建一个测试首页 <code>index.php</code></p>
<figure class="highlight plaintext"><table><tr><td class="code"><pre><span class="line">$ sudo mkdir /data/wwwroot/default</span><br><span class="line">$ sudo echo &quot;&lt;?php phpinfo();?&gt;&quot; &gt; /data/wwwroot/default/index.php</span><br></pre></td></tr></table></figure>

<p>3.重启 <code>Nginx</code> 容器</p>
<p><img src="https://steemitimages.com/DQmZRZdRXGXHYxYrLHHbHF8WWiacefJ6AfmHGSAMJA3zthD/24.png" alt="24.png"></p>
<h2 id="在浏览器中访问测试页面"><a href="#在浏览器中访问测试页面" class="headerlink" title="在浏览器中访问测试页面"></a>在浏览器中访问测试页面</h2><p><img src="https://steemitimages.com/DQmTo7GRPcZzWLvdpBNhi289sFvpujVPgThhR78vzjp6VuH/25.png" alt="25.png"></p>
<h1 id="总结"><a href="#总结" class="headerlink" title="总结"></a>总结</h1><p>使用 <code>Docker</code> 化应用是一个趋势. 如果你想在你的个人 <code>VPS</code> 上运行 <code>Docker</code> 化的应用, <code>Portainer</code> 是一个不错的选择, 因为它使用简单并且轻量.</p>
]]></content>
      <tags>
        <tag>教程</tag>
      </tags>
  </entry>
  <entry>
    <title>Vundle使用教程</title>
    <url>/2018/01/14/vundle-tutorial.html</url>
    <content><![CDATA[<h2 id="简介"><a href="#简介" class="headerlink" title="简介"></a>简介</h2><p><code>Vundle</code> 是 <code>Vim Bundle</code> 的简称，是为了使 <code>Vim</code> 的插件更便于管理，如果你使用过 <code>Vim</code> ，那么你也一定对于 <code>Vim</code> 的插件管理很头疼。现在可以体验下 <code>Vundle</code> 给我们带来的使用便利。</p>
<h2 id="快速全新安装-Mac-or-Linux"><a href="#快速全新安装-Mac-or-Linux" class="headerlink" title="快速全新安装(Mac or Linux)"></a>快速全新安装(Mac or Linux)</h2><h3 id="1-清除掉原有配置，如果需要备份，请先备份"><a href="#1-清除掉原有配置，如果需要备份，请先备份" class="headerlink" title="1. 清除掉原有配置，如果需要备份，请先备份"></a>1. 清除掉原有配置，如果需要备份，请先备份</h3><figure class="highlight plaintext"><table><tr><td class="code"><pre><span class="line">~ » rm -rf .vim .viminfo .vimrc</span><br></pre></td></tr></table></figure>

<h3 id="2-安装-Vundle"><a href="#2-安装-Vundle" class="headerlink" title="2. 安装 Vundle"></a>2. 安装 <code>Vundle</code></h3><figure class="highlight plaintext"><table><tr><td class="code"><pre><span class="line">~ » git clone https://github.com/VundleVim/Vundle.vim.git ~/.vim/bundle/Vundle.vim</span><br></pre></td></tr></table></figure>

<h3 id="3-创建-vimrc-并添加以下-Vundle-的配置信息"><a href="#3-创建-vimrc-并添加以下-Vundle-的配置信息" class="headerlink" title="3. 创建 .vimrc 并添加以下 Vundle 的配置信息"></a>3. 创建 <code>.vimrc</code> 并添加以下 <code>Vundle</code> 的配置信息</h3><figure class="highlight plaintext"><table><tr><td class="code"><pre><span class="line">set nocompatible              &quot; be iMproved, required</span><br><span class="line">filetype off                  &quot; required</span><br><span class="line"></span><br><span class="line">&quot; set the runtime path to include Vundle and initialize</span><br><span class="line">set rtp+=~/.vim/bundle/Vundle.vim</span><br><span class="line">call vundle#begin()</span><br><span class="line">&quot; alternatively, pass a path where Vundle should install plugins</span><br><span class="line">&quot;call vundle#begin(&#x27;~/some/path/here&#x27;)</span><br><span class="line"></span><br><span class="line">&quot; let Vundle manage Vundle, required</span><br><span class="line">Plugin &#x27;VundleVim/Vundle.vim&#x27;</span><br><span class="line"></span><br><span class="line">&quot; Add your plugins to this place 在这里添加你的插件</span><br><span class="line"></span><br><span class="line">&quot; 在这行前添加你的插件</span><br><span class="line">call vundle#end()            &quot; required</span><br><span class="line">filetype plugin indent on    &quot; required</span><br><span class="line">&quot; To ignore plugin indent changes, instead use:</span><br><span class="line">&quot;filetype plugin on</span><br><span class="line">&quot;</span><br><span class="line">&quot; 以下是常用命令</span><br><span class="line">&quot; :PluginList       - lists configured plugins</span><br><span class="line">&quot; :PluginInstall    - installs plugins; append `!` to update or just :PluginUpdate</span><br><span class="line">&quot; :PluginSearch foo - searches for foo; append `!` to refresh local cache</span><br><span class="line">&quot; :PluginClean      - confirms removal of unused plugins; append `!` to auto-approve removal</span><br><span class="line">&quot;</span><br><span class="line">&quot; see :h vundle for more details or wiki for FAQ</span><br><span class="line">&quot; 在该行后添加自己的配置信息</span><br></pre></td></tr></table></figure>

<h3 id="4-安装插件"><a href="#4-安装插件" class="headerlink" title="4. 安装插件"></a>4. 安装插件</h3><p>启动 <code>Vim</code> 然后运行 <code>:PluginInstall</code>，底部状态栏显示 <code>Done</code> 即为安装完毕，如图<br><img src="https://i.loli.net/2018/01/14/5a5ace9119331.png" alt="setup_success"></p>
<h2 id="使用说明"><a href="#使用说明" class="headerlink" title="使用说明"></a>使用说明</h2><h3 id="1-想要安装新的插件"><a href="#1-想要安装新的插件" class="headerlink" title="1. 想要安装新的插件"></a>1. 想要安装新的插件</h3><p>在 <code>.vimrc</code> 中的 <code>Plugin &#39;VundleVim/Vundle.vim&#39;</code> 和 <code>call vundle#end()</code> 之间插入你想要增加的插件信息，常见的几种语法如下：</p>
<figure class="highlight plaintext"><table><tr><td class="code"><pre><span class="line">&quot; 插件托管在 Github 上的</span><br><span class="line">Plugin &#x27;tpope/vim-fugitive&#x27;</span><br><span class="line">&quot; 插件托管在 http://vim-scripts.org/vim/scripts.html 上的</span><br><span class="line">&quot; Plugin &#x27;L9&#x27;</span><br><span class="line">&quot; 插件托管在非 github 上的</span><br><span class="line">Plugin &#x27;git://git.wincent.com/command-t.git&#x27;</span><br><span class="line">&quot; 插件是在自己本地的</span><br><span class="line">Plugin &#x27;file:///home/gmarik/path/to/plugin&#x27;</span><br></pre></td></tr></table></figure>

<p>比如我要安装 <code>NERDTree</code> 插件，它的 <code>Github</code> 地址是 <code>https://github.com/scrooloose/nerdtree</code>，那么添加的配置信息如下：</p>
<figure class="highlight plaintext"><table><tr><td class="code"><pre><span class="line">Plugin &#x27;scrooloose/nerdtree&#x27;</span><br></pre></td></tr></table></figure>

<p>然后启动 <code>Vim</code> ，执行 <code>PluginInstall</code> 即可完成安装。</p>
<h3 id="2-增加自己的配置信息"><a href="#2-增加自己的配置信息" class="headerlink" title="2. 增加自己的配置信息"></a>2. 增加自己的配置信息</h3><p>如果想要增加自己的配置信息的话，只要在 <code>Vundle</code> 的配置信息之后增加即可，以下是我的自定义配置信息：</p>
<figure class="highlight plaintext"><table><tr><td class="code"><pre><span class="line">colorscheme peachpuff</span><br><span class="line">set guifont=Monaco:h10       &quot; 字体 &amp;&amp; 字号</span><br><span class="line">set expandtab                &quot; 设置tab键换空格</span><br><span class="line">set tabstop=4                &quot; 设置tab键的宽度</span><br><span class="line">set shiftwidth=4             &quot; 换行时行间交错使用4个空格</span><br><span class="line">set autoindent               &quot; 自动对齐</span><br><span class="line">set backspace=2              &quot; 设置退格键可用</span><br><span class="line">set cindent shiftwidth=4     &quot; 自动缩进4空格</span><br><span class="line">set smartindent              &quot; 智能自动缩进</span><br><span class="line">set ai!                      &quot; 设置自动缩进</span><br><span class="line">set nu!                      &quot; 显示行号</span><br><span class="line">set showmatch               &quot; 显示括号配对情况</span><br><span class="line">&quot;set mouse=a                  &quot; 启用鼠标</span><br><span class="line">set ruler                    &quot; 右下角显示光标位置的状态行</span><br><span class="line">set incsearch                &quot; 查找book时，当输入/b时会自动找到</span><br><span class="line">set hlsearch                 &quot; 开启高亮显示结果</span><br><span class="line">set incsearch                &quot; 开启实时搜索功能</span><br><span class="line">set nowrapscan               &quot; 搜索到文件两端时不重新搜索</span><br><span class="line">set nocompatible             &quot; 关闭兼容模式</span><br><span class="line">set vb t_vb=                 &quot; 关闭提示音</span><br><span class="line">&quot;set cursorline              &quot; 突出显示当前行</span><br><span class="line">hi CursorLine  cterm=NONE   ctermbg=darkred ctermfg=white</span><br><span class="line">hi CursorColumn cterm=NONE ctermbg=darkred ctermfg=white</span><br><span class="line">set hidden                   &quot; 允许在有未保存的修改时切换缓冲区</span><br><span class="line"> </span><br><span class="line"> </span><br><span class="line">syntax enable                &quot; 打开语法高亮</span><br><span class="line">syntax on                    &quot; 开启文件类型侦测</span><br><span class="line">filetype indent on           &quot; 针对不同的文件类型采用不同的缩进格式</span><br><span class="line">filetype plugin on           &quot; 针对不同的文件类型加载对应的插件</span><br><span class="line">filetype plugin indent on    &quot; 启用自动补全</span><br><span class="line"> </span><br><span class="line">set writebackup              &quot; 设置无备份文件</span><br><span class="line">set nobackup</span><br><span class="line">set autochdir                &quot; 设定文件浏览器目录为当前目录</span><br><span class="line">set nowrap                  &quot; 设置不自动换行</span><br><span class="line">set foldmethod=syntax        &quot; 选择代码折叠类型</span><br><span class="line">set foldlevel=100            &quot; 禁止自动折叠</span><br><span class="line"> </span><br><span class="line">set laststatus=2             &quot; 开启状态栏信息</span><br><span class="line">set cmdheight=2              &quot; 命令行的高度，默认为1，这里设为2</span><br><span class="line">  </span><br><span class="line">  </span><br><span class="line">&quot; 设置编码</span><br><span class="line">set fenc=utf-8</span><br><span class="line">set encoding=utf-8</span><br><span class="line">set fileencodings=utf-8,gbk,cp936,latin-1</span><br><span class="line">&quot; 解决consle输出乱码</span><br><span class="line">language messages zh_CN.utf-8</span><br></pre></td></tr></table></figure>

<h3 id="3-对自己的-vimrc-进行版本管理"><a href="#3-对自己的-vimrc-进行版本管理" class="headerlink" title="3. 对自己的 .vimrc 进行版本管理"></a>3. 对自己的 <code>.vimrc</code> 进行版本管理</h3><p>大致配置好以后，可以把自己的 <code>.vimrc</code> 加入到自己的某个 <code>Github</code> 库中进行版本管理。然后做 <code>ln</code> 到自己的家目录。</p>
]]></content>
      <tags>
        <tag>教程</tag>
      </tags>
  </entry>
  <entry>
    <title>服务器间大文件传输还是要用Rsync</title>
    <url>/2018/01/21/use-rsync-to-transfer-files.html</url>
    <content><![CDATA[<p>下午购买了新的vps，从原来的 <code>1核1G内存100G硬盘100M带宽1TB流量</code> 升级到 <code>2核6G内存500G硬盘100M带宽流量不限</code>，为了搭建 <code>steem-mysql</code> 我也是拼了血本了。</p>
<p>为了转移已经同步好的数据库文件，大约有33G，一开始大意了，使用了 <code>scp</code> ，然后就放在那里传输，也忘记开个 <code>screen</code> ，中间打了个盹，等醒了的时候发现，服务器断开连接了😂。由于 <code>scp</code> 不带断点续传，所以说已经传完的60%多的数据就是白传了🤣🤣🤣🤣。</p>
<p>大文件的传输还是得靠 <code>rsync</code>，自己大意了。<code>rsync</code> 除了支持断点续传外，还可以进行 <code>gzip</code> 压缩传输，这样效率更高，以下是两者的对比：</p>
<p>scp:</p>
<figure class="highlight plaintext"><table><tr><td class="code"><pre><span class="line">root@steem-mysql:~# scp /data/mysql.tar root@173.249.63.24:~/</span><br><span class="line">root@173.249.63.24&#x27;s password:</span><br><span class="line">mysql.tar                                            18% 6158MB   6.9MB/s 1:05:55 ETA</span><br></pre></td></tr></table></figure>

<p>rsync:</p>
<figure class="highlight plaintext"><table><tr><td class="code"><pre><span class="line">root@steem-mysql:~# rsync -avzhP /data/mysql.tar  root@173.249.63.24:~/</span><br><span class="line">root@173.249.63.24&#x27;s password:</span><br><span class="line">sending incremental file list</span><br><span class="line">mysql.tar</span><br><span class="line"> 13,484,294,144  38%   21.12MB/s    0:16:30</span><br></pre></td></tr></table></figure>

<p>如果 <code>ssh</code> 端口换了，那么需要加个参数</p>
<figure class="highlight plaintext"><table><tr><td class="code"><pre><span class="line">rsync -avzhP -e &#x27;ssh -p 1234&#x27; /data/mysql.tar  root@173.249.63.24:~/</span><br></pre></td></tr></table></figure>

<p>另外，为了防止网络不稳定，在执行一些用时比较久的任务时，建议使用 <code>screen</code> 新开一个 <code>session</code> 来进行耗时较久的任务:</p>
<figure class="highlight plaintext"><table><tr><td class="code"><pre><span class="line">$ screen -S ws   # ws是自己定义的一个session名字</span><br></pre></td></tr></table></figure>

<p>如果中途网络断开了，我们重新连入服务器，只需要执行</p>
<figure class="highlight plaintext"><table><tr><td class="code"><pre><span class="line">$ screen -r ws</span><br></pre></td></tr></table></figure>

<p>即可恢复刚才的 <code>session</code>.</p>
<p>如果有多个 <code>session</code> 的话，可以使用下面的命令查看有哪些 <code>session</code>:</p>
<figure class="highlight plaintext"><table><tr><td class="code"><pre><span class="line">$ screen -ls</span><br></pre></td></tr></table></figure>
]]></content>
      <tags>
        <tag>教程</tag>
      </tags>
  </entry>
  <entry>
    <title>如何搭建Steem见证人节点</title>
    <url>/2018/01/31/how-to-build-a-steem-witness-node.html</url>
    <content><![CDATA[<p>最近运行了一个见证人节点，并且发布了 <a href="https://steemit.com/witness-category/@ety001/to-be-a-witness-i-need-your-vote">见证人公告</a>，欢迎各位给我投上一票，投票链接：<a href="https://v2.steemconnect.com/sign/account-witness-vote?witness=ety001&amp;approve=1">https://v2.steemconnect.com/sign/account-witness-vote?witness=ety001&amp;approve=1</a></p>
<p>为了成为 <a href="https://steemit.com/cn/@oflyhigh/6dbdqm">见证人</a>，我搜索了很多的资料，中文资料目前应该是没有，基本上都是英文的，并且每一篇都只是介绍了某一点，尤其是如何把自己的账号升级为见证人，这方面的资料几乎就没有。这里我将介绍下如何快速搭建成为见证人。（为了重现这个过程，我拿我的另外一个账号 <code>liuye</code> 来重新走一遍流程）</p>
<p><strong>注意1：教程将以Ubuntu16.04作为操作环境，如果你用其他的Linux系统，需要自己解决各种依赖等问题。</strong></p>
<p><strong>注意2：目前网上建议最小内存 32GB，最小硬盘 100GB（当前时间：2018.01.30）为了写这个教程，现买了几个小时的 VPS 用来测试。小内存似乎也可以跑，文末总结有彩蛋。</strong><br><img src="https://steemitimages.com/DQmT1CM9yF1i7fvi3RbrmT7aBFu8fKGGTPg3hwreNBrfKPx/image.png"></p>
<h3 id="把账号升级为见证人"><a href="#把账号升级为见证人" class="headerlink" title="把账号升级为见证人"></a>把账号升级为见证人</h3><p>目前最便利的方法就是使用 <a href="https://github.com/Netherdrake/conductor">Conductor</a> 了。建议把 <code>Conductor</code> 安装在本地，毕竟这一步需要导入你的账号信息，如果在服务器操作，可能安全度不高。另外，确保你的本地安装了 <code>Python3</code>。</p>
<p>1.安装必要的依赖</p>
<figure class="highlight plaintext"><table><tr><td class="code"><pre><span class="line">sudo apt install libffi-dev libssl-dev python3 python3-dev python3-pip</span><br></pre></td></tr></table></figure>


<p>2.安装 <code>steem-python</code></p>
<figure class="highlight plaintext"><table><tr><td class="code"><pre><span class="line">pip3 install -U git+git://github.com/Netherdrake/steem-python</span><br></pre></td></tr></table></figure>


<p>3.安装 <code>conductor</code></p>
<figure class="highlight plaintext"><table><tr><td class="code"><pre><span class="line">pip3 install -U git+https://github.com/Netherdrake/conductor</span><br></pre></td></tr></table></figure>


<p>4.使用 <code>steem-python</code> 创建本地钱包，并导入你的账号</p>
<figure class="highlight plaintext"><table><tr><td class="code"><pre><span class="line">$ steempy addkey</span><br></pre></td></tr></table></figure>

<p>弹出下面的提示</p>
<figure class="highlight plaintext"><table><tr><td class="code"><pre><span class="line">Private Key (wif) [Enter to quit]:</span><br></pre></td></tr></table></figure>

<p>在这里输入你账号的活跃权限的私钥，在你的 <code>steemit</code> 的网站钱包页面的权限中可以找到。<br>输入完，回车，会提示下面的信息</p>
<figure class="highlight plaintext"><table><tr><td class="code"><pre><span class="line">Please provide a password for the new wallet</span><br></pre></td></tr></table></figure>

<p>这里输入一个你自己的密码，用于加密你本地的钱包，假如这里我们设置的是 <code>123456</code>。<br>当再次弹出 <code>Private Key (wif) [Enter to quit]:</code> 时表明添加成功，直接回车退出。</p>
<p>5.初始化见证人</p>
<figure class="highlight plaintext"><table><tr><td class="code"><pre><span class="line">conductor init</span><br></pre></td></tr></table></figure>

<p>回车后会依次让你输入下面的内容</p>
<figure class="highlight plaintext"><table><tr><td class="code"><pre><span class="line">What is your witness account name?: liuye</span><br><span class="line">Witness liuye does not exist. Would you like to create it? [y/N]: y</span><br><span class="line">What should be your witness URL? [https://steemdb.com/witnesses]: https://steemit.com/@liuye</span><br><span class="line">How much do you want the account creation fee to be (STEEM)? [0.500 STEEM]: 0.200 STEEM</span><br><span class="line">What should be the maximum block size? [65536]: </span><br><span class="line">What should be the SBD interest rate? [0]: </span><br><span class="line">BIP38 Wallet Password: </span><br><span class="line">Witness liuye created!</span><br></pre></td></tr></table></figure>

<p>其中 <code>account creation fee</code>，<code>maximum block size</code>，<code>SBD interest rate</code>这几个参数我也不清楚具体干什么的，<br>我是按照多数见证人的设置来配置的，其中注意 <code>account creation fee</code> 的格式。另外那个 <code>BIP38 Wallet Password</code> 就是上一步里设置的钱包密码，即那个 <code>123456</code>。</p>
<p>6.生成打包区块所要用的公私钥对</p>
<figure class="highlight plaintext"><table><tr><td class="code"><pre><span class="line">conductor keygen</span><br></pre></td></tr></table></figure>

<p>这一步生成的公钥将用来激活你的见证人，生成的私钥将配置在服务器节点的 <code>config.ini</code> 文件中。<br>比如这里我生成的是</p>
<figure class="highlight plaintext"><table><tr><td class="code"><pre><span class="line">+-----------------------------------------------------+-------------------------------------------------------+</span><br><span class="line">| Private (install on your witness node)              | Public (publish with &#x27;conductor enable&#x27; command)      |</span><br><span class="line">+-----------------------------------------------------+-------------------------------------------------------+</span><br><span class="line">| 5JEREu41d6zdBsFHjKx3PumyHMhydUH5DCPFejRiBTyQLg3rGgt | STM6fhWKaF4okgbjeAZrQg7mc7fNUKT7BtyevHAF9Qtfe666RDaEp |</span><br><span class="line">+-----------------------------------------------------+-------------------------------------------------------+</span><br></pre></td></tr></table></figure>


<p>7.激活见证人</p>
<figure class="highlight plaintext"><table><tr><td class="code"><pre><span class="line">conductor enable STM6fhWKaF4okgbjeAZrQg7mc7fNUKT7BtyevHAF9Qtfe666RDaEp</span><br></pre></td></tr></table></figure>

<p>回车后会要求输入钱包密码，等看到一堆信息后，如果 <code>block_signing_key</code> 里是你设置的公钥，<br>那么就激活成功了。</p>
<p>8.临时关闭见证人</p>
<figure class="highlight plaintext"><table><tr><td class="code"><pre><span class="line">conductor disable</span><br></pre></td></tr></table></figure>

<p>按照提示输入完信息后，当看到一堆信息后，其中的 <code>block_signing_key</code> 变为 <code>STM1111111111111111111111111111111114T1Anm</code> 则表明见证人临时关闭成功。</p>
<p>如果目前你的节点不在运行，则需要临时关闭见证人，否则如果轮到你出块了，而你不在线，则将记录一次你丢块。（PS: 通过我这一周的观察，目前我的这些票数，完全轮不到我出块，所以关不关掉都是一个样。。。😂）</p>
<h3 id="部署见证人节点"><a href="#部署见证人节点" class="headerlink" title="部署见证人节点"></a>部署见证人节点</h3><p>我自己搭建见证人节点的时候，是使用的官方的 <code>Docker</code> 镜像。<br>本教程则使用更傻瓜化的一个 <code>Docker</code> <a href="https://github.com/Someguy123/steem-docker">镜像</a> 来完成。</p>
<p><strong>再次注意：服务器环境是ubuntu16.04</strong></p>
<p>1.更新系统，安装依赖，获取 <a href="https://github.com/Someguy123/steem-docker">steem-docker</a> 的安装脚本。</p>
<figure class="highlight plaintext"><table><tr><td class="code"><pre><span class="line">sudo apt update</span><br><span class="line">sudo apt install git curl wget</span><br><span class="line">git clone https://github.com/Someguy123/steem-docker.git</span><br><span class="line">cd steem-docker</span><br></pre></td></tr></table></figure>

<p>2.安装 <code>Docker</code>，如果你的系统目前已经安装，则跳过该步</p>
<figure class="highlight plaintext"><table><tr><td class="code"><pre><span class="line">./run.sh install_docker</span><br></pre></td></tr></table></figure>

<p>3.拉取 <code>steem-docker</code> 镜像</p>
<figure class="highlight plaintext"><table><tr><td class="code"><pre><span class="line">./run.sh install</span><br></pre></td></tr></table></figure>

<p>4.同步区块数据，目前区块数据大约23GB，该步是从大佬@gtg 维护的节点下载已经打包好的区块数据（同步和解压都需要很久，尤其是解压）。</p>
<figure class="highlight plaintext"><table><tr><td class="code"><pre><span class="line">./run.sh dlblocks</span><br></pre></td></tr></table></figure>

<blockquote>
<p>如果你想跳过下载这一步，而是想直接通过 <code>P2P</code> 网络来同步区块数据，那么在执行第7步之前，可以修改一下 <code>run.sh</code> 的 170 行，<br><img src="https://steemitimages.com/DQmYDAniAE6xLunbYjNsetgMY8JCx3C5okTFu5mLo3U1i7B/image.png"><br>我们删除掉，最后的那个 <code>--replay</code> 参数，然后执行 <code>./run.sh replay</code>。<br>通过读取日志，看到有区块数据同步后，再次修改 <code>run.sh</code> 的 170 行，把刚才去掉的参数再加回来，加回参数后，再执行 <code>./run.sh replay</code> 即可。<br>如果提示类似下面的错误</p>
<figure class="highlight plaintext"><table><tr><td class="code"><pre><span class="line">Error response from daemon: You cannot remove a running container c083355ec3960722bee080cff5c1bb13c225f5b9a3e0ae8ea63b4f73ce531992. Stop the container before attempting removal or force remove</span><br></pre></td></tr></table></figure>
<p>执行下面的命令后再执行 <code>./run.sh deplay</code>，其中 <code>c08</code> 是报错中提到的那个 <code>container id</code> 的头几位</p>
<figure class="highlight plaintext"><table><tr><td class="code"><pre><span class="line">docker stop c08</span><br></pre></td></tr></table></figure>
</blockquote>
<p>5.调整内存。由于要使用 <code>/dev/shm</code> 来作为 <code>shared-file-dir</code>，而默认 <code>/dev/shm</code> 是机器内存的一半，为了更好的利用内存，我们需要把这个内存调大，我的服务器是32GB的，因此我调到30GB，留下2GB给系统自己。(<a href="http://www.361way.com/dev-shm/4029.html">啥是 shm</a>。)</p>
<figure class="highlight plaintext"><table><tr><td class="code"><pre><span class="line">sudo ./run.sh shm_size 30G</span><br></pre></td></tr></table></figure>

<p>6.修改 <code>config.ini</code> 配置文件</p>
<figure class="highlight plaintext"><table><tr><td class="code"><pre><span class="line">vim data/witness_node_data_dir/config.ini</span><br></pre></td></tr></table></figure>

<p>只需要参照下面的内容修改几项即可，</p>
<figure class="highlight plaintext"><table><tr><td class="code"><pre><span class="line">p2p-endpoint = 0.0.0.0:2001 # 做种子</span><br><span class="line">shared-file-size = 30G</span><br><span class="line">shared-file-dir = /shm # 如果注释掉这行，在小内存机器上也可以跑</span><br><span class="line">witness = &quot;liuye&quot;  # 这里填写你的 steem 账号，注意要加双引号！！</span><br><span class="line">private-key = 5JEREu41d6zdBsFHjKx3PumyHMhydUH5DCPFejRiBTyQLg3rGgt # 这里填写 conductor 生成的私钥，不需要引号</span><br></pre></td></tr></table></figure>

<p>7.启动见证人节点</p>
<figure class="highlight plaintext"><table><tr><td class="code"><pre><span class="line">./run.sh replay</span><br></pre></td></tr></table></figure>

<p>运行成功后，可以通过 <code>./run.sh logs</code> 命令，查看 <code>Docker容器</code> 的运行情况，如图</p>
<p><img src="https://steemitimages.com/DQmUUfm46LPZackRezNLkHEzGkTEo6Z3qsmj72cbCrWVCek/image.png"></p>
<p><code>Log</code> 信息中出现见证人信息了，就代表配置成功了。等待区块链同步到最新后，显示类似下面的内容时，就一切正常了，这时别忘了用 <code>conductor</code> 激活见证人。</p>
<p><img src="https://steemitimages.com/DQmbjAJzkUDvwBtMQapfs1aWfYdQNvngt7VzvJoFyTMcC2N/image.png"></p>
<p>8.发布见证人公告到 <code>witness-category</code> 下面，以表示你开始了见证人之旅。写一写你能为社区做啥，为啥大家要给你投票之类的。</p>
<h3 id="关于喂价"><a href="#关于喂价" class="headerlink" title="关于喂价"></a>关于喂价</h3><p>见证人除了打包这个工作外，还有一个重要的工作就是给系统提供喂价。<br>目前有好几个版本的喂价脚本， 这里我们使用 <code>conductor</code> 提供的喂价功能即可。</p>
<figure class="highlight plaintext"><table><tr><td class="code"><pre><span class="line">conductor feed</span><br></pre></td></tr></table></figure>

<p>第一次运行会出现类似的错误提示</p>
<figure class="highlight plaintext"><table><tr><td class="code"><pre><span class="line">BIP38 Wallet Password: </span><br><span class="line">Tue Jan 30 21:18:48 2018</span><br><span class="line">Old Price: 0.000</span><br><span class="line">New Price: 5.165</span><br><span class="line"></span><br><span class="line">Current STEEM price: 5.165 USD</span><br><span class="line">Current SBD price: 5.767 USD</span><br><span class="line">Quote: 1.000 STEEM</span><br><span class="line"></span><br><span class="line">Spread between prices: 100.000%</span><br><span class="line">Possibly invalid spread (100.00%), ignoring...</span><br></pre></td></tr></table></figure>

<p>查看源代码发现，之所以 <code>ignoring</code> 是因为我们目前在区块上存储的喂价是0，也就是我们还没有提供过喂价，这就导致新旧价格差价过大，即 <code>Spread between prices</code> 过大，超过了代码中设置的 <code>20%</code>，因此被忽略了。这应该是这个喂价程序的一个缺陷，没有考虑第一次喂价更新。</p>
<p>所以我们需要手动使用 <code>Python</code> 完成第一次喂价更新。在终端中打开 <code>Python3</code>，然后按照下面的命令进行输入：</p>
<figure class="highlight plaintext"><table><tr><td class="code"><pre><span class="line">Python 3.6.3 (default, Oct 24 2017, 14:48:20) </span><br><span class="line">[GCC 7.2.0] on linux</span><br><span class="line">Type &quot;help&quot;, &quot;copyright&quot;, &quot;credits&quot; or &quot;license&quot; for more information.</span><br><span class="line">&gt;&gt;&gt; from steem import Steem</span><br><span class="line">&gt;&gt;&gt; steem = Steem()</span><br><span class="line">&gt;&gt;&gt; steem.commit.witness_feed_publish(5.165, quote=1.000, account=&quot;liuye&quot;)</span><br><span class="line">Passphrase: </span><br><span class="line">&#123;&#x27;ref_block_num&#x27;: 33686, &#x27;ref_block_prefix&#x27;: 2156333139, &#x27;expiration&#x27;: &#x27;2018-01-30T13:37:05&#x27;, &#x27;operations&#x27;: [[&#x27;feed_publish&#x27;, &#123;&#x27;publisher&#x27;: &#x27;liuye&#x27;, &#x27;exchange_rate&#x27;: &#123;&#x27;base&#x27;: &#x27;5.165 SBD&#x27;, &#x27;quote&#x27;: &#x27;1.000 STEEM&#x27;&#125;&#125;]], &#x27;extensions&#x27;: [], &#x27;signatures&#x27;: [&#x27;202c413bf800c51e583a30687954fa5e77b052bd90e3e4834d5fa82a817121ebb40677fbf1351abcd70e656eb7fc97e16e236aa5092960ec87e6f0a0531ba982b6&#x27;]&#125;</span><br></pre></td></tr></table></figure>

<p>其中 <code>witness_feed_publish</code> 的参数中，<code>5.165</code> 是 <code>Current STEEM price: 5.165 USD</code>，<code>quote</code> 是 <code>Quote: 1.000 STEEM</code>。</p>
<p>完成手动更新后，再次使用 <code>conductor feed</code> 执行就成功了。</p>
<p>如果想要使用 <code>Docker</code> 化的 <code>conductor</code>，可以参考 <a href="https://github.com/ety001/docker-steem-conductor">这里</a>，我自己封装了一个。</p>
<h3 id="总结"><a href="#总结" class="headerlink" title="总结"></a>总结</h3><p>前前后后连写加调试，完成这篇教程花了有那么几个小时，这应该是目前中文版教程里最全的了，没有之一。</p>
<p><strong>这里有个小技巧</strong>，如果你内存不够，在配置文件中不要用 <code>/dev/shm</code> 作为 <code>shared-file-dir</code>，节点依然可以运行，也就是说可以注释掉 <code>shared-file-dir = /shm</code>。之所以把这个放在最后说，是因为我并没有完全测试这种情况。其他人貌似都是用 <code>/dev/shm</code> 来作为 <code>shared-file-dir</code> 的。</p>
<p>总的来说，搭建见证人节点就是会者不难，难者不会。虽然见证人节点的资源消耗不及全节点，但是也是够费资源的。我目前并不理解，为何见证人节点需要同步全量数据，难道只获取目前区块链全部数据的最近25%的数据，不能完成打包工作吗？看来这个还有待等到进一步去看源代码的时候思考。</p>
]]></content>
      <tags>
        <tag>教程</tag>
      </tags>
  </entry>
  <entry>
    <title>困惑我很久的价格单位终于弄明白了</title>
    <url>/2018/03/10/resolve-confusion-of-stellar-price.html</url>
    <content><![CDATA[<blockquote>
<p>这篇可能又会是一篇比较晦涩的文章了。可能也许写完了也就只有我自己能看懂了吧。。</p>
</blockquote>
<p>在没有开发恒星做市机器人之前，一直都没有仔细关注过交易市场的价格单位。</p>
<p>由于交易市场之前都是 <code>CNY</code> 和具体的数字货币交易，所以交易所显示的价格都是买一个数字货币需要多少 <code>CNY</code>，我只需要看具体的数值即可，并不影响我判断什么时候买入，什么时候卖出。</p>
<p>在开发<a href="https://stellar.to0l.cn/">第一版的机器人</a>的时候，由于只是在单网关下做 <code>XLM</code> 和 <code>CNY</code>这一个交易对，也就没有在意价格单位的问题。</p>
<p>但是从开发<a href="https://stellarbot.top/">第二版机器人</a>开始，由于加入了多网关多币种之间互相做市的功能，就不得不看看具体的单位到底代表什么意思了。</p>
<p>之前每次扫到类似 <code>BTC/CNY </code> 这样的单位的时候，总以为这是个分数，比如 <code>60000 BTC/CNY</code> 我会以为是每一个 <code>CNY</code> 可以买到 60000 个 <code>BTC</code>，由于这个例子使用的是 <code>CNY</code> ，我们心里清楚目前 <code>BTC</code> 值多少 <code>CNY</code>，因此才知道我刚才的阅读单位的方式是错误的。</p>
<p>目前我开发机器人过程中，会出现两个陌生币种之间的交易，这个时候，如果不能真正了解价格单位的意义，开发出来的机器人肯定会是有问题的。</p>
<p>所以到底类似 <code>BTC/CNY</code> 这样的交易对价格单位该如何正确解读呢？</p>
<p>在说正确方法之前，还要再插一句，就是 <code>BTS</code> 内盘的价格单位其实在很长一段时间都是给我有误导作用的。我们看一下在内盘抵押 <code>BTS</code> 的时候，出现的喂价和强平触发价的单位。</p>
<p><img src="https://steemitimages.com/DQmQw1vDLJDuF2CxznpCxenw2pkXapvEkG88yGPRf7XgdMt/image.png"></p>
<p><em>这里的单位就真的是分数式的解读啊！</em>比如强平触发价 <code>2.97143 BTS/bitCNY</code>，就是当 1 个 <code>bitCNY</code> 可以买到 2.97143 个 <code>BTS</code>，也就是 1 个 BTS 值大约 0.3365 <code>bitCNY</code> 的时候爆仓。</p>
<p>下面就来说下到底该如何解读交易所的交易对的价格单位。</p>
<p>我以 <code>base currency and counter currency</code> 作为关键词，在 <code>Google</code> 上搜索了下，发现了这个解释 <a href="https://www.investopedia.com/terms/b/basecurrency.asp">https://www.investopedia.com/terms/b/basecurrency.asp</a>。</p>
<p>简单来说，这是外汇市场的一个约定俗成的表示方法，而 <strong>不是</strong> 一个分数形式的表示，只是通过先后顺序来表示关注程度。一个交易对的价格使用类似 <code>base currency/counter currency</code> 的格式来表示，意味着我更关注 <code>base currency</code> 的价值是升了还是跌了，也就是我买一个 <code>base currency</code> 要花多少 <code>counter currency</code> 或者 卖一个 <code>base currency</code> 能得到多少 <code>counter currency</code>。就是这么简单的按照顺序阅读即可。</p>
<p>举个例子，比如说 <code>BTC/CNY</code> 这个交易对，之前 <code>60000 BTC/CNY</code> 应该解读为我购买 1 个 <code>BTC</code> 需要花费 60000 个 <code>CNY</code>，如果购买一天后价格变为了 <code>70000 BTC/CNY</code>，就意味着我关注的这个 <code>base currency</code> 即 <code>BTC</code> 升值了。</p>
<p><strong>总结一下，其实 <code>counter currency</code> 就是你手里的筹码。<code>base currency</code> 是你想持有的。</strong></p>
<p>这样一来，你关心哪个币的涨跌，就把哪个币设置为 <code>base currency</code> 就可以轻松的了解是否升值了。</p>
<p>以上就是完整的价格单位如何解读的内容了，下面是吐槽内容，选读：</p>
<blockquote>
<p>除了恶心的价格单位外，再说一下 <code>bid</code> 和 <code>ask</code>，这个也是让我头疼的东西。<br>放狗搜索了下，发现了这篇文章，<a href="https://www.bitcoinmarketjournal.com/difference-bid-ask-buy-offer-cryptocurrency-trading/">https://www.bitcoinmarketjournal.com/difference-bid-ask-buy-offer-cryptocurrency-trading/</a>，发现老外也真是够了。<br>原来 <code>bid price</code> 代表了最高的买价，<code>ask price</code> 代表了最低的卖价，而 <code>buy price</code> 和 <code>sell price</code> 只是代表最终的成交价。。。<br>WTF，为啥要多搞出来两个名词，对于中文来说都是买价卖家，无非加上最低和最高这样的形容词罢了。。。<br>我还要吐槽的是，恒星币的接口返回的 <code>orderbook</code> 里用 <code>buy</code> 和 <code>sell</code> 来表示买单列表和卖单列表并没有不严谨吧，反而用的是 <code>asks</code> 和 <code>bids</code> 来表示卖单列表和买单列表。每次我都是要反应半天！只能说还是我的英语学的不好。<br>说到 <code>orderbook</code>，又想起了另外一个槽点，就是在恒星币的 <code>API</code> 体系里清一色的都是 <code>offer</code>，而这里却是 <code>orderbook</code>，你咋不叫 <code>offerbook</code> 呢？<br>吐槽完毕！</p>
</blockquote>
]]></content>
      <tags>
        <tag>教程</tag>
      </tags>
  </entry>
  <entry>
    <title>出国狗的福音--使用树莓派搭建跨国语音短信设备</title>
    <url>/2018/02/08/asterisk-tuturial.html</url>
    <content><![CDATA[<blockquote>
<p>有朋友推荐了一个设备，我还没有测试，不过原理应该跟自己用树莓派搭建的系统一样，购买地址：<a href="https://item.taobao.com/item.htm?spm=a230r.1.14.53.250350a1rJhohU&id=558848686579&ns=1&abbucket=18">https://item.taobao.com/item.htm?spm=a230r.1.14.53.250350a1rJhohU&amp;id=558848686579&amp;ns=1&amp;abbucket=18</a> – 更新于 20180208</p>
</blockquote>
<p>对于出国狗来说，在国外想要使用国内手机语音短信服务是个比较头疼的事情。这篇教程将教你用树莓派基于<br> <em>Asterisk</em> 实现一个 <em>PBX</em> 系统。最终的效果是：你可以在国外通过互联网使用你国内的手机号，享受的是国内手机号的资费。</p>
<h3 id="基本的原理图"><a href="#基本的原理图" class="headerlink" title="基本的原理图"></a>基本的原理图</h3><p><img src="https://steemitimages.com/DQmeYfsJr2q47CAM3c6r2D7HGnBrzD5BRpcL9FKWMrHuPcJ/1.png" alt="1.png"></p>
<h3 id="需要准备的东西"><a href="#需要准备的东西" class="headerlink" title="需要准备的东西"></a>需要准备的东西</h3><ul>
<li>树莓派3B（使用2代也可以，不过性能不是很好）</li>
</ul>
<p><img src="https://steemitimages.com/DQmUXTNoRjrGCMrPipXrbCrjCvowCfFdrwdzYL1byhHqLfB/2.jpg" alt="2.jpg"></p>
<ul>
<li>一个带语音支持的 <em>3G</em> 卡托（尽量买华为的，并且一定要注意带语音支持，一般带语音的都是要卖出海外的，卖给国内的都是阉割掉语音功能的。我手里还有4个，有需要的可以找我，亲测可用，150国内包邮，国外的可以考虑从 <a href="http://www.alibaba.com/">阿里巴巴</a> 上搜索 <em>3g dongle voice</em> 来购买。按照我两年前的实验来看，50多 <em>CNY</em> 的带语音卡托在树莓派上识别不出来，建议优先考虑华为，另外在 <a href="https://github.com/bg111/asterisk-chan-dongle/wiki/Requirements-and-Limitations">这里</a> 有一份测试通过的型号清单，不过某些型号貌似也有好几种版本，比如我曾经买到过一个E169是没法用的。）</li>
</ul>
<p><img src="https://steemitimages.com/DQmSjbHWQ3cuUwZy8JqLBu6eGAr5MDnN6UrpL6xUQ4MH5aL/3.jpg" alt="3.jpg"></p>
<ul>
<li>一个带电源的USB HUB（一定要带电源，因为供电不足的话，来去电的时候可能不稳定）</li>
<li>一根HDMI转VGA线（如果有HDMI显示器，可以忽略该配件）</li>
<li>一张至少8G的TF卡（建议买树莓派的时候一并购买）</li>
<li>5V2A的电源</li>
</ul>
<h3 id="前置技能"><a href="#前置技能" class="headerlink" title="前置技能"></a>前置技能</h3><ul>
<li>Linux基本知识</li>
<li>最好有折腾过树莓派</li>
<li>折腾的精神</li>
</ul>
<h3 id="基础配置"><a href="#基础配置" class="headerlink" title="基础配置"></a>基础配置</h3><p>1.首先我们需要去 <a href="http://www.raspberry-asterisk.org/downloads/">http://www.raspberry-asterisk.org/downloads/</a> 这里下载最新的镜像，该镜像是基于 <em>Debian</em><br> 已经封装好的 <em>FreePBX</em> 系统，本次教程使用的是 <em>raspbx-03-12-2017.zip</em>，其中 <em>Asterisk 13.18.3</em>, <em>FreePBX 14.0.1.20</em>。<br><strong>备注：该网站需要翻墙访问！</strong></p>
<p>2.下载后，解压 <em>raspbx-03-12-2017.zip</em>，使用你熟悉的烧录软件，把解压出来的 <em>.img</em> 文件烧录进TF卡中。推荐使用 <a href="https://etcher.io/">Etcher</a> 进行烧录操作。用 <a href="https://etcher.io/">Etcher</a> 烧录还是比较方便，只需要三步即可。第一步选择镜像文件，第二步选择你的TF卡，第三步点击 <em>Flash</em> 即可开始。</p>
<p><img src="https://steemitimages.com/DQmZ1Eae6p71XY1rG77TYAPTVXt7uYk4fnRwBu5SBMNxE7z/image.png"></p>
<p>3.插入TF卡到树莓派中，然后上电。系统默认用户密码为： <em>root &#x2F; raspberry</em>。</p>
<p>4.登陆后，先配置 <em>WiFi</em> （如果计划使用网线，可以跳过该步，建议使用网线，稳定），打开 <code>/etc/wpa_supplicant/wpa_supplicant.conf</code> 文件，</p>
<figure class="highlight plaintext"><table><tr><td class="code"><pre><span class="line">country=GB</span><br><span class="line">ctrl_interface=DIR=/var/run/wpa_supplicant GROUP=netdev</span><br><span class="line">update_config=1</span><br><span class="line"># 增加如下配置，WiFi的ssid和密码</span><br><span class="line">network=&#123;</span><br><span class="line">    ssid=&quot;ety001_router&quot;</span><br><span class="line">    psk=&quot;12345678&quot;</span><br><span class="line">&#125;</span><br></pre></td></tr></table></figure>

<p>增加配置后，输入 <code>reboot</code> 进行重启，重启后，<code>ifconfig</code> 就能看到 <em>IP</em> 了，系统的 <em>ssh</em> 默认是开启状态，现在就可以使用 <em>ssh</em> 了。</p>
<p>另外镜像默认使用 <em>4G</em> 空间，如果你想扩展到 <em>TF</em> 卡全部空间，执行下面的命令</p>
<figure class="highlight plaintext"><table><tr><td class="code"><pre><span class="line">raspi-config</span><br></pre></td></tr></table></figure>

<p>选择 <em>Advanced Options</em> ，再选择 <em>Expand Filesystem</em>，即可完成扩充。除此之外，也可以用 <code>fdisk</code> 命令完成，具体方法可以参考我博客上很早之前的一篇 <a href="/2015/01/23/expand-raspberry-pi-sd-card-space.html">博文</a>。</p>
<p>5.打开浏览器，访问你树莓派IP，会看到如下的配置页面</p>
<p><img src="https://steemitimages.com/DQmf8cLfnALZwekkbof61bzTwJuT4NV8pfrhkvLxCywX1xn/image.png"></p>
<p>6.增加管理用户后，显示下面的登录界面，</p>
<p><img src="https://steemitimages.com/DQmebVv48wZJeQPuGvhmK47oZ1kuSPy7ggZBnZfZwvS8UWo/image.png"></p>
<p>7.点击 <code>FreePBX Administration</code> 进行管理员登陆，开始配置，登陆后进行语言和时区设置</p>
<p><img src="https://steemitimages.com/DQmRxqyu7kDgwe4CAbLhtMMWdgWHwDSi3Gugw7NJpHGobPf/image.png"></p>
<p>8.设置成功后，进入了管理主界面</p>
<p><img src="https://steemitimages.com/DQmRmkBgSRGi6Hpv2xGtLmwbx9XBKPsWjKj99PMiAq34Knv/image.png"></p>
<p>9.从 <code>Application</code> &#x3D;&gt; <code>Extensions</code> &#x3D;&gt; <code>Add Extension</code> &#x3D;&gt; <code>Add New PJSIP Extension</code></p>
<p><img src="https://steemitimages.com/DQmXxFVjaH27ZK1Kq72xzojCRXHSLaLZZXAs4PnZYS74zxA/image.png"></p>
<p><img src="https://steemitimages.com/DQmaydKeB9mJtgBLLbiTzNL4WL89nFobXC2FC8vK8PEmEqy/image.png"></p>
<p>10.需要填写的项目有 <em>User Extension</em>，<em>DisplayName</em>，<em>Secret</em>，<em>Link to a Default User</em>.</p>
<p><img src="https://steemitimages.com/DQmavEHVmqP8nd6H8JoPXs178ppUC8aChiYkVn87XRjR6Dk/7.png" alt="7.png"></p>
<p>其中 <em>User Extension</em> 是你的内线号码，用于呼叫和登陆客户端；<br><em>DisplayName</em> 是用于呼叫时的显示，可选填；<br><em>Secret</em> 是你在客户端登陆时需要填写的密码，请使用健壮的密码，详见最后的 <strong>安全</strong> 章节；<br><em>Link to Default User</em> 是让用户自己管理自己的号码，如果不需要，则选 <em>None</em>。</p>
<p>点击 <em>Submit</em> 后，保存成功。用同样的方法再创建一个用户用于测试。</p>
<p>创建完两个用户后，点击右上角的 <em>Apply Config</em> 使配置生效。</p>
<p><img src="https://steemitimages.com/DQmUvEQBoP4kFq6gkgDA4Dfw8F94B7CcFTNiLXPM1k8CFxS/image.png"></p>
<p>11.在 <em>Settings</em> &#x3D;&gt; <em>Asterisk SIP Settings</em> 页面的 <em>General SIP Settings</em> 标签页下面，<em>External Address</em> 一栏填写你的外网IP或者你的外网域名，这里我填写了我的外网IP。<em>Local Networks</em> 中填写你的树莓派所在的子网。<em>RTP Port Ranges</em> 里，填写 <em>10000</em> 到 <em>10100</em>。这里不要使用 <em>20000</em>，测试来看，如果你只是自己用，设置 <em>10100</em> 很稳定。点击 <em>Submit</em> 保存。</p>
<p><img src="https://steemitimages.com/DQmSxMmFx8fAAjhktmpMeM7t6YKbHoaGZ9ti4uPuJcLVW3E/8.png" alt="8.png"></p>
<p>12.切换到 <em>Chan PJSIP Settings</em> 标签页下面，把 <em>tcp</em> 设置为 <em>yes</em>，点击 <em>Submit</em> 保存。<br><em>Asterisk</em> 默认使用的是 <em>UDP</em>，为了能保证手机app在后台运行时，可以及时收到来电提醒，需要开启 <em>tcp</em> 通信。</p>
<p><img src="https://steemitimages.com/DQmefPwudwdN4fWGxXddERRvYemJQvqR5Zq6QdfitpyW2gz/9.png" alt="9.png"></p>
<p><img src="https://steemitimages.com/DQmeJ9NorhwV2yL8tWVKuhg6vBqBRs6DtosMStUinPdh274/image.png"></p>
<p>13.去自己的路由器上，设置端口映射，需要打开 <em>5060</em> 和 <em>10000-10100</em>，可以参考下图</p>
<p><img src="https://steemitimages.com/DQmNhr5za8A8pnyu9aNku5bPBrQtKModcVHLjBMpEAqVuNA/4.png" alt="4.png"></p>
<p><img src="https://steemitimages.com/DQmabg36E8eZuerJ7TcfxNTZoCiZ4tYUfWWWNSjNNNnrsTj/5.png" alt="5.png"></p>
<p>14.去 <a href="http://www.linphone.org/">http://www.linphone.org/</a> 下载 <em>Linphone</em> 到你的手机和电脑上，如下图分别用刚才新建立的两个账号登陆两个客户端。</p>
<p><img src="https://steemitimages.com/DQmZieaAJTu8RaCoqrYTKqxHrQVV5R1wnRKLhskFDZ39QFw/1.jpeg" alt="1.jpeg"></p>
<p><img src="https://steemitimages.com/DQmYraQ7jhL1wC3cFEo5XgPCFQwU2sD6miWRcUwiazmMr5J/2.jpeg" alt="2.jpeg"></p>
<p><img src="https://steemitimages.com/DQmb9ETeHyPK8jhghBs8eAixQT3VZUjCATKuvVNVwU4QzFD/3.jpeg" alt="3.jpeg"></p>
<p><img src="https://steemitimages.com/DQmS6gRMmMdSpbDRQDeWNEWmq9DMHT88ggDY45vLvoTvm3j/a1.png" alt="a1.png"></p>
<p><img src="https://steemitimages.com/DQmaFfKZByWG2Yt7PkMmjF4EkxGV5o75cyipWA3Cro4QfRo/a2.png" alt="a2.png"></p>
<p><img src="https://steemitimages.com/DQmQWksaW3rj9LbWABTN9iWjfwfh4yZCA1kvLC5D1e3qGmW/a3.png" alt="a3.png"></p>
<p><img src="https://steemitimages.com/DQmWL5oQHjaM61CnKDu5boEPgZPGAHLLSyZkfkf8PcKCLbY/a4.png" alt="a4.png"></p>
<p>现在从手机上，拨打 <em>102</em> ，如果以上设置没有问题的话，电脑上就能响铃，接起来，两边听一下，看看有没有什么问题。如果有一方听不到，很可能是端口映射的问题，重新检查下配置。端口映射这里偶尔会有莫名奇妙的问题。</p>
<h3 id="配置GSM，实现呼入和呼出"><a href="#配置GSM，实现呼入和呼出" class="headerlink" title="配置GSM，实现呼入和呼出"></a>配置GSM，实现呼入和呼出</h3><p>1.把 <em>SIM</em> 卡插入 <em>3G</em> 卡托，把 <em>3G</em> 卡托插到树莓派或者 <em>USB HUB</em> 上。</p>
<p>2.<em>SSH</em> 连接到树莓派后，执行下面的命令安装 <em>dongle</em> 扩展</p>
<figure class="highlight plaintext"><table><tr><td class="code"><pre><span class="line">root@raspbx:~# install-dongle</span><br></pre></td></tr></table></figure>

<p><img src="https://steemitimages.com/DQmQiMuMpn4trjb5zyeo5eKJPiEQxddrXUmdtGQe2vUM9qp/image.png"></p>
<p>其中①输入你插入 <em>3G</em> 卡托里的手机卡号，②输入你要准备接收短信的邮箱地址，③如果你不想转发短信留空即可。</p>
<p>安装到最后，会再问你是否需要安装网页界面的发短信工具（即访问地址就是 <em><a href="http://raspbx_ip/sms">http://raspbx_ip/sms</a></em>），按照提示输入即可</p>
<figure class="highlight plaintext"><table><tr><td class="code"><pre><span class="line">Would you like to install a webpage for sending SMS with</span><br><span class="line">chan_dongle? (http://raspbx/sms/) [y/N] y</span><br><span class="line">Enter password for SMS page: 123456</span><br></pre></td></tr></table></figure>

<p><strong>注意：安装 <em>dongle</em> 扩展需要翻墙</strong></p>
<p>3.回到网页配置界面，依次访问 <em>Connectivity</em> &#x3D;&gt; <em>Trunks</em>  &#x3D;&gt; <em>Add Trunk</em> &#x3D;&gt; <em>Add Custom Trunk</em></p>
<p><img src="https://steemitimages.com/DQmWqm8ojVQbY94AnwXdkgUHZwuNvsL4GSfEBeBMDR3Q1Dg/image.png"></p>
<p><img src="https://steemitimages.com/DQmYDqCy2oe5BUbHjTb8DM2PH5hEqC9fBSGxDCn4AUXcwVV/b2.png" alt="b2.png"></p>
<p>4.在 <em>General</em> 标签页下面，设置一个 <em>Trunk Name</em>，<em>Outbound CallerID</em> 中填写你的手机号</p>
<p><img src="https://steemitimages.com/DQmSg3izeiNK2srq86kgVE2inKur6GNxdx7UJntnzpAfzf7/b33.png" alt="b33.png"></p>
<p>5.在 <em>custom Settings</em> 中设置 <code>dongle/dongle0/$OUTNUM$</code>。</p>
<p><img src="https://steemitimages.com/DQmQS9kjLvNymQNX8obrTUSF8CQYv5MFEhrUgEsjjaiecS9/b44.png" alt="b44.png"></p>
<p>这里如果你只是插了一个 <em>3G Dongle</em>，那么就是默认 <em>dongle0</em>，如果你设备上插了多个设备，你需要在命令行下输入一下命令，查看下所有的 <em>Dongle</em>：</p>
<figure class="highlight plaintext"><table><tr><td class="code"><pre><span class="line">root@raspbx:~# asterisk -rx &quot;dongle show devices&quot;</span><br><span class="line">ID           Group State      RSSI Mode Submode Provider Name  Model      Firmware          IMEI             IMSI             Number        </span><br><span class="line">dongle0      0     Free       6    5    4       CHN-CUGSM      E1750      11.126.10.00.00   359767033517971  460090019804894  +8617xxxxxxx44</span><br></pre></td></tr></table></figure>

<p>6.点击 <em>Submit</em> 保存设置，然后点击右上角的 <em>Apply Config</em> 使配置生效。</p>
<p>7.从 <em>Connectivity</em> &#x3D;&gt; <em>Outbound Routes</em> &#x3D;&gt; <em>Add Outbound Route</em> 中，在 <em>Route Settings</em> 下面填写一个 <em>Route Name</em>，在 <em>Trunk Sequence for Matched Routes</em> 中选择刚才添加的 <em>Trunk</em>。</p>
<p><img src="https://steemitimages.com/DQmaGPqX8bq3FNWsdh6FFZPd4U61fhzLnaWX2uttcMZua9N/b3.png" alt="b3.png"></p>
<p>6.切换到 <em>Dial Patterns</em> 标签下，按照下图来配置拨号规则，这里配置的规则是，匹配所有0开头的电话号码，把所有0开头的号码，去除开头的0后，转发到我们设置的那个 <em>Trunk</em> 上，进行呼出操作。</p>
<p><img src="https://steemitimages.com/DQmPrRxMQAouB4JUo6UKPjudEikazHhALdtXU5A1wQjrZ3J/b4.png" alt="b4.png"></p>
<p>7.点击 <em>Submit</em> 保存配置，点击右上角 <em>Apply Config</em> 使配置生效。生效后，你现在可以用你的 <em>App</em> 进行外呼操作了，只要在要拨打的电话前加拨0，即可完成外拨。</p>
<p>8.在 <em>Connectivity</em> &#x3D;&gt; <em>Inbound Routes</em> &#x3D;&gt; <em>Add Inbound Route</em> &#x3D;&gt; <em>General</em> 下，配置 <em>Set Destination</em> ，选择 <em>Extension</em>，从已经添加的 <em>Extension</em> 中，选择一个即可。点击 <em>Submit</em> 保存配置，点击右上角 <em>Apply Config</em> 使配置生效。生效后，你可以拨打你的 <em>3G Dongle</em> 中的手机卡号，如果顺利，你手机上的 <em>App</em> 将会接到这个呼入操作。</p>
<p><img src="https://steemitimages.com/DQmRxz55NeRbi4v1Cp14cn8Eq6pzrNJ865AyKePZcSkjmZs/d1.png" alt="d1.png"></p>
<p><img src="https://steemitimages.com/DQmbMYLBAbZ9t6dr6mWdmVih3wQnzhHC9t9XyuYbrGJUZaU/d2.png" alt="d2.png"></p>
<h3 id="配置-Email，测试收发短信"><a href="#配置-Email，测试收发短信" class="headerlink" title="配置 Email，测试收发短信"></a>配置 <em>Email</em>，测试收发短信</h3><p>1.输入如下命令进入 <em>Email</em> 配置界面：</p>
<figure class="highlight plaintext"><table><tr><td class="code"><pre><span class="line"># dpkg-reconfigure exim4-config</span><br></pre></td></tr></table></figure>

<p>2.选择 <em>internet site; mail is sent and received directly using SMTP</em></p>
<p><img src="https://steemitimages.com/DQmQkKY3gJdP32Rqun9w7nJ5BpeLAMQ3iWBDtSXR2fXSpPi/e1.png" alt="e1.png"></p>
<p>3.配置你的发信域名</p>
<p><img src="https://steemitimages.com/DQmVbB56XP6BRQWp9E9nU3cK6ahxPPxRkFQe1q9P26wJHAZ/e2.png" alt="e2.png"></p>
<p>4.保持默认值</p>
<p><img src="https://steemitimages.com/DQmcHJMRN5jkuRaG9Uc3DCPFWDaMC67cYHAGuLdanH4dYD9/e3.png" alt="e3.png"></p>
<ol start="5">
<li>配置为你的发信域名</li>
</ol>
<p><img src="https://steemitimages.com/DQmVdXQZEEhkA1dB2DdHhPQ4Zr3PnZ1n7PrVvhvbHWTNhHZ/e4.png" alt="e4.png"></p>
<p>6.以下几步保持默认值</p>
<p><img src="https://steemitimages.com/DQmcMYZhBJP7CcSbuFaEELwUx5Nhs5Cnkyb4nTjvErmNJSQ/e5.png" alt="e5.png"></p>
<p><img src="https://steemitimages.com/DQmYNEaizm8VUaDHM9jXJ2PYNMp7NYg4MZ4vfszJYKu1td6/e6.png" alt="e6.png"></p>
<p><img src="https://steemitimages.com/DQmdveDTjFUEDtB9evWiujvkDF3dceTKz3KYkaLDWGCPkjk/e7.png" alt="e7.png"></p>
<p><img src="https://steemitimages.com/DQmXwniU9ZN5c9AQAjpSAqZfsmQZC4gArWFsSUis7LRfJXn/e8.png" alt="e8.png"></p>
<p><img src="https://steemitimages.com/DQmXcqZ4F7z1TTfSGihKhdhiQoj9XbRbHY2QzGqbo7oR1S5/e9.png" alt="e9.png"></p>
<p>7.该步输入 <code>root</code></p>
<p><img src="https://steemitimages.com/DQmRVY6ffJ5yJtKAzg5tU6XcGAD5dDWCGMvb9cCGfULfSVB/e10.png" alt="e10.png"></p>
<p>8.完成发信配置后，使用 <code>send_test_email &lt;your_email&gt;</code> 命令进行发信测试。打开你的邮箱，检查垃圾箱，100%的会被拦截，像我用的腾讯的企业邮，在 <em>自助查询</em> 中可以找到拦截信息，为了收信顺利，把你上面配置的发信域名加入邮箱的域名白名单即可。</p>
<p><img src="https://steemitimages.com/DQmVXxBrpUQ1CpTPw7oDZ4K3P451WS3bBg4bwPSV4FJWTgw/e11.png" alt="e11.png"></p>
<p>9.用手机给自己 <em>3G Dongle</em> 里的手机卡发条短信，应该很快就能收到邮件了，</p>
<p><img src="https://steemitimages.com/DQmSDNGwNUnLzXA4SLydE7ZRs8BjsVKyTJ14CRyxLNw4Lw1/image.png"></p>
<p>10.如果想要发送短信的话，我们可以通过 <em>Web</em> 页面进行，访问 <strong><a href="http://your_raspbx_ip/sms">http://your_raspbx_ip/sms</a></strong>，会提示你输入密码，这个密码即为你安装 <em>Dongle</em> 扩展的时候输入的那个密码，登陆后如下所示</p>
<p><img src="https://steemitimages.com/DQmfJnm7i4cbxdLdhh5vevRBNPRnLqmg2VqojdrWT54oFXL/image.png"></p>
<p><strong>注意：收件人手机号一定要加国号</strong></p>
<h3 id="设备安全！！！！！"><a href="#设备安全！！！！！" class="headerlink" title="设备安全！！！！！"></a>设备安全！！！！！</h3><p>先给大家看一个截图，</p>
<p><img src="https://steemitimages.com/DQmUa2c9h5JnQugb5RfXEJohdV2k1APz4PNHfQV2JQPFHa7/s1.png" alt="s1.png"></p>
<p>这是目前我的设备被暴力破解的情况。</p>
<h5 id="请一定重视安全问题"><a href="#请一定重视安全问题" class="headerlink" title="请一定重视安全问题"></a>请一定重视安全问题</h5><p>再附上我之前的悲惨遭遇：<a href="https://www.v2ex.com/t/394297#reply11">https://www.v2ex.com/t/394297#reply11</a></p>
<p>1.首先，你的 <em>Extension</em> 一定要给各个账号配置超强的密码</p>
<p>2.其次，使用 <em>Fail2ban</em> 来防暴破。</p>
<figure class="highlight plaintext"><table><tr><td class="code"><pre><span class="line"># install-fail2ban</span><br></pre></td></tr></table></figure>

<p>3.安装 <em>Fail2ban</em> 后，程序会自动启动，我们需要调整下配置，打开 <code>/etc/fail2ban/jail.conf</code> 文件，搜索 <code>[asterisk]</code>，找到 <code>maxretry</code> 项，修改为 2，就是说密码输入错2次，就会被 <em>Fail2ban</em> 拦截。再搜索下 <code>bantime</code>，修改为 <code>604800</code>。配置好后，意味着有人要是输入错两次密码，那么这个人的 <em>IP</em> 就会被屏蔽一周。保存后，执行 <code>systemctl restart fail2ban</code> 重启服务使配置生效。</p>
<h3 id="后记"><a href="#后记" class="headerlink" title="后记"></a>后记</h3><p>本来计划争取半天写完，结果写了一天半。最初其实是计划写一本 《面向菜鸟的 Asterisk 教程》，把各种好玩的功能写进去的，让菜鸟也能轻松的用上牛逼的 <em>Asterisk</em> 。不过还是感觉自己的水平和能力没有达到，于是放弃了。</p>
<p>目前这篇教程里还未涉及的我已经测试可用的功能，还有 <strong>语音信箱</strong>，<strong>电话会议</strong>，<strong>电话组</strong>。其中 <strong>语音信箱</strong> 功能还是很赞的，可以在自己未接听电话的时候，自动把呼入转接到 <strong>语音信箱</strong>，让给你打电话的人给你留言，留言还可以配置发送到你的邮箱。这些功能有机会我再写教程吧。</p>
<p>目前这套方案，收发短信很稳定，语音通话的话，会受到你在国外手机网络连接回你国内家里的网络情况的影响。按照两年前去欧洲的时候我的测试来看，当时在瑞士的时候，连接回国内打电话大约会有将近1秒的延时，勉强可以通话。</p>
<p>如果有什么疑问，可以在本帖下面留言，我收到 <a href="https://steem-mention.com/">回复提醒</a> 后，会尽力第一时间给出答复。</p>
]]></content>
      <tags>
        <tag>教程</tag>
      </tags>
  </entry>
  <entry>
    <title>YOYOW 见证人教程(docker版)</title>
    <url>/2018/04/09/yoyow-witness-deploy-by-docker.html</url>
    <content><![CDATA[<h1 id="前言"><a href="#前言" class="headerlink" title="前言"></a>前言</h1><p><code>YOYOW</code> 是一个基于区块链的内容激励网络，<code>YOYOW</code> 虽然给人第一印象是模仿 <code>Steem</code>，其实不然。<code>YOYOW</code> 在做的事情应该是一个区块链版的 <code>UCenter</code>。其他的事情也不多说了，不是教程范畴的，请自行去 <a href="https://yoyow.org/">官网</a> 阅读 <a href="https://yoyow.org/files/white-paper3.pdf">白皮书</a>。</p>
<h1 id="前置技能-和-准备工作"><a href="#前置技能-和-准备工作" class="headerlink" title="前置技能 和 准备工作"></a>前置技能 和 准备工作</h1><ul>
<li>基础的 <code>Linux</code> 知识</li>
<li>基础的 <code>Docker</code> 知识</li>
<li>有一台运行有 <code>Docker</code> 的服务器（目前 2G 内存，50G 硬盘就足够足够了）</li>
<li>有 <code>YOYOW</code> 账号，且至少账号内有 <strong>11000</strong> 个币（抵押需要1w，手续费需要1k）</li>
</ul>
<h1 id="开始我们的表演"><a href="#开始我们的表演" class="headerlink" title="开始我们的表演"></a>开始我们的表演</h1><p>1.创建以下目录</p>
<figure class="highlight plaintext"><table><tr><td class="code"><pre><span class="line"># mkdir -p /yoyow/data</span><br><span class="line"># mkdir -p /yoyow/yoyow_node_data_dir</span><br></pre></td></tr></table></figure>

<p>2.下载 <code>YOYOW</code> 的最新版程序，<a href="https://github.com/yoyow-org/yoyow-core/releases">https://github.com/yoyow-org/yoyow-core/releases</a> 。<br>请分别下载 <code>yoyow-client-v0.2.1-ubuntu-20180313.tgz</code> 和 <code>yoyow-node-v0.2.1-ubuntu-20180313.tgz</code>，并解压 <code>yoyow-client</code> 和 <code>yoyow-node</code> 到 <code>/yoyow/data</code> 目录。（可能你看到此文的时候，版本号已经变了，但是下载 <code>Ubuntu</code> 环境下的 <code>yoyow-client</code> 和 <code>yoyow-node</code> 肯定是没错的）<br><strong>请直接 watch 这个项目，以免错过版本更新造成丢块。</strong></p>
<p>3.下载 <code>Dockerfile</code> 文件到任意目录</p>
<figure class="highlight plaintext"><table><tr><td class="code"><pre><span class="line"># curl https://gist.githubusercontent.com/ety001/640f944f7299cae4af4e3ef092a5f4a8/raw/192d36950d580996c176e23f5d5c4ae6da26110e/yoyow_Dockerfile -o Dockerfile</span><br></pre></td></tr></table></figure>

<p>4.打开 <code>Dockerfile</code> 文件，注释掉最后一行，如下</p>
<figure class="highlight bash"><table><tr><td class="code"><pre><span class="line">FROM ubuntu:16.04</span><br><span class="line">Volume /data</span><br><span class="line">Volume /yoyow_node_data_dir</span><br><span class="line"><span class="comment"># CMD /data/yoyow_node --rpc-endpoint -w 485699321 --private-key &#x27;[&quot;YYW7TSRLZ9EXZpxxxx&quot;,&quot;5JbDUxxxxxxxxxx&quot;]&#x27;</span></span><br></pre></td></tr></table></figure>

<p>保存退出。</p>
<p>5.生成一个镜像</p>
<figure class="highlight bash"><table><tr><td class="code"><pre><span class="line"><span class="comment"># docker build -t yoyow .</span></span><br></pre></td></tr></table></figure>

<p>6.启动一个容器来运行 <code>yoyow-node</code></p>
<figure class="highlight bash"><table><tr><td class="code"><pre><span class="line"><span class="comment"># docker run --name yoyow -d -v /yoyow/data:/data -v /yoyow/yoyow_node_data_dir:/yoyow_node_data_dir yoyow /data/yoyow_node --rpc-endpoint</span></span><br></pre></td></tr></table></figure>

<p>7.等待数据同步到最新，可以通过下面的命令来查看容器的运行情况</p>
<figure class="highlight bash"><table><tr><td class="code"><pre><span class="line"><span class="comment"># docker logs --tail 10 yoyow</span></span><br></pre></td></tr></table></figure>

<p>上面的命令是显示最后10行的，如果想显示更多行，请自行修改，去掉 <code>--tail</code> 参数可以显示全部输出信息。</p>
<p>8.同步完数据后，执行下面的命令可以打开本地钱包</p>
<figure class="highlight bash"><table><tr><td class="code"><pre><span class="line"><span class="comment"># docker exec -it yoyow /data/yoyow_client -w /data/wallet.json -s ws://localhost:8090</span></span><br></pre></td></tr></table></figure>

<p>第一次打开本地钱包，会要求你设置一个本地钱包的密码，如下图（请设置后牢记）</p>
<p><img src="https://steemitimages.com/DQmR5L8h3kdTsYP98RGf95wEPvf7UPhuzNPMyQPK5vDUZgg/image.png"></p>
<p>输入 <code>set_password</code> 命令完成密码设置，本教程内设置的密码是 <code>123456</code> 如下</p>
<figure class="highlight bash"><table><tr><td class="code"><pre><span class="line">Please use the set_password method to initialize a new wallet before continuing</span><br><span class="line">new &gt;&gt;&gt; set_password 123456</span><br><span class="line">set_password 123456</span><br><span class="line">null</span><br><span class="line">locked &gt;&gt;&gt; </span><br></pre></td></tr></table></figure>

<p>9.解锁钱包</p>
<figure class="highlight bash"><table><tr><td class="code"><pre><span class="line">locked &gt;&gt;&gt;  unlock 123456</span><br><span class="line">unlock 123456</span><br><span class="line">null</span><br><span class="line">unlocked &gt;&gt;&gt; </span><br></pre></td></tr></table></figure>

<p>10.导入资金密钥 <strong>Active key</strong>（<strong>Active key</strong> 去这里可以找到 <a href="https://wallet.yoyow.org/#/settings/viewpurview">https://wallet.yoyow.org/#/settings/viewpurview</a> ），导入命令如下</p>
<figure class="highlight bash"><table><tr><td class="code"><pre><span class="line">unlocked &gt;&gt;&gt;  import_key   你的数字账号   你的ActiveKey</span><br></pre></td></tr></table></figure>

<p>11.生成一对新的公私钥对，用于签名打包的块。**请备份好，如果丢失，需要重新生成新的公私钥对，并重新配置 <code>yoyow_node</code>**。</p>
<figure class="highlight bash"><table><tr><td class="code"><pre><span class="line">unlocked &gt;&gt;&gt;  suggest_brain_key</span><br><span class="line">suggest_brain_key</span><br><span class="line">&#123;</span><br><span class="line">  <span class="string">&quot;brain_priv_key&quot;</span>: <span class="string">&quot;JIGGETY DEATHLY MUSTEE WINDORE CHAGUL WACE TUQUE BEMOON FLAVIC PITCHY SEVENER FELINE VIDETTE RUMNEY OVUM XENYL&quot;</span>,</span><br><span class="line">  <span class="string">&quot;wif_priv_key&quot;</span>: <span class="string">&quot;5KMJDKiUcWr9J2pPu9YdAQnbAiMKKxx2DA4W5ALfvgkUsWyXNWX&quot;</span>,</span><br><span class="line">  <span class="string">&quot;pub_key&quot;</span>: <span class="string">&quot;YYW87JoiJguwTWgSXZBHHaA78xiaNaEh5Lup1rNJGEg37Z4huNGyS&quot;</span></span><br><span class="line">&#125;</span><br></pre></td></tr></table></figure>

<p>12.创建见证人</p>
<figure class="highlight bash"><table><tr><td class="code"><pre><span class="line">unlocked &gt;&gt;&gt;  create_witness   你的数字账号名    见证人签名公钥    押金金额(10000+)    YOYO   你的宣传链接   <span class="literal">true</span></span><br></pre></td></tr></table></figure>

<p>如果创建成功，在 <a href="https://yoyow.bts.ai/witness?locale=zh-CN">https://yoyow.bts.ai/witness?locale=zh-CN</a> 就可以查到了。</p>
<blockquote>
<p>退出本地钱包的方法：ctrl + d</p>
</blockquote>
<p>13.停止刚才创建的容器并删除容器和镜像</p>
<figure class="highlight bash"><table><tr><td class="code"><pre><span class="line"><span class="comment"># docker stop yoyow</span></span><br><span class="line"><span class="comment"># docker rm yoyow</span></span><br><span class="line"><span class="comment"># docker rmi yoyow</span></span><br></pre></td></tr></table></figure>

<p>14.打开刚才的 <code>Dockerfile</code>，把刚才注释掉的最后一行取消注释，并且 <code>485699321</code> 修改为你的数字账号，<code>YYW7TSRLZ9EXZpxxxx</code> 和 <code>5JbDUxxxxxxxxxx </code> 分别修改为刚才生成的公私钥，即 <code>YYW87JoiJguwTWgSXZBHHaA78xiaNaEh5Lup1rNJGEg37Z4huNGyS</code> 和 <code>5KMJDKiUcWr9J2pPu9YdAQnbAiMKKxx2DA4W5ALfvgkUsWyXNWX</code>，修改完后，保存退出。</p>
<p>15.重新生成镜像</p>
<figure class="highlight bash"><table><tr><td class="code"><pre><span class="line"><span class="comment"># docker build -t yoyow .</span></span><br></pre></td></tr></table></figure>

<p>16.重新启动容器</p>
<figure class="highlight bash"><table><tr><td class="code"><pre><span class="line">docker run --name yoyow -d --restart always -v /yoyow/data:/data -v /yoyow/yoyow_node_data_dir:/yoyow_node_data_dir yoyow</span><br></pre></td></tr></table></figure>

<p>到这里，就完成了见证人服务器的搭建工作。</p>
<h1 id="一些常用的命令"><a href="#一些常用的命令" class="headerlink" title="一些常用的命令"></a>一些常用的命令</h1><p>1.打开本地钱包（其中 <code>wallet.json</code> 即为你本地钱包文件，在母机的 <code>/yoyow/data</code> 目录下，注意保护）</p>
<figure class="highlight bash"><table><tr><td class="code"><pre><span class="line"><span class="comment"># docker exec -it yoyow /data/yoyow_client -w /data/wallet.json -s ws://localhost:8090</span></span><br></pre></td></tr></table></figure>

<p>2.如果你要维护节点，为了避免错过块，请先下线见证人，然后再进行维护。启停见证人使用 <code>update_witness</code> 命令，其格式如下：</p>
<figure class="highlight bash"><table><tr><td class="code"><pre><span class="line">unlocked &gt;&gt;&gt;  update_witness    您的数字账号名     签名用的公钥    押金金额(10000)   YOYO    链接     <span class="literal">true</span></span><br><span class="line"><span class="comment"># 不需要修改的内容填null，不能填写和修改前一样的参数，否则会报错）</span></span><br><span class="line"></span><br><span class="line"><span class="comment"># 下线见证人</span></span><br><span class="line">unlocked &gt;&gt;&gt;  update_witness  485699321  YYW1111111111111111111111111111111114T1Anm  null null null  <span class="literal">true</span></span><br><span class="line"></span><br><span class="line"><span class="comment"># 上线见证人</span></span><br><span class="line">unlocked &gt;&gt;&gt; update_witness  485699321  YYW87JoiJguwTWgSXZBHHaA78xiaNaEh5Lup1rNJGEg37Z4huNGyS  null null null  <span class="literal">true</span></span><br></pre></td></tr></table></figure>

<p>3.查看可以领取的见证人工资</p>
<figure class="highlight bash"><table><tr><td class="code"><pre><span class="line">unlocked &gt;&gt;&gt;  get_full_account 485699321</span><br></pre></td></tr></table></figure>

<p>其中 <code>uncollected_witness_pay</code> 的数值除以10万就是你未领取的见证人工资。</p>
<p>4.领取见证人工资</p>
<figure class="highlight bash"><table><tr><td class="code"><pre><span class="line">unlocked &gt;&gt;&gt;  collect_witness_pay 485699321 money YOYO <span class="literal">true</span></span><br></pre></td></tr></table></figure>

<p>把 <code>485699321</code> 换成你的账号，<code>money</code> 换成你要申领的工资数。</p>
<h1 id="节点升级工作"><a href="#节点升级工作" class="headerlink" title="节点升级工作"></a>节点升级工作</h1><p>如果遇到程序升级，那么需要首先下载最新版的 <code>yoyow_node</code> 和 <code>yoyow_client</code>，下线见证人后停止容器</p>
<figure class="highlight bash"><table><tr><td class="code"><pre><span class="line"><span class="comment"># docker stop yoyow</span></span><br></pre></td></tr></table></figure>

<p>用新版的程序覆盖之前的程序后，再启动容器，</p>
<figure class="highlight bash"><table><tr><td class="code"><pre><span class="line"><span class="comment"># docker start yoyow</span></span><br></pre></td></tr></table></figure>

<p>容器启动数据同步完后，再上线见证人。</p>
<h1 id="完结"><a href="#完结" class="headerlink" title="完结"></a>完结</h1><p>以上即为 <code>Docker</code> 版的部署教程，如有遗漏请留言，欢迎给我投上一票，我的账号是：<strong>485699321</strong> 。</p>
]]></content>
      <tags>
        <tag>教程</tag>
        <tag>区块链</tag>
      </tags>
  </entry>
  <entry>
    <title>配置SSL时出现 Error: unable to verify the first certificate</title>
    <url>/2018/04/12/ssl-unable-to-verify-the-first-certificate.html</url>
    <content><![CDATA[<p>之前在家里的服务器上搭建了一个 BTS 的 API 节点，使用的是 <a href="https://letsencrypt.org/">Let’s Encrypt</a> 的证书服务。搭建好以后，一直有一个奇怪的问题没有解决，就是在交易所使用没有问题，但是用 <code>wscat</code> 连接就会报 <code>Error: unable to verify the first certificate</code> 的错误，如下图：</p>
<p><img src="https://steemeditor.com/storage/images/gnx6OCstwifimJW6eBLEE1uyU89DdzWrXFIrkdSR.png"></p>
<p>使用 <code>openssl s_client -connect bts.to0l.cn:4443</code> 检查也是有报错的</p>
<p><img src="https://steemitimages.com/DQmPEg2q8uMNQmHeoCvPYFNH6hw8xPqKcowikVnjdZjPc2V/image.png"></p>
<p>由于不影响我使用交易所，所以就忽略了。今天 @abit 在群里说我的节点证书有问题，虽然没有指出具体问题在哪，我目测应该就是这个问题。</p>
<p>经过检查，证书生成没有问题，最后确定是 <code>nginx</code> 的证书配置有问题，参考了这个帖子 <a href="https://serverfault.com/questions/875297/verify-return-code-21-unable-to-verify-the-first-certificate-lets-encrypt-apa">https://serverfault.com/questions/875297/verify-return-code-21-unable-to-verify-the-first-certificate-lets-encrypt-apa</a> 。</p>
<p>就是把</p>
<figure class="highlight plaintext"><table><tr><td class="code"><pre><span class="line">ssl_certificate      /root/.acme.sh/bts.to0l.cn/fullchain.cer;</span><br></pre></td></tr></table></figure>

<p>替换成</p>
<figure class="highlight plaintext"><table><tr><td class="code"><pre><span class="line">ssl_certificate      /root/.acme.sh/bts.to0l.cn/bts.to0l.cn.cer;</span><br></pre></td></tr></table></figure>

<p>这次之所以出现这个问题，也是疏忽。之前在服务器上一直用 <code>certbot</code> 生成证书，<code>certbot</code> 生成证书后，会提示使用如下两个文件</p>
<figure class="highlight plaintext"><table><tr><td class="code"><pre><span class="line">/etc/letsencrypt/live/xxxx.net/fullchain.pem;</span><br><span class="line">/etc/letsencrypt/live/xxxx.net/privkey.pem;</span><br></pre></td></tr></table></figure>

<p>而这次使用家里搭建服务器，由于联通封锁了家庭网络的 80 和 443 ，所以没有办法用 <code>certbot</code> 来签发证书，因此使用的是 <code>acme</code> 脚本，通过 <code>DNS</code> 来完成证书签发过程中的域名认证。而 <code>acme</code> 最后生成好后，给出的两个文件是</p>
<figure class="highlight plaintext"><table><tr><td class="code"><pre><span class="line">/root/.acme.sh/bts.to0l.cn/bts.to0l.cn.cer;</span><br><span class="line">/root/.acme.sh/bts.to0l.cn/bts.to0l.cn.key;</span><br></pre></td></tr></table></figure>

<p>所以相当然的就配置上了。</p>
<p>具体的这两个证书文件为何不同还不清楚，目测 <code>bts.to0l.cn.cer</code> 是一个不完整的证书吧，以后有时间再去研究下。</p>
]]></content>
      <tags>
        <tag>教程</tag>
        <tag>经验</tag>
      </tags>
  </entry>
  <entry>
    <title>关于pymysql的两个坑</title>
    <url>/2018/05/03/pymysql-two-bugs.html</url>
    <content><![CDATA[<p>在使用 <em>pymysql</em> 的时候遇到的两个坑。</p>
<p>第一个，在 <em>pymysql</em> 中 <em>sql</em> 语句中的占位符并不是 <em>Python</em> 中常规的占位符，<em>sql</em> 中的所有占位符都是 <code>%s</code>。如果你在 <em>sql</em> 中使用了类似 <code>%d</code> 这样的占位符，你会得到类似 <code>TypeError: %d format: a number is required, not str</code> 这样的错误提示。参考：<a href="https://stackoverflow.com/questions/5785154/python-mysqldb-issues-typeerror-d-format-a-number-is-required-not-str">https://stackoverflow.com/questions/5785154/python-mysqldb-issues-typeerror-d-format-a-number-is-required-not-str</a></p>
<p>第二个坑，依旧是使用规则上的问题，先看代码：</p>
<figure class="highlight plaintext"><table><tr><td class="code"><pre><span class="line">sql = &quot;insert into TABLE (col_a, col_b) values (%s, %s)&quot;</span><br><span class="line">data = (&quot;abc&quot;, &quot;xyz&quot;)</span><br><span class="line">cursor.execute(sql, data)</span><br><span class="line"></span><br><span class="line">sql = &quot;insert into TABLE (col_a, col_b) values (&#x27;%s&#x27;, &#x27;%s&#x27;)&quot; % (&quot;abc&quot;, &quot;xyz&quot;)</span><br><span class="line">cursor.execute(sql)</span><br></pre></td></tr></table></figure>

<p>以上两种用法都是可以的，但是坑就在于不要混用，比如下面这两种情况：</p>
<figure class="highlight plaintext"><table><tr><td class="code"><pre><span class="line">sql = &quot;insert into TABLE (col_a, col_b) values (%s, %s)&quot; % (&quot;abc&quot;, &quot;xyz&quot;)</span><br><span class="line">cursor.execute(sql)</span><br><span class="line"></span><br><span class="line">sql = &quot;insert into TABLE (col_a, col_b) values (&#x27;%s&#x27;, &#x27;%s&#x27;)&quot;</span><br><span class="line">data = ((&quot;abc&quot;, &quot;xyz&quot;), (&quot;efg&quot;, &quot;uvw&quot;))</span><br><span class="line">cursor.executemany(sql, data)</span><br></pre></td></tr></table></figure>

<p><strong>由于 <em>pymysql</em> 里有相应的机制来处理传入的 <em>sql</em> 语句和数据，但是机制并不完善，所以混用将会导致有多余的引号出现。</strong></p>
]]></content>
      <tags>
        <tag>经验</tag>
      </tags>
  </entry>
  <entry>
    <title>简单的谈谈 Bitshares 和 Stellar</title>
    <url>/2018/03/20/bitshares-and-stellar.html</url>
    <content><![CDATA[<p>一切的一切都要从一封垃圾邮件开始。</p>
<p>当时还是2013年11月的某天，在我邮箱里发现了一封收XRP的邮件，于是在 V2EX 上 <a href="https://www.v2ex.com/t/87855#reply2">发了个帖子</a>，想看看社区有知道 XRP 是啥的人没有。后来就从接触 XRP 开始，又知道了 BTC，就这样算是关注到了币圈。那个年代真的是除了 BTC 、Ripple、LTC外都是山寨币。</p>
<p>当时有看到过 PTS，但是并没有了解这是个啥，因为自己脑子里一直认为其他的都是山寨币。后来也听说了 Stellar，知道 Stellar 是从 Ripple 继承过去的，所以也并不重视这个。</p>
<p>后来是因为去年（你没看错就是去年）在比特时代上看到了比特股的简介，瞬间来了兴趣，就开始买入了一点，然后研究起来。</p>
<p><img src="https://steemitimages.com/DQmceAX5WaEiPzAvLiFrVmPjEs9xvzYLktJxfq36bjkg3U6/image.png"></p>
<p>所以，我对于这两者的历史了解并不多，我只把我知道的说出来，有不对的地方，还请各位指点。</p>
<p>先说 Stellar。由于 Stellar 继承于 Ripple， 所以我认为 Stellar 也同样是中心化的，具体 Stellar 的中心是公司还是个人，我其实也不清楚。 Ripple 和 Stellar 其实只是借助于区块链来完成分布式账本，让交易数据不可逆。之所以采取中心化，我的理解是为了解决 BTC 的转账慢和手续费高的问题。BTC 转账慢和手续费高的问题由来已久，并不是这两年才有的，在我 2013年刚接触的时候，就有人提出 BTC 的转账慢是无法完成类似于支付宝这样的交易的。于是很多人都在探索这一块，其中 Ripple 就是其中之一。同时 Ripple 的目的也是为了解决跨国结算和支付的问题。既然 Stellar 是继承于 Ripple，所以 Ripple 有的特性，Stellar 也都一样存在着。</p>
<p>Stellar 网络中可信节点数量应该是确认的，这个 P2P 网络中，部署着 API 节点、Federation Server、Bridge Server。这其中 API 节点的作用是为用户的钱包以及其他的应用提供数据服务；Federation Server我的理解就是提供一个 Stellar 网络中的 DNS服务，比如一些 Anchor 的地址可以用类似邮件地址的格式来代替，这个工作就是由可信的 Federation Server来完成解析的；关于Bridge Server 我没有接触过，所以跳过。</p>
<p>除了以上三个类型的服务外，还有就是 Anchor 了。Stellar 网络的通用代币是 XLM（有些交易所也称作 STR ） ，就像 Bitcoin 网络里的通用代币是 BTC 一样。而为了实现其他的货币，就要靠 Anchor 来实现。Anchor 是 Stellar 网络中最关键的一环，我一般称这个为网关，因为网关可以发行和销毁代币，这就提供了资金进入的途径。</p>
<p>比如说，我做了一个人民币的网关，那么我可以在我的网关上发行一个代币叫做 CNY，然后别人只要在钱包里设置信任我这个网关，就可以直接在钱包的交易页面，从我的网关上进行挂单，进行 XLM &#x2F; CNY 交易。如果两个人同时信任了我这个网关，那么这两个人也可以通过 Stellar 的网络进行 CNY 转账。注意这里转账的 CNY 是由我这个网关发行的。也就是说现在如果有另外一个网关也发行 CNY，那么这两个 CNY 是不通用的。（不过这里要提一点，就是在 Ripple 的网络中，有一种方法是可以置换的，比如甲在A网关有50CNY，没有信任B网关，他想转50CNY给乙，而乙没有信任A网关，只信任了B网关，此时如果丙同时信任了A和B网关，并打开了置换功能，且丙在B网关有至少50CNY，那么系统会在网络里找到这条通道完成转账，即甲把A网关的50CNY给了丙，丙把B网关的50给了乙。当年我就是这么被骗子置换了将近1w个 Ripple 币。）</p>
<p>总结一下，其实 Stellar 只是借助了区块链来完成数据不可逆的工作，而其中的网关有些像交易所的角色，完成资金的进出。对于普通用户来说，通过 Stellar 网络进行交易和转账也很便捷，具体出块时间忘记了，但是很快。</p>
<p>下面再简单描述下我理解中的 Bitshares。比特股在一开始打造的时候，就是按照去中心化的交易所的思路建设的，而其中重要的核心就是 DPOS 机制来保证相对的去中心化。BTS 的网络分为三种类型的节点，P2P节点、见证人节点、API节点。相对于 Stellar 来说差不太多。只是 BTS 引入外部资金的方式很不一样，通过抵押其网络中的核心代币 BTS 来获取其他法币代币，然后再由通过抵押 BTS 获得法币代币的人来做承兑商，完成资金的进出场。我觉得这样的做法无异于是增加了整个系统的运行风险，因为我认为这会让盘子里所有的货币都跟 BTS 的价值挂钩了。我个人觉得这个不应该是由抵押来实现法币代币价值锚定，而应该通过信用来实现价值锚定。也就是说，BTS 在抵押这个操作上把方向搞反了，想要试图用 BTS 的价值来决定现实中法币的价值。这个问题也是我在过去几个月内盘经历的一次次爆仓中体悟到的。</p>
<p>但是总的来说，Bitshares 吸引我的地方还是在 DPOS 这样的机制。并且我觉得 BTS 应该是目前为数不多的，创始人团队离开后，通过社区还能维持运营的币种。随着对币圈的深入，我现在很相信相对的去中心化才是未来。一味追求去中心化，其实是盲目的。并不是所有的场景都需要去中心化。总结一下 BTS 就是哲学很牛逼，但是产品还需要再打磨，但是市场到底留给 BTS 还有多少时间允许他打磨产品，是个问号。</p>
<p>以上是我的浅薄分析，如有错误，请指出。</p>
]]></content>
      <tags>
        <tag>杂七杂八</tag>
      </tags>
  </entry>
  <entry>
    <title>pymysql又莫名踩到一个坑</title>
    <url>/2018/05/07/pymysql-another-pool.html</url>
    <content><![CDATA[<p>通过跑前几天的脚本，发现网络不稳定会导致区块数据同步不全，因此还需要写一个守护脚本，定期去检查下未完成的区块，并完成同步。</p>
<p>但在写的过程中发现了一个坑，目前还没有找到触发的原因，临时找到了解决方案。</p>
<p>下面就是简化版的问题代码：</p>
<figure class="highlight plaintext"><table><tr><td class="code"><pre><span class="line">#!/usr/bin/python3</span><br><span class="line">#encoding:UTF-8</span><br><span class="line">import sys, time</span><br><span class="line">from contextlib import suppress</span><br><span class="line">import pymysql</span><br><span class="line"># init db</span><br><span class="line">try:</span><br><span class="line">    conn = pymysql.connect(</span><br><span class="line">        host = &quot;steem-lightdb.com&quot;,</span><br><span class="line">        user = &quot;steem&quot;,</span><br><span class="line">        password = &quot;steem&quot;,</span><br><span class="line">        database = &quot;steemdb&quot;,</span><br><span class="line">        charset = &#x27;utf8&#x27;,</span><br><span class="line">        cursorclass = pymysql.cursors.DictCursor)</span><br><span class="line">    #conn.autocommit(True)</span><br><span class="line">except Exception as e:</span><br><span class="line">    print(&#x27;[warning] DB connection failed&#x27;, e)</span><br><span class="line">    sys.exit()</span><br><span class="line"></span><br><span class="line">def getLatestBlockNumFromDB():</span><br><span class="line">    global conn</span><br><span class="line">    sql = &#x27;&#x27;&#x27;</span><br><span class="line">    Select block_num from blocks</span><br><span class="line">    Order by block_num desc limit 1;</span><br><span class="line">    &#x27;&#x27;&#x27;</span><br><span class="line">    try:</span><br><span class="line">        with conn.cursor() as cursor:</span><br><span class="line">            cursor.execute(sql)</span><br><span class="line">            result = cursor.fetchone()</span><br><span class="line">            if result:</span><br><span class="line">                return int(result[&#x27;block_num&#x27;]) + 1</span><br><span class="line">            else:</span><br><span class="line">                return 1</span><br><span class="line">        conn.commit()</span><br><span class="line">    except Exception as  e:</span><br><span class="line">        print(&#x27;[warning]get latest block num error&#x27;, e)</span><br><span class="line">        return 1</span><br><span class="line"></span><br><span class="line">def run():</span><br><span class="line">    while True:</span><br><span class="line">        latest_block_num = getLatestBlockNumFromDB()</span><br><span class="line">        print(latest_block_num)</span><br><span class="line">        time.sleep(3)</span><br><span class="line"></span><br><span class="line">if __name__ == &#x27;__main__&#x27;:</span><br><span class="line">    with suppress(KeyboardInterrupt):</span><br><span class="line">        run()</span><br></pre></td></tr></table></figure>

<p><strong>问题</strong> ：每次获取最新的区块号，总是一样的，就像被 <code>cache</code> 了一样。手动 <code>commit</code> 没有效果。</p>
<p><strong>临时解决方案</strong> ：把 <code>autocommit</code> 打开即可。</p>
<p>参考：<a href="https://github.com/PyMySQL/PyMySQL/issues/76">https://github.com/PyMySQL/PyMySQL/issues/76</a></p>
<p>等以后有机会再解决吧。。。</p>
]]></content>
      <tags>
        <tag>经验</tag>
      </tags>
  </entry>
  <entry>
    <title>YOYOW见证人监控程序部署教程（docker版）</title>
    <url>/2018/04/10/yoyow-witness-watcher.html</url>
    <content><![CDATA[<p>部署YOYOW见证人有几个月了，发现貌似没有人关注丢块的问题，我也没有找到有相关的开源软件可以去完成丢块自动下线的功能。像 Steem 社区有太多的类似程序了，python 的、nodejs 的，多的数不胜数。只能说 YOYOW 还是很年轻。</p>
<p>作为一个 YOYOW 的见证人，有义务去开发一款这样开源版本的工具。经过一晚上的折腾，基本功能已经是完成了。代码库在 <a href="https://github.com/ety001/yoyow-witness-watcher">这里</a>。这个工具是基于docker进行部署的，如果你看了上一篇我写的《YOYOW 见证人教程》 , 那么这个工具的部署应该会很轻松。因为我花了大量的时间在部署脚本上（大约6个小时），目的就是尽可能把部署过程傻瓜化。</p>
<h1 id="准备"><a href="#准备" class="headerlink" title="准备"></a>准备</h1><ul>
<li>一台 Linux 服务器，装有 docker , wget</li>
<li>如果需要通知服务，请自行注册discord，并创建一个新的服务器、频道和频道的webhook（文章最后有个简易获取 Webhook 的教程）。</li>
</ul>
<h1 id="开始"><a href="#开始" class="headerlink" title="开始"></a>开始</h1><h3 id="1-首先下载代码"><a href="#1-首先下载代码" class="headerlink" title="1.首先下载代码"></a>1.首先下载代码</h3><figure class="highlight plaintext"><table><tr><td class="code"><pre><span class="line">git clone https://github.com/ety001/yoyow-witness-watcher.git</span><br><span class="line">cd yoyow-witness-watcher</span><br></pre></td></tr></table></figure>

<h3 id="2-部署-yoyow-client，并提供-RPC-服务。"><a href="#2-部署-yoyow-client，并提供-RPC-服务。" class="headerlink" title="2.部署 yoyow_client，并提供 RPC 服务。"></a>2.部署 <code>yoyow_client</code>，并提供 <code>RPC</code> 服务。</h3><figure class="highlight plaintext"><table><tr><td class="code"><pre><span class="line">./init.sh</span><br></pre></td></tr></table></figure>

<p>首先提示你输入 <code>yoyow_client</code> 的下载地址：</p>
<figure class="highlight plaintext"><table><tr><td class="code"><pre><span class="line">*********************************************</span><br><span class="line">Welcome to use YOYOW witness watcher.</span><br><span class="line">This tool is made by ETY001. (https://github.com/ety001)</span><br><span class="line">My YOYOW ID is 485699321. It&#x27;s pleasure to get your votes!</span><br><span class="line">*********************************************</span><br><span class="line"></span><br><span class="line">Please input current yoyow_client download URL (https://github.com/yoyow-org/yoyow-core/releases/latest):</span><br><span class="line">https://github.com/yoyow-org/yoyow-core/releases/download/v0.2.1-180313/yoyow-client-v0.2.1-ubuntu-20180313.tgz</span><br></pre></td></tr></table></figure>

<p>下载地址可以在 <a href="https://github.com/yoyow-org/yoyow-core/releases/latest">https://github.com/yoyow-org/yoyow-core/releases/latest</a> 找到，填写下载地址后，回车继续。</p>
<p>当看到出现 <code>Listening for incoming HTTP RPC requests on 0.0.0.0:9999</code> 以及 <code>new &gt;&gt;&gt;</code> 的时候说明 <code>yoyow_client</code> 的 docker 镜像已经做好，现在开始创建钱包并导入你的账号</p>
<figure class="highlight plaintext"><table><tr><td class="code"><pre><span class="line">Create wallet</span><br><span class="line">Logging RPC to file: logs/rpc/rpc.log</span><br><span class="line">3505859ms th_a       main.cpp:120                  main                 ] key_to_wif( committee_private_key ): 5KCBDTcyDqzsqehcb52tW5nU6pXife6V2rX9Yf7c3saYSzbDZ5W</span><br><span class="line">3505862ms th_a       main.cpp:124                  main                 ] nathan_pub_key: YYW6MRyAjQq8ud7hVNYcfnVPJqcVpscN5So8BhtHuGYqET5GDW5CV</span><br><span class="line">3505862ms th_a       main.cpp:125                  main                 ] key_to_wif( nathan_private_key ): 5KQwrPbwdL6PhXujxW37FSSQZ1JiwsST4cqQzDeyXtP79zkvFD3</span><br><span class="line">Starting a new wallet with chain ID ae4f234c75199f67e526c9478cf499dd6e94c2b66830ee5c58d0868a3179baf6 (from egenesis)</span><br><span class="line">3505863ms th_a       main.cpp:172                  main                 ] wdata.ws_server: wss://wallet.yoyow.org/ws</span><br><span class="line">3506840ms th_a       main.cpp:177                  main                 ] wdata.ws_user:  wdata.ws_password:</span><br><span class="line">Please use the set_password method to initialize a new wallet before continuing</span><br><span class="line">3509652ms th_a       main.cpp:243                  main                 ] Listening for incoming HTTP RPC requests on 0.0.0.0:9999</span><br><span class="line">new &gt;&gt;&gt;</span><br></pre></td></tr></table></figure>

<p>先设置本地钱包密码（比如 123456）</p>
<figure class="highlight plaintext"><table><tr><td class="code"><pre><span class="line">set_password 123456</span><br></pre></td></tr></table></figure>

<p>解锁本地钱包</p>
<figure class="highlight plaintext"><table><tr><td class="code"><pre><span class="line">unlock 123456</span><br></pre></td></tr></table></figure>

<p>导入你的 YOYOW 账号</p>
<figure class="highlight plaintext"><table><tr><td class="code"><pre><span class="line">import_key YOUR_YOYOW_ID  YOUR_YOYOW_ACTIVE_KEY</span><br></pre></td></tr></table></figure>

<p>完成以上工作后，按 <code>ctrl + d</code> 退出钱包，docker 容器开始重启</p>
<p>直到看到 Finish 且已经在监听 9999 端口时，整个 <code>yoyow_client</code> 的部署完成。</p>
<figure class="highlight plaintext"><table><tr><td class="code"><pre><span class="line">Get Status</span><br><span class="line">00200e8bde55        yoyow_client                     &quot;/bin/sh -c &#x27;/data/y…&quot;    10 seconds ago      Up 10 seconds                                                  yoyow_client</span><br><span class="line"></span><br><span class="line">Logs</span><br><span class="line">Logging RPC to file: logs/rpc/rpc.log</span><br><span class="line">140909ms th_a       main.cpp:120                  main                 ] key_to_wif( committee_private_key ): 5K**********************5W</span><br><span class="line">140910ms th_a       main.cpp:124                  main                 ] nathan_pub_key: YY************************CV</span><br><span class="line">140910ms th_a       main.cpp:125                  main                 ] key_to_wif( nathan_private_key ): 5****************************3</span><br><span class="line">140912ms th_a       main.cpp:172                  main                 ] wdata.ws_server: wss://wallet.yoyow.org/ws</span><br><span class="line">141820ms th_a       main.cpp:177                  main                 ] wdata.ws_user:  wdata.ws_password:</span><br><span class="line">145239ms th_a       main.cpp:243                  main                 ] Listening for incoming HTTP RPC requests on 0.0.0.0:9999</span><br><span class="line"></span><br><span class="line">************</span><br><span class="line">Finish!</span><br></pre></td></tr></table></figure>

<h3 id="3-部署监控程序"><a href="#3-部署监控程序" class="headerlink" title="3.部署监控程序"></a>3.部署监控程序</h3><p>直接运行下面的命令开始部署</p>
<figure class="highlight plaintext"><table><tr><td class="code"><pre><span class="line">./install_bot.sh</span><br></pre></td></tr></table></figure>

<p>提示输入你的 YOYOW ID</p>
<figure class="highlight plaintext"><table><tr><td class="code"><pre><span class="line"># ./install_bot.sh</span><br><span class="line">Please input YOYOW ID:</span><br><span class="line">485699321</span><br></pre></td></tr></table></figure>

<p>提示输入你签名块用的公钥。</p>
<figure class="highlight plaintext"><table><tr><td class="code"><pre><span class="line">Please input Your Public Key:</span><br><span class="line">If you have multiple public keys, separate them with commas</span><br><span class="line">eg. YYW7TSRLZ9EXZps37Kt31qa7qi,YYW7TSRLZ9EXZpZqk25atoL2s37</span><br><span class="line">YYW7TSRLZ9EXZpZqk25atoL2s37Kt31qa7qi78ZR368kCN969rFiT,YYW733FxEEaAFTHxdTJdowZyQzJ3JnPocsVmdq4aSsm1gSd1VkYDC</span><br></pre></td></tr></table></figure>

<p>&gt; 如果你有多台备机，可以用逗号把多个公钥隔开填写，<strong>请务必把当前正在运行的节点的公钥放在第一位</strong>，程序会在检测到丢块后，自动依次往后切换，直到所有节点都不可用。因此，如果你有两个节点的话，当第一个节点挂掉，程序自动切换到第二个备份节点后，赶紧去修第一个节点，第一个节点重启可用后，<strong>一定要重新部署下bot程序，并且填写公钥时，把目前的第二个节点的公钥放在前面</strong>。</p>
<p>提示输入你的本地钱包密码</p>
<figure class="highlight plaintext"><table><tr><td class="code"><pre><span class="line">Please input wallet password:</span><br><span class="line">123456</span><br></pre></td></tr></table></figure>

<p>提示输入 discord 的 webhook 地址，如果你想获取通知的话，就配置这项，否则留空。最后会简单说下怎么获取 webhook 地址</p>
<figure class="highlight plaintext"><table><tr><td class="code"><pre><span class="line">Please input Discord webhook for notify (If you don&#x27;t need it, leave empty.):</span><br><span class="line">https://discordapp.com/api/webhooks/433204170/X2RWo7-qiFlnMtQeQkk_sSgb5Vn0rQVWZCF5f</span><br></pre></td></tr></table></figure>

<p>当你看到类似以下信息的时候，就已经完成了所有部署工作。</p>
<figure class="highlight plaintext"><table><tr><td class="code"><pre><span class="line">Get status</span><br><span class="line">string(20) &quot;global value in init&quot;</span><br><span class="line">array(2) &#123;</span><br><span class="line">  [0]=&gt;</span><br><span class="line">  string(53) &quot;YYW7TSRLZ9EXZpZqk25atoL2s37Kt31qa7qi78ZR368kCN969rFiT&quot;</span><br><span class="line">  [1]=&gt;</span><br><span class="line">  string(53) &quot;YYW733FxEEaAFTHxdTJdowZyQzJ3JnPocsVmdq4aSsm1gSd1VkYDC&quot;</span><br><span class="line">&#125;</span><br><span class="line">string(9) &quot;485699321&quot;</span><br><span class="line">string(27) &quot;http://172.20.99.2:9999/rpc&quot;</span><br><span class="line">int(3)</span><br><span class="line">send_notify:&quot;&quot;</span><br><span class="line">witness_info: [&#123;&quot;id&quot;:&quot;1.5.118&quot;,&quot;account&quot;:485699321,&quot;name&quot;:&quot;yoyo485699321&quot;,&quot;sequence&quot;:1,&quot;is_valid&quot;:true,&quot;signing_key&quot;:&quot;YYW7TSRLZ9EXZpZqk25atoL2s37Kt31qa7qi78ZR368kCN969rFiT&quot;,&quot;pledge&quot;:&quot;4800000000&quot;,&quot;pledge_last_update&quot;:&quot;2018-04-09T16:27:36&quot;,&quot;average_pledge&quot;:&quot;4769814330&quot;,&quot;average_pledge_last_update&quot;:&quot;2018-04-10T09:29:36&quot;,&quot;average_pledge_next_update_block&quot;:6208938,&quot;total_votes&quot;:&quot;1012502907669&quot;,&quot;by_pledge_position&quot;:&quot;0&quot;,&quot;by_pledge_position_last_update&quot;:&quot;13192707760156474609520154309632187&quot;,&quot;by_pledge_scheduled_time&quot;:&quot;13192779100955781906176323330356157&quot;,&quot;by_vote_position&quot;:&quot;0&quot;,&quot;by_vote_position_last_update&quot;:&quot;8327365446400524735205121087916251&quot;,&quot;by_vote_scheduled_time&quot;:&quot;8327365782480909634055199728870765&quot;,&quot;last_confirmed_block_num&quot;:6208607,&quot;last_aslot&quot;:6220862,&quot;total_produced&quot;:1143,&quot;total_missed&quot;:3,&quot;url&quot;:&quot;https:\/\/github.com\/ety001&quot;&#125;]</span><br><span class="line">total_produced: 1143, total_missed: 3</span><br><span class="line">2018-04-10 10:23:38</span><br><span class="line"></span><br><span class="line"></span><br><span class="line">***********</span><br><span class="line">Finish!!</span><br></pre></td></tr></table></figure>

<p>如果想查看监控程序的工作状态，执行下面的命令即可</p>
<figure class="highlight plaintext"><table><tr><td class="code"><pre><span class="line">docker logs --tail 50 yoyow_witness_watcher</span><br></pre></td></tr></table></figure>

<h3 id="4-卸载"><a href="#4-卸载" class="headerlink" title="4.卸载"></a>4.卸载</h3><p>卸载非常的简单，只需要执行下面的命令即可</p>
<figure class="highlight plaintext"><table><tr><td class="code"><pre><span class="line">./uninstall_bot.sh &amp;amp;&amp;amp; ./uninstall.sh</span><br></pre></td></tr></table></figure>

<p>&gt; 如果你只想重新部署监控程序，只需要执行 <code>./uninstall_bot.sh</code> 即可，执行完后重新执行 <code>./install_bot.sh</code>。如果你中途执行安装脚本有错误的话，也需要先执行卸载脚本后，再重新执行安装脚本。卸载脚本如果都要执行的话，执行顺序一定要是先 <code>uninstall_bot</code> 再 <code>uninstall</code>。</p>
<h1 id="申请-Discord-的频道-Webhook"><a href="#申请-Discord-的频道-Webhook" class="headerlink" title="申请 Discord 的频道 Webhook"></a>申请 Discord 的频道 Webhook</h1><p>注册账号就不说了，打开桌面app界面（网页界面应该也差不多），在左下角找到一个加号，点击后如下图</p>
<p><img src="https://steemitimages.com/DQmZF3sQtGZo54dNxNHgcyvtXb8JitUJv7azLtL1gAyH3Rr/y1.png" alt="y1.png"></p>
<p>选择创建一个服务器，进入下个界面，配置下你的服务器的名字和位置后，即可完成创建，进入你的服务器，新建一个频道，然后在频道右侧有个齿轮，点击一下，如图</p>
<p><img src="https://steemitimages.com/DQmayhuefPERpPxwx2kjtnpJ5KxgFxZ8k6wm8U2EFCRwa9q/y2.png" alt="y2.png"></p>
<p>打开频道配置页面后，找到 Webhook 选项，然后创建一个新的 Webhook，如图</p>
<p><img src="https://steemitimages.com/DQmVEbzzEQUoZC9GVTKbq6jLrqSgTDe4bjM3ePatri4HUVV/y3.png" alt="y3.png"></p>
<p>填写下 Webhook 的名字后，即可完成创建，里面的 URL 即为你的 Webhook 地址。</p>
<p>欢迎给我投票，我的 <strong>YOYOW</strong> 号是 <strong>485699321</strong>。</p>
]]></content>
      <tags>
        <tag>教程</tag>
        <tag>区块链</tag>
      </tags>
  </entry>
  <entry>
    <title>使用LVM扩容服务器硬盘容量</title>
    <url>/2018/05/13/increase-volumn-space-by-lvm.html</url>
    <content><![CDATA[<p>昨天新购置了一台大硬盘服务器，为了完成 Steem LightDB 也是拼了。今天机房那边完成了服务器的部署，登陆后发现原本 2 X 1T 的硬盘，只挂了一块，如图：</p>
<p><img src="https://steemeditor.com/storage/images/Y9GafQaXSWVChZ7R2bxQM2E5qli2DQHhB20NL3nq.png"></p>
<p>一看是通过 LVM 完成的硬盘管理。并且在 <code>/dev/sda</code> 这块硬盘上划出了243M做 <code>/boot</code>。还有两个 <code>/dev/mapper/vg-*</code> 的 Logical Volume。</p>
<p>再看下目前硬盘的各个分区以及 LVM 是怎么配置的。（<strong>注意：一定要仔细看下现有LVM的配置，我刚开始由于粗心，一直误认为PV是做在了sda上，以为sdb是空硬盘啊，差点酿成大错！！！坑爹的配置，第一次见sda上只放一个引导区的。。。</strong></p>
<figure class="highlight plaintext"><table><tr><td class="code"><pre><span class="line">[root@lightdb ~]# fdisk -l</span><br><span class="line"></span><br><span class="line">Disk /dev/sdb: 1000.2 GB, 1000204886016 bytes, 1953525168 sectors</span><br><span class="line">Units = sectors of 1 * 512 = 512 bytes</span><br><span class="line">Sector size (logical/physical): 512 bytes / 512 bytes</span><br><span class="line">I/O size (minimum/optimal): 512 bytes / 512 bytes</span><br><span class="line">Disk label type: dos</span><br><span class="line">Disk identifier: 0x000e0ad8</span><br><span class="line"></span><br><span class="line">   Device Boot      Start         End      Blocks   Id  System</span><br><span class="line">/dev/sdb1            2048  1953523711   976760832   8e  Linux LVM</span><br><span class="line"></span><br><span class="line">Disk /dev/sda: 1000.2 GB, 1000204886016 bytes, 1953525168 sectors</span><br><span class="line">Units = sectors of 1 * 512 = 512 bytes</span><br><span class="line">Sector size (logical/physical): 512 bytes / 512 bytes</span><br><span class="line">I/O size (minimum/optimal): 512 bytes / 512 bytes</span><br><span class="line">Disk label type: dos</span><br><span class="line">Disk identifier: 0x00040a3c</span><br><span class="line"></span><br><span class="line">   Device Boot      Start         End      Blocks   Id  System</span><br><span class="line">/dev/sda1   *        2048      514047      256000   83  Linux</span><br><span class="line"></span><br><span class="line">Disk /dev/mapper/vg-root: 990.7 GB, 990665244672 bytes, 1934893056 sectors</span><br><span class="line">Units = sectors of 1 * 512 = 512 bytes</span><br><span class="line">Sector size (logical/physical): 512 bytes / 512 bytes</span><br><span class="line">I/O size (minimum/optimal): 512 bytes / 512 bytes</span><br><span class="line"></span><br><span class="line"></span><br><span class="line">Disk /dev/mapper/vg-swap: 8455 MB, 8455716864 bytes, 16515072 sectors</span><br><span class="line">Units = sectors of 1 * 512 = 512 bytes</span><br><span class="line">Sector size (logical/physical): 512 bytes / 512 bytes</span><br><span class="line">I/O size (minimum/optimal): 512 bytes / 512 bytes</span><br><span class="line"></span><br><span class="line"></span><br><span class="line">Disk /dev/mapper/vg-tmp: 1073 MB, 1073741824 bytes, 2097152 sectors</span><br><span class="line">Units = sectors of 1 * 512 = 512 bytes</span><br><span class="line">Sector size (logical/physical): 512 bytes / 512 bytes</span><br><span class="line">I/O size (minimum/optimal): 512 bytes / 512 bytes</span><br><span class="line"></span><br><span class="line"></span><br><span class="line"></span><br><span class="line"> ### 一开始粗心没看好这里！！！也是太长时间不摸LVM了。。。</span><br><span class="line"></span><br><span class="line">[root@lightdb ~]# pvdisplay</span><br><span class="line">  --- Physical volume ---</span><br><span class="line">  PV Name               /dev/sdb1</span><br><span class="line">  VG Name               vg</span><br><span class="line">  PV Size               931.51 GiB / not usable 4.00 MiB</span><br><span class="line">  Allocatable           yes </span><br><span class="line">  PE Size               4.00 MiB</span><br><span class="line">  Total PE              238466</span><br><span class="line">  Free PE               1</span><br><span class="line">  Allocated PE          238465</span><br><span class="line">  PV UUID               3MQezN-W53d-oj6q-I3GK-9GdP-j4Yj-hag2Dj</span><br><span class="line"></span><br><span class="line"></span><br><span class="line"></span><br><span class="line"></span><br><span class="line"></span><br><span class="line">[root@lightdb ~]# vgdisplay</span><br><span class="line">  --- Volume group ---</span><br><span class="line">  VG Name               vg</span><br><span class="line">  System ID             </span><br><span class="line">  Format                lvm2</span><br><span class="line">  Metadata Areas        1</span><br><span class="line">  Metadata Sequence No  4</span><br><span class="line">  VG Access             read/write</span><br><span class="line">  VG Status             resizable</span><br><span class="line">  MAX LV                0</span><br><span class="line">  Cur LV                3</span><br><span class="line">  Open LV               3</span><br><span class="line">  Max PV                0</span><br><span class="line">  Cur PV                1</span><br><span class="line">  Act PV                1</span><br><span class="line">  VG Size               &lt;931.51 GiB</span><br><span class="line">  PE Size               4.00 MiB</span><br><span class="line">  Total PE              238466</span><br><span class="line">  Alloc PE / Size       238465 / 931.50 GiB</span><br><span class="line">  Free  PE / Size       1 / 4.00 MiB</span><br><span class="line">  VG UUID               dzuyJa-LoIn-ZUAY-BvEN-X13J-EYkc-daFgy5</span><br><span class="line"></span><br><span class="line"></span><br><span class="line"></span><br><span class="line"></span><br><span class="line"></span><br><span class="line"></span><br><span class="line">[root@lightdb ~]# lvdisplay</span><br><span class="line">  --- Logical volume ---</span><br><span class="line">  LV Path                /dev/vg/swap</span><br><span class="line">  LV Name                swap</span><br><span class="line">  VG Name                vg</span><br><span class="line">  LV UUID                qNuaiE-j4mA-5dZJ-RsZZ-YqKX-4zSm-P2vWg8</span><br><span class="line">  LV Write Access        read/write</span><br><span class="line">  LV Creation host, time lightdb, 2018-05-12 15:20:38 -0400</span><br><span class="line">  LV Status              available</span><br><span class="line">  # open                 2</span><br><span class="line">  LV Size                &lt;7.88 GiB</span><br><span class="line">  Current LE             2016</span><br><span class="line">  Segments               1</span><br><span class="line">  Allocation             inherit</span><br><span class="line">  Read ahead sectors     auto</span><br><span class="line">  - currently set to     256</span><br><span class="line">  Block device           253:1</span><br><span class="line">   </span><br><span class="line">  --- Logical volume ---</span><br><span class="line">  LV Path                /dev/vg/tmp</span><br><span class="line">  LV Name                tmp</span><br><span class="line">  VG Name                vg</span><br><span class="line">  LV UUID                oaS1B0-eSu3-s7B4-L2Dl-EUAs-wQxU-Ueohsl</span><br><span class="line">  LV Write Access        read/write</span><br><span class="line">  LV Creation host, time lightdb, 2018-05-12 15:20:39 -0400</span><br><span class="line">  LV Status              available</span><br><span class="line">  # open                 1</span><br><span class="line">  LV Size                1.00 GiB</span><br><span class="line">  Current LE             256</span><br><span class="line">  Segments               1</span><br><span class="line">  Allocation             inherit</span><br><span class="line">  Read ahead sectors     auto</span><br><span class="line">  - currently set to     256</span><br><span class="line">  Block device           253:2</span><br><span class="line">   </span><br><span class="line">  --- Logical volume ---</span><br><span class="line">  LV Path                /dev/vg/root</span><br><span class="line">  LV Name                root</span><br><span class="line">  VG Name                vg</span><br><span class="line">  LV UUID                wqdC7u-9sg4-ekEH-dwR5-kBpy-PdN0-TXVcN0</span><br><span class="line">  LV Write Access        read/write</span><br><span class="line">  LV Creation host, time lightdb, 2018-05-12 15:20:40 -0400</span><br><span class="line">  LV Status              available</span><br><span class="line">  # open                 1</span><br><span class="line">  LV Size                &lt;922.63 GiB</span><br><span class="line">  Current LE             236193</span><br><span class="line">  Segments               1</span><br><span class="line">  Allocation             inherit</span><br><span class="line">  Read ahead sectors     auto</span><br><span class="line">  - currently set to     256</span><br><span class="line">  Block device           253:0</span><br></pre></td></tr></table></figure>

<p>在 <code>/dev/sda</code> 这个硬盘上创建新的分区，使用剩余的全部空间</p>
<figure class="highlight plaintext"><table><tr><td class="code"><pre><span class="line">[root@lightdb ~]# fdisk /dev/sda</span><br><span class="line">Welcome to fdisk (util-linux 2.23.2).</span><br><span class="line"></span><br><span class="line">Changes will remain in memory only, until you decide to write them.</span><br><span class="line">Be careful before using the write command.</span><br><span class="line"></span><br><span class="line"></span><br><span class="line">Command (m for help): t</span><br><span class="line">Partition number (1,2, default 2): 2</span><br><span class="line">Hex code (type L to list all codes): 8e</span><br><span class="line">Changed type of partition &#x27;Linux&#x27; to &#x27;Linux LVM&#x27;</span><br><span class="line"></span><br><span class="line">Command (m for help): p</span><br><span class="line"></span><br><span class="line">Disk /dev/sda: 1000.2 GB, 1000204886016 bytes, 1953525168 sectors</span><br><span class="line">Units = sectors of 1 * 512 = 512 bytes</span><br><span class="line">Sector size (logical/physical): 512 bytes / 512 bytes</span><br><span class="line">I/O size (minimum/optimal): 512 bytes / 512 bytes</span><br><span class="line">Disk label type: dos</span><br><span class="line">Disk identifier: 0x00040a3c</span><br><span class="line"></span><br><span class="line">   Device Boot      Start         End      Blocks   Id  System</span><br><span class="line">/dev/sda1   *        2048      514047      256000   83  Linux</span><br><span class="line">/dev/sda2          514048  1953525167   976505560   8e  Linux LVM</span><br><span class="line"></span><br><span class="line">Command (m for help): w</span><br><span class="line">The partition table has been altered!</span><br></pre></td></tr></table></figure>

<p>把 <code>/dev/sda2</code> 做成 PV</p>
<figure class="highlight plaintext"><table><tr><td class="code"><pre><span class="line">[root@lightdb ~]# pvcreate /dev/sda2 </span><br><span class="line">  Physical volume &quot;/dev/sda2&quot; successfully created.</span><br><span class="line"></span><br><span class="line"></span><br><span class="line">[root@lightdb ~]# pvdisplay</span><br><span class="line">  --- Physical volume ---</span><br><span class="line">  PV Name               /dev/sdb1</span><br><span class="line">  VG Name               vg</span><br><span class="line">  PV Size               931.51 GiB / not usable 4.00 MiB</span><br><span class="line">  Allocatable           yes </span><br><span class="line">  PE Size               4.00 MiB</span><br><span class="line">  Total PE              238466</span><br><span class="line">  Free PE               1</span><br><span class="line">  Allocated PE          238465</span><br><span class="line">  PV UUID               3MQezN-W53d-oj6q-I3GK-9GdP-j4Yj-hag2Dj</span><br><span class="line">   </span><br><span class="line">  &quot;/dev/sda2&quot; is a new physical volume of &quot;&lt;931.27 GiB&quot;</span><br><span class="line">  --- NEW Physical volume ---</span><br><span class="line">  PV Name               /dev/sda2</span><br><span class="line">  VG Name               </span><br><span class="line">  PV Size               &lt;931.27 GiB</span><br><span class="line">  Allocatable           NO</span><br><span class="line">  PE Size               0   </span><br><span class="line">  Total PE              0</span><br><span class="line">  Free PE               0</span><br><span class="line">  Allocated PE          0</span><br><span class="line">  PV UUID               gGrU32-2AW0-10Sv-upON-cXEE-hqC9-fe3X76</span><br></pre></td></tr></table></figure>

<p>给 VG 扩容</p>
<figure class="highlight plaintext"><table><tr><td class="code"><pre><span class="line">[root@lightdb ~]# vgextend vg /dev/sda2 </span><br><span class="line">  Volume group &quot;vg&quot; successfully extended</span><br><span class="line"></span><br><span class="line">[root@lightdb ~]# vgdisplay</span><br><span class="line">  --- Volume group ---</span><br><span class="line">  VG Name               vg</span><br><span class="line">  System ID             </span><br><span class="line">  Format                lvm2</span><br><span class="line">  Metadata Areas        2</span><br><span class="line">  Metadata Sequence No  6</span><br><span class="line">  VG Access             read/write</span><br><span class="line">  VG Status             resizable</span><br><span class="line">  MAX LV                0</span><br><span class="line">  Cur LV                3</span><br><span class="line">  Open LV               3</span><br><span class="line">  Max PV                0</span><br><span class="line">  Cur PV                2</span><br><span class="line">  Act PV                2</span><br><span class="line">  VG Size               &lt;1.82 TiB</span><br><span class="line">  PE Size               4.00 MiB</span><br><span class="line">  Total PE              476870</span><br><span class="line">  Alloc PE / Size       476870 / &lt;1.82 TiB</span><br><span class="line">  Free  PE / Size       0 / 0   </span><br><span class="line">  VG UUID               dzuyJa-LoIn-ZUAY-BvEN-X13J-EYkc-daFgy5</span><br></pre></td></tr></table></figure>

<p>给 <code>/dev/mapper/vg-root</code> 这个 LV 扩容</p>
<figure class="highlight plaintext"><table><tr><td class="code"><pre><span class="line">[root@lightdb ~]# lvextend -l +100%FREE /dev/vg/root</span><br><span class="line">  Size of logical volume vg/root changed from &lt;922.63 GiB (236193 extents) to 1.81 TiB (474598 extents).</span><br><span class="line">  Logical volume vg/root successfully resized.</span><br><span class="line">  </span><br></pre></td></tr></table></figure>

<p>刷新文件系统</p>
<figure class="highlight plaintext"><table><tr><td class="code"><pre><span class="line">[root@lightdb ~]# resize2fs /dev/vg/root</span><br><span class="line">resize2fs 1.42.9 (28-Dec-2013)</span><br><span class="line">Filesystem at /dev/vg/root is mounted on /; on-line resizing required</span><br><span class="line">old_desc_blocks = 116, new_desc_blocks = 232</span><br><span class="line">The filesystem on /dev/vg/root is now 485988352 blocks long.</span><br></pre></td></tr></table></figure>

<p>查看下是否成功</p>
<figure class="highlight plaintext"><table><tr><td class="code"><pre><span class="line">[root@lightdb ~]# df -hP</span><br><span class="line">Filesystem           Size  Used Avail Use% Mounted on</span><br><span class="line">/dev/mapper/vg-root  1.8T  1.2G  1.7T   1% /</span><br><span class="line">devtmpfs             7.8G     0  7.8G   0% /dev</span><br><span class="line">tmpfs                7.8G     0  7.8G   0% /dev/shm</span><br><span class="line">tmpfs                7.8G  8.6M  7.8G   1% /run</span><br><span class="line">tmpfs                7.8G     0  7.8G   0% /sys/fs/cgroup</span><br><span class="line">/dev/sda1            243M  148M   83M  65% /boot</span><br><span class="line">/dev/mapper/vg-tmp   976M  2.6M  907M   1% /tmp</span><br><span class="line">tmpfs                1.6G     0  1.6G   0% /run/user/0</span><br></pre></td></tr></table></figure>

<p>根目录已经是1.8T，扩容成功！</p>
<p>重启服务器看了下，也没有什么异常，OVER！</p>
<hr>
<h3 id="扩展阅读"><a href="#扩展阅读" class="headerlink" title="扩展阅读"></a>扩展阅读</h3><p>简单说下什么是 <strong>LVM</strong>。</p>
<p><strong>LVM</strong> 是 <strong>Logical Volume Manager</strong> 的简称。可以用来在物理硬盘上创建虚拟的卷，使服务器的硬盘动态扩容变的更加轻松。</p>
<p>其中这里面涉及到以下几个常用概念：</p>
<ul>
<li><p>物理卷（PV, Physical Volume）<br>物理卷就是指磁盘,磁盘分区或从逻辑上和磁盘分区具有同样功能的设备(如RAID)，是LVM的基本存储逻辑块，但和基本的物理存储介质（如分区、磁盘等）比较，却包含有和LVM相关的管理参数。当前LVM允许你在每个物理卷上保存这个物理卷的0至2份元数据拷贝.默认为1,保存在设备的开始处.为2时,在设备结束处保存第二份备份.</p>
</li>
<li><p>卷组（VG, Volume Group）<br><strong>LVM卷组类似于非LVM系统中的物理硬盘</strong>，其由物理卷组成。能在卷组上创建一个或多个“LVM分区”（逻辑卷），LVM卷组由一个或多个物理卷组成。</p>
</li>
<li><p>逻辑卷（LV, Logical Volume）<br>LVM的逻辑卷类似于非LVM系统中的硬盘分区，在逻辑卷之上能建立文件系统(比如&#x2F;home或&#x2F;usr等)。</p>
</li>
</ul>
<p>其实可以简单的理解为：PV相当于是传统硬盘的扇区，VG相当于是传统硬盘，LV是在VG上划分的逻辑分区。</p>
<p>Over!</p>
]]></content>
      <tags>
        <tag>教程</tag>
      </tags>
  </entry>
  <entry>
    <title>在 Symfony4 的 Console 中使用数据服务</title>
    <url>/2018/05/17/how-to-connect-db-in-symfony4-console.html</url>
    <content><![CDATA[<p>真的是刚爬出一个坑，又跳到一个新坑。<a href="https://github.com/ety001/steem-lightdb">LightDB</a> 的 <code>Transfer</code> 组件使用 <code>Symfony4</code> 框架，感觉 <code>Symfony3</code> 出来都没有多久，就又出来4了。本来想使用框架来节约开发时间的，结果又额外增加了时间。</p>
<p>在 <code>Symfony</code> 的最新文档里，给出的在 <code>Console</code> 中使用数据库的最佳实践方案是，把数据库的调用封装进 <code>Service</code> ，然后通过容器注入，来实现最终的数据库调用。</p>
<p>下面是代码示例：</p>
<p>src&#x2F;Service&#x2F;ExampleManager.php</p>
<figure class="highlight plaintext"><table><tr><td class="code"><pre><span class="line">&lt;?php</span><br><span class="line">namespace App\Service;</span><br><span class="line"></span><br><span class="line">use Doctrine\ORM\EntityManagerInterface;</span><br><span class="line">use App\Entity\Example;</span><br><span class="line"></span><br><span class="line">class ExampleManager</span><br><span class="line">&#123;</span><br><span class="line">    private $em;</span><br><span class="line"></span><br><span class="line">    public function __construct(</span><br><span class="line">                        EntityManagerInterface $em</span><br><span class="line">                    )</span><br><span class="line">    &#123;</span><br><span class="line">        $this-&gt;em = $em;</span><br><span class="line">    &#125;</span><br><span class="line"></span><br><span class="line">   public function findSomething($id)</span><br><span class="line">   &#123;</span><br><span class="line">       return $this-&gt;em-&gt;getRepository(Example::class)-&gt;find($id);</span><br><span class="line">   &#125;</span><br><span class="line">&#125;</span><br></pre></td></tr></table></figure>

<p>src&#x2F;Command&#x2F;ExampleRunCommand.php</p>
<figure class="highlight plaintext"><table><tr><td class="code"><pre><span class="line">&lt;?php</span><br><span class="line">namespace App\Command;</span><br><span class="line">use Symfony\Component\Console\Command\Command;</span><br><span class="line">use Symfony\Component\Console\Input\InputArgument;</span><br><span class="line">use Symfony\Component\Console\Input\InputInterface;</span><br><span class="line">use Symfony\Component\Console\Input\InputOption;</span><br><span class="line">use Symfony\Component\Console\Output\OutputInterface;</span><br><span class="line">use Symfony\Component\Console\Style\SymfonyStyle;</span><br><span class="line"></span><br><span class="line">use App\Service\ExampleManager;</span><br><span class="line"></span><br><span class="line">class TransferRunCommand extends Command</span><br><span class="line">&#123;</span><br><span class="line">    protected static $defaultName = &#x27;example:run&#x27;;</span><br><span class="line">    private $example_manager;</span><br><span class="line"></span><br><span class="line">    public function __construct(</span><br><span class="line">                        ExampleManager $example_manager,</span><br><span class="line">                    )</span><br><span class="line">    &#123;</span><br><span class="line">        parent::__construct();</span><br><span class="line">        $this-&gt;example_manager = $example_manager;</span><br><span class="line">    &#125;</span><br><span class="line"></span><br><span class="line">    protected function configure()</span><br><span class="line">    &#123;</span><br><span class="line">        $this</span><br><span class="line">            -&gt;setDescription(&#x27;run the example shell&#x27;)</span><br><span class="line">        ;</span><br><span class="line">    &#125;</span><br><span class="line"></span><br><span class="line">    protected function execute(InputInterface $input, OutputInterface $output)</span><br><span class="line">    &#123;</span><br><span class="line">       $result = $this-&gt;example_manager-&gt;findSomething(1);</span><br><span class="line">    &#125;</span><br><span class="line">&#125;</span><br></pre></td></tr></table></figure>

<p>Over!!!</p>
]]></content>
      <tags>
        <tag>教程</tag>
      </tags>
  </entry>
  <entry>
    <title>Doctrine不支持在 ManyToMany 的 join table 上增加额外的字段</title>
    <url>/2018/05/18/doctrine-not-support-adding-column-into-join-table.html</url>
    <content><![CDATA[<p><a href="https://github.com/ety001/steem-lightdb">SteemLightDB</a> 的用户表设计，<br>之前使用的是 Many To Many self-referencing 的方法来实现的用户关注关系的数据库实现。</p>
<p>昨天发现在关注数据中，还有一个 what 字段我给疏忽了，这个字段表明是“关注”还是“屏蔽”，<br>于是想要在 join table 中加一个字段。但是看了 Doctrine 的文档后，发现并没有相关的方法，<br>按照 Doctrine 的意思是，ManyToMany 的 join table 的目的是为了连接两个表，<br>因此只会存储两个被连接表的外键字段，如果想要增加 extra column，需要自己手动建立 join table，<br>实现 OneToMany &lt;&#x3D;&gt; ManyToOne 的关系。</p>
<p>Over!</p>
]]></content>
      <tags>
        <tag>经验</tag>
      </tags>
  </entry>
  <entry>
    <title>在PHP中捕获系统信号</title>
    <url>/2018/05/21/how-to-catch-signal-in-php.html</url>
    <content><![CDATA[<p>为了让 <a href="https://github.com/ety001/steem-lightdb">LightDB</a> 在退出的时候更加安全，因此考虑加入信号处理。目前 <a href="https://github.com/ety001/steem-lightdb">LightDB</a> 在主循环中，先获取区块数据，再遍历区块数据进行加工，最后入库，这几个步骤中，最不希望发生的事情就是，在加工数据最后入库的时候，程序被中断。</p>
<p>因此加入信号处理，对人为执行 ctrl + c 的时候，把程序中断放到获取数据阶段或者入库结束之后。</p>
<p>以下是示例代码</p>
<figure class="highlight plaintext"><table><tr><td class="code"><pre><span class="line">&lt;?php</span><br><span class="line">//使用ticks需要PHP 4.3.0以上版本</span><br><span class="line">// declare(ticks = 1);</span><br><span class="line"></span><br><span class="line">class a &#123;</span><br><span class="line">    public function __construct() &#123;</span><br><span class="line">        pcntl_signal(SIGTERM, array($this, &#x27;handle&#x27;));</span><br><span class="line">        pcntl_signal(SIGINT, array($this, &#x27;handle&#x27;));</span><br><span class="line">    &#125;</span><br><span class="line"></span><br><span class="line">    public function handle($signo) &#123;</span><br><span class="line">        var_dump($signo);</span><br><span class="line">        exit();</span><br><span class="line">    &#125;</span><br><span class="line"></span><br><span class="line">    public function start() &#123;</span><br><span class="line">        while (1) &#123;</span><br><span class="line">            echo time().&quot;\n&quot;;</span><br><span class="line">            sleep(1);</span><br><span class="line">            echo &quot;11111111\n&quot;;</span><br><span class="line">            pcntl_signal_dispatch();</span><br><span class="line">            echo &quot;22222222\n&quot;;</span><br><span class="line">        &#125;</span><br><span class="line">    &#125;</span><br><span class="line"></span><br><span class="line">&#125;</span><br><span class="line"></span><br><span class="line">$b = new a();</span><br><span class="line">$b-&gt;start();</span><br></pre></td></tr></table></figure>

<p>PHP处理信号的方法是，把程序收到的信号入队列，然后再从队列里取信号处理。这样在使用 <code>pcntl_signal</code> 方法的时候，需要加上 <code>declare(ticks = 1);</code> 或者 <code>pcntl_signal_dispatch();</code>，二者添加一个即可。<code>declare(ticks = 1);</code> 的作用是，让 <code>PHP</code> 每执行一行代码就去触发下从队列取信号的操作。<code>pcntl_signal_dispatch();</code> 的作用则是，主动去处理队列里的信号。如果这两句不添加一个，那么最终的执行效果是，你触发了信号，但是程序只是对信号进行入队列的操作，没有程序来执行队列中的信号。</p>
<p>另外一个需要注意的就是，<code>pcntl_signal</code> 的第二个参数的使用。网上多是面向过程的使用方法，直接写要绑定的回调函数的名字即可，PHP文档中也只是有面向过程的使用方法。经过搜索，才找到绑定对象中的函数的方法，就是上面示例代码的方法。</p>
<p>Over!</p>
]]></content>
      <tags>
        <tag>教程</tag>
      </tags>
  </entry>
  <entry>
    <title>基于 alpine 构建 PHP 的 docker镜像时 iconv 扩展有缺陷</title>
    <url>/2018/05/22/iconv-has-an-bug-when-build-alpine-docker-images.html</url>
    <content><![CDATA[<p>在部署 <a href="https://github.com/ety001/steem-lightdb">LightDB</a> 第二阶段的代码的时候，需要基于 alpine 构建 PHP 镜像，结果发现 iconv 扩展有缺陷，具体表现见 <a href="https://github.com/docker-library/php/issues/240">https://github.com/docker-library/php/issues/240</a> 。</p>
<p>通过该 issue 中提到的那个 hack 方法可以临时解决</p>
<figure class="highlight plaintext"><table><tr><td class="code"><pre><span class="line">RUN apk add --no-cache --repository http://dl-3.alpinelinux.org/alpine/edge/testing gnu-libiconv</span><br><span class="line">ENV LD_PRELOAD /usr/lib/preloadable_libiconv.so</span><br></pre></td></tr></table></figure>

<p>但是并不是完美解决，虽然 iconv 函数可用了，但是扩展使用的库版本依旧是 unknown，并且在使用 <a href="https://github.com/yetanotherape/diff-match-patch">yetanotherape&#x2F;diff-match-patch</a> 的时候，依旧有报错无法使用。( <a href="https://github.com/yetanotherape/diff-match-patch">yetanotherape&#x2F;diff-match-patch</a> 在我之前的 <a href="">这篇文章</a> 里有介绍 )</p>
<p>基本上导致 iconv 有问题的原因，可能是 alpine 使用的是 musl ，目前基于 musl 的 iconv 库可能本身就有些问题，具体问题不详。</p>
<p>最终不得不改用 ubuntu 18.04 来构建，可参考我的 <a href="https://github.com/ety001/dockerfile/tree/master/php7.2-ubuntu18.04">构建文件</a>。使用 ubuntu 构建的最大问题就是最终的镜像包过大，目前我的这个封装，镜像包大约300多兆，之前基于 alpine 构建的话，大小在100M以内。</p>
]]></content>
      <tags>
        <tag>教程</tag>
      </tags>
  </entry>
  <entry>
    <title>优雅的终止Docker容器</title>
    <url>/2018/05/23/how-to-stop-docker-container-gracefully.html</url>
    <content><![CDATA[<p>之前在文章中提到过通过<a href="https://steemit.com/cn-dev/@ety001/php">PHP捕获信号</a>，以优雅的关闭程序，保证程序能够完成数据写入后才关闭。由于目前程序是通过 Docker 进行部署的，因此需要看下 Docker 容器的关闭方式。</p>
<p>目前 Docker 容器关闭可以通过两条命令，一条是 <code>docker stop</code> 一条是 <code>docker kill</code>。</p>
<p>先看 <code>docker stop</code>。</p>
<figure class="highlight plaintext"><table><tr><td class="code"><pre><span class="line">~/ &gt; docker stop -h</span><br><span class="line">Flag shorthand -h has been deprecated, please use --help</span><br><span class="line"></span><br><span class="line">Usage:	docker stop [OPTIONS] CONTAINER [CONTAINER...]</span><br><span class="line"></span><br><span class="line">Stop one or more running containers</span><br><span class="line"></span><br><span class="line">Options:</span><br><span class="line">  -t, --time int   Seconds to wait for stop before killing it (default 10)</span><br></pre></td></tr></table></figure>

<p><code>docker stop</code> 命令执行的时候，会先向容器中PID为1的进程发送系统信号SIGTERM，然后等待容器中的应用程序终止执行，如果等待时间达到设定的超时时间，或者默认的10秒，会继续发送SIGKILL的系统信号强行kill掉进程。在容器中的应用程序，可以选择忽略和不处理SIGTERM信号，不过一旦达到超时时间，程序就会被系统强行kill掉，因为SIGKILL信号是直接发往系统内核的，应用程序没有机会去处理它。在使用docker stop命令的时候，我们唯一能控制的是超时时间。</p>
<p>目前 <a href="https://github.com/ety001/steem-lightdb">SteemLightDB</a> 使用 <code>docker stop -t 60 lightdb-transfer</code> 来停止程序，60秒的超时时间足够了。</p>
<p>另外一个就是 <code>docker kill</code>。</p>
<figure class="highlight plaintext"><table><tr><td class="code"><pre><span class="line">~/ &gt; docker kill -h</span><br><span class="line">Flag shorthand -h has been deprecated, please use --help</span><br><span class="line"></span><br><span class="line">Usage:	docker kill [OPTIONS] CONTAINER [CONTAINER...]</span><br><span class="line"></span><br><span class="line">Kill one or more running containers</span><br><span class="line"></span><br><span class="line">Options:</span><br><span class="line">  -s, --signal string   Signal to send to the container (default &quot;KILL&quot;)</span><br></pre></td></tr></table></figure>

<p><code>docker kill</code> 的好处就是可以使用自定义的信号。默认信号是 <code>SIGKILL</code>，我们可以通过使用 <code>-s</code> 参数，使用指定信号。比如在我的程序中，我有对 <code>SIGINT</code> 信号进行处理，因此使用 <code>docker kill -s SIGINT lightdb-transfer</code> 也可以优雅的停止容器。</p>
<p>Over!!!</p>
]]></content>
      <tags>
        <tag>教程</tag>
      </tags>
  </entry>
  <entry>
    <title>PyMysql 在多线程下的问题</title>
    <url>/2018/05/31/pymysql-has-an-bug-in-mutiple-threadings.html</url>
    <content><![CDATA[<p>最近在使用 Python 重写 LightDB 的第二层的数据转换程序，因为之前 PHP 版的转换程序效率太低了（主要是设计思路的问题）。使用 Python 换了个思路来实现。</p>
<p>现在发现了 PyMysql 在多线程下工作异常，示例代码大致如下：</p>
<p><img src="https://steemeditor.com/storage/images/SsGMFPAiBjfavtpXzIIG3akSHovOkpMSttxiPxS9.png"></p>
<p>执行效果如下：</p>
<p><img src="https://steemeditor.com/storage/images/cDEQhhhyThI4sJI9m4M9jsdMOJXn71GHDEO2bTWO.png"></p>
<p>通过搜索引擎找到这个 Issue (<a href="https://github.com/PyMySQL/PyMySQL/issues/422">https://github.com/PyMySQL/PyMySQL/issues/422</a>)，在 7 楼有提到，</p>
<figure class="highlight plaintext"><table><tr><td class="code"><pre><span class="line">See https://www.python.org/dev/peps/pep-0249/#threadsafety</span><br><span class="line"></span><br><span class="line">PyMySQL&#x27;s threadsafety is 1.</span><br></pre></td></tr></table></figure>

<p>解决方案，在这个 Issue 中也提到了，就是一个 process&#x2F;thread 中开一个 mysql 的连接。</p>
<p>Oh my god !!!!!</p>
<p>这显然并不好！</p>
<p>另外，@oflyhigh O哥给找到了一个小哥写的库，<a href="https://github.com/jkklee/pymysql-connpool">https://github.com/jkklee/pymysql-connpool</a> ，这个库的目的就是实现一个 Mysql connection pool 来解决多线程的问题。准备尝试下这个库。感谢 O哥。</p>
]]></content>
      <tags>
        <tag>经验</tag>
      </tags>
  </entry>
  <entry>
    <title>如何用PHP完成Steem中的patch</title>
    <url>/2018/05/19/how-to-use-diff-match-patch-in-php.html</url>
    <content><![CDATA[<p>在 <a href="https://github.com/ety001/steem-lightdb">LightDB</a> 开发过程中，如何把已修改的文章更新到原有文章上，是个很重要的功能。</p>
<p>Steem 对于大篇幅的文章修改，使用的是 patch 的方式，把增量信息存入到区块链上，这样可以很大程度上减少空间开销，但是原始数据对人类不友好。因此在最终给人阅读前，需要由程序把所有变动的 patch 都依次打上才行。</p>
<p>经过调研，发现 Steem 使用的是 Google 的 <a href="https://github.com/google/diff-match-patch">DiffMatchPatch</a> 这个库，但是遗憾的是，没有针对 PHP 的封装。不过最终我也还是找到一个 PHP 的库，<a href="https://github.com/yetanotherape/diff-match-patch">https://github.com/yetanotherape/diff-match-patch</a> 。</p>
<p>这个库的使用非常的简单，直接上示例</p>
<figure class="highlight plaintext"><table><tr><td class="code"><pre><span class="line">&lt;?php</span><br><span class="line">require __DIR__ . &#x27;/vendor/autoload.php&#x27;;</span><br><span class="line">use DiffMatchPatch\DiffMatchPatch;</span><br><span class="line">$dmp = new DiffMatchPatch();</span><br><span class="line"></span><br><span class="line">$old = &quot;[SteemLightDB](https://github.com/ety001/steem-lightdb) (以下简称 LightDB ) 是一个基于 Steem 链的 MySQL 数据服务。</span><br><span class="line"></span><br><span class="line">在有 SBDS 的情况下，为啥还要在弄一个 SteemLightDB 呢？</span><br><span class="line"></span><br><span class="line">由于之前搭建过 SBDS 服务，发现里面有很多的问题，其中稳定性、数据原始性、数据容量这三个问题比较突出。</span><br><span class="line"></span><br><span class="line">* SBDS 的稳定性直接依赖于其取数据的节点的稳定性；</span><br><span class="line">* SBDS 的数据太原始，加工度不够，如果应用开发者需要一些数据之间的关系，需要开发者获取后自己加工，增加了开发者的开发工作量和难度；</span><br><span class="line">* SBDS 占用空间太大，对于穷人来说，服务器费用开销太大。&quot;;</span><br><span class="line"></span><br><span class="line"></span><br><span class="line">$patches = &quot;@@ -32,11 +32,8 @@</span><br><span class="line"> om/e</span><br><span class="line">-ty0</span><br><span class="line"> 01/s</span><br><span class="line">@@ -90,17 +90,16 @@</span><br><span class="line">  %E6%95%B0%E6%8D%AE%E6%9C%8D%E5%8A%A1%E3%80%82%0A%0A</span><br><span class="line">-%E5%9C%A8</span><br><span class="line"> %E6%9C%89 SBDS %E7%9A%84</span><br><span class="line">&quot;;</span><br><span class="line"></span><br><span class="line"></span><br><span class="line"></span><br><span class="line">$new_content = &quot;[SteemLightDB](https://github.com/e01/steem-lightdb) (以下简称 LightDB ) 是一个基于 Steem 链的 MySQL 数据服务。</span><br><span class="line"></span><br><span class="line">有 SBDS 的情况下，为啥还要在弄一个 SteemLightDB 呢？</span><br><span class="line"></span><br><span class="line">由于之前搭建过 SBDS 服务，发现里面有很多的问题，其中稳定性、数据原始性、数据容量这三个问题比较突出。</span><br><span class="line"></span><br><span class="line">* SBDS 的稳定性直接依赖于其取数据的节点的稳定性；</span><br><span class="line">* SBDS 的数据太原始，加工度不够，如果应用开发者需要一些数据之间的关系，需要开发者获取后自己加工，增加了开发者的开发工作量和难度；</span><br><span class="line">* SBDS 占用空间太大，对于穷人来说，服务器费用开销太大。&quot;;</span><br><span class="line"></span><br><span class="line"></span><br><span class="line"></span><br><span class="line">$patches = $dmp-&gt;patch_fromText($patches);</span><br><span class="line">$res = $dmp-&gt;patch_apply($patches, $old);</span><br><span class="line">var_dump($res);</span><br><span class="line">var_dump($new_content);</span><br></pre></td></tr></table></figure>

<p>这里需要注意一点，就是 patch 中数据的格式。之前一直卡在这里调不出来的原因就是 <a href="https://steemd.com/">steemd.com</a> 中提供的 patch 数据格式有问题。就像我上面给出的示例代码中的 patch ，其中有些行前面是有空格的，而在 <a href="https://steemd.com/">steemd.com</a> 提供数据中，这些空格是消失了的。。。</p>
<p><img src="https://steemeditor.com/storage/images/yvNCoVX0AvlY0tozipdljcqLA3fJslbYnRAhfpFL.png"></p>
<p>除此之外，还有一个坑，就是 Steem 会针对文章长短来采取是否使用 patch。。。也就是说如果你的文章就一句话，如果你编辑修好提交了，那么就不会用 patch，而是直接把你新修改的内容直接提交保存。。。具体多长我也不清楚，我没有看源码，但是有一点可以肯定就是这个操作让人很蛋疼。目前我的解决方案是使用 try catch 来区分是否使用了 patch。</p>
<figure class="highlight plaintext"><table><tr><td class="code"><pre><span class="line">try &#123;</span><br><span class="line">	$patches = $dmp-&gt;patch_fromText($patches);</span><br><span class="line">	$res = $dmp-&gt;patch_apply($patches, $old);</span><br><span class="line">&#125; catch(\Exception $e) &#123;</span><br><span class="line">	$res = $patches;</span><br><span class="line">&#125;</span><br></pre></td></tr></table></figure>

<p>虽然目前看貌似没有什么问题，但是感觉实现的很不优雅。</p>
<p>OVER!</p>
]]></content>
      <tags>
        <tag>教程</tag>
      </tags>
  </entry>
  <entry>
    <title>对于btsbots修复进程的阶段性总结</title>
    <url>/2018/07/17/summary-of-fixing-btsbots.html</url>
    <content><![CDATA[<p>25天前填完 <a href="https://steemit.com/utopian-io/@ety001/lightdb-v0-0-2-has-been-released">LightDB</a> 的坑以后，就开始研究 <strong>alt</strong> 留下的那个 <strong>btsbots</strong> 的 <a href="https://github.com/pch957/btsbots-demo-2016">代码</a> 了。之前也有<a href="https://steemit.com/notbtsbots/@aperson/introducing-not-btsbots">团队在修复这套代码</a> ，但是考虑到这么重要的一个设施，还是把核心技术握在自己手里比较好，要不然哪天那个团队歇菜了，又要凉。</p>
<p>代码断断续续的看了将近一个月了，总的感受就是崩溃。</p>
<p>从我开始参加工作开始，接的活都是半路加入救火的，没有人指导，只有代码，基本上是靠分析输出数据和看代码来逆向梳理需求的。但是这次修复 <strong>btsbots</strong> 的难度加大了，因为不会 *C++*，只能对着各种输出数据去逆向推理 <strong>btsbots</strong> 的代码到底想要做什么，为什么这么做。所以等这个 <strong>btsbots</strong> 修好，还是要找时间去学 <strong>C++</strong> 了。</p>
<p>目前并没有什么实质的代码修改，还停留在分析代码的阶段，该文就是基于目前我对于 <strong>btsbots</strong> 的理解进行的总结。</p>
<p>最简单的做市需要的数据无非就是当前账户内各种币剩多少，交易对是否满足下单要求，是否有订单需要取消。<strong>btsbots</strong> 的思路其实很简单，就是基于 <strong>1.11.x</strong> 这个 <strong>operation history object</strong> 来把链上的所有操作 <strong>replay</strong> 一遍，然后得到所有用户的 <strong>balance</strong> 和所有的交易对深度数据。</p>
<p><strong>btsbots</strong> 项目使用 <strong>python</strong> 来完成从链上取数据并 <strong>replay</strong> 的操作，然后存入 <strong>MongoDB</strong>，最后基于 <strong>Meteor</strong> 开发了应用界面来读取 <strong>MongoDB</strong> 中的数据并展示，用户可以设置自己的做市逻辑并在浏览器本地完成下单和取消订单的签名操作。</p>
<p>思路很明确，但是比较让人恶心的就是数据和需求的分析了。</p>
<p>目前几乎所有的时间都在分析 <strong>scripts</strong> 目录下的 <strong>python</strong> 代码的逻辑，因为这一块之前在试跑的时候，数据一直有问题。</p>
<p><strong>scripts</strong> 目录下主要就是 <strong>correct-balance.py</strong> , <strong>monitor.py</strong>, <strong>statistics.py</strong> 这三个文件。</p>
<p>这三个文件中，<strong>monitor.py</strong> 和 <strong>statistics.py</strong> 这两个的目的我是最明确的了，<strong>correct-balance.py</strong> 的目的一直很糊涂。</p>
<p>之前忘记在哪里看到的部署文档说，第一次运行 <strong>btsbots</strong> 的时候，要先运行  <strong>correct-balance.py</strong> 进行 <strong>balance</strong> 和 <strong>order</strong> 的初始化。然而看 <strong>correct-balance.py</strong> 的代码中，只是去获取 <strong>1.8.x</strong> 这一种类型的订单的数据和 <strong>2.5.x</strong> 的 <strong>balance</strong> 数据。在代码的头部，你需要指定 <strong>x</strong> 的上限，如下图</p>
<p><img src="https://steemeditor.com/storage/images/Nch5576DeiraOIHgnlm6TV0jZylxGfTFM7CYNGsv.png"></p>
<p>然后循环获取从 <strong>1.8.0</strong> 到 <strong>1.8.x</strong> 获取订单数据并插入数据库，从 <strong>2.5.0</strong> 到 <strong>2.5.x</strong> 获取 <strong>balance</strong> 数据并插入数据库。完成这两步以后，会再遍历一遍已经插入数据库的订单数据，然后去更新数据库里已经存下来的 <strong>balance</strong>，如图：</p>
<p><img src="https://steemeditor.com/storage/images/oOX8LmuGG982GhBZg9tcBkixpcJQPyEVztDOl3Gf.png"></p>
<p><img src="https://steemeditor.com/storage/images/tsQErm0jNo9E8696zGG1lh0KuMywInXe9oeEEiAr.png"></p>
<p><img src="https://steemeditor.com/storage/images/yO62x3OpZuFbLEl5V03q0VNfHvzIwNyPn5HXKgol.png"></p>
<p><img src="https://steemeditor.com/storage/images/IhKwYQ8xhNHLoAOLMQGfF9oIdqsxIK14qoiAxNAV.png"></p>
<p>这里我就有疑问了!!!</p>
<p>首先是为什么第一次获取数据只获取 <strong>1.8.x</strong> 这一种类型的订单，而在下面的 <strong>add_b_from_o</strong> 函数中却有 <strong>1.4.x</strong> 和 <strong>1.7.x</strong> 的处理逻辑？</p>
<p>其次就是获取到的 <strong>2.5.x</strong> 是最新的 <strong>balance</strong> 数据，而拿着订单中的 <strong>amount</strong> 在最新 <strong>balance</strong> 上加减是不是错误的？我通过自己手动从 <strong>API</strong> 获取到的 <strong>2.5.x</strong> 的数据来看，拿到的这些 <strong>balance</strong> 数据都是刨除掉未成交订单额度后的，而在 <strong>btsbots</strong> 中却又在 <strong>2.5.x</strong> 的数据的基础上去刨除订单额度貌似是不对的，但是现在我又不敢确定，因为我不确定 <strong>1.4.x</strong>, <strong>1.7.x</strong>, <strong>1.8.x</strong>这些数据是代表的是未成交的订单，还是所有的订单。</p>
<p>最后就是感觉这里处理 <strong>balance</strong> 的方法跟 <strong>monitor.py</strong> 的处理方法是冲突的，这里先按下不表。我们先去看 <strong>monitor.py</strong> 的代码。</p>
<p>在 <strong>monitor.py</strong> 中，思路很简单，就是获取 <strong>1.11.x</strong>，然后根据各种不同的 <strong>operation type</strong> 来分别处理数据，最后把数据更新进数据库。这个脚本里的疑问也是有不少。</p>
<p>首先是怎么触发的问题，先看下图的代码，</p>
<p><img src="https://steemeditor.com/storage/images/acKGEdCdTl7bePOxqz3z2hkG5XrWJf6AvsoQ2vEL.png"></p>
<p>其中 63 行是我补上的代码。与第 63 行类似的代码其实在这个类初始化的时候已经执行过了，这个在<a href="https://github.com/pch957/python-bts/blob/master/bts/ws/base_protocol.py#L87">这里</a>可以看到。在 <strong>python-bts</strong> 库里，默认是把 <strong>clear_filter</strong> 置为 <strong>false</strong> 了，这意味着只有你发送了 <strong>get_object</strong> 的指令，服务端才会推送你刚才获取的那个 <strong>object</strong> 的变动。</p>
<p>在没有我补上的 63 行的代码之前，执行 <strong>monitor.py</strong> 其实是没有任何数据进数据库的，因为所有的插入数据库的操作都在 <strong>onOperation</strong> 里面，而 <strong>onOperation</strong> 的触发是在用户订阅的 <strong>1.11.x</strong> 的 <strong>object</strong> 有变动的时候才会触发，而程序代码从开始运行，就没有 <strong>get_object</strong> 的操作，所以服务端并不知道你想要获取哪个 <strong>object</strong> 的变动信息。加上 63 行后，把 <strong>clear_filter</strong> 置为 <strong>true</strong>，那么服务端就会推送所有的 <strong>object</strong> 的变动信息了。</p>
<p>其次就是语言方面的问题了，如下图</p>
<p><img src="https://steemeditor.com/storage/images/Cgrg1g3FiSB4jsBuKHx5xHO5X22YXWcgjfOwMeQq.png"></p>
<p>由于我写 <strong>python</strong> 的时间不久，这里并不明白加锁的意义。如果加锁是为了保证共享资源的修改顺序的话，为啥还要用协程来异步？这里我还需要再多看看这方面的文章去了解下协程中的锁的目的。</p>
<p>然后这里第 41 行的代码在执行的时候也有问题。在这个类的父类中，看到作者最早是把 <strong>op_id_begin</strong> 置为 <strong>1.11.0</strong> 的，在从数据库中取不到数据的时候（也就是说第一次运行的时候），但是现在注释掉了，改为了置为 <strong>None</strong>，这就导致这里的代码如果按照作者原先的逻辑，就是从当前程序执行的时刻起，开始数据的同步。这也是之前那个团队修复的 <strong>btsbots</strong> 为何不支持老账户的原因。这里我改回到 <strong>1.11.0</strong> 后，运行程序跑了一天多后，发现有报错，大致意思就是插入的数据的索引有重复导致插入失败。这个问题现在还没有去深究原因。</p>
<p>最后为解决的难点就是这个 <strong>monitor.py</strong> 对 <strong>operation</strong> 的处理了。先看下面两个截图感受下</p>
<p><img src="https://steemeditor.com/storage/images/wTy4zQxaCv5efixHejOjxU8jtJ71Nbi9u2WKCXGI.png"></p>
<p><img src="https://steemeditor.com/storage/images/CBQGHbM8uTVwJiqCmuf45N07MXwOIIoaaduZ6lUx.png"></p>
<p>第一个截图中，是初始化了所有类型的 <strong>op</strong>，从 <strong>btsbots</strong> 的代码里看，截止到这份代码的最后修改时间，一共有 44 个类型，这里比较蛋疼的就是之后的 <strong>bitshares-core</strong> 中是否有再新增类型吗？由于我看不懂 **C++**，所以这里就会不确定。这 44 个类型里，有些没有手续费的类型，就去掉了没有处理，因为这个对于 <strong>balance</strong> 不产生影响，剩下的类型由 16 个 <strong>handler</strong> 处理，这里就有疑问了。大致扫过这些 <strong>handler</strong>，里面也有对数据库中的 <strong>balance</strong> 的操作，那么这里通过 <strong>1.11.x</strong> 对 <strong>balance</strong> 进行的操作与 <strong>correct-balance.py</strong> 文件中，通过 <strong>1.8.x</strong> 对 <strong>balance</strong> 的操作会不会有冲突？这个问题现在我一直在里面绕着出不来。现在的打算是，最好能确认 <strong>correct-balance.py</strong> 的意义，然后把这个文件中的逻辑整合进 <strong>monitor.py</strong> 中。</p>
<p>目前还没有深入看 <strong>statistics.py</strong> 这个文件，这个文件的主要作用就是通过 <strong>1.2.9952</strong> 发布的喂价来更新数据库里的交易对的交易价格，另外就是统计一下交易数据。</p>
<p>纵观这三个文件，还有个疑问就是三个文件都在获取 <strong>global properties</strong>，且都更新数据库，那么这里面到底会不会有问题有冲突，这个还没有细看。</p>
<p>以上就是现有的收获了。接下来有两个方向，一个是继续看所有的 <strong>handler</strong>，把具体的处理逻辑都看完，然后再修复，另一个方向就是跳过细看 <strong>handler</strong>，直接去看看那个索引冲突的问题，强行把程序跑起来看看。</p>
<p>最后再附上一份我搜集的 <strong>object id</strong>：</p>
<table>
<thead>
<tr>
<th>ID</th>
<th>Object Type</th>
</tr>
</thead>
<tbody><tr>
<td>1.1.x</td>
<td>base object</td>
</tr>
<tr>
<td>1.2.x</td>
<td>account object</td>
</tr>
<tr>
<td>1.3.x</td>
<td>asset object</td>
</tr>
<tr>
<td>1.4.x</td>
<td>force settlement object</td>
</tr>
<tr>
<td>1.5.x</td>
<td>committee member object</td>
</tr>
<tr>
<td>1.6.x</td>
<td>witness object</td>
</tr>
<tr>
<td>1.7.x</td>
<td>limit order object</td>
</tr>
<tr>
<td>1.8.x</td>
<td>call order object</td>
</tr>
<tr>
<td>1.9.x</td>
<td>custom object</td>
</tr>
<tr>
<td>1.10.x</td>
<td>proposal object</td>
</tr>
<tr>
<td>1.11.x</td>
<td>operation history object</td>
</tr>
<tr>
<td>1.12.x</td>
<td>withdraw permission object</td>
</tr>
<tr>
<td>1.13.x</td>
<td>vesting balance object</td>
</tr>
<tr>
<td>1.14.x</td>
<td>worker object</td>
</tr>
<tr>
<td>1.15.x</td>
<td>balance object</td>
</tr>
<tr>
<td>2.0.x</td>
<td>global_property_object</td>
</tr>
<tr>
<td>2.1.x</td>
<td>dynamic_global_property_object</td>
</tr>
<tr>
<td>2.3.x</td>
<td>asset_dynamic_data</td>
</tr>
<tr>
<td>2.4.x</td>
<td>asset_bitasset_data</td>
</tr>
<tr>
<td>2.5.x</td>
<td>account_balance_object</td>
</tr>
<tr>
<td>2.6.x</td>
<td>account_statistics_object</td>
</tr>
<tr>
<td>2.7.x</td>
<td>transaction_object</td>
</tr>
<tr>
<td>2.8.x</td>
<td>block_summary_object</td>
</tr>
<tr>
<td>2.9.x</td>
<td>account_transaction_history_object</td>
</tr>
<tr>
<td>2.10.x</td>
<td>blinded_balance_object</td>
</tr>
<tr>
<td>2.11.x</td>
<td>chain_property_object</td>
</tr>
<tr>
<td>2.12.x</td>
<td>witness_schedule_object</td>
</tr>
<tr>
<td>2.13.x</td>
<td>budget_record_object</td>
</tr>
<tr>
<td>2.14.x</td>
<td>special_authority_object</td>
</tr>
</tbody></table>
]]></content>
      <tags>
        <tag>经验</tag>
      </tags>
  </entry>
  <entry>
    <title>见证人服务器重做系统中</title>
    <url>/2018/08/22/rebuild-my-steem-witness-server.html</url>
    <content><![CDATA[<p>一周三次出块都失败了，也不知道服务器到底抽了什么风，于是索性就重装系统吧，顺便把 <code>zram</code> 也折腾下。重做系统的时候没有再选择 <code>ubuntu16.04</code>，而是选择了我最熟悉的 <code>Archlinux</code>。重做很快就结束了，登陆系统看了下，还是 <code>Arch</code> 精简干练，即使把所有需要的软件都装完，内存依然占用很少。</p>
<p><img src="https://steemeditor.com/storage/images/qXkl0bBuInhSWACOHmGeY2VzTeaDKBTmuh61nwkI.png"></p>
<p>由于我还是打算在 <code>docker</code> 里面跑见证人，所以先安装 <code>docker</code>，执行 <code>pacman -S docker</code> 搞定。</p>
<p>然后安装一个轻量的管理 <code>docker</code> 界面 <code>portainer</code>，</p>
<figure class="highlight plaintext"><table><tr><td class="code"><pre><span class="line"># docker volume create portainer_data</span><br><span class="line"># docker run -d -p 9000:9000 -v /var/run/docker.sock:/var/run/docker.sock --name portainer --restart always -v portainer_data:/data portainer/portainer</span><br></pre></td></tr></table></figure>

<p>安装好，直接浏览器访问 <code>IP:9000</code> ，配置上用户名和密码，选择本地模式，搞定。</p>
<p>接下来就是做个文件的 <code>swap</code>，</p>
<figure class="highlight plaintext"><table><tr><td class="code"><pre><span class="line"># fallocate -l 50G /swapfile</span><br><span class="line"># mkswap /swapfile</span><br><span class="line"># swapon /swapfile</span><br><span class="line"># echo &#x27;/swapfile none swap sw 0 0&#x27; | tee -a /etc/fstab</span><br></pre></td></tr></table></figure>

<p>然后安装 <code>zramswap</code>，由于 <code>zramswap</code> 是在 <code>AUR</code> 里，所以先安装一下 <code>makepkg</code> 所要用到的编译环境</p>
<figure class="highlight plaintext"><table><tr><td class="code"><pre><span class="line"># pacman -S base-devel</span><br></pre></td></tr></table></figure>

<p>然后新建一个普通用户，并切换到该用户的家目录，然后下载 <code>zramswap</code> 的安装包（在 <a href="https://aur.archlinux.org/packages/zramswap/">https://aur.archlinux.org/packages/zramswap/</a> 这里能找到下载地址），解压后编译安装</p>
<figure class="highlight plaintext"><table><tr><td class="code"><pre><span class="line">$ wget https://aur.archlinux.org/cgit/aur.git/snapshot/zramswap.tar.gz</span><br><span class="line">$ tar xvf zramswap.tar.gz</span><br><span class="line">$ cd zramswap</span><br><span class="line">$ makepkg -si</span><br></pre></td></tr></table></figure>

<p>安装好以后，确认下 <code>zram</code> 模块是否加载，如果没有加载的话，加载下</p>
<figure class="highlight plaintext"><table><tr><td class="code"><pre><span class="line"># lsmod | grep zram</span><br><span class="line"># modprobe zram</span><br></pre></td></tr></table></figure>

<p>启动 <code>zramswap</code> 并设置为开机自启动，</p>
<figure class="highlight plaintext"><table><tr><td class="code"><pre><span class="line"># systemctl start zramswap</span><br><span class="line"># systemctl enable zramswap</span><br></pre></td></tr></table></figure>

<p>检查是否正常</p>
<figure class="highlight plaintext"><table><tr><td class="code"><pre><span class="line"># zramctl</span><br><span class="line">NAME       ALGORITHM DISKSIZE DATA COMPR TOTAL STREAMS MOUNTPOINT</span><br><span class="line">/dev/zram9 lz4        1006.3M   4K   69B    4K      10 [SWAP]</span><br><span class="line">/dev/zram8 lz4        1006.3M   4K   69B    4K      10 [SWAP]</span><br><span class="line">/dev/zram7 lz4        1006.3M   4K   69B    4K      10 [SWAP]</span><br><span class="line">/dev/zram6 lz4        1006.3M   4K   69B    4K      10 [SWAP]</span><br><span class="line">/dev/zram5 lz4        1006.3M   4K   69B    4K      10 [SWAP]</span><br><span class="line">/dev/zram4 lz4        1006.3M   4K   69B    4K      10 [SWAP]</span><br><span class="line">/dev/zram3 lz4        1006.3M   4K   69B    4K      10 [SWAP]</span><br><span class="line">/dev/zram2 lz4        1006.3M   4K   69B    4K      10 [SWAP]</span><br><span class="line">/dev/zram1 lz4        1006.3M   4K   69B    4K      10 [SWAP]</span><br><span class="line">/dev/zram0 lz4        1006.3M   4K   69B    4K      10 [SWAP]</span><br><span class="line"></span><br><span class="line"># swapon</span><br><span class="line">NAME       TYPE         SIZE USED PRIO</span><br><span class="line">/swapfile  file          50G   0B   -2</span><br><span class="line">/dev/zram0 partition 1006.3M   0B  100</span><br><span class="line">/dev/zram1 partition 1006.3M   0B  100</span><br><span class="line">/dev/zram2 partition 1006.3M   0B  100</span><br><span class="line">/dev/zram3 partition 1006.3M   0B  100</span><br><span class="line">/dev/zram4 partition 1006.3M   0B  100</span><br><span class="line">/dev/zram5 partition 1006.3M   0B  100</span><br><span class="line">/dev/zram6 partition 1006.3M   0B  100</span><br><span class="line">/dev/zram7 partition 1006.3M   0B  100</span><br><span class="line">/dev/zram8 partition 1006.3M   0B  100</span><br><span class="line">/dev/zram9 partition 1006.3M   0B  100</span><br></pre></td></tr></table></figure>

<p>发现 <code>zramswap</code> 只分配了10G内存，于是去查了下他的启动文件 <code>/usr/lib/systemd/system/zramswap.service</code>，发现最终执行的文件是 <code>/usr/lib/systemd/scripts/zramctrl</code>，打印下 <code>zramctrl</code> 的内容，</p>
<figure class="highlight plaintext"><table><tr><td class="code"><pre><span class="line"># cat /usr/lib/systemd/scripts/zramctrl </span><br><span class="line">#!/bin/sh</span><br><span class="line"></span><br><span class="line">start() &#123;</span><br><span class="line">  exec awk -v ZRAM_SIZE=$ZRAM_SIZE -v ZRAM_PARM=&quot;$(modinfo zram | grep -E -o &#x27;(num_devices|zram_num_devices)&#x27;)&quot; &#x27;</span><br><span class="line"></span><br><span class="line">  FILENAME == &quot;/proc/cpuinfo&quot; &amp;&amp; ($1 == &quot;processor&quot; || $1 == &quot;Processor&quot;) &#123;</span><br><span class="line">    cpucount++</span><br><span class="line">    next</span><br><span class="line">  &#125;</span><br><span class="line">  FILENAME == &quot;/proc/meminfo&quot; &amp;&amp; $1 == &quot;MemTotal:&quot; &#123;</span><br><span class="line">    if (ZRAM_SIZE == &quot;&quot;)</span><br><span class="line">      ZRAM_SIZE = 20</span><br><span class="line">    mem_total = int( (0 + $2) * 1024 * ( ZRAM_SIZE/100 ) )</span><br><span class="line">    next</span><br><span class="line">  &#125;</span><br><span class="line"></span><br><span class="line">....以下代码省略</span><br></pre></td></tr></table></figure>

<p>发现需要设置一个 <code>$ZRAM_SIZE</code> 的环境变量，否则默认20%。在 <code>/usr/lib/systemd/system/zramswap.service</code> 中增加环境变量，</p>
<figure class="highlight plaintext"><table><tr><td class="code"><pre><span class="line">[Unit]</span><br><span class="line">Description=Zram-based swap (compressed RAM block devices)</span><br><span class="line"></span><br><span class="line">[Service]</span><br><span class="line">Type=oneshot</span><br><span class="line">Environment=&quot;ZRAM_SIZE=100&quot;   # 这里是增加的环境变量</span><br><span class="line">ExecStart=/usr/lib/systemd/scripts/zramctrl start</span><br><span class="line">ExecStop=/usr/lib/systemd/scripts/zramctrl stop</span><br><span class="line">RemainAfterExit=yes</span><br><span class="line"></span><br><span class="line">[Install]</span><br><span class="line">WantedBy=multi-user.target</span><br></pre></td></tr></table></figure>

<p>重载配置文件并重启 <code>zramswap</code>，</p>
<figure class="highlight plaintext"><table><tr><td class="code"><pre><span class="line"># systemctl daemon-reload</span><br><span class="line"># systemctl restart zramswap</span><br></pre></td></tr></table></figure>

<p>再次查看 <code>zram</code> 状态，发现已经搞定。</p>
<figure class="highlight plaintext"><table><tr><td class="code"><pre><span class="line"># zramctl</span><br><span class="line">NAME       ALGORITHM DISKSIZE DATA COMPR TOTAL STREAMS MOUNTPOINT</span><br><span class="line">/dev/zram9 lz4           4.9G   4K   69B    4K      10 [SWAP]</span><br><span class="line">/dev/zram8 lz4           4.9G   4K   69B    4K      10 [SWAP]</span><br><span class="line">/dev/zram7 lz4           4.9G   4K   69B    4K      10 [SWAP]</span><br><span class="line">/dev/zram6 lz4           4.9G   4K   69B    4K      10 [SWAP]</span><br><span class="line">/dev/zram5 lz4           4.9G   4K   69B    4K      10 [SWAP]</span><br><span class="line">/dev/zram4 lz4           4.9G   4K   69B    4K      10 [SWAP]</span><br><span class="line">/dev/zram3 lz4           4.9G   4K   69B    4K      10 [SWAP]</span><br><span class="line">/dev/zram2 lz4           4.9G   4K   69B    4K      10 [SWAP]</span><br><span class="line">/dev/zram1 lz4           4.9G   4K   69B    4K      10 [SWAP]</span><br><span class="line">/dev/zram0 lz4           4.9G   4K   69B    4K      10 [SWAP]</span><br></pre></td></tr></table></figure>

<p>接下来就是去部署 @someguy123 的见证人镜像了，这个在之前写过教程，就不再细说了，这是链接 <a href="https://steemit.com/cn/@ety001/5xtjgz">https://steemit.com/cn/@ety001/5xtjgz</a> 。</p>
<p>看目前下载离线区块数据的速度应该不是网络卡导致的丢块，难道是之前配置的 <code>shared-file-size</code> 有问题？等部署完见证人运行起来再观察下看看还会不会频繁的丢块了吧。。。</p>
]]></content>
      <tags>
        <tag>Server&amp;OS</tag>
      </tags>
  </entry>
  <entry>
    <title>优酷路由宝刷padavan使用3G卡托上网</title>
    <url>/2018/08/25/3g-dongle-router.html</url>
    <content><![CDATA[<h2 id="起因"><a href="#起因" class="headerlink" title="起因"></a>起因</h2><p>昨天收到了新买的二手网件路由，预刷的梅林系统，今天上午花了一个多小时把家里的主路由（米3）替换成新买的网件，在配置梅林的时候，发现梅林支持USB 3G Dongle。突然就想到了我之前买的，已经闲置了的优酷路由宝L1，里面我刷了不死 breed，可以考虑拿那个路由折腾下，正好手里有联通的大天王卡（每天3块钱无限流量）可以测试。</p>
<p>其实这个月初就在考虑怎么用这个天王卡，但是由于急着去青岛度假，时间匆忙，就拿了个 Android 手机当路由使。实际的体验效果是，手机终归是手机，可以带的设备数还是很有限的，同时4台手机上网就很卡了。这次正好发现梅林支持我手里的华为E1750C，于是就准备拿已经闲置的优酷路由宝L1开试（路由宝的配置对于这个价位还是很良心的）。</p>
<h2 id="开始"><a href="#开始" class="headerlink" title="开始"></a>开始</h2><p>首先要做的就是刷入系统。从网上搜索了下，路由宝的Flash容量不足以装下梅林系统，但是可以装下老毛子的 Padavan ，所以去下载了 Padavan 的固件（Google搜索 <code>rt-n14u-gpio-1-youku1-128m_3.4.3.9-099.trx</code> 即可找到）。因为我之前路由宝里已经刷入了 breed，所以写入新固件很轻松，只需要断电状态下，按住 Reset 键，然后送电，等待大约 2s 松开 Reset ，然后网线连接路由的 Lan 口，访问 <code>192.168.1.1</code> 打开 Breed，上传固件刷入即可。</p>
<p><img src="/img/2018/10/1.jpeg"></p>
<p>写入成功后，路由会自动重启，重启后，找到新的IP地址是 <code>192.168.123.1</code> 访问下，在 <strong>高级设置</strong> &gt; <strong>USB应用程序</strong> 中，找到 <strong>USB调制解调器</strong> ，国家选择 <strong>China</strong>，应用设置即可。</p>
<p><img src="/img/2018/10/2.jpeg"></p>
<p>回到 <strong>网络地图</strong>，点击那个地球，就能看到连接方式变成了 <strong>USB调制解调器（总是）</strong>，过一会 <strong>连接状态</strong> 就会显示 <strong>已连接</strong>。</p>
<p><img src="/img/2018/10/3.jpeg"></p>
<p>这时就能开心的使用流量上网了。由于是个3G的卡托，所以速度还是不理想，对于4G卡来说有些浪费了。以后再有机会的时候，换个4G卡托。目前来看，虽然带宽小了些，但是浏览网页看个视频还是没有问题的。</p>
<p><img src="/img/2018/10/4.png"></p>
<p>最后附一张设备图</p>
<p><img src="/img/2018/10/5.jpg" alt="d0.jpg"></p>
]]></content>
      <tags>
        <tag>经验</tag>
      </tags>
  </entry>
  <entry>
    <title>给媳妇做了一个购物清单的微信小程序，欢迎其他家庭煮妇（夫）使用</title>
    <url>/2018/08/26/shopping-list-wechat.html</url>
    <content><![CDATA[<p>媳妇有个好习惯，就是每次去超市都会把要买的东西记录到纸上。</p>
<p>但是每次到了超市就会发现，不是忘带了那张纸，就是纸找不到放到哪里了😂。</p>
<p>于是我花了一天多的时间给媳妇做了个微信小程序用来实现记录要买的东西。</p>
<p>现在公开出来，大家也可以使用了，微信扫描文末的小程序码即可~</p>
<p>下面是演示视频：</p>
<p><a href="https://youtu.be/QjVA0QCWK6I">Youtube</a></p>
<p><a href="http://v.youku.com/v_show/id_XMzc5ODM2MjM0MA==.html">优酷</a></p>
<p>因为最初也是为了自己用，因此把需求砍到了最精简，直接输入添加要买的东西即可。<br>删除的话，只需要长按就可以了。<br>由于考虑到经常去超市购买的物品大致相同，所以增加了一个历史记录的功能，<br>这样下次再添加要买物品的时候，可以从历史记录里直接点按即可添加。<br>另外把小程序添加进“我的小程序”中，可以从微信首页下拉菜单中快速进入~</p>
<p>欢迎各位家庭煮妇（夫）使用，也欢迎分享给更多的家庭煮妇（夫）~</p>
<p>PS：据说有人还要用这个来记录其他的东西，而不仅仅是超市购物使用🤔。</p>
<p><img src="/img/2018/10/7.png"></p>
]]></content>
      <tags>
        <tag>DM实验室</tag>
      </tags>
  </entry>
  <entry>
    <title>初读《浮生六记》</title>
    <url>/2018/09/16/fu-sheng-liu-ji.html</url>
    <content><![CDATA[<p><img src="/img/2018/10/6.png"></p>
<p>昨天买了《浮生六记》回来看，最早听到《浮生六记》应该是在语文课上的课文里，“余忆童稚时，能张目对日，明察秋毫……”，这也是这次买这本书的原因了。</p>
<p>一直好奇《浮生六记》讲了什么，买回来看了序才知道原来写的是夫妻之间的家庭生活之事。于是有些怀疑写一些琐事是如何能获得200来年里各种大文学家的好评的。于是耐下心去读，看看到底是个什么。</p>
<p>读完前两记，起初还是有些不耐烦的，但是随着阅读反而平静了下来。文字虽不奢华，但是叙事中却不让人觉得是在记流水账。读完真的是可以感受到了一股浓浓的生活气息。</p>
<p>与其说这个是部散文选，不如说这其实是一部纪录片，就好像我们每天在用微信发朋友圈来记录我们的生活似的，但是《浮生六记》却不给人一种无聊的感觉，又能记录下精彩丰富的生活，实在是很让人惊叹。</p>
<p>继续阅读剩下的四记去了。</p>
]]></content>
      <tags>
        <tag>随笔</tag>
      </tags>
  </entry>
  <entry>
    <title>使用 hapijs 快速构建自己的 api 服务</title>
    <url>/2018/10/09/easy-startup-tuturial-for-hapi.html</url>
    <content><![CDATA[<p><img src="/img/2018/10/8.png"></p>
<p>最近接手的 <code>Stellar</code> 钱包的外包小活需要搭建个 <code>API</code> 服务，考虑再三，由于 <code>Stellar SDK</code> 中我只会 <code>Javascript</code>，因此打算使用 <code>Nodejs</code> 去完成这个服务搭建工作。</p>
<p>大约5年前曾经用 <code>Express</code> 框架搭建过一个记事本网站，不过这次是做 <code>API</code>，用 <code>Express</code> 感觉好像太重了，于是搜索了下，发现了 <a href="https://hapijs.com/">hapi</a> 这个框架。</p>
<p>说干就干。</p>
<p>首先初始化一个 <code>Nodejs</code> 项目</p>
<figure class="highlight plaintext"><table><tr><td class="code"><pre><span class="line">npm init</span><br></pre></td></tr></table></figure>

<p>然后安装一下 <code>hapi</code>，</p>
<figure class="highlight plaintext"><table><tr><td class="code"><pre><span class="line">npm install hapi -s</span><br></pre></td></tr></table></figure>

<p>创建一个 <code>index.js</code> 文件，并粘贴下面的代码</p>
<figure class="highlight plaintext"><table><tr><td class="code"><pre><span class="line">&#x27;use strict&#x27;;</span><br><span class="line"></span><br><span class="line">const Hapi = require(&#x27;hapi&#x27;);</span><br><span class="line">const server = Hapi.server(&#123;</span><br><span class="line">    port: 8877,</span><br><span class="line">&#125;);</span><br><span class="line"></span><br><span class="line">server.route(&#123;</span><br><span class="line">  method: &#x27;GET&#x27;,</span><br><span class="line">  path: &#x27;/&#x27;,</span><br><span class="line">  options: &#123;</span><br><span class="line">    cors: true</span><br><span class="line">  &#125;,</span><br><span class="line">  handler: (request, h) =&gt; &#123;</span><br><span class="line">    return &#x27;Hello, &#x27; + request.query.r;</span><br><span class="line">  &#125;</span><br><span class="line">&#125;);</span><br><span class="line"></span><br><span class="line">const init = async () =&gt; &#123;</span><br><span class="line">  await server.start();</span><br><span class="line">  console.log(`Server running at: $&#123;server.info.uri&#125;`);</span><br><span class="line">&#125;;</span><br><span class="line"></span><br><span class="line">process.on(&#x27;unhandledRejection&#x27;, (err) =&gt; &#123;</span><br><span class="line">  console.log(err);</span><br><span class="line">  process.exit(1);</span><br><span class="line">&#125;);</span><br><span class="line"></span><br><span class="line">init();</span><br></pre></td></tr></table></figure>

<p>启动一下，并访问 <code>http://localhost:8877/?r=ety001</code>，会看到 <code>Hello, ety001</code>。</p>
<p>这样最简单的 <code>API</code> 服务就搞定了。</p>
<blockquote>
<p>这里需要注意下 cors 这个配置，这个设置为 true，就可以避免跨域的报错，不过安全性需要注意，详细的配置参数请看 hapi 的文档。</p>
</blockquote>
<p>除此之外，我还加入了缓存。因为每次去获取 <code>Trade Aggregation</code> 数据都需要大约5–6秒，这样的性能还是不行的。因此加入一个10秒的缓存，10秒内访问，将会返回缓存数据。</p>
<p>加入方法很简单，大致的代码结构如下：</p>
<figure class="highlight plaintext"><table><tr><td class="code"><pre><span class="line">const getTradePair = async (pointPair) =&gt; &#123;</span><br><span class="line">  // the code to get trade pairs and trade aggregation</span><br><span class="line">&#125;</span><br><span class="line">const traidPairCache = server.cache(&#123;</span><br><span class="line">  expiresIn: 10 * 1000,</span><br><span class="line">  segment: &#x27;customSegment&#x27;,</span><br><span class="line">  generateFunc: async (pair) =&gt; &#123;</span><br><span class="line">    return await getTradePair(pair);</span><br><span class="line">  &#125;,</span><br><span class="line">  generateTimeout: 20000</span><br><span class="line">&#125;);</span><br><span class="line">server.route(&#123;</span><br><span class="line">  method: &#x27;GET&#x27;,</span><br><span class="line">  path: &#x27;/v2/api/trade_aggregations&#x27;,</span><br><span class="line">  options: &#123;</span><br><span class="line">    cors: true</span><br><span class="line">  &#125;,</span><br><span class="line">  handler: async (request, h) =&gt; &#123;</span><br><span class="line">    return await traidPairCache.get(&#x27;pair&#x27;);</span><br><span class="line">  &#125;</span><br><span class="line">&#125;);</span><br></pre></td></tr></table></figure>

<p>这里说明下。 <code>traidPairCache</code> 中 <code>generateFunc</code> 方法就是在缓存未命中的时候，去获取新数据的方法。第一个参数相当于是缓存的标示，<code>generateTimeout</code> 就是 <code>generateFunc</code> 的执行超时时间。</p>
<blockquote>
<p>hapi 使用 <a href="https://github.com/hapijs/catbox">catbox</a> 来实现缓存，框架默认使用 <code>memory</code> 作为缓存介质。</p>
</blockquote>
<p>以上就是目前我所用到的功能，<code>hapi</code> 框架真的很轻，在处理些类似我这样的需求的时候，最省时间，尤其再配合 <code>Docker</code>，把服务直接做成镜像，部署起来也就一句话的事儿~~</p>
]]></content>
      <tags>
        <tag>编程语言</tag>
        <tag>后端</tag>
      </tags>
  </entry>
  <entry>
    <title>把 conductor 封装进 docker</title>
    <url>/2018/10/10/conductor-docker.html</url>
    <content><![CDATA[<p>今天才发现，自从上次重装服务器后，一直忘记恢复 <code>Steem</code> 见证人的喂价程序了。之前一直使用的是 @furion 开发的 <a href="https://github.com/Netherdrake/conductor">conductor</a>，并且之前没有用 <code>Dockerfile</code> 封装成镜像，而是直接在 <code>ubuntu:16.04</code> 的镜像上启动容器，添加的命令。这次就直接做成镜像方便以后使用。</p>
<h2 id="镜像文件"><a href="#镜像文件" class="headerlink" title="镜像文件"></a>镜像文件</h2><ul>
<li><p>你可以自己编译，<code>Dockerfile</code> 如下：</p>
<figure class="highlight plaintext"><table><tr><td class="code"><pre><span class="line">FROM alpine:3.6</span><br><span class="line">RUN apk add --no-cache python3 python3-dev gcc git musl-dev libffi-dev openssl-dev \</span><br><span class="line">    &amp;&amp; pip3 install -U git+git://github.com/Netherdrake/steem-python \</span><br><span class="line">    &amp;&amp; pip3 install -U git+https://github.com/Netherdrake/conductor \</span><br><span class="line">    &amp;&amp; apk del git gcc musl-dev libffi-dev python3-dev</span><br><span class="line">ENV UNLOCK=123456</span><br><span class="line">CMD [&quot;conductor&quot;]</span><br></pre></td></tr></table></figure>
</li>
<li><p>也可以直接用我封装好的，<code>docker pull ety001/steem-conductor</code>。</p>
</li>
</ul>
<h2 id="使用方法"><a href="#使用方法" class="headerlink" title="使用方法"></a>使用方法</h2><ul>
<li><p>添加 active_key 。</p>
<figure class="highlight plaintext"><table><tr><td class="code"><pre><span class="line">docker run -it --rm -v ~/.local/share/steem:/root ety001/steem-conductor /bin/ash</span><br></pre></td></tr></table></figure>
<p>执行后，进入容器，再执行</p>
<figure class="highlight plaintext"><table><tr><td class="code"><pre><span class="line">steempy addkey</span><br></pre></td></tr></table></figure>
<p>输入 <code>active key</code> 后就可以把你要操作的用户加入到本地数据库里了，数据库文件最终会存储在你宿主机的 <code>~/.local/share/steem/.local/share/steem</code> 位置。添加好以后，执行 <code>exit</code> 退出容器环境即可，效果如下图：<br><img src="/img/2018/10/W5gkMOnNlicX27TEaefIrXHj5T1C8jzztFVibMCv.png"></p>
</li>
<li><p>初始化 <code>conductor</code></p>
<figure class="highlight plaintext"><table><tr><td class="code"><pre><span class="line">docker run -it --rm -v ~/.local/share/steem:/root ety001/steem-conductor conductor init</span><br></pre></td></tr></table></figure>
<p><img src="/img/2018/10/Wn36kvnMBbvTyKj1FDRxknaV4s6XqqAllGmgoU9d.png"></p>
</li>
<li><p>测试喂价程序</p>
<figure class="highlight plaintext"><table><tr><td class="code"><pre><span class="line">docker run -it --rm -v ~/.local/share/steem:/root ety001/steem-conductor conductor feed</span><br></pre></td></tr></table></figure>
<p><img src="/img/2018/10/oyrpAWa4MFtSsI8A8AFYO5VzJmM5R3UpZsbAdKJZ.png"><br>可以工作</p>
</li>
<li><p>启动喂价容器</p>
<figure class="highlight plaintext"><table><tr><td class="code"><pre><span class="line">docker run -itd --name steem-feed -v ~/.local/share/steem:/root --restart always ety001/steem-conductor conductor feed</span><br></pre></td></tr></table></figure>
<p><img src="/img/2018/10/My7FKQkHkc5j5JMP5nVyeg9sjxXEuoqUdIvhJYil.png"></p>
</li>
</ul>
<p>完工！以后再部署喂价程序，两行命令就搞定了。</p>
]]></content>
      <tags>
        <tag>steem</tag>
      </tags>
  </entry>
  <entry>
    <title>最近折腾 cordova 遇到的问题</title>
    <url>/2018/10/12/cordova.html</url>
    <content><![CDATA[<h4 id="1-A-valid-provisioning-profile-for-this-executable-was-not-found"><a href="#1-A-valid-provisioning-profile-for-this-executable-was-not-found" class="headerlink" title="1. A valid provisioning profile for this executable was not found."></a>1. A valid provisioning profile for this executable was not found.</h4><p>这个问题，在网上搜了很久，有很多种可能会导致这个问题。我遇到这个问题的解决方案是：</p>
<p>File &gt; Workspace Settings &gt; Set Build system to “Legacy Build System”</p>
<h4 id="2-Cannot-read-property-‘semver’-of-null"><a href="#2-Cannot-read-property-‘semver’-of-null" class="headerlink" title="2. Cannot read property ‘semver’ of null"></a>2. Cannot read property ‘semver’ of null</h4><ul>
<li>find the path <project_root>&#x2F;platforms&#x2F;android&#x2F;cordova&#x2F;lib&#x2F;emulator.js</li>
<li>find the line <code>avd.target = &#39;Android &#39; + level.semver + &#39; (API level &#39; + api_level + &#39;)&#39;;</code></li>
<li>replace it with <code>avd.target = &#39;Android &#39; + (level ? level.semver : &#39;&#39;) + &#39; (API level &#39; + api_level + &#39;)&#39;;</code></li>
</ul>
<h4 id="3-如果-build-的时候显示-Error-spawn-EACCES"><a href="#3-如果-build-的时候显示-Error-spawn-EACCES" class="headerlink" title="3. 如果 build 的时候显示 Error: spawn EACCES"></a>3. 如果 build 的时候显示 Error: spawn EACCES</h4><p>这个错误说明你正在使用的程序没有执行权限，通过给 <code>cordova</code> 命令增加 <code>--verbose</code> 参数，可以看到是哪个程序执行不了，然后给这个程序加上执行权限即可</p>
<h4 id="4-cordova-build-之前先配置好环境变量"><a href="#4-cordova-build-之前先配置好环境变量" class="headerlink" title="4. cordova build 之前先配置好环境变量"></a>4. cordova build 之前先配置好环境变量</h4><p>详细的安装配置需要去看下 <code>cordova</code> 的官方文档，这里只是强调下环境变量的配置。这里分享下我的环境变量配置：</p>
<figure class="highlight plaintext"><table><tr><td class="code"><pre><span class="line">export JAVA_HOME=/Applications/Android\ Studio.app/Contents/jre/jdk/Contents/Home</span><br><span class="line">export ANDROID_HOME=/Users/ety001/Library/Android/sdk</span><br><span class="line">export PATH=$&#123;PATH&#125;:$&#123;JAVA_HOME&#125;/bin:$&#123;ANDROID_HOME&#125;:$&#123;ANDROID_HOME&#125;/platform-tools:$&#123;ANDROID_HOME&#125;/tools:$&#123;ANDROID_HOME&#125;/tools/bin</span><br></pre></td></tr></table></figure>

<p>把上面的配置加到你的 <code>~/.bashrc</code> 或者如果你要用的是 <code>zsh</code> 的话就是 <code>~/.zshrc</code>。</p>
<h4 id="5-代码更新"><a href="#5-代码更新" class="headerlink" title="5. 代码更新"></a>5. 代码更新</h4><p>代码修改后，需要先 <code>npm run build</code> ，也就是先把 <code>js</code> 编译好，编译好后的静态文件会在项目根目录的 <code>www</code> 目录中，再执行 <code>cordova prepare -d</code> 就会把静态文件复制到各个 <code>platform</code> 的 <code>www</code> 目录里面。</p>
<h4 id="6-如何使用-Safari-和-Chrome-调试-app"><a href="#6-如何使用-Safari-和-Chrome-调试-app" class="headerlink" title="6. 如何使用 Safari 和 Chrome 调试 app"></a>6. 如何使用 Safari 和 Chrome 调试 app</h4><ul>
<li>ios的话，先在手机上找到 “设置” &#x3D;&gt; “Safari浏览器” &#x3D;&gt; “高级” &#x3D;&gt; 把 “Web 检查器” 选中，然后用手机线把手机和电脑连接，电脑上打开 “Safari 浏览器”，”偏好设置” &#x3D;&gt; “高级” &#x3D;&gt; 选中 “在菜单栏显示开发菜单”，最后打开手机上的 App，这样在 Safari 的 “开发” 菜单中就能看到你的手机名的菜单了，选中其中的 app 名字就能打开 <code>inspect</code> 进行调试了。</li>
<li>android的话，也差不多的流程，在 Chrome 浏览器里访问 <code>chrome://inspect</code>，使用 <code>debug</code> 模式打开模拟器里要调试的 app 后，在 Chrome 浏览器里就能看到信息了，点击 <code>inspect</code> 就能打开针对这个 app 的调试窗口。需要注意的是，调试窗口里面的调试器需要翻墙，可以先用浏览器访问 <code>https://chrome-devtools-frontend.appspot.com/serve_rev/@180870/devtools.html</code> ，然后把这个网址加入到白名单里面，再回到 <code>inspect</code> 就可以看到调试界面了（这里我折腾了一天多，最终才发现是墙的问题😂）。</li>
</ul>
]]></content>
      <tags>
        <tag>cordova</tag>
      </tags>
  </entry>
  <entry>
    <title>原来最干净的安装谷歌套件的方法是这样</title>
    <url>/2018/10/20/google-play.html</url>
    <content><![CDATA[<p>昨天刷机结束，成功root后，还没有来得及安装谷歌四件套，毕竟很多软件不敢从国内应用商店安装，有些软件则是国内应用商店没有的。</p>
<p>今天使用老方法，去 <a href="http://www.goplaycn.com/">GoPlayCN</a> 下载回App，然后安装，结果一直在 Google Play 服务那一步安装失败，于是又从网上搜了半天，最后发现正确的安装姿势应该是去 <a href="https://opengapps.org/">Open Gapps</a> 下载卡刷包，然后进第三方Recovery 直接卡刷。在 <a href="https://opengapps.org/">Open Gapps</a> 上只要选好自己的CPU是啥架构的，安卓版本是啥，选择什么体型的包，然后下载就ok啦~</p>
]]></content>
      <tags>
        <tag>配置</tag>
      </tags>
  </entry>
  <entry>
    <title>小米4c刷xposed</title>
    <url>/2018/10/19/4c-xposed.html</url>
    <content><![CDATA[<p>最近为了研究 <code>xposed</code> 模块开发，我拿我的一块手机跟我妈换了下，把她手里的小米4C换过来，准备用这个作为开发机使用。折腾了一整天，终于是搞定了。</p>
<h2 id="准备工作"><a href="#准备工作" class="headerlink" title="准备工作"></a>准备工作</h2><ul>
<li>解锁BL</li>
<li>线刷包 libra_images_6.1.7_20151221.0000.11_5.1_cn_b09dac70a0.tgz</li>
<li>cofface_twrp_recovery.img</li>
<li>SuperSU-v2.79-SR2-20170103_automode_by_kane.apk</li>
<li>XposedInstaller_3.0_alpha4.apk</li>
<li>xposed-v86-sdk22-arm64-MIUI-edition-by-Solar_-20160710.zip</li>
</ul>
<h2 id="下载所需的资源"><a href="#下载所需的资源" class="headerlink" title="下载所需的资源"></a>下载所需的资源</h2><p>准备工作中列出的各种工具，都已放到百度云了，链接: <a href="https://pan.baidu.com/s/1GPumHzCjc89o-jZlKh1V3g">https://pan.baidu.com/s/1GPumHzCjc89o-jZlKh1V3g</a> 提取码: 25xf。其中 <code>cofface_twrp_recovery.img</code> 在 <code>小米4C刷第三方recovery工具2.8.7.3.zip</code> 中。</p>
<h2 id="解锁BL"><a href="#解锁BL" class="headerlink" title="解锁BL"></a>解锁BL</h2><p>先去这里 <a href="http://www.miui.com/unlock/index.html">http://www.miui.com/unlock/index.html</a> 申请解锁手机BL的资格。BL 就是 BootLoader，解锁后才能修改 BootLoader。</p>
<p>获得解锁资格后如下图所示</p>
<p><img src="/img/2018/10/UkRh6Ph10pIP7MGaLraCrD9AZcBuyEDTriIv5p9Z.png"></p>
<p>然后下载解锁工具。解锁工具只有 Windows 版，因此如果你用的是非 Windows 系统，请自行准备 Windows 系统 或者虚拟机。启动解锁工具，会提示登陆</p>
<p><img src="/img/2018/10/7qF2377KTb81yWPmvKza2LKu1KkFP0fWMvo2hPxP.png"></p>
<p>登陆后，将手机关机进入Fastboot模式（同时按电源键及音量减键），手机上会出现米兔在维修机器人的图标，</p>
<p><img src="/img/2018/10/Yn8HKdkbaOfiRuFIJMIUZayXYNLyizi7EBkMkJWp.png"></p>
<p>然后这时用数据线连接电脑和手机，然后在电脑上点击“解锁”</p>
<p><img src="/img/2018/10/bdHTi9xMCgEjE3geFVuunbaiPPuYu7PxvGNp60id.png"></p>
<p>大约一分钟左右即可完成解锁，然后系统会自动重启。</p>
<h2 id="刷入低版本系统"><a href="#刷入低版本系统" class="headerlink" title="刷入低版本系统"></a>刷入低版本系统</h2><p>目前已知 6.1.7 及以下的版本是没有任何锁的，之后的版本都对 <code>/system</code> 分区加锁了，因此我们需要先刷入低版本的系统。从 <code>http://www.miui.com/shuaji-393.html</code> 这里可以找到通用刷机工具，按照这个网页中的教程操作即可。</p>
<p>刷完后，手机自动重启，第一次重启会很长时间，耐心等待直到进入系统。</p>
<p>做完系统初始化配置后，进入到设置里，找到“关于手机”，一直点击 MIUI版本上 直到开启“开发者选项”，切回设置主菜单，“其他高级设置”里面找到“开发者选项”，打开“USB调试”。</p>
<h2 id="刷入第三方Recovery"><a href="#刷入第三方Recovery" class="headerlink" title="刷入第三方Recovery"></a>刷入第三方Recovery</h2><p>再次进入 Fastboot 模式，手机线连接手机和电脑，在电脑上解压 <code>小米4C刷第三方recovery工具2.8.7.3.zip</code>，如果是 <code>windows</code> 系统，直接执行里面的一个 <code>bat</code> 脚本即可完成第三方 <code>Recovery</code> 刷入。</p>
<p>由于我 Mac 下有 <code>ADB</code> 和 <code>Fastboot</code> 工具，因此我是手动刷入并引导进入 <code>Recovery</code> 的，如下图：</p>
<p><img src="/img/2018/10/UDex969zG9hxmhoTV4LJts2mxhCWz52jzXvqy1hh.jpeg"></p>
<h2 id="对系统进行ROOT"><a href="#对系统进行ROOT" class="headerlink" title="对系统进行ROOT"></a>对系统进行ROOT</h2><p>刷入第三方 <code>Recovery</code> 后，会自动重启进入 <code>Recovery</code>，界面如下图</p>
<p><img src="/img/2018/10/I5Qas0Jcv8se42g1hIZ8XWlWGSjYnmKelbV9OweH.png"></p>
<p>这时在我的电脑里应该能找到手机的SD卡的那个盘，把 <code>SuperSU-v2.79-SR2-20170103_automode_by_kane.apk</code> 拷贝进去，然后回到手机，点击“安装刷机包”，找到 <code>SuperSU-v2.79-SR2-20170103_automode_by_kane.apk</code>，并滑动滑块开始安装，等提示完成后，即可重启手机。进入系统后就能在桌面看到新安装的“超级授权”应用了。</p>
<h2 id="安装-xposed"><a href="#安装-xposed" class="headerlink" title="安装 xposed"></a>安装 xposed</h2><p>从我的电脑里，把 <code>XposedInstaller_3.0_alpha4.apk</code> 和 <code>xposed-v86-sdk22-arm64-MIUI-edition-by-Solar_-20160710.zip</code> 复制进手机SD卡。在手机上安装 <code>XposedInstaller_3.0_alpha4.apk</code>。</p>
<p>安装后，进入 <code>Recovery</code> 模式，即一直按住电源键和音量增键，直至出现开机Logo的时候，松开电源键，再等几秒后，进入 <code>Recovery</code>，这时松开音量增键。</p>
<p>点击进入“安装刷机包”，选择 <code>xposed-v86-sdk22-arm64-MIUI-edition-by-Solar_-20160710.zip</code>，滑动进行确认后开始安装，完成后重启手机。进入系统后，打开 <code>xposed installer</code> 点击“框架”，就能看到如下的字样</p>
<p><img src="/img/2018/10/roVYl0V9QEIrOv0knnKf0Qz3Yi3ENQHA326VpcFl.png"></p>
<p>说明我们的 <code>xposed</code> 已经安装好了。</p>
<p>为了测试下是否安装正确，我安装了一个微信机器人的模块，并且把微信机器人放到了群里测试了下，效果如下：</p>
<p><img src="/img/2018/10/UYG0JYVq5CO0gNxEcNx3N8ZrrXWjoWISYCRv0QUR.png"></p>
<p>至此，完成！</p>
]]></content>
      <tags>
        <tag>配置</tag>
        <tag>Xposed</tag>
        <tag>刷机</tag>
      </tags>
  </entry>
  <entry>
    <title>在PHP中获取最新的 steem_per_mvests</title>
    <url>/2018/10/28/php-steempermvests-or-get-newest-steempermvests-in-php.html</url>
    <content><![CDATA[<figure class="highlight plaintext"><table><tr><td class="code"><pre><span class="line">&lt;?php</span><br><span class="line">function steem_per_mvests() &#123;</span><br><span class="line">    $url = &#x27;https://api.steemit.com&#x27;;</span><br><span class="line"></span><br><span class="line">    $data = &#x27;&#123;&quot;jsonrpc&quot;:&quot;2.0&quot;, &quot;method&quot;:&quot;database_api.get_dynamic_global_properties&quot;, &quot;id&quot;:1&#125;&#x27;;</span><br><span class="line">    $options = array(</span><br><span class="line">      &#x27;http&#x27; =&gt;</span><br><span class="line">        array(</span><br><span class="line">          &#x27;header&#x27; =&gt; &quot;Content-Type: application/json\r\n&quot;.</span><br><span class="line">                      &quot;Content-Length: &quot;.strlen($data).&quot;\r\n&quot;.</span><br><span class="line">                      &quot;User-Agent:SteemMention/1.0\r\n&quot;,</span><br><span class="line">          &#x27;method&#x27;  =&gt; &#x27;POST&#x27;,</span><br><span class="line">          &#x27;content&#x27; =&gt; $data,</span><br><span class="line">        )</span><br><span class="line">    );</span><br><span class="line">    $context  = stream_context_create($options);</span><br><span class="line">    try &#123;</span><br><span class="line">        $result = file_get_contents($url, false, $context);</span><br><span class="line">        $r = json_decode($result, true);</span><br><span class="line">        $result = $r[&#x27;result&#x27;];</span><br><span class="line">    &#125; catch (\Exception $e) &#123;</span><br><span class="line">        return false;</span><br><span class="line">    &#125;</span><br><span class="line">    return $result[&#x27;total_vesting_fund_steem&#x27;][&#x27;amount&#x27;] / ($result[&#x27;total_vesting_shares&#x27;][&#x27;amount&#x27;] / 1e6);</span><br><span class="line">&#125;</span><br><span class="line"></span><br><span class="line">function vests_to_sp($vests) &#123;</span><br><span class="line">    $steem_per_mvests = steem_per_mvests();</span><br><span class="line">    if ($steem_per_mvests) &#123;</span><br><span class="line">        return $vests / 1e6 * $steem_per_mvests;</span><br><span class="line">    &#125; else &#123;</span><br><span class="line">        return false;</span><br><span class="line">    &#125;</span><br><span class="line">&#125;</span><br></pre></td></tr></table></figure>]]></content>
      <tags>
        <tag>steem</tag>
      </tags>
  </entry>
  <entry>
    <title>利用docker搭建eth智能合约开发环境</title>
    <url>/2018/11/01/docker-eth.html</url>
    <content><![CDATA[<p>最近有个项目需要使用 eth 的智能合约，虽然我不看好eth，但是为了挣钱也不得不花些时间去学习下了。之所以选择 Docker 是因为我不喜欢删除的时候删不干净，毕竟不熟悉工具会安装哪些东西。使用 Docker 的话，基本上都被封装在容器里，不用了删掉容器和映射出来的目录数据就ok了。</p>
<p>去 eth 的 github 看了下，是有提供 Docker 镜像的，那么我们直接拉取官方做好的镜像包就好了</p>
<figure class="highlight plaintext"><table><tr><td class="code"><pre><span class="line">docker pull ethereum/client-go</span><br></pre></td></tr></table></figure>

<p>由于我们是本地开发测试，所以我们启动测试节点</p>
<figure class="highlight plaintext"><table><tr><td class="code"><pre><span class="line">docker run -it --rm -v $(pwd)/eth:/root/.ethereum ethereum/client-go console --dev</span><br></pre></td></tr></table></figure>

<p>其中 <code>$(pwd)/eth</code> 是用来存储区块数据的宿主机目录，设置成为自己的一个目录就好。<br>执行后，就会看到类似下面的样子</p>
<p><img src="/img/2018/11/I3uvvSuwMnDrAKTO926pL4v9igiALK2utr573LtJ.png"></p>
<p>最后会出现一个 <code>&gt;</code> 的控制符，这时候就可以输入命令了，比如查看下目前的账户</p>
<figure class="highlight plaintext"><table><tr><td class="code"><pre><span class="line">&gt; eth.accounts</span><br><span class="line">[&quot;0xeeffae8858bee06d1b4f57d7a2fbf3544a593f12&quot;]</span><br></pre></td></tr></table></figure>

<p>获取指定用户的 balance</p>
<figure class="highlight plaintext"><table><tr><td class="code"><pre><span class="line">&gt; eth.getBalance(eth.accounts[0])</span><br><span class="line">1.15792089237316195423570985008687907853269984665640564039457584007913129639927e+77</span><br></pre></td></tr></table></figure>

<p>创建个密码是“ety001”的新用户来专门测试开发</p>
<figure class="highlight plaintext"><table><tr><td class="code"><pre><span class="line">&gt; personal.newAccount(&#x27;ety001&#x27;)</span><br><span class="line">&quot;0x6ed051356a14c1354a95f3352856f05d622b1658&quot;</span><br></pre></td></tr></table></figure>

<p>转账给新账户，用于测试</p>
<figure class="highlight plaintext"><table><tr><td class="code"><pre><span class="line">&gt; eth.sendTransaction(&#123;from: &#x27;0xb0ebe17ef0e96b5c525709c0a1ede347c66bd391&#x27;, to: &#x27;0xf280facfd60d61f6fd3f88c9dee4fb90d0e11dfc&#x27;, value: web3.toWei(1, &quot;ether&quot;)&#125;)</span><br></pre></td></tr></table></figure>

<p>从网上找一段合约代码试试创建合约，把下面的代码复制到 <a href="http://remix.ethereum.org/">Remix</a> 里，编译器选择 <code>0.4.18</code> 编译，之后点击“detail”</p>
<figure class="highlight plaintext"><table><tr><td class="code"><pre><span class="line">pragma solidity ^0.4.18;</span><br><span class="line">contract hello &#123;</span><br><span class="line">    string greeting;</span><br><span class="line">    </span><br><span class="line">    function hello(string _greeting) public &#123;</span><br><span class="line">        greeting = _greeting;</span><br><span class="line">    &#125;</span><br><span class="line"></span><br><span class="line">    function say() constant public returns (string) &#123;</span><br><span class="line">        return greeting;</span><br><span class="line">    &#125;</span><br><span class="line">&#125;</span><br></pre></td></tr></table></figure>

<p><img src="/img/2018/11/Ic2xRAWOqFBjvdjOiTLXL8fL960X8Oh7bCS7sN9r.png"></p>
<p>点击“detail”打开一个浮层，里面找到 <code>WEB3DEPLOY</code> 的代码，复制出来，修改一下第一行，比如</p>
<figure class="highlight plaintext"><table><tr><td class="code"><pre><span class="line">var _greeting = &#x27;hi, ety001&#x27;</span><br></pre></td></tr></table></figure>

<p>修改完后解锁钱包，把代码复制进 <code>console</code> 里，回车，即可创建新的合约了</p>
<figure class="highlight plaintext"><table><tr><td class="code"><pre><span class="line">&gt; personal.unlockAccount(eth.accounts[1],&quot;ety001&quot;);</span><br></pre></td></tr></table></figure>

<p><img src="/img/2018/11/uaxS8DXBqqQRLMt1ryH5RRdToEtXgK9waQ8ykaGN.png"></p>
<p>在 <code>console</code> 里输入 <code>hello.say()</code> 回车后，就能看到输出了 <code>hi, ety001</code> 了，这样一个智能合约的开发环境就搭建好了。</p>
<p>完工！</p>
]]></content>
      <tags>
        <tag>eth</tag>
      </tags>
  </entry>
  <entry>
    <title>用php如何获取当前Steem用户的Voting Power</title>
    <url>/2018/11/04/php-steem-voting-power.html</url>
    <content><![CDATA[<p>再来一篇，这篇代码是获取指定用户当前的 <code>Voting Power</code>，不废话直接上代码。</p>
<figure class="highlight plaintext"><table><tr><td class="code"><pre><span class="line">&lt;?php</span><br><span class="line">    function postData($data) &#123;</span><br><span class="line">        $url = &#x27;https://api.steemit.com&#x27;;</span><br><span class="line">        $options = array(</span><br><span class="line">          &#x27;http&#x27; =&gt;</span><br><span class="line">            array(</span><br><span class="line">              &#x27;header&#x27; =&gt; &quot;Content-Type: application/json\r\n&quot;.</span><br><span class="line">                          &quot;Content-Length: &quot;.strlen($data).&quot;\r\n&quot;.</span><br><span class="line">                          &quot;User-Agent:SteemTools/1.0\r\n&quot;,</span><br><span class="line">              &#x27;method&#x27;  =&gt; &#x27;POST&#x27;,</span><br><span class="line">              &#x27;content&#x27; =&gt; $data,</span><br><span class="line">            )</span><br><span class="line">        );</span><br><span class="line">        $context  = stream_context_create($options);</span><br><span class="line">        try &#123;</span><br><span class="line">            $result = file_get_contents($url, false, $context);</span><br><span class="line">            $r = json_decode($result, true);</span><br><span class="line">            $result = $r[&#x27;result&#x27;];</span><br><span class="line">        &#125; catch (\Exception $e) &#123;</span><br><span class="line">            return false;</span><br><span class="line">        &#125;</span><br><span class="line">        return $result;</span><br><span class="line">    &#125;</span><br><span class="line"></span><br><span class="line">    function getAccountVotingPower($username) &#123;</span><br><span class="line">        $data = postData(&#x27;&#123;&quot;jsonrpc&quot;:&quot;2.0&quot;, &quot;method&quot;:&quot;condenser_api.get_accounts&quot;, &quot;params&quot;:[[&quot;&#x27;.trim($username).&#x27;&quot;]], &quot;id&quot;:1&#125;&#x27;);</span><br><span class="line">        $user = $data[0];</span><br><span class="line">        $last_vote_time = $user[&#x27;last_vote_time&#x27;];</span><br><span class="line">        var_dump(strtotime($last_vote_time));</span><br><span class="line">        $voting_power = $user[&#x27;voting_power&#x27;];</span><br><span class="line">        var_dump($voting_power);</span><br><span class="line">        $vpow = $voting_power + (10000 * (time() - strtotime($last_vote_time)) / 432000);</span><br><span class="line">        return number_format(min($vpow, 10000) / 100, 2);</span><br><span class="line">    &#125;</span><br><span class="line">    var_dump(getAccountVotingPower(&#x27;ety001&#x27;));</span><br></pre></td></tr></table></figure>

<p>完工！</p>
]]></content>
      <tags>
        <tag>steem</tag>
      </tags>
  </entry>
  <entry>
    <title>PHP如何计算当前账号Upvote的价值</title>
    <url>/2018/11/04/php-upvote.html</url>
    <content><![CDATA[<p>由于最近开发需要计算指定账号的赞的价值，因此研究了下。</p>
<ul>
<li>参考了官方的开发文档，地址：<a href="https://developers.steem.io/tutorials-recipes/estimate_upvote">https://developers.steem.io/tutorials-recipes/estimate_upvote</a></li>
<li>参考了这个工具网站，地址：<a href="https://steemnow.com/upvotecalc.html">https://steemnow.com/upvotecalc.html</a></li>
</ul>
<p>代码如下：</p>
<figure class="highlight plaintext"><table><tr><td class="code"><pre><span class="line">&lt;?php</span><br><span class="line">    function postData($data) &#123;</span><br><span class="line">        $url = &#x27;https://api.steemit.com&#x27;;</span><br><span class="line">        $options = array(</span><br><span class="line">          &#x27;http&#x27; =&gt;</span><br><span class="line">            array(</span><br><span class="line">              &#x27;header&#x27; =&gt; &quot;Content-Type: application/json\r\n&quot;.</span><br><span class="line">                          &quot;Content-Length: &quot;.strlen($data).&quot;\r\n&quot;.</span><br><span class="line">                          &quot;User-Agent:SteemTools/1.0\r\n&quot;,</span><br><span class="line">              &#x27;method&#x27;  =&gt; &#x27;POST&#x27;,</span><br><span class="line">              &#x27;content&#x27; =&gt; $data,</span><br><span class="line">            )</span><br><span class="line">        );</span><br><span class="line">        $context  = stream_context_create($options);</span><br><span class="line">        try &#123;</span><br><span class="line">            $result = file_get_contents($url, false, $context);</span><br><span class="line">            $r = json_decode($result, true);</span><br><span class="line">            $result = $r[&#x27;result&#x27;];</span><br><span class="line">        &#125; catch (\Exception $e) &#123;</span><br><span class="line">            return false;</span><br><span class="line">        &#125;</span><br><span class="line">        return $result;</span><br><span class="line">    &#125;</span><br><span class="line"></span><br><span class="line">    function getRewardFund() &#123;</span><br><span class="line">        $result = postData(&#x27;&#123;&quot;id&quot;:0,&quot;jsonrpc&quot;:&quot;2.0&quot;,&quot;method&quot;:&quot;call&quot;,&quot;params&quot;:[&quot;database_api&quot;,&quot;get_reward_fund&quot;,[&quot;post&quot;]]&#125;&#x27;);</span><br><span class="line">        if (isset($result[&#x27;reward_balance&#x27;])) &#123;</span><br><span class="line">            $result[&#x27;reward_balance&#x27;] = str_replace(&#x27; STEEM&#x27;, &#x27;&#x27;, $result[&#x27;reward_balance&#x27;]);</span><br><span class="line">        &#125;</span><br><span class="line">        return $result;</span><br><span class="line">    &#125;</span><br><span class="line"></span><br><span class="line">    function getAccountVests($username) &#123;</span><br><span class="line">        $result = postData(&#x27;&#123;&quot;jsonrpc&quot;:&quot;2.0&quot;, &quot;method&quot;:&quot;condenser_api.get_accounts&quot;, &quot;params&quot;:[[&quot;&#x27;.trim($username).&#x27;&quot;]], &quot;id&quot;:1&#125;&#x27;);</span><br><span class="line">        return str_replace(&#x27; VESTS&#x27;, &#x27;&#x27;, $result[0][&#x27;vesting_shares&#x27;]) + str_replace(&#x27; VESTS&#x27;, &#x27;&#x27;, $result[0][&#x27;received_vesting_shares&#x27;]) - str_replace(&#x27; VESTS&#x27;, &#x27;&#x27;, $result[0][&#x27;delegated_vesting_shares&#x27;]);</span><br><span class="line">    &#125;</span><br><span class="line"></span><br><span class="line">    function getCurrentMedianHistoryPrice() &#123;</span><br><span class="line">        $result = postData(&#x27;&#123;&quot;id&quot;:1,&quot;jsonrpc&quot;:&quot;2.0&quot;,&quot;method&quot;:&quot;call&quot;,&quot;params&quot;:[&quot;database_api&quot;,&quot;get_current_median_history_price&quot;,[]]&#125;&#x27;);</span><br><span class="line">        return str_replace(&#x27; SBD&#x27;, &#x27;&#x27;, $result[&#x27;base&#x27;]) / str_replace(&#x27; STEEM&#x27;, &#x27;&#x27;, $result[&#x27;quote&#x27;]);</span><br><span class="line">    &#125;</span><br><span class="line"></span><br><span class="line">    function getAccountUpvoteValue($username, $vp, $weight) &#123;</span><br><span class="line">        $power = (100*$vp * 100*$weight / 1e4 + 49) / 50;</span><br><span class="line">        $total_vests = getAccountVests($username);</span><br><span class="line">        $final_vests = $total_vests * 1e6;</span><br><span class="line">        $rshares = $power * $final_vests / 1e4;</span><br><span class="line">        $rewards = getRewardFund();</span><br><span class="line">        $sbd_median_price = getCurrentMedianHistoryPrice();</span><br><span class="line">        $estimate = $rshares / $rewards[&#x27;recent_claims&#x27;] * $rewards[&#x27;reward_balance&#x27;] * $sbd_median_price;</span><br><span class="line">        return $estimate;</span><br><span class="line">    &#125;</span><br><span class="line"></span><br><span class="line">    // var_dump(getRewardFund());</span><br><span class="line">    // var_dump(getAccountVests(&#x27;ety001&#x27;));</span><br><span class="line">    // var_dump(getCurrentMedianHistoryPrice());</span><br><span class="line">    var_dump(getAccountUpvoteValue(&#x27;ety001&#x27;, 100, 100));</span><br></pre></td></tr></table></figure>

<p>官网的公式已经很明确了，其中遇到的问题就是 <code>voting power</code> 和 <code>weight</code> 的精度问题了。由于在官网公式上并没有指明，所以很容易被忽略。</p>
<p>在我的代码中，很清楚的看到我传入的 <code>voting power</code> 是 <code>90</code>，<code>weight</code> 是 <code>100</code>，由于 Steem 在百分比上的精度是下面这样子的：</p>
<figure class="highlight plaintext"><table><tr><td class="code"><pre><span class="line">100.00%</span><br></pre></td></tr></table></figure>

<p>而存储在区块上的是整数 <code>10000</code>。因此官方给出的代码中，<code>power = (voting_power * weight / 10000) / 50</code> 要看你传入是什么精度的数据了。按照我的传参，我必须要给传入的值再乘以100才是正确结果，也就是我的代码是 <code>$power = (100*$vp * 100*$weight / 1e4 + 49) / 50;</code>。其中的 <code>+49</code> 是挺高精度的一种方式，可以去掉。</p>
<p>完工！</p>
]]></content>
      <tags>
        <tag>steem</tag>
      </tags>
  </entry>
  <entry>
    <title>命令行版的docker化lnmp搭建</title>
    <url>/2018/11/10/docker-lnmp.html</url>
    <content><![CDATA[<p>之前写过一篇<a href="/2018/01/16/build-a-dockerized-lnmp-environment-by-portainer.html" title="Build a dockerized LNMP environment by portainer &#x2F; 通过portainer搭建docker化的LNMP环境">用 Portainer 图形界面工具来搭建 Docker 化的LNMP</a>。但是每次开一台新的VPS，按照那个流程走下来都要累死，于是按照那个思路，整理了一份命令行版本的部署方案。</p>
<h1 id="创建数据目录"><a href="#创建数据目录" class="headerlink" title="创建数据目录"></a>创建数据目录</h1><figure class="highlight plaintext"><table><tr><td class="code"><pre><span class="line">mkdir -p /data/wwwroot &amp;&amp; mkdir -p /data/logs &amp;&amp; mkdir -p /data/mysql</span><br></pre></td></tr></table></figure>

<p>这三个目录分别用来存储网站文件，网站日志，数据库文件。</p>
<h1 id="在-CentOS-下安装-Docker"><a href="#在-CentOS-下安装-Docker" class="headerlink" title="在 CentOS 下安装 Docker"></a>在 CentOS 下安装 Docker</h1><figure class="highlight plaintext"><table><tr><td class="code"><pre><span class="line">yum remove docker \</span><br><span class="line">                  docker-client \</span><br><span class="line">                  docker-client-latest \</span><br><span class="line">                  docker-common \</span><br><span class="line">                  docker-latest \</span><br><span class="line">                  docker-latest-logrotate \</span><br><span class="line">                  docker-logrotate \</span><br><span class="line">                  docker-selinux \</span><br><span class="line">                  docker-engine-selinux \</span><br><span class="line">                  docker-engine \</span><br><span class="line">&amp;&amp; yum install -y yum-utils \</span><br><span class="line">  device-mapper-persistent-data \</span><br><span class="line">  lvm2 \</span><br><span class="line">&amp;&amp; yum-config-manager \</span><br><span class="line">    --add-repo \</span><br><span class="line">    https://download.docker.com/linux/centos/docker-ce.repo \</span><br><span class="line">&amp;&amp; yum install -y docker-ce \</span><br><span class="line">&amp;&amp; systemctl enable docker \</span><br><span class="line">&amp;&amp; systemctl start docker</span><br></pre></td></tr></table></figure>
<p>以上是 Docker 官方给出的在 CentOS 下安装 Docker 的文档，Ubuntu 可以参考这里: <a href="https://docs.docker.com/install/linux/docker-ce/ubuntu/">https://docs.docker.com/install/linux/docker-ce/ubuntu/</a> 。在边栏还可以看到其他系统的安装方法。</p>
<h1 id="创建子网络"><a href="#创建子网络" class="headerlink" title="创建子网络"></a>创建子网络</h1><figure class="highlight plaintext"><table><tr><td class="code"><pre><span class="line">docker network create --gateway &quot;172.20.0.1&quot; --subnet &quot;172.20.0.0/16&quot; lnmp</span><br></pre></td></tr></table></figure>

<p>把 LNMP 放在独立的网络里更易管理。</p>
<h1 id="部署-Nginx"><a href="#部署-Nginx" class="headerlink" title="部署 Nginx"></a>部署 Nginx</h1><figure class="highlight plaintext"><table><tr><td class="code"><pre><span class="line">docker run -itd --name nginx nginx \</span><br><span class="line">&amp;&amp; \</span><br><span class="line">docker cp nginx:/etc/nginx /etc \</span><br><span class="line">&amp;&amp; \</span><br><span class="line">docker stop nginx &amp;&amp; docker rm nginx \</span><br><span class="line">&amp;&amp; \</span><br><span class="line">docker run -itd --name nginx \</span><br><span class="line">       -v /etc/nginx:/etc/nginx \</span><br><span class="line">       -v /data/wwwroot:/data/wwwroot \</span><br><span class="line">       -v /data/logs/nginx:/var/log/nginx \</span><br><span class="line">       -p 80:80 -p 443:443 \</span><br><span class="line">       --restart always \</span><br><span class="line">       -l &quot;ink.akawa.nginx&quot; \</span><br><span class="line">       -v /tmp:/tmp \</span><br><span class="line">       --network lnmp --ip &quot;172.20.0.2&quot; nginx</span><br></pre></td></tr></table></figure>

<p>前三行的作用就是启动一个临时的 Nginx 容器，目的是为了把其中的配置文件复制出来，最后再删除掉这个临时容器。最后一行就是真正启动 Nginx 容器的命令了。</p>
<h1 id="部署-MySQL"><a href="#部署-MySQL" class="headerlink" title="部署 MySQL"></a>部署 MySQL</h1><figure class="highlight plaintext"><table><tr><td class="code"><pre><span class="line">read -s mysql_pass</span><br></pre></td></tr></table></figure>

<p>输入MySQL管理员密码后，继续执行</p>
<figure class="highlight plaintext"><table><tr><td class="code"><pre><span class="line">docker run -itd --name mysql mariadb \</span><br><span class="line">&amp;&amp; \</span><br><span class="line">docker cp mysql:/etc/mysql /etc \</span><br><span class="line">&amp;&amp; \</span><br><span class="line">docker stop mysql &amp;&amp; docker rm mysql \</span><br><span class="line">&amp;&amp; \</span><br><span class="line">docker run -itd --name mysql \</span><br><span class="line">-p 3306:3306 \</span><br><span class="line">-v /etc/mysql:/etc/mysql \</span><br><span class="line">-v /data/mysql:/var/lib/mysql \</span><br><span class="line">-v /tmp:/tmp \</span><br><span class="line">-v /data/logs/mysql:/var/log/mysql \</span><br><span class="line">--restart always \</span><br><span class="line">--network lnmp \</span><br><span class="line">--ip &quot;172.20.0.3&quot; \</span><br><span class="line">-e MYSQL_ROOT_PASSWORD=$mysql_pass \</span><br><span class="line">mariadb</span><br></pre></td></tr></table></figure>

<p>前三行依旧是为了复制配置文件出来，第四行会要求你输入 MySQL 的 root 密码。第五行启动 MySQL 容器。</p>
<h1 id="部署-PHP7"><a href="#部署-PHP7" class="headerlink" title="部署 PHP7"></a>部署 PHP7</h1><figure class="highlight plaintext"><table><tr><td class="code"><pre><span class="line">docker run -itd --name php7 ety001/php:7.2.14 \</span><br><span class="line">&amp;&amp; \</span><br><span class="line">docker cp php7:/etc/php7 /etc \</span><br><span class="line">&amp;&amp; \</span><br><span class="line">docker stop php7 &amp;&amp; docker rm php7 \</span><br><span class="line">&amp;&amp; \</span><br><span class="line">docker run -itd --name php7 \</span><br><span class="line">-v /etc/php7:/etc/php7 \</span><br><span class="line">-v /data/wwwroot:/data/wwwroot \</span><br><span class="line">-v /tmp:/tmp \</span><br><span class="line">-v /data/logs/php7:/var/log/php7 \</span><br><span class="line">--restart always \</span><br><span class="line">--network lnmp \</span><br><span class="line">--ip &quot;172.20.0.4&quot; \</span><br><span class="line">ety001/php:7.2.14</span><br></pre></td></tr></table></figure>

<p>前三行复制配置文件出来，第四行启动 PHP 容器。其中这里使用的镜像是我自己封装的，镜像里面写死了数据目录，如果你更改了数据目录，请自行修改 <code>/etc/php7/php-fpm.d/www.conf</code> 中的 <code>chdir</code> 参数值。</p>
<h1 id="修改-Nginx-配置文件并进行测试"><a href="#修改-Nginx-配置文件并进行测试" class="headerlink" title="修改 Nginx 配置文件并进行测试"></a>修改 Nginx 配置文件并进行测试</h1><p>打开 <code>/etc/nginx/conf.d/default.conf</code> 文件，改成下面的样子</p>
<figure class="highlight plaintext"><table><tr><td class="code"><pre><span class="line">server &#123;</span><br><span class="line">    listen       80;</span><br><span class="line">    server_name  localhost;</span><br><span class="line"></span><br><span class="line">    #charset koi8-r;</span><br><span class="line">    #access_log  /var/log/nginx/host.access.log  main;</span><br><span class="line"></span><br><span class="line">    location / &#123;</span><br><span class="line">        root   /data/wwwroot/default;          # &lt;------ 修改这里为自己的目录</span><br><span class="line">        index  index.html index.htm;</span><br><span class="line">    &#125;</span><br><span class="line"></span><br><span class="line">    #error_page  404              /404.html;</span><br><span class="line"></span><br><span class="line">    # redirect server error pages to the static page /50x.html</span><br><span class="line">    #</span><br><span class="line">    error_page   500 502 503 504  /50x.html;</span><br><span class="line">    location = /50x.html &#123;</span><br><span class="line">        root   /usr/share/nginx/html;</span><br><span class="line">    &#125;</span><br><span class="line"></span><br><span class="line">    # proxy the PHP scripts to Apache listening on 127.0.0.1:80</span><br><span class="line">    #</span><br><span class="line">    #location ~ \.php$ &#123;</span><br><span class="line">    #    proxy_pass   http://127.0.0.1;</span><br><span class="line">    #&#125;</span><br><span class="line"></span><br><span class="line">    # pass the PHP scripts to FastCGI server listening on 127.0.0.1:9000</span><br><span class="line">    #</span><br><span class="line">    location ~ \.php$ &#123;</span><br><span class="line">        root /data/wwwroot/default;          # &lt;------ 修改这里为自己的目录</span><br><span class="line">        fastcgi_pass   172.20.0.4:9000;          # &lt;------ 修改这里为正确的PHP解析地址</span><br><span class="line">        fastcgi_index  index.php;</span><br><span class="line">        fastcgi_param  SCRIPT_FILENAME  $document_root$fastcgi_script_name;          # &lt;------ 修改这里的路径</span><br><span class="line">        include        fastcgi_params;</span><br><span class="line">    &#125;</span><br><span class="line"></span><br><span class="line">    # deny access to .htaccess files, if Apache&#x27;s document root</span><br><span class="line">    # concurs with nginx&#x27;s one</span><br><span class="line">    #</span><br><span class="line">    #location ~ /\.ht &#123;</span><br><span class="line">    #    deny  all;</span><br><span class="line">    #&#125;</span><br><span class="line">&#125;</span><br></pre></td></tr></table></figure>

<p>修改好以后，执行 <code>docker exec nginx nginx -s reload</code> 重载 <code>nginx</code> 配置以使其生效。这时可以在 <code>/data/wwwroot/default</code> 目录下创建一个 <code>index.html</code> 的文件，然后浏览器访问下看看是否可以正常显示。再创建一个含有 <code>&lt;?php   phpinfo();?&gt;</code> 代码的 PHP 文件测试下 PHP 是否可用。</p>
<h1 id="后续要添加网站"><a href="#后续要添加网站" class="headerlink" title="后续要添加网站"></a>后续要添加网站</h1><p>后续如果要增加新的网站，只需要在 <code>/data/wwwroot/</code> 中新建个文件夹存储网站文件，然后在 <code>/etc/nginx/conf.d/</code> 中增加新网站的配置文件，最后执行 <code>docker exec nginx nginx -s reload</code> 重载 nginx 配置即可生效。</p>
<p>如果要增加 Let’s encrypted 的 SSL 的话，建议使用 <a href="https://acme.sh/">acme.sh</a> 中的 DNS 方法来注册证书，并把证书安装到 <code>/etc/nginx/ssl</code> 目录里，最后使用 <code>docker restart nginx</code> 来重启 Nginx 容器生效。这个后续可以再开篇文章写一下。</p>
<h4 id="完工！"><a href="#完工！" class="headerlink" title="完工！"></a>完工！</h4>]]></content>
      <tags>
        <tag>配置</tag>
        <tag>LNMP</tag>
        <tag>Docker</tag>
      </tags>
  </entry>
  <entry>
    <title>手里第一个归零的币 -- BlockCDN</title>
    <url>/2018/11/23/coin-return-0.html</url>
    <content><![CDATA[<blockquote>
<p>跑路前还发个公告</p>
</blockquote>
<p>重要公告<br>首先感谢大中华地区的BlockCDN爱好者和参与者，在这一年多来对BCDN项目的支持和鼓励。伴随BCDN走过了融资到退币，从94到成长。没有您们就没有BCDN的成长！为了更好的让分享型CDN能尽快的落地造福大众，区块链全球发展基金会（Blockchain Global Development Foundation）拟定同全球CDN巨头合作技术研发和加快BCDN的全球应用落地。具体洽谈合作商包括：Akamai 、 Amazon 、CloudFront、EdgeCast、CloudFlare。介于大中华地区对CDN的准入条件和对区块链行业的政策性风险，基金会艰难的决定暂停中国地区的BCDN业务和停止同原中国合作商（成都区块链公司）的开发和大中华区的推广合作。并于2018年12月1日起暂停原大中华区的BCDN挖矿，快照等一切活动。大中华区业务的从新开启时间待定。原大中华区平台内的BCDN资产请于12月15日前提现到个人ETH 钱包，官方将于12月15日24：00后将停止所有大中华区平台内BCDN的提现、维护等活动，未提现的按自愿放弃其所有权。望相互告知。再次感谢您的支持！</p>
<p>区块链全球发展基金会（Blockchain Global Development Foundation）<br>2018&#x2F;11&#x2F;22</p>
]]></content>
      <tags>
        <tag>杂七杂八</tag>
      </tags>
  </entry>
  <entry>
    <title>在树莓派3B上搭建Hass.io并接入米家和iOS（二）</title>
    <url>/2018/12/11/raspberrypi-3b-home-assistant-mi-2.html</url>
    <content><![CDATA[<p>这是这个系列的第二篇，主要讲一下各种设备接入配置。先放一张目前我已经配置好的管理界面图片</p>
<p><img src="/upload/20181211/HDJ48ZxcSFTWAt0MaM43oYcTagO0EuGLxxUY0PvW.png"></p>
<p>再放一张配置好的 HomeKit 截图</p>
<p><img src="/upload/20181211/5UcdR3uIjaHSc2HhVxr4zDqbSJ0YSrGAPMEtxZwT.png"></p>
<p><em>开始这篇之前，首先你要确保你已经安装了上一篇中提到的 <strong>SSH &amp; Web Terminal</strong> 插件。</em></p>
<h2 id="如何修改配置文件"><a href="#如何修改配置文件" class="headerlink" title="如何修改配置文件"></a>如何修改配置文件</h2><p>如果已经安装好了 <strong>SSH &amp; Web Terminal</strong> 插件并启动了，那么直接在 <strong>Terminal</strong> 中执行下面的命令就可以连接到树莓派上了。</p>
<figure class="highlight plaintext"><table><tr><td class="code"><pre><span class="line">ssh hassio@hassio.local</span><br></pre></td></tr></table></figure>

<p>连接后 ，用 <code>ls</code> 查看目录</p>
<p><img src="/upload/20181211/GQsHPHWOazBkCO9RHLjcxJVrFgSsf054nBPYCSwf.png"></p>
<p>各个目录的作用如下：</p>
<ul>
<li>addons 存储自定义插件</li>
<li>backup 备份目录</li>
<li>config 配置文件目录已经自定义组件</li>
<li>share 共享目录</li>
<li>ssl 证书目录</li>
</ul>
<p>我们配置的时候，主要就是修改 <code>config</code> 目录下的 <code>configuration.yaml</code> 文件。每次修改保存后，要先在后台的“配置”&#x3D;&gt;“通用”中“检查配置”，配置检查通过后，再重载配置或者重启服务（有些配置的修改需要重启服务才能生效）。</p>
<h2 id="接入小米多功能网关"><a href="#接入小米多功能网关" class="headerlink" title="接入小米多功能网关"></a>接入小米多功能网关</h2><p>打开 <code>config/configuration.yaml</code>，加入下面的配置（根据你的情况选择是多网关还是单网关配置）：</p>
<figure class="highlight plaintext"><table><tr><td class="code"><pre><span class="line"># 使用单网关前提下，可不填 mac, mac 不带冒号</span><br><span class="line">xiaomi_aqara:</span><br><span class="line">  gateways:</span><br><span class="line">    - mac:</span><br><span class="line">      key: xxxxxxxxxxxxxxxx</span><br><span class="line"># 多个网关必须填入 mac，mac 不带冒号</span><br><span class="line">xiaomi_aqara:</span><br><span class="line">  gateways:</span><br><span class="line">    - mac: xxxxxxxxxxxx</span><br><span class="line">      key: xxxxxxxxxxxxxxxx</span><br><span class="line">    - mac: xxxxxxxxxxxx</span><br><span class="line">      key: xxxxxxxxxxxxxxxx</span><br></pre></td></tr></table></figure>

<p>其中 <code>key</code> 的获取，需要打开米家App，打开网关页面，点击右上角的三个点，打开菜单后，选择“关于”，之后“玩法教程”下面的空白处点击5次，就会出现新的列表选项，点击“局域网通信协议”，里面的密码就是 <code>key</code> 了，另外要把最上面的那个“局域网通信协议”的开关打开。</p>
<p>保存重启，接入网关成功后，通过网关接入的各种 <strong>ZigBee</strong> 设备都会被 <strong>HomeAssistant</strong> 识别出来。<br>目前的支持情况参见这里：<a href="https://home-assistant.cc/component/xiaomi/zigbee/">https://home-assistant.cc/component/xiaomi/zigbee/</a></p>
<h2 id="接入小米Wifi设备"><a href="#接入小米Wifi设备" class="headerlink" title="接入小米Wifi设备"></a>接入小米Wifi设备</h2><p>插座类的配置如下：</p>
<figure class="highlight plaintext"><table><tr><td class="code"><pre><span class="line">switch:</span><br><span class="line">  - platform: xiaomi_miio</span><br><span class="line">    name: Original Xiaomi Mi Smart WiFi Socket</span><br><span class="line">    host: 192.168.130.59</span><br><span class="line">    token: YOUR_TOKEN</span><br></pre></td></tr></table></figure>

<p>其中 <strong>name</strong> 可以自定义，<strong>host</strong> 是插座的IP地址，<strong>token</strong>则是通信用的凭证。</p>
<p>小米Wifi设备由于各个生产厂商的原因，并不像智能网关那么人性给提供设备的 <code>token</code>。获取 <code>wifi</code> 设备的 <code>token</code> 需要折腾一下。网上给出了几种方案，我使用的是用 <strong>Root</strong> 过的安卓手机。在手机上安装 <strong>5.0.19</strong> 版的米家（这是最后一个版本支持通过本地sqlite数据库查询 <strong>token</strong> 的版本），登陆米家，然后手机上打开文件管理器（比如ES文件管理器），把 <code>/data/data/com.xiaomi.smarthome/databases/miio2.db</code> 复制到电脑可访问的目录（比如SD卡），然后通过<code>USB</code> 把文件从手机转移到电脑上，用 <code>sqlite</code> 软件查询 <code>devicerecord</code> 表，其中有个 <code>token</code> 字段，那个就是了。</p>
<p>其他的一些Wifi设备参考这里：<a href="https://home-assistant.cc/component/xiaomi/wifi/">https://home-assistant.cc/component/xiaomi/wifi/</a></p>
<h2 id="接入苹果HomeKit"><a href="#接入苹果HomeKit" class="headerlink" title="接入苹果HomeKit"></a>接入苹果HomeKit</h2><p>配置这个的好处是，可以使用 <strong>Siri</strong> 来控制你的家庭智能场景和设备。</p>
<p>增加如下配置：</p>
<figure class="highlight plaintext"><table><tr><td class="code"><pre><span class="line">homekit:</span><br></pre></td></tr></table></figure>

<p>保存重启服务后，会在主面板看到一个PIN码，这时候打开iPhone，找到 <strong>Home</strong> ，“添加配件”，“没有代码或无法扫描”，“输入代码”，把刚才的PIN码输入进去即可。</p>
<p>其他配置可参考这里：<a href="https://home-assistant.cc/homekit/builtin/">https://home-assistant.cc/homekit/builtin/</a></p>
<h2 id="接入路由器"><a href="#接入路由器" class="headerlink" title="接入路由器"></a>接入路由器</h2><p>我的是网件路由刷的华硕的固件，因此找到华硕的配置如下：</p>
<figure class="highlight plaintext"><table><tr><td class="code"><pre><span class="line">asuswrt:</span><br><span class="line">  host: 路由器IP</span><br><span class="line">  username:  路由器账号</span><br><span class="line">  password: 路由器密码</span><br><span class="line">  protocol: 协议 ssh 或者 telnet</span><br><span class="line">  port: 端口，默认 22,telnet 模式为 23</span><br><span class="line">  mode: 模式，默认 router，可选 ap</span><br><span class="line">  ssh_key: ssh 秘钥路径，可选</span><br></pre></td></tr></table></figure>

<p>其他路由参考：<a href="https://home-assistant.cc/component/router/">https://home-assistant.cc/component/router/</a></p>
<h2 id="自定义组件"><a href="#自定义组件" class="headerlink" title="自定义组件"></a>自定义组件</h2><p>有时候，有些设备可能自带的组件并不支持，那么需要去搜索安装下第三方组件，比如小米直流电风扇，就需要去下载 <a href="https://github.com/syssi/xiaomi_fan">https://github.com/syssi/xiaomi_fan</a> 到 <code>config</code> 目录下面，</p>
<p><img src="/upload/20181211/cuLXvbOSLqdzFzWvg8h8KqkTxjvb5UxWvb8KRBIZ.png"></p>
<p>然后按照第三方插件给的说明增加配置即可。</p>
<h2 id="位置和天气设置"><a href="#位置和天气设置" class="headerlink" title="位置和天气设置"></a>位置和天气设置</h2><p>查询下经纬度，可以把经纬度设置好，之后就能显示当地的日落日出时间了。</p>
<figure class="highlight plaintext"><table><tr><td class="code"><pre><span class="line">homeassistant:</span><br><span class="line">  # 名称，可为中文</span><br><span class="line">  name: 家</span><br><span class="line">  # 纬度</span><br><span class="line">  latitude: !secret latitude</span><br><span class="line">  # 经度</span><br><span class="line">  longitude: !secret longitude</span><br><span class="line">  # 海拔</span><br><span class="line">  elevation: 11</span><br><span class="line">  # 度量单位，这里选择“米”</span><br><span class="line">  unit_system: metric</span><br><span class="line">  # 时区</span><br><span class="line">  time_zone: Asia/Shanghai</span><br><span class="line">  # 设备个性化</span><br><span class="line">  customize: </span><br></pre></td></tr></table></figure>

<p>我使用的是yahoo天气的数据，配置如下：</p>
<figure class="highlight plaintext"><table><tr><td class="code"><pre><span class="line">weather:</span><br><span class="line">  - platform: ywether</span><br><span class="line">    woeid: 2168257</span><br><span class="line">    name: Zibo</span><br></pre></td></tr></table></figure>

<p>其中 <code>woeid</code> 需要自己去 <a href="https://www.yahoo.com/news/weather/">https://www.yahoo.com/news/weather/</a> 查询城市天气，URL中的id即为 <code>woeid</code>。</p>
<h2 id="个性化设置"><a href="#个性化设置" class="headerlink" title="个性化设置"></a>个性化设置</h2><p>个性化设置在 “配置” -&gt; “自定义” 里面，在这里可以修改每个接入设备的名字等参数，并且可以设置是否隐藏（这个还是挺有用的，尤其是接入了路由器的情况下，会有很多的 <strong>device_tracker</strong> 类的设备，都显示在面板上显然是很乱的）。</p>
<p>一些可以参考的参数：<a href="https://home-assistant.cc/system/customize/">https://home-assistant.cc/system/customize/</a></p>
<h2 id="智能语言"><a href="#智能语言" class="headerlink" title="智能语言"></a>智能语言</h2><p>配置这个的目的是为了能通过语音合成技术进行结果输出（播报）。</p>
<p>直接参考这里即可： <a href="https://home-assistant.cc/component/nlp/">https://home-assistant.cc/component/nlp/</a></p>
<h2 id="结语"><a href="#结语" class="headerlink" title="结语"></a>结语</h2><p>基本的配置就这些，目前家里所有的智能设备都加入到了 <strong>Home Assistant</strong> 的管理中了，之后就是配置各种智能逻辑了，等我试验过后，会在下一篇写一下。</p>
<p>Over！</p>
]]></content>
      <tags>
        <tag>HomeAssistant</tag>
        <tag>家庭智能</tag>
        <tag>米家</tag>
        <tag>树莓派</tag>
      </tags>
  </entry>
  <entry>
    <title>centos 6.4 mini 网络配置</title>
    <url>/2013/04/02/centos-6-4-mini-network-config.html</url>
    <content><![CDATA[<p>1、这里可以修改基本的网络信息，IP，netmask</p>
<figure class="highlight plaintext"><table><tr><td class="code"><pre><span class="line">vi /etc/sysconfig/network-scripts/ifcfg-eth0</span><br></pre></td></tr></table></figure>

<p>2、修改网关在这里</p>
<figure class="highlight plaintext"><table><tr><td class="code"><pre><span class="line">vi /etc/sysconfig/network</span><br><span class="line">加入gateway=192.168.1.1</span><br></pre></td></tr></table></figure>

<p>3、修改DNS</p>
<figure class="highlight plaintext"><table><tr><td class="code"><pre><span class="line">vi /etc/resolve.conf</span><br></pre></td></tr></table></figure>

<p>另外，配置好网络后需要用yum安装下wget和vim</p>
<p>开发工具包</p>
<figure class="highlight plaintext"><table><tr><td class="code"><pre><span class="line">yum groupinstall &quot;Development Libraries&quot; &quot;Development Tools&quot;</span><br></pre></td></tr></table></figure>

<h2 id="以上是centos6-4的配置方法，在centos7下，直接输入-nmtui-即可进入-text-ui模式配置"><a href="#以上是centos6-4的配置方法，在centos7下，直接输入-nmtui-即可进入-text-ui模式配置" class="headerlink" title="以上是centos6.4的配置方法，在centos7下，直接输入 nmtui 即可进入 text ui模式配置"></a>以上是centos6.4的配置方法，在centos7下，直接输入 nmtui 即可进入 text ui模式配置</h2>]]></content>
      <tags>
        <tag>Server&amp;OS</tag>
      </tags>
  </entry>
  <entry>
    <title>在树莓派3B上搭建Hass.io并接入米家和iOS（一）</title>
    <url>/2018/12/06/raspberrypi-3b-home-assistant-mi-1.html</url>
    <content><![CDATA[<p>本来今天应该是写（二）的，但是昨晚配置的过程中发现了很多问题，比如声音、蓝牙之类的配置，以及最关键的是发现原来 <strong>Hass.io</strong> 已经不被官方推荐了，现在官方推荐他们自己做的 <strong>HassOS</strong>，WTF，这都是啥跟啥？！所以今天就是把昨天写的(一)推翻掉，重新写。</p>
<p>先来说说刚才提到的 <strong>Hass.io</strong> 和 <strong>HassOS</strong> 。</p>
<p>按照目前我的理解，这个项目的演化历程是这样的，最早的 <strong>Home Assistant</strong> 是一堆脚本构成的，系统是基于 <strong>Respbian</strong> 的，所以起名叫做 <strong>Hassbian</strong>，之后基于 <strong>ResinOS</strong>(一个面向嵌入式系统的docker系统平台)，把整个的核心代码封装进了两个镜像中，一个是 **<a href="https://hub.docker.com/r/homeassistant/raspberrypi3-homeassistant/">homeassistant&#x2F;raspberrypi3-homeassistant</a>**，一个是 **<a href="">homeassistant&#x2F;armhf-hassio-supervisor</a>**，其余的插件都各自独立成为一个镜像，这样整个系统运行起来就是一个 <strong>ResinOS</strong> 加上一堆容器，对于整体的稳定性和可维护性提升了不少，这也就是 <strong>Hass.io</strong>。再之后不知道什么原因，又基于 <strong>buildroot</strong> 系统（另外一个面向嵌入式的系统平台）做了 <strong>HassOS</strong>，这款比起上一款来说，感觉加入了一些新的驱动，比如声卡和蓝牙，另外就是宿主机做的更加的封闭了，可能是处于安全考虑，也可能是处于以后的商业考虑。</p>
<p>由于不想覆盖掉昨天的那篇，所以开始这篇作为第一篇，然后开始我们的重做系统之旅吧。。。。。</p>
<p>目前 <strong>HassOS</strong> 的稳定版本是 <em>1.13</em>，最新版本是 <em>2.3</em>，这个在 <strong>HassOS</strong> 项目的 <strong>Release</strong> 页面可以看到，<a href="https://github.com/home-assistant/hassos/releases">https://github.com/home-assistant/hassos/releases</a> 。我选择了 <em>2.3</em> 这个版本，由于我是树莓派3B，所以下载了 <strong>hassos_rpi3-2.3.img.gz</strong> 这个包（这里之所以不下载64位的是因为树莓派官方推出64位的系统时间也不长，稳定性有待观察）。</p>
<p>下载后解压得到 <strong>img</strong> 文件，依旧用 <strong>etcher</strong> 来写入到 <strong>TF</strong> 卡中。</p>
<p>这里需要注意，如果你是 <strong>Mac</strong> 电脑，那么写完后，会提示 <strong>TF</strong> 卡无法识别，你直接推出就好。这是因为 <strong>HassOS</strong> 使用的 <strong>GPT</strong> 分区格式，而 <strong>Mac</strong> 默认不支持这个格式。</p>
<p>那么这里就有意思了，往常都是 <strong>boot</strong> 分区是 <strong>FAT</strong> 格式，然后挂载，放入各种位置文件，比如wifi联网的配置，然后把卡插回树莓派，启动就能用了，但现在 <strong>TF</strong> 卡的 <strong>boot</strong> 分区无法挂载，这咋整？</p>
<p>官方给出了方案：<a href="https://github.com/home-assistant/hassos/blob/dev/Documentation/configuration.md">https://github.com/home-assistant/hassos/blob/dev/Documentation/configuration.md</a> ，思路就是再找一个U盘，格式化成 <strong>FAT32</strong> &#x2F; <strong>EXT4</strong> &#x2F; <strong>NTFS</strong> 任意格式，格式化的时候把U盘命名为 <strong>CONFIG</strong>（全大写）。</p>
<p><img src="/upload/20181206/XERIGA49irRbHDpStCCTkJWuj7mz4xwymhv0C86N.png"></p>
<p>之后需要加入的配置文件，按照文档要求的格式放在U盘根目录下即可。启动树莓派的时候，先把U盘插好，系统会自动读取U盘的配置文件并生效。</p>
<p><img src="/upload/20181206/gsOSk9x1aXds3uLtOMtFq4UWzQetIWokbJaGKqDR.png"></p>
<p><strong>另外注意就是配置network的时候，文件名必须是my-network。</strong></p>
<p><strong>除了网络配置以外，timesyncd.conf也要配置，否则系统启动起来时间不对，然后更新就会卡住，因为更新访问的是 HTTPS 加密链接，时间不对，签名就有问题，进而就无法访问更新镜像的链接（下面的截图就是这个坑了）。timesyncd.conf中的NTP服务器网上找下亚洲区的就好。</strong></p>
<p><img src="/upload/20181206/WlBcqLD97OTqxEtLyMgXmxSSAiDUgrQ1Clkn8tMy.png"></p>
<p><strong>另外建议把 authorized_keys 也配置了吧，这样可以远程直接SSH到宿主机。authorized_keys 文件里的内容其实就是你电脑 ~&#x2F;.ssh&#x2F;id_rsa.pub 文件的内容，如果没有这个目录，就执行下 ssh-keygen 生成下。</strong></p>
<p><strong>还有就是一定记住，初始化结束后，要在UI界面上把U盘的配置再导入一次，这个之后会再提到，切记切记啊！！！</strong></p>
<h3 id="以上满满的都是坑！"><a href="#以上满满的都是坑！" class="headerlink" title="以上满满的都是坑！"></a>以上满满的都是坑！</h3><p>所有工作做完，启动树莓派，来看看显示器最后输出的内容，<strong>默认登陆用户是root，不需要密码。</strong></p>
<p><img src="/upload/20181206/kbLzSsoKiFIbEVxjphTruFHG3DtrdXtuCltbDFTa.png"></p>
<p>恩，你没有看错，登陆后是官方实现的一个 <strong>cli</strong>，用于便捷管理各种服务，屏蔽掉操作系统的存在。虽然现在允许你使用 <strong>login</strong> 命令进入宿主机，但是我觉得早晚会屏蔽掉这个命令，做的跟路由器似的。</p>
<p>这时候，你执行 <strong>login</strong> 进入宿主机，然后执行 <code>docker ps</code>，看看是不是一个 <strong>supervisor</strong> 的容器，一个 <strong>homeassistant&#x2F;raspberrypi3-homeassistant</strong> 生成的容器。</p>
<p>如果没问题，那么在浏览器里访问 <strong><a href="http://hassio.local:8123/">http://hassio.local:8123</a></strong> 就能看到创建新用户的界面了（如果你路由器不支持mDNS，那么就只能用 <strong>http:&#x2F;&#x2F;树莓派IP:8123</strong> 的形式访问了。</p>
<p><img src="/upload/20181206/BUHkhtk3LUHmQKwEy28ImqELyIG4IjBnKLbDjYCA.png"></p>
<p>登陆之后，就能看到主界面了。去左边栏 <strong>Hass.io</strong> 中，选择 <strong>ADD-ON STORE</strong>，然后找到 <strong>SSH &amp; Web Terminal</strong>，点进去安装，如下图</p>
<p><img src="/upload/20181206/pIBImO28p50Bsk4jd0f79NhKAXYhLTVw0pET2bm0.png"></p>
<p>这个插件其实是让你 <strong>SSH</strong> 登陆进一个容器，然后把一些配置文件从宿主机映射进容器，这样相对安全一些。</p>
<p>安装完，在下面的配置中，把你的登陆用户名和密码加入进去，另外配置下 <strong>Web Terminal</strong> 的证书，证书是放在 <strong>&#x2F;root&#x2F;ssl</strong> 目录下的。你可以先关闭 <strong>Web Terminal</strong>，启动 <strong>SSH</strong> 成功后，用 <strong>SCP</strong> 把证书传上去，或者去插件中心安装 <strong>Samba Share</strong> 插件，用共享的方法传上去。</p>
<p>最关键的一步来了，在 <strong>Hass.io</strong> 中，选择 <strong>SYSTEM</strong> ，点击 <strong>IMPORT FROM USB</strong> 完成配置写入。</p>
<p><img src="/upload/20181206/eBX8GzKodKV7FRzFIX9Jl9w8PjLSkNuwDF0BD53D.png"></p>
<h3 id="OK，这一篇就先到这里，下一篇真的要讲讲其他的配置了。"><a href="#OK，这一篇就先到这里，下一篇真的要讲讲其他的配置了。" class="headerlink" title="OK，这一篇就先到这里，下一篇真的要讲讲其他的配置了。"></a>OK，这一篇就先到这里，下一篇真的要讲讲其他的配置了。</h3>]]></content>
      <tags>
        <tag>HomeAssistant</tag>
        <tag>家庭智能</tag>
        <tag>米家</tag>
        <tag>树莓派</tag>
      </tags>
  </entry>
  <entry>
    <title>用 Docker 快速部署 PPTP VPN 和 L2TP + IPSEC VPN</title>
    <url>/2019/01/11/docker-pptp-vpn-l2tp-ipsec-vpn.html</url>
    <content><![CDATA[<p>虽然平时主要用 <code>Shadowsocks</code>，但是架不住有时候没法安装 <code>Shadowsocks</code> 的客户端，那么就还是需要 <code>PPTP VPN</code> 或者 <code>L2TP VPN</code>。</p>
<p>最早的时候，是使用的各种一键安装脚本，但是由于系统版本差异，每次需要安装的时候，都要现找可用的一键脚本，太费劲了。于是从网上找了别人封装好的 <code>Docker</code> 镜像，这篇文章总结下，基本上就是一条语句就搞定了。</p>
<h1 id="PPTP-VPN"><a href="#PPTP-VPN" class="headerlink" title="PPTP VPN"></a>PPTP VPN</h1><p>使用的镜像是 <code>mobtitude/vpn-pptp</code>，首先需要把用户名和密码配置一下，打开 <code>/etc/ppp/chap-secrets</code>，</p>
<figure class="highlight plaintext"><table><tr><td class="code"><pre><span class="line"># Secrets for authentication using CHAP</span><br><span class="line"># client        server  secret                  IP addresses</span><br><span class="line">ety001         *          123456              *</span><br></pre></td></tr></table></figure>
<p>上面的就是配置了一个用户名 <code>ety001</code> 和 密码 <code>123456</code> 的用户，然后执行下面的命令就可以了，</p>
<figure class="highlight plaintext"><table><tr><td class="code"><pre><span class="line">docker run -d --name pptp --restart always  --privileged -p 1723:1723 -v /etc/ppp/chap-secrets:/etc/ppp/chap-secrets mobtitude/vpn-pptp</span><br></pre></td></tr></table></figure>
<p>最后检查下 <code>tcp 1723</code> 端口在防火墙上是否打开就可以了。</p>
<h1 id="L2TP-IPSEC-VPN"><a href="#L2TP-IPSEC-VPN" class="headerlink" title="L2TP + IPSEC VPN"></a>L2TP + IPSEC VPN</h1><p>使用的镜像是 <code>hwdsl2/ipsec-vpn-server</code>，需要先配置下用户名、密码和PSK，新建一个环境变量的文件 <code>/etc/l2tp-env</code>，内容如下</p>
<figure class="highlight plaintext"><table><tr><td class="code"><pre><span class="line">VPN_IPSEC_PSK=abcdef</span><br><span class="line">VPN_USER=ety001</span><br><span class="line">VPN_PASSWORD=123456</span><br></pre></td></tr></table></figure>
<p>上面的就是配置了一个用户名 <code>ety001</code>，密码 <code>123456</code>，PSK 为 <code>abcdef</code> 的用户，然后执行下面的命令就可以了，</p>
<figure class="highlight plaintext"><table><tr><td class="code"><pre><span class="line">docker run --name ipsec-vpn-server \</span><br><span class="line">--env-file /etc/l2tp-env \</span><br><span class="line">--restart=always \</span><br><span class="line">-p 500:500/udp \</span><br><span class="line">-p 4500:4500/udp \</span><br><span class="line">-p 1701:1701/udp \</span><br><span class="line">-v /lib/modules:/lib/modules:ro \</span><br><span class="line">-d --privileged \</span><br><span class="line">hwdsl2/ipsec-vpn-server</span><br></pre></td></tr></table></figure>
<p>最后检查下 <code>udp 500</code> 和 <code>udp 4500</code> 端口在防火墙上是否打开就可以了。</p>
<h1 id="Shadowsocks"><a href="#Shadowsocks" class="headerlink" title="Shadowsocks"></a>Shadowsocks</h1><p>最后再附带上一个一句话部署 <code>Shadowsocks</code> 的命令，先创建个配置文件 <code>/etc/shadowsocks.json</code>，内容如下</p>
<figure class="highlight plaintext"><table><tr><td class="code"><pre><span class="line">&#123;</span><br><span class="line">    &quot;server&quot;:&quot;0.0.0.0&quot;,</span><br><span class="line">    &quot;server_port&quot;: 10000,</span><br><span class="line">    &quot;local_address&quot;:&quot;127.0.0.1&quot;,</span><br><span class="line">    &quot;local_port&quot;:1080,</span><br><span class="line">    &quot;password&quot;:&quot;ety001&quot;,</span><br><span class="line">    &quot;timeout&quot;:60,</span><br><span class="line">    &quot;method&quot;:&quot;aes-256-cfb&quot;</span><br><span class="line">&#125;</span><br></pre></td></tr></table></figure>
<p>然后执行下面的命令部署</p>
<figure class="highlight plaintext"><table><tr><td class="code"><pre><span class="line">$ docker run -d -p 10000:10000 -v /etc/shadowsocks.json:/conf/shadowsocks.json --restart=always --name ss ety001/ss</span><br></pre></td></tr></table></figure>
]]></content>
      <tags>
        <tag>Server&amp;OS</tag>
        <tag>Docker</tag>
      </tags>
  </entry>
  <entry>
    <title>微信扫一扫相册无法显示图片的原因</title>
    <url>/2018/12/29/wechat-jpg-detect.html</url>
    <content><![CDATA[<p>今天在进行demo的联调的时候，微信端的扫一扫相册里一直不显示app下载到本地的二维码。</p>
<p>这个二维码是服务端php生成的，最初以为微信相册的所有照片不显示，是因为格式的问题。</p>
<p>在尝试了更换格式后，发现问题仍然不能解决。</p>
<p>于是找了一张微信能够识别的图片，然后分析它跟我用php生成的图片的 EXIF 信息。</p>
<p>又折腾了大约1–2个小时，把我php生成的图片的 EXIF 调整的跟正常图片一样，发现还是不行。</p>
<p>不是格式的问题，不是 EXIF 的问题，感觉整个人都不好了。。。</p>
<p>想来想去，想了好久，不知道怎么突然想起来文件大小。</p>
<p>可能是我发现我用php生成的图片都是小于4kb的吧。</p>
<p>于是我分别找了一张 21kb+ 的，一张 16kb+ 的，一张 11kb+ 的，一张 6kb+ 的图片。</p>
<p>然后传到手机上，用微信扫一扫相册打开，发现除了那个 6kb+ 的图片识别不出来，其他的都可以。</p>
<p>尼玛啊！！！！！弄了半天原来是文件大小的原因！！！！！！</p>
<p>看来微信在所有图片那个分类下优先显示大于 10kb 的图片啊。。。。</p>
]]></content>
      <tags>
        <tag>杂七杂八</tag>
      </tags>
  </entry>
  <entry>
    <title>融合Cordova和Vuejs的开发环境</title>
    <url>/2019/01/04/cordova-vuejs-integration.html</url>
    <content><![CDATA[<p>最近开始在开发 <code>Cordova + Webpack + Vuejs</code> 架构的 <code>App</code>，开发 <code>Demo</code> 的时候，最麻烦的就是测试了。</p>
<p>由于我是先使用 <code>cordova</code> 的工具创建 <code>cordova</code> 项目，然后用 <code>vue-cli</code> 再在 <code>cordova</code> 中创建 <code>vuejs</code> 项目。<br>这样在开发的时候，需要先使用 <code>npm run dev</code> 调试 <code>vuejs</code> ，然后开发差不多了，需要调用 <code>cordova</code> 插件的时候，再执行 <code>cordova prepare browser</code> 和 <code>cordova run browser</code> 调试 <code>cordova</code> 插件，每次改完代码还要再执行 <code>npm run build &amp;&amp; cordova prepare browser</code>。</p>
<p>这样就很烦啊！</p>
<p>为了在正式开发项目前解决这个问题，我研究了<a href="https://github.com/StellarCN/firefly">萤火钱包</a>的实现和 <code>webpack</code> 的文档。</p>
<p>萤火钱包的实现方式是自己用 <code>Node</code> 写了一个 <code>Web</code> 服务，代码在这里：<a href="https://github.com/StellarCN/firefly/blob/master/build/dev-server.js">https://github.com/StellarCN/firefly/blob/master/build/dev-server.js</a> 。</p>
<p>由于 <code>Webpack</code> 可以使用 <code>require</code> 的方式和 <code>webpack-dev-server</code> 两种方式对代码进行打包，萤火钱包就是在自己写的 <code>Server</code> 中，先引用 <code>webpack</code> 打包代码（24行–41行），然后用 <code>express</code> 给 <code>cordova</code> 的 <code>js bridge</code> 提供解析（66行–88行），最后在 <code>package.json</code> <a href="https://github.com/StellarCN/firefly/blob/master/package.json#L18">https://github.com/StellarCN/firefly/blob/master/package.json#L18</a> 中加入一行代码，完成 <code>cordova prepare</code> 后再启动自己写的 <code>Node</code> 服务器。</p>
<p>按照萤火的思路尝试了大半天，一直都搞不定 <code>webpack</code> 的配置，一直给我报错，如下</p>
<figure class="highlight plaintext"><table><tr><td class="code"><pre><span class="line">WebpackOptionsValidationError: Invalid configuration object. Webpack has been initialised using a configuration object that does not match the API schema.</span><br><span class="line"> - configuration misses the property &#x27;entry&#x27;.</span><br><span class="line">   object &#123; &lt;key&gt;: non-empty string | [non-empty string] &#125; | non-empty string | [non-empty string] | function</span><br><span class="line">   -&gt; The entry point(s) of the compilation.</span><br></pre></td></tr></table></figure>

<p>最后只得再换个思路，用 <code>webpack-dev-server</code> 再试试。</p>
<p>由于 <code>vuejs</code> 默认就是用 <code>webpack-dev-server</code> 作为测试环境，所以需要改动的文件还是比较少，只需要修改 <code>build/webpack.dev.conf.js</code> 中的配置和 <code>package.json</code> 就好了。</p>
<p>在 <code>build/webpack.dev.conf.js</code> 中的 <code>devServer</code> 配置项里加上下面的代码：</p>
<figure class="highlight plaintext"><table><tr><td class="code"><pre><span class="line">before(app)&#123;</span><br><span class="line">  // serve Cordova javascript and plugins</span><br><span class="line">  const cordovaPlatformPath = path.join(__dirname, &#x27;../platforms/browser/www&#x27;)</span><br><span class="line">  app.use(&#x27;/plugins&#x27;, express.static(path.join(cordovaPlatformPath, &#x27;plugins&#x27;)))</span><br><span class="line">  app.get(</span><br><span class="line">    [</span><br><span class="line">      &#x27;/cordova.js&#x27;,</span><br><span class="line">      &#x27;/cordova_plugins.js&#x27;,</span><br><span class="line">    ],</span><br><span class="line">    function (req, res) &#123;</span><br><span class="line">      try &#123;</span><br><span class="line">        res.sendFile(path.join(cordovaPlatformPath, req.path))</span><br><span class="line">      &#125; catch(err) &#123;</span><br><span class="line">        console.log(err)</span><br><span class="line">      &#125;</span><br><span class="line">  &#125;)</span><br><span class="line">  // serve Cordova config.xml</span><br><span class="line">  app.get(&#x27;/config.xml&#x27;,</span><br><span class="line">    function(req,res)&#123;</span><br><span class="line">      try&#123;</span><br><span class="line">        res.sendFile(path.join(__dirname, &#x27;../&#x27;+req.path))</span><br><span class="line">      &#125; catch(err)&#123;</span><br><span class="line">        consol.log(err)</span><br><span class="line">      &#125;</span><br><span class="line">  &#125;)</span><br><span class="line">&#125;,</span><br></pre></td></tr></table></figure>

<p>另外再在该文件头部加入 <code>express</code> 包的引用。</p>
<p>通过 <code>devServer.before</code> 加入 <code>cordova</code> 的 <code>js bridge</code>，这样就可以用 <code>webpack-dev-server</code> 来解析 <code>js bridge</code> 了。</p>
<p>最后在 <code>package.json</code> 中修改下原有的 <code>dev</code> 命令如下：</p>
<figure class="highlight plaintext"><table><tr><td class="code"><pre><span class="line">&quot;dev&quot;: &quot;cordova prepare browser &amp;&amp; cross-env PORT=3000 webpack-dev-server --inline --progress --config build/webpack.dev.conf.js&quot;,</span><br></pre></td></tr></table></figure>

<p>这样以后只需要执行 <code>npm run dev</code> 就可以了，只有当用 <code>cordova</code> 安装了新插件的时候，才需要重启下 <code>npm run dev</code>。</p>
<hr>
<p>再插入个小修改。我在 <code>src/main.js</code> 中加入了如下的代码，可以让 <code>cordova js bridge</code> 动态插入进 <code>APP</code>：</p>
<figure class="highlight plaintext"><table><tr><td class="code"><pre><span class="line">// add cordova.js only if serving the app through file://</span><br><span class="line">if (window.location.protocol === &#x27;file:&#x27; || window.location.port === &#x27;3000&#x27;) &#123;</span><br><span class="line">  const cordovaScript = document.createElement(&#x27;script&#x27;);</span><br><span class="line">  cordovaScript.setAttribute(&#x27;type&#x27;, &#x27;text/javascript&#x27;);</span><br><span class="line">  cordovaScript.setAttribute(&#x27;src&#x27;, &#x27;cordova.js&#x27;);</span><br><span class="line">  document.body.appendChild(cordovaScript);</span><br><span class="line">&#125;</span><br></pre></td></tr></table></figure>

<p>OVER!!</p>
]]></content>
      <tags>
        <tag>前端</tag>
        <tag>cordova</tag>
        <tag>Vuejs</tag>
      </tags>
  </entry>
  <entry>
    <title>ETH多签测试</title>
    <url>/2018/12/22/eth-multiple-signature.html</url>
    <content><![CDATA[<h2 id="前言"><a href="#前言" class="headerlink" title="前言"></a>前言</h2><p>ETH的多签是依靠智能合约实现的，也就是说持币的是智能合约，通过在智能合约里设置条件，来使转账之类的权限通过多人签名来集体控制。</p>
<p>从网上找到了一段简单的多签智能合约，代码如下：</p>
<figure class="highlight plaintext"><table><tr><td class="code"><pre><span class="line">pragma solidity ^0.4.21;</span><br><span class="line"></span><br><span class="line">contract MultiSigWallet&#123;</span><br><span class="line">    address private owner;</span><br><span class="line">    mapping (address =&gt; uint8) private managers;</span><br><span class="line">    </span><br><span class="line">    modifier isOwner&#123;</span><br><span class="line">        require(owner == msg.sender);</span><br><span class="line">        _;</span><br><span class="line">    &#125;</span><br><span class="line">    </span><br><span class="line">    modifier isManager&#123;</span><br><span class="line">        require(</span><br><span class="line">            msg.sender == owner || managers[msg.sender] == 1);</span><br><span class="line">        _;</span><br><span class="line">    &#125;</span><br><span class="line">    </span><br><span class="line">    uint constant MIN_SIGNATURES = 3;</span><br><span class="line">    uint private transactionIdx;</span><br><span class="line">    </span><br><span class="line">    struct Transaction &#123;</span><br><span class="line">        address from;</span><br><span class="line">        address to;</span><br><span class="line">        uint amount;</span><br><span class="line">        uint8 signatureCount;</span><br><span class="line">        mapping (address =&gt; uint8) signatures;</span><br><span class="line">    &#125;</span><br><span class="line">    </span><br><span class="line">    mapping (uint =&gt; Transaction) private transactions;</span><br><span class="line">    uint[] private pendingTransactions;</span><br><span class="line">    </span><br><span class="line">    function MultiSigWallet() public&#123;</span><br><span class="line">        owner = msg.sender;</span><br><span class="line">    &#125;</span><br><span class="line">    </span><br><span class="line">    event DepositFunds(address from, uint amount);</span><br><span class="line">    event TransferFunds(address to, uint amount);</span><br><span class="line">    event TransactionCreated(</span><br><span class="line">        address from,</span><br><span class="line">        address to,</span><br><span class="line">        uint amount,</span><br><span class="line">        uint transactionId</span><br><span class="line">        );</span><br><span class="line">    </span><br><span class="line">    function addManager(address manager) public isOwner&#123;</span><br><span class="line">        managers[manager] = 1;</span><br><span class="line">    &#125;</span><br><span class="line">    </span><br><span class="line">    function removeManager(address manager) public isOwner&#123;</span><br><span class="line">        managers[manager] = 0;</span><br><span class="line">    &#125;</span><br><span class="line">    </span><br><span class="line">    function () public payable&#123;</span><br><span class="line">        emit DepositFunds(msg.sender, msg.value);</span><br><span class="line">    &#125;</span><br><span class="line">    </span><br><span class="line">    function withdraw(uint amount) isManager public&#123;</span><br><span class="line">        transferTo(msg.sender, amount);</span><br><span class="line">    &#125;</span><br><span class="line">    function transferTo(address to,  uint amount) isManager public&#123;</span><br><span class="line">        require(address(this).balance &gt;= amount);</span><br><span class="line">        uint transactionId = transactionIdx++;</span><br><span class="line">        </span><br><span class="line">        Transaction memory transaction;</span><br><span class="line">        transaction.from = msg.sender;</span><br><span class="line">        transaction.to = to;</span><br><span class="line">        transaction.amount = amount;</span><br><span class="line">        transaction.signatureCount = 0;</span><br><span class="line">        transactions[transactionId] = transaction;</span><br><span class="line">        pendingTransactions.push(transactionId);</span><br><span class="line">        emit TransactionCreated(msg.sender, to, amount, transactionId);</span><br><span class="line">    &#125;</span><br><span class="line">    </span><br><span class="line">    function getPendingTransactions() public isManager view returns(uint[])&#123;</span><br><span class="line">        return pendingTransactions;</span><br><span class="line">    &#125;</span><br><span class="line">    </span><br><span class="line">    function signTransaction(uint transactionId) public isManager&#123;</span><br><span class="line">        Transaction storage transaction = transactions[transactionId];</span><br><span class="line">        require(0x0 != transaction.from);</span><br><span class="line">        require(msg.sender != transaction.from);</span><br><span class="line">        require(transaction.signatures[msg.sender]!=1);</span><br><span class="line">        transaction.signatures[msg.sender] = 1;</span><br><span class="line">        transaction.signatureCount++;</span><br><span class="line">        </span><br><span class="line">        if(transaction.signatureCount &gt;= MIN_SIGNATURES)&#123;</span><br><span class="line">            require(address(this).balance &gt;= transaction.amount);</span><br><span class="line">            transaction.to.transfer(transaction.amount);</span><br><span class="line">            emit TransferFunds(transaction.to, transaction.amount);</span><br><span class="line">            deleteTransactions(transactionId);</span><br><span class="line">        &#125;</span><br><span class="line">    &#125;</span><br><span class="line">    </span><br><span class="line">    function deleteTransactions(uint transacionId) public isManager&#123;</span><br><span class="line">        uint8 replace = 0;</span><br><span class="line">        for(uint i = 0; i&lt; pendingTransactions.length; i++)&#123;</span><br><span class="line">            if(1==replace)&#123;</span><br><span class="line">                pendingTransactions[i-1] = pendingTransactions[i];</span><br><span class="line">            &#125;else if(transacionId == pendingTransactions[i])&#123;</span><br><span class="line">                replace = 1;</span><br><span class="line">            &#125;</span><br><span class="line">        &#125; </span><br><span class="line">        delete pendingTransactions[pendingTransactions.length - 1];</span><br><span class="line">        pendingTransactions.length--;</span><br><span class="line">        delete transactions[transacionId];</span><br><span class="line">    &#125;</span><br><span class="line">    </span><br><span class="line">    function walletBalance() public isManager view returns(uint)&#123;</span><br><span class="line">        return address(this).balance;</span><br><span class="line">    &#125;</span><br><span class="line">&#125;</span><br></pre></td></tr></table></figure>

<h2 id="部署合约"><a href="#部署合约" class="headerlink" title="部署合约"></a>部署合约</h2><p>我本地的测试网络是使用 <a href="https://truffleframework.com/ganache"><strong>Ganache</strong></a> 搭建的，如下图</p>
<p><img src="/upload/20181222/L4Eyix0wrf4gIollkxdHytVyd5cgbCdXI3kvcZP9.png"></p>
<p>我修改了我的 <strong>Ganache</strong> 的端口为 <strong>8545</strong>。</p>
<p>然后打开 <a href="http://remix.ethereum.org/#"><strong>Remix</strong></a>，在右边栏选择 <strong>Run</strong>，在 <strong>Environment</strong> 中选择 <strong>Web3 Provider</strong>，如下图</p>
<p><img src="/upload/20181222/5cE6alqJv6QxCd25lESLhFuxeeZQRrVAiFWtj40h.png"></p>
<p>在弹出的层中，输入本地地址和刚才配置的8545端口，就可以连接到 <strong>Ganache</strong> 的环境了，如下图</p>
<p><img src="/upload/20181222/jY43d1c4RtY1pGlwO7dl0KizQJWql8aGzAhXnCN1.png"></p>
<p>连接成功后，会看到在 <strong>Environment</strong> 下面的 <strong>Account</strong> 栏中会列出所有 <strong>Ganache</strong> 中的测试账号。</p>
<p>我们选择第一个账号作为部署合约的主账号，即合约的 <strong>owner</strong>。</p>
<p>在编辑器中创建一个新的合约文件，把上面的合约代码复制进编辑器，右边栏选择 <strong>Compile</strong> ，<br>在 <strong>Select new compiler version</strong> 中选择 <strong>0.4.21</strong> 版本的编译器，等待编译完成。<br>完成后，最下面出现绿色的提示信息，如下图</p>
<p><img src="/upload/20181222/k6OPqJvJys4K69lcKHn4BshSUYtXWLAsdcl1QZKL.png"></p>
<p>再切换回 <strong>Run</strong> 标签，点击 <strong>Deploy</strong> 就可以部署了。<br>部署成功后，在 <strong>Deployed Contracts</strong> 中就能看到新部署的合约了，下拉打开可以看到合约的各个接口，如图</p>
<p><img src="/upload/20181222/S8aVs938m7ft7bxlmVTRmk9mwyyHomyXPUbCamwz.png"></p>
<h2 id="增加合约管理员"><a href="#增加合约管理员" class="headerlink" title="增加合约管理员"></a>增加合约管理员</h2><p>在右边栏找到合约的 <strong>addManager</strong> 接口，下拉打开输入一个以太钱包地址，然后点击 <strong>transact</strong> 即完成添加。<br>这里我把 <strong>Ganache</strong> 的第 2 到 4 的地址加入进管理员中。</p>
<p><img src="/upload/20181222/YnjFibmHTTEV1g0fD8LVpltCwUz1XB1PTRRwXUBq.png"></p>
<h2 id="给合约内转账"><a href="#给合约内转账" class="headerlink" title="给合约内转账"></a>给合约内转账</h2><p>切换回 <strong>Ganache</strong>，在 <strong>Transactions</strong> 中找到我们刚才部署的合约地址，<code>0x08ea5409922D4204C0E03d17243E77c3810C0CCe</code>，</p>
<p><img src="/upload/20181222/UeCYGKvH71KR9rglfytM804vtEPhujdRTyI8Lh6T.png"></p>
<p>使用任意的其他账号转账任意个 <strong>ETH</strong> 进合约里。<br>我用的是 <a href="https://www.myetherwallet.com/"><strong>MyEtherWallet</strong></a>进行的转账，只需要把节点设置成本地网络，<br>然后用私钥模式登陆转账即可，这里就略过不说了。</p>
<p><img src="/upload/20181222/MPimqby4mz4E5Na5klyh1V5j8mdmS524tUYAi8eB.png"></p>
<p>转完账后，在 <strong>Remix</strong> 的 <strong>Run</strong> 标签下，找到合约的 <strong>walletBalance</strong> 接口，<br>点击调用即可显示当前合约的余额，注意单位！</p>
<p><img src="/upload/20181222/iE2U7iMdDcVZsTRxrCaC0RV7mL0UFZdYMfsxWmE8.png"></p>
<h2 id="多签从合约内转出金额"><a href="#多签从合约内转出金额" class="headerlink" title="多签从合约内转出金额"></a>多签从合约内转出金额</h2><p>回到 <strong>Remix</strong>，在右边栏的 <strong>Run</strong> 标签下，先确认 <strong>Account</strong> 选择的是合约的 <strong>owner</strong>，<br>这个例子里就是第一个测试地址了。</p>
<p>在合约中找到 <strong>transferTo</strong>，下拉打开，输入一个本地测试网络中的以太钱包地址，输入待转账的金额，点击 <strong>transact</strong>。这里注意单位，下图为转 5 ETH，</p>
<p><img src="/upload/20181222/A9w0zfyJdUyEhmZQLffBCVMGsQxd2Nm8dG4FoMr6.png"></p>
<p>成功执行后，就会有一个等待多签的 <strong>transaction</strong> 在 <strong>pendingTransactions</strong> 这个数组里。<br>点击 <strong>getPendingTransactions</strong> 可以得到当前等待多签的 <strong>transaction</strong> 在数组中的索引值。<br>下图则代表当前等待多签的 <strong>transaction</strong> 的索引值是 0 。</p>
<p><img src="/upload/20181222/TJgxy72QO6CEOZ6BmOCvz2GLPCtl9FtM9h0uoueH.png"></p>
<p>这时，在 <strong>Run</strong> 标签页的顶部，把 <strong>Account</strong> 依次切换为其他几个管理员，分别执行合约的 <strong>signTransaction</strong> 接口即可完成多签，其中 <strong>transactionId</strong> 就是上一步中的索引值，如下图</p>
<p><img src="/upload/20181222/oOACWaJc1OkPG4XOfeEAlCP62tS0h5ihc4hClikr.png"></p>
<p>目前这个合约代码中，是当签名管理员的数量大于等于3个，就正式完成多签并发送交易。<br>所以当第三个管理执行完 <strong>signTransaction</strong> 后，查一下合约的余额就发现已经转出去 5ETH了。</p>
<h2 id="总结"><a href="#总结" class="headerlink" title="总结"></a>总结</h2><p>目前这个例子中的合约代码还是比较简单的，没有各个用户的权重关系。这个就可以根据自己的需要来写合约了。</p>
<p>Over！</p>
]]></content>
      <tags>
        <tag>ethereum</tag>
        <tag>数字货币</tag>
      </tags>
  </entry>
  <entry>
    <title>终于填了 hapijs 中的 catbox 组件的坑</title>
    <url>/2019/02/01/hapijs-catbox.html</url>
    <content><![CDATA[<h1 id="起因"><a href="#起因" class="headerlink" title="起因"></a>起因</h1><p>由于最近在开发恒星币的钱包，其中有部分数据，如果直接通过恒星的 API 获取则效率太低，影响页面展示体验。<br>于是用 <code>hapijs</code> 来开发一些定制的接口，批量获取并缓存数据，来提升页面访问效果。</p>
<p>之前在 <a href="/2018/10/09/easy-startup-tuturial-for-hapi.html">《使用 hapijs 快速构建自己的 api 服务》</a> 这篇文章中有写到 <code>hapijs</code> 默认使用 <code>catbox</code> 的 <code>catbox-memory</code> 组件来缓存数据。</p>
<p>我这次还是按照上次的方法来使用缓存，但是却没有成功，每次提交请求，都是重新去获取数据，而没有走缓存。</p>
<h1 id="祸起文档和配置"><a href="#祸起文档和配置" class="headerlink" title="祸起文档和配置"></a>祸起文档和配置</h1><p>翻了好几遍 <code>hapijs</code> 的文档，也使用搜索引擎查了，折腾了3个多小时无果，最终决定一边读源码一边在代码加标记输出。</p>
<p>在每个关键位置都打了输出，但是没有看到任何报错和问题。无意中看到了 <code>hapijs</code> 文档中的一个配置参数 <a href="https://hapijs.com/api#server.cache()">generateOnReadError</a>，作用是当在读取缓存时遇到错误时是否报错，而默认则是关掉的！！！WTF！！！！</p>
<p>配置这个参数为 <code>false</code> 后，得再配合 <code>try &#123;&#125; catch () &#123;&#125;</code> 才显示了错误信息，原来是缓存的 <code>key</code> 非法。</p>
<p>比较这次和上次使用 <code>cache</code> 功能的代码，找到了一个不同点，就是上次是使用的 <code>string</code> 作为 <code>key</code>，而这次使用的是 <code>object</code> 作为 <code>key</code>。</p>
<p>不过在 <code>hapijs</code> 关于 <code>cache</code> 的 <a href="https://hapijs.com/api#server.cache()">文档</a> 中，关于 <code>generateFunc</code> 参数的解释里有一句 <code>the \&#39;id\&#39; string or object provided to the \&#39;get()\&#39; method.</code>，看上去 <code>id</code> 用 <code>object</code> 也没有问题啊。</p>
<p>于是我又去读了 <code>catbox</code> 的源码，最终看到 <code>catbox</code> 的一段关于获取缓存信息的 <a href="https://github.com/hapijs/catbox/blob/master/lib/policy.js#L88">代码</a>。</p>
<p>在第88行，原来特么的只接受 <code>&#123;id: id&#125;</code> 这种样子的对象啊？！！！！并且上面82行的注释也列出来了。。。</p>
<p>又去看了下 <code>catbox</code> 的文档中关于 <code>get()</code> 方法的介绍，有这么一句 <code>id - the unique item identifier (within the policy segment). Can be a string or an object with the required &#39;id&#39; key.</code>。</p>
<p>这就恍然大悟了。。。。。。。。。</p>
<p><strong>原来对象中必须包含 <code>id</code> 这个字段啊，原来要是提交对象的话，需要自己来定义索引啊？！！！</strong></p>
<p>修改下代码，这个坑过了。</p>
<p>不容易不容易啊。。</p>
]]></content>
      <tags>
        <tag>前端</tag>
        <tag>hapijs</tag>
        <tag>catbox</tag>
      </tags>
  </entry>
  <entry>
    <title>用Docker封装了一个简易的图片代理服务</title>
    <url>/2019/02/25/make-a-nodejs-proxy-package-by-docker.html</url>
    <content><![CDATA[<p>在开发 <code>SteemTools</code> 服务号的文章单独页面的时候，遇到的一个问题就是有些人的图片存放在了被墙的服务器上了，导致文章中的图片无法正常显示。</p>
<p>从网上搜索了下，找到了一个用 <code>node</code> 写的图片代理，我已经 <code>fork</code> 到了自己的库中，<a href="https://github.com/ety001/node-image-proxy">https://github.com/ety001/node-image-proxy</a> 。</p>
<p>为了方便部署和管理，把这个服务封装进了 <code>Docker</code> 中。</p>
<p>运行命令如下：</p>
<figure class="highlight plaintext"><table><tr><td class="code"><pre><span class="line">docker run -itd --name node-image-proxy -p 9091:9091 -v /data/node-image-cache:/app/cache --restart always ety001/node-image-proxy</span><br></pre></td></tr></table></figure>

<p>其中 <code>/data/node-image-cache</code> 目录是用来存储缓存的，自己手动建立一个目录就好了。</p>
<p>启动成功后，可以用 <code>nginx</code> 的反向代理来实现 <code>https</code>，也可以直接使用，只需要把要代理的图片地址放到 <code>url</code> 后面就好了，例如这样：</p>
<figure class="highlight plaintext"><table><tr><td class="code"><pre><span class="line">https://img.steemtools.top/http://newappaz.oss-cn-hongkong.aliyuncs.com/wherein_images/post/20190224/89a2802d622c4940b2ece51eea04aecd.jpg</span><br></pre></td></tr></table></figure>

<p>这样只需要把服务部署在国外服务器上，然后在解析 <code>markdown</code> 的时候把原来的图片地址加上代理地址后，就可以正常的访问文章中的图片了。</p>
]]></content>
      <tags>
        <tag>Docker</tag>
        <tag>nodejs</tag>
        <tag>proxy</tag>
      </tags>
  </entry>
  <entry>
    <title>Cordova项目中的www和platforms目录</title>
    <url>/2019/02/26/cordova-www-platform-folder.html</url>
    <content><![CDATA[<p>最近新开了一个钱包的App项目，直接把之前的代码从 <strong>Github</strong> 上拖回来，但是执行 <code>cordova prepare -d</code> 一直不成功，显示 <code>current working directory is not a cordova-based project.</code>。</p>
<p>经过查看源码，发现在 <a href="https://github.com/apache/cordova-lib/blob/master/src/cordova/util.js#L102">https://github.com/apache/cordova-lib/blob/master/src/cordova/util.js#L102</a> 这个地方的代码有问题。</p>
<p>正常情况下，这个函数返回 <code>2</code> 就可以了，由于我的 <code>.gitignore</code> 中把 <code>www</code> 和 <code>platforms</code> 两个目录都给忽略了，这就导致了一直返回 <code>0</code>，进而导致另外一个位置获取到的项目目录一直是 <code>/</code>，这显示不是项目根目录。。。</p>
<p>于是手动创建了 <code>www</code> 和 <code>platforms</code> 两个空目录后，一切就正常了。。。。。坑爹。。。。。。</p>
]]></content>
      <tags>
        <tag>cordova</tag>
      </tags>
  </entry>
  <entry>
    <title>终于是搞定了 Laravel 和 iview-admin 的融合</title>
    <url>/2019/03/10/laravel-iview-admin.html</url>
    <content><![CDATA[<p>最近需要开发一套后台，挑来挑去，觉得 <strong><a href="https://github.com/iview/iview-admin">iview-admin</a></strong> 不错，决定要使用这个后台前端框架。上面就是最终的效果图。</p>
<p>但是由于我们的后台是 <strong>Laravel</strong> 框架用的 <strong>Laravel Mix</strong>， 与 <strong>iview-admin</strong> 用的 <strong>vue-cli-service</strong> 不一样，于是整合起来有些麻烦，虽然最简单的方法是开两个库独立开来，但是这会让部署什么的增加一些环节，毕竟这个项目开发就我自己，没必要折腾那么多，于是就想要整合。</p>
<p>从周二开始折腾，折腾来折腾去，将近一周过去了，终于搞定了（虽然解决了最后一个问题，但是原理是啥我也不知道），现在已经可以使用 <strong>Laravel Mix</strong> 来直接替代 <strong>vue-cli-service</strong> 编译啦。</p>
<p>为了方便自己以后再次使用，所以记录下关键的几个环节。</p>
<p>首先需要的就是调整下 <strong>package.json</strong>，我的代码最终版如下：</p>
<figure class="highlight plaintext"><table><tr><td class="code"><pre><span class="line">&#123;</span><br><span class="line">    &quot;private&quot;: true,</span><br><span class="line">    &quot;scripts&quot;: &#123;</span><br><span class="line">        &quot;dev&quot;: &quot;npm run development&quot;,</span><br><span class="line">        &quot;development&quot;: &quot;cross-env NODE_ENV=development node_modules/webpack/bin/webpack.js --progress --hide-modules --config=node_modules/laravel-mix/setup/webpack.config.js&quot;,</span><br><span class="line">        &quot;watch&quot;: &quot;npm run development -- --watch&quot;,</span><br><span class="line">        &quot;watch-poll&quot;: &quot;npm run watch -- --watch-poll&quot;,</span><br><span class="line">        &quot;hot&quot;: &quot;cross-env NODE_ENV=development node_modules/webpack-dev-server/bin/webpack-dev-server.js --inline --hot --config=node_modules/laravel-mix/setup/webpack.config.js&quot;,</span><br><span class="line">        &quot;prod&quot;: &quot;npm run production&quot;,</span><br><span class="line">        &quot;production&quot;: &quot;cross-env NODE_ENV=production node_modules/webpack/bin/webpack.js --no-progress --hide-modules --config=node_modules/laravel-mix/setup/webpack.config.js&quot;</span><br><span class="line">    &#125;,</span><br><span class="line">    &quot;devDependencies&quot;: &#123;</span><br><span class="line">        &quot;@vue/babel-preset-app&quot;: &quot;^3.5.0&quot;,</span><br><span class="line">        &quot;axios&quot;: &quot;^0.18&quot;,</span><br><span class="line">        &quot;bootstrap&quot;: &quot;^4.0.0&quot;,</span><br><span class="line">        &quot;chai&quot;: &quot;^4.1.2&quot;,</span><br><span class="line">        &quot;clipboard&quot;: &quot;^2.0.0&quot;,</span><br><span class="line">        &quot;codemirror&quot;: &quot;^5.38.0&quot;,</span><br><span class="line">        &quot;countup&quot;: &quot;^1.8.2&quot;,</span><br><span class="line">        &quot;cropperjs&quot;: &quot;^1.2.2&quot;,</span><br><span class="line">        &quot;cross-env&quot;: &quot;^5.1&quot;,</span><br><span class="line">        &quot;dayjs&quot;: &quot;^1.7.7&quot;,</span><br><span class="line">        &quot;echarts&quot;: &quot;^4.0.4&quot;,</span><br><span class="line">        &quot;html2canvas&quot;: &quot;^1.0.0-alpha.12&quot;,</span><br><span class="line">        &quot;iview&quot;: &quot;^3.3.0&quot;,</span><br><span class="line">        &quot;iview-area&quot;: &quot;^1.5.17&quot;,</span><br><span class="line">        &quot;jquery&quot;: &quot;^3.2&quot;,</span><br><span class="line">        &quot;js-cookie&quot;: &quot;^2.2.0&quot;,</span><br><span class="line">        &quot;laravel-mix&quot;: &quot;^4.0.14&quot;,</span><br><span class="line">        &quot;less&quot;: &quot;^2.7.3&quot;,</span><br><span class="line">        &quot;less-loader&quot;: &quot;^4.0.5&quot;,</span><br><span class="line">        &quot;lodash&quot;: &quot;^4.17.5&quot;,</span><br><span class="line">        &quot;mockjs&quot;: &quot;^1.0.1-beta3&quot;,</span><br><span class="line">        &quot;popper.js&quot;: &quot;^1.12&quot;,</span><br><span class="line">        &quot;resolve-url-loader&quot;: &quot;2.3.1&quot;,</span><br><span class="line">        &quot;sass&quot;: &quot;^1.17.2&quot;,</span><br><span class="line">        &quot;sass-loader&quot;: &quot;7.*&quot;,</span><br><span class="line">        &quot;simplemde&quot;: &quot;^1.11.2&quot;,</span><br><span class="line">        &quot;sortablejs&quot;: &quot;^1.7.0&quot;,</span><br><span class="line">        &quot;tree-table-vue&quot;: &quot;^1.1.0&quot;,</span><br><span class="line">        &quot;v-org-tree&quot;: &quot;^1.0.6&quot;,</span><br><span class="line">        &quot;vue&quot;: &quot;^2.5.17&quot;,</span><br><span class="line">        &quot;vue-i18n&quot;: &quot;^7.8.0&quot;,</span><br><span class="line">        &quot;vue-router&quot;: &quot;^3.0.2&quot;,</span><br><span class="line">        &quot;vue-template-compiler&quot;: &quot;^2.5.13&quot;,</span><br><span class="line">        &quot;vuedraggable&quot;: &quot;^2.16.0&quot;,</span><br><span class="line">        &quot;vuex&quot;: &quot;^3.0.1&quot;,</span><br><span class="line">        &quot;wangeditor&quot;: &quot;^3.1.1&quot;,</span><br><span class="line">        &quot;xlsx&quot;: &quot;^0.13.3&quot;</span><br><span class="line">    &#125;</span><br><span class="line">&#125;</span><br></pre></td></tr></table></figure>

<p>这里是在 <strong>Laravel</strong> 原有的 <strong>package.json</strong> 基础上，把 <strong>iview-admin</strong> 需要的 <a href="https://github.com/iview/iview-admin/blob/master/package.json">依赖</a> 一一手动添加进去的。</p>
<p>其中命令中的 <code>node_modules/webpack/bin/webpack.js</code> 应该是调用的 <code>laravel-mix</code> 包中的依赖。</p>
<p>完成 <strong>package.json</strong> 之后，我们使用 <code>npm install</code> 安装一下所有的依赖，然后把 <strong>iview-admin</strong> 项目克隆到本地，把其中的 <code>src</code> 目录下的所有文件复制到 <strong>Laravel</strong> 项目的 <code>resources/js</code> 目录下。如果你想变更入口名称，可以把 <code>main.js</code> 改成你自己想要的名字，这里我改为了 <code>admin.js</code>。</p>
<p>之后修改一下 <strong>Laravel</strong> 项目根目录下的 <strong>webpack.mix.js</strong> 文件如下：</p>
<figure class="highlight plaintext"><table><tr><td class="code"><pre><span class="line">const mix = require(&#x27;laravel-mix&#x27;);</span><br><span class="line"></span><br><span class="line">mix.js(&#x27;resources/js/admin.js&#x27;, &#x27;public/static&#x27;)</span><br><span class="line">    .sass(&#x27;resources/sass/admin.scss&#x27;, &#x27;public/static&#x27;)</span><br><span class="line">    .webpackConfig(&#123;</span><br><span class="line">        resolve: &#123;</span><br><span class="line">            alias: &#123;</span><br><span class="line">                &#x27;@&#x27;: path.resolve(__dirname, &#x27;resources/js/&#x27;),</span><br><span class="line">                &#x27;_c&#x27;: path.resolve(__dirname, &#x27;resources/js/components&#x27;),</span><br><span class="line">            &#125;,</span><br><span class="line">        &#125;,</span><br><span class="line">        output: &#123;</span><br><span class="line">            chunkFilename: &#x27;static/chunks/[name].js&#x27;,</span><br><span class="line">        &#125;,</span><br><span class="line">    &#125;)</span><br><span class="line">    .babelConfig(&#123;</span><br><span class="line">        &quot;presets&quot;: [</span><br><span class="line">            &quot;@vue/app&quot;,</span><br><span class="line">        ],</span><br><span class="line">    &#125;)</span><br><span class="line">    .version();</span><br></pre></td></tr></table></figure>

<p>在原有的基础上增加了 <code>resolve</code> 配置，为了能够正确解析 <code>@</code> 和 <code>_c</code> 开头的引入包路径。增加了 <code>output</code> 配置，让所有的 <code>chunk</code> 文件与主文件同目录（这条配置可不加）。增加了 <code>babelConfig</code> 配置，为了解决 <strong>动态import</strong> 语法解析的问题（这个就是目前还没有弄明白的那个地方）。</p>
<p>完成上面的步骤后，就完成了大半了。</p>
<p>之后，在 <strong>Laravel</strong> 项目中增加一个后台的路由，我是直接加在 <code>routers/web.php</code> 中的，如下</p>
<figure class="highlight plaintext"><table><tr><td class="code"><pre><span class="line">Route::get(&#x27;admin&#x27;, &#x27;AdminController@index&#x27;);</span><br></pre></td></tr></table></figure>

<p>创建 <code>AdminController</code>，代码如下</p>
<figure class="highlight plaintext"><table><tr><td class="code"><pre><span class="line">&lt;?php</span><br><span class="line"></span><br><span class="line">namespace App\Http\Controllers;</span><br><span class="line"></span><br><span class="line">use Illuminate\Http\Request;</span><br><span class="line"></span><br><span class="line">class AdminController extends Controller</span><br><span class="line">&#123;</span><br><span class="line">    public function index(Request $request) &#123;</span><br><span class="line">        return view(&#x27;admin/index&#x27;);</span><br><span class="line">    &#125;</span><br><span class="line">&#125;</span><br></pre></td></tr></table></figure>

<p>创建视图 <code>resources/view/admin/index.blade.php</code>，代码如下</p>
<figure class="highlight plaintext"><table><tr><td class="code"><pre><span class="line">&lt;!doctype html&gt;</span><br><span class="line">&lt;html lang=&quot;en&quot;&gt;</span><br><span class="line">&lt;head&gt;</span><br><span class="line">    &lt;meta charset=&quot;UTF-8&quot;&gt;</span><br><span class="line">    &lt;title&gt;BACC&lt;/title&gt;</span><br><span class="line">    &lt;meta name=&quot;csrf-token&quot; content=&quot;&#123;&#123; csrf_token() &#125;&#125;&quot; api_token=&quot;&#123;&#123; \Auth::check() ? &#x27;Bearer &#x27; . \Auth::user()-&gt;api_token : &#x27;Bearer &#x27;  &#125;&#125;&quot;&gt;</span><br><span class="line">    &lt;link rel=&quot;stylesheet&quot; href=&quot;&#123;&#123; mix(&#x27;static/admin.css&#x27;) &#125;&#125;&quot;&gt;</span><br><span class="line">    &lt;!-- &lt;script src=&quot;&#123;&#123; asset(&#x27;/js/tinymce.min.js&#x27;) &#125;&#125;&quot;&gt;&lt;/script&gt; --&gt;</span><br><span class="line">&lt;/head&gt;</span><br><span class="line">&lt;body&gt;</span><br><span class="line">&lt;div id=&quot;app&quot;&gt;&lt;/div&gt;</span><br><span class="line"></span><br><span class="line">&lt;script src=&quot;&#123;&#123; mix(&#x27;static/admin.js&#x27;) &#125;&#125;&quot;&gt;&lt;/script&gt;</span><br><span class="line">&lt;/body&gt;</span><br><span class="line">&lt;/html&gt;</span><br></pre></td></tr></table></figure>

<p>最后要修改的就是 <strong>iview-admin</strong> 的路由模式了。<strong>iview-admin</strong> 默认使用的是 <code>history</code>，而这个配置将会让 <strong>iview-admin</strong> 的路由与 <strong>Laravel</strong> 的路由冲突，因此需要去掉这个配置。这个配置项在 <code>resources/js/router/index.js</code> 中，把下面的代码中的 <code>mode: &#39;history&#39;</code>去掉即可。</p>
<figure class="highlight plaintext"><table><tr><td class="code"><pre><span class="line">const router = new Router(&#123;</span><br><span class="line">  routes,</span><br><span class="line">  mode: &#x27;history&#x27;</span><br><span class="line">&#125;)</span><br></pre></td></tr></table></figure>

<p>所有配置完成，执行 <code>npm run watch</code>，如果一切顺利的话，所有的前端文件会编译完成，直接访问 <code>http://localhost:8000/admin</code> 就能看到 <strong>iview-admin</strong> 已经成功整合完成了！</p>
<p>撒花！</p>
]]></content>
      <tags>
        <tag>Laravel</tag>
        <tag>iview-admin</tag>
      </tags>
  </entry>
  <entry>
    <title>如何删除sasl用户，如何让postfix以TLS方式连接远端服务器发信</title>
    <url>/2019/03/28/remove-sasl-user-enable-tls.html</url>
    <content><![CDATA[<h1 id="如何删除sasl用户"><a href="#如何删除sasl用户" class="headerlink" title="如何删除sasl用户"></a>如何删除sasl用户</h1><figure class="highlight plaintext"><table><tr><td class="code"><pre><span class="line">db_dump -p /etc/sasldb2 &gt; /tmp/sasldb2.dump</span><br><span class="line">vim /tmp/sasldb2.dump # 找到你要删除的用户，删掉用户和密码即可，也可以修改密码</span><br><span class="line">mv /etc/sasldb2 /etc/sasldb2.bak</span><br><span class="line">db_load -f /tmp/sasldb2.dump /etc/sasldb2</span><br><span class="line">rm -rf /tmp/sasldb2.dump</span><br></pre></td></tr></table></figure>

<h1 id="如何让postfix以TLS方式连接远端服务器发信"><a href="#如何让postfix以TLS方式连接远端服务器发信" class="headerlink" title="如何让postfix以TLS方式连接远端服务器发信"></a>如何让postfix以TLS方式连接远端服务器发信</h1><p>在 <code>/etc/postfix/main.cf</code> 最后增加下面的配置。配置后再给 Gmail 发信，就不会提示不安全连接了。</p>
<figure class="highlight plaintext"><table><tr><td class="code"><pre><span class="line">smtpd_tls_security_level = may</span><br><span class="line">smtp_tls_security_level = may</span><br></pre></td></tr></table></figure>

<p>另外推一下之前写的《如何快速搭建邮件服务器用来发邮件》<a href="/2018/01/08/create-a-simple-smtp-server-by-postfix-and-sasl.html">https://akawa.ink/2018/01/08/create-a-simple-smtp-server-by-postfix-and-sasl.html</a></p>
]]></content>
      <tags>
        <tag>后端</tag>
        <tag>Server&amp;OS</tag>
        <tag>postfix</tag>
      </tags>
  </entry>
  <entry>
    <title>远程在服务器上安装KVM并部署Win10</title>
    <url>/2019/04/02/kvm-win10.html</url>
    <content><![CDATA[<h1 id="起因"><a href="#起因" class="headerlink" title="起因"></a>起因</h1><p>由于目前手头所有的本不是 MacOSX 就是LInux，再或者是ChromeOS系统。有时候想找个 Windows 系统测试东西，都找不到。老想着在淘一台性价比高的 Windows 的 VPS 用，今天才反应过来，我特么的见证人服务器那么多闲置资源为啥不拿来用？！！！轻轻松松 8 核 16G，硬盘任意用啊！！！</p>
<p><img src="/upload/20190402/S9esaVBwDZwyuPaRvcdD9bcn5H5vIA10T61BVWbW.png"></p>
<h1 id="开工"><a href="#开工" class="headerlink" title="开工"></a>开工</h1><h2 id="安装KVM"><a href="#安装KVM" class="headerlink" title="安装KVM"></a>安装KVM</h2><p>我的宿主机是 Ubuntu16.04 不带桌面，安装很简单，只需要一条命令：</p>
<figure class="highlight plaintext"><table><tr><td class="code"><pre><span class="line">apt-get install qemu-kvm libvirt-bin virtinst bridge-utils cpu-checker</span><br></pre></td></tr></table></figure>

<p>安装好以后，下载 Windows10 的 ISO 镜像。</p>
<h2 id="启动"><a href="#启动" class="headerlink" title="启动"></a>启动</h2><p>下载好以后，只需要两条命令就可以启动 KVM VPS 了。</p>
<p>先去创建虚拟盘</p>
<figure class="highlight plaintext"><table><tr><td class="code"><pre><span class="line">qemu-img create -f qcow2 /data/vm_images/win10/sys.img 50G</span><br></pre></td></tr></table></figure>

<blockquote>
<p>路径和大小根据自己的情况设定就好了。</p>
</blockquote>
<p>然后一条命令创建并启动 VPS</p>
<figure class="highlight plaintext"><table><tr><td class="code"><pre><span class="line">virt-install --name win10 --ram 16384 --file /data/vm_images/win10/sys.img --cdrom /home/ety001/win10prox64.iso --os-type windows --vnc --vncport 5900 --vnclisten 0.0.0.0 --vcpus 8</span><br></pre></td></tr></table></figure>

<blockquote>
<p>里面的参数应该都看得懂，记得加上 –vnc 参数和配置，这样才能通过 VNC 远程来操作 VPS</p>
</blockquote>
<h2 id="使用"><a href="#使用" class="headerlink" title="使用"></a>使用</h2><p>这里不得不吐槽苹果自带的 VNC 客户端，千万不要用这个去连，因为根本连不上！！！！一开始我还在怀疑是我的 frp 端口映射软件出了问题，折腾了一天，也不行，每次连接就是在那里转菊花。。。</p>
<p>今天才想到为什么我不换一个 VNC 客户端呢？！正好手机上有 VNC Viewer，赶快连一下服务器所在网络的 VPN，接入后，打开 VNC Viewer，连接服务器，瞬间登陆进去，画面早已经在安装界面等待，赶紧的安装了一下，快的飞起~~~</p>
<p>安装后进入系统</p>
<p><img src="/upload/20190402/CwgXrD4uNynelJeJ78c3XCP1QPvl6dm1WycryGGZ.png"></p>
<h2 id="设置开机自启动"><a href="#设置开机自启动" class="headerlink" title="设置开机自启动"></a>设置开机自启动</h2><p>首先需要关闭虚拟机，然后执行下面的命令</p>
<figure class="highlight plaintext"><table><tr><td class="code"><pre><span class="line">virsh autostart win10</span><br></pre></td></tr></table></figure>
<blockquote>
<p>win10就是你的虚拟机的名字了</p>
</blockquote>
<h2 id="增加声卡"><a href="#增加声卡" class="headerlink" title="增加声卡"></a>增加声卡</h2><figure class="highlight plaintext"><table><tr><td class="code"><pre><span class="line">&lt;sound model=&#x27;ich6&#x27;&gt;</span><br><span class="line">  &lt;address type=&#x27;pci&#x27; domain=&#x27;0x0000&#x27; bus=&#x27;0x00&#x27; slot=&#x27;0x06&#x27; function=&#x27;0x0&#x27;/&gt;</span><br><span class="line">&lt;/sound&gt;</span><br></pre></td></tr></table></figure>

<h2 id="列出所有主机"><a href="#列出所有主机" class="headerlink" title="列出所有主机"></a>列出所有主机</h2><figure class="highlight plaintext"><table><tr><td class="code"><pre><span class="line">virsh list</span><br></pre></td></tr></table></figure>

<h2 id="关机"><a href="#关机" class="headerlink" title="关机"></a>关机</h2><figure class="highlight plaintext"><table><tr><td class="code"><pre><span class="line">virsh shutdown win10</span><br></pre></td></tr></table></figure>

<h2 id="强制关机"><a href="#强制关机" class="headerlink" title="强制关机"></a>强制关机</h2><figure class="highlight plaintext"><table><tr><td class="code"><pre><span class="line">virsh destroy win10</span><br></pre></td></tr></table></figure>

<h2 id="删除主机"><a href="#删除主机" class="headerlink" title="删除主机"></a>删除主机</h2><figure class="highlight plaintext"><table><tr><td class="code"><pre><span class="line">virsh undefined win10</span><br></pre></td></tr></table></figure>

<h1 id="总结"><a href="#总结" class="headerlink" title="总结"></a>总结</h1><p>最近忙到脑子经常秀逗，思路跳跃比以前差了好多。总结一下就是身边自己的资源不要忘了，苹果自家的远程还是只跟自家的配套。</p>
<hr>
<p>2021-05-28 补充</p>
<p>增加声卡支持</p>
<figure class="highlight plaintext"><table><tr><td class="code"><pre><span class="line">&lt;sound model=&#x27;ich6&#x27;&gt;</span><br><span class="line">  &lt;address type=&#x27;pci&#x27; domain=&#x27;0x0000&#x27; bus=&#x27;0x00&#x27; slot=&#x27;0x06&#x27; function=&#x27;0x0&#x27;/&gt;</span><br><span class="line">&lt;/sound&gt;</span><br></pre></td></tr></table></figure>

<blockquote>
<p>注意 <code>slot</code> 位不要冲突。</p>
</blockquote>
]]></content>
      <tags>
        <tag>Server&amp;OS</tag>
        <tag>KVM</tag>
      </tags>
  </entry>
  <entry>
    <title>win10如何安装完整的Hyper-V</title>
    <url>/2019/04/15/win10-setup-hyper-v.html</url>
    <content><![CDATA[<p>今天老板新招了个前端来做 <strong>App</strong> 的 <strong>UE</strong> 方面的工作。结果小伙无法在他的 <strong>Windows</strong> 上运行开发环境，而我在我的 <strong>KVM</strong> 虚拟出的 <strong>Win10</strong> 里测试下，完全没有问题啊。。。。</p>
<p>貌似小伙一直在等我给他找解决方案，也真是日了个狗了，这个不应该是你自己的事情吗？</p>
<p>尝试了一些方法都失败了，一直报错 <strong>webpack</strong> 找不到，应该就是他本机的环境设置的问题，但是不知道具体是什么原因。理论上讲，<strong>nodejs</strong> 都应该优先在当前项目目录下面寻找依赖，而在他机器上则偏偏不这样，即使你在启动命令里指定了目录路径、使用绝对路径，都不好使。。。这两天也真是日了狗了。。。</p>
<p>最后，我决定封装个开发环境的 <strong>Docker</strong> 容器。</p>
<p>在我的 <strong>Mac</strong> 里封装个镜像还是很轻松的，但是为了在 <strong>Win10</strong> 下安装个 <strong>Docker Desktop</strong> 也真是废了个劲了。</p>
<p>我的 <strong>win10</strong> 安装的是老毛子精简过的版本，2.38G，去掉了好多东西，比如最重要的 <strong>Hyper-V</strong>（终于说到了主题）。于是换了另外一个 <strong>Ghost</strong> 版的，</p>
<p>最终找到了下面的脚本</p>
<figure class="highlight plaintext"><table><tr><td class="code"><pre><span class="line">pushd &quot;%~dp0&quot;</span><br><span class="line"></span><br><span class="line">dir /b %SystemRoot%\servicing\Packages\*Hyper-V*.mum &gt;hyper-v.txt</span><br><span class="line"></span><br><span class="line">for /f %%i in (&#x27;findstr /i . hyper-v.txt 2^&gt;nul&#x27;) do dism /online /norestart /add-package:&quot;%SystemRoot%\servicing\Packages\%%i&quot;</span><br><span class="line"></span><br><span class="line">del hyper-v.txt</span><br><span class="line"></span><br><span class="line">Dism /online /enable-feature /featurename:Microsoft-Hyper-V-All /LimitAccess /ALL</span><br></pre></td></tr></table></figure>

<p>保存为 <code>.cmd</code> 扩展名的批处理文件，然后用管理员权限执行下，之后重启机器就可以有 <strong>Hyper-V</strong> 了。</p>
]]></content>
      <tags>
        <tag>Server&amp;OS</tag>
      </tags>
  </entry>
  <entry>
    <title>解决由import()导致的Webpack编译过慢的问题</title>
    <url>/2019/03/14/webpack-import-build-slow.html</url>
    <content><![CDATA[<h2 id="引子"><a href="#引子" class="headerlink" title="引子"></a>引子</h2><p>最近真的是跟 <strong>Webpack</strong> 作上了，又在 <strong>Webpack</strong> 上花费了宝贵的两天的工作时间。</p>
<p>上次好不容易把 <strong>iview-admin</strong> 集成进 <strong>Laravel</strong>，本来以为可以开开心心的开发了，结果在收尾的功能中需要加入富文本编辑器。由于 <strong>iview-admin</strong> 中集成了一个富文本编辑器，于是就把集成的这个 <strong>wangeditor</strong> 引入过来使用了。</p>
<p>结果，<code>webpack</code> 对于文件的编译速度瞬间从几秒变成了一分半钟。</p>
<p>WTF！</p>
<h2 id="找原因"><a href="#找原因" class="headerlink" title="找原因"></a>找原因</h2><p><strong>Laravel Mix</strong>默认的开发环境的编译命令如下：</p>
<figure class="highlight plaintext"><table><tr><td class="code"><pre><span class="line">cross-env NODE_ENV=development node_modules/webpack/bin/webpack.js --progress --hide-modules --config=node_modules/laravel-mix/setup/webpack.config.js</span><br></pre></td></tr></table></figure>

<p>但是这个坑爹的配置，根本看不出来编译慢的问题出在哪里好吗？！（如下图，加入 <strong>wangedit</strong> 编辑器后，每次在70%位置就会卡主大约70多秒，甚至更多）</p>
<p><img src="/upload/20190314/5mgCmOWo0PlYQyIv6DtpuBe2dOKS1dXqbSDkKyOl.png"></p>
<p>怎么才能找到是具体哪个文件编译慢呢？</p>
<p>最先想到的是看看 <strong>webpack.js</strong> 的可用参数，最终找到了一个 <code>--profile</code> 参数，加上这个参数后，稍微多了点信息，但是完全不够啊。。。还是没法确认问题在哪啊。。。</p>
<p><img src="/upload/20190314/9Tjse6bSpsVQc05Lf3y9qjVTf54VLJxfOOY2BCYV.png"></p>
<p>接下来的大部分时间都花在了搜索引擎上，主要围绕的搜索关键词是 <strong>webpack build slow</strong> 之类的。但是完全没有什么用。</p>
<p>又切换了个思路，看看有没有什么好的调试工具。群里有人推荐我 <strong>speed-measure-webpack-plugin</strong> 。</p>
<p>看了下说明，是个好插件，可惜我这个项目的 <strong>webpack</strong> 套在 <strong>laravel-mix</strong> 里面，我只能通过 <strong>laravel-mix</strong> 提供的方法来配置 <strong>webpack</strong> 的参数，而 <strong>speed-measure-webpack-plugin</strong> 的使用方法是下面这个样子：</p>
<figure class="highlight plaintext"><table><tr><td class="code"><pre><span class="line">把原来的</span><br><span class="line">const webpackConfig = &#123;</span><br><span class="line">  plugins: [</span><br><span class="line">    new MyPlugin(),</span><br><span class="line">    new MyOtherPlugin()</span><br><span class="line">  ]</span><br><span class="line">&#125;</span><br><span class="line">改为</span><br><span class="line">const SpeedMeasurePlugin = require(&quot;speed-measure-webpack-plugin&quot;);</span><br><span class="line">const smp = new SpeedMeasurePlugin();</span><br><span class="line">const webpackConfig = smp.wrap(&#123;</span><br><span class="line">  plugins: [</span><br><span class="line">    new MyPlugin(),</span><br><span class="line">    new MyOtherPlugin()</span><br><span class="line">  ]</span><br><span class="line">&#125;);</span><br></pre></td></tr></table></figure>

<p>如果我想要用 <strong>speed-measure-webpack-plugin</strong> 的话，需要在 <code>node_modules</code> 目录下找到 <strong>laravel-mix</strong> 包，然后修改里面的代码，让 <strong>laravel-mix</strong> 在 <strong>merge</strong> 完用户自定义的配置后，调用 <strong>speed-measure-webpack-plugin</strong> ，再传给 <strong>webpack</strong>。</p>
<p>我看了下 <strong>laravel-mix</strong> 的代码，感觉就目前我的水平要想实现的话，需要耗费不止两天的时间吧，这样方向也有点偏。于是这个方案也抛弃了。</p>
<h2 id="柳暗花明"><a href="#柳暗花明" class="headerlink" title="柳暗花明"></a>柳暗花明</h2><p>虽然 <strong>speed-measure-webpack-plugin</strong> 不能用，但是给了我一个启发，那就是有没有可以直接写在 <strong>webpack</strong> 的 <code>plugins</code> 配置中调用的调试插件呢？</p>
<p>功夫不负有心人，在大半天之后，偶然在 <strong>Stack Overflow</strong> 的一个问题的回复中看到了 <strong>simple-progress-webpack-plugin</strong> 这个插件。不过当时心是灰的，因为找了很久没找到，打开这个插件的文档，里面也没有个截图啥的，完全就是死马当活马医，试了试。按照文档提示，先安装 <code>npm install simple-progress-webpack-plugin --save-dev</code>，然后修改 <strong>laravel-mix</strong> 的配置：</p>
<figure class="highlight plaintext"><table><tr><td class="code"><pre><span class="line">const SimpleProgressWebpackPlugin = require( &#x27;simple-progress-webpack-plugin&#x27; ); // 这是新增的配置</span><br><span class="line"></span><br><span class="line">mix.js(&#x27;resources/js/admin.js&#x27;, &#x27;public/static&#x27;)</span><br><span class="line">  .sass(&#x27;resources/sass/admin.scss&#x27;, &#x27;public/static&#x27;)</span><br><span class="line">  .webpackConfig(&#123;</span><br><span class="line">    resolve: &#123;</span><br><span class="line">      alias: &#123;</span><br><span class="line">        &#x27;@&#x27;: path.resolve(__dirname, &#x27;resources/js/&#x27;),</span><br><span class="line">        &#x27;_c&#x27;: path.resolve(__dirname, &#x27;resources/js/components&#x27;),</span><br><span class="line">      &#125;,</span><br><span class="line">    &#125;,</span><br><span class="line">    output: &#123;</span><br><span class="line">      chunkFilename: &#x27;static/chunks/[name].js&#x27;,</span><br><span class="line">    &#125;,</span><br><span class="line">    plugins: [</span><br><span class="line">      new SimpleProgressWebpackPlugin() // 这是新增的配置</span><br><span class="line">    ],</span><br><span class="line">  &#125;)</span><br><span class="line">  .babelConfig(&#123;</span><br><span class="line">    persets: [&#x27;@vue/app&#x27;]</span><br><span class="line">  &#125;)</span><br><span class="line">  .version();</span><br></pre></td></tr></table></figure>

<p>这次打印出来的信息有些用处了，如下图所示</p>
<p><img src="/upload/20190314/PDgL8dwFCOFWMeOnhuHKgeQXJGJCGRpozYqBhXqV.png"></p>
<p>这次知道是在 <strong>Optimize modules</strong> 阶段速度慢了，具体是在 <strong>Module and chunk tree optimization</strong> 这里。于是以 <strong>webpack optimize modules slow</strong> 为关键词搜索，结果第一条就解决了问题：</p>
<p><img src="/upload/20190314/KTcXU9Us6ovluPwrjKInWrMMiRET9li1oSorU7U6.png"></p>
<p><img src="/upload/20190314/ZBwQ1lkkhBHQ8JQU8ImNfyBwBuXT205TLYBWwhx9.png"></p>
<p>妈蛋的原来是在异步加载优化这里慢啊。按照 <strong>issue</strong> 里提到的 <strong>babel-plugin-dynamic-import-node</strong> 插件，搜索了下，找到安装部署方法 <code>npm install babel-plugin-dynamic-import-node --save-dev</code>，然后配置下 <strong>laravel-mix</strong></p>
<figure class="highlight plaintext"><table><tr><td class="code"><pre><span class="line">const SimpleProgressWebpackPlugin = require( &#x27;simple-progress-webpack-plugin&#x27; );</span><br><span class="line"></span><br><span class="line">mix.js(&#x27;resources/js/admin.js&#x27;, &#x27;public/static&#x27;)</span><br><span class="line">  .sass(&#x27;resources/sass/admin.scss&#x27;, &#x27;public/static&#x27;)</span><br><span class="line">  .webpackConfig(&#123;</span><br><span class="line">    resolve: &#123;</span><br><span class="line">      alias: &#123;</span><br><span class="line">        &#x27;@&#x27;: path.resolve(__dirname, &#x27;resources/js/&#x27;),</span><br><span class="line">        &#x27;_c&#x27;: path.resolve(__dirname, &#x27;resources/js/components&#x27;),</span><br><span class="line">      &#125;,</span><br><span class="line">    &#125;,</span><br><span class="line">    output: &#123;</span><br><span class="line">      chunkFilename: &#x27;static/chunks/[name].js&#x27;,</span><br><span class="line">    &#125;,</span><br><span class="line">    plugins: [</span><br><span class="line">      new SimpleProgressWebpackPlugin()</span><br><span class="line">    ],</span><br><span class="line">  &#125;)</span><br><span class="line">  .babelConfig(&#123;</span><br><span class="line">    plugins: [&#x27;dynamic-import-node&#x27;], // 新增配置</span><br><span class="line">  &#125;)</span><br><span class="line">  .version();</span><br></pre></td></tr></table></figure>

<p>再次编译，瞬间完成！！撒花！！</p>
<h2 id="区别"><a href="#区别" class="headerlink" title="区别"></a>区别</h2><p>但是看到有提到是在 <strong>dev</strong> 环境使用 <strong>babel-plugin-dynamic-import-node</strong> 插件，这是为啥呢？用 <strong>require</strong> 和 <strong>import()</strong> 有啥区别呢？</p>
<p>初步探索了下发现使用 <strong>babel-plugin-dynamic-import-node</strong> 把 <strong>import()</strong> 替换成 <strong>require</strong> 编译的话，就没有 <strong>chunk files</strong> 了，相当于是跳过了 <strong>code split</strong> 之类的阶段吧（我猜是这样）。</p>
<p>可以看下下面的两个截图，第一个是不使用 <strong>babel-plugin-dynamic-import-node</strong> 进行生产环境 <strong>build</strong>，第二个是使用的情况进行 <strong>build</strong>。</p>
<p><img src="/upload/20190314/Zg2z9MCHBwYopX7wks27BGHLIME812UDjNVBDUMr.png"></p>
<p><img src="/upload/20190314/NU6O2K8WIQaJdmjXkfMJdc4jab0ZKGg2MtJggPbz.png"></p>
<p>从最终的文件大小和编译所需要的时间来看，目前不用 <strong>chunk</strong> 功能，并没有什么问题，于是最终选择使用 <strong>babel-plugin-dynamic-import-node</strong> 以此来解决编译时间过长的原因。</p>
<p>具体深入进去还有什么区别没时间探索了，目前编译后，使用正常，那就先这样吧。。。</p>
]]></content>
      <tags>
        <tag>Webpack</tag>
      </tags>
  </entry>
  <entry>
    <title>用php实现steem的private key转为public key的功能</title>
    <url>/2019/04/19/php-steem-priv-key-to-public-key.html</url>
    <content><![CDATA[<p>直接上代码：</p>
<figure class="highlight plaintext"><table><tr><td class="code"><pre><span class="line">use BitWasp\Bitcoin\Key\Factory\PrivateKeyFactory;</span><br><span class="line">use BitWasp\Buffertools\Buffer;</span><br><span class="line">use BitWasp\Buffertools\Buffertools;</span><br><span class="line">use BitWasp\Bitcoin\Crypto\Hash;</span><br><span class="line">use BitWasp\Bitcoin\Base58;</span><br><span class="line">use BitWasp\Bitcoin\Bitcoin;</span><br><span class="line">use BitWasp\Bitcoin\Crypto\EcAdapter\Impl\PhpEcc\Key\PublicKey;</span><br><span class="line"></span><br><span class="line">function getPubKeyFromPrivKeyWif($wif) &#123;</span><br><span class="line">	$factory = new PrivateKeyFactory();</span><br><span class="line">	$privKey = $factory-&gt;fromWif($wif);</span><br><span class="line">	$publicKey = $privKey-&gt;getPublicKey();</span><br><span class="line">	$pubKeyBuff = doSerialize($publicKey);</span><br><span class="line">	$checkSum = Hash::ripemd160($pubKeyBuff);</span><br><span class="line">	$addy = Buffertools::concat($pubKeyBuff, $checkSum-&gt;slice(0, 4));</span><br><span class="line">	$pubdata = Base58::encode($addy);</span><br><span class="line">	$pubKeyStr = &#x27;STM&#x27;.$pubdata;</span><br><span class="line">	return $pubKeyStr;</span><br><span class="line">&#125;</span><br><span class="line"></span><br><span class="line">function doSerialize(PublicKey $pubKey) &#123;</span><br><span class="line">	$point = $pubKey-&gt;getPoint();</span><br><span class="line">	$prefix = getPubKeyPrefix($pubKey);</span><br><span class="line">	$xBuff = Buffer::hex(gmp_strval($point-&gt;getX(), 16), 32);</span><br><span class="line">	$yBuff = Buffer::hex(gmp_strval($point-&gt;getY(), 16), 32);</span><br><span class="line">	$data = Buffertools::concat($prefix , $xBuff);</span><br><span class="line">	// steem的compress与btc相反</span><br><span class="line">	if ($pubKey-&gt;isCompressed()) &#123;</span><br><span class="line">		$data = Buffertools::concat($data, $yBuff);</span><br><span class="line">	&#125;</span><br><span class="line">	return $data;</span><br><span class="line">&#125;</span><br><span class="line"></span><br><span class="line">function getPubKeyPrefix($pubKey) &#123;</span><br><span class="line">	// steem的compress与btc相反</span><br><span class="line">	return !$pubKey-&gt;isCompressed() ?</span><br><span class="line">		Bitcoin::getEcAdapter()-&gt;getMath()-&gt;isEven($pubKey-&gt;getPoint()-&gt;getY())</span><br><span class="line">			? Buffer::hex(&#x27;02&#x27;, 1) : Buffer::hex(&#x27;03&#x27;, 1)</span><br><span class="line">		: Buffer::hex(&#x27;04&#x27;, 1);</span><br><span class="line">&#125;</span><br></pre></td></tr></table></figure>

<p>之前一直搞不出来，就是因为不知道为什么 <strong>Steem</strong> 判断压缩的变量跟 <strong>BTC</strong> 的正好是反的。不懂，先略过吧。</p>
]]></content>
      <tags>
        <tag>Server&amp;OS</tag>
      </tags>
  </entry>
  <entry>
    <title>用 PHP 生成 Steem 的私钥</title>
    <url>/2019/04/14/php-generate-steem-privateykey.html</url>
    <content><![CDATA[<h1 id="起因"><a href="#起因" class="headerlink" title="起因"></a>起因</h1><p>因为最近要开发 <a href="https://github.com/ety001/authsteem">AuthSteem</a>（一个 <strong>SteemConnect</strong> 的 <strong>PHP</strong> 版本的复制品），其中需要到生成私钥，验证私钥之类的操作，而目前没有找到一款包含这个功能的 <strong>PHP SDK</strong>，所以要自己来实现。</p>
<h1 id="代码"><a href="#代码" class="headerlink" title="代码"></a>代码</h1><p>虽然过程很艰辛，但是代码还是很简短的，如下：</p>
<figure class="highlight plaintext"><table><tr><td class="code"><pre><span class="line">use BitWasp\Bitcoin\Key\Factory\PrivateKeyFactory;</span><br><span class="line">function generatePrivateKeysFromMainPassword($username, $mainPassword) &#123;</span><br><span class="line">	$roles = [&#x27;owner&#x27;, &#x27;active&#x27;, &#x27;posting&#x27;, &#x27;memo&#x27;];</span><br><span class="line">	$result = [];</span><br><span class="line">	$factory = new PrivateKeyFactory();</span><br><span class="line">	foreach ($roles as $role) &#123;</span><br><span class="line">		$seed = $username.$role.$mainPassword;</span><br><span class="line">		$brainKey = implode(&quot; &quot;, explode(&quot;/[\t\n\v\f\r ]+/&quot;, trim($seed)));</span><br><span class="line">		$hashSha256 = hash(&#x27;sha256&#x27;, $brainKey);</span><br><span class="line">		$privKey = $factory-&gt;fromHexUncompressed($hashSha256);</span><br><span class="line">		$result[$role] = $privKey-&gt;toWif();</span><br><span class="line">	&#125;</span><br><span class="line">	return $result;</span><br><span class="line">&#125;</span><br><span class="line">$result = generatePrivateKeysFromMainPassword(&#x27;ety001&#x27;, &#x27;123456&#x27;);</span><br></pre></td></tr></table></figure>

<h1 id="探索过程"><a href="#探索过程" class="headerlink" title="探索过程"></a>探索过程</h1><p>过程真的是很艰辛，主要时间就是在读 <strong>steem-js</strong> 的源代码中度过的。另外有一篇关于比特币地址的文章也有指导意义，地址是：<a href="https://www.cnblogs.com/kumata/p/10477369.html">https://www.cnblogs.com/kumata/p/10477369.html</a> 。</p>
<p>总结下，生成过程是 <strong>$username</strong>, <strong>$role</strong>, <strong>$mainPassword</strong>，三者连接后的字符串做 <strong>sha256</strong> 哈希，哈希的这一步的目的是产生一个 <strong>32-byte</strong> 的 <strong>hex</strong> 字符串，这个字符串也就是你的私钥了，只不过这个私钥还需要经过一步处理，才是我们平时看到的样子。这个过程就是 <strong>Base58</strong>。</p>
<p><strong>Base58</strong> 的目的就是要把 <strong>256-bit</strong> 的二进制串（也就是 <strong>32-byte</strong> 的 <strong>hex</strong> 字符串）转换为人类可读的、相对较短、不易写错的字符串。详细的内容在上面我给出的那个文章里有。</p>
<p>经过 <strong>Base58</strong> 处理后，就能得到我们平时看到的私钥字符串了。</p>
<p>这里我找到了一个库 <code>bitwasp/bitcoin</code>，可以帮助我更好的完成这个过程。通过使用这个库的 <code>BitWasp\Bitcoin\Key\Factory\PrivateKeyFactory::fromHexUncompressed()</code> 方法，可以快速的完成这个工作。</p>
<h1 id="下一步"><a href="#下一步" class="headerlink" title="下一步"></a>下一步</h1><p>本计划等研究出如何把私钥转成公钥后再发文，但无奈花了一个下午，还是没有弄成功，于是下一步的工作就是需要能用 <code>bitwasp/bitcoin</code> 库已有的方法，实现通过私钥得到公钥。</p>
<p>目前尝试了 <code>bitwasp/bitcoin</code> 库里面自带的 <code>BitWasp\Bitcoin\Address\PayToPubKeyHashAddress</code> 类继承的 <code>getAddress</code> 方法，但是得到的地址并不是 <strong>Steem</strong> 格式的公钥地址。问题应该是 <strong>Steem</strong> 得到公钥的过程跟 <strong>BTC</strong> 还是有区别的。</p>
<p>另外仿照 <strong>Steem-js</strong> 的这段代码<a href="https://github.com/steemit/steem-js/blob/master/src/auth/ecc/src/key_public.js#L110">https://github.com/steemit/steem-js/blob/master/src/auth/ecc/src/key_public.js#L110</a> 改写了一段 PHP 的版本，仿写的代码如下：</p>
<figure class="highlight plaintext"><table><tr><td class="code"><pre><span class="line">use BitWasp\Bitcoin\Key\Factory\PrivateKeyFactory;</span><br><span class="line">use BitWasp\Buffertools\Buffertools;</span><br><span class="line">use BitWasp\Bitcoin\Crypto\Hash;</span><br><span class="line">use BitWasp\Bitcoin\Base58;</span><br><span class="line">function getPubKeyFromPrivKeyWif($wif) &#123;</span><br><span class="line">	$factory = new PrivateKeyFactory();</span><br><span class="line">	$privKey = $factory-&gt;fromWif($wif);</span><br><span class="line">	$pubKeyBuff = $privKey-&gt;getBuffer();</span><br><span class="line">	$checkSum = Hash::ripemd160($pubKeyBuff);</span><br><span class="line">	$addy = Buffertools::concat($pubKeyBuff, $checkSum-&gt;slice(0, 4));</span><br><span class="line">	$pubdata = Base58::encode($addy);</span><br><span class="line">	$pubKeyStr = &#x27;STM&#x27;.$pubdata;</span><br><span class="line">	return $pubKeyStr;</span><br><span class="line">&#125;</span><br></pre></td></tr></table></figure>

<p>但是，结果依旧不对。</p>
<p>所以还得继续折腾。。。</p>
]]></content>
      <tags>
        <tag>Server&amp;OS</tag>
        <tag>steem</tag>
        <tag>PHP</tag>
      </tags>
  </entry>
  <entry>
    <title>不用root快速获取米家数据库的方法</title>
    <url>/2019/04/24/mi-get-key-non-root.html</url>
    <content><![CDATA[<h1 id="准备"><a href="#准备" class="headerlink" title="准备"></a>准备</h1><ul>
<li>adb</li>
<li>ADB Backup Extractor (<a href="https://sourceforge.net/projects/adbextractor/">https://sourceforge.net/projects/adbextractor/</a>)</li>
</ul>
<h1 id="开始"><a href="#开始" class="headerlink" title="开始"></a>开始</h1><ol>
<li><p>手机连接电脑，使用adb调用数据备份功能</p>
<figure class="highlight plaintext"><table><tr><td class="code"><pre><span class="line">adb backup -noapk com.xiaomi.smarthome -f backup.ab</span><br></pre></td></tr></table></figure>
<p>执行这条命令后，手机上会显示一个界面，点击允许备份即可。</p>
</li>
<li><p>使用 <code>ADB Backup Extractor</code> 把备份下来的 <code>backup.ab</code> 转换为 <code>backup.tar</code>，</p>
<figure class="highlight plaintext"><table><tr><td class="code"><pre><span class="line">java -jar abe.jar unpack backup.ab backup.tar</span><br></pre></td></tr></table></figure>
</li>
<li><p>解压缩<code>backup.tar</code> 后，在 <code>db</code> 目录里就能找到 <code>miio2.db</code> 了。</p>
</li>
</ol>
<h1 id="注意"><a href="#注意" class="headerlink" title="注意"></a>注意</h1><p>对于新版的米家不再把 <code>token</code> 存储在 <code>miio2.db</code> 中的解决方案，就是去下载米家 <strong>5.0.19</strong>，这里是下载地址：<br><a href="https://www.apkmirror.com/apk/xiaomi-inc/mihome/mihome-5-0-19-release/mihome-5-0-19-android-apk-download/download/">https://www.apkmirror.com/apk/xiaomi-inc/mihome/mihome-5-0-19-release/mihome-5-0-19-android-apk-download/download/</a></p>
]]></content>
      <tags>
        <tag>Server&amp;OS</tag>
      </tags>
  </entry>
  <entry>
    <title>Laravel Task Schedule 在 Docker 环境下的实践</title>
    <url>/2019/04/04/laravel-task-schedule-docker.html</url>
    <content><![CDATA[<h1 id="起因"><a href="#起因" class="headerlink" title="起因"></a>起因</h1><p>最近一个项目用到了 <strong>Laravel</strong> 框架的 <strong>Task Schedule</strong> 功能。</p>
<p>这个功能其实就是把 <strong>Laravel</strong> 的一个 <strong>Command</strong> 加到 <strong>Crontab</strong> 中，即</p>
<figure class="highlight plaintext"><table><tr><td class="code"><pre><span class="line">* * * * *  php /path-to-your-project/artisan schedule:run &gt;&gt; /dev/null 2&gt;&amp;1</span><br></pre></td></tr></table></figure>

<p>然后你可以在 <strong>Laravel</strong> 中配置更多的详细的计划任务。</p>
<h1 id="问题"><a href="#问题" class="headerlink" title="问题"></a>问题</h1><p>由于当前生产环境，我使用的是 <strong>Docker</strong> 来部署的。</p>
<p>我的 <strong>Docker</strong> 部署方案思路是用 <strong>Docker</strong> 的容器来作为运行环境，所有的网站代码通过挂载的方式，让容器读取到。具体的配置方案可以参考我之前的一篇文章 《<a href="/2018/11/10/docker-lnmp.html">命令行版的docker化lnmp搭建</a>》。</p>
<p>这样的生产环境部署 <strong>Crontab</strong> 就有些棘手了。因为容器最好是只跑一个进程，如果用 <strong>docker exec</strong> 在 <strong>PHP</strong> 容器里执行 <code> php /path-to-your-project/artisan schedule:run &gt;&gt; /dev/null 2&gt;&amp;1</code>，那就违背了这个最佳实践。而在宿主机部署计划任务，宿主机又没有 <strong>PHP</strong> 执行环境。</p>
<h1 id="解决"><a href="#解决" class="headerlink" title="解决"></a>解决</h1><p>最终我想到的方案是，按照当前 <strong>PHP</strong> 容器的配置参数，再启动一个临时容器来执行 <code> php /path-to-your-project/artisan schedule:run &gt;&gt; /dev/null 2&gt;&amp;1</code>。</p>
<p>比如说当前我的 <strong>PHP</strong> 容器的启动命令是：</p>
<figure class="highlight plaintext"><table><tr><td class="code"><pre><span class="line">docker run -itd --name php7 \</span><br><span class="line">-v /etc/php7:/etc/php7 \</span><br><span class="line">-v /data/wwwroot:/data/wwwroot \</span><br><span class="line">-v /tmp:/tmp \</span><br><span class="line">-v /data/logs/php7:/var/log/php7 \</span><br><span class="line">--restart always \</span><br><span class="line">--network lnmp \</span><br><span class="line">--ip &quot;172.20.0.4&quot; \</span><br><span class="line">ety001/php:7.2.14</span><br></pre></td></tr></table></figure>

<p>那么我在宿主机创建一个脚本 <code>schedule.sh</code>，内容如下：</p>
<figure class="highlight plaintext"><table><tr><td class="code"><pre><span class="line">docker run -i \</span><br><span class="line">--user 65534:65534 \</span><br><span class="line">--rm \</span><br><span class="line">-v /etc/php7:/etc/php7 \</span><br><span class="line">-v /data/wwwroot:/data/wwwroot \</span><br><span class="line">-v /tmp:/tmp \</span><br><span class="line">-v /data/logs/php7:/var/log/php7 \</span><br><span class="line">--network lnmp \</span><br><span class="line">ety001/php:7.2.14 \</span><br><span class="line">php /data/wwwroot/xiaoyugan-server/artisan schedule:run</span><br></pre></td></tr></table></figure>

<p>然后在宿主机的计划任务中添加</p>
<figure class="highlight plaintext"><table><tr><td class="code"><pre><span class="line">* * * * * /your-project-path/schedule.sh</span><br></pre></td></tr></table></figure>

<blockquote>
<p>这里需要注意的是，去掉了 <code>-t</code> 参数，否则把 <code>schedule.sh</code> 加入到计划任务后，会执行失败，报 <code>The input device is not a TTY</code>。<br>另外需要增加 <code>--user</code> 参数来指定你的计划任务的执行用户。<strong>这个配置很重要！！！</strong>由于我的网站运行在 <strong>nobody</strong> 用户下，如果不增加这个配置，那么计划任务里的写日志操作，很可能在每天0点的时候触发，进而导致日志文件的属主是 <strong>root</strong> 用户，进而网站再有写日志操作就会没有权限写入了，很尴尬！<br><code>--rm</code> 参数可以使容器里的主进程执行结束后，自动删除该容器</p>
</blockquote>
<h1 id="总结"><a href="#总结" class="headerlink" title="总结"></a>总结</h1><p>目前看，这个方案应该是优雅的吧。不过配置起来还是很复杂，且很多点有时候想不到。就像这个 <code>--user</code> 参数，也是在偶然的跨天测试中发现的。像这种跨天的bug真的是很坑。。。</p>
]]></content>
      <tags>
        <tag>Server&amp;OS</tag>
        <tag>Docker</tag>
        <tag>Laravel</tag>
      </tags>
  </entry>
  <entry>
    <title>原来Steem的operation有这么多</title>
    <url>/2019/04/29/steem-operation.html</url>
    <content><![CDATA[<p>之前在开发 <strong>Steem LightDB</strong> 的时候，曾经总结过 <strong>Steem</strong> 的 <strong>Operation</strong> ，当时只是基于从数据块中总结出来了一些常见的类型。</p>
<p>最近在用 <strong>PHP</strong> 去实现一些公私钥生成，签名操作这样的功能，在比对着 <strong>steem-js</strong> 库在一点点用 <strong>PHP</strong> 仿写，过程真的是蛋碎一地，几度要放弃。</p>
<p>目前公私钥可以用 <strong>PHP</strong> 去生成了，目前正在实现如何组装 <strong>Transaction</strong> 并签名发送。</p>
<p>组装部分已经实现，目前就是签名这里实现很复杂，需要先对 <strong>Transaction</strong> 的原始数据 —— JSON 对象，进行转换，转换为二进制的形式，然后才是签名。</p>
<p>在看 <strong>steem-js</strong> 如何把 <strong>Transaction</strong> 转二进制的时候，发现了这么一段代码，里面应该就是目前 <strong>Steem</strong> 的所有操作方法吧，记录一下，说不定以后有用：</p>
<figure class="highlight plaintext"><table><tr><td class="code"><pre><span class="line">operation.st_operations = [</span><br><span class="line">vote,</span><br><span class="line">comment,</span><br><span class="line">transfer,</span><br><span class="line">transfer_to_vesting,</span><br><span class="line">withdraw_vesting,</span><br><span class="line">limit_order_create,</span><br><span class="line">limit_order_cancel,</span><br><span class="line">feed_publish,</span><br><span class="line">convert,</span><br><span class="line">account_create,</span><br><span class="line">account_update,</span><br><span class="line">witness_update,</span><br><span class="line">account_witness_vote,</span><br><span class="line">account_witness_proxy,</span><br><span class="line">pow,</span><br><span class="line">custom,</span><br><span class="line">report_over_production,</span><br><span class="line">delete_comment,</span><br><span class="line">custom_json,</span><br><span class="line">comment_options,</span><br><span class="line">set_withdraw_vesting_route,</span><br><span class="line">limit_order_create2,</span><br><span class="line">claim_account,</span><br><span class="line">create_claimed_account,</span><br><span class="line">request_account_recovery,</span><br><span class="line">recover_account,</span><br><span class="line">change_recovery_account,</span><br><span class="line">escrow_transfer,</span><br><span class="line">escrow_dispute,</span><br><span class="line">escrow_release,</span><br><span class="line">pow2,</span><br><span class="line">escrow_approve,</span><br><span class="line">transfer_to_savings,</span><br><span class="line">transfer_from_savings,</span><br><span class="line">cancel_transfer_from_savings,</span><br><span class="line">custom_binary,</span><br><span class="line">decline_voting_rights,</span><br><span class="line">reset_account,</span><br><span class="line">set_reset_account,</span><br><span class="line">claim_reward_balance,</span><br><span class="line">delegate_vesting_shares,</span><br><span class="line">account_create_with_delegation,</span><br><span class="line">fill_convert_request,</span><br><span class="line">author_reward,</span><br><span class="line">curation_reward,</span><br><span class="line">comment_reward,</span><br><span class="line">liquidity_reward,</span><br><span class="line">interest,</span><br><span class="line">fill_vesting_withdraw,</span><br><span class="line">fill_order,</span><br><span class="line">shutdown_witness,</span><br><span class="line">fill_transfer_from_savings,</span><br><span class="line">hardfork,</span><br><span class="line">comment_payout_update,</span><br><span class="line">return_vesting_delegation,</span><br><span class="line">comment_benefactor_reward</span><br><span class="line">];</span><br></pre></td></tr></table></figure>
]]></content>
      <tags>
        <tag>Server&amp;OS</tag>
        <tag>steem</tag>
      </tags>
  </entry>
  <entry>
    <title>做了个非常精简的BTS内盘做市机器人</title>
    <url>/2019/05/22/bts-trade-bots.html</url>
    <content><![CDATA[<p>去年年初一直想修 <strong>btsbots</strong>，但是水平有限，在解析 <strong>BTS</strong> 区块数据那块，实在是搞不定，于是就放下了。前天，花了6个小时，按照之前 <strong>btsbots</strong> 的大致逻辑，实现了核心部分，现在已经封装成了 <strong>Docker</strong> 镜像。</p>
<h1 id="拉取镜像"><a href="#拉取镜像" class="headerlink" title="拉取镜像"></a>拉取镜像</h1><figure class="highlight plaintext"><table><tr><td class="code"><pre><span class="line">docker pull ety001/btsbots-cli</span><br></pre></td></tr></table></figure>

<h1 id="创建环境变量"><a href="#创建环境变量" class="headerlink" title="创建环境变量"></a>创建环境变量</h1><figure class="highlight plaintext"><table><tr><td class="code"><pre><span class="line">vim env</span><br></pre></td></tr></table></figure>
<p>环境变量的内容如下：</p>
<figure class="highlight plaintext"><table><tr><td class="code"><pre><span class="line"># 节点地址</span><br><span class="line">API_URL=wss://bts.open.icowallet.net/ws</span><br><span class="line"># 账号名</span><br><span class="line">ACCOUNT=</span><br><span class="line"># 账号active私钥</span><br><span class="line">PRIV_KEY=</span><br><span class="line"># 钱包密码</span><br><span class="line">PASSWD=</span><br><span class="line"># 做市市场 Quote:Base</span><br><span class="line">MARKET=BTS:CNY</span><br><span class="line"># 买单价格比率</span><br><span class="line">BUY_RATE=0.01</span><br><span class="line"># 卖单价格比率</span><br><span class="line">SELL_RATE=0.01</span><br><span class="line"># 花费base的数量</span><br><span class="line">BUY_AMOUNT=10</span><br><span class="line"># 得到base的数量</span><br><span class="line">SELL_AMOUNT=10</span><br><span class="line"># base货币最大持有量</span><br><span class="line">BASE_MAX=2000</span><br><span class="line"># quote货币最大持有量</span><br><span class="line">QUOTE_MAX=2000</span><br></pre></td></tr></table></figure>

<h1 id="启动"><a href="#启动" class="headerlink" title="启动"></a>启动</h1><figure class="highlight plaintext"><table><tr><td class="code"><pre><span class="line">docker run -d\</span><br><span class="line"> --name btsbots\</span><br><span class="line"> --restart always\</span><br><span class="line"> --env-file env\</span><br><span class="line"> ety001/btsbots-cli</span><br></pre></td></tr></table></figure>

<h1 id="查看log"><a href="#查看log" class="headerlink" title="查看log"></a>查看log</h1><figure class="highlight plaintext"><table><tr><td class="code"><pre><span class="line">docker logs btsbots</span><br></pre></td></tr></table></figure>

<h1 id="查看代码"><a href="#查看代码" class="headerlink" title="查看代码"></a>查看代码</h1><figure class="highlight plaintext"><table><tr><td class="code"><pre><span class="line">docker run -it\</span><br><span class="line"> --rm\</span><br><span class="line"> ety001/btsbots-cli\</span><br><span class="line"> cat /app/bots.py</span><br></pre></td></tr></table></figure>

<h1 id="解释"><a href="#解释" class="headerlink" title="解释"></a>解释</h1><p><strong>btsbots</strong> 的做市逻辑就是按照比当前最高买价低 <code>BUY_RATE</code> 的价格下买单，比当前最低卖价高 <code>SELL_RATE</code> 的价格下卖单。<br>举例说明一下，比如目前做 <code>BTS:CNY</code> 市场（<code>quote:base</code>)，当前最高买入BTS价是 <code>0.45 CNY</code>，最低卖出价是 <code>0.46 CNY</code>，<br>你的账号目前有 <code>200 CNY</code> 和 <code>500 BTS</code>，<code>BUY_RATE = 0.01</code>，<code>SELL_RATE = 0.02</code>，<code>BUY_AMOUNT=10</code>，<code>SELL_AMOUNT=20</code>。</p>
<blockquote>
<p>市场中<code>quote</code>是要交易的对象，也就是如果你把 <code>BTS</code> 设置为 <code>quote</code>，那么就意味着你是在拿一种货币买入 <code>BTS</code>，<br>或者卖出 <code>BTS</code> 获取某种其他货币。</p>
</blockquote>
<p>机器人的下单数据计算如下:</p>
<p>1.计算买入价: <code>buyPrice = 0.45 * (1-0.01)</code><br>2.计算卖出价: <code>sellPrice = 0.46 * (1+0.02)</code><br>3.买单买入 <code>BTS</code> 数量: <code>BUY_AMOUNT / buyPrice</code><br>4.卖单卖出 <code>BTS</code> 数量: <code>SELL_AMOUNT / sellPrice</code></p>
<p>符合下买单的条件:</p>
<p>1.当前没有买单<br>2.当前持有的 <code>quote币</code> 数量小于 <code>QUOTE_MAX</code> （要买的币还没买够，继续买）<br>3.当前持有的 <code>base币</code> 数量大于 <code>BUY_AMOUNT</code> （拿来买币的币足以下买单）</p>
<p>符合下卖单的条件</p>
<p>1.当前没有卖单<br>2.当前持有的 <code>base币</code> 数量小于 <code>BASE_MAX</code> （要卖的币还没卖够，继续卖）<br>3.当前持有的 <code>quote币</code> 数量大于 <code>SELL_AMOUNT / sellPrice</code> （要卖的币足够下卖单）</p>
<h1 id="完"><a href="#完" class="headerlink" title="完"></a>完</h1><p>在不考虑小白用户的无脑输入异常处理，不考虑用户体验的情况下，只开发核心真的是轻松加愉快，只用了6个小时就完工了。</p>
<h3 id="该程序不提供任何支持、答疑，不提供任何担保，交易风险自行承担。"><a href="#该程序不提供任何支持、答疑，不提供任何担保，交易风险自行承担。" class="headerlink" title="该程序不提供任何支持、答疑，不提供任何担保，交易风险自行承担。"></a>该程序不提供任何支持、答疑，不提供任何担保，交易风险自行承担。</h3><h3 id="该程序不提供任何支持、答疑，不提供任何担保，交易风险自行承担。-1"><a href="#该程序不提供任何支持、答疑，不提供任何担保，交易风险自行承担。-1" class="headerlink" title="该程序不提供任何支持、答疑，不提供任何担保，交易风险自行承担。"></a>该程序不提供任何支持、答疑，不提供任何担保，交易风险自行承担。</h3><h3 id="该程序不提供任何支持、答疑，不提供任何担保，交易风险自行承担。-2"><a href="#该程序不提供任何支持、答疑，不提供任何担保，交易风险自行承担。-2" class="headerlink" title="该程序不提供任何支持、答疑，不提供任何担保，交易风险自行承担。"></a>该程序不提供任何支持、答疑，不提供任何担保，交易风险自行承担。</h3><p>祝玩的愉快～</p>
]]></content>
      <tags>
        <tag>Server&amp;OS</tag>
        <tag>Bitshares</tag>
      </tags>
  </entry>
  <entry>
    <title>用 Docker 和 Firewalld 实现高度防护</title>
    <url>/2019/06/11/docker-firewall.html</url>
    <content><![CDATA[<p>最近接了一个运维 <strong>cybex</strong> 节点的任务，过程甚是坎坷。首先，我的客户提供的服务器上有一个在运行的 <strong>eos</strong> 侧链节点，其次，<strong>cybex</strong> 节点的搭建，官方要求要做严格的防火墙设置，即入站规则中只允许指定的 <strong>IP</strong> 访问本地的指定端口，出站规则中只允许本地访问指定IP的指定端口。</p>
<p>这样就防火墙要求就有些棘手了。由于目前服务器上的 <strong>eos</strong> 侧链节点并没有什么防火墙配置，所以要是把 <strong>cybex</strong> 的出站白名单机制做上了，<strong>eos</strong> 侧链要想正常工作，也需要配置一份出站白名单，否则 <strong>eos</strong> 侧链节点将拿不到其他节点的同步数据了。</p>
<p>思前想后，觉得可以把 <strong>cybex</strong> 节点使用 <strong>docker</strong> 容器运行，这样 <strong>cybex</strong> 节点就有独立的 <strong>IP</strong> 和隔离的环境了，我只需要在宿主机，使用 <strong>cybex</strong> 容器的 <strong>IP</strong> 作为标示来过滤进出站数据包即可。</p>
<p>思路定下来后，开始准备实施。</p>
<p>由于宿主机操作系统是 <strong>CentOS7</strong>，也就是系统默认安装的是 <strong>Firewalld</strong>。经过一番学习，写出了入站规则，如下：</p>
<figure class="highlight plaintext"><table><tr><td class="code"><pre><span class="line">firewall-cmd --zone=public --add-rich-rule &#x27;rule family=&quot;ipv4&quot; source address=&quot;IP1&quot; forward-port port=&quot;5000&quot; protocol=&quot;tcp&quot; to-port=&quot;5000&quot; to-addr=&quot;172.20.0.2&quot;&#x27; --permanent</span><br><span class="line">firewall-cmd --zone=public --add-rich-rule &#x27;rule family=&quot;ipv4&quot; source address=&quot;IP2&quot; destination address=&quot;172.20.0.2&quot; accept&#x27; --permanent</span><br></pre></td></tr></table></figure>

<p>以上只是规则的一部分，重复语法的规则就不再写了。入站主要是两种规则，一种规则是指定来源IP，访问指定端口，就像第一条，来源 <strong>IP</strong> 是<code>IP1</code>，访问宿主机 <code>5000</code> 端口，直接转发到容器 <code>172.20.0.2</code> 的 <code>5000</code> 端口，即这是一条 <code>FORWARD</code> 链的规则。另外一种规则就是指定来源 <strong>IP</strong> 可以访问容器的所有端口，即这是一条 <code>INPUT</code> 链的规则。</p>
<p>这里需要注意，由于我们需要容器的高度隔离，所以，在启动容器的时候，就不再使用 <code>-p</code> 参数来绑定端口了。原因我们通过 <code>iptables -L FORWORD --line-number</code> 可以看到如下信息，</p>
<figure class="highlight plaintext"><table><tr><td class="code"><pre><span class="line">[root@li1677-102 ~]# iptables -L FORWARD --line-number</span><br><span class="line">Chain FORWARD (policy ACCEPT)</span><br><span class="line">num  target     prot opt source               destination</span><br><span class="line">1    DOCKER-USER  all  --  anywhere             anywhere</span><br><span class="line">2    DOCKER-ISOLATION-STAGE-1  all  --  anywhere             anywhere</span><br><span class="line">3    ACCEPT     all  --  anywhere             anywhere             ctstate RELATED,ESTABLISHED</span><br><span class="line">4    DOCKER     all  --  anywhere             anywhere</span><br><span class="line">5    ACCEPT     all  --  anywhere             anywhere</span><br><span class="line">6    ACCEPT     all  --  anywhere             anywhere</span><br><span class="line">7    ACCEPT     all  --  anywhere             anywhere             ctstate RELATED,ESTABLISHED</span><br><span class="line">8    DOCKER     all  --  anywhere             anywhere</span><br><span class="line">9    ACCEPT     all  --  anywhere             anywhere</span><br><span class="line">10   ACCEPT     all  --  anywhere             anywhere</span><br><span class="line">11   ACCEPT     all  --  anywhere             anywhere             ctstate RELATED,ESTABLISHED</span><br><span class="line">12   DOCKER     all  --  anywhere             anywhere</span><br><span class="line">13   ACCEPT     all  --  anywhere             anywhere</span><br><span class="line">14   ACCEPT     all  --  anywhere             anywhere</span><br><span class="line">15   ACCEPT     all  --  anywhere             anywhere             ctstate RELATED,ESTABLISHED</span><br><span class="line">16   ACCEPT     all  --  anywhere             anywhere</span><br><span class="line">17   FORWARD_direct  all  --  anywhere             anywhere</span><br><span class="line">18   FORWARD_IN_ZONES_SOURCE  all  --  anywhere             anywhere</span><br><span class="line">19   FORWARD_IN_ZONES  all  --  anywhere             anywhere</span><br><span class="line">20   FORWARD_OUT_ZONES_SOURCE  all  --  anywhere             anywhere</span><br><span class="line">21   FORWARD_OUT_ZONES  all  --  anywhere             anywhere</span><br><span class="line">22   DROP       all  --  anywhere             anywhere             ctstate INVALID</span><br><span class="line">23   REJECT     all  --  anywhere             anywhere             reject-with icmp-host-prohibited</span><br></pre></td></tr></table></figure>

<p>结合 <code>iptables</code> 的结构流程图（<a href="http://www.zsythink.net/archives/1199/">http://www.zsythink.net/archives/1199/</a>），</p>
<p><img src="https://steemeditor.com/storage/images/JtTZMLQZLKqcFjL4baLqyxsSZ8N4LYcFmyDBZDrm.png"></p>
<p>所有 <strong>Docker</strong> 容器的流量都是通过 <strong>FORWARD</strong> 链转发的，我们能看到上面第1\2\4\8\12行都是 <strong>Docker</strong> 产生的自定义链，并且通过 <strong>Docker</strong> 的官方文档了解到，官方不建议用户去修改 <strong>DOCKER</strong> 命名的自定义链，而是把需要增加的自定义内容放到 <strong>DOCKER-USER</strong> 这个自定义链中。而我们平时启动容器的时候，使用 <code>-p</code> 参数的时候，其实是把过滤规则写入了 <strong>DOCKER</strong> 链中。这就意味着，使用 <code>-p</code> 参数设置的转发过滤规则的优先级最高，无法用 <strong>Firewalld</strong> 来限制（17–21行是 <strong>Firewalld</strong> 产生的自定义链）。这也是我最初尝试的方案，用 <code>-p</code> 把容器端口映射到宿主机，然后再在宿主机配置端口策略，<strong>这个方法是不行的</strong>！</p>
<p>写完入站规则后，也想用入站的规则改一下成出站规则，发现 <strong>Firewalld</strong> 的 <strong>rich rules</strong> 无法做到（至少目前我是绕不出来）。于是继续看文档，发现 <strong>Firewalld</strong> 有一个 <strong>–direct</strong> 的参数可以直接使用 <strong>iptables</strong> 的语法来写入规则到 <strong>iptables</strong> 中。</p>
<p>又经过若干时间的学习和本地虚拟机实验，最终总结出的出站规则如下:</p>
<figure class="highlight plaintext"><table><tr><td class="code"><pre><span class="line">firewall-cmd  --permanent --direct --add-rule ipv4 filter DOCKER-USER 0 -p tcp -s 172.20.0.2 -d IP1 --dport 5000 -j ACCEPT</span><br><span class="line">firewall-cmd  --permanent --direct --add-rule ipv4 filter DOCKER-USER 0 -s 172.20.0.2 -d IP2 -j ACCEPT</span><br><span class="line">firewall-cmd  --permanent --direct --add-rule ipv4 filter DOCKER-USER 0 -s 172.20.0.2 -j REJECT</span><br></pre></td></tr></table></figure>

<p>同样，这里也是捡出来关键的几条来展示。</p>
<p>这里就涉及到刚才说的，如果你要添加针对 <strong>Docker</strong> 的防火墙规则，就要把规则写入到 <strong>DOCKER-USER</strong> 中，因为 <strong>DOCKER-USER</strong> 的优先级最高。这几条规则的思路就是写出要放行的是哪些，然后最后把其他的<strong>所有的</strong>出站数据都禁掉。</p>
<p>这个地方，我踩到了一个还没有填的坑。</p>
<p>由于 <strong>Docker</strong> 和 <strong>Firewalld</strong> 都是通过修改 <strong>iptables</strong> 来实现其相应的功能的。而 <strong>Docker</strong> 的 <strong>DOCKER-USER</strong> 链 <strong>Firewalld</strong> 无法管理。具体表现就是上面的规则，你执行后，由于加了 <code>--permanent</code> 参数，需要重载配置才能生效，但是重载配置的时候，会报错，并且新增配置并不能生效。</p>
<p>经过两天的搜索，最终找到了一个临时的解决方案（ <a href="https://github.com/moby/moby/issues/35043#issuecomment-356036671">https://github.com/moby/moby/issues/35043#issuecomment-356036671</a> ） 。</p>
<p>这个方案的原理大概是这样的：<strong>Docker</strong> 启动的时候会去检查有没有 <strong>DOCKER-USER</strong> 链，如果没有就创建一个，如果有就不再操作了，只是检查该链的最后，是不是放行所有规则。由于 <strong>Docker</strong> 的这个特性，那么我们就手动删掉 <strong>DOCKER-USER</strong> 链，用 <strong>Firewalld</strong> 来创建并管理这个链，这样并不影响 <strong>Docker</strong> 的正常使用，且 <strong>Firewalld</strong> 也可以正常重启或者重载配置。</p>
<figure class="highlight plaintext"><table><tr><td class="code"><pre><span class="line"># Removing DOCKER-USER CHAIN (it won&#x27;t exist at first)</span><br><span class="line">firewall-cmd --permanent --direct --remove-chain ipv4 filter DOCKER-USER</span><br><span class="line"></span><br><span class="line"># Flush rules from DOCKER-USER chain (again, these won&#x27;t exist at first; firewalld seems to remember these even if the chain is gone)</span><br><span class="line">firewall-cmd --permanent --direct --remove-rules ipv4 filter DOCKER-USER</span><br><span class="line"></span><br><span class="line"># Add the DOCKER-USER chain to firewalld</span><br><span class="line">firewall-cmd --permanent --direct --add-chain ipv4 filter DOCKER-USER</span><br></pre></td></tr></table></figure>

<p>所以，先执行上面这三条命令，用 <strong>Firewalld</strong> 重建 <strong>DOCKER-USER</strong> 链，然后再执行写好的出站规则，重载配置。进入容器测试了下，出站规则生效了。</p>
<p>到这里，我本来以为已经完美配置结束了。正要欢呼的时候，<strong>cybex</strong> 那边的技术小哥说，我的 <strong>5000</strong> 端口为啥不通？</p>
<p>WTF？！</p>
<p>考虑了下，感觉应该是后加的出站规则影响了入站规则。我也用 <code>nc -zv server_ip 5000</code> 测试了下，发现会一直卡到连接超时。我猜测可能是 <code>firewall-cmd  --permanent --direct --add-rule ipv4 filter DOCKER-USER 0 -s 172.20.0.2 -j REJECT</code> 这条规则影响的，于是手动删除掉这条规则，再用 <strong>nc</strong> 测试就正常了。</p>
<p>思考了下，这个过程应该是，白名单中的外部主机向我的服务器的 <strong>5000</strong> 端口发送了握手包要建立连接，而外部主机肯定是系统随机了一个高位的端口来连接我的 <strong>5000</strong> 端口，虽然入站规则符合了，但是我回应给他的握手包却不符合我设置的出站规则，导致握手不成功。</p>
<p>这个思路确定后，就继续去翻 <strong>iptables</strong> 的教程，去看看这种关联性的数据包怎么处理。最终还真让我发现了，<a href="http://www.zsythink.net/archives/1597">http://www.zsythink.net/archives/1597</a></p>
<p><img src="https://steemeditor.com/storage/images/I3d5w4nJSBbIu20reYo7QscJFoESVMO2XTKGbxpn.png"></p>
<p>也就是，我可以在出站规则中先加上放行这些 <strong>state</strong> 的数据包的规则，所以修改后的出站规则如下:</p>
<figure class="highlight plaintext"><table><tr><td class="code"><pre><span class="line">firewall-cmd  --permanent --direct --add-rule ipv4 filter DOCKER-USER 0 -m state --state RELATED,ESTABLISHED -j ACCEPT</span><br><span class="line">firewall-cmd  --permanent --direct --add-rule ipv4 filter DOCKER-USER 0 -s 172.20.0.2 -d IP2 -j ACCEPT</span><br><span class="line">firewall-cmd  --permanent --direct --add-rule ipv4 filter DOCKER-USER 0 -s 172.20.0.2 -j REJECT</span><br></pre></td></tr></table></figure>

<p>这样配置后，再测试，所有配置都已达到预期，完工！</p>
<p>这里再补充下这种出站策略对于节点的保护的意义。</p>
<p>很早之前，还是 <strong>webshell</strong> 盛行的时代，有见过类似这样配置的主机。由于 <strong>webshell</strong> 的运行权限一般不是 <strong>Administrator</strong> 或者 <strong>root</strong>，所以入侵者通过 <strong>web</strong> 网站拿到 <strong>webshell</strong> 后的权限比较低，会想通过上传本地溢出漏洞代码的方式，拿到最高权限。而有时候，管理员会配置上传文件的大小或者扩展名，所以直接通过 <strong>webshell</strong> 上传是受限的，所以入侵者想到了一个曲线救国的方案，就是用 <strong>webshell</strong> 指定一个下载路径，让服务器自己去指定的下载路径下载溢出漏洞的执行代码。这时候出站规则就排上用途了，如果管理员配置了禁止所有出站链接，除了 <strong>RELATED,ESTABLISHED</strong> 这样的数据包外，那么入侵者的这个方案就不可行了。另外还有就是如果入侵者通过 <strong>webshell</strong> 成功上传了被动链接式的木马程序，出站规则一样可以拦截掉。</p>
<p>这就是我之前对于出站规则的理解，就是防止内鬼从外部获取数据。</p>
<p>但是这次这种分布式节点，为什么还要这么设置呢？在咨询了 @abit 后豁然开朗。那就是这种配置，可以避免自己服务器的 <strong>IP</strong> 暴露给不信任的节点。不过我还是觉得这种规则的必要性并不是很强。</p>
]]></content>
      <tags>
        <tag>Server&amp;OS</tag>
        <tag>Docker</tag>
      </tags>
  </entry>
  <entry>
    <title>远程工作的四年</title>
    <url>/2019/06/17/remote-work-4-years.html</url>
    <content><![CDATA[<p>到今天，满打满算，已经远程工作了有四年了。写下这篇，算是总结，也算是给想要远程工作的人揭开这种工作模式的面纱，并给出建议和启示。</p>
<p>时间先倒退到大学。大学的时候，其实对于远程工作是没有什么理解的，当时只是觉得把部里（校会网络部）的工作拿回宿舍去完成，感觉很酷炫。毕竟那时候很多资料都是存储在部里办公室的电脑里的，在宿舍做一些东西，发现缺少资料了，还要从南区最南头奔到北区最北头去取，很是麻烦。于是我通过一些技术手段，把处于内网中的办公室电脑开放到公共网络中，于是在宿舍也可以远程去操作。</p>
<p>到了大三快结束的时候，需要考虑是实习还是准备考研的时候，选择了实习。那时也没有想到会要去找一份远程工作，因为那个时候，国内很少看到这样的概念。可能只有黑产和灰产是远程工作吧。</p>
<p>投实习简历的时候，一心想要去深圳的我，最终鬼使神差的去了北京，进到了中科院计算所“打杂”。大四一年实习，之后毕业也就留在了计算所继续“打杂”。在计算所的几年，浩哥（实验室小boss）也是给了我充分的时间自由，再加上经手的项目多为外地合作项目，倒是感觉像是在远程工作。</p>
<p><img src="/upload/20190617/1.png"></p>
<p>到后来跟来爷、海辰一块创业的时候，也基本上是一周碰面一到两次讨论重要的核心问题，而多数时间，我基本上都是宅在回龙观的某出租屋里，躺在懒人沙发上码代码。</p>
<p><img src="/upload/20190617/2.png"></p>
<p>创业失败后，让我决定回家的原因有很多，但是能够支撑我做出最终决定的最大动力，就是我这好几年的远程工作的经历了。正因为有这样的经历，让我相信，我可以找到一份薪资还算说得过去的远程岗位，然后回家生活。</p>
<p>这个决定也算是我人生几个重要转折点之一吧。这也算是我的性格使然，追求自己想要的生活。帝都这种高房价的生活一旦开始，就真的是没有了生活，人生苦短，我觉得我没有那个兴趣去做这样的事情。尽管帝都的资源很多，机会很多，但是作为一粒沙子的我，大概率的还是会随风飘扬，而不是成为小概率的钻石。</p>
<p>在把所有的行李打成几个包弄回家后，我也踏上了返家的行程。</p>
<p>回家后头几个月，在经历了两段不是很开心的短暂远程工作后，最终自己主动降薪一半，找到了一份还算不错的远程工作。之所以说还算不错，是因为给我的时间很灵活，基本上是任务多以结果为导向，时间节点会给一个比较远的设定，整体工作压力不大。</p>
<p>直到前年年底，我决定辞职，脱产一年专心搞一下我自己的产品。于是就这样，开始了终极道路–自由职业者。不过最终坚持大半年后，还是弹尽粮绝了。现在又回到了远程工作的状态。</p>
<p>流水账写完，就来说说远程工作的一些好处，基本上这些好处，也是显而易见的。远程工作的最大好处就是不受地点限制，你可以选择回老家，也可以选择去自己喜欢的城市，可以选择在家办公，也可以选择在咖啡馆之类的公共场所里搞事情，甚至你也可以一边旅行一边工作。所有的一切都是你自己说了算，只要你赚的钱足够多就好。</p>
<p><img src="/upload/20190617/3.png"></p>
<p>其次，就是时间相对灵活。这个也要看你找到的工作的老板的要求了。如果是按周或者月来安排计划的话，每天的时间其实就非常的灵活了。除了工作时间，你的生活时间也会增加很多，因为在家办公，没有大城市的通勤时间，每天至少是可以多出来一到两个小时的。这一两个小时的时间可以拿来做很多事情，比如健身。</p>
<p>再来说说缺点和问题。最大的问题，就是如何把工作和生活分开。目前看，想要彻底分开是不可能的，但是需要最大限度的分开，否则真的有被拖垮的危险。由于在家办公，所以家里人有时候有事情需要跑腿，那么基本上大概率的就会把这个任务落在你的身上。除此之外还有很多琐碎的事情，也会拜托到你的身上。因为你在家里办公，大家最大的感触就是你顺手就可以把这个事情给做了。但实际到底如何，也就只有当事人最清楚了。</p>
<p>除了无法把自己从琐碎的家务中剥离，还有就是要承受一定的孤单。很多时候，你可能是一个人在工作，一个人在家，一个人吃饭。因为远程，你基本上没有了跟同事聊天的机会。这就会带来很多问题。你只能自己想办法去解决，尽量给自己增加一些社交机会，否则过不了几年，你可能就脱离社会比较远了。也许你刚开始远程工作的时候，由于很兴奋，感受不到。但是时间一久，就会慢慢凸现出来了。</p>
<p>最后一个比较严重的问题，就是亲朋好友的认可问题了。尤其是对于老一些的长辈，这种新鲜的事物未必就是他们能够接受的。他们可能觉得你整天闷在家里不务正业。这种情况没有什么好办法，你只能用事实和时间来证明你自己不是在家里不务正业。</p>
<p>对于选择远程工作的人，我觉得有三类，一类是家里所迫，由于家里的问题，不得不回家工作，一类是喜欢相对自由的环境，不喜欢朝九晚五的束缚，最后一类就是介于二者之间了。我想我属于第三类，但是会偏向于追求自由的那类。</p>
<p>做出了怎样的选择，就会过上怎样的生活。仔细考虑好，再做选择就好。对于目前国内的情况，还是慎重选择远程工作为好。</p>
]]></content>
      <tags>
        <tag>杂七杂八</tag>
      </tags>
  </entry>
  <entry>
    <title>自己实现了一个cs类型的ddns更新</title>
    <url>/2019/06/22/client-server-type-ddns-for-cloudflare.html</url>
    <content><![CDATA[<p>最近家里的服务器的 <code>cloudflare</code> 的 <code>DDNS</code> 更新功能总是不灵验，估计问题是跟墙有关吧。</p>
<p>不得不说这种基础设施还是得自己开发。</p>
<p>考虑到有墙的原因，所以实现更新IP的思路就是，本地获取公网IP，然后发送到墙外的服务器。<br>然后墙外的服务器拿到IP后再更新 <code>cloudflare</code>。</p>
<p>获取并转发公网IP的代码：</p>
<p><a href="https://github.com/ety001/dockerfile/tree/master/transfer_ip">https://github.com/ety001/dockerfile/tree/master/transfer_ip</a></p>
<p>获取到IP并更新的代码：</p>
<p><a href="https://github.com/ety001/dockerfile/tree/master/update-ip-to-cloudflare">https://github.com/ety001/dockerfile/tree/master/update-ip-to-cloudflare</a></p>
<p>为了方便使用，我还封装成了 <code>Docker</code> 镜像，分别是： <code>ety001/transfer_ip</code> 和 <code>ety001/update-ip-to-cloudflare</code>。</p>
<p>使用方法如下：</p>
<p>假如你要更新的域名是 <code>abc.ppp.com</code>，先在墙外的服务器(1.1.1.1)上部署，命令是</p>
<figure class="highlight plaintext"><table><tr><td class="code"><pre><span class="line">docker run -itd --name update-cloudflare --restart always \</span><br><span class="line">    -p 8888:80</span><br><span class="line">    -e &quot;EMAIL=xxxxxxxx@yyyyyyy.com&quot; \</span><br><span class="line">    -e &quot;AUTH_KEY=xxxxxxxxxxxxxxxx&quot; \</span><br><span class="line">    ety001/update-ip-to-cloudflare:latest</span><br></pre></td></tr></table></figure>

<p>其中环境变量 <code>EMAIL</code> 是 <code>cloudflare</code> 的 <code>email</code>，<code>AUTH_KEY</code> 是 <code>cloudflare</code> 的 <code>API KEY</code>。</p>
<p>部署好这个后，你就可以通过 <code>http://1.1.1.1:8888/?domain=ppp.com&amp;record=abc.ppp.com&amp;ip=</code> 地址更新IP地址了。</p>
<p>然后在墙内的服务器上执行</p>
<figure class="highlight plaintext"><table><tr><td class="code"><pre><span class="line">docker run -itd --name send-ip --restart always \</span><br><span class="line">    -e &quot;TO_URL=http://1.1.1.1:8888/?domain=ppp.com&amp;record=abc.ppp.com&amp;ip=&quot; \</span><br><span class="line">    -e &quot;IP_URL=https://api.ipify.org/&quot; \</span><br><span class="line">    ety001/transfer_ip:latest</span><br></pre></td></tr></table></figure>

<p>这里面的两个环境变量，<code>TO_URL</code> 就是墙外服务器的更新IP的地址，<code>IP_URL</code> 是可以返回你公网IP的网址。</p>
<p>这样两个容器跑起来以后，你就可以本地获取公网IP传到墙外服务器，然后再更新DNS了。</p>
<p>如果你想再更新一个新的地址，只需要在本地再启动一个容器，然后手动修改下 <code>TO_URL</code> 参数配置即可。</p>
]]></content>
      <tags>
        <tag>Server&amp;OS</tag>
      </tags>
  </entry>
  <entry>
    <title>用 docker compose 搭建 bitshares elastic search</title>
    <url>/2019/07/15/bitshares-es-node.html</url>
    <content><![CDATA[<blockquote>
<p>怕是这是第一篇中文说如何部署 <code>bitshares elastic search</code> 的文章吧。</p>
</blockquote>
<h1 id="前置知识"><a href="#前置知识" class="headerlink" title="前置知识"></a>前置知识</h1><ul>
<li>docker</li>
<li>elastic search</li>
</ul>
<h1 id="准备工作"><a href="#准备工作" class="headerlink" title="准备工作"></a>准备工作</h1><h2 id="安装-docker-和-docker-compose"><a href="#安装-docker-和-docker-compose" class="headerlink" title="安装 docker 和 docker-compose"></a>安装 docker 和 docker-compose</h2><figure class="highlight plaintext"><table><tr><td class="code"><pre><span class="line"># 这里只给出centos7的安装步骤</span><br><span class="line"># 其他系统请参考docker的官方文档  [https://docs.docker.com/install/]</span><br><span class="line"></span><br><span class="line"># 安装 docker</span><br><span class="line">yum remove docker \</span><br><span class="line">                  docker-client \</span><br><span class="line">                  docker-client-latest \</span><br><span class="line">                  docker-common \</span><br><span class="line">                  docker-latest \</span><br><span class="line">                  docker-latest-logrotate \</span><br><span class="line">                  docker-logrotate \</span><br><span class="line">                  docker-selinux \</span><br><span class="line">                  docker-engine-selinux \</span><br><span class="line">                  docker-engine \</span><br><span class="line">&amp;&amp; yum install -y yum-utils \</span><br><span class="line">  device-mapper-persistent-data \</span><br><span class="line">  lvm2 \</span><br><span class="line">&amp;&amp; yum-config-manager \</span><br><span class="line">    --add-repo \</span><br><span class="line">    https://download.docker.com/linux/centos/docker-ce.repo \</span><br><span class="line">&amp;&amp; yum install -y docker-ce \</span><br><span class="line">&amp;&amp; systemctl enable docker \</span><br><span class="line">&amp;&amp; systemctl start docker</span><br><span class="line"></span><br><span class="line"># 安装 docker-compose</span><br><span class="line">yum install epel-release \</span><br><span class="line">    &amp;&amp; yum install -y python-pip \</span><br><span class="line">    &amp;&amp; pip install docker-compose \</span><br><span class="line">    &amp;&amp; yum upgrade python*</span><br></pre></td></tr></table></figure>

<h2 id="拉取dockerfile"><a href="#拉取dockerfile" class="headerlink" title="拉取dockerfile"></a>拉取dockerfile</h2><figure class="highlight plaintext"><table><tr><td class="code"><pre><span class="line">git clone https://github.com/ety001/dockerfile.git</span><br><span class="line"></span><br><span class="line"># 切换到相关目录</span><br><span class="line">cd dockerfile/bts-es</span><br></pre></td></tr></table></figure>

<blockquote>
<p>这是我自己用来存储常用的 <code>dockerfile</code> 的库</p>
</blockquote>
<h2 id="编译-Bitshares-内核"><a href="#编译-Bitshares-内核" class="headerlink" title="编译 Bitshares 内核"></a>编译 Bitshares 内核</h2><figure class="highlight plaintext"><table><tr><td class="code"><pre><span class="line"># 编译 3.1.0，如果编译其他版本，自行更换版本号即可</span><br><span class="line">docker-compose build --build-arg TAG=3.1.0</span><br></pre></td></tr></table></figure>

<blockquote>
<p>编译速度取决于你的网速和机器配置。</p>
<ul>
<li>如果在国内，可以打开该目录下的 <code>Dockerfile</code>，把其中的替换 <code>sources.list</code> 的步骤取消注释，这样更新系统软件的时候，可以使用国内163的源。</li>
<li>另外 <code>Dockerfile</code> 文件中也可以调整编译参数利用多核性能提高编译速度。</li>
</ul>
</blockquote>
<h2 id="修改系统配置"><a href="#修改系统配置" class="headerlink" title="修改系统配置"></a>修改系统配置</h2><p>向 <code>/etc/sysctl.conf</code> 中增加 <code>vm.max_map_count = 262144</code>。 <code>elasticsearch</code>要求 <code>max_map_count</code> 最低 262144。添加后，重新载入 <code>sysctl --system</code></p>
<h1 id="启动"><a href="#启动" class="headerlink" title="启动"></a>启动</h1><p>启动前，需要修改<code>docker-compose.yml</code>中的 <code>Xms</code> 和 <code>Xmx</code>环境变量，代表 <code>es</code> 的最小内存和最大内存占用。我的文件默认配置的是 <code>6G</code>。</p>
<figure class="highlight plaintext"><table><tr><td class="code"><pre><span class="line">docker-compose up -d</span><br></pre></td></tr></table></figure>
<blockquote>
<p>需要在 <code>docker-compose.yml</code> 文件所在目录执行该命令。</p>
</blockquote>
<h1 id="停止"><a href="#停止" class="headerlink" title="停止"></a>停止</h1><figure class="highlight plaintext"><table><tr><td class="code"><pre><span class="line">docker-compose down</span><br></pre></td></tr></table></figure>
<blockquote>
<p>需要在 <code>docker-compose.yml</code> 文件所在目录执行该命令。</p>
</blockquote>
<h1 id="验证es是否启动成功"><a href="#验证es是否启动成功" class="headerlink" title="验证es是否启动成功"></a>验证es是否启动成功</h1><figure class="highlight plaintext"><table><tr><td class="code"><pre><span class="line">curl http://127.0.0.1:9200/_cat/health</span><br></pre></td></tr></table></figure>

<h1 id="验证是否有数据"><a href="#验证是否有数据" class="headerlink" title="验证是否有数据"></a>验证是否有数据</h1><figure class="highlight plaintext"><table><tr><td class="code"><pre><span class="line">curl -X GET &#x27;http://localhost:9200/bitshares-*/data/_count?pretty=true&#x27; -H &#x27;Content-Type: application/json&#x27; -d &#x27;</span><br><span class="line">&#123;</span><br><span class="line">        &quot;query&quot; : &#123;</span><br><span class="line">                &quot;bool&quot; : &#123; &quot;must&quot; : [&#123;&quot;match_all&quot;: &#123;&#125;&#125;] &#125;</span><br><span class="line">        &#125;</span><br><span class="line">&#125;&#x27;</span><br></pre></td></tr></table></figure>

<h1 id="已知问题"><a href="#已知问题" class="headerlink" title="已知问题"></a>已知问题</h1><ul>
<li>默认用户密码未修改</li>
</ul>
<h1 id="相关链接"><a href="#相关链接" class="headerlink" title="相关链接"></a>相关链接</h1><ul>
<li><a href="https://dev.bitshares.works/en/master/supports_dev/elastic_search_plugin.html">https://dev.bitshares.works/en/master/supports_dev&#x2F;elastic_search_plugin.html</a></li>
</ul>
<hr>
<h1 id="UPDATE"><a href="#UPDATE" class="headerlink" title="UPDATE"></a>UPDATE</h1><ul>
<li>修改密码的话，只需要在 <code>docker-compose.yml</code> 的 <code>elasticsearch</code> 中增加 <code>ELASTIC_PASSWORD=123456</code> 环境变量，这样启动后，密码就是 <code>123456</code>。</li>
</ul>
]]></content>
      <tags>
        <tag>Server&amp;OS</tag>
        <tag>Docker</tag>
        <tag>Bitshares</tag>
      </tags>
  </entry>
  <entry>
    <title>封装了一个Bitshares的喂价程序</title>
    <url>/2019/10/04/bitshares-pricefeed-docker.html</url>
    <content><![CDATA[<p>最近 <a href="http://gbacenter.org/">GBAC</a> 计划参与 Bitshares 的见证人竞选，而我负责见证人服务节点等一系列服务的搭建。</p>
<p>一个见证人，最好是配备2台节点服务器（主备），1台测试节点服务器，1个API节点服务器，1个喂价程序。</p>
<p>其中像API和测试节点为了省成本，可以跟备机一块。最让我头疼的就是喂价程序了。</p>
<p>找了两个老的开源的喂价程序，折腾了一整天，总是各种各样的报错，最后@abit 提供了一个 <a href="https://github.com/Zapata/bitshares-pricefeed">https://github.com/Zapata/bitshares-pricefeed</a> ，最终终于打包成可用的 docker 镜像了。</p>
<p>目前已经<a href="https://github.com/Zapata/bitshares-pricefeed/pull/9">提交 PR 给原库</a>了，不过还没有合并。目前想要使用的话，可以先用我的库，</p>
<figure class="highlight plaintext"><table><tr><td class="code"><pre><span class="line">git clone https://github.com/ety001/bitshares-pricefeed.git</span><br><span class="line">cd bitshares-pricefeed</span><br><span class="line">git checkout develop</span><br><span class="line">docker build -t bitshares-pricefeed .</span><br></pre></td></tr></table></figure>

<p>打包好以后，镜像大约在250MB左右，比原作者的1G多的镜像小了很多。</p>
<p>使用前，先生成默认配置文件</p>
<figure class="highlight plaintext"><table><tr><td class="code"><pre><span class="line">docker run -it --rm -v /path/to:/app bitshares-pricefeed:latest bitshares-pricefeed create</span><br></pre></td></tr></table></figure>

<p>执行后，在 <code>/path/to</code> 目录下会有一个 <code>config.yml</code> 的配置文件，里面的注释解释的比较清楚，自己看一下就好。</p>
<p>然后执行下面的命令即可启动喂价程序</p>
<figure class="highlight plaintext"><table><tr><td class="code"><pre><span class="line">docker run -v /path/to/config.yml:/config/config.yml bitshares-pricefeed:latest bitshares-pricefeed --configfile /config/config.yml --node wss://ws.gdex.top update --active-key=XXXXXXX</span><br></pre></td></tr></table></figure>

<blockquote>
<p>其中 active-key 就是你的见证人账号的 active 权限的私钥</p>
</blockquote>
<p>简单来说，就是简单的两步，创建配置文件，启动喂价程序。</p>
<p>不得不说，现在我对于docker的依赖越来越严重了。。。</p>
]]></content>
      <tags>
        <tag>Server&amp;OS</tag>
        <tag>Docker</tag>
        <tag>Bitshares</tag>
      </tags>
  </entry>
  <entry>
    <title>对之前的 Bitshares Elastic Search 增加 Kibana</title>
    <url>/2019/10/11/bitshares-es-node-add-kibana.html</url>
    <content><![CDATA[<p><img src="/upload/20191011/bsLKuXdNVZ5I3DiMSwWsWHrYE3z6ygCvtTua60Zw.jpeg"></p>
<p>继上篇文章<a href="https://steemit.com/cn/@ety001/bitshares-elasticsearch-docker-compose">《重写了我的bitshares-elasticsearch的docker-compose》</a>之后，经过一天的调试，我又增加了 <code>Kibana</code> 的配置到 <code>docker-compose.yml</code> 文件中。</p>
<p>使用方法很简单，首先停止所有容器</p>
<figure class="highlight plaintext"><table><tr><td class="code"><pre><span class="line">docker-compose down</span><br></pre></td></tr></table></figure>

<p>然后备份下你之前的密码，再更新代码仓库到最新。</p>
<p>之后，修改 <code>kibana.yml</code> 文件中的 <code>elasticsearch.password</code> 为你的 <code>elastic</code> 密码。</p>
<p>如果你想要直接暴露 <code>Kibana</code> 的管理端口，可以修改 <code>docker-compose.yml</code> 文件，</p>
<figure class="highlight plaintext"><table><tr><td class="code"><pre><span class="line">kibana:</span><br><span class="line">    container_name: kibana</span><br><span class="line">    image: docker.elastic.co/kibana/kibana:7.4.0</span><br><span class="line">    volumes:</span><br><span class="line">      - ./kibana.yml:/usr/share/kibana/config/kibana.yml</span><br><span class="line">    networks:</span><br><span class="line">      esnet:</span><br><span class="line">        ipv4_address: 172.22.0.5</span><br><span class="line">    #ports:               # 去掉这里的注释即可直接暴露端口</span><br><span class="line">    #  - 5601:5601        # 去掉这里的注释即可直接暴露端口</span><br></pre></td></tr></table></figure>

<p>最后，启动所有容器即可，</p>
<figure class="highlight plaintext"><table><tr><td class="code"><pre><span class="line">docker-compose up -d</span><br></pre></td></tr></table></figure>

<p>目前，我已经在我的节点上配置了开放用户，</p>
<blockquote>
<p>URL: <a href="https://bts-es.liuye.tech/">https://bts-es.liuye.tech/</a><br>Username: bts<br>Password: btsbts  </p>
</blockquote>
]]></content>
      <tags>
        <tag>Server&amp;OS</tag>
        <tag>Docker</tag>
        <tag>Bitshares</tag>
      </tags>
  </entry>
  <entry>
    <title>对上一篇说远程工作的一些补充</title>
    <url>/2019/06/20/remote-work-2.html</url>
    <content><![CDATA[<p>有很多人在问薪水高低的事情，我个人觉得每个人对于高薪的定义不同，有些人觉得 20k&#x2F;月很多了，有些人觉得 20k&#x2F;月也就一般般。所以我也没有办法给出高薪的标准是多少，因为这个不存在标准。真正的标准在自己的心里。你自己觉得挣的钱够花，应该就算是符合自己的标准了吧。</p>
<p>我只能给出我所知道的数据给大家作为参考。目前我接触过的、看到的远程外包团队，能给出的薪水在 6k–12k 的范围，多数是 8k 上下，能给到 10k 往上的相对较少。20k 往上的凤毛麟角，有的话，也需要你的技能点很牛逼或者是个全栈什么都干（所谓全栈就是你一个人完成好几个人的活，意味着会比较累）。</p>
<p>目前远程团队有能盈利养活团队的产品的很少，几乎大部分远程团队都是外包。因此如果你准备开始一份远程工作，请做好心理准备，尤其是之前没有跟甲方打过交道的。这里面扯皮的事情很多。做一段时间后，你可能会想，同样是做外包，为什么不自己去揽活自己干，而是要加入别人的团队之类的问题。</p>
<p>另外就是关于远程外包团队，你需要互相适应。不过一般远程外包团队也没有几个人，通常就是一个全栈开发负责一整个项目的样子，最多给你配个设计师或者外包一个临时的设计师。我这里说的适应，其实主要就是跟负责揽活的团队boss之间的默契问题。举个小例子，之前我曾经在一个团队里面工作，项目出点小问题，自己的boss就跟甲方站在一条战线上批斗我，最后，我没有干满两周，就果断辞掉了这份工作，因为实在是给的少，还干的太不爽了。总之，这是个双向选择。</p>
<p>还有很多问从哪里找远程工作。我这里直接给出远程圈里的一个朋友总结的库吧，我觉得里面的资料已经足够全面了，地址是: <a href="https://github.com/greatghoul/remote-working">https://github.com/greatghoul/remote-working</a>  。目前 greathoul 在维护豆瓣的一个小组，以及在telegram上有个机器人，你们在 github 的库能找到相关的链接。我个人的经历来看，如果口语不错，可以尝试去找一下国外的远程岗位，可能唯一就是时差是个问题。</p>
<p>接下来就说一些细碎的问题。首先是社保。目前我是自己注册了一个公司来给自己缴社保，这种方式我不推荐。之前也是没有经验，觉得注册个公司不是什么问题。经过四年的时间洗礼，注册的确很快很方便，但是运营维护公司是个很蛋疼的事情。即使公司没有进出账，也要每月和每季度进行税务报账，每年上半年需要进行出工商年报，每年7月省人社局出社保缴费基数后，打印各种表单跑人社局改社保基数，每年经济普查要填各种表，每年去税务缴残保金之类的，等等一系列很琐碎的事情。并且注册公司后，你注册公司的手机号基本上就是被各种机构打爆的节奏。</p>
<p>注册公司目前对我来说唯一的好处就是：需要注册微信公众号之类需要公司资质的时候，很轻松就搞定了；学到了很多以前没有接触过的税务、公司方面的知识；面向创业者的政府贴息贷款也有资质去申请。然并卵。【画外音：也是因为自己弄公司，才有对税这种东西有直观深刻的体悟。依法纳税很重要】【再补充：没注册公司之前，五险一金对我来说就是个名词，我也不关注这个，自己弄公司之后，才知道是哪五险哪一金。如果你要注册公司，看看能不能只缴三险，生育险和失业险没有什么缴的必要。目前我是只缴五险。】</p>
<p>那么不注册公司的话，你可以选择找一家当地公司代缴，或者是直接去人社局个人缴费，具体我也没有办理过，不是很清楚，去当地人社局问一下就知道了。不过，除了国家的这些社保医保之类的，还是建议自己给自己买一些合适的商业保险作为二重保障。</p>
<p>关于一边旅行一边远程工作。这个事情很美好，也是很多没有远程工作的人很向往的，但是实际是很蛋疼的。你在旅行过程中会遇到各种各样未知的情况，这会导致你的工作时间和效率大幅降低。如果你真的想一边旅行一边远程工作，我能给出的建议就是，一个目的地的时间跨度在两周到一个月比较好，另外就是旅行期间的工作繁忙度不高。如果你已经成家有孩子了，请放弃这种不切实际的想法！！！</p>
<p>关于上升空间，远程工作也无法保障。这包括了你的人脉、薪水、能力，都很难在远程工作中获得上升空间。这也是由你所在的工作性质决定的。就像我上面提到的，目前多数远程工作团队是外包团队，所以能力想要提升很难，因为外包的目的是完成任务，所以就是各种copy – paste。人脉你也很难接触到客户。薪水基本上就是固定的。</p>
<p>因此你要选择远程工作这条路，只能是奔着自由开发者的目标去的。也就是需要在某个圈子里建立自己的品牌和口碑，这有助于你获取人脉。能力上自己push自己去学习。这两点做到了，薪水就是水到渠成的事情了。</p>
<p>就先补充这么多，如果再有想到的，再补充！</p>
]]></content>
      <tags>
        <tag>杂七杂八</tag>
      </tags>
  </entry>
  <entry>
    <title>重写了我的bitshares-elasticsearch的docker-compose</title>
    <url>/2019/10/11/rewrite-bitshares-docker-es-node.html</url>
    <content><![CDATA[<p><img src="https://cdn.steemitimages.com/DQmSWLDEXYtzT8XP4Geq549MY2415EC9JRSsN7VwcMW4wxq/OlGLOj5UsS2Ms4mf4wfRQMZWWQwmD2Uoeu6lIuaj.png" alt="OlGLOj5UsS2Ms4mf4wfRQMZWWQwmD2Uoeu6lIuaj.png"></p>
<p>之前在<a href="/2019/07/15/bitshares-es-node.html">《用 docker compose 搭建 bitshares elastic search》</a>中已经介绍了如何使用<code>docker-composer</code>搭建 <code>Bitshares Elastic Search 服务</code>。</p>
<p>最近有些时间，就对之前的部署进行了优化，并且升级了 <code>elastic search</code> 的版本和 <code>Bitshares</code> 的版本。</p>
<p><strong>仓库地址(Repository)</strong> &#x3D;&gt; <a href="https://github.com/ety001/dockerfile/tree/master/bts-es">https://github.com/ety001/dockerfile/tree/master/bts-es</a></p>
<p><strong>Manual in English</strong> &#x3D;&gt; <a href="https://github.com/ety001/dockerfile/blob/master/bts-es/README.md">https://github.com/ety001/dockerfile/blob/master/bts-es/README.md</a></p>
<h2 id="如何部署"><a href="#如何部署" class="headerlink" title="如何部署"></a>如何部署</h2><h3 id="1-克隆代码库"><a href="#1-克隆代码库" class="headerlink" title="1. 克隆代码库"></a>1. 克隆代码库</h3><figure class="highlight plaintext"><table><tr><td class="code"><pre><span class="line">$ git clone https://github.com/ety001/dockerfile.git</span><br><span class="line">$ cd dockerfile/bts-es</span><br></pre></td></tr></table></figure>

<h3 id="2-修改-docker-composer-yaml-中的部分参数"><a href="#2-修改-docker-composer-yaml-中的部分参数" class="headerlink" title="2. 修改 docker-composer.yaml 中的部分参数"></a>2. 修改 docker-composer.yaml 中的部分参数</h3><ul>
<li><strong>ES_JAVA_OPTS&#x3D;-Xms3g -Xmx3g</strong> 这里可以调整 es 的内存占用</li>
<li><strong>ELASTIC_PASSWORD</strong> 这是你的es密码. 请同时修改 <code>--elasticsearch-basic-auth</code> 的值</li>
<li><strong>#ports: - 9200:9200</strong>, 如果你想直接让http服务可以被访问，可以取消这个地方的注释</li>
</ul>
<h3 id="3-生成证书"><a href="#3-生成证书" class="headerlink" title="3. 生成证书"></a>3. 生成证书</h3><figure class="highlight plaintext"><table><tr><td class="code"><pre><span class="line">$ docker run \</span><br><span class="line">    -it --rm \</span><br><span class="line">    -v $(pwd)/ssl:/usr/share/elasticsearch/config/certs \</span><br><span class="line">    docker.elastic.co/elasticsearch/elasticsearch:7.4.0 \</span><br><span class="line">    /bin/bash</span><br><span class="line"></span><br><span class="line">-- 进入临时容器 --</span><br><span class="line"></span><br><span class="line"># elasticsearch-certutil ca</span><br><span class="line">ENTER ENTER （两次回车）</span><br><span class="line"></span><br><span class="line"># elasticsearch-certutil cert --ca elastic-stack-ca.p12</span><br><span class="line">ENTER ENTER ENTER （三次回车）</span><br><span class="line"></span><br><span class="line"># mv *.p12 config/certs/</span><br><span class="line"># chown 1000:1000 config/certs/*.p12</span><br><span class="line"></span><br><span class="line"># exit</span><br></pre></td></tr></table></figure>

<h3 id="4-增加-vm-max-map-count-配置"><a href="#4-增加-vm-max-map-count-配置" class="headerlink" title="4. 增加 vm.max_map_count 配置"></a>4. 增加 vm.max_map_count 配置</h3><figure class="highlight plaintext"><table><tr><td class="code"><pre><span class="line">$ sudo sysctl -w vm.max_map_count=262144</span><br></pre></td></tr></table></figure>
<p>如果想要永久修改这个配置值，在 <code>/etc/sysctl.conf</code> 中增加 <code>vm.max_map_count</code> 设置。<br>配置好需要重启，执行 <code>sysctl vm.max_map_count</code> 检查是否配置成功。</p>
<h3 id="5-启动"><a href="#5-启动" class="headerlink" title="5. 启动"></a>5. 启动</h3><figure class="highlight plaintext"><table><tr><td class="code"><pre><span class="line">$ docker-compose up -d</span><br></pre></td></tr></table></figure>

<h2 id="其他常用命令"><a href="#其他常用命令" class="headerlink" title="其他常用命令"></a>其他常用命令</h2><h3 id="1-检查运行日志"><a href="#1-检查运行日志" class="headerlink" title="1. 检查运行日志"></a>1. 检查运行日志</h3><figure class="highlight plaintext"><table><tr><td class="code"><pre><span class="line">$ docker-compose logs -f --tail 100</span><br></pre></td></tr></table></figure>

<h3 id="2-停止所有容器"><a href="#2-停止所有容器" class="headerlink" title="2. 停止所有容器"></a>2. 停止所有容器</h3><figure class="highlight plaintext"><table><tr><td class="code"><pre><span class="line">$ docker-compose down</span><br></pre></td></tr></table></figure>

<h3 id="3-检查es是否成功运行"><a href="#3-检查es是否成功运行" class="headerlink" title="3. 检查es是否成功运行"></a>3. 检查es是否成功运行</h3><figure class="highlight plaintext"><table><tr><td class="code"><pre><span class="line">$ curl -u elastic:123456 -X GET &#x27;http://172.22.0.2:9200/_cat/health&#x27;</span><br></pre></td></tr></table></figure>
<blockquote>
<p><code>123456</code> 是你在 <code>docker-compose.yml</code> 中配置的密码.</p>
</blockquote>
<h3 id="4-把-es01-加入到-nginx-的容器网络中"><a href="#4-把-es01-加入到-nginx-的容器网络中" class="headerlink" title="4. 把 es01 加入到 nginx 的容器网络中"></a>4. 把 es01 加入到 nginx 的容器网络中</h3><p>如果你同时使用 <code>docker</code> 来部署 <code>nginx</code>，你可以把 <code>es01</code> 容器加入到 <code>nginx</code> 容器<br>所在的网络里，这样可以方便 <code>nginx</code> 做反向代理到 <code>es</code> 的 <code>http</code> 服务并加上证书。</p>
<blockquote>
<p>假设你的 nginx 容器所在网络名为 lnmp</p>
</blockquote>
<figure class="highlight plaintext"><table><tr><td class="code"><pre><span class="line">docker network connect --ip 172.20.0.3 lnmp es01</span><br></pre></td></tr></table></figure>

<h2 id="任何问题？"><a href="#任何问题？" class="headerlink" title="任何问题？"></a>任何问题？</h2><p>如果有任何问题，欢迎提 issue。</p>
<p>My bitshares account: <strong>ety001</strong><br>My witness account: <strong>liuye</strong></p>
]]></content>
      <tags>
        <tag>Server&amp;OS</tag>
        <tag>Docker</tag>
        <tag>Bitshares</tag>
      </tags>
  </entry>
  <entry>
    <title>上手 Genymotion</title>
    <url>/2019/10/31/genymotion-setup.html</url>
    <content><![CDATA[<p>由于最近需要在模拟器里搞事情，Genymotion 是个很好用的模拟器，<br>然而初始状态下，并不好用，需要安装很多必备软件。<br>这篇会简述下大致的步骤。</p>
<h3 id="1-安装-Genymotion"><a href="#1-安装-Genymotion" class="headerlink" title="1. 安装 Genymotion"></a>1. 安装 Genymotion</h3><p>具体安装过程请去 Genymotion 的官网查看。<br>安装好以后，安装 <code>Google Nexus 5X 8.0-API26</code> 这个版本。</p>
<h3 id="2-安装-OpenGapps"><a href="#2-安装-OpenGapps" class="headerlink" title="2. 安装 OpenGapps"></a>2. 安装 OpenGapps</h3><p>安装 OpenGapps 的目的是为了使用 Google Play Store 来安装浏览器。<br>在 Genymotion 的 3.0.3 版本中，已经自带了 OpenGapps 的安装途径，<br>就在模拟器的控制栏上，如图所示</p>
<p><img src="/upload/20191031/zSdTodxe7HzkorbjbeRDQwU3j5yrB6JaTiOsr467.png"></p>
<p>点击后，按照提示即可完成安装，重启后，就可以登录 Google Play Store 来安装个浏览器了。</p>
<h3 id="3-安装-Genymotion-ARM-Translation"><a href="#3-安装-Genymotion-ARM-Translation" class="headerlink" title="3. 安装 Genymotion ARM Translation"></a>3. 安装 Genymotion ARM Translation</h3><p>由于 Genymotion 的模拟器是 x86 架构编译的 Android 系统，有一些 App 是不支持 X86 的，<br>所以我们需要安装一个翻译器。</p>
<p>访问 <a href="https://github.com/m9rco/Genymotion_ARM_Translation">https://github.com/m9rco/Genymotion_ARM_Translation</a> 这里，<br>找到 Android 8.0 版本的下载包，下载后直接把 zip 包拖拽进模拟器里，<br>按照提示信息安装即可，完成后重启模拟器。</p>
<h3 id="4-安装-XPosed-框架"><a href="#4-安装-XPosed-框架" class="headerlink" title="4. 安装 XPosed 框架"></a>4. 安装 XPosed 框架</h3><p>访问 <a href="https://forum.xda-developers.com/showthread.php?t=3034811">https://forum.xda-developers.com/showthread.php?t=3034811</a> ，<br>在这个页面，下载 <code>XposedInstaller_*.apk</code>。</p>
<p>然后访问 <a href="https://dl-xda.xposed.info/framework/">https://dl-xda.xposed.info/framework/</a> ，<br>依次打开 sdk26 &#x2F; x86 目录，下载最新的 zip 包。下载完成后，拖拽入模拟器安装。</p>
<p>安装完重启模拟器，再拖入 <code>XposedInstaller_*.apk</code> 进行安装，完成后，重启模拟器。</p>
<h3 id="这样一些基础软件就都完成了安装，再使用起来就方便了很多。"><a href="#这样一些基础软件就都完成了安装，再使用起来就方便了很多。" class="headerlink" title="这样一些基础软件就都完成了安装，再使用起来就方便了很多。"></a>这样一些基础软件就都完成了安装，再使用起来就方便了很多。</h3>]]></content>
      <tags>
        <tag>教程</tag>
        <tag>Genymotion</tag>
      </tags>
  </entry>
  <entry>
    <title>我也加入了bitshares交易赛的战局</title>
    <url>/2019/10/29/add-bts-trade-game.html</url>
    <content><![CDATA[<p>具体的比赛贴子：<a href="https://bitsharestalk.org/index.php?topic=29665.0">https://bitsharestalk.org/index.php?topic=29665.0</a></p>
<p>使用我之前开发的机器人参赛非常简单。这里是之前发布机器人时的贴子：<a href="/2019/05/22/bts-trade-bots.html">https://akawa.ink/2019/05/22/bts-trade-bots.html</a> 。</p>
<p>本教程是在Linux下运行。</p>
<p>首先，需要有Docker环境，具体Docker安装方法请参考Docker官方网站。</p>
<p>然后，创建一个环境变量文件，用于配置你的机器人，内容如下：</p>
<figure class="highlight plaintext"><table><tr><td class="code"><pre><span class="line"># 节点地址</span><br><span class="line">API_URL=wss://bts.open.icowallet.net/ws</span><br><span class="line"># 账号名</span><br><span class="line">ACCOUNT=</span><br><span class="line"># 账号active私钥</span><br><span class="line">PRIV_KEY=</span><br><span class="line"># 钱包密码</span><br><span class="line">PASSWD=123456</span><br><span class="line"># 做市市场 Quote:Base</span><br><span class="line">MARKET=GDEX.BTC:BTS</span><br><span class="line"># 买单价格比率</span><br><span class="line">BUY_RATE=0.01</span><br><span class="line"># 卖单价格比率</span><br><span class="line">SELL_RATE=0.01</span><br><span class="line"># 花费base的数量</span><br><span class="line">BUY_AMOUNT=100</span><br><span class="line"># 得到base的数量</span><br><span class="line">SELL_AMOUNT=100</span><br><span class="line"># base货币最大持有量</span><br><span class="line">BASE_MAX=2000</span><br><span class="line"># quote货币最大持有量</span><br><span class="line">QUOTE_MAX=2000</span><br></pre></td></tr></table></figure>

<p>假设该文件名为 <code>bts_bts</code>。</p>
<p>启动机器人的命令如下：</p>
<figure class="highlight plaintext"><table><tr><td class="code"><pre><span class="line">docker run -itd \</span><br><span class="line"> --name bot1 \</span><br><span class="line"> --restart always \</span><br><span class="line"> --env-file btc_bts \</span><br><span class="line"> ety001/btsbots-cli:latest</span><br></pre></td></tr></table></figure>

<p>启动之后，可以用 <code>docker logs -f --tail 100 bot1</code> 来查看机器人的运行状态。</p>
<p>如果想要停止并删除机器人，执行 <code>docker stop bot1 &amp;&amp; docker rm bot1</code> 即可。</p>
]]></content>
      <tags>
        <tag>Docker</tag>
        <tag>Bitshares</tag>
      </tags>
  </entry>
  <entry>
    <title>Flutter 编译为 APK Release时无法联网</title>
    <url>/2019/11/02/flutter-android-internet.html</url>
    <content><![CDATA[<p>今天完成了我第一个 Flutter App —— <a href="https://fir.im/yhu7">网络剪切板</a>。<br>当我满怀激动的编译出 Release 版本后，发现程序并不能联网。</p>
<p>经过搜索发现，原来要想联网需要自己手动去 <code>AndroidManifest.xml</code> 里添加下面的权限</p>
<figure class="highlight plaintext"><table><tr><td class="code"><pre><span class="line">&lt;uses-permission android:name=&quot;android.permission.INTERNET&quot;/&gt;</span><br></pre></td></tr></table></figure>

<p>我觉得 Flutter 的这种方式，让人觉得很恶心，这些工作不应该是 Flutter 自身的工具集<br>来完成的事情吗？为什么需要用户再去手动配置权限？不可思议。</p>
]]></content>
      <tags>
        <tag>教程</tag>
        <tag>Flutter</tag>
      </tags>
  </entry>
  <entry>
    <title>用Docker封装了火币的python sdk</title>
    <url>/2019/11/05/huobi-docker-sdk.html</url>
    <content><![CDATA[<p>天天盯盘实在是有点吃不消了，有些工作还是需要用机器来完成。<br>由于已经习惯了靠 Docker 部署，所以先把基础工作做好，把火币<br>的 python sdk 环境封装个 Docker 基础包。</p>
<h1 id="Dockerfile"><a href="#Dockerfile" class="headerlink" title="Dockerfile"></a>Dockerfile</h1><figure class="highlight plaintext"><table><tr><td class="code"><pre><span class="line">FROM alpine:3.9</span><br><span class="line">WORKDIR /app</span><br><span class="line">ARG TAG=1.0.5</span><br><span class="line">RUN apk --no-cache add git python3 &amp;&amp; \</span><br><span class="line">    git clone https://github.com/HuobiRDCenter/huobi_Python.git &amp;&amp; \</span><br><span class="line">    cd huobi_Python &amp;&amp; \</span><br><span class="line">    git checkout $&#123;TAG&#125; &amp;&amp; \</span><br><span class="line">    python3 setup.py install &amp;&amp; \</span><br><span class="line">    cd .. &amp;&amp; \</span><br><span class="line">    rm -rf huobi_Python</span><br><span class="line">CMD [&quot;pwd&quot;]</span><br></pre></td></tr></table></figure>

<p>编译的时候，可以通过 ARG 来控制你要使用的版本。</p>
<figure class="highlight plaintext"><table><tr><td class="code"><pre><span class="line">docker build --build-arg TAG=1.0.5 -t ety001/huobi-lib:1.0.5 .</span><br></pre></td></tr></table></figure>

<h1 id="测试一下"><a href="#测试一下" class="headerlink" title="测试一下"></a>测试一下</h1><p>在当前目录创建个测试文件 <code>a.py</code></p>
<figure class="highlight plaintext"><table><tr><td class="code"><pre><span class="line">from huobi import SubscriptionClient</span><br><span class="line">from huobi.model import *</span><br><span class="line">from huobi.exception.huobiapiexception import HuobiApiException</span><br><span class="line">from huobi import RequestClient</span><br><span class="line"></span><br><span class="line">request_client = RequestClient()</span><br><span class="line"></span><br><span class="line"># Get the timestamp from Huobi server and print on console</span><br><span class="line">timestamp = request_client.get_exchange_timestamp</span><br><span class="line">print(timestamp)</span><br><span class="line"></span><br><span class="line"># Get the latest btcusdt‘s candlestick data and print the highest price on console</span><br><span class="line">candlestick_list = request_client.get_latest_candlestick(&quot;btcusdt&quot;, CandlestickInterval.DAY1, 20)</span><br><span class="line">for item in candlestick_list:</span><br><span class="line">    print(item.high)</span><br></pre></td></tr></table></figure>

<p>启动一个临时容器，测试一下我们的 SDK 是否安装正确</p>
<figure class="highlight plaintext"><table><tr><td class="code"><pre><span class="line">docker run -it --rm -v $(pwd):/app ety001/huobi-lib:1.0.5 python3 /app/a.py</span><br></pre></td></tr></table></figure>

<p>如果环境正确，则会正常输出数据。</p>
<p>OVER！接下来就要去研究下火币的各个 API 了。</p>
]]></content>
      <tags>
        <tag>Docker</tag>
      </tags>
  </entry>
  <entry>
    <title>重新部署了我的 Bitshares API Node</title>
    <url>/2019/11/09/change-bitshares-api-url.html</url>
    <content><![CDATA[<p>家里的服务器<a href="/2019/11/07/accident-by-memory.html">重做了系统后</a>，bitshares节点我也计划重新换一种部署模式。</p>
<p>由于家里的网络是动态公网IP，联通会不定时把客户端踢下线，让其重新拨号，<br>这就导致 IP 会不定时变动。尽管做了 DDNS 脚本，每分钟去监测变动并修改，<br>但是架不住 DNS 的生效时间和脚本出现意外不可用。</p>
<p>所以新的部署方案，我使用 frp 来让我家里的服务器主动去把本地端口映射到<br>远程公网服务器上（目前是阿里云香港轻量服务器）。这样就能解决 IP 变动<br>带来的潜在不稳定因素了。</p>
<p>另外一个好处就是，这样相当于是在节点前加了一层，保证了自己真实 IP 不暴露。<br>即使有 DDoS 过来，也是前面的阿里云的节点挂掉。</p>
<p>除了部署方案调整了以外，节点的 URL 地址也发生了变动。</p>
<p>鉴于之前 <code>liuye.tech</code> 这个域名是注册给公司用的，现在公司已经注销了，<br>所以这个域名就不再继续使用了。</p>
<p>新注册了 <code>61bts.com</code> 专门用来放 BTS 相关的东西。</p>
<h3 id="新的-API-地址是"><a href="#新的-API-地址是" class="headerlink" title="新的 API 地址是:"></a>新的 API 地址是:</h3><blockquote>
<p>wss:&#x2F;&#x2F;api.61bts.com</p>
</blockquote>
]]></content>
      <tags>
        <tag>Server&amp;OS</tag>
        <tag>Bitshares</tag>
      </tags>
  </entry>
  <entry>
    <title>把 elasticsearch 又换回了单节点</title>
    <url>/2019/11/09/change-es-to-single-node.html</url>
    <content><![CDATA[<p>之前不知道怎么想的，在一台物理机上通过 docker 来搭建两个 Node 的 Elasticsearch 集群。</p>
<p>由于 ES 默认分片要有一个备份，所以导致我的硬盘用量很大，关键是在同一台物理机上搞两个 Node 没有什么意义。</p>
<p>所以今天我又换回了单 Node 模式。</p>
<p>新的 Dockerfile 我放在了我的库里，<a href="https://github.com/ety001/dockerfile/tree/master/bts-es">https://github.com/ety001/dockerfile/tree/master/bts-es</a> ，<br>那个 <code>docker-compose.yml.single</code> 就是了。</p>
<p>切换回单节点后，集群的健康状态里就会显示各个索引都是 yellow。原因就是刚才说的，ES 默认会<br>保持一个备份分片，而单节点后，没法分发备份分片到其他节点，所以就会报不健康。</p>
<p>我们可以通过执行下面的命令，来让分片默认0备份</p>
<figure class="highlight plaintext"><table><tr><td class="code"><pre><span class="line">$ curl -u elastic:123456 -XPUT &quot;http://127.0.0.1:9200/_template/default_template&quot; -H &#x27;Content-Type: application/json&#x27; -d&#x27;</span><br><span class="line">&#123;</span><br><span class="line">  &quot;index_patterns&quot;: [&quot;*&quot;],</span><br><span class="line">  &quot;settings&quot;: &#123;</span><br><span class="line">    &quot;number_of_replicas&quot;: 0</span><br><span class="line">  &#125;</span><br><span class="line">&#125;</span><br><span class="line">&#x27;</span><br></pre></td></tr></table></figure>

<p>通过设置默认模板，再创建的新的分片就不再需要有备份了。</p>
<p>PS：我搭建的国内 Bitshares ES 节点也上线了，目前还在数据同步中</p>
<figure class="highlight plaintext"><table><tr><td class="code"><pre><span class="line">https://es.61bts.com</span><br><span class="line">用户名: bts</span><br><span class="line">密码: btsbts</span><br></pre></td></tr></table></figure>
]]></content>
      <tags>
        <tag>Server&amp;OS</tag>
        <tag>Bitshares</tag>
      </tags>
  </entry>
  <entry>
    <title>使用 nsenter 配合 wireshark 来抓取容器数据包</title>
    <url>/2019/11/14/wireshark.html</url>
    <content><![CDATA[<p>最近在开发 Bitshares 内盘交易机器人，使用的 <code>pybitshares</code> 库，文档写的很基础，真是苦了我了。</p>
<p>这不就遇到了下单时，给我说 <code>UnhandledRPCError</code>，然后就没有然后了。</p>
<p>WTF！这特么让我怎么调试？你代码不知道怎么处理，你倒是把错误信息打出来啊。</p>
<p>我尝试过了 <code>pdb</code> 工具，逐步调试，也没有拿到信息，主要是不熟悉调试工具。最后打算直接上 <code>wireshark</code> 抓包了。</p>
<p>不过由于公开节点都是 <code>http</code> 的，用 <code>wireshark</code> 抓包也没法看，都是加密的。</p>
<p>于是我只能把我远端的节点服务器上的 <code>8090</code> 端口映射到我本地，这样我就可以直接使用 <code>http</code> 协议了。</p>
<p>但是还有个问题，就是我的开发环境在 <code>Docker</code> 容器里，而 <code>8090</code> 是映射在宿主机上，<br>用 <code>wireshark</code> 抓包没有抓到（后来想了下，应该要监听错了网卡，应该监听 <code>Docker</code> 的那块虚拟网卡才对）。</p>
<p>抓不到包咋办？</p>
<p>搜索了下，发现 <code>Linux</code> 大多数发行版会带着一个叫做 <code>nsenter</code> 的工具。</p>
<p>这个工具可以以其他程序的名字空间运行某个程序。而 <code>Docker</code> 容器在宿主机上其实就是一个进程，<br>那么我们就可以用这个工具把容器的名字空间搞出来，再运行 <code>wireshark</code>，那就相当于是在容器里<br>直接运行 <code>wireshark</code>。</p>
<p>所以，我们需要先看下当前开发用的 <code>Docker</code> 容器的进程ID</p>
<figure class="highlight plaintext"><table><tr><td class="code"><pre><span class="line">docker ps</span><br></pre></td></tr></table></figure>

<p>找到进程ID是 <code>4030</code>，再执行下面的命令完成映射，</p>
<figure class="highlight plaintext"><table><tr><td class="code"><pre><span class="line"># nsenter -n -t 4030</span><br></pre></td></tr></table></figure>

<p>这时候，再执行</p>
<figure class="highlight plaintext"><table><tr><td class="code"><pre><span class="line"># wireshark</span><br></pre></td></tr></table></figure>

<p>这时就能在 <code>wireshark</code> 里看到跟宿主机不一样的网卡列表，这就成功了。</p>
<p>启动抓包，重新执行我的程序，终于拿到了错误信息！！</p>
<p><img src="/upload/20191114/Xz8NAJEozUzgxtsnujTWjP101VQVb1NY6tNNo5mZ.png"></p>
]]></content>
      <tags>
        <tag>经验</tag>
        <tag>Bitshares</tag>
      </tags>
  </entry>
  <entry>
    <title>由四条内存引起的事故</title>
    <url>/2019/11/07/accident-by-memory.html</url>
    <content><![CDATA[<p>昨天新买的四条服务器内存到了，于是早上去安装一下。</p>
<p>很不幸的是，关机安装完内存条后，系统起不来。第一反应是内存没有插好。<br>拔下所有新装的内存，先试试能不能开机，结果不能。</p>
<p>系统一直卡在一个光标闪烁的状态。</p>
<p>由于一直就很想重做这个服务器的系统，当时装的时候，忘记做LVM了，<br>所以这次故障也懒得修了，直接开始重做系统。</p>
<p>花了2个小时，把基础系统做完，重启了几遍看看有没有什么问题，一切正常。</p>
<p>看到内存插满主板达到256G顶值后，心里美滋滋，心想这下可以大开杀戒了。</p>
<p><img src="/upload/20191107/cJ64E7n1icFTMST0S7wfmLxJNeKcdmhatHVTRGkX.png"></p>
<p>结果下午回到家，没安装几个服务，主机就挂了。</p>
<p>由于我的服务器电源连接在米家的电源开关上，所以我进行了远程重新断电上电操作。<br>通过米家可以看到机器自动启动成功了，但是一直连不上，怕是系统又进不去了。</p>
<p>折腾了半天没有成功后，不得不再回去看看是什么情况。</p>
<p>重新接上显示器后，发现跟早上的情况一个样，目测应该是硬盘有问题。打开 BIOS 看了下，果然</p>
<p><img src="/upload/20191107/Nvjm1ifcDd4IWZ9rgLWZbjcjcc9v8nHLX3XvJe24.png"></p>
<p>一共三块硬盘，只识别出来了两块，最关键的那块带这 grub 引导的硬盘没有识别出来。</p>
<p>考虑到新系统上了 LVM ，我这块没有识别出来的硬盘（金士顿）和另外一块东芝的做成了一个逻辑组，<br>所以在考虑能不能把金士顿这块从逻辑组里踢出去。</p>
<p>但是我重启引导进U盘里的系统后，发现并没有金士顿那个硬盘</p>
<p><img src="/upload/20191107/68U5TBj6LcWNAf1yEGo6m7KBhhQ59X8oVJQw0omm.png"></p>
<p>有点慌！既然系统间歇性能启动起来，那看来硬盘坏的不严重。<br>估计重启几次，肯定会有一次能挂上。在重启了三四次后，终于检测出来了。</p>
<p><img src="/upload/20191107/7NwjgoAD7rOxTbLNU5WN6MqIZB4C1cqSKFBQkQkU.png"></p>
<p><strong>好，既然监测出来了，让我先理顺一下目前的情况。</strong></p>
<p>1.当前是金士顿（<code>/dev/sdb1</code>）和东芝（<code>/dev/sdc1</code>）做了一个逻辑组 <code>/dev/vssd</code></p>
<p><img src="/upload/20191107/Xr94c8OiTCW07NmdItTrFkKLu5bsYZAxjr23guYP.png"></p>
<p>2.然后在 <code>/dev/vssd</code> 这个逻辑组上划分了两个逻辑卷 <code>/dev/vssd/vboot</code> 和 <code>/dev/vssd/vmain</code></p>
<p><img src="/upload/20191107/cHbNU0bzz2MwSDjfRi8ocJoGwncWPNAkm5Fw0jKZ.png"></p>
<p>3.系统有两个分区，<code>/</code> 挂在 <code>/dev/vssd/vmain</code> 上，<code>/boot</code> 挂在 <code>/dev/vssd/vboot</code> 上。<br>尝试了挂载 <code>/</code> 和 <code>/boot</code> ，发现 <code>/</code> 挂载成功，<code>/boot</code> 挂载失败，提示磁盘有错误。<br>系统目前不超过 7G 大。</p>
<p><img src="/upload/20191107/f7GGEkqToEkeDf8rTaQU8N3yisEOLov21OYquGl0.png"></p>
<p><strong>情况理顺完，我们的思路也就有了。</strong></p>
<ol>
<li>把 <code>/dev/vssd/vmain</code> 缩小到 <code>/dev/sdc1</code> 的大小以内，</li>
<li>从 <code>/dev/vssd</code> 中把 <code>/dev/vssd/vboot</code> 删除，</li>
<li>把 <code>/dev/sdb1</code> 这个 <code>pv</code> 从 <code>/dev/vssd</code> 逻辑组中删除，这个时候，逻辑组里就没有金士顿硬盘了，</li>
<li>在逻辑组 <code>/dev/vssd</code> 中再新建一个 <code>/dev/vssd/vboot</code> 逻辑卷，</li>
<li>重新调整 <code>/dev/vssd/vmain</code> 的大小，让其把剩余所有的空间占有，</li>
<li>重新挂在 <code>/dev/vssd/vmain</code> 和 <code>/dev/vssd/vboot</code>，在 <code>/dev/vssd/vboot</code> 上安装内核，</li>
<li>重新生成 <code>fstab</code></li>
<li>重新安装 <code>Grub</code> 到 <code>/dev/sdc</code> 上，并生成新的 <code>grub.cfg</code> 存储到 <code>/dev/vssd/vboot</code> 上。</li>
</ol>
<p><strong>开始实施。</strong></p>
<p>1.缩小 <code>/dev/vssd/vmain</code>，需要先监测才能缩小</p>
<figure class="highlight plaintext"><table><tr><td class="code"><pre><span class="line">w2fsck -f /dev/vssd/vmain</span><br></pre></td></tr></table></figure>

<p>执行缩小，由于我的东芝是400多G，那么我只要缩小到400G内就好了，懒得计算，取了个整 300G</p>
<figure class="highlight plaintext"><table><tr><td class="code"><pre><span class="line"># 先缩小文件系统</span><br><span class="line">resize2fs /dev/vssd/vmain 300G</span><br><span class="line"># 再缩小逻辑卷</span><br><span class="line">lvreduce -L 300G /dev/vssd/vmain</span><br></pre></td></tr></table></figure>

<p>三步操作如下图</p>
<p><img src="/upload/20191107/9Gyjtf9HMeRTAoNrvJBiS10LNLA7jdnE3mZ5GjD2.png"></p>
<p>2.从 <code>/dev/vssd</code> 中把 <code>/dev/vssd/vboot</code> 删除，</p>
<figure class="highlight plaintext"><table><tr><td class="code"><pre><span class="line">lvremove /dev/vssd/vboot</span><br></pre></td></tr></table></figure>

<p>3.从逻辑组中移除金士顿硬盘</p>
<figure class="highlight plaintext"><table><tr><td class="code"><pre><span class="line">vgreduce vssd /dev/sdb1</span><br></pre></td></tr></table></figure>

<p>操作完可以看到逻辑组（VG）里只有一个 PV 了，并且 VG 的容量跟东芝的硬盘一样大了</p>
<p><img src="/upload/20191107/mpbFv6uTk1mzZLsYCNNRVCyGFZxCCWrwrihrUIAT.png"></p>
<p>4.新建 <code>/dev/vssd/vboot</code></p>
<figure class="highlight plaintext"><table><tr><td class="code"><pre><span class="line">lvcreate -L 200M vssd -n vboot</span><br></pre></td></tr></table></figure>

<p>5.扩容 <code>/dev/vssd/vmain</code></p>
<figure class="highlight plaintext"><table><tr><td class="code"><pre><span class="line"># 注意这里参数是小写L</span><br><span class="line">lvextend -l +100%FREE /dev/vssd/vmain</span><br></pre></td></tr></table></figure>

<p><img src="/upload/20191107/T9iSiBSmcR1wcAojApuQwD2JJAEMvRJIrMIQULyl.png"></p>
<p>6.格式化 <code>/dev/vssd/vboot</code> 后，重新挂载</p>
<figure class="highlight plaintext"><table><tr><td class="code"><pre><span class="line">mkfs.ext2 /dev/vssd/vboot</span><br><span class="line">mount /dev/vssd/vboot /mnt/boot</span><br></pre></td></tr></table></figure>

<p><img src="/upload/20191107/HoFpTcLPLvKDswKBRNYdWrP1uf9s8GqueyJ7sP8s.png"></p>
<p>重新安装内核</p>
<figure class="highlight plaintext"><table><tr><td class="code"><pre><span class="line">pacstrap /mnt linux linux-firmware</span><br></pre></td></tr></table></figure>

<p><img src="/upload/20191107/vXuQTb0rKjCpuPJ6Z2tf3SRj9ivOqhHitm3OfNrK.png"></p>
<p>7.生成新的 <code>fstab</code></p>
<p>由于 <code>/dev/vssd/vboot</code> 是新创建的，所以原来分区的 <code>UUID</code> 也就不存在了，因此需要更新 <code>fstab</code>，<br>否则启动的时候会找不到分区。（通过截图可以看到原来的 <code>UUID</code>）</p>
<figure class="highlight plaintext"><table><tr><td class="code"><pre><span class="line">genfstab -U /mnt &gt; /mnt/etc/fstab</span><br></pre></td></tr></table></figure>

<p><img src="/upload/20191107/nYXNhrTSKrRZvjcq11R7Y5mvaSekRcf9pLg0sfJo.png"></p>
<p>8.重新安装 Grub ，生成新的 <code>grub.cfg</code></p>
<figure class="highlight plaintext"><table><tr><td class="code"><pre><span class="line"># 进入chroot</span><br><span class="line">arch-chroot /mnt</span><br><span class="line"># 安装 grub 到 /dev/sdc</span><br><span class="line">grub-install --target=i386-pc /dev/sdc</span><br><span class="line"># 生成新的 grub.cfg</span><br><span class="line">grub-mkconfig -o /boot/grub/grub.cfg</span><br></pre></td></tr></table></figure>

<p><img src="/upload/20191107/djob2p07zHs9gfNeV9ce89IN7s5BGySE0Fw5plsb.png"></p>
<p>9.所有操作结束后，退出 <code>chroot</code>，卸载所有已挂载分区，重启。</p>
<h4 id="完美启动！！！！"><a href="#完美启动！！！！" class="headerlink" title="完美启动！！！！"></a>完美启动！！！！</h4>]]></content>
      <tags>
        <tag>Server&amp;OS</tag>
        <tag>经验</tag>
        <tag>Docker</tag>
        <tag>LVM</tag>
      </tags>
  </entry>
  <entry>
    <title>将近两周，终于完工</title>
    <url>/2019/11/21/finish-trade-robot.html</url>
    <content><![CDATA[<p><img src="/upload/20191121/c559qchLC0ku2QKXNfUWn6NV8IcZiCvMW5J2xyyo.png"></p>
<p>忙活了两周时间终于完工了第一个三角套利机器人。</p>
<p>什么是三角套利？</p>
<p>三角套利就是在交易市场中，你找到多个标的之间的差价，然后一通买卖盈利。</p>
<p>举个例子来说就是你手里有1美元。现在市场价格是 1 美元可以买 6.8 人民币，1人民币可以买 0.15 欧元，1 欧元可以买 1.1 美元。那么你按照这个顺序买卖下来，手里的 1 美元最后会变成 1.122 美元。这就是三角套利。</p>
<p>三角套利应该是量化交易里面最简单的策略了吧。这也算是我开始量化交易之路的开端吧。</p>
<p>这次是在 Bitshares 这个分布式交易所里进行的。Bitshares 里进行三角套利的最大好处就是无风险。</p>
<p>要知道三角套利最大的风险就是在搬砖的路上卡单。比如你 1 美元购买完 6.8 人民币后，这时 人民币到欧元的价格发生变化，或者你手里的 6.8 人民币按照 0.15 的价格无法完全成交，这就导致你的钱卡在了路上，很可能最后就是亏损。</p>
<p>而 Bitshares 的好处是，你可以一次性把整个链条上的单全部下单，只要一个单不成交，就都不成交，且没有任何手续费。</p>
<p>所以 Bitshares 在技术层面讲，是非常适合三角套利的。不过就是市场深度和交易活跃度不很乐观。于是，需要除了写下单的程序外，还需要写程序找到市场交易量不错的交易链条。</p>
<p>这两周最大的感慨就是，很简单的东西，自己抓瞎写了将近两周。感觉这两周智商被按在地上反复的摩擦的节奏，果然是外包做多了会变傻。还是得多读书啊。</p>
]]></content>
      <tags>
        <tag>Bitshares</tag>
      </tags>
  </entry>
  <entry>
    <title>如何使用Bitshares Python库一次下多个Fill or Kill单</title>
    <url>/2019/11/21/python-bitshares.html</url>
    <content><![CDATA[<p>Bitshares Python库的文档并没有写如果在一个tx中下多个单的方法，经过看源码，找到了方法。<br>现总结下代码</p>
<figure class="highlight plaintext"><table><tr><td class="code"><pre><span class="line">from bitshares import BitShares</span><br><span class="line">from bitshares.market import Market</span><br><span class="line">from bitshares.asset import Asset</span><br><span class="line">from bitshares.account import Account</span><br><span class="line">from bitshares.utils import formatTimeFromNow</span><br><span class="line">from bitsharesbase import transactions, memo, account, operations, objects</span><br><span class="line"></span><br><span class="line">API_URL = &#x27;ws://127.0.0.1:8090/ws&#x27;</span><br><span class="line">PRIV_KEY = &#x27;这是账号私钥&#x27;</span><br><span class="line">ACCOUNT_NAME = &#x27;ety001&#x27;</span><br><span class="line"></span><br><span class="line"># 创建连接</span><br><span class="line">bitshares = BitShares(API_URL, keys=PRIV_KEY)</span><br><span class="line"># 创建账号实体</span><br><span class="line">importAccount = Account(ACCOUNT_NAME, blockchain_instance=bitshares)</span><br><span class="line"></span><br><span class="line"># 拿到 orderbook</span><br><span class="line">market = Market(&#x27;BTS:CNY&#x27;, blockchain_instance=bitshares)</span><br><span class="line">orderbook = market.orderbook(1)</span><br><span class="line">sellAssetId = orderbook[&#x27;bids&#x27;][0][&#x27;quote&#x27;][&#x27;asset&#x27;][&#x27;id&#x27;]</span><br><span class="line">receiveAssetId = orderbook[&#x27;bids&#x27;][0][&#x27;base&#x27;][&#x27;asset&#x27;][&#x27;id&#x27;]</span><br><span class="line">amountToSell = 3 * 10 ** orderbook[&#x27;bids&#x27;][0][&#x27;quote&#x27;][&#x27;asset&#x27;][&#x27;precision&#x27;]</span><br><span class="line">receiveAmount = 5 * 10 ** orderbook[&#x27;bids&#x27;][0][&#x27;base&#x27;][&#x27;asset&#x27;][&#x27;precision&#x27;]</span><br><span class="line"></span><br><span class="line"># 创建订单</span><br><span class="line">op1 = operations.Limit_order_create(</span><br><span class="line">    **&#123;</span><br><span class="line">        &quot;fee&quot;: &#123;&quot;amount&quot;: 0, &quot;asset_id&quot;: &quot;1.3.0&quot;&#125;,</span><br><span class="line">        &quot;seller&quot;: importAccount[&#x27;id&#x27;],</span><br><span class="line">        &quot;amount_to_sell&quot;: &#123;</span><br><span class="line">            &quot;amount&quot;: int(round(amountToSell)),</span><br><span class="line">            &quot;asset_id&quot;: sellAssetId,</span><br><span class="line">        &#125;,</span><br><span class="line">        &quot;min_to_receive&quot;: &#123;</span><br><span class="line">            &#x27;amount&#x27;: int(round(receiveAmount)),</span><br><span class="line">            &quot;asset_id&quot;: receiveAssetId,</span><br><span class="line">        &#125;,</span><br><span class="line">        &quot;expiration&quot;: formatTimeFromNow(60 * 60 * 24 * 7),</span><br><span class="line">        &quot;fill_or_kill&quot;: True,</span><br><span class="line">        &quot;extensions&quot;: [],</span><br><span class="line">    &#125;</span><br><span class="line">)</span><br><span class="line">op2 = operations.Limit_order_create(</span><br><span class="line">    **&#123;</span><br><span class="line">        &quot;fee&quot;: &#123;&quot;amount&quot;: 0, &quot;asset_id&quot;: &quot;1.3.0&quot;&#125;,</span><br><span class="line">        &quot;seller&quot;: importAccount[&#x27;id&#x27;],</span><br><span class="line">        &quot;amount_to_sell&quot;: &#123;</span><br><span class="line">            &quot;amount&quot;: int(round(amountToSell)),</span><br><span class="line">            &quot;asset_id&quot;: sellAssetId,</span><br><span class="line">        &#125;,</span><br><span class="line">        &quot;min_to_receive&quot;: &#123;</span><br><span class="line">            &#x27;amount&#x27;: int(round(receiveAmount)),</span><br><span class="line">            &quot;asset_id&quot;: receiveAssetId,</span><br><span class="line">        &#125;,</span><br><span class="line">        &quot;expiration&quot;: formatTimeFromNow(60 * 60 * 24 * 7),</span><br><span class="line">        &quot;fill_or_kill&quot;: True,</span><br><span class="line">        &quot;extensions&quot;: [],</span><br><span class="line">    &#125;</span><br><span class="line">)</span><br><span class="line">opList = []</span><br><span class="line">opList.append(op1)</span><br><span class="line">opList.append(op2)</span><br><span class="line"></span><br><span class="line"># 下单</span><br><span class="line">bitshares.finalizeOp(opList, ACCOUNT_NAME, &#x27;active&#x27;)</span><br></pre></td></tr></table></figure>

<p><strong>说明：</strong></p>
<blockquote>
<ol>
<li>需要连接获取数据的方法，请使用参数 <code>blockchain_instance</code> 把你自己创建的对象传入，<br>否则连接的 <code>API</code> 并不是你指定的。默认连接库作者的 <code>API</code>。</li>
<li>买入卖出数量需要转换成整数，即乘以 <code>precision</code></li>
</ol>
</blockquote>
]]></content>
      <tags>
        <tag>Bitshares</tag>
      </tags>
  </entry>
  <entry>
    <title>在树莓派3B上搭建Hass.io并接入米家和iOS（一）</title>
    <url>/2018/12/05/raspberrypi-3b-home-assistant-mi.html</url>
    <content><![CDATA[<p>最近想要在树莓派上折腾下 Home Assistant。</p>
<p>Home Assistant 于 2017年7月26日发布的 Hass.io 集成系统，全可视化安装配置，基于 Docker 和  ResinOS。</p>
<p>Docker 的引入使得 Hass.io 管理功能插件就像你在手机上安装 App 一样简单（事实上 iOS 的底层确实采用了类似机制），再不用通过命令行和代码来管理你的 Home Assistant。同时，通过 Docker 来封装插件，使得插件的稳定性得到了极大提高，用户能够把精力集中在个性化定制 Home Assistant 及自动化上来。</p>
<p>可以预见 Hass.io 是 Home Assistant 的发展方向，如果说它有什么缺点的话，那么也在于它的封闭性上。</p>
<h2 id="下载针对树莓派3的-hass-io-镜像"><a href="#下载针对树莓派3的-hass-io-镜像" class="headerlink" title="下载针对树莓派3的 hass.io 镜像"></a>下载针对树莓派3的 hass.io 镜像</h2><p><a href="https://github.com/home-assistant/hassio-build/releases/">https://github.com/home-assistant/hassio-build/releases/</a></p>
<p><img src="/upload/20181205/G5b3TG80id57xV2UGde9TLHsk86lflWLBkB7HYIj.png"></p>
<h2 id="使用-etcher-写入镜像到-TF-卡"><a href="#使用-etcher-写入镜像到-TF-卡" class="headerlink" title="使用 etcher 写入镜像到 TF 卡"></a>使用 etcher 写入镜像到 TF 卡</h2><p><img src="/upload/20181205/1IYlHON1Ps6nYgYm2MAYdfN18NkxN2nFkCZPlUKU.png"></p>
<h2 id="配置Wifi"><a href="#配置Wifi" class="headerlink" title="配置Wifi"></a>配置Wifi</h2><p>如果树莓派采用 WiFi 连接，在烧录完成后使用文本编译器打开 TF 卡目录下 system-connections&#x2F;resin-sample 文件，修改填写你的 WiFi 信息：</p>
<figure class="highlight plaintext"><table><tr><td class="code"><pre><span class="line">[connection]</span><br><span class="line">id=resin-wifi</span><br><span class="line">type=wifi</span><br><span class="line"></span><br><span class="line">[wifi]</span><br><span class="line">hidden=true</span><br><span class="line">mode=infrastructure</span><br><span class="line">ssid=你的 WiFi SSID</span><br><span class="line"></span><br><span class="line">[ipv4]</span><br><span class="line">method=auto</span><br><span class="line"></span><br><span class="line">[ipv6]</span><br><span class="line">addr-gen-mode=stable-privacy</span><br><span class="line">method=auto</span><br><span class="line"></span><br><span class="line">[wifi-security]</span><br><span class="line">auth-alg=open</span><br><span class="line">key-mgmt=wpa-psk</span><br><span class="line">psk=你的 WiFi 密码</span><br></pre></td></tr></table></figure>

<h2 id="启动初始化"><a href="#启动初始化" class="headerlink" title="启动初始化"></a>启动初始化</h2><p>将 TF 卡插入树莓派中，上电，几分钟后，在浏览器（推荐 Chrome）地址栏输入 <a href="http://hassio.local:8123/">http://hassio.local:8123</a> 即可看到如下界面了</p>
<p><img src="/upload/20181205/me4NsNkXIpyiyk31ejnLfkkiWu1UjvCgPUrCpyZQ.png"></p>
<p>由于没有国内的镜像站，所以且等着就好了，需要很久，除非你在路由上开了科学上网。</p>
<p>完成后，大致是这样</p>
<p><img src="/upload/20181205/kAwZf0AZEWiy8hGjEn3TNgCcdpKDADoK9bTm6WNU.png"></p>
<h2 id="接下来"><a href="#接下来" class="headerlink" title="接下来"></a>接下来</h2><p>在下一篇将会继续安装相关的插件和配置，敬请期待。</p>
]]></content>
      <tags>
        <tag>HomeAssistant</tag>
        <tag>家庭智能</tag>
        <tag>米家</tag>
        <tag>树莓派</tag>
      </tags>
  </entry>
  <entry>
    <title>在同一个路径下反代 Websocket 和 HTTP 服务</title>
    <url>/2019/12/04/nginx-proxy-websocket-and-http-in-the-same-path.html</url>
    <content><![CDATA[<p>昨天重做了一个线上VPS的操作系统，结果忘记了备份 <code>nginx</code> 配置，<br>其中有一个配置还是比较棘手，这个服务是我的 <a href="https://oc.to0l.cn/">Online Clipboard</a>。</p>
<p>这个工具最初后端服务是基于 <code>Swoole</code> 实现的 <code>Websocket</code>，后来<br>用户提了一个需求，希望在命令行下也能用，所以又在 <code>Websocket</code> 的<br>基础上增加了响应 <code>HTTP</code> 的功能，在<a href="https://github.com/ety001/online-clipboard/blob/master/server.php">代码</a>里可以很清楚的看到这些。</p>
<p>然后最终的服务是依靠 <code>Nginx</code> 反代出来的。这里就有个问题，那就是<br><code>Websocket</code> 和 <code>HTTP</code> 都在一个路径下面。也就是说下面的两个路径<br>一个可以创建 <code>Websocket</code> 连接，一个可以直接通过 <code>HTTP</code> 访问 (其中<br><code>username</code> 和 <code>password</code> 是参数)</p>
<figure class="highlight plaintext"><table><tr><td class="code"><pre><span class="line">wss://oc-server.to0l.cn/username/password</span><br><span class="line">https://oc-server.to0l.cn/username/password</span><br></pre></td></tr></table></figure>

<p>尴尬的事情就是，之前我怎么配置的忘记了。这次重做系统丢掉配置后，<br>重新配置怎么也配不出来了，最后搜索到一个方案，就是通过报文头来<br>区分是 <code>Websocket</code> 还是 <code>HTTP</code>，示例配置如下：</p>
<figure class="highlight plaintext"><table><tr><td class="code"><pre><span class="line">map $http_upgrade $connection_upgrade &#123;</span><br><span class="line">    default upgrade;</span><br><span class="line">    &#x27;&#x27; close;</span><br><span class="line">&#125;</span><br><span class="line"></span><br><span class="line">upstream clip-server &#123;</span><br><span class="line">    server 172.20.0.2:8080;</span><br><span class="line">&#125;</span><br><span class="line"></span><br><span class="line">server &#123;</span><br><span class="line">    listen 443 ssl;</span><br><span class="line">    server_name oc-server.to0l.cn;</span><br><span class="line">    ssl_certificate /etc/nginx/ssl/oc.to0l.cn.fullchain.cer;</span><br><span class="line">    ssl_certificate_key /etc/nginx/ssl/oc.to0l.cn.key;</span><br><span class="line">    ssl_ciphers &quot;EECDH+AESGCM:EDH+AESGCM:AES256+EECDH:AES256+EDH&quot;;</span><br><span class="line">    ssl_protocols TLSv1 TLSv1.1 TLSv1.2;</span><br><span class="line">    ssl_prefer_server_ciphers on;</span><br><span class="line">    ssl_session_cache shared:SSL:10m;</span><br><span class="line"></span><br><span class="line">    location / &#123;</span><br><span class="line">        try_files /noexistfile @$http_upgrade;</span><br><span class="line">    &#125;</span><br><span class="line"></span><br><span class="line">    location @websocket &#123;</span><br><span class="line">        proxy_pass http://clip-server;</span><br><span class="line">        proxy_http_version 1.1;</span><br><span class="line">        proxy_set_header Upgrade $http_upgrade;</span><br><span class="line">        proxy_set_header Connection $connection_upgrade;</span><br><span class="line">    &#125;</span><br><span class="line"></span><br><span class="line">    location @ &#123;</span><br><span class="line">        proxy_redirect off;</span><br><span class="line">        proxy_set_header Host $host;</span><br><span class="line">        proxy_set_header X-Real-IP $remote_addr;</span><br><span class="line">        proxy_set_header X-Forwarded-For $proxy_add_x_forwarded_for;</span><br><span class="line">        proxy_pass http://clip-server;</span><br><span class="line">    &#125;</span><br><span class="line">&#125;</span><br></pre></td></tr></table></figure>

<p>思路就是解析 <code>/</code> 的时候，尝试访问一个不存在的文件，既然不存在，<br>那么势必要内部访问 <code>location @$http_upgrade</code>。</p>
<p>当来访访问是 <code>Websocket</code> 请求的时候， <code>$http_upgrade</code> 的值是<br><code>websocket</code>，而来访访问是 <code>HTTP</code> 请求的时候，则是空值。</p>
<p>这样就把两个不同报文头的请求转发到两个不同的 <code>location</code> 中去了。<br>这样之前尴尬的问题就解决了。</p>
<p>配置好后，通过 <code>curl https://oc-server.to0l.cn/public/public -d &quot;content=test&quot;</code><br>测试提交数据到剪切板，成功！</p>
<p>通过 <code>curl https://oc-server.to0l.cn/public/public</code> 访问最后<br>一条剪切板数据，成功！</p>
<p>浏览器访问 <code>https://oc.to0l.cn</code>，分别输入剪切板名和密码后，可以<br>看到之前发的 <code>test</code> 信息，成功！</p>
]]></content>
      <tags>
        <tag>Server&amp;OS</tag>
      </tags>
  </entry>
  <entry>
    <title>快速搭建私有单节点 Bitshares Testnet（一）</title>
    <url>/2019/11/27/bitshares-testnet-1.html</url>
    <content><![CDATA[<h1 id="前因"><a href="#前因" class="headerlink" title="前因"></a>前因</h1><p>有时候想搞点事情的时候，最终都是由于 BTS 目前的公共测试网络里你要用代币只能找别人要。<br>我是很不喜欢麻烦别人的，所以就放弃想搞点东西的想法了。</p>
<p>很好奇，BTS 作为一个好几年的老项目了，居然没有一个类似 ETH 那样的可以自行申请代币的测试网络，<br>真是神奇！</p>
<p>所以我打算自己部署一整套类似 ETH 那边 kovan 一样的测试网络。<br>测试网络每个季度重置数据，Dapp 开发人员可以通过机器人申请代币。</p>
<p>同时，部署方案我也会公开出来，如果你不想用我搭建的服务，也可以自建。</p>
<p>这第一篇是讲节点部署的，在我完成发币机器人和水龙头后，会再发布第二篇，介绍机器人和水龙头部署方法。</p>
<h1 id="准备工作"><a href="#准备工作" class="headerlink" title="准备工作"></a>准备工作</h1><p>由于考虑到部署尽量傻瓜化，所以我选择用 <code>Docker</code> 来作为部署底层支持。</p>
<p>这样，我们能够屏蔽掉很多环节，只需要很少量的工作，就可以完成目标。</p>
<h1 id="开始部署"><a href="#开始部署" class="headerlink" title="开始部署"></a>开始部署</h1><h3 id="1-拉取测试网镜像"><a href="#1-拉取测试网镜像" class="headerlink" title="1.拉取测试网镜像"></a>1.拉取测试网镜像</h3><p>目前我已经把测试网的程序封装好了，如果你希望自己封装，可以参考的 <code>Dockerfile</code> 文件，<br>文件地址是：<a href="https://github.com/ety001/dockerfile/blob/master/bitshares-core-builder/Dockerfile.test">https://github.com/ety001/dockerfile/blob/master/bitshares-core-builder/Dockerfile.test</a> 。</p>
<p>如果你想直接用现成的，那么直接执行下面的命令拉取我的镜像即可</p>
<figure class="highlight plaintext"><table><tr><td class="code"><pre><span class="line">docker pull ety001/bts-core-testnet:latest</span><br></pre></td></tr></table></figure>

<blockquote>
<p>latest 版本指向最新的测试网程序，如果你想用其他的版本，可以去这里看下我之前编译的版本 <a href="https://hub.docker.com/r/ety001/bts-core-testnet/tags">https://hub.docker.com/r/ety001/bts-core-testnet/tags</a></p>
</blockquote>
<h3 id="2-下载-docker-compose-yml-文件"><a href="#2-下载-docker-compose-yml-文件" class="headerlink" title="2.下载 docker-compose.yml 文件"></a>2.下载 docker-compose.yml 文件</h3><figure class="highlight plaintext"><table><tr><td class="code"><pre><span class="line">wget https://raw.githubusercontent.com/ety001/dockerfile/master/btfdd/docker-compose.yml</span><br></pre></td></tr></table></figure>

<h3 id="3-创建数据目录"><a href="#3-创建数据目录" class="headerlink" title="3.创建数据目录"></a>3.创建数据目录</h3><p>在 <code>docker-compose.yml</code> 文件的同目录下，创建数据目录，用于存放区块数据。</p>
<figure class="highlight plaintext"><table><tr><td class="code"><pre><span class="line">mkdir bts_data</span><br></pre></td></tr></table></figure>

<h3 id="4-创建-my-genesis-json-文件"><a href="#4-创建-my-genesis-json-文件" class="headerlink" title="4.创建 my-genesis.json 文件"></a>4.创建 my-genesis.json 文件</h3><p>在 <code>bts_data</code> 目录下，创建 <code>genesis</code> 目录，<br>并创建 <code>my-genesis.json</code> 文件用于配置创世块。</p>
<figure class="highlight plaintext"><table><tr><td class="code"><pre><span class="line">mkdir bts_data/genesis</span><br><span class="line">touch bts_data/genesis/my-genesis.json</span><br></pre></td></tr></table></figure>

<blockquote>
<p><code>my-genesis.json</code> 文件可以参考模板配置文件 <code>genesis-dev.json</code>，地址在这里：<a href="https://raw.githubusercontent.com/bitshares/bitshares-core/master/libraries/egenesis/genesis-dev.json">https://raw.githubusercontent.com/bitshares/bitshares-core/master/libraries/egenesis/genesis-dev.json</a></p>
</blockquote>
<p>接下来我们需要修改 <code>my-genesis.json</code> 文件，以上面提到的 <code>genesis-dev.json</code> 模板为例。</p>
<p>我们需要修改默认11个见证人的 <code>owner_key</code>、<code>active_key</code> 和 <code>block_signing_key</code> 这三种值。</p>
<p>另外里面还有个 <code>nathan</code> 的用户，我们一并修改这个用户的 <code>owner_key</code> 和 <code>active_key</code>。</p>
<blockquote>
<p>当然你也可以把 <code>nathan</code> 这个名字换成自己的，比如 <code>ety001</code>。这个账号，我们之后会拿来给机器人用。</p>
</blockquote>
<p>这样这里就需要很多组公私钥对，我们可以使用下面的命令即可快速生成</p>
<figure class="highlight plaintext"><table><tr><td class="code"><pre><span class="line">docker run \</span><br><span class="line">    -it \</span><br><span class="line">    --rm \</span><br><span class="line">    ety001/bts-core:5.0.0-tools \</span><br><span class="line">    /app/get_dev_key TEST seed1 seed2 seed3 seed4</span><br></pre></td></tr></table></figure>

<p><code>get_dev_key</code> 是 BTS 自带的生成公私钥对的小工具，使用语法是：<br>第一个参数是公钥的前置，之后的参数都是生成私钥时所需要的 <code>seed</code>。</p>
<p>上面的示例中，可以生成四组公私钥对，并且公钥是以 <code>TEST</code> 开头。</p>
<blockquote>
<p>这里需要注意，测试网公钥必须要以 <code>TEST</code> 开头。</p>
</blockquote>
<p>除了修改上面提到的 <code>owner_key</code>、<code>active_key</code> 和 <code>block_signing_key</code> 之外，<br>还需要修改 <code>initial_balances</code> 中的 <code>owner</code> 和 <code>asset_symbol</code>。</p>
<blockquote>
<ul>
<li><code>owner</code> 使用的是 <code>address</code> 而不是 <code>public_key</code>。</li>
<li><code>asset_symbol</code> 设置为 <code>TEST</code>。</li>
<li><code>initial_balances</code> 申领需要在节点启动后，在 <code>cli</code> 里使用 <code>import_balance ety001 [5JLxxx] true</code> 命令获取，其中 <code>5JLxxx</code> 是 <code>ety001</code> 的 <code>owner</code> 权限的私钥。</li>
</ul>
</blockquote>
<h3 id="5-创建-config-json-文件"><a href="#5-创建-config-json-文件" class="headerlink" title="5.创建 config.json 文件"></a>5.创建 config.json 文件</h3><p>接下需要启动一次容器，以创建 <code>config.json</code> 文件</p>
<figure class="highlight plaintext"><table><tr><td class="code"><pre><span class="line">docker-compose up</span><br></pre></td></tr></table></figure>

<p>执行后，由于还没有配置见证人，所以会一直卡住。这个时候，我们 <code>ctrl + c</code> 结束，<br>在 <code>bts_data</code> 目录下就能看到 <code>config.json</code> 文件了。</p>
<h3 id="6-配置见证人"><a href="#6-配置见证人" class="headerlink" title="6.配置见证人"></a>6.配置见证人</h3><p>我们需要把我们的11个见证人配置进 <code>config.json</code> 里。</p>
<p>我们把 <code>config.json</code> 里原有的 <code>private-key</code> 删掉，加入新的配置，示例如下：</p>
<figure class="highlight plaintext"><table><tr><td class="code"><pre><span class="line">witness-id = &quot;1.6.1&quot;</span><br><span class="line">witness-id = &quot;1.6.2&quot;</span><br><span class="line">witness-id = &quot;1.6.3&quot;</span><br><span class="line">witness-id = &quot;1.6.4&quot;</span><br><span class="line">witness-id = &quot;1.6.5&quot;</span><br><span class="line">witness-id = &quot;1.6.6&quot;</span><br><span class="line">witness-id = &quot;1.6.7&quot;</span><br><span class="line">witness-id = &quot;1.6.8&quot;</span><br><span class="line">witness-id = &quot;1.6.9&quot;</span><br><span class="line">witness-id = &quot;1.6.10&quot;</span><br><span class="line">witness-id = &quot;1.6.11&quot;</span><br><span class="line"></span><br><span class="line">private-key = [&quot;TEST7HSRc2ifS2Xzr98t1xQgdPWrM6zChe8gTAycKDYTCJvKJqVyJC&quot;, &quot;5JQ7Uo6f8WmqnzoYcE5AkuSLFyUEQWP5uLNphykFnJCmpMXKa4D&quot;]</span><br><span class="line">private-key = [&quot;TEST6hboHaJmrdSNdawxrjpHtM7dm5cbd16rBegrswer3yBfHth9Zo&quot;, &quot;5JkW1yf6MwTGaP9CjimugZMRjgPuJMm1Pdmp785NndtXmWAfUe6&quot;]</span><br><span class="line">private-key = [&quot;TEST8WbrXZn9v334bv5v4PKnDG36QZfkvt6qsK46knQQpxgA6RnHhV&quot;, &quot;5KNBtnDp3yEu1RZchANYoZsTXCwQVvMQb42bbwjNtq3Woq7nRES&quot;]</span><br><span class="line">private-key = [&quot;TEST8k9DRh9KrTjAYZFgFXwznAWkdD6Ke48URYWjgeit8jA5V1vnnU&quot;, &quot;5JaFdWJvf9Vu1Bz98P1g4PjJGEUDquGzZ3vFtWXzuHZeLNiaTpF&quot;]</span><br><span class="line">private-key = [&quot;TEST8CzmYt2sJVdRCpdx51N7YXjBFhyj17DS7oaiQ6MjLa8oHyFkUX&quot;, &quot;5KgtUPZXF4AxQSqXVSqweRb8ixFfdev41c1jAszZ8PTSHowcXyc&quot;]</span><br><span class="line">private-key = [&quot;TEST6PU8rAukkA8ynMqiBVxYDTsoYz8TFSZDZ68Hct9LVmhaYc6AbT&quot;, &quot;5K9Fxnc9RvDS1CWUhrd89ap8zJ8hEggibYvahvAJKexSrTeZS46&quot;]</span><br><span class="line">private-key = [&quot;TEST8FMi4q6A8hELQRJ5zrdwuW7tkjKABSP4DRuRVkVA3rp6s4HRZy&quot;, &quot;5KKpUNdUMqEwT8hBhwc9p9x5JxeRxHgwAeTCPt3BjL1Yh7ASoU6&quot;]</span><br><span class="line">private-key = [&quot;TEST8XEJor1k1f9jTd9GiS4VycmmaL6WTtj4NpKrz3BMPhW9w6pxw9&quot;, &quot;5KKmySfMqXeeutsfYsbD8AonsxVm1cbC33nCZEvVbUsnc7KEshD&quot;]</span><br><span class="line">private-key = [&quot;TEST7NLQf5P2csPdmfSbMftcBsfvKfY96RMHrpZtcrQHG454khzALY&quot;, &quot;5Ji1FVJZDTnTFJ1dSGo7EGqroLCi9kuZMYqgvphYcSvKCWkEfZH&quot;]</span><br><span class="line">private-key = [&quot;TEST6Gvr1QZdPQyFWnZrPsgUASTFUsfmZmrAWZKQjX1TL5yQs5GMro&quot;, &quot;5KErQxNxaQJXHaeWGLonW23RSc6zqZuBUE9YCZASEyPG5nBjnkG&quot;]</span><br><span class="line">private-key = [&quot;TEST6ujzsVvmKr1ASSDSukjC9EtobjMM1uVTWtYFPzJ5TvaZjCRGYz&quot;, &quot;5JT6QzZnV14jCuyxqPk6BjPDFAvhYBfjfXkCgk5Mr5neA92voyA&quot;]</span><br></pre></td></tr></table></figure>

<blockquote>
<ul>
<li>其中 <code>private-key</code> 要与 <code>my-genesis.json</code> 中的 <code>block_signing_key</code> 一致。</li>
<li>注意 <code>checkpoint</code> 设置为 <code>[]</code></li>
</ul>
</blockquote>
<h3 id="7-启动"><a href="#7-启动" class="headerlink" title="7.启动"></a>7.启动</h3><p>至此，所有的配置都已完成，执行下面的命令启动即可</p>
<figure class="highlight plaintext"><table><tr><td class="code"><pre><span class="line">docker-compose up -d</span><br></pre></td></tr></table></figure>

<h1 id="结语"><a href="#结语" class="headerlink" title="结语"></a>结语</h1><p>部署的主要工作就是配置 <code>my-genesis.json</code> 和 <code>config.json</code>。</p>
<p>如果有疑问，请到这里提 issue: <a href="https://github.com/ety001/bitshares-testnet-for-dapp-developers/issues">https://github.com/ety001/bitshares-testnet-for-dapp-developers/issues</a> 。</p>
<h4 id="参考文档"><a href="#参考文档" class="headerlink" title="参考文档"></a>参考文档</h4><ul>
<li><a href="https://dev.bitshares.works/en/master/development/testnets/private_testnet-v2.html#creating-another-directory-for-the-bitshares-private-testnet-project">https://dev.bitshares.works/en/master/development/testnets/private_testnet-v2.html#creating-another-directory-for-the-bitshares-private-testnet-project</a></li>
<li><a href="https://dev.bitshares.works/en/master/bts_guide/tutorials/how_to_get_key_pairs.html#suggest-brain-key">https://dev.bitshares.works/en/master/bts_guide&#x2F;tutorials&#x2F;how_to_get_key_pairs.html#suggest-brain-key</a></li>
</ul>
<h4 id="感谢"><a href="#感谢" class="headerlink" title="感谢"></a>感谢</h4><p>@abit  @Necklace</p>
]]></content>
      <tags>
        <tag>Bitshares</tag>
      </tags>
  </entry>
  <entry>
    <title>在自有私链上使用bitshares-js库</title>
    <url>/2019/12/13/bitshares-js-init-promise-using-in-private-network.html</url>
    <content><![CDATA[<p>由于我正在搭建的测试网络属于私有链，在这两天的开发中，我发现使用 <code>bitshares-ws</code> 中的 <code>Apis</code> 进行初始化的时候，一直有下面截图中的问题</p>
<p><img src="/upload/20191213/fOe22UYf8pNGrgze9EQ8MmBEfpMJyHYPpbzbusO7.png"></p>
<p>我的代码是官方文档示例中的</p>
<figure class="highlight plaintext"><table><tr><td class="code"><pre><span class="line">import &#123;Apis&#125; from &#x27;bitsharesjs-ws&#x27;;</span><br><span class="line">const apiUrl = &#x27;wss://api-testnet.61bts.com&#x27;;</span><br><span class="line">Apis.instance(apiUrl, true).init_promise.then((res) =&gt; &#123;</span><br><span class="line">    console.log(res);</span><br><span class="line">&#125;);</span><br></pre></td></tr></table></figure>

<p>即返回值的第一个值一直是 <code>undefined</code>，目前还不确定这个会导致什么问题，不过有个 <code>undefined</code> 肯定是不对的。</p>
<p>去看了下 <code>Apis.instance().init_promise</code> 的代码，我摘了关键部分如下：</p>
<figure class="highlight plaintext"><table><tr><td class="code"><pre><span class="line">const newApis = () =&gt; (&#123;</span><br><span class="line">  connect: (</span><br><span class="line">    cs,</span><br><span class="line">    connectTimeout,</span><br><span class="line">    optionalApis = &#123; enableCrypto: false, enableOrders: false &#125;</span><br><span class="line">  ) =&gt; &#123;</span><br><span class="line">    ......</span><br><span class="line">    Apis.init_promise = Apis.ws_rpc</span><br><span class="line">      .login(rpc_user, rpc_password)</span><br><span class="line">      .then(() =&gt; &#123;</span><br><span class="line">        //console.log(&quot;Connected to API node:&quot;, cs);</span><br><span class="line">        Apis._db = new GrapheneApi(Apis.ws_rpc, &quot;database&quot;);</span><br><span class="line">        Apis._net = new GrapheneApi(Apis.ws_rpc, &quot;network_broadcast&quot;);</span><br><span class="line">        Apis._hist = new GrapheneApi(Apis.ws_rpc, &quot;history&quot;);</span><br><span class="line">        if (optionalApis.enableOrders)</span><br><span class="line">          Apis._orders = new GrapheneApi(Apis.ws_rpc, &quot;orders&quot;);</span><br><span class="line">        if (optionalApis.enableCrypto)</span><br><span class="line">          Apis._crypt = new GrapheneApi(Apis.ws_rpc, &quot;crypto&quot;);</span><br><span class="line">        var db_promise = Apis._db.init().then(() =&gt; &#123;</span><br><span class="line">          //https://github.com/cryptonomex/graphene/wiki/chain-locked-tx</span><br><span class="line">          return Apis._db.exec(&quot;get_chain_id&quot;, []).then(_chain_id =&gt; &#123;</span><br><span class="line">            Apis.chain_id = _chain_id;</span><br><span class="line">            return ChainConfig.setChainId(_chain_id);</span><br><span class="line">            //DEBUG console.log(&quot;chain_id1&quot;,this.chain_id)</span><br><span class="line">          &#125;);</span><br><span class="line">        &#125;);</span><br><span class="line">        ......</span><br><span class="line">        let initPromises = [db_promise, Apis._net.init(), Apis._hist.init()];</span><br><span class="line"></span><br><span class="line">        if (optionalApis.enableOrders) initPromises.push(Apis._orders.init());</span><br><span class="line">        if (optionalApis.enableCrypto) initPromises.push(Apis._crypt.init());</span><br><span class="line">        return Promise.all(initPromises);</span><br><span class="line">      &#125;)</span><br><span class="line">      ......</span><br><span class="line">  &#125;,</span><br><span class="line">  ......</span><br><span class="line">&#125;);</span><br></pre></td></tr></table></figure>

<p>可以看到 <code>Apis.init_promise</code> 最终是返回了一个 <code>Promise.all()</code>，其中索引 <code>0</code> 的值是 <code>db_promise</code>。</p>
<p>再看了一下，<code>db_promise</code> 的结果由 <code>ChainConfig.setChainId()</code> 来决定。</p>
<p>再找出 <code>ChainConfig</code> 的代码，这个文件代码不长，我就全部贴出来了</p>
<figure class="highlight plaintext"><table><tr><td class="code"><pre><span class="line">var config = &#123;</span><br><span class="line">  core_asset: &quot;CORE&quot;,</span><br><span class="line">  address_prefix: &quot;GPH&quot;,</span><br><span class="line">  expire_in_secs: 15,</span><br><span class="line">  expire_in_secs_proposal: 24 * 60 * 60,</span><br><span class="line">  review_in_secs_committee: 24 * 60 * 60,</span><br><span class="line">  networks: &#123;</span><br><span class="line">    BitShares: &#123;</span><br><span class="line">      core_asset: &quot;BTS&quot;,</span><br><span class="line">      address_prefix: &quot;BTS&quot;,</span><br><span class="line">      chain_id:</span><br><span class="line">        &quot;4018d7844c78f6a6c41c6a552b898022310fc5dec06da467ee7905a8dad512c8&quot;</span><br><span class="line">    &#125;,</span><br><span class="line">    Muse: &#123;</span><br><span class="line">      core_asset: &quot;MUSE&quot;,</span><br><span class="line">      address_prefix: &quot;MUSE&quot;,</span><br><span class="line">      chain_id:</span><br><span class="line">        &quot;45ad2d3f9ef92a49b55c2227eb06123f613bb35dd08bd876f2aea21925a67a67&quot;</span><br><span class="line">    &#125;,</span><br><span class="line">    Test: &#123;</span><br><span class="line">      core_asset: &quot;TEST&quot;,</span><br><span class="line">      address_prefix: &quot;TEST&quot;,</span><br><span class="line">      chain_id:</span><br><span class="line">        &quot;39f5e2ede1f8bc1a3a54a7914414e3779e33193f1f5693510e73cb7a87617447&quot;</span><br><span class="line">    &#125;,</span><br><span class="line">    Obelisk: &#123;</span><br><span class="line">      core_asset: &quot;GOV&quot;,</span><br><span class="line">      address_prefix: &quot;FEW&quot;,</span><br><span class="line">      chain_id:</span><br><span class="line">        &quot;1cfde7c388b9e8ac06462d68aadbd966b58f88797637d9af805b4560b0e9661e&quot;</span><br><span class="line">    &#125;</span><br><span class="line">  &#125;,</span><br><span class="line"></span><br><span class="line">  /** Set a few properties for known chain IDs. */</span><br><span class="line">  setChainId: chain_id =&gt; &#123;</span><br><span class="line">    let result = Object.entries(config.networks).find(</span><br><span class="line">      ([network_name, network]) =&gt; &#123;</span><br><span class="line">        if (network.chain_id === chain_id) &#123;</span><br><span class="line">          config.network_name = network_name;</span><br><span class="line"></span><br><span class="line">          if (network.address_prefix) &#123;</span><br><span class="line">            config.address_prefix = network.address_prefix;</span><br><span class="line">          &#125;</span><br><span class="line">          return true;</span><br><span class="line">        &#125;</span><br><span class="line">      &#125;</span><br><span class="line">    );</span><br><span class="line"></span><br><span class="line">    if (result) return &#123; network_name: result[0], network: result[1] &#125;;</span><br><span class="line">    else console.log(&quot;Unknown chain id (this may be a testnet)&quot;, chain_id);</span><br><span class="line">  &#125;,</span><br><span class="line"></span><br><span class="line">  reset: () =&gt; &#123;</span><br><span class="line">    config.core_asset = &quot;CORE&quot;;</span><br><span class="line">    config.address_prefix = &quot;GPH&quot;;</span><br><span class="line">    config.expire_in_secs = 15;</span><br><span class="line">    config.expire_in_secs_proposal = 24 * 60 * 60;</span><br><span class="line"></span><br><span class="line">    console.log(&quot;Chain config reset&quot;);</span><br><span class="line">  &#125;,</span><br><span class="line"></span><br><span class="line">  setPrefix: (prefix = &quot;GPH&quot;) =&gt; (config.address_prefix = prefix)</span><br><span class="line">&#125;;</span><br><span class="line"></span><br><span class="line">export default config;</span><br></pre></td></tr></table></figure>

<p>可以看到在 <code>ChainConfig</code> 对象中有个 <code>networks</code> 的值，在进行 <code>setChainId()</code> 操作的时候，会在这个 <code>networks</code> 里搜索，找不到符合条件的结果，就会进入 <code>else</code>，也就是这个 <code>setChainId()</code> 会返回 <code>undefined</code>。</p>
<p>好了找到了问题所在，那么我们只需要在 <code>Apis.instance().init_promise</code> 之前，先配置下 <code>ChainConfig</code>。</p>
<p>但是 <code>ChainConfig</code> 在 <code>init_promise</code> 中，我们怎么配置呢？</p>
<p>结合上一篇文章 <a href="/2019/12/12/bitshares-ws-api-url-confuse.html">https://akawa.ink/2019/12/12/bitshares-ws-api-url-confuse.html</a> ，我们知道使用 <code>import</code> 可以引入库的引用，那么我们在调用前，先 <code>import ChainConfig</code> 配置好就OK了。</p>
<p>最终代码如下：</p>
<figure class="highlight plaintext"><table><tr><td class="code"><pre><span class="line">import &#123;Apis, ChainConfig&#125; from &#x27;bitsharesjs-ws&#x27;;</span><br><span class="line">const apiUrl = &#x27;wss://api-testnet.61bts.com&#x27;;</span><br><span class="line">ChainConfig.networks[&#x27;LiuyeTest&#x27;] = &#123;</span><br><span class="line">    core_asset: &#x27;TEST&#x27;,</span><br><span class="line">    address_prefix: &#x27;TEST&#x27;,</span><br><span class="line">    chain_id: &#x27;d5dfe0da7cda9426dc4761752d889d44401c5f04f76c17970e90437b02c038d4&#x27;,</span><br><span class="line">&#125;;</span><br><span class="line">Apis.instance(apiUrl, true).init_promise.then((res) =&gt; &#123;</span><br><span class="line">    console.log(res);</span><br><span class="line">&#125;);</span><br></pre></td></tr></table></figure>
]]></content>
      <tags>
        <tag>Bitshares</tag>
      </tags>
  </entry>
  <entry>
    <title>bitshares-ws 的 API 配置疑惑</title>
    <url>/2019/12/12/bitshares-ws-api-url-confuse.html</url>
    <content><![CDATA[<p>目前正在开发针对 <code>Bitshares</code> 的测试工具，一开始就让我遇到了疑惑，先来看代码：</p>
<figure class="highlight plaintext"><table><tr><td class="code"><pre><span class="line">import &#123;Apis&#125; from &quot;bitsharesjs-ws&quot;;</span><br><span class="line">var &#123;ChainStore&#125; = require(&quot;bitsharesjs&quot;);</span><br><span class="line"></span><br><span class="line">Apis.instance(&quot;wss://eu.nodes.bitshares.ws&quot;, true).init_promise.then((res) =&gt; &#123;</span><br><span class="line">    console.log(&quot;connected to:&quot;, res[0].network);</span><br><span class="line">    ChainStore.init().then(() =&gt; &#123;</span><br><span class="line">        ChainStore.subscribe(updateState);</span><br><span class="line">    &#125;);</span><br><span class="line">&#125;);</span><br><span class="line"></span><br><span class="line">let dynamicGlobal = null;</span><br><span class="line">function updateState(object) &#123;</span><br><span class="line">    dynamicGlobal = ChainStore.getObject(&quot;2.1.0&quot;);</span><br><span class="line">    console.log(&quot;ChainStore object update\n&quot;, dynamicGlobal ? dynamicGlobal.toJS() : dynamicGlobal);</span><br><span class="line">&#125;</span><br></pre></td></tr></table></figure>

<p>上面这段代码是来自 <code>bitshares-js</code> 的官方文档的示例代码，其中我有两个疑惑，一个是 <code>API</code> 地址的设置，一个是 <code>subscribe</code> 是在什么时候调用的，<code>ChainStore</code> 到底该如何使用。</p>
<p>这篇文章是来写第一个疑惑的。</p>
<p>通过翻代码，可以看到在 <code>ChainStore.init()</code> 中也有调用 <code>Apis.instance()</code>，但是却没有方法指定 <code>API</code> 的 <code>URL</code>。于是我很好奇这个到底是怎么确定 <code>ChainStore</code> 在使用哪个节点呢？</p>
<p>去看 <code>bitshares-ws</code> 中关于 <code>Apis.instance()</code> 的代码，发现有其中一段代码</p>
<figure class="highlight plaintext"><table><tr><td class="code"><pre><span class="line">var Apis = null;</span><br><span class="line">export const instance = (</span><br><span class="line">  cs = &quot;ws://localhost:8090&quot;,</span><br><span class="line">  connect,</span><br><span class="line">  connectTimeout = 4000,</span><br><span class="line">  optionalApis,</span><br><span class="line">  closeCb</span><br><span class="line">) =&gt; &#123;</span><br><span class="line">  if (!Apis) &#123;</span><br><span class="line">    Apis = newApis();</span><br><span class="line">    Apis.setRpcConnectionStatusCallback(statusCb);</span><br><span class="line">  &#125;</span><br><span class="line"></span><br><span class="line">  if (Apis &amp;&amp; connect) &#123;</span><br><span class="line">    Apis.connect(cs, connectTimeout, optionalApis);</span><br><span class="line">  &#125;</span><br><span class="line">  if (closeCb) Apis.closeCb = closeCb;</span><br><span class="line">  return Apis;</span><br><span class="line">&#125;;</span><br></pre></td></tr></table></figure>

<p>这里我们可以看到在 <code>Apis.instance()</code> 这个库代码里，有一个变量 <code>Apis</code>，对于我这种 <code>js</code> 半路出家的人来说，并不理解这个 <code>Apis</code> 到底是在哪个局部生效的。</p>
<p>也就是说，我在同一个项目的不同位置，<code>import</code> 同一个库的时候，库里的变量到底是指向两个内存地址，还是指向了同一个内存地址。按照目前 <code>bitshares-js</code> 给的示例代码来猜测，是指向了同一个内存地址。</p>
<p>于是我自己写了个简单的例子，来测试了一下。</p>
<figure class="highlight plaintext"><table><tr><td class="code"><pre><span class="line">-- main.js --</span><br><span class="line">import t from &#x27;./test2&#x27;;</span><br><span class="line">import init from &#x27;./test1&#x27;;</span><br><span class="line"></span><br><span class="line">t();</span><br><span class="line">const anotherGVal = init();</span><br><span class="line">console.log(&#x27;another g val:&#x27;, anotherGVal);</span><br><span class="line"></span><br><span class="line">-- test1.js --</span><br><span class="line">var g = null;</span><br><span class="line">export const init = () =&gt; &#123;</span><br><span class="line">  if (!g) &#123;</span><br><span class="line">    console.log(&#x27;not defined&#x27;);</span><br><span class="line">    g = 1;</span><br><span class="line">  &#125;</span><br><span class="line">  console.log(&#x27;has defined&#x27;);</span><br><span class="line">  return g;</span><br><span class="line">&#125;</span><br><span class="line"></span><br><span class="line">-- test2.js --</span><br><span class="line">import init from &#x27;./test1&#x27;;</span><br><span class="line"></span><br><span class="line">export const t = () =&gt; &#123;</span><br><span class="line">  const gVal = init();</span><br><span class="line">  console.log(&#x27;gVal is:&#x27;, gVal);</span><br><span class="line">&#125;</span><br></pre></td></tr></table></figure>

<p>最终指向结果就是，只打印了一次 <code>not defined</code>，也就说明了，在我的测试代码中，第二次调用 <code>test1.init()</code> 的时候，变量 <code>g</code> 其实已经存在了。</p>
<p>这也就说明了 <code>ChainStore.init()</code> 中再次调用 <code>Apis.instance()</code> 的时候，由于之前已经调用过，所以 <code>Apis</code> 已经存在了。</p>
<p>再后来我又搜索了关于 <code>javascript</code> 中 <code>import</code> 相关的文章，发现了这篇文章 <a href="https://zhuanlan.zhihu.com/p/33843378">https://zhuanlan.zhihu.com/p/33843378</a> 。</p>
<p>** 总结下就是在同个项目下， <code>import</code> 同一个库只会执行一次，且返回结果是引用。 **</p>
]]></content>
      <tags>
        <tag>Bitshares</tag>
      </tags>
  </entry>
  <entry>
    <title>把服务器的 frp 换成了 nps</title>
    <url>/2019/12/16/change-frp-to-nps.html</url>
    <content><![CDATA[<p>由于国内家庭网络的 80 和 443 端口是被运营商封锁的，因此为了提供 web 服务，我就要用一台公网服务器做一下转发。</p>
<p>之前选择的是 <code>frp</code> 这个方案，不过最近在开发 <code>Bitshares Testnet</code> 的工具集的时候，发现 <code>frp</code> 非常的不稳定，连接经常莫名其妙的断掉，如下图</p>
<p><img src="/upload/20191216/ESFm799WTnYv0Cr3itlcex8PcehctIFmKOGeru83.png"></p>
<p>这蛋疼的断线，让我一直以为是 <code>bitshares-js</code> 库我使用的不对，看了大半周的源码。</p>
<p>在网上搜索了下，都说断线是 <code>mtu</code> 的问题，我折腾了一周，也没有弄好，最后放弃了，换了另外一个方案 <code>nps</code>。</p>
<p>这是 <code>nps</code> 的官方库: <a href="https://github.com/cnlh/nps">https://github.com/cnlh/nps</a> 。</p>
<p>配置也非常的简单，服务端根据文档配置下 <code>nps.conf</code>，启动后，在 <code>web</code> 界面配置下客户端。</p>
<p>客户端指定服务器的 <code>IP</code> 和端口，以及密码，就可以连接到服务端了。</p>
<p><img src="/upload/20191216/RgdJPEIzbHhoUpa7f619xd7AW7CN9xjyp2snskRS.png"></p>
<p>目前我觉得 <code>nps</code> 比 <code>frp</code> 好的两点，一个是配置可以在服务端通过 <code>web</code> 轻松解决，一个是服务端和客户端的连接可以是基于 <code>KCP</code> 协议的，这意味着在网络不是很好的情况下，依然可以提供相对稳定的服务。</p>
<p>至于稳定性，容我再观测一段时间。现在终于可以正常使用我的 <code>wss://api.61bts.com</code> 节点了。</p>
]]></content>
      <tags>
        <tag>Server&amp;OS</tag>
      </tags>
  </entry>
  <entry>
    <title>使用 bitsharesjs 库创建新用户Demo</title>
    <url>/2019/12/26/bitshares-js-create-new-user-demo.html</url>
    <content><![CDATA[<p>整理了一下用 <code>js-sdk</code> 创建新用户的最简单的 <code>Demo</code> 实现代码。</p>
<h1 id="代码"><a href="#代码" class="headerlink" title="代码"></a>代码</h1><figure class="highlight plaintext"><table><tr><td class="code"><pre><span class="line">import &#123;PrivateKey, key, FetchChain, TransactionBuilder&#125; from &#x27;bitsharesjs&#x27;;</span><br><span class="line">import &#123;Apis, ChainConfig&#125; from &#x27;bitsharesjs-ws&#x27;;</span><br><span class="line"></span><br><span class="line">generateKeyFromPassword(accountName, role, password) &#123;</span><br><span class="line">  const seed = accountName + role + password;</span><br><span class="line">  const privKey = PrivateKey.fromSeed(seed);</span><br><span class="line">  const pubKey = privKey.toPublicKey().toString();</span><br><span class="line">  return &#123;privKey, pubKey&#125;;</span><br><span class="line">&#125;</span><br><span class="line"></span><br><span class="line">registerUser(username, password, registrar, referrer) &#123;</span><br><span class="line">  const privKey = &#x27;这里是用来签名数据的用户active私钥&#x27;;</span><br><span class="line">  const pKey = PrivateKey.fromWif(this.privKey);</span><br><span class="line">  const referrerPercent = 0;</span><br><span class="line">  const &#123;pubKey: ownerPubkey&#125; = generateKeyFromPassword(</span><br><span class="line">    username,</span><br><span class="line">    &#x27;owner&#x27;,</span><br><span class="line">    password</span><br><span class="line">  );</span><br><span class="line">  const &#123;pubKey: activePubkey&#125; = generateKeyFromPassword(</span><br><span class="line">    username,</span><br><span class="line">    &#x27;active&#x27;,</span><br><span class="line">    password</span><br><span class="line">  );</span><br><span class="line">  const &#123;pubKey: memoPubkey&#125; = generateKeyFromPassword(</span><br><span class="line">    username,</span><br><span class="line">    &#x27;memo&#x27;,</span><br><span class="line">    password</span><br><span class="line">  );</span><br><span class="line"></span><br><span class="line">  try &#123;</span><br><span class="line">    return Promise.all([</span><br><span class="line">      FetchChain(&quot;getAccount&quot;, registrar),</span><br><span class="line">      FetchChain(&quot;getAccount&quot;, referrer)</span><br><span class="line">    ]).then((res) =&gt; &#123;</span><br><span class="line">      const [chainRegistrar, chainReferrer] = res;</span><br><span class="line">      const tr = new TransactionBuilder();</span><br><span class="line">      tr.add_type_operation(&quot;account_create&quot;, &#123;</span><br><span class="line">        fee: &#123;</span><br><span class="line">          amount: 0,</span><br><span class="line">          asset_id: 0</span><br><span class="line">        &#125;,</span><br><span class="line">        registrar: chainRegistrar.get(&quot;id&quot;),</span><br><span class="line">        referrer: chainReferrer.get(&quot;id&quot;),</span><br><span class="line">        referrer_percent: referrerPercent,</span><br><span class="line">        name: username,</span><br><span class="line">        owner: &#123;</span><br><span class="line">            weight_threshold: 1,</span><br><span class="line">            account_auths: [],</span><br><span class="line">            key_auths: [[ownerPubkey, 1]],</span><br><span class="line">            address_auths: []</span><br><span class="line">        &#125;,</span><br><span class="line">        active: &#123;</span><br><span class="line">            weight_threshold: 1,</span><br><span class="line">            account_auths: [],</span><br><span class="line">            key_auths: [[activePubkey, 1]],</span><br><span class="line">            address_auths: []</span><br><span class="line">        &#125;,</span><br><span class="line">        options: &#123;</span><br><span class="line">            memo_key: memoPubkey,</span><br><span class="line">            voting_account: &quot;1.2.1&quot;,</span><br><span class="line">            num_witness: 0,</span><br><span class="line">            num_committee: 0,</span><br><span class="line">            votes: []</span><br><span class="line">        &#125;</span><br><span class="line">      &#125;);</span><br><span class="line">      return tr.set_required_fees().then(() =&gt; &#123;</span><br><span class="line">        tr.add_signer(pKey);</span><br><span class="line">        console.log(&quot;serialized transaction:&quot;, tr.serialize());</span><br><span class="line">        tr.broadcast();</span><br><span class="line">        return true;</span><br><span class="line">      &#125;);</span><br><span class="line">    &#125;).catch((err) =&gt; &#123;</span><br><span class="line">      console.log(&#x27;err:&#x27;, err);</span><br><span class="line">    &#125;);</span><br><span class="line">  &#125; catch(e) &#123;</span><br><span class="line">    console.log(&#x27;unexpected_error:&#x27;, e);</span><br><span class="line">  &#125;</span><br><span class="line">&#125;</span><br><span class="line"></span><br><span class="line">registerUser(&#x27;新用户名&#x27;, &#x27;新用户的密码&#x27;, &#x27;用来签名的用户的用户名&#x27;, &#x27;推荐用户的用户名&#x27;)；</span><br></pre></td></tr></table></figure>

<h1 id="说明"><a href="#说明" class="headerlink" title="说明"></a>说明</h1><blockquote>
<ul>
<li><code>registerUser</code> 函数参数中的 <code>registrar</code> 是用来签发数据的用户的用户名，函数里面的 <code>privKey</code> 是 <code>registrar</code> 的 <code>active</code> 私钥</li>
<li><code>referrerPercent</code> 是分成比例，这里注意是基于手续费的 50% 再分成。也就是 <code>referrerPercent</code> 设置为 <code>10000</code> ，则代表 <code>registrar</code> 分成 0%，<code>referrer</code> 分成 50%。</li>
<li>提交的数据中的 <code>voting_account</code> 是设置投票代理人是谁。</li>
</ul>
</blockquote>
]]></content>
      <tags>
        <tag>Bitshares</tag>
      </tags>
  </entry>
  <entry>
    <title>快速搭建私有单节点 Bitshares Testnet（二）</title>
    <url>/2020/01/04/bitshares-testnet-2.html</url>
    <content><![CDATA[<h1 id="前言"><a href="#前言" class="headerlink" title="前言"></a>前言</h1><p>在 <a href="/2019/11/27/bitshares-testnet-1.html">《快速搭建私有单节点 Bitshares Testnet（一）》</a> 中，讲解了如何搭建一个私有测试网络，这一篇将会讲解如何部署 Web 界面用于注册新用户，以及向新用户转账测试币。</p>
<h1 id="部署"><a href="#部署" class="headerlink" title="部署"></a>部署</h1><h2 id="拉取代码"><a href="#拉取代码" class="headerlink" title="拉取代码"></a>拉取代码</h2><figure class="highlight plaintext"><table><tr><td class="code"><pre><span class="line">git clone https://github.com/ety001/bitshares-testnet-for-dapp-developers.git</span><br></pre></td></tr></table></figure>

<h2 id="编译镜像"><a href="#编译镜像" class="headerlink" title="编译镜像"></a>编译镜像</h2><figure class="highlight plaintext"><table><tr><td class="code"><pre><span class="line">cd bitshares-testnet-for-dapp-developers</span><br><span class="line">docker build -t btfdd:latest .</span><br></pre></td></tr></table></figure>

<blockquote>
<p>你也可以直接使用我编译好的镜像，<code>docker pull ety001/btfdd:latest</code></p>
</blockquote>
<h2 id="运行"><a href="#运行" class="headerlink" title="运行"></a>运行</h2><figure class="highlight plaintext"><table><tr><td class="code"><pre><span class="line">docker run -itd \</span><br><span class="line">  --restart always \</span><br><span class="line">  --name btfdd \</span><br><span class="line">  -p 3000:3000 \</span><br><span class="line">  -e PRIV_KEY=5Jxxxxxx \</span><br><span class="line">  -e API_URL=ws://192.168.0.10/ws \</span><br><span class="line">  -e CHAIN_ID=2d20869f3d925cdeb57da14dec65bbc18261f38db0ac2197327fc3414585b0c5 \</span><br><span class="line">  -e CORE_ASSET=TEST \</span><br><span class="line">  ety001/btfdd:latest</span><br></pre></td></tr></table></figure>

<p><strong>环境变量说明</strong></p>
<ul>
<li><code>PRIV_KEY</code> 是你用来作为水龙头的账号的 <code>active</code> 私钥</li>
<li><code>API_URL</code> 是你私有测试网络的地址。<strong>这里需要注意下地址是否可访问。</strong></li>
<li><code>CHAIN_ID</code> 是你私有测试网络的 <code>CHAIN_ID</code></li>
<li><code>CORE_ASSET</code> 是你私有网络的测试币名</li>
</ul>
<h2 id="访问"><a href="#访问" class="headerlink" title="访问"></a>访问</h2><p>如果一切正常，这个时候浏览器访问 <code>http://localhost:3000</code> 即可看到工具页面了。</p>
<p><img src="/upload/20200104/r8pKvKBaGy8mEqOYCTia9xCycrqyx4v9eMvWFAnl.png"></p>
<p>目前工具只提供创建账号和转账的功能。</p>
<h2 id="公共服务"><a href="#公共服务" class="headerlink" title="公共服务"></a>公共服务</h2><p>目前我也搭建了公共服务免费供大家使用，地址: <a href="https://testnet.61bts.com/">https://testnet.61bts.com</a> 。</p>
<h1 id="疑问"><a href="#疑问" class="headerlink" title="疑问"></a>疑问</h1><p>如果有问题可以给我发邮件 <code>work#akawa.ink</code> 或者提交 <a href="https://github.com/ety001/bitshares-testnet-for-dapp-developers/issues">issue</a>。</p>
]]></content>
      <tags>
        <tag>Bitshares</tag>
      </tags>
  </entry>
  <entry>
    <title>在Chrome扩展的Content Scripts中使用@font-face</title>
    <url>/2020/01/09/chrome-content-scripts-font-face.html</url>
    <content><![CDATA[<p>在 <a href="/2020/01/07/chrome-extension-vuejs.html">《Chrome扩展中使用Vuejs》</a> 文章中，我们提到过 <code>@font-face</code> 我是用的 <code>CDN</code> 的方式来搞定的。但是用 <code>CDN</code> 的缺点就是网络不畅的时候，扩展中使用 <code>@font-face</code> 的地方显示就是个方块了。</p>
<p>为了解决这个问题，我搜索了下，找到了解决方案。</p>
<p>这里面有几个要点，一个是字体文件可以在任意页面访问到，一个是如何获取到扩展ID。</p>
<p>正常情况下，扩展的资源文件是与所有网页隔离开的，扩展相当于是在一个沙盒里面运行，如果想要在 <code>Content Scripts</code> 模式下，让 <code>JS</code> 或者 <code>CSS</code> 文件访问到扩展中的资源文件，那么就需要在 <code>manifest.json</code> 中增加配置项 <code>web_accessible_resources</code>。</p>
<figure class="highlight plaintext"><table><tr><td class="code"><pre><span class="line">&quot;web_accessible_resources&quot;: [&quot;fonts/*&quot;]</span><br></pre></td></tr></table></figure>

<p>就像上面这样增加配置后，我们就可以在 <code>Content Scripts</code> 模式下访问到 <code>fonts/</code> 目录下的所有资源文件了。</p>
<p>再来说下第二个问题。</p>
<p>我们知道扩展的地址结构是 <code>chrome://[扩展ID]</code>，那么我们的 <code>CSS</code> 文件中的 <code>@font-face</code> 的路径中的扩展ID该怎么获取呢？</p>
<p>通过看文档，找到了预设值 <code>__MSG_@@extension_id__</code>，这是出处：<a href="https://developer.chrome.com/extensions/i18n#overview-predefined">https://developer.chrome.com/extensions/i18n#overview-predefined</a></p>
<p>那么我们去修改下 <code>element-variables.scss</code> 中的 <code>font-path</code> 像这样：</p>
<figure class="highlight plaintext"><table><tr><td class="code"><pre><span class="line">$--font-path: &#x27;chrome-extension://__MSG_@@extension_id__/fonts&#x27;;</span><br></pre></td></tr></table></figure>

<p>这样，最关键的两个问题就解决了，最后只要在 <code>webpack.config.js</code> 中需要复制的操作里，增加复制字体文件的操作即可，就像这样：</p>
<figure class="highlight plaintext"><table><tr><td class="code"><pre><span class="line">new CopyPlugin([</span><br><span class="line">  ......</span><br><span class="line">  &#123; from: &#x27;../node_modules/element-ui/lib/theme-chalk/fonts&#x27;, to: &#x27;fonts&#x27; &#125;,</span><br><span class="line">  ......</span><br><span class="line">]),</span><br></pre></td></tr></table></figure>

<p>通过这样设置后，我们通过扩展插入到网页中的 <code>CSS</code> 文件就能直接访问到扩展中的资源文件了。</p>
]]></content>
      <tags>
        <tag>Chrome</tag>
        <tag>Javascript</tag>
      </tags>
  </entry>
  <entry>
    <title>解决Chrome扩展content script中的css冲突</title>
    <url>/2020/01/10/chrome-content-script-conflict.html</url>
    <content><![CDATA[<p>这次重构<a href="https://chrome.google.com/webstore/detail/review-bookmarks/oacajkekkegmjcnccaeijghfodogjnom">我的Chrome扩展</a>由于引入了很多新的东西，所以遇到的小问题还是挺多的。</p>
<p>比如在 <code>content script</code> 模式中，我的UI样式会被某些网站的 CSS 给影响到，以至于我的插件的 UI 显示不是预期。</p>
<p>在开发文档中，对于 <code>manifest.json</code> 中的 <code>content_scripts</code> 的 <code>CSS</code> 描述是： Optional. The list of CSS files to be injected into matching pages. These are injected in the order they appear in this array, <strong>before any DOM is constructed or displayed for the page</strong>.</p>
<p>这就是为啥 <code>Tab</code> 中网页可能会影响我的插件 UI 的原因。</p>
<p>因为我的插件的 <code>CSS</code> 早于 <code>Tab</code> 中网页的载入，这样 <code>Tab</code> 中网页里的 <code>CSS</code> 里面如果有重名的 <code>Class</code> 或者直接对 <code>HTML</code> 标签加样式，就会影响到我。</p>
<p>之前的版本，因为我是自己手写样式，且都用的 <code>div</code> 标签，所以很大程度上避免了冲突。</p>
<p>而这次重构引入了饿了么的 <code>UI</code>，所以增大了冲突的概率。我在 <code>content script</code> 中用的是 <code>notification</code> 这个组件，里面涉及到了 <code>&lt;h2 /&gt;</code>，<code>&lt;i /&gt;</code>这两个标签。有些网站是直接对这两个标签先进行样式全局设置的，这就导致在访问这些网站的时候，我的 <code>UI</code> 会受到影响。</p>
<p>目前我采用的解决方案是，把饿了么的 <code>UI</code> 库克隆到我的账号下，然后自己修改里面的代码，把 <code>&lt;h2 /&gt;</code>，<code>&lt;i /&gt;</code> 替换成别的标签，重新打包，引入我自己定义的库后，问题得到解决。</p>
]]></content>
      <tags>
        <tag>Chrome</tag>
        <tag>Javascript</tag>
      </tags>
  </entry>
  <entry>
    <title>Chrome扩展中使用Vuejs</title>
    <url>/2020/01/07/chrome-extension-vuejs.html</url>
    <content><![CDATA[<p><img src="/upload/20200107/Z6QxWQWDYgazq6lewQ9A7sVeCNBXbuMYQ8VvC9Ge.png"></p>
<p>我<a href="https://chrome.google.com/webstore/detail/review-bookmarks/oacajkekkegmjcnccaeijghfodogjnom">开发的扩展</a>四年多了，这两天终于突破了500用户数。很早就想要再进行开发了，但是无奈由于之前代码写的比较乱，并且用的 <code>jQuery</code> 去操作，很多东西开发起来还是很费劲的。</p>
<p>现在用户数已经 500 个用户了，之前用户呼声很高的功能，得花点心思搞一下了，要不就对不起这些铁杆用户了！</p>
<p>考虑再三，还是要重构。</p>
<p><code>jQuery</code> 在做一些交互少的功能的时候，还是很不错的选择。不过考虑到接下来要开发的功能的交互的复杂度，我觉得还是要引入 <code>Vuejs</code> 或者 <code>React</code>。鉴于熟练程度，我最终选择了 <code>Vuejs</code>。</p>
<p>由于我的 <code>Chrome</code> 扩展中将会使用 <code>Content Script</code>，<code>Popup Page</code>， <code>Tab Page</code>这三种形式，这就意味着，如果我要使用 <code>Vuejs</code> 的话，那么我需要用 <code>Webpack</code> 配置三个入口和三个文件。</p>
<p>不过让我修改 <code>Webpack</code> 配置还好，自己写，真的是太蛋疼了。于是，我找到了这个，<a href="https://github.com/Kocal/vue-web-extension">https://github.com/Kocal/vue-web-extension</a> 。</p>
<p>这个 <code>Vue</code> 模板真的是太好用了，基本上把大部分的工作都做好了。</p>
<p>我们只需要按照 <code>Kocal/vue-web-extension</code> 库的文档操作，就可以完成基本的部署。</p>
<p>不过没有 <code>Content Script</code> 的支持，我们只需要自己在 <code>src</code> 目录下创建个新的目录，比如叫做 <code>content-script</code>。</p>
<p>然后创建一个入口文件 <code>content-script.js</code>，内容如下：</p>
<figure class="highlight plaintext"><table><tr><td class="code"><pre><span class="line">import Vue from &#x27;vue&#x27;;</span><br><span class="line">import App from &#x27;./App&#x27;;</span><br><span class="line">import store from &#x27;../store&#x27;;</span><br><span class="line"></span><br><span class="line">global.browser = require(&#x27;webextension-polyfill&#x27;);</span><br><span class="line"></span><br><span class="line">Vue.prototype.$browser = global.browser;</span><br><span class="line">Vue.use(ElementUI);</span><br><span class="line"></span><br><span class="line">/* eslint-disable no-new */</span><br><span class="line">new Vue(&#123;</span><br><span class="line">  el: &#x27;#review-bookmark&#x27;,</span><br><span class="line">  store,</span><br><span class="line">  render: h =&gt; h(App),</span><br><span class="line">&#125;);</span><br></pre></td></tr></table></figure>

<p>再创建一个 <code>App.vue</code> 文件，内容如下：</p>
<figure class="highlight plaintext"><table><tr><td class="code"><pre><span class="line">&lt;template&gt;</span><br><span class="line">  &lt;div&gt;</span><br><span class="line">    &lt;button&gt;测试一下&lt;/button&gt;</span><br><span class="line">  &lt;/div&gt;</span><br><span class="line">&lt;/template&gt;</span><br><span class="line"></span><br><span class="line">&lt;script&gt;</span><br><span class="line">export default &#123;</span><br><span class="line">  data() &#123;</span><br><span class="line">    return &#123;&#125;;</span><br><span class="line">  &#125;,</span><br><span class="line">&#125;;</span><br><span class="line">&lt;/script&gt;</span><br><span class="line"></span><br><span class="line">&lt;style lang=&quot;scss&quot; scoped&gt;&lt;/style&gt;</span><br></pre></td></tr></table></figure>

<p>最后创建一个用于初始化的文件 <code>cs-init.js</code>，内容如下：</p>
<figure class="highlight plaintext"><table><tr><td class="code"><pre><span class="line">const reviewBookmarkDiv = document.createElement(&#x27;div&#x27;);</span><br><span class="line">reviewBookmarkDiv.id = &#x27;review-bookmark&#x27;;</span><br><span class="line">document.body.appendChild(reviewBookmarkDiv);</span><br></pre></td></tr></table></figure>

<p>创建好这三个文件后，再打开 <code>webpack.config.js</code> 文件，修改 <code>entry</code> 项如下：</p>
<figure class="highlight plaintext"><table><tr><td class="code"><pre><span class="line">entry: &#123;</span><br><span class="line">  background: &#x27;./background.js&#x27;,</span><br><span class="line">  &#x27;popup/popup&#x27;: &#x27;./popup/popup.js&#x27;,</span><br><span class="line">  &#x27;tab/tab&#x27;: &#x27;./tab/tab.js&#x27;,</span><br><span class="line">  &#x27;content-script/content-script&#x27;: &#x27;./content-script/content-script.js&#x27;,</span><br><span class="line">&#125;</span><br></pre></td></tr></table></figure>

<p>这样就设置好了多个编译入口，最后编译的时候就会在 <code>dist</code> 文件夹下生成四个编译好的 <code>js</code> 文件。</p>
<p>再修改 <code>webpack.config.js</code> 中 <code>plugins</code> 项中的 <code>CopyPlugin</code> 如下：</p>
<figure class="highlight plaintext"><table><tr><td class="code"><pre><span class="line">new CopyPlugin([</span><br><span class="line">  &#123; from: &#x27;icons&#x27;, to: &#x27;icons&#x27; &#125;,</span><br><span class="line">  &#123; from: &#x27;_locales&#x27;, to: &#x27;_locales&#x27; &#125;,</span><br><span class="line">  &#123; from: &#x27;content-script/cs-init.js&#x27;, to: &#x27;content-script/cs-init.js&#x27; &#125;,</span><br><span class="line">  &#123; from: &#x27;popup/popup.html&#x27;, to: &#x27;popup/popup.html&#x27;, transform: transformHtml &#125;,</span><br><span class="line">  &#123; from: &#x27;tab/tab.html&#x27;, to: &#x27;tab/tab.html&#x27;, transform: transformHtml &#125;,</span><br><span class="line">  &#123;</span><br><span class="line">    from: &#x27;manifest.json&#x27;,</span><br><span class="line">    to: &#x27;manifest.json&#x27;,</span><br><span class="line">    transform: content =&gt; &#123;</span><br><span class="line">      const jsonContent = JSON.parse(content);</span><br><span class="line">      jsonContent.version = version;</span><br><span class="line"></span><br><span class="line">      if (config.mode === &#x27;development&#x27;) &#123;</span><br><span class="line">        jsonContent[&#x27;content_security_policy&#x27;] = &quot;script-src &#x27;self&#x27; &#x27;unsafe-eval&#x27;; object-src &#x27;self&#x27;&quot;;</span><br><span class="line">      &#125;</span><br><span class="line"></span><br><span class="line">      return JSON.stringify(jsonContent, null, 2);</span><br><span class="line">    &#125;,</span><br><span class="line">  &#125;,</span><br><span class="line">])</span><br></pre></td></tr></table></figure>
<p>这样我们就把扩展需要的必要文件都复制进了 <code>dist</code> 目录。尤其是 <code>cs-init.js</code>。这个文件在下面会讲。</p>
<p>现在打开 <code>manifest.json</code> 文件，调整如下：</p>
<figure class="highlight plaintext"><table><tr><td class="code"><pre><span class="line">&#123;</span><br><span class="line">  &quot;name&quot;: &quot;__MSG_appname__&quot;,</span><br><span class="line">  &quot;description&quot;: &quot;__MSG_appdesc__&quot;,</span><br><span class="line">  &quot;version&quot;: null,</span><br><span class="line">  &quot;manifest_version&quot;: 2,</span><br><span class="line">  &quot;default_locale&quot;: &quot;en&quot;,</span><br><span class="line">  &quot;author&quot;: &quot;ETY001&quot;,</span><br><span class="line">  &quot;homepage_url&quot;: &quot;https://bm.to0l.cn/&quot;,</span><br><span class="line">  &quot;chrome_url_overrides&quot;: &#123;</span><br><span class="line">    &quot;newtab&quot;: &quot;tab/tab.html&quot;</span><br><span class="line">  &#125;,</span><br><span class="line">  &quot;icons&quot;: &#123;</span><br><span class="line">    &quot;16&quot;: &quot;icons/icon-16.png&quot;,</span><br><span class="line">    &quot;19&quot;: &quot;icons/icon-19.png&quot;,</span><br><span class="line">    &quot;38&quot;: &quot;icons/icon-38.png&quot;,</span><br><span class="line">    &quot;48&quot;: &quot;icons/icon-48.png&quot;,</span><br><span class="line">    &quot;128&quot;: &quot;icons/icon-128.png&quot;</span><br><span class="line">  &#125;,</span><br><span class="line">  &quot;browser_action&quot;: &#123;</span><br><span class="line">    &quot;default_title&quot;: &quot;__MSG_appname__&quot;,</span><br><span class="line">    &quot;default_popup&quot;: &quot;popup/popup.html&quot;</span><br><span class="line">  &#125;,</span><br><span class="line">  &quot;background&quot;: &#123;</span><br><span class="line">    &quot;scripts&quot;: [&quot;background.js&quot;],</span><br><span class="line">    &quot;persistent&quot;: false</span><br><span class="line">  &#125;,</span><br><span class="line">  &quot;content_scripts&quot;: [</span><br><span class="line">    &#123;</span><br><span class="line">      &quot;matches&quot;: [&quot;*://*/*&quot;],</span><br><span class="line">      &quot;css&quot;: [&quot;content-script/content-script.css&quot;],</span><br><span class="line">      &quot;js&quot;: [&quot;content-script/cs-init.js&quot;, &quot;content-script/content-script.js&quot;],</span><br><span class="line">      &quot;run_at&quot;: &quot;document_end&quot;</span><br><span class="line">    &#125;</span><br><span class="line">  ],</span><br><span class="line">  &quot;web_accessible_resources&quot;: [&quot;tab/tab.html&quot;],</span><br><span class="line">  &quot;permissions&quot;: [&quot;activeTab&quot;, &quot;notifications&quot;, &quot;bookmarks&quot;, &quot;tabs&quot;, &quot;background&quot;, &quot;https://www.google-analytics.com/&quot;, &quot;storage&quot;]</span><br><span class="line">&#125;</span><br></pre></td></tr></table></figure>

<p><strong>好了所有的文件都准备好了，接一下原理。</strong></p>
<p>通过看 <code>manifest.json</code> 的 <code>content_scripts</code>，可以看到我们引入了 <code>cs-init.js</code> 和 <code>content-script.js</code>。其中 <code>cs-init.js</code> 文件的作用就是为了能在页面里面插入一个 <code>&lt;div /&gt;</code> 作为模板的插入点，然后 <code>content-script.js</code> 就可以把相关的页面和逻辑就能插入进我们准备好的 <code>&lt;div /&gt;</code> 中去了。</p>
<p>除了 <code>Content Scripts</code> 这个坑需要自己填以外，还有一个字体库的坑也需要自己填一下。</p>
<p>由于我还使用了 <code>Element UI</code> 库，但是在测试的时候，发现 <code>font icon</code> 的库一直引入不了。最后，我用的 <code>cdn</code> 上的字体资源。</p>
<p>具体方法在 《<a href="https://element.eleme.io/#/zh-CN/component/custom-theme#zai-xiang-mu-zhong-gai-bian-scss-bian-liang">在项目中改变 SCSS 变量</a>》这个文档中可以看到，只需要修改 <code>font-path</code> 这个参数即可，如下：</p>
<figure class="highlight plaintext"><table><tr><td class="code"><pre><span class="line">/* 改变主题色变量 */</span><br><span class="line">$--color-primary: teal;</span><br><span class="line"></span><br><span class="line">/* 改变 icon 字体路径变量，必需 */</span><br><span class="line">$--font-path: &#x27;https://cdnjs.cloudflare.com/ajax/libs/element-ui/2.13.0/theme-chalk/fonts&#x27;;</span><br><span class="line"></span><br><span class="line">@import &#x27;~element-ui/packages/theme-chalk/src/index&#x27;;</span><br></pre></td></tr></table></figure>

<p>OK，花了两天的时间，把基础框架搭建好了！接下来就可以开始重构工作了，剩下的相对就简单了。</p>
]]></content>
      <tags>
        <tag>Chrome</tag>
        <tag>Javascript</tag>
      </tags>
  </entry>
  <entry>
    <title>用 js 控制 manifest.json 的 chrome_url_overrides</title>
    <url>/2020/01/13/js-manifest-json-chrome-url-overrides.html</url>
    <content><![CDATA[<p><a href="https://chrome.google.com/webstore/detail/review-bookmarks/oacajkekkegmjcnccaeijghfodogjnom">我的Chrome扩展</a>重构进度已经60%了，目前又遇到了新问题。</p>
<p>这个问题的缘由得慢慢说来。</p>
<p>我的扩展由于需要用自定义的页面替换新标签页。在我的早期版本的实现是<a href="https://github.com/ety001/bookmark-extension/blob/5a384bd15b/js/background.js#L11">这样的</a>:</p>
<figure class="highlight plaintext"><table><tr><td class="code"><pre><span class="line">chrome.tabs.onCreated.addListener(function(tab)&#123;</span><br><span class="line">  if(Mini.get_status()==&#x27;off&#x27;&amp;&amp;(tab.url==&quot;chrome://newtab/&quot;||tab.url==&quot;chrome://newtab&quot;))&#123;</span><br><span class="line">    chrome.tabs.update(tab.id, &#123;url:chrome.runtime.getURL(&#x27;show.html&#x27;)&#125;);</span><br><span class="line">  &#125;</span><br><span class="line">&#125;);</span><br></pre></td></tr></table></figure>

<p>也就是新建标签页的时候，用我自己的页面 URL 替换掉 Chrome 默认页面。</p>
<p>后来，Chrome 在某个版本后，新建标签页后，地址栏是空的，也就是 <code>tab.url</code> 是没有值，这就导致我之前的代码就失效了。</p>
<p>查看文档，发现正确的方法是在 <code>manifest.json</code> 中增加 <code>chrome_url_overrides</code> 这个选项，具体可以<a href="https://developer.chrome.com/extensions/override">查看这里</a>。</p>
<p>这就引入了新的问题。</p>
<p>我的扩展里原来是有一个开关的，这个开关可以控制新标签页是否显示我的自定义页面，也就是上面代码里的那个 <code>Mini.get_status() == &#39;off&#39;</code>。</p>
<p>现在用了 <code>manifest.json</code> 直接替换掉了默认页，而 <code>manifest.json</code> 是无法在扩展里修改的，同时 Chrome 没有提供相关的 API，那么如何实现这个开关就很尴尬了。</p>
<p>这个 BUG 我一直放着没有处理。</p>
<p>这次重构进行到了自定义页面重构后，这个问题就必须要解决了。</p>
<p>最终的解决方案是，监听页面更新，如果 URL 符合 <code>chrome://newtab/</code>，那么就替换成访问 <code>chrome-search://local-ntp/local-ntp.html</code>，代码如下：</p>
<figure class="highlight plaintext"><table><tr><td class="code"><pre><span class="line">chrome.tabs.onUpdated.addListener((tabId, changeInfo, tab) =&gt; &#123;</span><br><span class="line">  if (tab.url === &#x27;chrome://newtab/&#x27;) &#123;</span><br><span class="line">    if (store.getters.config.mini === false) &#123;</span><br><span class="line">      chrome.tabs.update(tabId, &#123; url: &#x27;chrome-search://local-ntp/local-ntp.html&#x27; &#125;);</span><br><span class="line">    &#125;</span><br><span class="line">  &#125;</span><br><span class="line">&#125;);</span><br></pre></td></tr></table></figure>

<p>之所以用 <code>chrome.tabs.onUpdated</code>，有两个原因：一个是因为 <code>onCreated</code> 拿不到 URL，一个是在当前标签页，如果点击主页按钮的时候，也会进入 <code>chrome://newtab/</code>。</p>
]]></content>
      <tags>
        <tag>Chrome</tag>
        <tag>Javascript</tag>
      </tags>
  </entry>
  <entry>
    <title>Google Analytics Api 使用</title>
    <url>/2020/02/08/google-analytics-api.html</url>
    <content><![CDATA[<p>最近在做浏览器扩展《<a href="https://creatorsdaily.com/9999e88d-0b00-46dc-8ff1-e1d311695324?utm_source=vote">温故知新</a>》的新版本。其中，最让我头疼的就是用 <code>Google Analytics</code> 统计信息了。</p>
<p>Google 官方提供的 <code>SDK</code> 使用的话，需要外部引入 <code>SDK</code>，并且配置 <a href="https://developer.chrome.com/extensions/contentSecurityPolicy">CSP</a>，而 <code>Firefox</code> 浏览器不允许配置 <code>CSP</code>。</p>
<p>无奈，只能自己去写一个简单的封装了。</p>
<figure class="highlight plaintext"><table><tr><td class="code"><pre><span class="line">export class GA &#123;</span><br><span class="line">  constructor(ua, cid, debug = false) &#123;</span><br><span class="line">    this.ua = ua;</span><br><span class="line">    this.cid = cid; // client id</span><br><span class="line">    this.gaApi = debug ? &#x27;https://www.google-analytics.com/debug/collect&#x27; : &#x27;https://www.google-analytics.com/collect&#x27;;</span><br><span class="line">    this.version = &#x27;1&#x27;;</span><br><span class="line">  &#125;</span><br><span class="line">  ga(t, ...items) &#123;</span><br><span class="line">    let payload = `v=$&#123;this.version&#125;&amp;tid=$&#123;this.ua&#125;&amp;cid=$&#123;this.cid&#125;`;</span><br><span class="line">    let params = [];</span><br><span class="line">    switch (t) &#123;</span><br><span class="line">      case &#x27;pageview&#x27;: // Pageview hit type</span><br><span class="line">        // dh -- Document hostname</span><br><span class="line">        // dp -- Page</span><br><span class="line">        // dt -- Title</span><br><span class="line">        params = [&#x27;dh&#x27;, &#x27;dp&#x27;, &#x27;dt&#x27;];</span><br><span class="line">        break;</span><br><span class="line">      case &#x27;event&#x27;:</span><br><span class="line">        // ec -- Event Category. Required</span><br><span class="line">        // ea -- Event Action. Required</span><br><span class="line">        // el -- Event label.</span><br><span class="line">        // ev -- Event value.</span><br><span class="line">        params = [&#x27;ec&#x27;, &#x27;ea&#x27;, &#x27;el&#x27;, &#x27;ev&#x27;];</span><br><span class="line">    &#125;</span><br><span class="line">    if (params === []) return;</span><br><span class="line">    payload = `$&#123;payload&#125;&amp;t=$&#123;t&#125;`;</span><br><span class="line">    items.forEach((v, i) =&gt; &#123;</span><br><span class="line">      payload = `$&#123;payload&#125;&amp;$&#123;params[i]&#125;=$&#123;encodeURIComponent(v)&#125;`;</span><br><span class="line">    &#125;);</span><br><span class="line">    const request = new XMLHttpRequest();</span><br><span class="line">    request.open(&#x27;POST&#x27;, this.gaApi, true);</span><br><span class="line">    request.send(payload);</span><br><span class="line">  &#125;</span><br><span class="line">&#125;</span><br><span class="line"></span><br><span class="line">const uid = &#x27;xxxx-xxxx-xxx-xxx&#x27;;</span><br><span class="line">const debug = false;</span><br><span class="line">const gaID = &#x27;UA-xxxxxx-x&#x27;;</span><br><span class="line">const gaObj = new GA(gaID, uid, debug);</span><br><span class="line">function sendEvent(eventCategory, eventAction, eventLabel = &#x27;&#x27;, eventValue = 1) &#123;</span><br><span class="line">  if (store.getters.config.ga === false) return;</span><br><span class="line">  gaObj.ga(&#x27;event&#x27;, eventCategory, eventAction, eventLabel, eventValue);</span><br><span class="line">&#125;</span><br><span class="line">// dh -- Document hostname, dp -- Page, dt -- Title</span><br><span class="line">function sendPageview(dp, dh = &#x27;&#x27;, dt = &#x27;&#x27;) &#123;</span><br><span class="line">  if (store.getters.config.ga === false) return;</span><br><span class="line">  gaObj.ga(&#x27;pageview&#x27;, dh, dp, dt);</span><br><span class="line">&#125;</span><br></pre></td></tr></table></figure>

<p>这就是我根据<a href="https://developers.google.com/analytics/devguides/collection/protocol/v1/devguide">官方文档</a>简单写的封装。</p>
<p><strong>这里面需要注意几个问题。</strong></p>
<p>一个是正式环境的地址是 <code>/collect</code> 而测试地址是 <code>/debug/collect</code>。这个在之前的时候，没有注意到还有测试地址，所以绕了弯路，也没有发现提交的参数错误。</p>
<p>另外一个就是在 <code>event</code> 类型中，<code>Event value</code> 必须是整型。</p>
<p>还有个小技巧，就是调试的时候，可以切换到“实时”选项卡，在那下面可以看到发送到 <code>/collect</code> 的实时数据。</p>
]]></content>
      <tags>
        <tag>Chrome</tag>
        <tag>Javascript</tag>
        <tag>Google Analytics</tag>
      </tags>
  </entry>
  <entry>
    <title>解决每次zip压缩后的md5不同的问题</title>
    <url>/2020/02/14/fix-zip-md5-sum-diff.html</url>
    <content><![CDATA[<p>最近为了把新版的**<a href="https://creatorsdaily.com/9999e88d-0b00-46dc-8ff1-e1d311695324?utm_source=vote">温故知新</a>**扩展上传到各个浏览器，真的是操碎了心了。这篇文章就来说说在通过火狐审核的时候的遇到的最棘手的问题。</p>
<p>由于我的扩展使用了 <code>webpack</code>，代码 <code>build</code> 后，没有可读性，所以火狐要求需要上传源代码，然后会进行审查。审查的步骤就是根据我提供的源代码和编译方法，审核人员编译一次，然后把编译后的代码打包，最后与我上传的压缩包比对，看是否一致。负责审查我的那位审查员，用的是 <code>Beyond Compare</code> 这个软件来检查两个压缩包是否一样。</p>
<p>最开始并没有注意到这里，审查员说他的编译结果跟我的不一样，我以为是我的开发环境对打包环境有污染。所以再次送审的时候，我是直接从 <code>github</code> 上下载的源码，重新来了一遍。结果审查结果依然是不一致。</p>
<p>于是我在本地进行测试，发现即使我在自己本地，两次编译后，用<code>zip</code>打包后的文件 <code>md5 sum</code> 都不一样。</p>
<p>WTF！</p>
<p>经过各种查询，最后确定应该是文件的 <code>metainfo</code> 导致的，看了下 <code>zip</code> 命令的参数，发现 <code>-X</code> 可以移除 <code>metainfo</code> 来打包，于是使用命令 <code>zip -r -X extension.zip dist/</code> 打包，对编译后的 <code>dist</code> 目录打包了两次，对比了下，发现终于特么的一致了。</p>
<p>既然一致了，就赶紧更新审核包和审核文案吧。就在更新过程中，我突然想到，我应该按照审核员的步骤再操作一遍，于是我又从下载源码开始来了一遍，最后惊奇的发现，这一遍生成的压缩包和上一遍的压缩包 <code>md5 sum</code> 又特么的不一样啊！！！！</p>
<p>经过各种试验后，排除了大部分的可能，最后猜测应该是文件日期导致的，毕竟前后两遍编译，经过各种排除后，只有时间这个变量了。</p>
<p>于是我用 <code>find dist | xargs touch -mt 202002110000</code> 先对编译结果强制修改文件的时间，然后再打压缩包，然后再从源码来一遍后，也修改成这个时间，再打包，最后对比两个压缩包的 <code>md5 sum</code>，终于一样了！！！！</p>
<p>最后提交审核，两天后，终于过审了！！！！！</p>
<p>对于书签巨多的人来说，我这个插件值得你去体验下~~~</p>
<p><strong>Chrome版地址</strong>：<a href="https://chrome.google.com/webstore/detail/review-bookmarks/oacajkekkegmjcnccaeijghfodogjnom">https://chrome.google.com/webstore/detail/review-bookmarks/oacajkekkegmjcnccaeijghfodogjnom</a></p>
<p><strong>Firefox版地址</strong>：<a href="https://addons.mozilla.org/zh-CN/firefox/addon/review-bookmarks/">https://addons.mozilla.org/zh-CN/firefox/addon/review-bookmarks/</a></p>
<p><strong>Microsoft Edge版地址</strong>：<a href="https://microsoftedge.microsoft.com/addons/detail/pibjmfgfgamgohlaehhhbdkjboaopjkj">https://microsoftedge.microsoft.com/addons/detail/pibjmfgfgamgohlaehhhbdkjboaopjkj</a></p>
<p><strong>反馈</strong>：<a href="https://creatorsdaily.com/9999e88d-0b00-46dc-8ff1-e1d311695324?utm_source=vote">https://creatorsdaily.com/9999e88d-0b00-46dc-8ff1-e1d311695324?utm_source&#x3D;vote</a></p>
<h5 id="欢迎使用，欢迎点赞！！"><a href="#欢迎使用，欢迎点赞！！" class="headerlink" title="欢迎使用，欢迎点赞！！"></a>欢迎使用，欢迎点赞！！</h5>]]></content>
      <tags>
        <tag>Chrome</tag>
      </tags>
  </entry>
  <entry>
    <title>从帮助400+用户7天重温了9000+个书签说起</title>
    <url>/2020/02/27/what-can-i-do-for-users.html</url>
    <content><![CDATA[<p>年前重新开发了我的浏览器扩展“温故知新”。“温故知新”这个扩展的目的就是在你每次打开新网页或者标签页的时候，能够随机从你的收藏夹&#x2F;书签栏里抽一个出来展示。这样利用了零碎的时间，就把你的书签栏整理了，对于书签数量巨大的用户来说，非常赞。</p>
<p>这次重新开发，除了解决老版本中的问题，提升操作体验，增加用户要求的新功能外，最重要的就是优化了数据统计功能。</p>
<p>之前由于对 Google Analytics 不熟悉，所以在事件埋点方面，设置的参照坐标很乱，导致在面板看到的数据意义不大。</p>
<p>这次优化后，只关注几个重要指标，比如获取书签操作、删除书签操作等。下面是2020年2月20日到2月26日的数据报表截图：</p>
<p><img src="https://cdn.steemitimages.com/DQmQ19UbXaLN9L7Mvp83gSdpjwh7hEa2tCBPsQKkcYg7hFj/photo_2020-02-27_12-08-23.jpg" alt="photo_2020-02-27_12-08-23.jpg"></p>
<p>图中 getbookmark_from_mini 和 getbookmark_from_full 就是获取书签的操作，remove_bookmark 就是删除书签的操作。“事件总数”就是事件发生的次数，“唯一身份事件数”可以看做是用户数。</p>
<p>可以看到在过去的7天，“温故知新”帮助了 285 + 127 位用户，重新回顾了 8888 + 448 个书签，并且有 38 个用户，删除了 95 个对他们来说没用的书签。</p>
<p>我觉得这应该算是一个让我感到振奋的事情！</p>
<p>在这个版本之前，我只能看到有多少用户在用我开发的扩展，而并不能了解到我可以帮助到他们多少？现在有了这些新的指标后，我能够看到我对于新版本付出的努力没有白费。</p>
<p>抛开数字统计，我觉得还有一个很重要的点，那就是我在开发工具时的思路也发生了变化。</p>
<p>在过去，我开发的目的就是玩或者解决自己的问题，但是现在我觉得开发出来的东西帮助到更多人，才是有意思的事情。尽管很多开发者，一起步的时候，就做到了这一点，不过我现在能意识到这一点也不算晚。</p>
<p>总结一下，数字可以帮助开发者量化自己的劳动成果。开发者需要收集各种信息，来看看可以帮助用户再做些什么。</p>
<blockquote>
<p>PS：点击【<a href="https://creatorsdaily.com/9999e88d-0b00-46dc-8ff1-e1d311695324">这里</a>】，可以下载安装我的这个扩展，也可以去吐槽这个扩展。</p>
</blockquote>
]]></content>
      <tags>
        <tag>Chrome</tag>
      </tags>
  </entry>
  <entry>
    <title>区块链公司该如何保护自己的资产</title>
    <url>/2020/03/09/how-to-protect-blockchain-company-asset.html</url>
    <content><![CDATA[<p>最近币圈的一个事情闹的动静还是不小的，就是Tron收购Steemit这个事情。这个事情现在还没有结束，我觉得还是要引起想在区块链这个领域做事情的公司关注的。</p>
<p>对于这个事情的大概前因后果，<a href="https://steemit.com/cn/@oflyhigh/steem-a9c7ff5100" title="在这篇大佬写的文章里介绍了">在这篇大佬写的文章里介绍了</a>，这里就不再细说。大概就是Steemit公司自己经营问题导致的一些历史遗留问题，在Tron收购的时候，Ned（Steemit公司CEO）并没有交代清楚，导致Tron的老板孙宇晨在做一些宣传事项的时候，触动了Steem社区的利益集团的神经，因为沟通不是很有效，社区直接封锁了原Steemit公司的账号的资金使用权利，孙老板联合交易所又来了一个猛烈的反击，最终导致对战开始。</p>
<p>这次的事件，我觉得对于想要基于区块链进行创业的团队来说，很具有教科书式的启发。那就是在区块链上，如果引入了社区治理（比如像DPOS这样的），如何才能划清楚公司和社区的责任和财产，如何才能保护好自己？</p>
<p>在现实生活中，国家都有相对比较完备的民事法律体系，来帮助有争端的人来解决争端。那么在区块链世界，用什么来保护呢？</p>
<p>我曾在社区跟另外一个人讨论过，关于口头承诺在区块链世界到底作不作数的问题。我个人倾向于这种东西是不作数的。区块链从比特币开始，我觉得它的本质就是要用客观的方法去解决客观的问题，不要在客观问题的执行上，让人参与。</p>
<p>那么什么是客观的方法呢？代码！代码就是区块链的一切，代码就是区块链里的法律。只有在代码产生前的所有讨论，才是人可以去主观影响的。一旦多数人达成了共识，就应该用代码的方式去落实共识。当遇到纠纷的时候，就是要靠已执行在链上的代码，来保证所有人的权益。这才应该是区块链的意义。</p>
<p>就像这次的事件，核心就是币权归属的问题。Ned在跟社区协商中，对于这些资产达成了共识，但是仅是发布视频和文件在区块链上而已，而实际的币权操作还是他自己说了算的，并没有代码去限制。</p>
<p>也就说，Ned完全可以撕破脸去做他想做的事情，最多就是社区声讨吧。但是对于一个可以最后撕破脸的人来说，你觉得他会怕声讨吗？不过Ned并没有去撕破脸，而是成功套现把锅甩给了之前不明真相的孙老板。</p>
<p>如果一开始，共识达成后，就直接落实为代码，就不会有现在这难解的扣了。</p>
<p>所以说，想要在区块链方向上创业的公司，请一定要把该做的事情做好，哪怕那个时候做起来觉得繁琐没必要，也一定要做。多一份保障就是对自己财产多一份保障。</p>
<p>下面是我针对这次事件的其他吐槽（先声明我不是给孙老板站队）。</p>
<p>这个资产问题在Steem链正式运营的时候就存在，到现在至少两年的时间了，社区的领袖们（头部见证人们）都去做什么了，就跟隐形了一样。为什么在孙老板收购Steemit后，你们却都跳出来了，还直接就封锁了Steemit公司账号的币权？</p>
<p>假如说社区的人多数都认可Ned发表的口头承诺，所以没有用代码限制公司的账号币权，那么为什么孙老板收购Steemit公司后，你们就不再认可Ned的口头承诺了呢？因为这个承诺理论上讲是跟着收购这个事情，一并都算到了新的老板头上的。是不是有点双标了？虽然人都有双标的特性，但是目前的这种双标真的是对整个社区负责吗？我看其实是在对你们自己的自身利益负责吧？</p>
<p>再要说的就是区块链的制度之争。我想说的是，没有什么制度是完美的，关键还是要看参与制度的人。这句话什么意思？就是说，没有绝对的去中心化，只有相对的去中心化。即使是POW制度下的公链，只要钱多，依然可以中心化，所以关键还是要看公链的治理团队的水平。</p>
<p>最后，就是我觉得，如果在整个收购过程中，Ned并没有写明这些细节，比如之前做过的承诺之类的，其实孙老板可以去起诉Ned了。花了泡澡堂子的钱，结果进门却被强制只能泡个脚，这买卖肯定是不能这么干，这瘪肯定不会就这么吃的。我觉得这应该是孙老板联合交易所发起反击前的内心写照了吧。</p>
]]></content>
      <tags>
        <tag>steem</tag>
        <tag>blockchain</tag>
      </tags>
  </entry>
  <entry>
    <title>Code Server使用小技巧--禁用浏览器标签页关闭</title>
    <url>/2020/03/12/code-server-trick.html</url>
    <content><![CDATA[<p>最近在我工作用的台式机上部署了传说中的、微软的 <strong>Code Server</strong>。</p>
<p><strong>Code Server</strong> 其实就是微软 <strong>Code editing</strong> 的服务器版，可以通过在你的服务器上，通过 <strong>Docker</strong> 容器建立一个网页 <strong>IDE</strong>，这样能做的事情就太多了。</p>
<p>比如我现在需要经常出门，而我的工作环境都在台式机上，有时候出门仅几个小时，在笔记本上可能代码都没有写完，就回家了，要把工作进度转移到台式机上就很麻烦。</p>
<p>现在用了 <strong>Code Server</strong> 后，我出门在笔记本上，只要用 <strong>SSH</strong> 把家里台式机的相关端口映射到笔记本的本地，就可以获得跟在台式机上开发几乎一致的开发体验。</p>
<p>不过里面也有一点很不爽，就是经常会习惯性的按 <strong>Command + W</strong> 想去关闭 <strong>Code Server</strong> 里的标签页，结果就是触发了浏览器的快捷键，把整个网页都关掉了。</p>
<p>从网上搜索了一下，发现了一个<a href="https://github.com/cdr/code-server/issues/53#issuecomment-563350766">非常赞的方法</a>，就是通过参数，让 <strong>Chrome</strong> 以 <strong>App</strong> 的形式运行，这样就可以自动屏蔽掉一些快捷键，其中包括 <strong>Command + W</strong>，更厉害的是，<strong>Command + W</strong> 可以像 <strong>IDE</strong> 里一样，关闭当前的代码标签页。</p>
<p>具体命令就是</p>
<figure class="highlight plaintext"><table><tr><td class="code"><pre><span class="line">chrome --app=http://localhost:8080</span><br></pre></td></tr></table></figure>

<p>如果你是OSX系统，那么命令就是</p>
<figure class="highlight plaintext"><table><tr><td class="code"><pre><span class="line">/Applications/Google\ Chrome.app/Contents/MacOS/Google\ Chrome --app=http://localhost:8080</span><br></pre></td></tr></table></figure>

<p>最后的效果就是这样：</p>
<p><img src="/upload/20200312/WX20200313-013203@2x.png" alt="WX20200313-013203@2x.png"></p>
]]></content>
      <tags>
        <tag>配置</tag>
        <tag>经验</tag>
        <tag>code server</tag>
      </tags>
  </entry>
  <entry>
    <title>Steem Fullnode 部署大致步骤</title>
    <url>/2020/03/26/steem-fullnode-build.html</url>
    <content><![CDATA[<h1 id="前言"><a href="#前言" class="headerlink" title="前言"></a>前言</h1><p>这篇讲述了如何部署 steemd 的 fullnode 版本。部署好以后，可以提供大部分 API 使用，但是无法直接用于 steemit 的 UI（即 <a href="https://github.com/steemit/condenser">https://github.com/steemit/condenser</a>）。</p>
<blockquote>
<p>注意：由于该方案使用 Docker 部署，所以请先自行安装 Docker。<br>注意：<strong>该方案是部署 0.22.5 mira 版本</strong></p>
</blockquote>
<h1 id="下面是步骤："><a href="#下面是步骤：" class="headerlink" title="下面是步骤："></a>下面是步骤：</h1><h2 id="（一）克隆控制脚本"><a href="#（一）克隆控制脚本" class="headerlink" title="（一）克隆控制脚本"></a>（一）克隆控制脚本</h2><figure class="highlight plaintext"><table><tr><td class="code"><pre><span class="line">git clone https://github.com/Someguy123/steem-docker.git</span><br></pre></td></tr></table></figure>

<h2 id="（二）进入目录"><a href="#（二）进入目录" class="headerlink" title="（二）进入目录"></a>（二）进入目录</h2><figure class="highlight plaintext"><table><tr><td class="code"><pre><span class="line">cd steem-docker/</span><br></pre></td></tr></table></figure>

<h2 id="（三）如果你还没有装-Docker-可以执行下面的命令"><a href="#（三）如果你还没有装-Docker-可以执行下面的命令" class="headerlink" title="（三）如果你还没有装 Docker 可以执行下面的命令"></a>（三）如果你还没有装 Docker 可以执行下面的命令</h2><figure class="highlight plaintext"><table><tr><td class="code"><pre><span class="line">./run.sh install_docker</span><br></pre></td></tr></table></figure>

<h2 id="（四）下载-block-log"><a href="#（四）下载-block-log" class="headerlink" title="（四）下载 block_log"></a>（四）下载 block_log</h2><p>如果你不想从0开始同步，可以选择下载已有区块数据。<br>由于 @someguy123 目前提供的数据可能是 hive 的，最<br>好不要用 run.sh 脚本内的下载指令。目前我提供了一份<br>镜像下载。</p>
<figure class="highlight plaintext"><table><tr><td class="code"><pre><span class="line"># 进入存放目录</span><br><span class="line">cd data/witness_node_data_dir/blockchain/</span><br><span class="line"># 下载</span><br><span class="line">wget -c http://da.mypi.win/block_log</span><br></pre></td></tr></table></figure>

<blockquote>
<p>建议：把下载放在 screen 中执行，下载结束后，返回 steem-docker&#x2F; 目录</p>
</blockquote>
<h2 id="（五）修改配置文件"><a href="#（五）修改配置文件" class="headerlink" title="（五）修改配置文件"></a>（五）修改配置文件</h2><figure class="highlight plaintext"><table><tr><td class="code"><pre><span class="line">vim data/witness_node_data_dir/config.ini</span><br></pre></td></tr></table></figure>

<h3 id="需要着重修改的是"><a href="#需要着重修改的是" class="headerlink" title="需要着重修改的是"></a>需要着重修改的是</h3><ul>
<li><p>(1) 把 p2p 节点注释掉，可以使用默认p2p节点，也可以参考这里 <a href="https://steemit.com/cn/@ety001/steem-seed">https:&#x2F;&#x2F;steemit.com&#x2F;cn&#x2F;@ety001&#x2F;steem-seed</a></p>
</li>
<li><p>(2) 注释掉 <strong>shared-file-dir</strong>，也就是不使用 <strong>&#x2F;dev&#x2F;shm</strong> ，这可以剩下不少内存</p>
</li>
<li><p>(3) 打开下面的两个配置</p>
<figure class="highlight plaintext"><table><tr><td class="code"><pre><span class="line">webserver-http-endpoint = 0.0.0.0:8090</span><br><span class="line">webserver-ws-endpoint = 0.0.0.0:8091</span><br></pre></td></tr></table></figure>
</li>
<li><p>(4) 增加plugin，其中没有 follow 插件，该插件可能有些问题，建议直接上 hivemind。</p>
<figure class="highlight plaintext"><table><tr><td class="code"><pre><span class="line">plugin = webserver p2p json_rpc witness account_by_key reputation market_history</span><br><span class="line">plugin = database_api account_by_key_api network_broadcast_api reputation_api market_history_api condenser_api block_api rc_api</span><br></pre></td></tr></table></figure></li>
</ul>
<h2 id="（六）下载镜像"><a href="#（六）下载镜像" class="headerlink" title="（六）下载镜像"></a>（六）下载镜像</h2><p>由于 @someguy123 没有提供打包好的 0.22.5 mira 版镜像，<br>所以你需要用 <code>dkr_fullnode</code> 目录下的 <code>Dockerfile</code> 自己编译。</p>
<p>或者直接使用我编译好的，该教程则以我的镜像为例。</p>
<ul>
<li>(1) 先拉取镜像<figure class="highlight plaintext"><table><tr><td class="code"><pre><span class="line">docker pull ety001/steem-full-mira:0.22.5</span><br></pre></td></tr></table></figure></li>
<li>(2) 镜像重命名。<code>run.sh</code> 使用的镜像名须为 <code>steem</code>。<figure class="highlight plaintext"><table><tr><td class="code"><pre><span class="line">docker tag ety001/steem-full-mira:0.22.5 steem</span><br></pre></td></tr></table></figure></li>
</ul>
<h2 id="（七）修改-run-sh"><a href="#（七）修改-run-sh" class="headerlink" title="（七）修改 run.sh"></a>（七）修改 run.sh</h2><p>由于默认是只映射了 2001 端口出来，所以还需要修改 <code>run.sh</code>。<br>打开文件，找到头部 <code>PORTS</code> 设置，参照下面的方式修改</p>
<figure class="highlight plaintext"><table><tr><td class="code"><pre><span class="line">: $&#123;PORTS=&quot;2001,8090,8091&quot;&#125;</span><br></pre></td></tr></table></figure>

<blockquote>
<p>上面的例子就是映射容器的 2001，8090，8091三个端口</p>
</blockquote>
<h2 id="（八）开始replay"><a href="#（八）开始replay" class="headerlink" title="（八）开始replay"></a>（八）开始replay</h2><figure class="highlight plaintext"><table><tr><td class="code"><pre><span class="line">./run.sh replay</span><br></pre></td></tr></table></figure>

<h2 id="（九）-replay-结束后"><a href="#（九）-replay-结束后" class="headerlink" title="（九） replay 结束后"></a>（九） replay 结束后</h2><p>replay结束后，可以选择不管，也可以 <code>./run.sh stop &amp;&amp; ./run.sh start</code> 重新启动。</p>
<h1 id="总结"><a href="#总结" class="headerlink" title="总结"></a>总结</h1><p>以上就是大致的部署 0.22.5 mira 版的步骤。真正的全节点还需要部署 jussi 和 hivemind。</p>
<p>jussi 相当于是接口层，后面跟着 steemd 和 hivemind 提供数据。</p>
<p>目前还没有研究 hivemind 的搭建。</p>
<hr>
<h4 id="PS-便宜的独立服务器推荐"><a href="#PS-便宜的独立服务器推荐" class="headerlink" title="PS: 便宜的独立服务器推荐"></a>PS: <a href="https://billing.dacentec.com/hostbill/?affid=723">便宜的独立服务器推荐</a></h4>]]></content>
      <tags>
        <tag>配置</tag>
        <tag>经验</tag>
        <tag>steem</tag>
        <tag>服务器</tag>
        <tag>steemit</tag>
      </tags>
  </entry>
  <entry>
    <title>中国大陆地区第一台不稳定Steem全节点正式上线</title>
    <url>/2020/03/23/the-first-steem-full-node-on-china-mainland.html</url>
    <content><![CDATA[<h1 id="前言"><a href="#前言" class="headerlink" title="前言"></a>前言</h1><p>鉴于之前全节点的内存占用太高（需要256G内存），一直没有机会去部署一台。后来Mira版出来后，社区也没有看到有相关的运行信息的帖子，而我也是懒，所以这个事情就一直拖到现在。</p>
<p>最近由于 Tron 收购 Steem 的事件发酵过程中，曾有一段时间多数节点不可用，于是我又重新把这个事情提上了议事日程。</p>
<p>经过两周的折腾，目前服务器已上线，地址是：</p>
<blockquote>
<p><a href="https://steem.61bts.com/">https://steem.61bts.com</a></p>
</blockquote>
<h1 id="相关信息"><a href="#相关信息" class="headerlink" title="相关信息"></a>相关信息</h1><p>下面就来总结下，以给想要搭建全节点的同学参考。</p>
<h2 id="软件实施方案"><a href="#软件实施方案" class="headerlink" title="软件实施方案"></a>软件实施方案</h2><p>目前我是使用 @someguy123 的 Docker 工具来部署的，整个部署过程还是很轻松的。其中需要注意的就是 <code>config.ini</code> 的配置中的 <code>plugin</code> 配置，可以参考官方的配置文件。</p>
<blockquote>
<p><a href="https://github.com/steemit/steem/blob/master/contrib/fullnode.config.ini">https://github.com/steemit/steem/blob/master/contrib/fullnode.config.ini</a><br>官方配置中缺少了 <code>follow</code> 插件</p>
</blockquote>
<p>另外就是 <code>Shared file</code> 的配置，如果要省内存，就不要把 <code>Shared file</code> 放到 <code>/dev/shm</code> 里，我的配置信息可以参考下：</p>
<figure class="highlight plaintext"><table><tr><td class="code"><pre><span class="line">shared-file-size = 64G</span><br><span class="line">shared-file-dir = /steem/witness_node_data_dir/blockchain/</span><br></pre></td></tr></table></figure>

<p>记得把 <code>web</code> 服务端口打开</p>
<figure class="highlight plaintext"><table><tr><td class="code"><pre><span class="line">webserver-http-endpoint = 0.0.0.0:8091</span><br><span class="line">webserver-ws-endpoint = 0.0.0.0:8090</span><br></pre></td></tr></table></figure>

<p>同时还要在 <code>run.sh</code> 中打开端口</p>
<figure class="highlight plaintext"><table><tr><td class="code"><pre><span class="line">: $&#123;PORTS=&quot;2001,8090,8091&quot;&#125;</span><br></pre></td></tr></table></figure>

<h2 id="硬件参考"><a href="#硬件参考" class="headerlink" title="硬件参考"></a>硬件参考</h2><p>目前我的服务器配置如下：</p>
<ul>
<li>双路 E5 2670</li>
<li>256G 内存</li>
<li>硬盘是 一块希捷 6T 硬盘（ST6000NM0115）和一块希捷 2T 硬盘（ST2000DM006）组成的 8T 大小的 LVM 卷</li>
</ul>
<h2 id="网络情况"><a href="#网络情况" class="headerlink" title="网络情况"></a>网络情况</h2><p>由于在国内主机服务商买大内存+高带宽的设备太特么几吧贵了，所以我用了一个折中的办法，这也是为什么我说是不稳定全节点的原因。</p>
<p>折中方案就是，机器自己组装放在家里，网络出口从机房买。</p>
<p>目前家里是联通光纤，上行是 30Mbps，然后在阿里云买了一台 1核 1G内存 5Mbps 青岛节点的 ECS（我家离青岛节点近，延时 10ms 以内），最后使用 <a href="https://github.com/ehang-io/nps">NPS&#x2F;NPC</a> 把家里的服务器端口映射到阿里云的 ECS上。</p>
<p>之所以使用 NPS 也是积累的经验。</p>
<p>最早的时候，我是家里用 DDNS 把动态公网 IP 绑定在一个域名A上，然后在 ECS 上，用 Nginx 反向代理到域名A。</p>
<p>这个方案的缺点就是，如果动态 IP 变了，那么你的 ECS 上的 Nginx 也需要重启才能刷新域名A到 IP 的 DNS 缓存。</p>
<p>而 NPS 是服务端&#x2F;客户端程序。客户端跑在家里的服务器上，服务端跑在 ECS 上。这样就是客户端主动去连接服务端，并建立隧道。这就避免了动态 IP 变动的尴尬。</p>
<p>目前服务最大的不稳定性，就是由于服务器在家里，意外断电的情况还是存在的。</p>
<h2 id="运行参考"><a href="#运行参考" class="headerlink" title="运行参考"></a>运行参考</h2><p>目前全节点运行后，内存占用情况是，<strong>真实内存占用不到 3G ，虚拟内存占用不到 14G</strong>。</p>
<p>区块数据的硬盘占用，在当前高度（41626529），<code>witness_node_data_dir/blockchain</code> <strong>目录的大小是 362G</strong>。</p>
<p>这次我先后尝试了带 <code>--memory-replay</code> 参数和不带参数的 <code>replay</code>。带着 <code>--memory-replay</code> 参数，目前的区块高度进行 <code>replay</code> 的话，需要 230G 内存。而不带参数，则只需要不到 3G 内存。</p>
<p>所以，内存足够的话，可以尝试用 <code>--memory-replay</code> 参数加速 <code>replay</code> 过程，等 <code>replay</code> 结束后，可以停掉进程后，去掉参数再启动，就可以了。</p>
<p>目前高度的数据，不使用 <code>--memory-replay</code> 参数，在机械硬盘的情况下，<code>replay</code> 一次大概需要6天多的时间。</p>
<h1 id="总结"><a href="#总结" class="headerlink" title="总结"></a>总结</h1><p>MIra版的确是最大程度把数据从内存里摘出来了，这对于社交平台服务端来说太重要了。因为社交平台的数据是爆炸性增长的，如果都怼到内存里，服务端的运行成本就太高了！</p>
<p>不过目前的架构设计还是没有完全解决后期数据量暴涨可能导致的成本问题、维护问题。</p>
<p>如果有什么问题，可以直接回复本帖。</p>
<p>完！撒花！</p>
]]></content>
      <tags>
        <tag>配置</tag>
        <tag>经验</tag>
        <tag>steem</tag>
        <tag>服务器</tag>
        <tag>steemit</tag>
      </tags>
  </entry>
  <entry>
    <title>解决CDN缓存301的问题</title>
    <url>/2020/03/20/fix-cloudflare-cdn-301-issue.html</url>
    <content><![CDATA[<p>今天在部署新的节点的时候，遇到了一个奇怪的事情，就是配置完 Nginx 后，访问 443 端口出现莫名其妙的 301 循环。</p>
<p>我的 Nginx 的配置文件如下：</p>
<figure class="highlight plaintext"><table><tr><td class="code"><pre><span class="line">server &#123;</span><br><span class="line">    listen 80;</span><br><span class="line">    server_name s2.61bts.com;</span><br><span class="line">    location / &#123;</span><br><span class="line">        return 301 https://s2.61bts.com$request_uri;</span><br><span class="line">    &#125;</span><br><span class="line">&#125;</span><br><span class="line">server &#123;</span><br><span class="line">    listen 443 ssl;</span><br><span class="line">    server_name s2.61bts.com;</span><br><span class="line">    ssl_certificate /etc/nginx/ssl/s2.61bts.com.fullchain.cer;</span><br><span class="line">    ssl_certificate_key /etc/nginx/ssl/s2.61bts.com.key;</span><br><span class="line">    ssl_ciphers &quot;EECDH+AESGCM:EDH+AESGCM:AES256+EECDH:AES256+EDH&quot;;</span><br><span class="line">    ssl_protocols TLSv1 TLSv1.1 TLSv1.2;</span><br><span class="line">    ssl_prefer_server_ciphers on;</span><br><span class="line">    ssl_session_cache shared:SSL:10m;</span><br><span class="line"></span><br><span class="line">    location / &#123;</span><br><span class="line">        proxy_redirect off;</span><br><span class="line">        proxy_set_header Host $host;</span><br><span class="line">        proxy_set_header X-Real-IP $remote_addr;</span><br><span class="line">        proxy_set_header X-Forwarded-For $proxy_add_x_forwarded_for;</span><br><span class="line">        proxy_pass http://172.20.0.21:8080;</span><br><span class="line">    &#125;</span><br><span class="line">&#125;</span><br></pre></td></tr></table></figure>

<p>正常情况下，访问 80 端口会 301 到 443 端口去，然后就正常访问了。</p>
<p>但是这次，却出现了 301 循环。</p>
<p>检查了 Nginx 配置，防火墙等等各个地方，就是没有查出原因来。</p>
<p>在命令行下用 curl 访问 443 端口显示的是 301 跳转的内容，总感觉哪个地方有缓存一样。</p>
<p>郁闷了小半天，突然想起来了我还有CDN没有检查。由于这个服务器是在国外，为了提升国内访问速度，所以我配置了CDN。</p>
<p>我登陆域名管理面板，把CDN先关掉，再访问一切正常！！还真是CDN的问题。</p>
<p>但是是哪里的配置导致的缓存呢？</p>
<p>最终发现原来是回源的问题。</p>
<p><img src="/upload/202003/2gsjgna1uruvUuS7ndgyCHjMdwbmktNvgzSa547pgFWFJLZKjAD3p9cNJFT1hhCFZFRxW8gNuejRvqKX5fMeP1dfh59wsRPWRKuRvAMjrQHLi6wZSW.png"></p>
<p>Cloudflare 默认的 SSL 策略是 Flexible，也就是回源的时候不使用 SSL&#x2F;TLS 加密，而是直接访问 80 端口。然后CDN一般都会直接缓存 301 页面，这就导致访问 443 的时候其实是访问的缓存，进而产生循环。</p>
<p>既然找到了原因那就好办了，只需要设置为 Full 模式，强制回源的时候走 443 端口就可以了。</p>
<p>设置好以后，重新打开CDN，清掉所有缓存，再访问，一切正常！</p>
]]></content>
      <tags>
        <tag>配置</tag>
        <tag>经验</tag>
        <tag>服务器</tag>
      </tags>
  </entry>
  <entry>
    <title>Steem Hivemind 搭建</title>
    <url>/2020/03/26/steem-hivemind-build.html</url>
    <content><![CDATA[<h1 id="前言"><a href="#前言" class="headerlink" title="前言"></a>前言</h1><p><a href="https://github.com/steemit/hivemind">hivemind</a> 其实就是为了解决 <code>steemd</code> 的 <code>API</code> 压力过大而设计的数据库，主要是把文章数据，关注数据等等一系列细碎但是访问频度高的数据整理出来。</p>
<h1 id="准备"><a href="#准备" class="headerlink" title="准备"></a>准备</h1><ul>
<li>docker-compose</li>
</ul>
<h1 id="开始"><a href="#开始" class="headerlink" title="开始"></a>开始</h1><h2 id="1-新建目录"><a href="#1-新建目录" class="headerlink" title="1) 新建目录"></a>1) 新建目录</h2><figure class="highlight plaintext"><table><tr><td class="code"><pre><span class="line">mkdir hivemind</span><br></pre></td></tr></table></figure>
<p>接下来的东西都将放在这个目录里面。</p>
<h2 id="2-新建-docker-compose-yml"><a href="#2-新建-docker-compose-yml" class="headerlink" title="2) 新建 docker-compose.yml"></a>2) 新建 <code>docker-compose.yml</code></h2><p>在 <code>hivemind/</code> 目录下创建 <code>docker-compose.yml</code> 文件，内容如下：</p>
<figure class="highlight plaintext"><table><tr><td class="code"><pre><span class="line">version: &#x27;3&#x27;</span><br><span class="line">services:</span><br><span class="line">  db:</span><br><span class="line">    image: postgres</span><br><span class="line">    environment:</span><br><span class="line">      POSTGRES_USER: steem</span><br><span class="line">      POSTGRES_PASSWORD: steem</span><br><span class="line">      POSTGRES_DB: hivedb</span><br><span class="line">    volumes:</span><br><span class="line">      - ./data:/var/lib/postgresql/data</span><br><span class="line">    restart: always</span><br><span class="line">  hive:</span><br><span class="line">    depends_on:</span><br><span class="line">      - db</span><br><span class="line">    image: ety001/hivemind</span><br><span class="line">    environment:</span><br><span class="line">      DATABASE_URL: postgresql://steem:steem@db:5432/hivedb</span><br><span class="line">      LOG_LEVEL: INFO</span><br><span class="line">      STEEMD_URL: http://172.20.0.10:8091</span><br><span class="line">      SYNC_SERVICE: 1</span><br><span class="line">    ports:</span><br><span class="line">      - 8888:8080</span><br><span class="line">    links:</span><br><span class="line">      - db:db</span><br><span class="line">    restart: always</span><br></pre></td></tr></table></figure>

<p>这里注意，需要修改 <code>STEEMD_URL</code> 为你的 <code>steemd</code> 的 <code>webserver</code> 地址。<br>另外，检查 <code>8888</code> 端口是否占用，如果已被占用，换之。</p>
<h2 id="3-启动"><a href="#3-启动" class="headerlink" title="3) 启动"></a>3) 启动</h2><figure class="highlight plaintext"><table><tr><td class="code"><pre><span class="line">docker-compose up -d</span><br></pre></td></tr></table></figure>

<p>可以通过下面的命令查看容器名</p>
<figure class="highlight plaintext"><table><tr><td class="code"><pre><span class="line">docker-compose ps</span><br></pre></td></tr></table></figure>

<p>假设容器名是 <code>hivemind_hive_1</code>，可以通过下面的命令查看Log</p>
<figure class="highlight plaintext"><table><tr><td class="code"><pre><span class="line">docker logs -f --tail 1000 hivemind_hive_1</span><br></pre></td></tr></table></figure>

<p>可以通过下面的命令查看同步进度</p>
<figure class="highlight plaintext"><table><tr><td class="code"><pre><span class="line">docker exec -it hivemind_hive_1 hive status</span><br></pre></td></tr></table></figure>

<p><img src="/upload/202003/hivemind.png"></p>
<h2 id="4-配置-jussi"><a href="#4-配置-jussi" class="headerlink" title="4) 配置 jussi"></a>4) 配置 <code>jussi</code></h2><p>如果是按照之前的教程 <a href="https://steemit.com/cn/@ety001/jussi">https:&#x2F;&#x2F;steemit.com&#x2F;cn&#x2F;@ety001&#x2F;jussi</a> 搭建的，切换到 <code>jussi</code> 目录下，下载针对 <code>hivemind</code> 的配置文件。</p>
<figure class="highlight plaintext"><table><tr><td class="code"><pre><span class="line">wget -c https://raw.githubusercontent.com/steemit/jussi/master/EXAMPLE_hivemind_upstream_config.json</span><br></pre></td></tr></table></figure>

<p>改一下名</p>
<figure class="highlight plaintext"><table><tr><td class="code"><pre><span class="line">mv  EXAMPLE_hivemind_upstream_config.json  hive_config.json</span><br></pre></td></tr></table></figure>

<p>打开这个配置文件，把里面所有标有 <code>steemd</code> 的 <code>URL</code> 换成你的 <code>steemd</code> 地址，所有标有 <code>hivemind</code> 的 <code>URL</code> 换成你的 <code>hivemind</code> 的地址。</p>
<p>例如，你宿主机IP是 <code>1.1.1.1</code>， <code>steemd</code> 是 <code>http://1.1.1.1:8091</code>，<code>hivemind</code> 是 <code>http://1.1.1.1:8888</code>，那么把 <code>https://your.account.history.steemd.url</code> 换成 <code>http://1.1.1.1:8091</code>，把 <code>https://your.hivemind.url</code> 换成 <code>http://1.1.1.1:8888</code>。</p>
<p>修改好以后，再打开 <code>jussi</code> 的 <code>docker-compose.yml</code>，把其中的配置文件映射修改为</p>
<figure class="highlight plaintext"><table><tr><td class="code"><pre><span class="line">volumes:</span><br><span class="line">      - ./hive_config.json:/app/config.json</span><br></pre></td></tr></table></figure>

<p>保存后，重启 <code>jussi</code> 完成配置</p>
<figure class="highlight plaintext"><table><tr><td class="code"><pre><span class="line">docker-compose down &amp;&amp; docker-compose up -d</span><br></pre></td></tr></table></figure>

<p>剩下的就等 <code>hivemind</code> 完成同步。</p>
<h1 id="其他"><a href="#其他" class="headerlink" title="其他"></a>其他</h1><h2 id="1-关于编译"><a href="#1-关于编译" class="headerlink" title="1) 关于编译"></a>1) 关于编译</h2><p>本例中使用了我编译好的 <code>hivemind</code> 镜像，你可以选择自己编译，步骤是：</p>
<p>先下载代码</p>
<figure class="highlight plaintext"><table><tr><td class="code"><pre><span class="line">git clone https://github.com/steemit/hivemind.git</span><br></pre></td></tr></table></figure>

<p>编译</p>
<figure class="highlight plaintext"><table><tr><td class="code"><pre><span class="line">cd hivemind</span><br><span class="line">docker build -t hivemind .</span><br></pre></td></tr></table></figure>

<h2 id="2-关于-PostgreSQL-优化"><a href="#2-关于-PostgreSQL-优化" class="headerlink" title="2) 关于 PostgreSQL 优化"></a>2) 关于 <code>PostgreSQL</code> 优化</h2><p>如果你想优化 <code>PostgreSQL</code>，可以参考下面的步骤：</p>
<p>先进入到 <code>hivemind/</code> 目录下，然后导出容器里的默认配置文件</p>
<figure class="highlight plaintext"><table><tr><td class="code"><pre><span class="line">docker run -i --rm postgres cat /usr/share/postgresql/postgresql.conf.sample &gt; my-postgres.conf</span><br></pre></td></tr></table></figure>

<p>把你想修改的参数在 <code>my-postgres.conf</code> 中修改好。官方给了一份 16G 内存 SSD 硬盘的优化方案作为参考：</p>
<figure class="highlight plaintext"><table><tr><td class="code"><pre><span class="line">effective_cache_size = 12GB # 50-75% of avail memory</span><br><span class="line">maintenance_work_mem = 2GB</span><br><span class="line">random_page_cost = 1.0      # assuming SSD storage</span><br><span class="line">shared_buffers = 4GB        # 25% of memory</span><br><span class="line">work_mem = 512MB</span><br><span class="line">synchronous_commit = off</span><br><span class="line">checkpoint_completion_target = 0.9</span><br><span class="line">checkpoint_timeout = 30min</span><br><span class="line">max_wal_size = 4GB</span><br></pre></td></tr></table></figure>

<p>修改好以后，打开 <code>docker-compose.yml</code> 文件，增加配置文件映射，</p>
<figure class="highlight plaintext"><table><tr><td class="code"><pre><span class="line">volumes:</span><br><span class="line">      - ./data:/var/lib/postgresql/data</span><br><span class="line">      - ./my-postgres.conf:/etc/postgresql/postgresql.conf</span><br></pre></td></tr></table></figure>

<p>最后一行就是我们新增的配置。</p>
<p>保存后，重启</p>
<figure class="highlight plaintext"><table><tr><td class="code"><pre><span class="line">docker-compose down &amp;&amp; docker-compose up -d</span><br></pre></td></tr></table></figure>

<h2 id="3-关于容器端口映射"><a href="#3-关于容器端口映射" class="headerlink" title="3) 关于容器端口映射"></a>3) 关于容器端口映射</h2><p>由于 <code>docker</code> 的默认策略优先级在 <code>iptables</code> 中比 <code>ufw</code> 和 <code>firewalld</code> 高，所以所有把容器端口映射出来的操作，端口在公网是可被访问的。</p>
<p>由于我的 <code>nginx</code> 是通过容器运行的，所以我没有对端口映射，而是直接把相关容器额外加入到 <code>nginx</code> 容器所在网络下，并指定好固定IP，这样各个容器直接可以互访。</p>
<hr>
<h4 id="PS-便宜的独立服务器推荐"><a href="#PS-便宜的独立服务器推荐" class="headerlink" title="PS: 便宜的独立服务器推荐"></a>PS: <a href="https://billing.dacentec.com/hostbill/?affid=723">便宜的独立服务器推荐</a></h4>]]></content>
      <tags>
        <tag>配置</tag>
        <tag>经验</tag>
        <tag>steem</tag>
        <tag>服务器</tag>
        <tag>steemit</tag>
      </tags>
  </entry>
  <entry>
    <title>终于部署成功 handshake 域名</title>
    <url>/2020/04/01/finally-build-handshake-service.html</url>
    <content><![CDATA[<h1 id="前言"><a href="#前言" class="headerlink" title="前言"></a>前言</h1><p><code>handshake</code> 是一个基于区块链的分布式域名服务链。他的目标就是要把目前中心化的 ICANN 给取代掉。</p>
<p>由于 <code>handshake</code> 针对 <code>github</code> 的开发者进行了空投，我运气比较好的符合了空投规则，拿到了4000多个代币，于是我就有机会来体验一下整个拍卖和运行的过程。</p>
<h1 id="原理"><a href="#原理" class="headerlink" title="原理"></a>原理</h1><p>在目前阶段，我们是如何解析域名的呢？</p>
<p>假如我们有一个 <code>steem.61bts.com</code> 这样的域名，当我们访问这个域名的时候，系统会去DNS服务器获取 <code>61bts.com</code> 的 <code>NS</code> 记录，<code>NS</code>记录实际就是一台 <code>name server</code>，上面记录了 <code>61bts.com</code> 下面的所有域名与IP的对应关系。系统拿到 <code>NS</code> 记录后，访问 <code>name server</code>，就能拿到 <code>steem.61bts.com</code> 的真实 IP 地址了，然后就可以建立访问链接了。</p>
<p>那么有了 <code>handshake</code> 后是什么流程呢？</p>
<p>其实 <code>handshake</code> 做的工作就是把你的域名的 <code>NS</code> 记录存储在区块链上，这样人们访问 <code>steem.61bts.com</code> 的时候，会去区块链上找寻 <code>61bts.com</code> 的 <code>NS</code> 记录，然后再去访问 <code>name server</code>，最终拿到 IP 地址。</p>
<h1 id="操作"><a href="#操作" class="headerlink" title="操作"></a>操作</h1><p>目前 <code>handshake</code> 有一个面向用户友好的 <code>UI</code> 界面，即 <a href="https://namebase.io/">https://namebase.io</a>。</p>
<p><code>Namebase</code> 的作用就是给用户提供一个方便拍卖，方便配置的 UI 界面。尤其是最近 <code>Namebase</code> 在配置面板上增加了他们自己维护的 <code>name server</code>（下面就简称 <code>NS</code> 了），更加方便用户去配置了。</p>
<p>这次的教程就是基于 <code>Namebase</code> 提供的 <code>NS</code> 服务器来搞的。</p>
<h2 id="配置-NS-记录上链"><a href="#配置-NS-记录上链" class="headerlink" title="配置 NS 记录上链"></a>配置 NS 记录上链</h2><p>访问 <a href="https://www.namebase.io/domain-manager">https://www.namebase.io/domain-manager</a> ，选择你要配置的域名，点击后面的 <strong>Edit DNS</strong>。</p>
<p>在新的页面上，你可以看到分为上下两部分。</p>
<p><img src="/upload/202004/handshake.png"></p>
<p>上半部分是配置域名的 <code>NS</code> 记录，下半部分是配置域名的解析地址（也就是 <code>Namebase</code> 官方提供给我们的 <code>NS</code> 的配置面板）。</p>
<p>在目前的中心化网络里，我们在域名商处买了域名，常见到的就是下半部分的配置面板。</p>
<p>在此之前，我们需要运行一台自己的 <code>NS</code> 服务器，但是现在，我们只需要把 <code>Namebase</code> 官方提供的 <code>NS</code> 的 IP 地址 <code>44.231.6.183</code> 添加进去即可。</p>
<p>具体操作方法就是在上半部分，增加一条 <code>NS</code> 记录，其中 <code>Name</code> 栏填写 <code>ns1</code>，<code>Value/Data</code> 栏填写 <code>44.231.6.183</code>，然后，在页面最下面，点击保存。</p>
<p>由于这个记录需要上链，所以需要等一段时间，等自己的记录成功打包进块，就完成了这部分的配置。也就是大家可以通过区块链查到你的域名指向了哪个 <code>NS</code> 服务器。</p>
<p>之后，你可以在下半部分，配置域名的 <code>A</code> 记录之类的了。</p>
<h2 id="配置-handshake-全节点"><a href="#配置-handshake-全节点" class="headerlink" title="配置 handshake 全节点"></a>配置 handshake 全节点</h2><p>那么在这个等待的时间，我们需要去搭建一个 <code>handshake</code> 的全节点。全节点的作用就是把整个区块链的数据下载下来，然后提供 <code>DNS</code> 服务，供你查询链上的域名 <code>NS</code> 记录。</p>
<p>我个人比较喜欢使用 <code>Docker</code>，所以这里的部署方案也是 <code>Docker</code> 部署。</p>
<p>目前，我已经编译好了一个 <code>Docker</code> 镜像，大家可以直接使用。</p>
<figure class="highlight plaintext"><table><tr><td class="code"><pre><span class="line">docker pull ety001/hsd:latest</span><br></pre></td></tr></table></figure>

<blockquote>
<p>你当然也可以自己去编译，源码库在这里： <a href="https://github.com/handshake-org/hsd">https://github.com/handshake-org/hsd</a> 。</p>
</blockquote>
<p>拉取完镜像后，创建一个目录用来存放区块数据，假设目录名为 <code>/data</code></p>
<p>如果你想用宿主机网络运行容器，则执行下面的命令</p>
<figure class="highlight plaintext"><table><tr><td class="code"><pre><span class="line">docker run -itd \</span><br><span class="line">    --name hsd \</span><br><span class="line">    --restart always \</span><br><span class="line">    -v /data:/root/.hsd \</span><br><span class="line">    ety001/hsd:latest \</span><br><span class="line">    hsd --rs-host 0.0.0.0 --rs-port 53 --rs-no-unbound true</span><br></pre></td></tr></table></figure>

<p>如果你想用 <code>Docker</code> 独立的内部网络，则执行下面的命令</p>
<figure class="highlight plaintext"><table><tr><td class="code"><pre><span class="line">docker run -itd \</span><br><span class="line">    --name hsd \</span><br><span class="line">    --restart always \</span><br><span class="line">    -v /data:/root/.hsd \</span><br><span class="line">    -p 53:53 \</span><br><span class="line">    -p 53:53/udp \</span><br><span class="line">    ety001/hsd:latest \</span><br><span class="line">    hsd --rs-host 0.0.0.0 --rs-port 53 --rs-no-unbound true</span><br></pre></td></tr></table></figure>

<blockquote>
<p>注意：请先查看你的 53 端口是否有其他程序占用</p>
</blockquote>
<p>这样，一个全节点就在你的本地启动了。你可以使用下面的命令来查看 <code>Log</code> 信息</p>
<figure class="highlight plaintext"><table><tr><td class="code"><pre><span class="line">docker logs -f --tail 100 hsd</span><br></pre></td></tr></table></figure>

<p>等到所有区块同步完成，你就可以测试下你的全节点是否可以正确检索到你的域名的 <code>NS</code> 记录了。</p>
<figure class="highlight plaintext"><table><tr><td class="code"><pre><span class="line">dig @localhost 你的handshake域名</span><br></pre></td></tr></table></figure>

<p>如果一切顺利，你就可以看到你刚才配置的域名 <code>A</code> 记录了。</p>
<h1 id="完成"><a href="#完成" class="headerlink" title="完成"></a>完成</h1><p>上面的操作，如果一切顺利的话，这个时候，你就可以把你网络中的首选DNS换成你运行全节点的机器的IP了。</p>
<p>我是在我家里的磁盘阵列上搭建的全节点，然后在路由器上，把首选 <code>DNS</code> 设置为了磁盘阵列的机器的 IP，这样我家里的所有设备就都可以访问 <code>handshake</code> 的域名了。</p>
<p>另外，我还在公网上搭建了一个全节点用于解析，<code>172.81.246.231</code>，欢迎体验。</p>
]]></content>
      <tags>
        <tag>配置</tag>
        <tag>经验</tag>
        <tag>服务器</tag>
        <tag>handshake</tag>
        <tag>namebase</tag>
      </tags>
  </entry>
  <entry>
    <title>Steem Jussi 搭建</title>
    <url>/2020/03/26/steem-jussi-build.html</url>
    <content><![CDATA[<h1 id="前言"><a href="#前言" class="headerlink" title="前言"></a>前言</h1><p><a href="https://github.com/steemit/jussi">jussi</a> 是全节点的最前端的缓存层，负责用 JSON 把后端数据源数据格式统一，且提供缓存功能，提高吞吐量。</p>
<p>这篇帖子就来简单说下如何搭建。</p>
<blockquote>
<p>注意：需要提前安装 <code>docker-compose</code></p>
</blockquote>
<h1 id="开始"><a href="#开始" class="headerlink" title="开始"></a>开始</h1><h2 id="1-创建目录"><a href="#1-创建目录" class="headerlink" title="1. 创建目录"></a>1. 创建目录</h2><p>新建一个目录，用于存储与 <code>jussi</code> 相关的东西</p>
<figure class="highlight plaintext"><table><tr><td class="code"><pre><span class="line">mkdir jussi</span><br></pre></td></tr></table></figure>

<h2 id="2-创建配置文件"><a href="#2-创建配置文件" class="headerlink" title="2. 创建配置文件"></a>2. 创建配置文件</h2><p>在 <code>jussi/</code> 目录下，新建 <code>config.json</code> 文件，内容如下</p>
<figure class="highlight plaintext"><table><tr><td class="code"><pre><span class="line">&#123;</span><br><span class="line">  &quot;limits&quot;: &#123;</span><br><span class="line">    &quot;blacklist_accounts&quot;: [</span><br><span class="line">      &quot;non-steemit&quot;</span><br><span class="line">    ]</span><br><span class="line">  &#125;,</span><br><span class="line">  &quot;upstreams&quot;: [</span><br><span class="line">    &#123;</span><br><span class="line">      &quot;name&quot;: &quot;steemd&quot;,</span><br><span class="line">      &quot;translate_to_appbase&quot;: true,</span><br><span class="line">      &quot;urls&quot;: [</span><br><span class="line">        [</span><br><span class="line">          &quot;steemd&quot;,</span><br><span class="line">         &quot;http://172.20.0.10:8091&quot;</span><br><span class="line">        ]</span><br><span class="line">      ],</span><br><span class="line">      &quot;ttls&quot;: [</span><br><span class="line">        [</span><br><span class="line">          &quot;steemd&quot;,</span><br><span class="line">          3</span><br><span class="line">        ],</span><br><span class="line">        [</span><br><span class="line">          &quot;steemd.login_api&quot;,</span><br><span class="line">          -1</span><br><span class="line">        ],</span><br><span class="line">        [</span><br><span class="line">          &quot;steemd.network_broadcast_api&quot;,</span><br><span class="line">          -1</span><br><span class="line">        ],</span><br><span class="line">        [</span><br><span class="line">          &quot;steemd.follow_api&quot;,</span><br><span class="line">          10</span><br><span class="line">        ],</span><br><span class="line">        [</span><br><span class="line">          &quot;steemd.market_history_api&quot;,</span><br><span class="line">          1</span><br><span class="line">        ],</span><br><span class="line">        [</span><br><span class="line">          &quot;steemd.database_api&quot;,</span><br><span class="line">          3</span><br><span class="line">        ],</span><br><span class="line">        [</span><br><span class="line">          &quot;steemd.database_api.get_block&quot;,</span><br><span class="line">          -2</span><br><span class="line">        ],</span><br><span class="line">        [</span><br><span class="line">          &quot;steemd.database_api.get_block_header&quot;,</span><br><span class="line">          -2</span><br><span class="line">        ],</span><br><span class="line">        [</span><br><span class="line">          &quot;steemd.database_api.get_content&quot;,</span><br><span class="line">          1</span><br><span class="line">        ],</span><br><span class="line">        [</span><br><span class="line">          &quot;steemd.database_api.get_state&quot;,</span><br><span class="line">          1</span><br><span class="line">        ],</span><br><span class="line">        [</span><br><span class="line">          &quot;steemd.database_api.get_state.params=[&#x27;/trending&#x27;]&quot;,</span><br><span class="line">          30</span><br><span class="line">        ],</span><br><span class="line">        [</span><br><span class="line">          &quot;steemd.database_api.get_state.params=[&#x27;trending&#x27;]&quot;,</span><br><span class="line">          30</span><br><span class="line">        ],</span><br><span class="line">        [</span><br><span class="line">          &quot;steemd.database_api.get_state.params=[&#x27;/hot&#x27;]&quot;,</span><br><span class="line">          30</span><br><span class="line">        ],</span><br><span class="line">        [</span><br><span class="line">          &quot;steemd.database_api.get_state.params=[&#x27;/welcome&#x27;]&quot;,</span><br><span class="line">          30</span><br><span class="line">        ],</span><br><span class="line">        [</span><br><span class="line">          &quot;steemd.database_api.get_state.params=[&#x27;/promoted&#x27;]&quot;,</span><br><span class="line">          30</span><br><span class="line">        ],</span><br><span class="line">        [</span><br><span class="line">          &quot;steemd.database_api.get_state.params=[&#x27;/created&#x27;]&quot;,</span><br><span class="line">          10</span><br><span class="line">        ],</span><br><span class="line">        [</span><br><span class="line">          &quot;steemd.database_api.get_dynamic_global_properties&quot;,</span><br><span class="line">          1</span><br><span class="line">        ]</span><br><span class="line">      ],</span><br><span class="line">      &quot;timeouts&quot;: [</span><br><span class="line">        [</span><br><span class="line">          &quot;steemd&quot;,</span><br><span class="line">          5</span><br><span class="line">        ],</span><br><span class="line">        [</span><br><span class="line">          &quot;steemd.network_broadcast_api&quot;,</span><br><span class="line">          0</span><br><span class="line">        ]</span><br><span class="line">      ]</span><br><span class="line">    &#125;,</span><br><span class="line">    &#123;</span><br><span class="line">      &quot;name&quot;: &quot;appbase&quot;,</span><br><span class="line">      &quot;urls&quot;: [</span><br><span class="line">        [</span><br><span class="line">          &quot;appbase&quot;,</span><br><span class="line">          &quot;http://172.20.0.10:8091&quot;</span><br><span class="line">        ]</span><br><span class="line">      ],</span><br><span class="line">      &quot;ttls&quot;: [</span><br><span class="line">        [</span><br><span class="line">          &quot;appbase&quot;,</span><br><span class="line">          -2</span><br><span class="line">        ],</span><br><span class="line">        [</span><br><span class="line">          &quot;appbase.block_api&quot;,</span><br><span class="line">          -2</span><br><span class="line">        ],</span><br><span class="line">        [</span><br><span class="line">          &quot;appbase.database_api&quot;,</span><br><span class="line">          1</span><br><span class="line">        ]</span><br><span class="line">      ],</span><br><span class="line">      &quot;timeouts&quot;: [</span><br><span class="line">        [</span><br><span class="line">          &quot;appbase&quot;,</span><br><span class="line">          3</span><br><span class="line">        ],</span><br><span class="line">        [</span><br><span class="line">          &quot;appbase.chain_api.push_block&quot;,</span><br><span class="line">          0</span><br><span class="line">        ],</span><br><span class="line">        [</span><br><span class="line">          &quot;appbase.chain_api.push_transaction&quot;,</span><br><span class="line">          0</span><br><span class="line">        ],</span><br><span class="line">        [</span><br><span class="line">          &quot;appbase.network_broadcast_api&quot;,</span><br><span class="line">          0</span><br><span class="line">        ],</span><br><span class="line">        [</span><br><span class="line">          &quot;appbase.condenser_api.broadcast_block&quot;,</span><br><span class="line">          0</span><br><span class="line">        ],</span><br><span class="line">        [</span><br><span class="line">          &quot;appbase.condenser_api.broadcast_transaction&quot;,</span><br><span class="line">          0</span><br><span class="line">        ],</span><br><span class="line">        [</span><br><span class="line">          &quot;appbase.condenser_api.broadcast_transaction_synchronous&quot;,</span><br><span class="line">          0</span><br><span class="line">        ],</span><br><span class="line">        [</span><br><span class="line">          &quot;appbase.condenser_api.get_ops_in_block.params=[2889020,false]&quot;,</span><br><span class="line">          20</span><br><span class="line">        ]</span><br><span class="line">      ]</span><br><span class="line">    &#125;</span><br><span class="line">  ]</span><br><span class="line">&#125;</span><br></pre></td></tr></table></figure>

<p>搜索 <code>http://172.20.0.10:8091</code> ，把里面出现两次的地方，都换成你自己的 <code>steemd</code> 的地址和端口。</p>
<blockquote>
<p>注意：填写的IP是否可以在容器内被访问。比如你宿主机IP是1.1.1.1，你用1.1.1.1:8091可以访问 <code>steemd</code> ，那么在配置文件里就这样填写即可。</p>
</blockquote>
<h2 id="3-创建-docker-compose-yml"><a href="#3-创建-docker-compose-yml" class="headerlink" title="3. 创建 docker-compose.yml"></a>3. 创建 <code>docker-compose.yml</code></h2><p>在 <code>jussi/</code> 目录下创建 <code>docker-compose.yml</code>，内容如下：</p>
<figure class="highlight plaintext"><table><tr><td class="code"><pre><span class="line">version: &quot;3.3&quot;</span><br><span class="line">services:</span><br><span class="line">  jussi:</span><br><span class="line">    restart: &quot;always&quot;</span><br><span class="line">    image: &quot;steemit/jussi:latest&quot;</span><br><span class="line">    ports:</span><br><span class="line">      - &quot;8080:8080&quot;</span><br><span class="line">    environment:</span><br><span class="line">      JUSSI_UPSTREAM_CONFIG_FILE: /app/config.json</span><br><span class="line">      JUSSI_REDIS_URL: redis://redis1:6379</span><br><span class="line">    volumes:</span><br><span class="line">      - ./config.json:/app/config.json</span><br><span class="line">  redis1:</span><br><span class="line">    restart: &quot;always&quot;</span><br><span class="line">    image: &quot;redis:latest&quot;</span><br><span class="line">    volumes:</span><br><span class="line">      - ./redis1:/data</span><br></pre></td></tr></table></figure>

<blockquote>
<p>注意： 确认下你目前机器是否有程序占用 <code>8080</code> 端口，如果有占用，修改一下 <code>ports</code> 参数中冒号前面的端口号</p>
</blockquote>
<h2 id="4-启动"><a href="#4-启动" class="headerlink" title="4. 启动"></a>4. 启动</h2><p>进入 <code>jussi/</code> 目录后，执行</p>
<figure class="highlight plaintext"><table><tr><td class="code"><pre><span class="line">docker-compose up -d</span><br></pre></td></tr></table></figure>

<p>即可启动。启动后，<code>8080</code> 端口即为 <code>jussi</code> 的服务端口。配合 <code>nginx</code> 进行反向代理，加上证书即可。</p>
<h1 id="其他参考命令"><a href="#其他参考命令" class="headerlink" title="其他参考命令"></a>其他参考命令</h1><p>以下命令需要在 <code>jussi/</code> 目录下执行</p>
<h2 id="1-停止并卸载容器和网络"><a href="#1-停止并卸载容器和网络" class="headerlink" title="1. 停止并卸载容器和网络"></a>1. 停止并卸载容器和网络</h2><figure class="highlight plaintext"><table><tr><td class="code"><pre><span class="line">docker-compose down</span><br></pre></td></tr></table></figure>

<h2 id="2-查看相关运行容器"><a href="#2-查看相关运行容器" class="headerlink" title="2. 查看相关运行容器"></a>2. 查看相关运行容器</h2><figure class="highlight plaintext"><table><tr><td class="code"><pre><span class="line">docker-compose ps</span><br></pre></td></tr></table></figure>

<h2 id="3-查看log"><a href="#3-查看log" class="headerlink" title="3. 查看log"></a>3. 查看log</h2><figure class="highlight plaintext"><table><tr><td class="code"><pre><span class="line"># 查看log，并且截取最后100行，且持续输出。容器名不填就是全部容器</span><br><span class="line">docker-compose logs -f --tail 100 [容器名]</span><br></pre></td></tr></table></figure>

<h1 id="参考"><a href="#参考" class="headerlink" title="参考"></a>参考</h1><p><a href="https://github.com/steemit/jussi">https://github.com/steemit/jussi</a></p>
<hr>
<h4 id="PS-便宜的独立服务器推荐"><a href="#PS-便宜的独立服务器推荐" class="headerlink" title="PS: 便宜的独立服务器推荐"></a>PS: <a href="https://billing.dacentec.com/hostbill/?affid=723">便宜的独立服务器推荐</a></h4>]]></content>
      <tags>
        <tag>配置</tag>
        <tag>经验</tag>
        <tag>steem</tag>
        <tag>服务器</tag>
        <tag>steemit</tag>
      </tags>
  </entry>
  <entry>
    <title>又从自由职业换回远程工作了</title>
    <url>/2020/04/20/back-to-job-new-trail.html</url>
    <content><![CDATA[<p>《<a href="https://mp.weixin.qq.com/s/WIW3QWunQF__9f4iIR8Ffw">今天正式离职了</a>》这是之前结束远程工作的时候，写的文章，距离现在过去了两年多了。现在我又重新回到了远程工作的状态。</p>
<p>自由职业和远程工作有什么不同？我觉得最大的不同就是，自由职业是为自己挣钱，远程工作是为别人打工。自由职业就像是创业，在没有准备好的时候去搞，很容易就吃了这顿没有下顿。而远程工作，更多的只是你的时间地点更灵活了，不受限制而已，工作关系和需要对谁负责的关系，跟传统坐班相比是没有变化的。</p>
<p>这次是借着孙宇晨收购Steemit的东风，加入到了 TRON （波场）的团队，来参与 Steem 公链相关的开发工作。</p>
<p>这应该算是我职业生涯里，第三次不是为了外包而活着了，也是我一直向往的工作体验。</p>
<p>能够一直打磨一件产品，让产品具有灵魂，让用户用的爽，是一件很有情怀的事情，因为这即实现了自我价值，又实现了社会价值。</p>
<p>我一直认为我是个有情怀的程序员，就像《中国合伙人2》里的楚振辉，即使生活如此不堪，但是内心还是有一个不灭的理想。</p>
<p>十年前我是如此，即使现在被生活快要磨平棱角，我觉得我依旧如此，否则我也不会选择过去两年的自由职业的生活。</p>
<p>如果把过去两年看作是我的第二次创业，最大的感受就是骑驴找马才是正确的打开方式。</p>
<p>在上次离职的时候，我只是看到了一个努力方向，就决定了离职去干。最终的现实就是，你在花完你的预算后，就需要一边打零工养家，一边去折腾你自己的事情，最后就是自己的事情顾不上了。</p>
<p>另外只是有个想法，没有市场数据支撑，就亦然去做，那么中途迷茫的概率就很大。就像我在《<a href="https://mp.weixin.qq.com/s/WIW3QWunQF__9f4iIR8Ffw">今天正式离职了</a>》里写的上下半年的计划，其实最终没有一个实施好，都是因为做着做着发现了解决不了的问题，然后就半途而废了。</p>
<p>之后就会进入一个迷茫的时期，走不出来，接着就会一直很低落，时间会大把大把因为颓废而浪费。加上生活压力，整个人都是天天徘徊在崩溃边缘的。</p>
<p>所以骑驴找马，找到马后再遛一遛，确定是好马了，再决定要不要换坐骑。不过也有一个更重要的因素，可以推翻上面那个总结，那就是有钱。正所谓有钱不慌！</p>
<p>总之，新的工作开始了，又是一个新的起点了。</p>
<hr>
<h4 id="好用不贵的VPS"><a href="#好用不贵的VPS" class="headerlink" title="好用不贵的VPS"></a>好用不贵的VPS</h4><ul>
<li><a href="https://my.racknerd.com/aff.php?aff=856&pid=207">1核1G内存18G硬盘1Gbps带宽1000GB流量&#x2F;月，洛杉矶机房，$23&#x2F;年</a></li>
<li><a href="https://my.racknerd.com/aff.php?aff=856&pid=208">2核2G内存25G硬盘1Gbps带宽3000GB流量&#x2F;月，洛杉矶机房，$33&#x2F;年</a></li>
<li><a href="https://kvm.yunserver.com/aff.php?aff=140&pid=79">1核1G内存20G硬盘30Mbps带宽600GB流量&#x2F;月，去程163直连 + 回程三网CN2_GIA，日本机房，年付方案优惠码：Friday_1，299元&#x2F;年</a> , 测速链接: <a href="http://118.107.12.12/speedtest/">http://118.107.12.12/speedtest/</a></li>
<li><a href="https://1hour.win/">xxxx 更多主机 xxxx</a></li>
</ul>
]]></content>
      <tags>
        <tag>随笔</tag>
        <tag>区块链</tag>
        <tag>steem</tag>
        <tag>blockchain</tag>
        <tag>远程工作</tag>
      </tags>
  </entry>
  <entry>
    <title>解决nginx反代kibana显示空白页的问题</title>
    <url>/2020/04/26/fix-blank-page-when-proxy-kibana-through-nginx.html</url>
    <content><![CDATA[<p>之前<a href="/2019/10/11/bitshares-es-node-add-kibana.html">搭建的 <strong>bitshares elastic search</strong></a> ，已经有太久不维护了，最近因为调整服务器的硬盘为 RAID0，这才发现有挺多问题了。其中一个问题就是，通过公网服务器的 <code>nginx</code> 进行反向代理的 <code>kibana</code> 面板一直是空白。</p>
<p>具体的现象就是，直接访问服务端口，一切正常，但是只要通过 <code>nginx</code> 进行反向代理，就是空白页。通过看浏览器，能看到已经把页面的 <code>HTML</code> 代码都下载回来了，但是不知道哪里解析不了。</p>
<p>最终发现是反向代理的配置有问题，贴出来已经测试通过的配置来记录下这次的问题吧：</p>
<figure class="highlight plaintext"><table><tr><td class="code"><pre><span class="line">server &#123;</span><br><span class="line">    listen 443 ssl;</span><br><span class="line">    server_name **********;</span><br><span class="line">    ssl_certificate /etc/nginx/ssl/****.cer;</span><br><span class="line">    ssl_certificate_key /etc/nginx/ssl/****.key;</span><br><span class="line">    ssl_ciphers &quot;EECDH+AESGCM:EDH+AESGCM:AES256+EECDH:AES256+EDH&quot;;</span><br><span class="line">    ssl_protocols TLSv1 TLSv1.1 TLSv1.2;</span><br><span class="line">    ssl_prefer_server_ciphers on;</span><br><span class="line">    ssl_session_cache shared:SSL:10m;</span><br><span class="line">    location / &#123;</span><br><span class="line">        #proxy_redirect off;</span><br><span class="line">        proxy_http_version 1.1;</span><br><span class="line">        proxy_set_header Upgrade $http_upgrade;</span><br><span class="line">        proxy_set_header Connection &#x27;upgrade&#x27;;</span><br><span class="line">        proxy_set_header Host $host;</span><br><span class="line">        proxy_set_header X-Real-IP $remote_addr;</span><br><span class="line">        proxy_set_header X-Forwarded-For $proxy_add_x_forwarded_for;</span><br><span class="line">        proxy_cache_bypass $http_upgrade;</span><br><span class="line">        proxy_pass http://172.20.0.1:5601;</span><br><span class="line">    &#125;</span><br><span class="line">&#125;</span><br></pre></td></tr></table></figure>

<hr>
<h4 id="好用不贵的VPS"><a href="#好用不贵的VPS" class="headerlink" title="好用不贵的VPS"></a>好用不贵的VPS</h4><ul>
<li><a href="https://my.racknerd.com/aff.php?aff=856&pid=207">1核1G内存18G硬盘1Gbps带宽1000GB流量&#x2F;月，洛杉矶机房，$23&#x2F;年</a></li>
<li><a href="https://my.racknerd.com/aff.php?aff=856&pid=208">2核2G内存25G硬盘1Gbps带宽3000GB流量&#x2F;月，洛杉矶机房，$33&#x2F;年</a></li>
<li><a href="https://kvm.yunserver.com/aff.php?aff=140&pid=79">1核1G内存20G硬盘30Mbps带宽600GB流量&#x2F;月，去程163直连 + 回程三网CN2_GIA，日本机房，年付方案优惠码：Friday_1，299元&#x2F;年</a> , 测速链接: <a href="http://118.107.12.12/speedtest/">http://118.107.12.12/speedtest/</a></li>
<li><a href="https://1hour.win/">xxxx 更多主机 xxxx</a></li>
</ul>
]]></content>
      <tags>
        <tag>Server&amp;OS</tag>
        <tag>配置</tag>
        <tag>经验</tag>
        <tag>服务器</tag>
        <tag>kibana</tag>
        <tag>elastic</tag>
      </tags>
  </entry>
  <entry>
    <title>今天把家里的服务器新配了Raid0硬盘</title>
    <url>/2020/04/24/add-new-raid0-hard-disk-on-my-server.html</url>
    <content><![CDATA[<p>鉴于现在家里的服务器，跑的服务太多了，尤其是近期跑起来 <code>hivemind</code> 和 <code>account history node</code>，明显感觉硬盘读写跟不上节奏了。</p>
<p>之前为了降低成本，买的硬盘都是希捷最便宜的硬盘。一块2T的和一块6TB的，加起来才 ￥1618。然后通过 LVM 把这两块硬盘做成了一个整体。</p>
<p>这次为了保证读写速度，也是多花了些钱，买了稍微上点档次的硬盘。西数的企业级硬盘，两块4TB的硬盘，加起来将近 ￥2000。</p>
<p>除了买的硬盘贵了些，还打算做成 <code>Raid0</code> 来提升读写速度。</p>
<p><code>RAID</code>，<code>Redundant Arrays of Independent Disks</code>，即磁盘阵列，有“独立磁盘构成的具有冗余能力的阵列”之意。</p>
<p>这是一个可以让你用廉价硬盘去实现更高可靠的存储介质的技术方案。<code>RAID</code> 有好几个等级，其中 <code>RAID0</code> 是几种等级里，对读写速度提升最大，但是数据安全最差的。具体的原理，请自行搜索。</p>
<p>这次我使用 <code>LVM</code> 来实现 <code>RAID0</code>，实现步骤：</p>
<figure class="highlight plaintext"><table><tr><td class="code"><pre><span class="line"># pvcreate /dev/sd&#123;d,e&#125;1</span><br><span class="line"># vgcreate raid0 /dev/sd&#123;d,e&#125;1</span><br><span class="line"># lvcreate -l +100%free -i 2 -I 128 raid0 -n raid0_lv</span><br><span class="line"># mkfs.ext4 /dev/raid0/raid0_lv</span><br><span class="line"># mount /dev/raid0/raid0_lv /data/</span><br></pre></td></tr></table></figure>

<blockquote>
<p>注意：<br>1.如果你的硬盘容量大于2TB，请先使用 <code>fdisk</code> 把硬盘分区表改为 <code>GPT</code><br>2.使用 <code>fdisk</code> 把磁盘的标记选择为 <code>Linux LVM</code>，然后再执行 <code>pvcreate</code><br>3.<code>lvcreate</code> 命令里 <code>-i</code> 设置驱动器数量，<code>-I</code> 设置 stripesize</p>
</blockquote>
<p>配置好以后，测试了下写入速度，真是快的飞起</p>
<p><img src="/upload/202004/4pd3RNz6xuTe35R2KeP6cR7NTfsPB5quJSpMUl2M.png"></p>
<p>接下来就是把 <code>hivemind</code> 那些数据转移到新的硬盘下，进行工作了！</p>
<hr>
<h4 id="好用不贵的VPS"><a href="#好用不贵的VPS" class="headerlink" title="好用不贵的VPS"></a>好用不贵的VPS</h4><ul>
<li><a href="https://my.racknerd.com/aff.php?aff=856&pid=207">1核1G内存18G硬盘1Gbps带宽1000GB流量&#x2F;月，洛杉矶机房，$23&#x2F;年</a></li>
<li><a href="https://my.racknerd.com/aff.php?aff=856&pid=208">2核2G内存25G硬盘1Gbps带宽3000GB流量&#x2F;月，洛杉矶机房，$33&#x2F;年</a></li>
<li><a href="https://kvm.yunserver.com/aff.php?aff=140&pid=79">1核1G内存20G硬盘30Mbps带宽600GB流量&#x2F;月，去程163直连 + 回程三网CN2_GIA，日本机房，年付方案优惠码：Friday_1，299元&#x2F;年</a> , 测速链接: <a href="http://118.107.12.12/speedtest/">http://118.107.12.12/speedtest/</a></li>
<li><a href="https://1hour.win/">xxxx 更多主机 xxxx</a></li>
</ul>
]]></content>
      <tags>
        <tag>Server&amp;OS</tag>
        <tag>配置</tag>
        <tag>经验</tag>
        <tag>服务器</tag>
      </tags>
  </entry>
  <entry>
    <title>在 alpine 容器中使用 crontab</title>
    <url>/2020/05/08/use-crontab-in-alpine-docker-container.html</url>
    <content><![CDATA[<p>今天在开发 <a href="/2020/05/08/steem-watcher.html">Steem Watcher</a> 过程中，由于需要跑计划任务，所以研究了一下如何在容器环境下使用 <code>crond</code>。</p>
<p>在此之前，我曾经使用宿主机的 <code>crond</code> 来启动一个临时容器跑任务，但这个思路很糟糕，并不方便快速移植。于是考虑还是要基于容器内部进行计划任务才是终极方案。</p>
<p>由于我的 <a href="https://github.com/ety001/steem-watcher">Steem Watcher</a> 使用的<a href="https://hub.docker.com/r/ety001/steem-python">镜像</a>是我自己基于 <code>alpine</code> 编译的，而 <code>alpine</code> 中已经带有 <code>crond</code> 程序，所以要在容器里实施计划任务还是比较轻松。</p>
<p>我们可以先看下 <code>crond</code> 的参数说明</p>
<figure class="highlight plaintext"><table><tr><td class="code"><pre><span class="line">/app # crond -h</span><br><span class="line">crond: unrecognized option: h</span><br><span class="line">BusyBox v1.27.2 (2018-06-06 09:08:44 UTC) multi-call binary.</span><br><span class="line"></span><br><span class="line">Usage: crond -fbS -l N -d N -L LOGFILE -c DIR</span><br><span class="line"></span><br><span class="line">        -f      Foreground</span><br><span class="line">        -b      Background (default)</span><br><span class="line">        -S      Log to syslog (default)</span><br><span class="line">        -l N    Set log level. Most verbose 0, default 8</span><br><span class="line">        -d N    Set log level, log to stderr</span><br><span class="line">        -L FILE Log to FILE</span><br><span class="line">        -c DIR  Cron dir. Default:/var/spool/cron/crontabs</span><br></pre></td></tr></table></figure>

<p>介于容器执行命令不能立即返回，所以我们需要使用 <code>-f</code> 参数让 <code>crond</code> 在前台运行，这样可以保持容器一直运行。</p>
<p>然后查了下手册，发现 <code>crond</code> 的配置文件在 <code>/etc/crontabs/</code> 目录下面。这里需要注意，由于每个用户的 <code>crontab</code> 是独立的，如果你是 <code>root</code> 用户启动，那么其配置文件为 <code>/etc/crontabs/root</code>。</p>
<p>弄明白这些之后，我们想要搞计划任务的话，只需要创建个容器，让其 <code>command</code> 命令是 <code>crond -f</code>，然后把一个配置好的文件 <code>mount</code> 到容器里的 <code>/etc/crontabs/root</code>，再把需要执行的程序 <code>mount</code> 进去，最后启动即可了。</p>
<p>具体可以参考 <a href="https://github.com/ety001/steem-watcher/blob/master/docker-compose.yml#L28">https://github.com/ety001/steem-watcher/blob/master/docker-compose.yml#L28</a> 这里了解。</p>
<blockquote>
<p>除此之外还需要 <strong>额外注意的事情</strong> 就是，如果通过挂载的方式覆盖 <code>/etc/crontabs/root</code>，那么在宿主机上的配置文件，需要配置为 <code>755</code> 权限，并且用户和用户组需要设置为 <code>root</code>。</p>
</blockquote>
<hr>
<h4 id="好用不贵的VPS"><a href="#好用不贵的VPS" class="headerlink" title="好用不贵的VPS"></a>好用不贵的VPS</h4><ul>
<li><a href="https://my.racknerd.com/aff.php?aff=856&pid=207">1核1G内存18G硬盘1Gbps带宽1000GB流量&#x2F;月，洛杉矶机房，$23&#x2F;年</a></li>
<li><a href="https://my.racknerd.com/aff.php?aff=856&pid=208">2核2G内存25G硬盘1Gbps带宽3000GB流量&#x2F;月，洛杉矶机房，$33&#x2F;年</a></li>
<li><a href="https://kvm.yunserver.com/aff.php?aff=140&pid=79">1核1G内存20G硬盘30Mbps带宽600GB流量&#x2F;月，去程163直连 + 回程三网CN2_GIA，日本机房，年付方案优惠码：Friday_1，299元&#x2F;年</a> , 测速链接: <a href="http://118.107.12.12/speedtest/">http://118.107.12.12/speedtest/</a></li>
<li><a href="https://1hour.win/">xxxx 更多主机 xxxx</a></li>
</ul>
]]></content>
      <tags>
        <tag>Server&amp;OS</tag>
        <tag>配置</tag>
        <tag>经验</tag>
        <tag>Docker</tag>
        <tag>服务器</tag>
      </tags>
  </entry>
  <entry>
    <title>开发了一个Steem链上监测程序</title>
    <url>/2020/05/08/steem-watcher.html</url>
    <content><![CDATA[<h1 id="Steem-Watcher"><a href="#Steem-Watcher" class="headerlink" title="Steem Watcher"></a>Steem Watcher</h1><p><strong>项目地址</strong>: <a href="https://github.com/ety001/steem-watcher">https://github.com/ety001/steem-watcher</a></p>
<p>该项目基于之前<a href="https://github.com/ety001/steem-tools/tree/master/watcher">项目的程序</a>修改而来，目的是为了可以定制化监控链上数据.<br>目前只监控 <code>claim_account</code>, <code>create_claimed_account</code>, <code>account_create</code> 三种数据.</p>
<blockquote>
<p>如果你想监测更多类型数据，请自行修改 <code>bin/lib/opType.py</code></p>
</blockquote>
<h1 id="部署"><a href="#部署" class="headerlink" title="部署"></a>部署</h1><p>由于使用了 <code>docker</code> 技术，整个部署过程非常简单。</p>
<h2 id="克隆代码"><a href="#克隆代码" class="headerlink" title="克隆代码"></a>克隆代码</h2><figure class="highlight plaintext"><table><tr><td class="code"><pre><span class="line">git clone https://github.com/ety001/steem-watcher.git</span><br></pre></td></tr></table></figure>

<h2 id="修改配置参数"><a href="#修改配置参数" class="headerlink" title="修改配置参数"></a>修改配置参数</h2><figure class="highlight plaintext"><table><tr><td class="code"><pre><span class="line">cd steem-watcher</span><br><span class="line">cp .env.example .env</span><br></pre></td></tr></table></figure>

<p>参数说明：</p>
<figure class="highlight plaintext"><table><tr><td class="code"><pre><span class="line">STEEMD=https://api.steemit.com  # 节点地址</span><br><span class="line">MYSQL_HOST=172.22.2.2           # 数据库地址，如果 docker-compose.yml 未改动，这里请保持不变</span><br><span class="line">MYSQL_USER=root                 # 数据库用户名，如果 docker-compose.yml 未改动，这里请保持不变</span><br><span class="line">MYSQL_PASS=123456               # 数据库密码，如果 docker-compose.yml 未改动，这里请保持不变</span><br><span class="line">BLOCK_NUM=43191800              # 从指定高度开始收集数据</span><br><span class="line">SLACK_URL=                      # Slack 的 Webhook 地址</span><br></pre></td></tr></table></figure>

<h2 id="启动"><a href="#启动" class="headerlink" title="启动"></a>启动</h2><figure class="highlight plaintext"><table><tr><td class="code"><pre><span class="line">./start.sh</span><br></pre></td></tr></table></figure>

<h2 id="查看-Log"><a href="#查看-Log" class="headerlink" title="查看 Log"></a>查看 Log</h2><figure class="highlight plaintext"><table><tr><td class="code"><pre><span class="line">./logs.sh</span><br></pre></td></tr></table></figure>

<h2 id="停止"><a href="#停止" class="headerlink" title="停止"></a>停止</h2><figure class="highlight plaintext"><table><tr><td class="code"><pre><span class="line">./stop.sh</span><br></pre></td></tr></table></figure>

<h1 id="其他说明"><a href="#其他说明" class="headerlink" title="其他说明"></a>其他说明</h1><ul>
<li><code>crontab</code> 配置文件在 <code>config/crontab</code>，需要用 <code>root</code> 权限修改</li>
<li><code>crontab</code> 日志在 <code>./logs</code> 目录下</li>
<li>如需删除数据库重新开始，请先停止，然后 <code>sudo rm -rf db/*</code></li>
</ul>
<h1 id="如有疑问"><a href="#如有疑问" class="headerlink" title="如有疑问"></a>如有疑问</h1><p>提 Issue 或者 发邮件给我: <a href="mailto:&#119;&#x6f;&#114;&#x6b;&#64;&#97;&#107;&#97;&#x77;&#97;&#46;&#105;&#110;&#x6b;">&#119;&#x6f;&#114;&#x6b;&#64;&#97;&#107;&#97;&#x77;&#97;&#46;&#105;&#110;&#x6b;</a></p>
<hr>
<h4 id="好用不贵的VPS"><a href="#好用不贵的VPS" class="headerlink" title="好用不贵的VPS"></a>好用不贵的VPS</h4><ul>
<li><a href="https://my.racknerd.com/aff.php?aff=856&pid=207">1核1G内存18G硬盘1Gbps带宽1000GB流量&#x2F;月，洛杉矶机房，$23&#x2F;年</a></li>
<li><a href="https://my.racknerd.com/aff.php?aff=856&pid=208">2核2G内存25G硬盘1Gbps带宽3000GB流量&#x2F;月，洛杉矶机房，$33&#x2F;年</a></li>
<li><a href="https://kvm.yunserver.com/aff.php?aff=140&pid=79">1核1G内存20G硬盘30Mbps带宽600GB流量&#x2F;月，去程163直连 + 回程三网CN2_GIA，日本机房，年付方案优惠码：Friday_1，299元&#x2F;年</a> , 测速链接: <a href="http://118.107.12.12/speedtest/">http://118.107.12.12/speedtest/</a></li>
<li><a href="https://1hour.win/">xxxx 更多主机 xxxx</a></li>
</ul>
]]></content>
      <tags>
        <tag>Server&amp;OS</tag>
        <tag>配置</tag>
        <tag>steem</tag>
        <tag>服务器</tag>
        <tag>steemit</tag>
      </tags>
  </entry>
  <entry>
    <title>新建了一个 Steem 备份数据服务器</title>
    <url>/2020/05/24/a-new-backup-steem-data-server.html</url>
    <content><![CDATA[<p>鉴于 Steem 的见证人节点和全节点 replay 的时间很长，所以有必要即使把 replay 好的数据进行备份。</p>
<p>这样一旦出现数据损坏的情况，能最快速度从灾难中完成恢复。</p>
<p>另外，部署新的节点的时候，也可以节省大量的时间。</p>
<p>经过我两天的搜索，最终找到了一台加拿大的廉价大硬盘主机。</p>
<figure class="highlight plaintext"><table><tr><td class="code"><pre><span class="line">Horse Storage Offer</span><br><span class="line"></span><br><span class="line">3 core</span><br><span class="line">3 GB ram</span><br><span class="line">3 TB hard disk</span><br><span class="line">100Mbps</span><br><span class="line">no limit bandwidth usage</span><br><span class="line"></span><br><span class="line">$110 / Year</span><br></pre></td></tr></table></figure>

<p><a href="https://servarica.com/clients/aff.php?aff=278">有感兴趣的可以点击这里看看</a> ，找一下 <strong>special order</strong> 里面有一款叫做 <strong>Horse Storage Offer</strong>。</p>
<p>经过一番安装部署，现在已经上线。</p>
<h2 id="地址-https-files-steem-fans"><a href="#地址-https-files-steem-fans" class="headerlink" title="地址: https://files.steem.fans"></a>地址: <a href="https://files.steem.fans/">https://files.steem.fans</a></h2><blockquote>
<p>目前还在上传备份数据过程中。</p>
</blockquote>
<hr>
<h4 id="好用不贵的VPS"><a href="#好用不贵的VPS" class="headerlink" title="好用不贵的VPS"></a>好用不贵的VPS</h4><ul>
<li><a href="https://my.racknerd.com/aff.php?aff=856&pid=207">1核1G内存18G硬盘1Gbps带宽1000GB流量&#x2F;月，洛杉矶机房，$23&#x2F;年</a></li>
<li><a href="https://my.racknerd.com/aff.php?aff=856&pid=208">2核2G内存25G硬盘1Gbps带宽3000GB流量&#x2F;月，洛杉矶机房，$33&#x2F;年</a></li>
<li><a href="https://kvm.yunserver.com/aff.php?aff=140&pid=79">1核1G内存20G硬盘30Mbps带宽600GB流量&#x2F;月，去程163直连 + 回程三网CN2_GIA，日本机房，年付方案优惠码：Friday_1，299元&#x2F;年</a> , 测速链接: <a href="http://118.107.12.12/speedtest/">http://118.107.12.12/speedtest/</a></li>
<li><a href="https://1hour.win/">xxxx 更多主机 xxxx</a></li>
</ul>
]]></content>
      <tags>
        <tag>steem</tag>
        <tag>服务器</tag>
      </tags>
  </entry>
  <entry>
    <title>lz4压缩是真的香</title>
    <url>/2020/05/23/lz4-compress.html</url>
    <content><![CDATA[<p>最近在看官方库的<a href="https://github.com/steemit/steem/tree/master/contrib">Dockerfile相关的脚本</a>，学习到了一些有价值的点。</p>
<p>比如在区块数据备份这块，我发现官方使用的 <code>lz4</code> 压缩工具。</p>
<p>去查了下，发现 <code>lz4</code> 是目前综合来看效率最高的压缩算法，更加侧重压缩解压速度，压缩比并不是第一。在当前的安卓和苹果操作系统中，内存压缩技术就使用的是 <code>lz4</code> 算法，及时压缩手机内存以带来更多的内存空间。本质上是时间换空间。</p>
<p>压缩效率高，对于像 <code>steem</code> 这样的庞大的数据怪物的备份来说，太重要了。</p>
<p>使用起来也很方便，系统应该都是默认安装了 <code>lz4</code> 的。</p>
<p>在目的目录执行下面的命令：</p>
<figure class="highlight plaintext"><table><tr><td class="code"><pre><span class="line">tar  -cf  steem_blockchain.tar.lz4  --use-compress-program=lz4   -C  /data2/steem/data/witness_node_data_dir   blockchain/</span><br></pre></td></tr></table></figure>

<p>就可以把 <code>/data2/steem/data/witness_node_data_dir</code> 下面的 <code>blockchain</code> 文件夹打包并使用 <code>lz4</code> 压缩。</p>
<p>经过测试，源目录 <code>blockchain</code> 的大小是 <code>374G</code>，压缩后的文件是 <code>261G</code>，压缩比还可以。</p>
<p>最重要的是时间。往常在我的服务器上使用 <code>gzip</code> 和 <code>tar</code> 打包备份，一般就是大半天的时间。而这次使用 <code>lz4</code> 压缩才用了大约两个小时，太惊艳了！</p>
<p>接下来，要把目前所有的备份都换成使用 <code>lz4</code> 进行压缩打包。</p>
<hr>
<h4 id="好用不贵的VPS"><a href="#好用不贵的VPS" class="headerlink" title="好用不贵的VPS"></a>好用不贵的VPS</h4><ul>
<li><a href="https://my.racknerd.com/aff.php?aff=856&pid=207">1核1G内存18G硬盘1Gbps带宽1000GB流量&#x2F;月，洛杉矶机房，$23&#x2F;年</a></li>
<li><a href="https://my.racknerd.com/aff.php?aff=856&pid=208">2核2G内存25G硬盘1Gbps带宽3000GB流量&#x2F;月，洛杉矶机房，$33&#x2F;年</a></li>
<li><a href="https://kvm.yunserver.com/aff.php?aff=140&pid=79">1核1G内存20G硬盘30Mbps带宽600GB流量&#x2F;月，去程163直连 + 回程三网CN2_GIA，日本机房，年付方案优惠码：Friday_1，299元&#x2F;年</a> , 测速链接: <a href="http://118.107.12.12/speedtest/">http://118.107.12.12/speedtest/</a></li>
<li><a href="https://1hour.win/">xxxx 更多主机 xxxx</a></li>
</ul>
]]></content>
      <tags>
        <tag>经验</tag>
        <tag>steem</tag>
        <tag>服务器</tag>
      </tags>
  </entry>
  <entry>
    <title>美化nginx的autoindex页面</title>
    <url>/2020/05/24/make-nginx-autoindex-page-beauty.html</url>
    <content><![CDATA[<p>昨天发文说到 <a href="/2020/05/24/a-new-backup-steem-data-server.html">我上线了一个Steem数据服务</a>，但是 <code>Nginx</code> 自带的 <code>autoindex</code> 功能的 <code>UI</code> 实在是丑爆了，那么怎么美化一下呢？</p>
<p>经过研究发现了三种方案。</p>
<h1 id="方案一"><a href="#方案一" class="headerlink" title="方案一"></a>方案一</h1><p>在 <code>Nginx</code> 的配置中，有下面这两个配置项目：</p>
<figure class="highlight plaintext"><table><tr><td class="code"><pre><span class="line">add_before_body /xxx/file1.html;</span><br><span class="line">add_after_body /xxx/file2.html;</span><br></pre></td></tr></table></figure>

<p>这两个选项，可以在 <code>Nginx</code> 输出 <code>HTML</code> 之前和之后分别先输出你设定的文件。</p>
<p>这样我们可以在自定义我们的头部或者尾部，加入我们自己想要的样式表或者用 <code>js</code> 实现更牛逼的功能。</p>
<p>完整的配置大概是这样</p>
<figure class="highlight plaintext"><table><tr><td class="code"><pre><span class="line">location / &#123;</span><br><span class="line">    root /data/wwwroot/steem;</span><br><span class="line">    try_files $uri $uri/ =404;</span><br><span class="line">    autoindex on;</span><br><span class="line">    autoindex_localtime on;</span><br><span class="line">    add_before_body /.beauty/top.html;</span><br><span class="line">    add_after_body /.beauty/bot.html;</span><br><span class="line">    autoindex_exact_size off;</span><br><span class="line">&#125;</span><br></pre></td></tr></table></figure>

<blockquote>
<p>这里需要注意的是这两个参数的寻址，是基于 <code>root</code> 配置项的，也就是在上面的示例中， <code>.beauty</code> 目录是在 <code>/data/wwwroot/steem</code> 目录下面的。另外，如果你的自定义文件里有包含 <code>css</code> 和 <code>js</code> 文件，还需要有 <code>try_files</code> 参数配合一下。</p>
</blockquote>
<p>这个功能唯一的不好处就是在查看网页源代码的时候，发现这两个参数的插入位置是在原来 <code>&lt;html&gt;</code> 之前和 <code>&lt;/html&gt;</code> 之后。</p>
<p>这就让有代码洁癖的人感到很恶心。。。</p>
<h1 id="方案二"><a href="#方案二" class="headerlink" title="方案二"></a>方案二</h1><p>该方案是第三方开发的插件：<a href="https://www.nginx.com/resources/wiki/modules/fancy_index/">https://www.nginx.com/resources/wiki/modules/fancy_index&#x2F;</a> 。</p>
<p>鉴于我使用的是 <code>Docker</code> 版的 <code>Nginx</code>，要想安装个第三方插件，我还要自己编译打包，很麻烦，所以这个方案就没有尝试。</p>
<p>不过看文档说明，应该是跟方案一思路一样，只不过多加了几个注入位置吧。</p>
<h1 id="方案三"><a href="#方案三" class="headerlink" title="方案三"></a>方案三</h1><p>目前，我使用的是方案三。这个方案则是依赖的 <code>Nginx</code> 的这个参数 <code>autoindex_format</code>。</p>
<p>这个参数可以规定输出信息格式，默认是 <code>html</code>，我们可以设置这里为 <code>json</code>。这样就变成了一个 <code>api</code> 接口。</p>
<p>然后自己去开发一套自己喜欢的前端，调用这个 <code>api</code> 接口就可以了。</p>
<p>这里我从网上找了一套现成的 <code>UI</code> 来使用，地址：<a href="https://github.com/spring-raining/pretty-autoindex">https://github.com/spring-raining/pretty-autoindex</a> 。</p>
<p>在 <code>Nginx</code> 配置这块，我没有按照这个库的方法配置两个 <code>Server</code> 模块，我是分成了两个 <code>location</code> 来实现。</p>
<p>参考配置如下：</p>
<figure class="highlight plaintext"><table><tr><td class="code"><pre><span class="line">location / &#123;</span><br><span class="line">    root    /data/wwwroot/pretty-autoindex/dist;</span><br><span class="line">    index   index.html;</span><br><span class="line">    autoindex off;</span><br><span class="line">&#125;</span><br><span class="line"></span><br><span class="line">location /data &#123;</span><br><span class="line">    alias  /data/wwwroot/steem;</span><br><span class="line">    autoindex   on;</span><br><span class="line">    autoindex_localtime on;</span><br><span class="line">    autoindex_exact_size off;</span><br><span class="line">    autoindex_format    json;</span><br><span class="line"></span><br><span class="line">    # Enable your browser to access here.</span><br><span class="line">    add_header  Access-Control-Allow-Origin &quot;*&quot;;</span><br><span class="line">    add_header  Access-Control-Allow-Methods &quot;GET, POST, OPTIONS&quot;;</span><br><span class="line">    add_header  Access-Control-Allow-Headers &quot;Origin, Authorization, Accept&quot;;</span><br><span class="line">    add_header  Access-Control-Allow-Credentials true;</span><br><span class="line">&#125;</span><br></pre></td></tr></table></figure>

<p>通过 <code>alias</code> 实现 <code>/data</code> 为 <code>api</code> 接口，来获取目录结构信息。</p>
<p>经过一下午的折腾，最终终于让 <code>autoindex</code> 页面看上去不是那么丑了，并且还加入了 <code>Google Analytics</code>。</p>
<p>以后如果还有什么想搞的好玩的东西，也可以加入到里面了。</p>
<hr>
<h4 id="好用不贵的VPS"><a href="#好用不贵的VPS" class="headerlink" title="好用不贵的VPS"></a>好用不贵的VPS</h4><ul>
<li><a href="https://my.racknerd.com/aff.php?aff=856&pid=207">1核1G内存18G硬盘1Gbps带宽1000GB流量&#x2F;月，洛杉矶机房，$23&#x2F;年</a></li>
<li><a href="https://my.racknerd.com/aff.php?aff=856&pid=208">2核2G内存25G硬盘1Gbps带宽3000GB流量&#x2F;月，洛杉矶机房，$33&#x2F;年</a></li>
<li><a href="https://kvm.yunserver.com/aff.php?aff=140&pid=79">1核1G内存20G硬盘30Mbps带宽600GB流量&#x2F;月，去程163直连 + 回程三网CN2_GIA，日本机房，年付方案优惠码：Friday_1，299元&#x2F;年</a> , 测速链接: <a href="http://118.107.12.12/speedtest/">http://118.107.12.12/speedtest/</a></li>
<li><a href="https://1hour.win/">xxxx 更多主机 xxxx</a></li>
</ul>
]]></content>
      <tags>
        <tag>经验</tag>
        <tag>steem</tag>
      </tags>
  </entry>
  <entry>
    <title>Vesting Shares 与 Steem Power 的关系</title>
    <url>/2020/07/26/the-relationship-of-vesting-shares-and-steem-power.html</url>
    <content><![CDATA[<p><code>SteemPower</code> 平时都被叫做 SP，这个单位虽然我们经常见，但是这个并不是真正的资产。</p>
<p>SP 的背后其实是 <code>VestingShares</code>。鉴于 <code>Steem</code> 的通胀，SP其实是用来表示当前你持有的 <code>VestingShares</code> 价值多少 Steem 的单位。</p>
<p><code>VestingShares</code> 我们把他看做一个商品会更容易理解。</p>
<p>用 <code>Steem</code> 币购买 <code>VestingShares</code> 的过程就是 <code>PowerUP</code>，相对的，卖出 <code>VestingShares</code> 得到 <code>Steem</code> 币的操作就是 <code>PowerDown</code>。</p>
<p>而购买价格就是 <code>total_vesting_shares</code> 和 <code>total_vesting_fund_steem</code> 的比值，</p>
<p>这个在这里可以看到：<a href="https://github.com/steemit/steem/blob/0.23.x/libraries/chain/include/steem/chain/global_property_object.hpp#L67-L73">https://github.com/steemit/steem/blob/0.23.x/libraries/chain/include/steem/chain/global_property_object.hpp#L67-L73</a></p>
<p>之所以价格这样计算，是因为系统要求，当用户 <code>PowerUp</code> 的时候，要求 <code>total_vesting_shares / total_vesting_fund_steem</code> 比值不变。</p>
<p>即 <code>total_vesting_shares / total_vesting_fund_steem = (total_vesting_shares + delta_vesting_shares) / (total_vesting_fund_steem + delta_vesting_fund_steem)</code></p>
<p>其中 <code>delta_vesting_fund_steem</code> 就是我们要 <code>PowerUp</code> 的 <code>Steem</code>，我们需要知道能获取多少 <code>vesting_shares</code>，即 <code>delta_vesting_shares</code>。</p>
<p>整理一下就是 <code>delta_vesting_shares = (total_vesting_shares / total_vesting_fund_steem) * delta_vesting_fund_steem</code></p>
<p>由此得到价格关系。</p>
<p>相关代码：<a href="https://github.com/steemit/steem/blob/0.23.x/libraries/chain/database.cpp#L1199-L1314">https://github.com/steemit/steem/blob/0.23.x/libraries/chain/database.cpp#L1199-L1314</a></p>
<p><code>total_vesting_fund_steem</code> 这个池子除了上面提到的 <code>PowerUp</code> 操作会增加这个池子，还有就是每次出块会增加。</p>
<p>每次出块，每个块总产出 <code>Steem</code> 的 15% 会进入到 <code>total_vesting_fund_steem</code>。</p>
<p>而 <code>total_vesting_shares</code> 的增加来源于见证人收益，因为每个块的见证人收益（即不到10%的块总产出）是以 <code>VestingShares</code> 发放，而不是以 <code>Steem</code> 发放。</p>
<p>发放见证人收益的时候，会同时增加 <code>total_vesting_fund_steem</code> 和 <code>total_vestting_shares</code>。</p>
<p>综上两点，就意味着 <code>total_vesting_fund_steem</code> 增长速度会快于 <code>total_vesting_shares</code>，也就是说 <code>vesting_shares</code> 会越来越值钱。</p>
<p>而 SP 的意义目前也就是实时展示你持有的 <code>VestingShares</code> 现在值多少 <code>Steem</code>。你如果不在这个时刻 <code>PowerDown</code>，那么这个 SP 就是没有意义的，只是一个数字。</p>
<p>如果说 SP 只是为了实时表示 <code>VestingShares</code> 的 <code>Steem</code> 价值，那么 SP 这个概念可能是个很失败的引入。</p>
<hr>
<h4 id="Some-very-cheap-and-good-VPS"><a href="#Some-very-cheap-and-good-VPS" class="headerlink" title="Some very cheap and good VPS"></a>Some very cheap and good VPS</h4><ul>
<li><a href="https://my.racknerd.com/aff.php?aff=856&pid=207">1Core&#x2F;1G RAM&#x2F;18G Disk&#x2F;1Gbps, $23&#x2F;year</a></li>
<li><a href="https://my.racknerd.com/aff.php?aff=856&pid=208">2Core&#x2F;2G RAM&#x2F;25G Disk&#x2F;1Gbps, $33&#x2F;year</a></li>
</ul>
]]></content>
      <tags>
        <tag>经验</tag>
        <tag>steem</tag>
      </tags>
  </entry>
  <entry>
    <title>通过RC注册新账号的总结</title>
    <url>/2020/05/12/create-steem-user-by-rc.html</url>
    <content><![CDATA[<p>在steem链上注册有三种途径，<code>account_create</code>,<code>create_claimed_account</code>和<code>account_create_with_delegation</code>，不过，最后这个 <code>account_create_with_delegation</code> 已经不再建议使用了。所以目前主要是通过 <code>account_create</code> 和 <code>create_claimed_account</code> 两个方法来注册新用户。</p>
<h1 id="调用方法"><a href="#调用方法" class="headerlink" title="调用方法"></a>调用方法</h1><h2 id="account-create"><a href="#account-create" class="headerlink" title="account_create"></a>account_create</h2><p>这个接口使用很简单，只需要交钱就能注册，即花费 steem 代币。</p>
<p>使用方法: <a href="https://developers.steem.io/apidefinitions/#broadcast_ops_account_create">https://developers.steem.io/apidefinitions/#broadcast_ops_account_create</a></p>
<h2 id="create-claimed-account"><a href="#create-claimed-account" class="headerlink" title="create_claimed_account"></a>create_claimed_account</h2><p>这个接口注册用户需要配合 <code>claim_account</code> 来进行。需要使用 <code>claim_account</code> 先花费 RC 申请一个牌子，然后再消耗牌子去使用 <code>create_claimed_account</code> 注册用户。</p>
<p><code>claim_account</code> 使用方法: <a href="https://developers.steem.io/apidefinitions/#broadcast_ops_claim_account">https://developers.steem.io/apidefinitions/#broadcast_ops_claim_account</a></p>
<p><code>create_claimed_account</code> 使用方法: <a href="https://developers.steem.io/apidefinitions/#broadcast_ops_create_claimed_account">https://developers.steem.io/apidefinitions/#broadcast_ops_create_claimed_account</a></p>
<p>这里给出一下 <code>claim_account</code> 的 <code>demo</code>:</p>
<figure class="highlight plaintext"><table><tr><td class="code"><pre><span class="line">const steem = require(&#x27;steem&#x27;);</span><br><span class="line">steem.api.setOptions(&#123; url: &#x27;https://steem.61bts.com&#x27; &#125;);</span><br><span class="line"></span><br><span class="line">const ac_key = &quot;&quot;;</span><br><span class="line">const user = &quot;&quot;;</span><br><span class="line"></span><br><span class="line">const keys = &#123;active: ac_key&#125;;</span><br><span class="line"></span><br><span class="line">const op = [</span><br><span class="line">  &quot;claim_account&quot;,</span><br><span class="line">  &#123;</span><br><span class="line">    &quot;fee&quot;: &quot;0.000 STEEM&quot;,</span><br><span class="line">    &quot;creator&quot;: user,</span><br><span class="line">    &quot;extensions&quot;: []</span><br><span class="line">  &#125;</span><br><span class="line">];</span><br><span class="line"></span><br><span class="line">const tx = &#123;</span><br><span class="line">    extensions: [],</span><br><span class="line">    operations: [</span><br><span class="line">        op</span><br><span class="line">    ]</span><br><span class="line">&#125;;</span><br><span class="line"></span><br><span class="line">steem.broadcast.send(tx, keys, (r) =&gt; &#123;</span><br><span class="line">    console.log(r);</span><br><span class="line">&#125;);</span><br></pre></td></tr></table></figure>

<h1 id="关于花费"><a href="#关于花费" class="headerlink" title="关于花费"></a>关于花费</h1><p>无论那个接口注册用户，都要涉及到注册费用，只不过 <code>account_create</code> 是直接花费注册费用，而 <code>create_claimed_account</code> 途径注册用户，需要计算消耗多少 RC。</p>
<h2 id="account-create-1"><a href="#account-create-1" class="headerlink" title="account_create"></a>account_create</h2><p>目前使用 <code>account_create</code> 注册用户会消耗当前用户 3 steem 代币。那么这个数是从哪里获得的呢？</p>
<p>我们看下面的代码：</p>
<figure class="highlight plaintext"><table><tr><td class="code"><pre><span class="line">FC_ASSERT( o.fee == wso.median_props.account_creation_fee, &quot;Must pay the exact account creation fee. paid: $&#123;p&#125; fee: $&#123;f&#125;&quot;,</span><br><span class="line">               (&quot;p&quot;, o.fee)</span><br><span class="line">               (&quot;f&quot;, wso.median_props.account_creation_fee) );</span><br></pre></td></tr></table></figure>
<blockquote>
<p>上面的代码来自 <code>/libararies/chain/steem_evaluator.cpp</code> 中的 <code>void account_create_evaluator::do_apply( const account_create_operation&amp; o )</code>。<br>代码位置: <a href="https://github.com/steemit/steem/blob/master/libraries/chain/steem_evaluator.cpp#L331">https://github.com/steemit/steem/blob/master/libraries/chain/steem_evaluator.cpp#L331</a></p>
</blockquote>
<p>可以看到在注册费这里需要断言，注册费用为 <code>wso.median_props.account_creation_fee</code>。</p>
<p>这个 <code>wso</code> 联系上下文看到是 <code>_db.get_witness_schedule_object()</code>，可以知道是拿的见证人的信息。其中里面涉及到一个 <code>median_props</code> 的成员，需要看看如何实现（看字面意思是中位数）。</p>
<figure class="highlight plaintext"><table><tr><td class="code"><pre><span class="line">/// sort them by account_creation_fee</span><br><span class="line">std::sort( active.begin(), active.end(), [&amp;]( const witness_object* a, const witness_object* b )</span><br><span class="line">&#123;</span><br><span class="line">   return a-&gt;props.account_creation_fee.amount &lt; b-&gt;props.account_creation_fee.amount;</span><br><span class="line">&#125; );</span><br><span class="line">asset median_account_creation_fee = active[active.size()/2]-&gt;props.account_creation_fee;</span><br></pre></td></tr></table></figure>
<blockquote>
<p>上面的代码来自 <code>/libararies/chain/witness_schedule.cpp</code> 中的 <code>void update_median_witness_props( database&amp; db )</code> 。<br>位置在: <a href="https://github.com/steemit/steem/blob/master/libraries/chain/witness_schedule.cpp#L37">https://github.com/steemit/steem/blob/master/libraries/chain/witness_schedule.cpp#L37</a></p>
</blockquote>
<p>其中 <code>active</code> 联系上下文，可以知道拿到的是当前活跃的所有见证人（目前的配置是21位），然后对这些活跃的见证人配置中的 <code>account_creation_fee</code> 进行排序，然后取中位数。</p>
<p><strong>结论：如果想要变动注册费用，需要半数以上的活跃见证人同时调整自己的 <code>account_creation_fee</code> 配置。</strong></p>
<h2 id="create-claimed-account-1"><a href="#create-claimed-account-1" class="headerlink" title="create_claimed_account"></a>create_claimed_account</h2><p>关于 <code>create_claimed_account</code> 和 <code>claim_account</code> 这两个函数，目前还没有完全看完，因为其中还涉及到了 RC 部分的代码。</p>
<p><strong>目前还不清楚要扣除的RC的计算公式或者说方法。当前只是了解到在使用 <code>claim_account</code> 的时候的几个限制条件。</strong></p>
<figure class="highlight plaintext"><table><tr><td class="code"><pre><span class="line">if( o.fee.amount == 0 )</span><br><span class="line">&#123;</span><br><span class="line">   const auto&amp; gpo = _db.get_dynamic_global_properties();</span><br><span class="line"></span><br><span class="line">   // This block is a little weird. We want to enforce that only elected witnesses can include the transaction, but</span><br><span class="line">   // we do not want to prevent the transaction from propogating on the p2p network. Because we do not know what type of</span><br><span class="line">   // witness will have produced the including block when the tx is broadcast, we need to disregard this assertion when the tx</span><br><span class="line">   // is propogating, but require it when applying the block.</span><br><span class="line">   if( !_db.is_pending_tx() )</span><br><span class="line">   &#123;</span><br><span class="line">      const auto&amp; current_witness = _db.get_witness( gpo.current_witness );</span><br><span class="line">      FC_ASSERT( current_witness.schedule == witness_object::elected, &quot;Subsidized accounts can only be claimed by elected witnesses. current_witness:$&#123;w&#125; witness_type:$&#123;t&#125;&quot;,</span><br><span class="line">         (&quot;w&quot;,current_witness.owner)(&quot;t&quot;,current_witness.schedule) );</span><br><span class="line"></span><br><span class="line">      FC_ASSERT( current_witness.available_witness_account_subsidies &gt;= STEEM_ACCOUNT_SUBSIDY_PRECISION, &quot;Witness $&#123;w&#125; does not have enough subsidized accounts to claim&quot;,</span><br><span class="line">         (&quot;w&quot;, current_witness.owner) );</span><br><span class="line"></span><br><span class="line">      _db.modify( current_witness, [&amp;]( witness_object&amp; w )</span><br><span class="line">      &#123;</span><br><span class="line">         w.available_witness_account_subsidies -= STEEM_ACCOUNT_SUBSIDY_PRECISION;</span><br><span class="line">      &#125;);</span><br><span class="line">   &#125;</span><br><span class="line"></span><br><span class="line">   FC_ASSERT( gpo.available_account_subsidies &gt;= STEEM_ACCOUNT_SUBSIDY_PRECISION, &quot;There are not enough subsidized accounts to claim&quot; );</span><br><span class="line"></span><br><span class="line">   _db.modify( gpo, [&amp;]( dynamic_global_property_object&amp; gpo )</span><br><span class="line">   &#123;</span><br><span class="line">      gpo.available_account_subsidies -= STEEM_ACCOUNT_SUBSIDY_PRECISION;</span><br><span class="line">   &#125;);</span><br><span class="line">&#125;</span><br></pre></td></tr></table></figure>
<blockquote>
<p>上面的代码来自 <code>/libararies/chain/steem_evaluator.cpp</code> 中的 <code>void claim_account_evaluator::do_apply( const claim_account_operation&amp; o )</code> 。<br>位置在: <a href="https://github.com/steemit/steem/blob/master/libraries/chain/steem_evaluator.cpp#L3211">https://github.com/steemit/steem/blob/master/libraries/chain/steem_evaluator.cpp#L3211</a></p>
</blockquote>
<p>在代码中，我们能看到有两个数量上的限制：</p>
<ul>
<li><code>current_witness.available_witness_account_subsidies</code></li>
<li><code>gpo.available_account_subsidies</code></li>
</ul>
<p>其中还涉及到一个全局参数 <code>STEEM_ACCOUNT_SUBSIDY_PRECISION</code>。</p>
<p>上面这三个值，我们通过下面的代码可以快速的获取到：</p>
<figure class="highlight plaintext"><table><tr><td class="code"><pre><span class="line">steem.api.getActiveWitnesses(function(err, result) &#123;</span><br><span class="line">    result.forEach((w)=&gt;&#123;</span><br><span class="line">        steem.api.getWitnessByAccount(w, (e, r) =&gt; &#123;</span><br><span class="line">            console.log(w, r.available_witness_account_subsidies);</span><br><span class="line">        &#125;)</span><br><span class="line">    &#125;)</span><br><span class="line">&#125;);</span><br><span class="line">steem.api.getDynamicGlobalProperties(function(err, result) &#123;</span><br><span class="line">  console.log(&#x27;available_account_subsidies: &#x27;, result[&#x27;available_account_subsidies&#x27;]);</span><br><span class="line">&#125;);</span><br><span class="line">steem.api.getConfig(function(err, result) &#123;</span><br><span class="line">  console.log(&#x27;STEEM_ACCOUNT_SUBSIDY_PRECISION:&#x27;, result[&#x27;STEEM_ACCOUNT_SUBSIDY_PRECISION&#x27;]);</span><br><span class="line">&#125;);</span><br></pre></td></tr></table></figure>

<blockquote>
<p>我们用 @justyy 提供的<a href="https://steemyy.com/steemjs/">网页工具</a> 可以快速的看到结果。</p>
</blockquote>
<p><strong>目前的结论就是，使用 RC 注册用户，不仅受到你自身 RC 数量影响，还会受到当前出块见证人的余量(available_witness_account_subsidies)，以及全局的余量(available_account_subsidies) 两个值的限制。具体这两个值怎么恢复，以及申领一个牌子消耗多少RC的计算，等我读完 RC Plugin 的代码应该就可以搞明白了。</strong></p>
<h1 id="注册费最终流向"><a href="#注册费最终流向" class="headerlink" title="注册费最终流向"></a>注册费最终流向</h1><p>目前这里没有细看，但是可以看到费用是流向了 @null 账号。在最终的写入区块的操作的时候，也有对 @null 账号的单独处理，<br>截取一段代码如下：</p>
<figure class="highlight plaintext"><table><tr><td class="code"><pre><span class="line">case STEEM_ASSET_NUM_STEEM:</span><br><span class="line">&#123;</span><br><span class="line">   asset new_vesting( (adjust_vesting &amp;&amp; delta.amount &gt; 0) ? delta.amount * 9 : 0, STEEM_SYMBOL );</span><br><span class="line">   props.current_supply += delta + new_vesting;</span><br><span class="line">   props.virtual_supply += delta + new_vesting;</span><br><span class="line">   props.total_vesting_fund_steem += new_vesting;</span><br><span class="line">   if( check_supply )</span><br><span class="line">   &#123;</span><br><span class="line">      FC_ASSERT( props.current_supply.amount.value &gt;= 0 );</span><br><span class="line">   &#125;</span><br><span class="line">   break;</span><br><span class="line">&#125;</span><br></pre></td></tr></table></figure>
<blockquote>
<p>上面的代码来自 <code>/libararies/chain/database.cpp</code> 中的 <code>void database::adjust_supply( const asset&amp; delta, bool adjust_vesting )</code> 。<br>位置在: <a href="https://github.com/steemit/steem/blob/master/libraries/chain/database.cpp#L4689">https://github.com/steemit/steem/blob/master/libraries/chain/database.cpp#L4689</a></p>
</blockquote>
<p>其中 <code>delta</code> 就是要扣除的手续费，<code>props</code> 是 <code>dynamic_global_property_object</code>。可以看到是对整个系统的供应做了修改，但是具体如何修改，由于这里涉及的条件很多，还没有理顺清楚。</p>
<h1 id="还未解决"><a href="#还未解决" class="headerlink" title="还未解决"></a>还未解决</h1><p>最后列出一下还没有搞清楚的事情：</p>
<ul>
<li>申请牌子的 RC 计算公式</li>
<li>除了上面提到的 <code>available_witness_account_subsidies</code> 和 <code>available_account_subsidies</code> 这两个限制条件外，对于使用 RC 申请牌子是否还有其他的限制条件。</li>
<li><code>available_witness_account_subsidies</code> 和 <code>available_account_subsidies</code> 这两个值如何恢复。</li>
<li>注册费用最终是如何影响全局供给的。</li>
</ul>
<hr>
<h4 id="好用不贵的VPS"><a href="#好用不贵的VPS" class="headerlink" title="好用不贵的VPS"></a>好用不贵的VPS</h4><ul>
<li><a href="https://my.racknerd.com/aff.php?aff=856&pid=207">1核1G内存18G硬盘1Gbps带宽1000GB流量&#x2F;月，洛杉矶机房，$23&#x2F;年</a></li>
<li><a href="https://my.racknerd.com/aff.php?aff=856&pid=208">2核2G内存25G硬盘1Gbps带宽3000GB流量&#x2F;月，洛杉矶机房，$33&#x2F;年</a></li>
<li><a href="https://kvm.yunserver.com/aff.php?aff=140&pid=79">1核1G内存20G硬盘30Mbps带宽600GB流量&#x2F;月，去程163直连 + 回程三网CN2_GIA，日本机房，年付方案优惠码：Friday_1，299元&#x2F;年</a> , 测速链接: <a href="http://118.107.12.12/speedtest/">http://118.107.12.12/speedtest/</a></li>
<li><a href="https://1hour.win/">xxxx 更多主机 xxxx</a></li>
</ul>
]]></content>
      <tags>
        <tag>经验</tag>
        <tag>steem</tag>
      </tags>
  </entry>
  <entry>
    <title>STEEM每个块出块奖励代码解读</title>
    <url>/2020/07/26/steem-reward-detail.html</url>
    <content><![CDATA[<blockquote>
<p>为了方便查看相关的系统参数和变量，我写了一个工具，文章中提到的参数都可以在工具中看到。<br>工具地址：<a href="https://dev-tools.steem.fans/">https://dev-tools.steem.fans/</a></p>
</blockquote>
<h1 id="一、通胀与每个块理论产出STEEM量"><a href="#一、通胀与每个块理论产出STEEM量" class="headerlink" title="一、通胀与每个块理论产出STEEM量"></a>一、通胀与每个块理论产出STEEM量</h1><p>steem 的通胀率是按照规律线性递减的，直到达到设置的值，通胀率就不会再减小了。</p>
<p><strong>通胀率如何计算？</strong></p>
<p>通胀率从 <code>STEEM_INFLATION_RATE_START_PERCENT（978）</code>开始，到 <code>STEEM_INFLATION_RATE_STOP_PERCENT（95）</code>结束。</p>
<p>即从 9.78% 到 0.95%。其中递减率是每 <code>STEEM_INFLATION_NARROWING_PERIOD（250000）</code>块减少 0.01%。</p>
<p>公式：</p>
<figure class="highlight plaintext"><table><tr><td class="code"><pre><span class="line">current_inflation_rate = max( STEEM_INFLATION_RATE_START_PERCENT - head_block_num / STEEM_INFLATION_NARROWING_PERIOD, STEEM_INFLATION_RATE_STOP_PERCENT )</span><br></pre></td></tr></table></figure>

<p>通胀是针对现有供应量来算的，所以每年新增的STEEM数量按照当前所在的25万块这个区间的通胀率算的话是：</p>
<figure class="highlight plaintext"><table><tr><td class="code"><pre><span class="line">virtual_supply * current_inflation_rate</span><br></pre></td></tr></table></figure>

<p>由于每3秒出一个块，所以理论上如果不丢块，每年出块数量为 <code>STEEM_BLOCKS_PER_YEAR</code>（即 60<em>60</em>24<em>365</em>3），</p>
<p>进而当前25万块区间内，每个块的理论产出为：<code>virtual_supply * current_inflation_rate / STEEM_BLOCKS_PER_YEAR</code></p>
<p>按照当前写文章时间的高度（45429466）算出来的块理论产出STEEM数量为 <code>EachBlockRewardInTheory = 2.944 STEEM</code> 。</p>
<p>相关代码：<a href="https://github.com/steemit/steem/blob/0.23.x/libraries/chain/database.cpp#L2396-L2403">https://github.com/steemit/steem/blob/0.23.x/libraries/chain/database.cpp#L2396-L2403</a></p>
<h1 id="二、每个块理论产生STEEM量如何分配"><a href="#二、每个块理论产生STEEM量如何分配" class="headerlink" title="二、每个块理论产生STEEM量如何分配"></a>二、每个块理论产生STEEM量如何分配</h1><p>总的来说，每个块是按照 65% content reward, 15% vesting_reward, 10% SPS fund, 10% witness reward。</p>
<p>按照上边的例子，分别得到</p>
<figure class="highlight plaintext"><table><tr><td class="code"><pre><span class="line">content_reward = EachBlockRewardInTheory * 0.65 = 1.913 STEEM</span><br><span class="line">vesting_reward = EachBlockRewardInTheory * 0.15 = 0.441 STEEM</span><br><span class="line">sps_fund = EachBlockRewardInTheory * 0.1 = 0.294 STEEM</span><br></pre></td></tr></table></figure>

<blockquote>
<p>注意：<br>这里在 HF17 之后有这样的操作，new_content_reward &#x3D; pay_reward_funds( content_reward )，<br>目前 pay_reward_funds 没看懂，我的工具暂时定义 new_content_reward &#x3D; content_reward 。</p>
</blockquote>
<p>另外，见证人收益不是直接乘以 10%，而是减出来的，即</p>
<figure class="highlight plaintext"><table><tr><td class="code"><pre><span class="line">witness_reward = EachBlockRewardInTheory - new_content_reward - vesting_reward - sps_fund</span><br></pre></td></tr></table></figure>

<p>如此便得到最初的四项分配值。</p>
<p>之后还需要进行一些计算和分类，来最终把块产生的STEEM加入到各个池子中。</p>
<p>其中，需要先处理见证人的收益。</p>
<p>见证人分为TOP20（Elected）和非TOP20（TimeShare），两者的权重（weight）不同。</p>
<p>见证人的最终收益计算公式：</p>
<figure class="highlight plaintext"><table><tr><td class="code"><pre><span class="line">new_witness_reward = witness_reward * STEEM_MAX_WITNESSES * weight / witness_pay_normalization_factor</span><br></pre></td></tr></table></figure>

<p>其中 <code>STEEM_MAX_WITNESSES</code> 为 21，<code>witness_pay_normalization_factor</code> 为 25.</p>
<p>TOP20的权重（elected_weight）为 1，非TOP20的权重（timeshare_weight）为 5.</p>
<p>除了见证人外，对于 <code>sps_fund_reward</code> 也需要单独计算，因为 SPS 最终是以 SBD 为单位，而块产生的是STEEM，所以需要进行转换。</p>
<p>转换率来自喂价，即 <code>current_median_history</code>。最终公式为：</p>
<figure class="highlight plaintext"><table><tr><td class="code"><pre><span class="line">sps_sbd = sps_fund_reward * current_median_history</span><br></pre></td></tr></table></figure>

<p>这个时候，所有的计算工作基本结束，开始对数据进行写入操作，也就是进入各个池子，</p>
<figure class="highlight plaintext"><table><tr><td class="code"><pre><span class="line">total_vesting_fund_steem += vesting_reward</span><br><span class="line">total_reward_fund_steem += new_content_reward</span><br><span class="line">current_supply += new_content_reward + vesting_reward + new_witness_reward</span><br><span class="line">current_sbd_supply +=  new_sbd</span><br><span class="line">virtual_supply += new_content_reward + vesting_reward + new_witness_reward + sps_fund</span><br><span class="line">sps_interval_ledger += sps_fund</span><br></pre></td></tr></table></figure>

<p>最后一步，把 <code>new_witness_reward</code> 以 <code>vesting_shares</code> 的形式发放给见证人。 vesting_shares 就是 SP 的实质。</p>
<p>相关代码：<a href="https://github.com/steemit/steem/blob/0.23.x/libraries/chain/database.cpp#L2404-L2453">https://github.com/steemit/steem/blob/0.23.x/libraries/chain/database.cpp#L2404-L2453</a></p>
<p>最后是我画的产出STEEM流向图：</p>
<p><img src="/img/2021/steem-block-reward.jpg" alt="steem-block-reward.jpg"></p>
<hr>
<h4 id="Some-very-cheap-and-good-VPS"><a href="#Some-very-cheap-and-good-VPS" class="headerlink" title="Some very cheap and good VPS"></a>Some very cheap and good VPS</h4><ul>
<li><a href="https://my.racknerd.com/aff.php?aff=856&pid=207">1Core&#x2F;1G RAM&#x2F;18G Disk&#x2F;1Gbps, $23&#x2F;year</a></li>
<li><a href="https://my.racknerd.com/aff.php?aff=856&pid=208">2Core&#x2F;2G RAM&#x2F;25G Disk&#x2F;1Gbps, $33&#x2F;year</a></li>
</ul>
]]></content>
      <tags>
        <tag>经验</tag>
        <tag>steem</tag>
      </tags>
  </entry>
  <entry>
    <title>在前端获取UTC时间戳的方法</title>
    <url>/2020/09/11/get-utc-timestamp-on-the-frontend.html</url>
    <content><![CDATA[<figure class="highlight plaintext"><table><tr><td class="code"><pre><span class="line">function getUtcTimestamp() &#123;</span><br><span class="line">    const now = new Date();</span><br><span class="line">    const utcTimestamp = Date.UTC(</span><br><span class="line">        now.getUTCFullYear(),</span><br><span class="line">        now.getUTCMonth(),</span><br><span class="line">        now.getUTCDate(),</span><br><span class="line">        now.getUTCHours(),</span><br><span class="line">        now.getUTCMinutes(),</span><br><span class="line">        now.getUTCSeconds(),</span><br><span class="line">        now.getUTCMilliseconds()</span><br><span class="line">    );</span><br><span class="line">    return `$&#123;parseInt(utcTimestamp / 1000, 10)&#125;`;</span><br><span class="line">&#125;</span><br></pre></td></tr></table></figure>
]]></content>
      <tags>
        <tag>前端</tag>
        <tag>经验</tag>
      </tags>
  </entry>
  <entry>
    <title>How to install docker on Ubuntu 20.04</title>
    <url>/2021/06/22/how-to-install-docker-on-ubuntu-20-04.html</url>
    <content><![CDATA[<p>This is one line command to install docker on Ubuntu 20.04.</p>
<figure class="highlight plaintext"><table><tr><td class="code"><pre><span class="line">apt update -y &amp;&amp; \</span><br><span class="line">apt install -y apt-transport-https ca-certificates curl software-properties-common &amp;&amp; \</span><br><span class="line">curl -fsSL https://download.docker.com/linux/ubuntu/gpg | apt-key add - &amp;&amp; \</span><br><span class="line">add-apt-repository &quot;deb [arch=amd64] https://download.docker.com/linux/ubuntu focal stable&quot; &amp;&amp; \</span><br><span class="line">apt update -y &amp;&amp; \</span><br><span class="line">apt install -y docker-ce</span><br></pre></td></tr></table></figure>

<p>This command line has been verified on Ubuntu20.04.</p>
<p>This will speed up deploying a fresh vps process. That is why I write all command in one line.</p>
]]></content>
      <tags>
        <tag>配置</tag>
        <tag>经验</tag>
        <tag>Docker</tag>
        <tag>服务器</tag>
      </tags>
  </entry>
  <entry>
    <title>How to set a proxy for dockerd? 如何给 docker 设置代理</title>
    <url>/2021/04/05/how-to-set-a-proxy-for-dockerd.html</url>
    <content><![CDATA[<p><img src="https://cdn.steemitimages.com/DQmZmk5YpB38FTThN8M9z64pb54H3LjZLFEGYGMij9BuMYL/image.png" alt="image.png"></p>
<p>In some cases, we need to pull some docker image through our custom proxy server.</p>
<p>But the <code>HTTPS_PROXY</code> and <code>HTTP_PROXY</code> in current login terminal will not be useful for the <code>docker pull</code> command.<br>The <code>proxychains-ng</code> tool is the same situation.</p>
<p>This is because docker is divided into <code>dockerd</code> and <code>client</code>. The <code>docker pull</code> command is executed by <code>dockerd</code> service. So we need make sure <code>dockerd</code> use proxy server.</p>
<p>The Docker daemon uses the <code>HTTP_PROXY</code>, <code>HTTPS_PROXY</code>, and <code>NO_PROXY</code> environmental variables in its start-up environment to configure HTTP or HTTPS proxy behavior. You cannot configure these environment variables using the <code>daemon.json</code> file.</p>
<p>So we can edit the systemd service file.</p>
<p><strong>1.First create a new folder</strong></p>
<figure class="highlight plaintext"><table><tr><td class="code"><pre><span class="line">$ sudo mkdir -p /etc/systemd/system/docker.service.d</span><br></pre></td></tr></table></figure>

<p><strong>2.Then create a new file named <code>/etc/systemd/system/docker.service.d/http-proxy.conf</code></strong></p>
<figure class="highlight plaintext"><table><tr><td class="code"><pre><span class="line">[Service]</span><br><span class="line">Environment=&quot;HTTP_PROXY=http://proxy.example.com:80&quot;</span><br><span class="line">Environment=&quot;HTTPS_PROXY=http://proxy.example.com:80&quot;</span><br></pre></td></tr></table></figure>

<p><strong>3.Reload and restart</strong></p>
<figure class="highlight plaintext"><table><tr><td class="code"><pre><span class="line">$ sudo systemctl daemon-reload</span><br><span class="line">$ sudo systemctl restart docker</span><br></pre></td></tr></table></figure>

<p><strong>4.Verify that the configuration has been loaded and matches the changes you made, for example:</strong></p>
<figure class="highlight plaintext"><table><tr><td class="code"><pre><span class="line">$  sudo systemctl show --property=Environment docker</span><br></pre></td></tr></table></figure>

]]></content>
      <tags>
        <tag>配置</tag>
        <tag>经验</tag>
        <tag>Docker</tag>
        <tag>proxy</tag>
        <tag>服务器</tag>
      </tags>
  </entry>
  <entry>
    <title>在 Chromebook Linux 中安装必备的软件</title>
    <url>/2021/09/12/install-required-software-on-chromebook-debian-buster.html</url>
    <content><![CDATA[<p>ChromeOS 内置 Debian buster 的 Linux 系统</p>
<ol>
<li><p>修改国内源, <code>/etc/apt/sources.list</code></p>
<figure class="highlight plaintext"><table><tr><td class="code"><pre><span class="line">deb http://mirrors.163.com/debian/ buster main non-free contrib</span><br><span class="line">deb http://mirrors.163.com/debian/ buster-updates main non-free contrib</span><br><span class="line">deb http://mirrors.163.com/debian/ buster-backports main non-free contrib</span><br><span class="line">deb http://mirrors.163.com/debian-security/ buster/updates main non-free contrib</span><br><span class="line"></span><br><span class="line">deb-src http://mirrors.163.com/debian/ buster main non-free contrib</span><br><span class="line">deb-src http://mirrors.163.com/debian/ buster-updates main non-free contrib</span><br><span class="line">deb-src http://mirrors.163.com/debian/ buster-backports main non-free contrib</span><br><span class="line">deb-src http://mirrors.163.com/debian-security/ buster/updates main non-free contrib</span><br></pre></td></tr></table></figure>
</li>
<li><p>安装 Docker</p>
<figure class="highlight plaintext"><table><tr><td class="code"><pre><span class="line">sudo apt-get update -y</span><br><span class="line">sudo apt-get install -y\</span><br><span class="line">    apt-transport-https \</span><br><span class="line">    ca-certificates \</span><br><span class="line">    curl \</span><br><span class="line">    gnupg \</span><br><span class="line">    lsb-release</span><br><span class="line">curl -fsSL https://download.docker.com/linux/debian/gpg | sudo gpg --dearmor -o /usr/share/keyrings/docker-archive-keyring.gpg</span><br><span class="line">echo \</span><br><span class="line">  &quot;deb [arch=amd64 signed-by=/usr/share/keyrings/docker-archive-keyring.gpg] https://download.docker.com/linux/debian \</span><br><span class="line">  $(lsb_release -cs) stable&quot; | sudo tee /etc/apt/sources.list.d/docker.list &gt; /dev/null</span><br><span class="line">sudo apt-get update -y</span><br><span class="line">sudo apt-get install docker-ce docker-ce-cli containerd.io -y</span><br><span class="line">sudo gpasswd -a ety001 docker</span><br></pre></td></tr></table></figure>
</li>
<li><p>修改 Docker 日志量</p>
</li>
</ol>
<figure class="highlight plaintext"><table><tr><td class="code"><pre><span class="line"># /etc/docker/daemon.json</span><br><span class="line">&#123;</span><br><span class="line">  &quot;log-driver&quot;:&quot;json-file&quot;,</span><br><span class="line">  &quot;log-opts&quot;: &#123;&quot;max-size&quot;:&quot;5m&quot;, &quot;max-file&quot;:&quot;3&quot;&#125;</span><br><span class="line">&#125;</span><br></pre></td></tr></table></figure>

<figure class="highlight plaintext"><table><tr><td class="code"><pre><span class="line">sudo systemctl restart docker</span><br><span class="line">sudo systemctl enable docker</span><br></pre></td></tr></table></figure>

<ol start="4">
<li>修改 Linux 容器为固定IP</li>
</ol>
<p><code>/etc/network/interfaces</code> 文件</p>
<figure class="highlight plaintext"><table><tr><td class="code"><pre><span class="line">auto lo</span><br><span class="line">iface lo inet loopback</span><br><span class="line"></span><br><span class="line">auto eth0</span><br><span class="line">iface eth0 inet static</span><br><span class="line">      address 100.115.92.202/28</span><br><span class="line">      gateway 100.115.92.193</span><br><span class="line"></span><br><span class="line">dns-nameservers 8.8.8.8 114.114.114.114</span><br></pre></td></tr></table></figure>

<p>重启网络 <code>sudo systemctl restart networking</code></p>
<ol start="5">
<li>修改 sudo 不需要密码</li>
</ol>
<figure class="highlight plaintext"><table><tr><td class="code"><pre><span class="line">%sudo ALL=(ALL) NOPASSWD: ALL</span><br></pre></td></tr></table></figure>

<ol start="6">
<li>设置当前用户密码</li>
</ol>
<figure class="highlight plaintext"><table><tr><td class="code"><pre><span class="line">sudo passwd ety001</span><br></pre></td></tr></table></figure>

<ol start="7">
<li><p>配置 Chrome 各个插件</p>
</li>
<li><p>配置 ssh</p>
</li>
<li><p>从 github 下载私有配置，进行自定义设置</p>
</li>
<li><p>安装 nvm</p>
</li>
</ol>
<figure class="highlight plaintext"><table><tr><td class="code"><pre><span class="line">curl -o- https://raw.githubusercontent.com/nvm-sh/nvm/v0.38.0/install.sh | bash</span><br></pre></td></tr></table></figure>

<ol start="11">
<li>下载 vscode</li>
</ol>
<p><a href="https://code.visualstudio.com/">https://code.visualstudio.com</a></p>
<ol start="12">
<li>安装 Remmina</li>
</ol>
<figure class="highlight plaintext"><table><tr><td class="code"><pre><span class="line">sudo apt install -y remmina \ </span><br><span class="line">    remmina-common \ </span><br><span class="line">    remmina-plugin-exec \ </span><br><span class="line">    remmina-plugin-kiosk \ </span><br><span class="line">    remmina-plugin-rdp \ </span><br><span class="line">    remmina-plugin-secret \ </span><br><span class="line">    remmina-plugin-vnc</span><br></pre></td></tr></table></figure>

<ol start="13">
<li>安装 Linux 搜狗拼音</li>
</ol>
<p><a href="https://pinyin.sogou.com/linux/?r=pinyin">https://pinyin.sogou.com/linux/?r=pinyin</a></p>
<p>安装完，在 <code>/etc/systemd/user/cros-garcon.service.d/cros-garcon-override.conf</code> 中增加下面的配置</p>
<figure class="highlight plaintext"><table><tr><td class="code"><pre><span class="line">Environment=&quot;GTK_IM_MODULE=fcitx&quot;</span><br><span class="line">Environment=&quot;QT_IM_MODULE=fcitx&quot;</span><br><span class="line">Environment=&quot;XMODIFIERS=@im=fcitx&quot;</span><br></pre></td></tr></table></figure>

<p>在 <code>~/.sommelierrc</code> 中增加</p>
<figure class="highlight plaintext"><table><tr><td class="code"><pre><span class="line">/usr/bin/fcitx-autostart</span><br></pre></td></tr></table></figure>

<p>参考： <a href="https://faq.fydeos.com/en/recipes/chinese-ime-in-linux-beta/">https://faq.fydeos.com/en/recipes/chinese-ime-in-linux-beta/</a></p>
<blockquote>
<p>最新： <a href="https://chromium.googlesource.com/chromiumos/docs/+/main/containers_and_vms.md#Can-I-set-environment-variables-for-my-container">https://chromium.googlesource.com/chromiumos/docs/+/main/containers_and_vms.md#Can-I-set-environment-variables-for-my-container</a></p>
</blockquote>
<ol start="14">
<li>安装 LinuxQQ</li>
</ol>
<p><a href="https://im.qq.com/linuxqq/download.html">https://im.qq.com/linuxqq/download.html</a></p>
<ol start="15">
<li>安装 Linux QQ音乐</li>
</ol>
<p><a href="https://y.qq.com/download/download.html">https://y.qq.com/download/download.html</a></p>
<ol start="16">
<li>安装 Linux 网易云音乐</li>
</ol>
<p><a href="https://music.163.com/#/download">https://music.163.com/#/download</a></p>
<ol start="17">
<li>安装 Slack</li>
</ol>
<p><a href="https://slack.com/intl/zh-cn/downloads/linux">https://slack.com/intl/zh-cn/downloads/linux</a></p>
<ol start="18">
<li>安装 hack 字体</li>
</ol>
<figure class="highlight plaintext"><table><tr><td class="code"><pre><span class="line">sudo apt-get install -y fonts-hack</span><br></pre></td></tr></table></figure>
]]></content>
      <tags>
        <tag>Server&amp;OS</tag>
      </tags>
  </entry>
  <entry>
    <title>Chromebook 无法访问 websocket</title>
    <url>/2022/02/23/chromebook-websocket.html</url>
    <content><![CDATA[<p>最近我的 Chromebook 无法访问 websocket 资源，这让人很烦恼。</p>
<p>查来查去，最后发现国外一篇文章提到，如果全局代理中勾选了“对所有协议使用同一代理”，就会出现这个问题。这是由于 websocket 会使用 socks 代理作为通讯方法，</p>
<p>我之前都是分着设置，前几天测试个东西，找省劲，勾选了“对所有协议使用同一代理”，而我的 socks 代理端口和 http 代理端口其实不是同一个，才导致现在访问所有 websocket 资源不成功。</p>
]]></content>
      <tags>
        <tag>chromebook</tag>
      </tags>
  </entry>
  <entry>
    <title>How to install docker on Debian 10/11</title>
    <url>/2022/02/23/how-to-install-docker-on-debian-10-11.html</url>
    <content><![CDATA[<p>This is one line command to install docker on Debian 10&#x2F;11.</p>
<figure class="highlight plaintext"><table><tr><td class="code"><pre><span class="line">apt-get install -y \</span><br><span class="line">    ca-certificates \</span><br><span class="line">    curl \</span><br><span class="line">    gnupg \</span><br><span class="line">    lsb-release &amp;&amp;</span><br><span class="line">curl -fsSL https://download.docker.com/linux/debian/gpg | gpg --dearmor -o /usr/share/keyrings/docker-archive-keyring.gpg &amp;&amp;</span><br><span class="line">echo \</span><br><span class="line">  &quot;deb [arch=$(dpkg --print-architecture) signed-by=/usr/share/keyrings/docker-archive-keyring.gpg] https://download.docker.com/linux/debian \</span><br><span class="line">  $(lsb_release -cs) stable&quot; | tee /etc/apt/sources.list.d/docker.list &gt; /dev/null &amp;&amp;</span><br><span class="line">  apt-get update &amp;&amp;</span><br><span class="line">  apt-get install -y docker-ce docker-ce-cli containerd.io</span><br></pre></td></tr></table></figure>

<p>This command line has been verified on Debian 10&#x2F;11.</p>
<p>This will speed up deploying a fresh vps process. That is why I write all command in one line.</p>
]]></content>
      <tags>
        <tag>配置</tag>
        <tag>经验</tag>
        <tag>Docker</tag>
        <tag>服务器</tag>
      </tags>
  </entry>
  <entry>
    <title>Send email on Debian via Exim4 through a public SMTP server</title>
    <url>/2022/03/21/send-email-on-debian-via-exim4-through-a-public-smtp-server.html</url>
    <content><![CDATA[<p>First run </p>
<figure class="highlight plaintext"><table><tr><td class="code"><pre><span class="line">sudo dpkg-reconfigure exim4-config</span><br></pre></td></tr></table></figure>

<p>and use these config options:</p>
<ul>
<li><strong>General type of mail configuration:</strong> mail sent by smarthost; received via SMTP or fetchmail</li>
<li><strong>System mail name:</strong> your hostname</li>
<li><strong>IP-address to listen on for incoming SMTP connections:</strong> 127.0.0.1</li>
<li><strong>Other destinations for which mail is accepted:</strong> your hostname</li>
<li><strong>Machines to relay mail for:</strong> leave this blank</li>
<li><strong>IP address or host name of the outgoing smarthost:</strong> mail.example.com::587</li>
<li><strong>Hide local mail name in outgoing mail?</strong><ul>
<li>Yes - all outgoing mail will appear to come from your gmail account</li>
<li>No - mail sent with a valid sender name header will keep the sender’s name</li>
</ul>
</li>
<li><strong>Keep number of DNS-queries minimal (Dial-on-Demand)?</strong> No</li>
<li><strong>Delivery method for local mail:</strong> choose the one you prefer</li>
<li><strong>Split configuration file into small files?</strong> Yes (you need to edit one of the files next)</li>
</ul>
<p>Then run <code>sudo vi /etc/exim4/passwd.client</code> and add the following lines for your mail host, and any aliases it has (found through <code>nslookup</code>). Substitute <code>email address</code> and <code>password</code> with the account you want to route mail through):</p>
<figure class="highlight plaintext"><table><tr><td class="code"><pre><span class="line">mail.example.com:email address:password</span><br></pre></td></tr></table></figure>

<p>Once you edit the <code>passwd.client</code> file, run <code>sudo update-exim4.conf</code> which will integrate your changes into your Exim4 config.</p>
<p>Run <code>sudo systemctl restart exim4</code> and make sure that the service stops and starts properly. If the service is unable to restart, something probably went wrong when you edited the <code>passwd.client</code> file.</p>
<p>Now the configure has been finished.</p>
<p>We can use <code>exim -v receiver@email.com</code> to get in send process to send a test email.</p>
<p>If get in the editor mode, input these charaters:</p>
<figure class="highlight plaintext"><table><tr><td class="code"><pre><span class="line">From: user@your.domain.example</span><br><span class="line">Subject: Foobar</span><br><span class="line">Text Text Text</span><br></pre></td></tr></table></figure>

<p>After inputing, press <code>Ctrl+d</code> to send test email.</p>
]]></content>
      <tags>
        <tag>Server&amp;OS</tag>
        <tag>经验</tag>
      </tags>
  </entry>
  <entry>
    <title>给 mdadm 配置邮件接受报警</title>
    <url>/2022/03/22/mdadm.html</url>
    <content><![CDATA[<p>在 <code>/etc/mdadm/mdadm.conf</code> 中，找到 <code>MAILADDR</code> 配置，修改为你要接收邮件的地址即可。</p>
<p>修改完，可以执行 <code>mdadm --monitor --scan --test -1</code> 来测试一下是否能够收到测试邮件。</p>
<p>不过我发现一个问题，就是在执行 <code>/usr/share/mdadm/mkconf &gt; /etc/mdadm/mdadm.conf</code> 这个重新生成 mdadm 配置文件的命令后，<code>MAILADDR</code> 会被重置为 <code>root</code>。</p>
<p>于是使用了另外一个方案来配置接收邮箱。</p>
<p>打开 <code>/etc/aliases</code> 文件，增加下面一行</p>
<figure class="highlight plaintext"><table><tr><td class="code"><pre><span class="line">root: your_email_addr@abc.com, /root/mailbox</span><br></pre></td></tr></table></figure>

<p>保存之后，执行 <code>newaliases</code> 使配置生效。这样发送给 root 用户的邮件，会被转发到你指定的邮箱了。</p>
]]></content>
      <tags>
        <tag>Server&amp;OS</tag>
        <tag>经验</tag>
      </tags>
  </entry>
  <entry>
    <title>使用 ipmitool 对 dell r730xd 风扇调速</title>
    <url>/2022/02/27/ipmitool-dell-r730xd.html</url>
    <content><![CDATA[<p>这两周一直在折腾新买的这台二手 r730xd。第一次上电的时候，风墙的6个18000转风扇的满速运行的噪音太感人了。让我想起来当年在机房跟同事维护机器的时候，说话完全靠喊的记忆。</p>
<p>既然风扇转速高，就去看看主板bios里有没有设置，结果看了半天，从bios到dell服务器的idrac，就没有找到可以手动设置风扇转速的地方。</p>
<p>我当时也是傻，没有放狗搜索一下，就直接准备干静音风扇了。。。</p>
<p>淘宝和闲鱼搜索了好几圈，都没有服务器用的 60<em>60</em>38 风扇的接口。</p>
<p><img src="/img/2022/02/01.png" alt="image.png"></p>
<p>最后随机在一家店里买了一个5000转的，准备自己动手改一下。</p>
<p><img src="/img/2022/02/DQmYhruiGxpBbCf7ktsTe2yRaXbbCtynFALkDDkkB3TvLkY.png" alt="image.png"></p>
<p>最后用杜邦线的塑料胶头改装成功了，上电测试没有问题。赶紧下单买剩下的5个。</p>
<p>第一周就这么过去了。</p>
<p>等待了五天，另外5个风扇到了，花了3个小时完成改装，改装后的风墙这个样子：</p>
<p><img src="/img/2022/02/DQmZypWE6ZT5N6G6QjENnunTJXsLFsgT1hrgHgfjcSZR4z3.png" alt="image.png"></p>
<p>由于放弃了快拆头，只能手动一个个插。上电后，成功识别风扇，噪音小了很多，但是依然是吵。</p>
<p>不死心的我，都要准备换水冷了，这个时候，搜索到可以使用dell的 ipmitool 来给风扇调速，唯一的缺点是，机器断电后重新上电，配置还需要重新设置。</p>
<p>安装很简单</p>
<figure class="highlight plaintext"><table><tr><td class="code"><pre><span class="line">pacman -S ipmitool</span><br></pre></td></tr></table></figure>

<p>或者</p>
<figure class="highlight plaintext"><table><tr><td class="code"><pre><span class="line">apt-get install -y ipmitool</span><br></pre></td></tr></table></figure>

<p>设置为手动调速</p>
<figure class="highlight plaintext"><table><tr><td class="code"><pre><span class="line">ipmitool -I lanplus -U 用户名 -P 密码 -H iDracIP raw 0x30 0x30 0x01 0x00</span><br></pre></td></tr></table></figure>

<p>设置回自动调速</p>
<figure class="highlight plaintext"><table><tr><td class="code"><pre><span class="line">ipmitool -I lanplus -U 用户名 -P 密码 -H iDracIP raw 0x30 0x30 0x01 0x01</span><br></pre></td></tr></table></figure>

<p>设置风扇转速，这里我写了个脚本 speed.sh</p>
<figure class="highlight plaintext"><table><tr><td class="code"><pre><span class="line">#!/bin/bash</span><br><span class="line">USER=xxxx</span><br><span class="line">PASS=xxxx</span><br><span class="line">IP=192.168.1.11</span><br><span class="line">DEFAULT_SPEED=0xf</span><br><span class="line"></span><br><span class="line">if [ &quot;$1&quot; != &quot;&quot; ]; then</span><br><span class="line">	fan=`printf &quot;0x%x&quot; $1`</span><br><span class="line">else</span><br><span class="line">	fan=$DEFAULT_SPEED</span><br><span class="line">fi</span><br><span class="line">echo $fan</span><br><span class="line">ipmitool -I lanplus -U $USER -P $PASS -H $IP raw 0x30 0x30 0x02 0xff $fan</span><br></pre></td></tr></table></figure>

<p>设置为可执行文件，然后想要设置风扇转速为 30%，则执行</p>
<figure class="highlight plaintext"><table><tr><td class="code"><pre><span class="line">./speed.sh 30</span><br></pre></td></tr></table></figure>

<p>风扇成功降速，且cpu温度也能压住，问题解决！</p>
<p>所以为啥我一开始不先搜索一下呢？ 哭笑。。。</p>
]]></content>
      <tags>
        <tag>经验</tag>
        <tag>服务器</tag>
      </tags>
  </entry>
  <entry>
    <title>在 github actions 中使用 telegram 推送消息</title>
    <url>/2022/04/02/github-actions-telegram.html</url>
    <content><![CDATA[<p>最近在研究 github actions。 这个是 github 提供的 CI&#x2F;CD 服务，并且对于开源库来说，几乎就是免费使用。</p>
<p>得利于 github actions 支持很多的环境，所以可以做很多的事情。</p>
<p>最近研究的方向就是 github actions 的计划任务功能。</p>
<p>而计划任务执行完需要通知我一下。</p>
<p>当前我自己用的比较多的是 telegram，所以优先找了一下如何发消息到 telegram 的方法。</p>
<figure class="highlight plaintext"><table><tr><td class="code"><pre><span class="line">name: &#x27;GitHub Actions Test for Telegram Notification&#x27;</span><br><span class="line"></span><br><span class="line">on:</span><br><span class="line">  schedule:</span><br><span class="line">    - cron: &#x27;30 0 * * *&#x27;</span><br><span class="line"></span><br><span class="line">jobs:</span><br><span class="line">  bot:</span><br><span class="line">    runs-on: ubuntu-latest</span><br><span class="line">    steps:</span><br><span class="line">      - name: &#x27;Send telegram message&#x27;</span><br><span class="line">        uses: appleboy/telegram-action@master</span><br><span class="line">        with:</span><br><span class="line">          to: $&#123;&#123; secrets.TELEGRAM_TO &#125;&#125;</span><br><span class="line">          token: $&#123;&#123; secrets.TELEGRAM_TOKEN &#125;&#125;</span><br><span class="line">          message: |</span><br><span class="line">            this is the test message</span><br></pre></td></tr></table></figure>

<p>只要再在 github 这个库的设置里面，增加 secrets 设置（TELEGRAM_TO 和 TELEGRAM_TOKEN）即可。</p>
]]></content>
      <tags>
        <tag>Server&amp;OS</tag>
        <tag>经验</tag>
      </tags>
  </entry>
  <entry>
    <title>Nginx日志统计分析常用命令</title>
    <url>/2020/06/11/nginx-log-analytics.html</url>
    <content><![CDATA[<h1 id="IP相关统计"><a href="#IP相关统计" class="headerlink" title="IP相关统计"></a>IP相关统计</h1><h3 id="统计IP访问量"><a href="#统计IP访问量" class="headerlink" title="统计IP访问量"></a>统计IP访问量</h3><figure class="highlight plaintext"><table><tr><td class="code"><pre><span class="line">awk &#x27;&#123;print $1&#125;&#x27; access.log | sort -n | uniq | wc -l</span><br></pre></td></tr></table></figure>

<h3 id="查看某一时间段的IP访问量-4-5点"><a href="#查看某一时间段的IP访问量-4-5点" class="headerlink" title="查看某一时间段的IP访问量(4-5点)"></a>查看某一时间段的IP访问量(4-5点)</h3><figure class="highlight plaintext"><table><tr><td class="code"><pre><span class="line">grep &quot;07/Apr/2017:0[4-5]&quot; access.log | awk &#x27;&#123;print $1&#125;&#x27; | sort | uniq -c| sort -nr | wc -l</span><br></pre></td></tr></table></figure>

<h3 id="查看访问最频繁的前100个IP"><a href="#查看访问最频繁的前100个IP" class="headerlink" title="查看访问最频繁的前100个IP"></a>查看访问最频繁的前100个IP</h3><figure class="highlight plaintext"><table><tr><td class="code"><pre><span class="line">awk &#x27;&#123;print $1&#125;&#x27; access.log | sort -n |uniq -c | sort -rn | head -n 100</span><br></pre></td></tr></table></figure>

<h3 id="查看访问100次以上的IP"><a href="#查看访问100次以上的IP" class="headerlink" title="查看访问100次以上的IP"></a>查看访问100次以上的IP</h3><figure class="highlight plaintext"><table><tr><td class="code"><pre><span class="line">awk &#x27;&#123;print $1&#125;&#x27; access.log | sort -n |uniq -c |awk &#x27;&#123;if($1 &gt;100) print $0&#125;&#x27;|sort -rn</span><br></pre></td></tr></table></figure>

<h3 id="查询某个IP的详细访问情况-按访问频率排序"><a href="#查询某个IP的详细访问情况-按访问频率排序" class="headerlink" title="查询某个IP的详细访问情况,按访问频率排序"></a>查询某个IP的详细访问情况,按访问频率排序</h3><figure class="highlight plaintext"><table><tr><td class="code"><pre><span class="line">grep &#x27;104.217.108.66&#x27; access.log |awk &#x27;&#123;print $7&#125;&#x27;|sort |uniq -c |sort -rn |head -n 100</span><br></pre></td></tr></table></figure>

<h1 id="页面访问统计"><a href="#页面访问统计" class="headerlink" title="页面访问统计"></a>页面访问统计</h1><h3 id="查看访问最频的页面-TOP100"><a href="#查看访问最频的页面-TOP100" class="headerlink" title="查看访问最频的页面(TOP100)"></a>查看访问最频的页面(TOP100)</h3><figure class="highlight plaintext"><table><tr><td class="code"><pre><span class="line">awk &#x27;&#123;print $7&#125;&#x27; access.log | sort |uniq -c | sort -rn | head -n 100</span><br></pre></td></tr></table></figure>

<h3 id="查看访问最频的页面-排除php页面】-TOP100"><a href="#查看访问最频的页面-排除php页面】-TOP100" class="headerlink" title="查看访问最频的页面([排除php页面】(TOP100)"></a>查看访问最频的页面([排除php页面】(TOP100)</h3><figure class="highlight plaintext"><table><tr><td class="code"><pre><span class="line">grep -v &quot;.php&quot;  access.log | awk &#x27;&#123;print $7&#125;&#x27; | sort |uniq -c | sort -rn | head -n 100</span><br></pre></td></tr></table></figure>

<h3 id="查看页面访问次数超过100次的页面"><a href="#查看页面访问次数超过100次的页面" class="headerlink" title="查看页面访问次数超过100次的页面"></a>查看页面访问次数超过100次的页面</h3><figure class="highlight plaintext"><table><tr><td class="code"><pre><span class="line">cat access.log | cut -d &#x27; &#x27; -f 7 | sort |uniq -c | awk &#x27;&#123;if ($1 &gt; 100) print $0&#125;&#x27; | less</span><br></pre></td></tr></table></figure>

<h3 id="查看最近1000条记录，访问量最高的页面"><a href="#查看最近1000条记录，访问量最高的页面" class="headerlink" title="查看最近1000条记录，访问量最高的页面"></a>查看最近1000条记录，访问量最高的页面</h3><figure class="highlight plaintext"><table><tr><td class="code"><pre><span class="line">tail -1000 access.log |awk &#x27;&#123;print $7&#125;&#x27;|sort|uniq -c|sort -nr|less</span><br></pre></td></tr></table></figure>

<h1 id="每秒请求量统计"><a href="#每秒请求量统计" class="headerlink" title="每秒请求量统计"></a>每秒请求量统计</h1><h3 id="统计每秒的请求数-top100的时间点-精确到秒"><a href="#统计每秒的请求数-top100的时间点-精确到秒" class="headerlink" title="统计每秒的请求数,top100的时间点(精确到秒)"></a>统计每秒的请求数,top100的时间点(精确到秒)</h3><figure class="highlight plaintext"><table><tr><td class="code"><pre><span class="line">awk &#x27;&#123;print $4&#125;&#x27; access.log |cut -c 14-21|sort|uniq -c|sort -nr|head -n 100</span><br></pre></td></tr></table></figure>

<h1 id="每分钟请求量统计"><a href="#每分钟请求量统计" class="headerlink" title="每分钟请求量统计"></a>每分钟请求量统计</h1><h3 id="统计每分钟的请求数-top100的时间点-精确到分钟"><a href="#统计每分钟的请求数-top100的时间点-精确到分钟" class="headerlink" title="统计每分钟的请求数,top100的时间点(精确到分钟)"></a>统计每分钟的请求数,top100的时间点(精确到分钟)</h3><figure class="highlight plaintext"><table><tr><td class="code"><pre><span class="line">awk &#x27;&#123;print $4&#125;&#x27; access.log |cut -c 14-18|sort|uniq -c|sort -nr|head -n 100</span><br></pre></td></tr></table></figure>

<h1 id="每小时请求量统计"><a href="#每小时请求量统计" class="headerlink" title="每小时请求量统计"></a>每小时请求量统计</h1><h3 id="统计每小时的请求数-top100的时间点-精确到小时"><a href="#统计每小时的请求数-top100的时间点-精确到小时" class="headerlink" title="统计每小时的请求数,top100的时间点(精确到小时)"></a>统计每小时的请求数,top100的时间点(精确到小时)</h3><figure class="highlight plaintext"><table><tr><td class="code"><pre><span class="line">awk &#x27;&#123;print $4&#125;&#x27; access.log |cut -c 14-15|sort|uniq -c|sort -nr|head -n 100</span><br></pre></td></tr></table></figure>

<h1 id="性能分析"><a href="#性能分析" class="headerlink" title="性能分析"></a>性能分析</h1><p>在nginx log中最后一个字段加入$request_time</p>
<h3 id="列出传输时间超过-3-秒的页面，显示前20条"><a href="#列出传输时间超过-3-秒的页面，显示前20条" class="headerlink" title="列出传输时间超过 3 秒的页面，显示前20条"></a>列出传输时间超过 3 秒的页面，显示前20条</h3><figure class="highlight plaintext"><table><tr><td class="code"><pre><span class="line">cat access.log|awk &#x27;($NF &gt; 3)&#123;print $7&#125;&#x27;|sort -n|uniq -c|sort -nr|head -20</span><br></pre></td></tr></table></figure>

<h3 id="列出php页面请求时间超过3秒的页面，并统计其出现的次数，显示前100条"><a href="#列出php页面请求时间超过3秒的页面，并统计其出现的次数，显示前100条" class="headerlink" title="列出php页面请求时间超过3秒的页面，并统计其出现的次数，显示前100条"></a>列出php页面请求时间超过3秒的页面，并统计其出现的次数，显示前100条</h3><figure class="highlight plaintext"><table><tr><td class="code"><pre><span class="line">cat access.log|awk &#x27;($NF &gt; 1 &amp;&amp;  $7~/\.php/)&#123;print $7&#125;&#x27;|sort -n|uniq -c|sort -nr|head -100</span><br></pre></td></tr></table></figure>

<h1 id="蜘蛛抓取统计"><a href="#蜘蛛抓取统计" class="headerlink" title="蜘蛛抓取统计"></a>蜘蛛抓取统计</h1><h3 id="统计蜘蛛抓取次数"><a href="#统计蜘蛛抓取次数" class="headerlink" title="统计蜘蛛抓取次数"></a>统计蜘蛛抓取次数</h3><figure class="highlight plaintext"><table><tr><td class="code"><pre><span class="line">grep &#x27;Baiduspider&#x27; access.log |wc -l</span><br></pre></td></tr></table></figure>

<h3 id="统计蜘蛛抓取404的次数"><a href="#统计蜘蛛抓取404的次数" class="headerlink" title="统计蜘蛛抓取404的次数"></a>统计蜘蛛抓取404的次数</h3><figure class="highlight plaintext"><table><tr><td class="code"><pre><span class="line">grep &#x27;Baiduspider&#x27; access.log |grep &#x27;404&#x27; | wc -l</span><br></pre></td></tr></table></figure>

<h1 id="TCP连接统计"><a href="#TCP连接统计" class="headerlink" title="TCP连接统计"></a>TCP连接统计</h1><h3 id="查看当前TCP连接数"><a href="#查看当前TCP连接数" class="headerlink" title="查看当前TCP连接数"></a>查看当前TCP连接数</h3><figure class="highlight plaintext"><table><tr><td class="code"><pre><span class="line">netstat -tan | grep &quot;ESTABLISHED&quot; | grep &quot;:80&quot; | wc -l</span><br></pre></td></tr></table></figure>

<h3 id="用tcpdump嗅探80端口的访问看看谁最高"><a href="#用tcpdump嗅探80端口的访问看看谁最高" class="headerlink" title="用tcpdump嗅探80端口的访问看看谁最高"></a>用tcpdump嗅探80端口的访问看看谁最高</h3><figure class="highlight plaintext"><table><tr><td class="code"><pre><span class="line">tcpdump -i eth0 -tnn dst port 80 -c 1000 | awk -F&quot;.&quot; &#x27;&#123;print $1&quot;.&quot;$2&quot;.&quot;$3&quot;.&quot;$4&#125;&#x27; | sort | uniq -c | sort -nr</span><br></pre></td></tr></table></figure>

<p>转自：<a href="https://www.cnblogs.com/coolworld/p/6726538.html">https://www.cnblogs.com/coolworld/p/6726538.html</a></p>
]]></content>
      <tags>
        <tag>经验</tag>
        <tag>服务器</tag>
      </tags>
  </entry>
  <entry>
    <title>把 makepkg 的下载器从 curl 换成了 aria2c</title>
    <url>/2022/03/27/makepkg-curl-aria2c.html</url>
    <content><![CDATA[<p>今天才知道，原来 archlinux 的 makepkg 可以更换下载器啊。</p>
<p>按照 arch 官方文档的说明，修改一下 <code>/etc/makepkg.conf</code> 的 <code>DLAGENTS</code> 变量。</p>
<figure class="highlight plaintext"><table><tr><td class="code"><pre><span class="line">DLAGENTS=(&#x27;file::/usr/bin/curl -qgC - -o %o %u&#x27;</span><br><span class="line">	  &#x27;ftp::/usr/bin/aria2c -UWget -s4 %u -o %o&#x27;</span><br><span class="line">	  &#x27;http::/usr/bin/aria2c -UWget -s4 %u -o %o&#x27;</span><br><span class="line">	  &#x27;https::/usr/bin/aria2c -UWget -s4 %u -o %o&#x27;</span><br><span class="line">          &#x27;rsync::/usr/bin/rsync --no-motd -z %u %o&#x27;</span><br><span class="line">          &#x27;scp::/usr/bin/scp -C %u %o&#x27;)</span><br></pre></td></tr></table></figure>

<p>然后以后再用 makepkg 的时候，就能体验到 aria2 优秀的下载体验了。</p>
]]></content>
      <tags>
        <tag>Server&amp;OS</tag>
        <tag>经验</tag>
      </tags>
  </entry>
  <entry>
    <title>解决 Bad SMB2 (sign_algo_id=0) signature for message 问题</title>
    <url>/2022/03/23/bad-smb2-signalgoid-0-signature-for-message.html</url>
    <content><![CDATA[<p>解决 Bad SMB2 (sign_algo_id&#x3D;0) signature for message 问题<br>最近线下培训教育机构都停了，孩子报的班都改为了线上授课，教练和老师会把视频发过来，看着学。</p>
<p>由于手机屏幕太小，所以打算把视频放到家里的服务器上，通过 samba 共享让投影可以读取。</p>
<p>但是却遇到不能连接的问题，看了下服务器的日志，发现有报错：</p>
<figure class="highlight plaintext"><table><tr><td class="code"><pre><span class="line">[2022/03/23 00:57:09.728871,  0] ../../libcli/smb/smb2_signing.c:722(smb2_signing_check_pdu)</span><br><span class="line">  Bad SMB2 (sign_algo_id=0) signature for message</span><br><span class="line">[2022/03/23 00:57:09.729142,  0] ../../lib/util/util.c:570(dump_data)</span><br><span class="line">  [0000] 73 34 44 8A 28 41 5E 00   D4 5E 9D 5D 38 39 9B A0   s4D.(A^. .^.]89..</span><br><span class="line">[2022/03/23 00:57:09.729263,  0] ../../lib/util/util.c:570(dump_data)</span><br><span class="line">  [0000] 6C 38 C8 B5 93 51 16 95   12 2C 64 92 54 A0 E2 8E   l8...Q.. .,d.T...</span><br><span class="line">[2022/03/23 00:57:42.258662,  0] ../../source3/smbd/server.c:1734(main)</span><br></pre></td></tr></table></figure>

<p>搜索了一下，似乎只有一个方案，就是降级协议，在 <code>/etc/samba/smb.conf</code> 文件的 <code>[global]</code> 中增加下面的配置：</p>
<figure class="highlight plaintext"><table><tr><td class="code"><pre><span class="line">server min protocol = LANMAN2</span><br></pre></td></tr></table></figure>

<p>重启服务， <code>systemctl restart smb</code>。</p>
<p>再次连接，成功！</p>
]]></content>
      <tags>
        <tag>Server&amp;OS</tag>
        <tag>经验</tag>
      </tags>
  </entry>
  <entry>
    <title>快速搭建一个SMTP邮件服务</title>
    <url>/2022/06/10/smtp.html</url>
    <content><![CDATA[<p>由于最近一台VPS要到期不打算续费了，上面有一个SMTP发邮件的服务，因此需要转移。</p>
<p>当时配置的时候，是直接在宿主机搞的，转移起来有些麻烦。</p>
<p>为了以后转移方便，这次打算使用 docker 部署。</p>
<p>在网上找了半天，有很多类似的快速搭建的 Docker 镜像。</p>
<p>我找到的是这个 <a href="https://github.com/cainwise/docker-postfix">https://github.com/cainwise/docker-postfix</a>。</p>
<p>但是这个库里记录的 Docker 镜像已经不存在或者被作者设置为私有了。</p>
<p>而 Dockerfile 编译也因为软件包过时的原因，无法编译了。</p>
<p>于是花了三天三夜的时间重写了 Dockerfile。</p>
<p>新的代码库：<a href="https://github.com/ety001/docker-postfix">https://github.com/ety001/docker-postfix</a></p>
<p>现在可以基于我新做的 Docker 镜像来快速部署 SMTP 服务了。</p>
<p>假设要为 <code>example.com</code> 域设置一个邮件服务器 <code>mail.example.com</code>（IP 地址为 1.2.3.4），并开启 STARTTLS 的支持。</p>
<h2 id="创建-Postfix-容器"><a href="#创建-Postfix-容器" class="headerlink" title="创建 Postfix 容器"></a>创建 Postfix 容器</h2><p>创建目录 <code>/etc/postfix_conf/dkim_keys</code> 和 <code>/etc/postfix_conf/tls</code>。</p>
<figure class="highlight sh"><table><tr><td class="code"><pre><span class="line"><span class="built_in">mkdir</span> -p /etc/postfix_conf/dkim_keys</span><br><span class="line"><span class="built_in">mkdir</span> -p /etc/postfix_conf/tls</span><br></pre></td></tr></table></figure>

<p>运行临时容器，不带 STARTTLS 功能</p>
<figure class="highlight sh"><table><tr><td class="code"><pre><span class="line">shell&gt; docker run --name postfix \</span><br><span class="line">          -itd --<span class="built_in">rm</span>\</span><br><span class="line">          --restart always \</span><br><span class="line">          -p 25:25 \</span><br><span class="line">          -e MTA_DOMAIN=example.com \</span><br><span class="line">          -e MTA_HOST=mail.example.com \</span><br><span class="line">          -e MTA_USERS=user:passwd \</span><br><span class="line">          -v /etc/postfix_conf/dkim_keys:/etc/opendkim/keys \</span><br><span class="line">          ety001/postfix</span><br></pre></td></tr></table></figure>

<p>使用 <a href="https://acme.sh/">acme.sh</a> 来申请证书并安装证书</p>
<figure class="highlight sh"><table><tr><td class="code"><pre><span class="line">shell&gt; acme.sh --issue -d mail.example.com --dns dns_cf</span><br><span class="line">shell&gt; acme.sh --installcert \</span><br><span class="line">    -d mail.example.com \</span><br><span class="line">    --key-file /etc/postfix_conf/tls/mail.example.com.key \</span><br><span class="line">    --fullchain-file /etc/postfix_conf/tls/mail.example.com.crt \</span><br><span class="line">    --reloadcmd <span class="string">&quot;docker restart postfix&quot;</span></span><br></pre></td></tr></table></figure>

<p>停止容器，启动正式容器（即多增加一个证书目录的映射）</p>
<figure class="highlight sh"><table><tr><td class="code"><pre><span class="line">shell&gt; docker stop postfix</span><br><span class="line">shell&gt; docker run --name postfix \</span><br><span class="line">          -itd --restart always \</span><br><span class="line">          -p 25:25 \</span><br><span class="line">          -e MTA_DOMAIN=example.com \</span><br><span class="line">          -e MTA_HOST=mail.example.com \</span><br><span class="line">          -e MTA_USERS=user:passwd \</span><br><span class="line">          -v /etc/postfix_conf/dkim_keys:/etc/opendkim/keys \</span><br><span class="line">          -v /etc/postfix_conf/tls:/etc/postfix/tls \</span><br><span class="line">          ety001/postfix</span><br></pre></td></tr></table></figure>

<h2 id="配置-MX-记录-和-A-记录"><a href="#配置-MX-记录-和-A-记录" class="headerlink" title="配置 MX 记录 和 A 记录"></a>配置 MX 记录 和 A 记录</h2><table>
<thead>
<tr>
<th>Type</th>
<th>Host</th>
<th>Answer</th>
</tr>
</thead>
<tbody><tr>
<td>MX</td>
<td>example.com</td>
<td>mail.example.com</td>
</tr>
<tr>
<td>A</td>
<td>mail.example.com</td>
<td>1.2.3.4</td>
</tr>
</tbody></table>
<ul>
<li>MX 保证向 <code>example.com</code> 域发送的邮件就会被递送到 <code>mail.example.com</code>。</li>
<li>A 记录保证能解析到 <code>mail.example.com</code> 的 IP 地址。</li>
</ul>
<h2 id="配置-PTR-记录-rDNS"><a href="#配置-PTR-记录-rDNS" class="headerlink" title="配置 PTR 记录 (rDNS)"></a>配置 PTR 记录 (rDNS)</h2><p>为 <code>1.2.3.4</code> 配置反向解析，值为 <code>mail.example.com</code>。</p>
<h2 id="配置-SPF-记录"><a href="#配置-SPF-记录" class="headerlink" title="配置 SPF 记录"></a>配置 SPF 记录</h2><table>
<thead>
<tr>
<th>Type</th>
<th>Host</th>
<th>Answer</th>
</tr>
</thead>
<tbody><tr>
<td>TXT</td>
<td>example.com</td>
<td><code>v=spf1 mx ~all</code></td>
</tr>
<tr>
<td>SPF</td>
<td>example.com</td>
<td><code>v=spf1 mx ~all</code></td>
</tr>
</tbody></table>
<h2 id="配置-DKIM-记录"><a href="#配置-DKIM-记录" class="headerlink" title="配置 DKIM 记录"></a>配置 DKIM 记录</h2><p>容器创建后，会在容器日志中显示公钥值，将其中的值按如下方式填写即可：</p>
<table>
<thead>
<tr>
<th>Type</th>
<th>Host</th>
<th>Answer</th>
</tr>
</thead>
<tbody><tr>
<td>TXT</td>
<td>mail._domainkey.example.com</td>
<td><code>v=DKIM1; k=rsa; p=MIGfMA0GCSqGSIb3DQEBAQUAA4GNADCBiQKBgQCi3zFH65YkLK+Edfu3VeZH2ylOpNC3ADfkL2p1PjhWQXrzn65rvrh2YTqEEb8xGunWD9c422SBoxRdpVENhUqnbb1Tk0Xu58gfrN2muTIedFDtWx7irvySNtDgcWWIdXDaPFk/nodeutahtueaszEuLqI/DpKD/9mY9Mm5QIDAQAB</code></td>
</tr>
</tbody></table>
<h2 id="配置-DMARC-记录"><a href="#配置-DMARC-记录" class="headerlink" title="配置 DMARC 记录"></a>配置 DMARC 记录</h2><table>
<thead>
<tr>
<th>Type</th>
<th>Host</th>
<th>Answer</th>
</tr>
</thead>
<tbody><tr>
<td>TXT</td>
<td>_dmarc.example.com</td>
<td><code>v=DMARC1; p=reject; rua=postmaster@mexample.com</code></td>
</tr>
</tbody></table>
<h2 id="测试"><a href="#测试" class="headerlink" title="测试"></a>测试</h2><p>用一个简单 Node 程序来测试邮件服务是否可以正常工作。</p>
<figure class="highlight js"><table><tr><td class="code"><pre><span class="line"><span class="meta">&#x27;use strict&#x27;</span>;</span><br><span class="line"></span><br><span class="line"><span class="keyword">const</span> nodemailer = <span class="built_in">require</span>(<span class="string">&#x27;nodemailer&#x27;</span>);</span><br><span class="line"></span><br><span class="line"><span class="keyword">const</span> transporter = nodemailer.<span class="title function_">createTransport</span>(&#123;</span><br><span class="line">  <span class="attr">host</span>: <span class="string">&#x27;mail.example.com&#x27;</span>,</span><br><span class="line">  <span class="attr">port</span>: <span class="number">25</span>,</span><br><span class="line">  <span class="attr">secure</span>: <span class="literal">false</span>,</span><br><span class="line">  <span class="attr">requireTLS</span>: <span class="literal">true</span>,</span><br><span class="line">  <span class="attr">auth</span>: &#123;</span><br><span class="line">    <span class="attr">user</span>: <span class="string">&#x27;user@mail.example.com&#x27;</span>,</span><br><span class="line">    <span class="attr">pass</span>: <span class="string">&#x27;passwd&#x27;</span></span><br><span class="line">  &#125;,</span><br><span class="line">&#125;);</span><br><span class="line"></span><br><span class="line"><span class="comment">// setup e-mail data with unicode symbols</span></span><br><span class="line"><span class="keyword">var</span> mailOptions = &#123;</span><br><span class="line">  <span class="attr">from</span>: <span class="string">&#x27;&quot;BOSS&quot; &lt;boss@example.com&gt;&#x27;</span>, <span class="comment">// sender address</span></span><br><span class="line">  <span class="attr">to</span>: <span class="string">&#x27;&lt;your mail&gt;&#x27;</span>, <span class="comment">// list of receivers</span></span><br><span class="line">  <span class="attr">subject</span>: <span class="string">&#x27;风中的来信&#x27;</span>, <span class="comment">// Subject line</span></span><br><span class="line">  <span class="attr">text</span>: <span class="string">&#x27;为了防止垃圾邮件，现在有许多 SMTP 服务器要求客户端的 IP 地址必须要能够查到有效的 PTR 记录。&#x27;</span>, <span class="comment">// plaintext body</span></span><br><span class="line">  <span class="attr">html</span>: <span class="string">&#x27;为了防止垃圾邮件，现在有许多 SMTP 服务器要求客户端的 IP 地址必须要能够查到有效的 PTR 记录。&#x27;</span> <span class="comment">// html body</span></span><br><span class="line">&#125;;</span><br><span class="line"></span><br><span class="line"><span class="comment">// send mail with defined transport object</span></span><br><span class="line">transporter.<span class="title function_">sendMail</span>(mailOptions, <span class="keyword">function</span>(<span class="params">error, info</span>)&#123;</span><br><span class="line">  <span class="keyword">if</span>(error)&#123;</span><br><span class="line">    <span class="keyword">return</span> <span class="variable language_">console</span>.<span class="title function_">log</span>(error);</span><br><span class="line">  &#125;</span><br><span class="line">  <span class="variable language_">console</span>.<span class="title function_">log</span>(<span class="string">&#x27;Message sent: &#x27;</span> + info.<span class="property">response</span>);</span><br><span class="line">&#125;)</span><br></pre></td></tr></table></figure>
]]></content>
      <tags>
        <tag>Server&amp;OS</tag>
        <tag>服务器</tag>
      </tags>
  </entry>
  <entry>
    <title>Chromebook 使用 flatpak 来管理应用</title>
    <url>/2022/05/01/chromebook-flatpak.html</url>
    <content><![CDATA[<p>之前使用 Chromebook 内置的 Linux 容器，一直都是用系统自带的 apt 包管理程序，但是很多常用的社交软件都不在 apt 包管理中，比如 slack, telegram, discord 等等。</p>
<p>每次都要挨个网站去下载 deb 安装包，然后手动一个个安装，非常费劲。</p>
<p>这次借着五一假期对我的 Pixelbook 进行下优化整理，用 flatpak 来作为主要的包管理工具。</p>
<p>之所以选择 flatpak 主要是这个货官方页面显示支持 ChromeOS，那么意味着大概率是有针对 ChromeOS 进行过优化的。</p>
<p><img src="https://user-images.githubusercontent.com/801928/166149267-78c52d52-d4f0-4ea0-97d2-bbc409dda11a.png" alt="image"></p>
<p>安装 flatpak 非常简单，按照官方的教程，逐步操作即可完成，<a href="https://flatpak.org/setup/Chrome%20OS">https://flatpak.org/setup/Chrome%20OS</a>。</p>
<p>针对国内用户，唯一需要了解的就是如何给使用 flatpak 安装的应用，增加代理配置。</p>
<p>网上给出的方案，我没有尝试成功，不过这里还是要记录下。</p>
<p>思路就是进入 flatpak 安装的应用的沙盒环境，然后使用 <code>gsettings</code> 来设置 <code>dconf</code> 数据库。</p>
<p>有些应用是直接从 <code>dconf</code> 获取相关配置的，具体命令如下：</p>
<figure class="highlight plaintext"><table><tr><td class="code"><pre><span class="line">#进入容器</span><br><span class="line">flatpak run --command=sh com.google.Chrome</span><br><span class="line"></span><br><span class="line">#设置代理为手动模式</span><br><span class="line">gsettings set org.gnome.system.proxy mode &#x27;manual&#x27;</span><br><span class="line"></span><br><span class="line">#设置 HTTP 代理</span><br><span class="line">gsettings set org.gnome.system.proxy.http host localhost</span><br><span class="line">gsettings set org.gnome.system.proxy.http port 3128 </span><br><span class="line"></span><br><span class="line">#设置 HTTPS 代理</span><br><span class="line">gsettings set org.gnome.system.proxy.https host localhost</span><br><span class="line">gsettings set org.gnome.system.proxy.https port 3128 </span><br><span class="line"></span><br><span class="line">#设置 Socks 代理</span><br><span class="line">gsettings set org.gnome.system.proxy.socks host localhost</span><br><span class="line">gsettings set org.gnome.system.proxy.socks port 1080</span><br></pre></td></tr></table></figure>

<p>我没有测试成功这种方法。</p>
<p>我的方法是，修改 <code>~/.local/share/flatpak/exports/share/applications/</code> 目录下面相关的 <code>*.desktop</code> 文件，如下：</p>
<figure class="highlight plaintext"><table><tr><td class="code"><pre><span class="line">[Desktop Entry]</span><br><span class="line">Name=Discord</span><br><span class="line">StartupWMClass=discord</span><br><span class="line">Comment=All-in-one voice and text chat for gamers that&#x27;s free, secure, and works on both your desktop and phone.</span><br><span class="line">GenericName=Internet Messenger</span><br><span class="line">Exec=env http_proxy=http://127.0.0.1:8001 https_proxy=http://127.0.0.1:8001 sommelier -X --scale=0.35 /usr/bin/flatpak run --branch=stable --arch=x86_64 --command=discord com.discordapp.Discord</span><br><span class="line">Icon=com.discordapp.Discord</span><br><span class="line">Type=Application</span><br><span class="line">Categories=Network;InstantMessaging;</span><br><span class="line">Path=/usr/bin</span><br><span class="line">X-Flatpak-Tags=proprietary;</span><br><span class="line">X-Flatpak=com.discordapp.Discord</span><br></pre></td></tr></table></figure>

<p>可以看到我在 Exec 中增加了两条 env 指令来配置容器启动时的环境变量。</p>
<p>除了代理外，还有个问题就是 Linux 容器下打开的应用的鼠标指针很小，找到的解决方案是使用 <code>sommelier</code> 命令指定 scale 值。</p>
<p>在上面的代码中能看到，在调用 <code>/usr/bin/flatpak</code> 之前，先调用了 <code>sommelier -X --scale=0.35</code>。</p>
<p>具体的 scale 值需要看你的具体的环境来调整。</p>
<p>这下安装这些社交软件，就可以一键完成了。赞！</p>
<figure class="highlight plaintext"><table><tr><td class="code"><pre><span class="line">flatpak install flathub org.mozilla.firefox</span><br><span class="line">flatpak install flathub com.visualstudio.code</span><br><span class="line">flatpak install flathub com.slack.Slack</span><br><span class="line">flatpak install flathub com.authy.Authy</span><br><span class="line">flatpak install flathub org.gnome.seahorse.Application</span><br></pre></td></tr></table></figure>


]]></content>
      <tags>
        <tag>经验</tag>
        <tag>chromebook</tag>
      </tags>
  </entry>
  <entry>
    <title>The different of date command in Ubuntu and Alpine</title>
    <url>/2022/06/16/the-different-of-date-command-in-ubuntu-and-alpine.html</url>
    <content><![CDATA[<p>Today I found the <code>date</code> command has different performance when I develop a bash shell.</p>
<p>In Ubuntu OS:</p>
<figure class="highlight plaintext"><table><tr><td class="code"><pre><span class="line">-&gt; % date -d &#x27;2022-06-16T23:21:03&#x27; +%s</span><br><span class="line">1655421663</span><br></pre></td></tr></table></figure>

<p>The same command in Alpine OS. This will give an error message:</p>
<figure class="highlight plaintext"><table><tr><td class="code"><pre><span class="line">/ # date -d &#x27;2022-06-16T23:21:03&#x27; +%s</span><br><span class="line">date: invalid date &#x27;2022-06-16T23:21:03&#x27;</span><br></pre></td></tr></table></figure>

<p>We have to remove the letter <code>T</code> from the time string.</p>
<figure class="highlight plaintext"><table><tr><td class="code"><pre><span class="line">/ # date -d &#x27;2022-06-16 23:21:03&#x27; +%s</span><br><span class="line">1655421663</span><br></pre></td></tr></table></figure>
]]></content>
      <tags>
        <tag>Server&amp;OS</tag>
      </tags>
  </entry>
  <entry>
    <title>调整声卡程序的采样率</title>
    <url>/2023/02/03/change-linux-sound-rate.html</url>
    <content><![CDATA[<p>最近服务器加装了带供电的 PCIe 转 USB 的板卡，然后发现接在上面的 USB 声卡，挂载到 Linux 的虚拟机里有噪音，但是挂载到 Windows 的虚拟机里没有噪音。</p>
<p>搜索了很多内容，最终找到了解决方案，修改了一下采样率，让人难受了两个月的问题终于解决。</p>
<figure class="highlight plaintext"><table><tr><td class="code"><pre><span class="line">$ vim  ~/.config/pulse/daemon.conf</span><br><span class="line">添加下面的配置</span><br><span class="line">default-sample-rate = 48000</span><br><span class="line">保存退出，重启 pulseaudio</span><br><span class="line"></span><br><span class="line">$ pulseaudio -k</span><br><span class="line">$ pulseaudio --start</span><br></pre></td></tr></table></figure>
]]></content>
      <tags>
        <tag>配置</tag>
        <tag>经验</tag>
      </tags>
  </entry>
  <entry>
    <title>使用 rclone 连接 WebDAV 并提供 Web Api 给 nginx</title>
    <url>/2022/10/08/rclone-webdav-web-api-nginx.html</url>
    <content><![CDATA[<p>最近调整了 Steem 区块数据的备份服务，使用了新的服务商 Hetzner。</p>
<p>由于 Hetzner 提供了多种上传下载数据的方式，我测试了 rsync，samba，webdav，目前决定使用 webdav，通过牛逼的 rclone 工具。</p>
<p>这篇文章记录下相关的配置。</p>
<p>首先需要安装 rclone，安装方法在官网有 <a href="https://rclone.org/install/">https://rclone.org/install/</a>。</p>
<p>配置 rclone 也很简单，安装后执行 <code>rclone config</code>，按照提示，创建新的连接，输入连接名（比如 hetzner），选择连接方式为 <code>WebDAV</code>，输入 URL、用户名、密码完成配置。</p>
<p>使用 <code>rclone ls [连接名]:[目录名]</code> 命令，检查一下是否配置成功。</p>
<figure class="highlight plaintext"><table><tr><td class="code"><pre><span class="line">[root@steem ～]# rclone ls hetzner:steem</span><br><span class="line">192373084633 block_log_20221005.tar.gz</span><br><span class="line">341570969022 steem_api_20221005.tar.lz4</span><br><span class="line">249576123913 steem_witness_20220805.tar.lz4</span><br><span class="line">251694849097 steem_witness_20221003.tar.lz4</span><br></pre></td></tr></table></figure>

<p>执行成功。</p>
<p>现在把本地备份服务器和远端的 <a href="https://files.steem.fans/">https://files.steem.fans</a> 服务器上都配置好 rclone。</p>
<p>本地备份服务器的备份脚本，涉及上传删除的指令都换成 <code>rclone copy</code> 和 <code>rclone delete</code>。</p>
<p>远端服务器之前是 nginx 做 autoindex，并以 json 格式显示目录文件结构：</p>
<figure class="highlight plaintext"><table><tr><td class="code"><pre><span class="line">location /data &#123;</span><br><span class="line">    alias /data/wwwroot/steem;</span><br><span class="line">    autoindex   on;</span><br><span class="line">    autoindex_localtime on;</span><br><span class="line">    autoindex_exact_size off;</span><br><span class="line">    autoindex_format    json;</span><br><span class="line">    # Enable your browser to access here.</span><br><span class="line">    add_header  Access-Control-Allow-Origin &quot;*&quot;;</span><br><span class="line">    add_header  Access-Control-Allow-Methods &quot;GET, POST, OPTIONS&quot;;</span><br><span class="line">    add_header  Access-Control-Allow-Headers &quot;Origin, Authorization, Accept&quot;;</span><br><span class="line">    add_header  Access-Control-Allow-Credentials true;</span><br><span class="line">&#125;</span><br></pre></td></tr></table></figure>

<p>现在换成 rclone 了，rclone 可以用挂载的方式继续使用 nginx 的 autoindex。</p>
<p>不过这里有一个问题，就是我的 nginx 是 docker 方式运行的，rclone 挂载目录后，还需要再挂载进 docker 容器。而每次 rclone 重启，都需要再重启一遍 nginx 容器。这就很糟糕了。</p>
<p>研究了下 rclone 的文档，发现可以使用 <code>rclone serve web</code> 启动一个 Web 服务器来显示 Hetzner 服务器目录，不过不支持 json 格式显示结果。幸好有个参数可以自定义模板。于是我自己写了个模板，</p>
<figure class="highlight plaintext"><table><tr><td class="code"><pre><span class="line">[&#123;&#123;$length := len .Entries&#125;&#125;&#123;&#123;- range $i, $entry := .Entries&#125;&#125;&#123;&#123;- if $entry.IsDir&#125;&#125;&#123;&#123;if ne $i 0&#125;&#125;,&#123;&#123;end&#125;&#125;&#123; &quot;name&quot;:&quot;&#123;&#123;html $entry.Leaf&#125;&#125;&quot;, &quot;type&quot;:&quot;directory&quot;, &quot;mtime&quot;:&quot;&#123;&#123;$entry.ModTime.Format &quot;Jan 02, 2006 15:04:05 UTC&quot;&#125;&#125;&quot;, &quot;size&quot;:&#123;&#123;$entry.Size&#125;&#125;&#125;&#123;&#123;- else&#125;&#125;&#123;&#123;if ne $i 0&#125;&#125;,&#123;&#123;end&#125;&#125;&#123; &quot;name&quot;:&quot;&#123;&#123;html $entry.Leaf&#125;&#125;&quot;, &quot;type&quot;:&quot;file&quot;, &quot;mtime&quot;:&quot;&#123;&#123;$entry.ModTime.Format &quot;Jan 02, 2006 15:04:05 UTC&quot;&#125;&#125;&quot;, &quot;size&quot;:&#123;&#123;$entry.Size&#125;&#125;&#125;&#123;&#123;- end&#125;&#125;&#123;&#123;- end&#125;&#125;]</span><br></pre></td></tr></table></figure>

<p>然后安装 supervisor 来管理 <code>rclone serve</code> 服务，</p>
<figure class="highlight plaintext"><table><tr><td class="code"><pre><span class="line">[program:rclone_hetzner]</span><br><span class="line">command = /usr/bin/rclone serve http --addr 0.0.0.0:8088 --template /etc/rclone/template.html --vfs-cache-mode writes --buffer-size 32M --dir-cache-time 12h --vfs-read-chunk-size 64M --vfs-read-chunk-size-limit 1G hetzner:steem</span><br><span class="line">autostart = true</span><br><span class="line">startsecs = 10</span><br><span class="line">autorestart = true</span><br><span class="line">user = root</span><br><span class="line">stdout_logfile_maxbytes = 20MB</span><br><span class="line">stdout_logfile_backups = 20</span><br><span class="line">stdout_logfile = /var/log/supervisor/rclone_het.log</span><br><span class="line">stderr_logfile = /var/log/supervisor/rclone_het_err.log</span><br></pre></td></tr></table></figure>

<p>最后，修改 nginx 配置文件，</p>
<figure class="highlight plaintext"><table><tr><td class="code"><pre><span class="line">location ~ ^/data(/?)(.*) &#123;</span><br><span class="line">    proxy_pass http://172.20.0.1:8088/$2;</span><br><span class="line">&#125;</span><br></pre></td></tr></table></figure>

<p>访问测试下 <a href="https://files.steem.fans/data">https://files.steem.fans/data</a>，成功。</p>
<p>目前总体迁移工作完成了大部分了，还得需要再等最后的数据replay结束。</p>
]]></content>
      <tags>
        <tag>Server&amp;OS</tag>
        <tag>服务器</tag>
      </tags>
  </entry>
  <entry>
    <title>配置 duncanthrax/scream 虚拟声卡</title>
    <url>/2023/02/25/duncanthrax-scream.html</url>
    <content><![CDATA[<p>我的服务器宿主机安装的是 PVE，上面跑着一台 Archlinux 的虚拟机作为工作机（显卡、键盘、鼠标、USB声卡直通），一台 Windows 的虚拟机作为辅助（在 Archlinux 下使用 KRDC 连接后一直开着一个窗口，用来运行没法在 Linux 下原生运行的程序，比如微信）。</p>
<p>最近看到 Atlas OS 不错，于是想要用 Atlas OS 重做 Windows 虚拟机。</p>
<p>但是问题是 Atlas OS 不支持 RDP，于是我只能选择 VNC 方式连接（tightvnc）。</p>
<p>但是众所周知，VNC 不支持声音传输。</p>
<p>搜索了一晚上，终于找到了一个牛逼的库，可以在 Windows 下实现虚拟声卡，然后通过 multicast 或者 unicast 的方式，把声音转到同局域网下的其他设备播放。</p>
<p>地址：<a href="https://github.com/duncanthrax/scream">https://github.com/duncanthrax/scream</a></p>
<p>我们的目的就是在 Windows 虚拟机安装虚拟声卡，在 Archlinux 下安装 Receiver。</p>
<p>Archlinux 下安装 Receiver 非常简单，直接用 Aur 库安装即可，</p>
<figure class="highlight plaintext"><table><tr><td class="code"><pre><span class="line">yay -S scream-git</span><br></pre></td></tr></table></figure>

<p>安装后，启动</p>
<figure class="highlight plaintext"><table><tr><td class="code"><pre><span class="line">scream -u -o pulse</span><br></pre></td></tr></table></figure>

<p>这样就指定 Receiver 用 unicast 方式接收数据，然后转给 pulseaudio 进行播放。</p>
<p>然后去 <a href="https://github.com/duncanthrax/scream">duncanthrax&#x2F;scream</a> 库的 Release 页面下载最新版本。</p>
<p>解压后，找到安装 bat 脚本，选择 x64 架构的，右键，用管理员权限执行。</p>
<p>这里在 Atlas 下有个问题，就是 Atlas 把 netlogon 服务给干掉了，导致 bat 脚本的 <code>net session</code> 执行失败，进而检查用户权限失败，进而无法安装。解决方法就是用记事本编辑 bat 脚本，把里面的 if 部分去掉，然后再用管理员权限执行，即可完成安装。</p>
<p>之后，需要配置 Windows 端也使用 unicast 。</p>
<p><img src="https://cdn.steemitimages.com/DQmSXbJXEvpdpqMTLnVDbu491GQncxZzavgUTEXrd7ii8Ld/image.png" alt="image.png"></p>
<p>按照图片在注册表中新建指定内容即可，一个配置指向 IP，一个配置指向端口，截图里的端口是 4011，Receiver 的默认端口是 4010。</p>
<p>修改完注册表，需要重启计算机，之后就能在 Windows 里播放声音测试了。</p>
<p>测试没有问题，我们需要在 Receiver 端配置开启启动，</p>
<p>新建 <code>~/.config/systemd/user/scream.service</code> 文件，内容如下：</p>
<figure class="highlight plaintext"><table><tr><td class="code"><pre><span class="line">[Unit]</span><br><span class="line">Description=scream</span><br><span class="line"></span><br><span class="line">[Service]</span><br><span class="line">ExecStart=/usr/bin/scream -u -p 4011 -o pulse</span><br><span class="line">Restart=always</span><br><span class="line"></span><br><span class="line">[Install]</span><br><span class="line">WantedBy=default.target</span><br></pre></td></tr></table></figure>

<p>然后执行下面的命令，设置为开机自启动</p>
<figure class="highlight plaintext"><table><tr><td class="code"><pre><span class="line">$ systemctl --user enable scream</span><br></pre></td></tr></table></figure>

<p>最后重启下 Archlinux 试试。</p>
]]></content>
      <tags>
        <tag>配置</tag>
        <tag>经验</tag>
      </tags>
  </entry>
  <entry>
    <title>记录下 Redmi AX6 扩容刷机过程</title>
    <url>/2023/03/02/redmi-ax6-router.html</url>
    <content><![CDATA[<h1 id="前情提要"><a href="#前情提要" class="headerlink" title="前情提要"></a>前情提要</h1><p>前段时间刷机，因为<a href="https://openwrt.org/inbox/toh/xiaomi/xiaomi_redmi_ax6_ax3000">官方文档</a>的问题，我把路由刷成砖了。</p>
<p>然后尝试了 ttl 救砖，一开始能进 uboot ，后来因为刷错了，导致 uboot 也挂了。</p>
<p><img src="/./img/2023/DQmNqbFU8CEbnwGosn5FeJMWukCG7ASeZh822CXxDJwyVhk.png" alt="image.png"></p>
<p>最后买了热风枪和编程器，拆焊后，用编程器刷固件。</p>
<p><img src="/./img/2023/DQmTxfB1u8BEjBmCJfbTRh4gnUewRLUKRYEyGdaWAti9xwb.png" alt="image.png"></p>
<p>固件倒是刷成功了，但是焊回去后，路由无法开机，看上去焊接的没有问题，估计是热风枪把路由器主板搞的太热，把某个元器件搞坏了吧，毕竟是我第一次用热风枪。</p>
<p><img src="/./img/2023/DQme1AR7WPKcMk1gaDEpzWhSTr1ojMEN29BcDV82yyN3eR1.png" alt="image.png"></p>
<p>于是从闲鱼二手买了一个同款路由器，重新刷机。之所以买同款，是因为这台路由器整体的硬件配置和价格真的是超高性价比啊。</p>
<p>这次吸取了之前刷机时对于官方文档中不确定的命令参数不懂硬上的教训，所以记录一下整个刷机过程。</p>
<p>大概过程是：</p>
<ul>
<li>破解获取SSH权限</li>
<li>刷入临时 Openwrt 固件到 mtd12，设置下次引导到 mtd12，重启</li>
<li>刷入扩容后的分区表到 mtd1，刷入魔改后的不死 uboot 到 mtd7</li>
<li><strong>断电</strong></li>
<li>按住 reset 键，上电，电脑网线连接 LAN 口，手动配置路由 IP 为 192.168.1.4&#x2F;24</li>
<li>访问 uboot 的 web 界面，192.168.1.1，刷入最终的 Openwrt 固件</li>
</ul>
<p>所有涉及到的固件都在这里： <a href="https://pan.baidu.com/s/1341uqxZab8om_YL9UEJpAA?pwd=2333">https://pan.baidu.com/s/1341uqxZab8om_YL9UEJpAA?pwd&#x3D;2333</a></p>
<h1 id="破解"><a href="#破解" class="headerlink" title="破解"></a>破解</h1><p>小米在旧的固件上不知道是故意留的后门，还是真有漏洞。第一步就是通过路由器管理界面的升级功能，降级固件到 1.0.16。</p>
<p>之后需要准备一台 OpenWRT，我这里正好有个闲置的刚好拿来用。</p>
<p><img src="/./img/2023/DQmU9EJ2TisQ97wcJFouFJxfY5izG4YkvUR6iA8hMEJQmmK.png" alt="image.png"></p>
<p>把这台 OpenWRT 的 LAN 口 IP 设置为 <code>169.254.31.1</code>，然后关闭 DHCP。</p>
<p>之后把 PC 端修改为 <code>169.254.31.22/24</code>（这里官方文档是错误的）。</p>
<p>完成生效后，登陆这台路由器的 SSH，创建文件 <code>/usr/lib/lua/luci/controller/admin/xqsystem.lua</code>，内容为：</p>
<figure class="highlight plaintext"><table><tr><td class="code"><pre><span class="line">module(&quot;luci.controller.admin.xqsystem&quot;, package.seeall)</span><br><span class="line"></span><br><span class="line">function index()</span><br><span class="line">    local page   = node(&quot;api&quot;)</span><br><span class="line">    page.target  = firstchild()</span><br><span class="line">    page.title   = (&quot;&quot;)</span><br><span class="line">    page.order   = 100</span><br><span class="line">    page.index = true</span><br><span class="line">    page   = node(&quot;api&quot;,&quot;xqsystem&quot;)</span><br><span class="line">    page.target  = firstchild()</span><br><span class="line">    page.title   = (&quot;&quot;)</span><br><span class="line">    page.order   = 100</span><br><span class="line">    page.index = true</span><br><span class="line">    entry(&#123;&quot;api&quot;, &quot;xqsystem&quot;, &quot;token&quot;&#125;, call(&quot;getToken&quot;), (&quot;&quot;), 103, 0x08)</span><br><span class="line">end</span><br><span class="line"></span><br><span class="line">local LuciHttp = require(&quot;luci.http&quot;)</span><br><span class="line"></span><br><span class="line">function getToken()</span><br><span class="line">    local result = &#123;&#125;</span><br><span class="line">    result[&quot;code&quot;] = 0</span><br><span class="line">    result[&quot;token&quot;] = &quot;; echo -e &#x27;admin\nadmin&#x27; | passwd root; nvram set ssh_en=1; nvram commit; sed -i &#x27;s/channel=.*/channel=\&quot;debug\&quot;/g&#x27; /etc/init.d/dropbear; /etc/init.d/dropbear start;&quot;</span><br><span class="line">    LuciHttp.write_json(result)</span><br><span class="line">end</span><br></pre></td></tr></table></figure>

<p>保存后，这时你用电脑访问 <code>http://169.254.31.1/cgi-bin/luci/api/xqsystem/token</code> 就能看到上面脚本文件中 <code>result</code> 变量的输出内容了，这个就是一会需要注入到 Redmi AX6 路由的代码。</p>
<p>可以看到我们注入的代码做了这么两个工作：</p>
<ul>
<li>修改 root 用户密码为 admin</li>
<li>启动 ssh 服务</li>
</ul>
<p>准备工作完毕，下面正式开始破解。</p>
<p>PC 清空之前的 IP 设置，改为自动获取，使用网线连接 Redmi AX6（之所以用网线，是因为破解使用的是路由无线中继中的漏洞，如果用 wifi 连接，在破解过程中会脱离与路由器的连接）。</p>
<p>登陆 Redmi AX6 网页界面后，可以看到 URL 中有一个 <code>stok</code> 的值，我们复制出来备用（这里假设是 <code>aaabbb</code>）。</p>
<p>假设我们之前准备的 OpenWRT 路由的 WiFi 名是 <code>ety001op</code>，密码是 <code>12345678</code>。</p>
<p>构造下面两条URL，然后浏览器依次访问</p>
<figure class="highlight plaintext"><table><tr><td class="code"><pre><span class="line">http://192.168.31.1/cgi-bin/luci/;stok=aaabbb/api/misystem/extendwifi_connect?ssid=ety001op&amp;password=12345678</span><br><span class="line">替换 stok, ssid, password 为你自己的</span><br><span class="line"></span><br><span class="line">http://192.168.31.1/cgi-bin/luci/;stok=aaabbb/api/xqsystem/oneclick_get_remote_token?username=xxx&amp;password=xxx&amp;nonce=xxx</span><br><span class="line">替换 stok 为你自己的</span><br></pre></td></tr></table></figure>

<p>第一个 URL 是让 Redmi 去连接我们准备的路由器，第二个 URL 就是让 Redmi 获取要注入的代码。</p>
<p>下面我们 <code>ssh root@192.168.31.1</code> 就能连接到 Redmi 的终端界面了，密码是 <code>admin</code>。</p>
<p>至此破解结束。</p>
<h1 id="刷入临时-OpenWRT"><a href="#刷入临时-OpenWRT" class="headerlink" title="刷入临时 OpenWRT"></a>刷入临时 OpenWRT</h1><p>进入 Redmi 的终端后，如果你想备份下，可以执行下面的命令备份相关的分区</p>
<figure class="highlight plaintext"><table><tr><td class="code"><pre><span class="line">dd if=/dev/mtd1 of=/tmp/mtd1.bin</span><br></pre></td></tr></table></figure>

<p>具体的分区情况，可以通过这条命令查看</p>
<figure class="highlight plaintext"><table><tr><td class="code"><pre><span class="line">cat /proc/mtd</span><br></pre></td></tr></table></figure>

<p>一般备份下 ART 分区，uboot 分区。</p>
<p>因为 Redmi AX6 是双系统，mtd12 一个系统，mtd13 一个系统。</p>
<p>我们要合并的是 mtd12, mtd13, mtd14(overlay分区)，因此我们需要先确认下我们目前是启动的哪个分区的系统（一般情况下出厂都是 mtd13 分区的系统）。</p>
<figure class="highlight plaintext"><table><tr><td class="code"><pre><span class="line">nvram get flag_boot_rootfs</span><br></pre></td></tr></table></figure>

<p>这是对照表</p>
<figure class="highlight plaintext"><table><tr><td class="code"><pre><span class="line">mtd12  &quot;rootfs&quot;    0</span><br><span class="line">mtd13  &quot;rootfs_1&quot;  1</span><br></pre></td></tr></table></figure>

<p>如果你看到你输出结果是 0，那么你现在用的是 mtd12 的系统，你需要先切换到 mtd13 系统去</p>
<figure class="highlight plaintext"><table><tr><td class="code"><pre><span class="line">nvram set flag_last_success=1</span><br><span class="line">nvram set flag_boot_rootfs=1</span><br><span class="line">nvram commit</span><br><span class="line">reboot</span><br></pre></td></tr></table></figure>

<blockquote>
<p>我们必须确保自己是在 mtd13 分区的系统中</p>
</blockquote>
<p>下面刷入临时系统（固件xiaomimtd12.bin）到  mtd12 分区，同时设置下次启动 mtd12 分区</p>
<figure class="highlight plaintext"><table><tr><td class="code"><pre><span class="line">mtd write /tmp/xiaomimtd12.bin rootfs</span><br><span class="line">nvram set flag_last_success=0</span><br><span class="line">nvram set flag_boot_rootfs=0</span><br><span class="line">nvram commit</span><br><span class="line">reboot</span><br></pre></td></tr></table></figure>

<p>如果一切顺利，重启后，你 PC 的 IP 地址会获取到 <code>192.168.1.0/24</code> 段的，访问 <code>192.168.1.1</code> 可以顺利打开 OpenWRT 登陆界面。</p>
<h1 id="扩容并刷入Uboot"><a href="#扩容并刷入Uboot" class="headerlink" title="扩容并刷入Uboot"></a>扩容并刷入Uboot</h1><p>我们重新登陆 SSH，<code>ssh root@192.168.1.1</code>，这个临时 OpenWRT 密码为空。</p>
<p>通过工具把 <code>ax6-uboot.bin</code> 和 <code>ax6-uboot-mibib.bin</code> 两个文件传入到路由器 <code>/tmp</code> 目录里。</p>
<p>扩容前打印下分区表，确认 mtd1 和 mtd7 存在</p>
<figure class="highlight plaintext"><table><tr><td class="code"><pre><span class="line">cat /proc/mtd</span><br></pre></td></tr></table></figure>

<p>确认后，顺次执行下面的命令，擦除分区并写入</p>
<figure class="highlight plaintext"><table><tr><td class="code"><pre><span class="line">mtd erase /dev/mtd1</span><br><span class="line">mtd write /tmp/ax6-uboot-mibib.bin /dev/mtd1</span><br><span class="line">mtd erase /dev/mtd7</span><br><span class="line">mtd write /tmp/ax6-uboot.bin /dev/mtd7</span><br></pre></td></tr></table></figure>

<p>等待执行成功。</p>
<h1 id="断电"><a href="#断电" class="headerlink" title="断电"></a>断电</h1><p>分区修改后，记得一点要 <strong>断电</strong>。</p>
<p>分区修改后，记得一点要 <strong>断电</strong>。</p>
<h1 id="刷入最终的系统"><a href="#刷入最终的系统" class="headerlink" title="刷入最终的系统"></a>刷入最终的系统</h1><p>剩下的操作就简单了，只要能顺利进入 Uboot，以后刷机就简单了，也不用担心变砖了（理论上 factory 的固件都可以刷）。</p>
<p>进入 Uboot 的方法基本上都一样，就是在断电的情况下，按住 reset ，上电。</p>
<p>Redmi AX6 指示灯会先蓝灯闪烁，然后变黄灯，这时松开 reset ，电脑上手动配置 IP 为 <code>192.168.1.2/24</code>。</p>
<p>进入 Uboot 的 Web 界面 <code>192.168.1.1</code>，选择最终固件 <code>openwrt-ipq807x-generic-redmi_ax6-squashfs-nand-factory.ubi</code> ，刷入，重启，成功！</p>
]]></content>
      <tags>
        <tag>配置</tag>
        <tag>经验</tag>
      </tags>
  </entry>
  <entry>
    <title>Demo code about how to create a new account by Steem JS SDK</title>
    <url>/2023/03/27/demo-code-about-how-to-create-a-new-account-by-steem-js-sdk.html</url>
    <content><![CDATA[<p>Here is the demo code which displays how to create a new account with Steem JS SDK in two different ways ( by taking fee or by taking interests of claimed account).</p>
<figure class="highlight plaintext"><table><tr><td class="code"><pre><span class="line">const steem = require(&#x27;steem&#x27;)</span><br><span class="line"></span><br><span class="line">const creator = &#x27;test1&#x27;;</span><br><span class="line">const activeWif = &#x27;&#x27;;</span><br><span class="line">const newUsername = &#x27;test2&#x27;;</span><br><span class="line">const newPasswd = &#x27;P5KZS6bp8sVxxxxxxxxxD48jwBKxshpNZxsYnJ&#x27;;</span><br><span class="line">const fee = &#x27;3.000 STEEM&#x27;</span><br><span class="line"></span><br><span class="line">const newKeys = steem.auth.getPrivateKeys(newUsername, newPasswd, [&#x27;owner&#x27;, &#x27;active&#x27;, &#x27;posting&#x27;, &#x27;memo&#x27;]);</span><br><span class="line">console.log(newKeys);</span><br><span class="line"></span><br><span class="line">const weightThreshold = 1;</span><br><span class="line">const accountAuths = [];</span><br><span class="line">const owner = &#123;</span><br><span class="line">    weight_threshold: weightThreshold,</span><br><span class="line">    account_auths: accountAuths,</span><br><span class="line">    key_auths: [[newKeys.ownerPubkey, 1]],</span><br><span class="line">&#125;;</span><br><span class="line">const active = &#123;</span><br><span class="line">    weight_threshold: weightThreshold,</span><br><span class="line">    account_auths: accountAuths,</span><br><span class="line">    key_auths: [[newKeys.activePubkey, 1]],</span><br><span class="line">&#125;;</span><br><span class="line">const posting = &#123;</span><br><span class="line">    weight_threshold: weightThreshold,</span><br><span class="line">    account_auths: accountAuths,</span><br><span class="line">    key_auths: [[newKeys.postingPubkey, 1]],</span><br><span class="line">&#125;;</span><br><span class="line">const memoKey = newKeys.memoPubkey;</span><br><span class="line"></span><br><span class="line">// create a new user by creator with 3.000 STEEM fee</span><br><span class="line">steem.broadcast.accountCreate(activeWif, fee, creator, newUsername, owner, active, posting, memoKey, &#x27;&#123;&#125;&#x27;, function(err, result) &#123;</span><br><span class="line">    console.log(err, result);</span><br><span class="line">&#125;);</span><br><span class="line"></span><br><span class="line">// create a new user by creator with claimed account interests</span><br><span class="line">const op = [</span><br><span class="line">    &quot;create_claimed_account&quot;,</span><br><span class="line">    &#123;</span><br><span class="line">        &quot;creator&quot;: creator,</span><br><span class="line">        &quot;new_account_name&quot;: newUsername,</span><br><span class="line">        &quot;owner&quot;: owner,</span><br><span class="line">        &quot;active&quot;: active,</span><br><span class="line">        &quot;posting&quot;: posting,</span><br><span class="line">        &quot;memo_key&quot;: memoKey,</span><br><span class="line">        &quot;json_metadata&quot;: &quot;&#123;&#125;&quot;</span><br><span class="line">    &#125;</span><br><span class="line">];</span><br><span class="line">const tx = &#123;</span><br><span class="line">    operations: [op],</span><br><span class="line">&#125;;</span><br><span class="line">steem.broadcast.send(tx, [activeWif], function(err, result) &#123;</span><br><span class="line">    console.log(err, result);</span><br><span class="line">&#125;);</span><br></pre></td></tr></table></figure>
]]></content>
      <tags>
        <tag>配置</tag>
        <tag>经验</tag>
        <tag>steem</tag>
        <tag>steemit</tag>
      </tags>
  </entry>
  <entry>
    <title>搭建 wireguard 中继服务器连通两个没有公网IP的局域网</title>
    <url>/2023/05/04/wireguard-ip.html</url>
    <content><![CDATA[<h1 id="前置信息"><a href="#前置信息" class="headerlink" title="前置信息"></a>前置信息</h1><p>之前两个局域网是靠 zerotier 连接的，但是 zerotier 在国内的网络环境实在是太糟糕了，即使我用了黑科技在国内服务器上搭建两 planet ，依旧是不稳定。</p>
<p>于是放弃 zerotier ，转而使用 wireguard 组建我的工作 VPN。</p>
<p>网络信息如下：</p>
<ul>
<li>局域网A:  192.168.196.0&#x2F;22，  做节点的机器A的 IP: 192.168.199.81</li>
<li>局域网B:  192.168.31.0&#x2F;24，  做节点的机器B的 IP: 192.168.31.5</li>
<li>服务器: x.x.x.x</li>
</ul>
<p>公私钥信息如下：</p>
<ul>
<li>机器A:    PubKeyA&#x2F;PrivKeyA</li>
<li>机器B:    PubKeyB&#x2F;PrivKeyB</li>
<li>服务器:    PubKeyServ&#x2F;PrivKeyServ</li>
</ul>
<blockquote>
<p>公私钥生成命令：</p>
</blockquote>
<figure class="highlight plaintext"><table><tr><td class="code"><pre><span class="line">wg genkey | tee privatekey | wg pubkey &gt; publickey</span><br></pre></td></tr></table></figure>

<h1 id="步骤"><a href="#步骤" class="headerlink" title="步骤"></a>步骤</h1><p>1.三台机器都开启转发</p>
<figure class="highlight plaintext"><table><tr><td class="code"><pre><span class="line"># 添加下面的配置到 /etc/sysctl.conf 后执行 sysctl -p 生效</span><br><span class="line">net.ipv4.ip_forward = 1</span><br></pre></td></tr></table></figure>

<p>2.三台机器都安装 wireguard</p>
<p>3.机器A配置 &#x2F;etc&#x2F;wireguard&#x2F;wg0.conf</p>
<figure class="highlight plaintext"><table><tr><td class="code"><pre><span class="line">[Interface]</span><br><span class="line">PrivateKey = PrivKeyA</span><br><span class="line">Address = 10.0.1.2/32</span><br><span class="line">PostUp = iptables -A FORWARD -i %i -j ACCEPT; iptables -A FORWARD -o %i -j ACCEPT; iptables -t nat -A POSTROUTING -o eth0 -j MASQUERADE</span><br><span class="line">PostDown = iptables -D FORWARD -i %i -j ACCEPT; iptables -D FORWARD -o %i -j ACCEPT; iptables -t nat -D POSTROUTING -o eth0 -j MASQUERADE</span><br><span class="line"></span><br><span class="line">[Peer]</span><br><span class="line">PublicKey = PubKeyServ</span><br><span class="line">AllowedIPs = 10.0.1.1/32, 192.168.31.0/24</span><br><span class="line">Endpoint = x.x.x.x:51820</span><br><span class="line">PersistentKeepalive = 25</span><br></pre></td></tr></table></figure>

<p>4.机器B配置 &#x2F;etc&#x2F;wireguard&#x2F;wg0.conf</p>
<figure class="highlight plaintext"><table><tr><td class="code"><pre><span class="line">[Interface]</span><br><span class="line">PrivateKey = PrivKeyB</span><br><span class="line">Address = 10.0.1.3/32</span><br><span class="line">PostUp = iptables -A FORWARD -i %i -j ACCEPT; iptables -A FORWARD -o %i -j ACCEPT; iptables -t nat -A POSTROUTING -o eth0 -j MASQUERADE</span><br><span class="line">PostDown = iptables -D FORWARD -i %i -j ACCEPT; iptables -D FORWARD -o %i -j ACCEPT; iptables -t nat -D POSTROUTING -o eth0 -j MASQUERADE</span><br><span class="line"></span><br><span class="line">[Peer]</span><br><span class="line">PublicKey = PubKeyServ</span><br><span class="line">AllowedIPs = 10.0.1.1/32, 192.168.196.0/22</span><br><span class="line">Endpoint = x.x.x.x:51820</span><br><span class="line">PersistentKeepalive = 25</span><br></pre></td></tr></table></figure>

<p>5.服务器配置 &#x2F;etc&#x2F;wireguard&#x2F;wg0.conf</p>
<figure class="highlight plaintext"><table><tr><td class="code"><pre><span class="line">[Interface]</span><br><span class="line">PrivateKey = PrivKeyServ</span><br><span class="line">Address = 10.0.1.1/24</span><br><span class="line">ListenPort = 51820</span><br><span class="line">PostUp = iptables -t nat -A POSTROUTING -o wg0 -j MASQUERADE</span><br><span class="line">PostDown = iptables -t nat -D POSTROUTING -o wg0 -j MASQUERADE</span><br><span class="line"></span><br><span class="line">[Peer]</span><br><span class="line"># HostA</span><br><span class="line">PublicKey = PubKeyA</span><br><span class="line">AllowedIPs = 10.0.1.2/32, 192.168.196.0/22</span><br><span class="line">PersistentKeepalive = 25</span><br><span class="line"></span><br><span class="line">[Peer]</span><br><span class="line"># HostB</span><br><span class="line">PublicKey = PubKeyB</span><br><span class="line">AllowedIPs = 10.0.1.3/32, 192.168.31.0/24</span><br><span class="line">PersistentKeepalive = 25</span><br></pre></td></tr></table></figure>

<p>6.局域网A的openwrt路由器上添加静态路由</p>
<ul>
<li>接口: lan</li>
<li>目的地址: 192.168.31.0&#x2F;24</li>
<li>路由ip: 192.168.199.81</li>
<li>类型: unicast</li>
</ul>
<p>7.局域网A的openwrt路由器上添加静态路由</p>
<ul>
<li>接口: lan</li>
<li>目的地址: 192.168.196.0&#x2F;22</li>
<li>路由ip: 192.168.31.5</li>
<li>类型: unicast</li>
</ul>
<h1 id="总结"><a href="#总结" class="headerlink" title="总结"></a>总结</h1><p>主要难点就是各个节点的 AllowedIPs 和防火墙规则配置。</p>
]]></content>
      <tags>
        <tag>Server&amp;OS</tag>
        <tag>配置</tag>
        <tag>经验</tag>
        <tag>服务器</tag>
      </tags>
  </entry>
  <entry>
    <title>安装 termux 和 proot，并安装 archlinux 桌面</title>
    <url>/2023/09/29/install-termux-and-proot-and-archlinux-desktop-on-android.html</url>
    <content><![CDATA[<h1 id="1-安装-termux"><a href="#1-安装-termux" class="headerlink" title="1.安装 termux"></a>1.安装 termux</h1><p>去 <a href="https://github.com/termux/termux-app">https://github.com/termux/termux-app</a> 下载并安装</p>
<h1 id="2-打开-termux-执行下面的命令"><a href="#2-打开-termux-执行下面的命令" class="headerlink" title="2.打开 termux 执行下面的命令"></a>2.打开 termux 执行下面的命令</h1><figure class="highlight plaintext"><table><tr><td class="code"><pre><span class="line">$ pkg update</span><br><span class="line">$ pkg upgrade</span><br><span class="line">$ pkg install x11-repo proot-distro pulseaudio vim</span><br><span class="line">$ pkg install termux-x11-nightly virglrenderer-android</span><br><span class="line">$ proot-distro install archlinux</span><br></pre></td></tr></table></figure>
<p>上面的命令是更新 termux 的包管理，安装 x11 相关工具，安装 proot，安装声音相关内容，安装 3D 相关内容，安装 archlinux。</p>
<h1 id="3-进入-archlinux"><a href="#3-进入-archlinux" class="headerlink" title="3.进入 archlinux"></a>3.进入 archlinux</h1><figure class="highlight plaintext"><table><tr><td class="code"><pre><span class="line">$ proot-distro login archlinux --user root --shared-tmp</span><br></pre></td></tr></table></figure>
<p>以 root 用户身份进入 archlinux，并且跟 termux 共享 &#x2F;tmp</p>
<h1 id="4-更换-archlinux-源（-etc-pacman-d-mirrorlist）"><a href="#4-更换-archlinux-源（-etc-pacman-d-mirrorlist）" class="headerlink" title="4.更换 archlinux 源（&#x2F;etc&#x2F;pacman.d&#x2F;mirrorlist）"></a>4.更换 archlinux 源（&#x2F;etc&#x2F;pacman.d&#x2F;mirrorlist）</h1><figure class="highlight plaintext"><table><tr><td class="code"><pre><span class="line">Server = https://mirrors.tuna.tsinghua.edu.cn/archlinuxarm/$arch/$repo</span><br></pre></td></tr></table></figure>

<h1 id="5-更新安装archlinux相关内容"><a href="#5-更新安装archlinux相关内容" class="headerlink" title="5.更新安装archlinux相关内容"></a>5.更新安装archlinux相关内容</h1><figure class="highlight plaintext"><table><tr><td class="code"><pre><span class="line"># pacman -Syu</span><br><span class="line"># pacman -S vim firefox networkmanager xorg xorg-server pulseaudio noto-fonts-cjk git openssh fakeroot base-devel</span><br><span class="line"># pacman -S xfce4 xfce4-goodies lightdm tigervnc</span><br></pre></td></tr></table></figure>

<h1 id="6-配置密码和普通用户"><a href="#6-配置密码和普通用户" class="headerlink" title="6.配置密码和普通用户"></a>6.配置密码和普通用户</h1><figure class="highlight plaintext"><table><tr><td class="code"><pre><span class="line"># passwd</span><br><span class="line"># pacman -S sudo</span><br><span class="line"># useradd -m -g users -G wheel,audio,video,storage -s /bin/bash ety001</span><br><span class="line"># passwd ety001</span><br></pre></td></tr></table></figure>

<h1 id="7-配置-sudo"><a href="#7-配置-sudo" class="headerlink" title="7.配置 sudo"></a>7.配置 sudo</h1><figure class="highlight plaintext"><table><tr><td class="code"><pre><span class="line"># vim /etc/sudoers</span><br><span class="line"></span><br><span class="line">ety001  ALL=(ALL:ALL)  NOPASSWD:  ALL</span><br></pre></td></tr></table></figure>

<h1 id="8-安装-yay"><a href="#8-安装-yay" class="headerlink" title="8.安装 yay"></a>8.安装 yay</h1><figure class="highlight plaintext"><table><tr><td class="code"><pre><span class="line"># su ety001</span><br><span class="line">$ git clone https://aur.archlinux.org/yay.git &amp;&amp; cd yay &amp;&amp; makepkg -si</span><br></pre></td></tr></table></figure>

<h1 id="9-设置时区"><a href="#9-设置时区" class="headerlink" title="9.设置时区"></a>9.设置时区</h1><figure class="highlight plaintext"><table><tr><td class="code"><pre><span class="line"># ln -sf /usr/share/zoneinfo/Asia/Shanghai /etc/localtime</span><br></pre></td></tr></table></figure>

<h1 id="10-配置语言"><a href="#10-配置语言" class="headerlink" title="10.配置语言"></a>10.配置语言</h1><p>修改 <code>/etc/locale.gen</code> 中 <code>zh_CN.</code>开头的注释符，并执行 <code>locale-gen</code></p>
<p>配置默认语言</p>
<figure class="highlight plaintext"><table><tr><td class="code"><pre><span class="line"># echo &quot;LANG=zh_CN.UTF-8&quot; &gt;&gt; /etc/locale.conf</span><br></pre></td></tr></table></figure>

<h1 id="11-配置-vncserver"><a href="#11-配置-vncserver" class="headerlink" title="11.配置 vncserver"></a>11.配置 vncserver</h1><figure class="highlight plaintext"><table><tr><td class="code"><pre><span class="line">$ vncserver -localhost</span><br></pre></td></tr></table></figure>
<p>如果是第一次启动 vncserver，会提示配置 vnc 的密码。</p>
<figure class="highlight plaintext"><table><tr><td class="code"><pre><span class="line">$ vncserver -kill :1</span><br></pre></td></tr></table></figure>

<p>停止服务，然后访问 <code>~/.vnc/xstartup</code>，注释掉所有内容后，添加下面的内容</p>
<figure class="highlight plaintext"><table><tr><td class="code"><pre><span class="line">startxfce4 &amp;</span><br></pre></td></tr></table></figure>

<p>这样启动 vncserver 后，会执行启动 xfce4 桌面的命令。</p>
<p>这里需要注意的是，在启动 vncserver 前，还需要设置下面的环境变量</p>
<figure class="highlight plaintext"><table><tr><td class="code"><pre><span class="line">export DISPLAY=:1</span><br></pre></td></tr></table></figure>

<h1 id="12-启动桌面"><a href="#12-启动桌面" class="headerlink" title="12.启动桌面"></a>12.启动桌面</h1><p>回到 termux，创建 <code>start.sh</code> 脚本</p>
<figure class="highlight plaintext"><table><tr><td class="code"><pre><span class="line">pulseaudio --start --load=&quot;module-native-protocol-tcp auth-ip-acl=127.0.0.1 auth-anonymous=1&quot; --exit-idle-time=-1</span><br><span class="line"></span><br><span class="line">pacmd load-module module-native-protocol-tcp auth-ip-acl=127.0.0.1 auth-anonymous=1</span><br><span class="line"></span><br><span class="line">virgl_test_server_android &amp;</span><br><span class="line"></span><br><span class="line">proot-distro login archlinux --user ety001 --shared-tmp -- bash -c &quot;export DISPLAY=:1 PULSE_SERVER=tcp:127.0.0.1; dbus-launch --exit-with-session vncserver :1&quot;</span><br></pre></td></tr></table></figure>

<p>以后，只需要打开 termux 后，执行 <code>start.sh</code> 脚本即可启动 archlinux 容器和桌面。</p>
<p>只需要用 vnc 软件连接 127.0.0.1:5901 即可。</p>
<p>另外，还需要在 xfce4 的配置面板中，关闭屏保和锁屏功能。</p>
]]></content>
      <tags>
        <tag>经验</tag>
        <tag>Android</tag>
      </tags>
  </entry>
  <entry>
    <title>Chomebook 配置真文韵输入法的翻页使用逗号和句号</title>
    <url>/2023/06/20/chromebook-input-method.html</url>
    <content><![CDATA[<p><a href="https://chrome.google.com/webstore/detail/%E7%9C%9F%E6%96%87%E9%9F%B5%E8%BE%93%E5%85%A5%E6%B3%95/ppgpjbgimfloenilfemmcejiiokelkni?hl=zh-CN">真文韵输入法</a> 是 fydeOS 团队开发的，基于 RIME 引擎，针对 ChromeOS 的输入法集成。</p>
<p>给中文用户第三方输入法选择方案。</p>
<p>但是目前还处于早期阶段，因此 UI 配置界面很简陋，可以自己通过 RIME的配置文件，按照自己的需求更改。</p>
<p>比如我习惯的翻页方法是逗号和句号，而这个默认不支持的。</p>
<p>需要我们自己修改一下配置。</p>
<p>在编辑 RIME 配置文件里，找到 <code>/root/build</code> 目录下面 yaml 配置文件，命名则是根据你安装的输入法来确定的。</p>
<p>打开 yaml 格式配置文件，找到 <code>key_binder: bindings</code> 选项，删除掉原来的 <code>Page_Down</code> 和 <code>Page_Up</code> 配置，增加下面两行配置：</p>
<figure class="highlight plaintext"><table><tr><td class="code"><pre><span class="line">- &#123;accept: &quot;comma&quot;, send: Page_Down, when: has_menu&#125;</span><br><span class="line">- &#123;accept: &quot;period&quot;, send: Page_Up, when: has_menu&#125;</span><br></pre></td></tr></table></figure>

<p>保存后，等待输入法重载即可。</p>
]]></content>
      <tags>
        <tag>配置</tag>
        <tag>经验</tag>
        <tag>chromebook</tag>
        <tag>fydeos</tag>
      </tags>
  </entry>
  <entry>
    <title>解决安卓12限制32个线程</title>
    <url>/2023/10/14/fix-android-12-process-limited-32.html</url>
    <content><![CDATA[<p>Android 12及以上用户在使用Termux时，有时会显示 <code>[Process completed (signal 9) - press Enter]</code>，这是因为Android 12的 <code>PhantomProcesskiller</code> 限制了应用的子进程，最大允许应用有32个子进程。</p>
<p>解决方案就是通过 adb 命令来修改底层的配置，命令如下：</p>
<figure class="highlight plaintext"><table><tr><td class="code"><pre><span class="line">adb shell device_config set_sync_disabled_for_tests persistent </span><br><span class="line">adb shell device_config put activity_manager max_phantom_processes 65536</span><br></pre></td></tr></table></figure>

<p>这两条命令执行完，即修改最大子进程数为 65536。</p>
<p>补充：</p>
<p>可以直接在 termux 中安装 adb 工具，使用开发者工具里的无线调试来连接，并执行上面的两条指令。</p>
<figure class="highlight plaintext"><table><tr><td class="code"><pre><span class="line">pkg install android-tools</span><br><span class="line"></span><br><span class="line">adb pair ip:port</span><br><span class="line"></span><br><span class="line">adb connect ip:port</span><br></pre></td></tr></table></figure>

<hr>
<p>补充：</p>
<p>鸿蒙系统的话，执行下面的命令</p>
<figure class="highlight plaintext"><table><tr><td class="code"><pre><span class="line">adb shell /system/bin/device_config set_sync_disabled_for_tests persistent </span><br><span class="line">adb shell /system/bin/device_config put activity_manager max_phantom_processes 65536</span><br></pre></td></tr></table></figure>
]]></content>
      <tags>
        <tag>经验</tag>
        <tag>Android</tag>
      </tags>
  </entry>
  <entry>
    <title>现货网格机器人经验总结（干货）</title>
    <url>/2023/07/12/summary-of-experience-of-spot-grid-robots.html</url>
    <content><![CDATA[<h1 id="什么是现货网格机器人"><a href="#什么是现货网格机器人" class="headerlink" title="什么是现货网格机器人"></a>什么是现货网格机器人</h1><p>网格机器人，就是在一定的价格范围内，划定指定数量的价格网格，作为买卖价格的基础。</p>
<p>比如币安的 STEEM &#x2F; USDT 交易对，开通一个价格范围 0.175 – 0.275 ，网格数100的机器人。那就意味着每个小网格的价格跨度是 0.001 &#x3D; (0.275-0.175)&#x2F;100，那么机器人建单就会按照 0.175, 0.176, 0.177, 0.178 这样的规律操作，这就是所谓的网格。</p>
<p>而具体的买单和卖单数量则是根据当前的市场价决定初始状态。</p>
<p>假设你目前开机器人订单的时候，当前市场价是 0.178，那么 0.178 之前的网格是买单，0.178之后的网格是卖单，空下 0.178 这个价格。（这里卖单需要的STEEM币，是机器人计算出需要多少初始数量的STEEM，然后以市场价一次性吃入）。</p>
<p>之后随着市场价格波动，机器人动态增加买卖单。比如按照上面的假设初始化以后，</p>
<table>
<thead>
<tr>
<th>Buy</th>
<th>Sell</th>
</tr>
</thead>
<tbody><tr>
<td>0.177</td>
<td>0.179</td>
</tr>
<tr>
<td>0.176</td>
<td>0.180</td>
</tr>
<tr>
<td>0.175</td>
<td>0.181</td>
</tr>
<tr>
<td></td>
<td>0.182</td>
</tr>
<tr>
<td></td>
<td>0.183</td>
</tr>
<tr>
<td></td>
<td>………</td>
</tr>
</tbody></table>
<p>价格跌到 0.176 – 0.177 之间的时候， 0.177 的买单成交，机器人自动用 0.177 成交的 STEEM 下 0.178 的卖单，等 0.178 的卖单成交，这一个网格的低买高卖就完成了。</p>
<h1 id="现货网格机器人的收益来源"><a href="#现货网格机器人的收益来源" class="headerlink" title="现货网格机器人的收益来源"></a>现货网格机器人的收益来源</h1><ul>
<li>每个网格低买高卖的差价收益</li>
<li>交易过程持有代币的浮盈（有浮盈就可能会有浮亏）</li>
</ul>
<h1 id="开设现货网格机器人需要注意的事情（干货来了）"><a href="#开设现货网格机器人需要注意的事情（干货来了）" class="headerlink" title="开设现货网格机器人需要注意的事情（干货来了）"></a>开设现货网格机器人需要注意的事情（干货来了）</h1><ul>
<li>如果想要赚得多，就<strong>需要自己能判断是否在阶段性的低点</strong>。我个人经验来看，现货网格机器人更像是左侧建仓（左侧建仓的意思就是在阶段性低点的左边建仓）。<strong>浮盈应该是我们开设机器人网格单的目标</strong>。如果你想要无脑开单，那么你就只能死扛到浮盈，甚至永远也等不到浮盈（比如在 0.175 – 0.275 开网格单后，价格飙升过 0.275 后再也不回头），只能割肉结束机器人订单。</li>
<li><strong>选择深度不错的交易对</strong>。因为我们在开单的时候，要一次性买入代币，如果深度不好，比如你投入资金多，那么你的平均买入代币的成本就要比你预期的要高。另外深度不错，代表交易相对活跃，那么网格成交密度也会较好。</li>
<li><strong>过密的网格不会带来更高的收益</strong>。可能你觉得提高网格密度能提高交易频次，但是提高网格密度的同时，单个网格的收益会降低（这个在币安，火币这样的平台上，开单的时候会有预计的单个网格的收益率估算），因此如何找到一个平衡点需要自己多看多试，每个交易对的情况都各不相同，没有固定的公式。</li>
<li><strong>过宽的价格区间会导致资金闲置率很高</strong>，这个也需要多看多试，自己摸索。</li>
<li>避免在牛市开现货网格机器人，<strong>尽量在熊市布局</strong>，除非你明确自己是要做短线。</li>
<li><strong>浮盈达到预期，尽快止盈</strong>，因为我们的最终目的还是要靠浮盈挣钱。所以在开单的时候，设置一个止盈价位是个好习惯。</li>
</ul>
<h1 id="总结"><a href="#总结" class="headerlink" title="总结"></a>总结</h1><p>现货网格机器人并不是无脑就能赚钱的机器人，无论是价格低点的判断，还是各种参数的设置，都需要长时间的观察和尝试。</p>
<p><strong>网格机器人只是一个辅助工具，关键还是自我对于市场价格的判断。我们可能做不到像专业的技术流的分析师那样，但是只要能判断出一个大致范围，那么就是网格机器人一展身手的时候。</strong></p>
<h4 id="关键还是自身价格判断的修炼。"><a href="#关键还是自身价格判断的修炼。" class="headerlink" title="关键还是自身价格判断的修炼。"></a>关键还是自身价格判断的修炼。</h4>]]></content>
      <tags>
        <tag>区块链</tag>
        <tag>经验</tag>
        <tag>数字货币</tag>
        <tag>blockchain</tag>
      </tags>
  </entry>
  <entry>
    <title>ubuntu22.04 server 安装 xfce4 和 xrdp</title>
    <url>/2023/10/26/install-xfce4-and-xrdp-on-ubuntu-22-04-server.html</url>
    <content><![CDATA[<p>最近需要在服务器上安装桌面。于是总结一下。</p>
<figure class="highlight plaintext"><table><tr><td class="code"><pre><span class="line">apt update &amp;&amp; apt-get upgrade -y &amp;&amp; \</span><br><span class="line">  apt install -y xubuntu-desktop &amp;&amp; \</span><br><span class="line">  apt install -y xrdp</span><br></pre></td></tr></table></figure>

<p>在用户家目录输出 xfce4 的 session</p>
<figure class="highlight plaintext"><table><tr><td class="code"><pre><span class="line">echo &quot;xfce4-session&quot; | tee .xsession</span><br></pre></td></tr></table></figure>

<p>重启 xrdp </p>
<figure class="highlight plaintext"><table><tr><td class="code"><pre><span class="line">systemctl restart xrdp</span><br></pre></td></tr></table></figure>]]></content>
      <tags>
        <tag>Server&amp;OS</tag>
        <tag>经验</tag>
        <tag>服务器</tag>
      </tags>
  </entry>
  <entry>
    <title>关于 SPS 相关总结</title>
    <url>/2023/11/16/summary-of-steem-sps.html</url>
    <content><![CDATA[<h1 id="SPS的机制概述"><a href="#SPS的机制概述" class="headerlink" title="SPS的机制概述"></a>SPS的机制概述</h1><ul>
<li>用户提交提案，提案只要有投票就算是激活了。</li>
<li>提案的钱来自 steem.dao 账号，理论上每小时结算一次，按照投票数排序提案，顺次发钱，发完为止（因为每小时发放数额有限）。</li>
</ul>
<h1 id="资金来源"><a href="#资金来源" class="headerlink" title="资金来源"></a>资金来源</h1><p>steem.dao 账号的资金来源于每次出块时 10% 的 steem，按照喂价中位数转化为 SBD 后存入，同时更新 dgp.sps_interval_ledger（相关逻辑在 database::process_funds() 中）。</p>
<p>dgp.sps_interval_ledger 会在每小时结算的时候清零（相关逻辑在 sps_processor::record_funding() 中）。</p>
<h1 id="资金发放"><a href="#资金发放" class="headerlink" title="资金发放"></a>资金发放</h1><p><strong>公式一:</strong></p>
<figure class="highlight plaintext"><table><tr><td class="code"><pre><span class="line">每天发放资金量 = steem.dao中的 SBD 数量 / 100 + 每日通胀</span><br></pre></td></tr></table></figure>

<p><strong>公式二:</strong></p>
<figure class="highlight plaintext"><table><tr><td class="code"><pre><span class="line">当前小时发放资金 = (当前块时间戳 - 上次发放时间戳)/(24*3600) * 每天发放资金量</span><br></pre></td></tr></table></figure>

<p>发放资金的时候，会按照投票数，从多到少排序所有激活的提案。</p>
<p>然后遍历排序好的提案，每个提案从公式二计算出的资金里发钱，直到公式二计算的资金发完为止（该逻辑在 sps_processor::transfer_payments() ）。</p>
<blockquote>
<p>备注1: 当前块时间戳，在区块浏览器的某个块的 timestamp 字段。<br>备注2: 上次发放时间戳，可以从 dgp.last_budget_time 获得。<br>备注3: SPS 中的通胀在当前的 HF23 版本还没有设计好，所有涉及到通胀的地方都是 0。<br>备注4: 公式一和公式二在 sps_processor::calculate_maintenance_budget() 中。<br>备注5: <a href="https://steemdb.io/block/79880772">https://steemdb.io/block/79880772</a> 在这个页面的 Virtual Ops 下可以看到当时那个小时的结算情况。</p>
</blockquote>
<h1 id="当前状态"><a href="#当前状态" class="headerlink" title="当前状态"></a>当前状态</h1><p>目前排名第一的提案，每小时提取 24w SBD 到 steem.dao 账号，而系统每小时发放的资金大约在 1600 SBD，所以第一名的提案把钱都花完了，相当于变相停止了 SPS 系统。</p>
<p><strong>但是目前排名第一的提案截止到 2029年12月31日，在其后面的还有一个截止 2030年3月1日的。这就意味着，最后这个提案可以从 2030年1月1日 到 2030年3月1日，每小时获得 1000 SBD。</strong></p>
]]></content>
      <tags>
        <tag>区块链</tag>
        <tag>经验</tag>
        <tag>steem</tag>
        <tag>数字货币</tag>
        <tag>blockchain</tag>
        <tag>steemit</tag>
      </tags>
  </entry>
  <entry>
    <title>太TM坑爹的 TrueNAS 的虚拟机了</title>
    <url>/2023/10/29/the-fuck-truenas-virtual-mechine.html</url>
    <content><![CDATA[<p>这两天折腾 TrueNas，然后想要在 TrueNas 的虚拟机里安装 Archlinux。</p>
<p>但是安装完，总是无法引导启动。</p>
<p>搜索了很久，终于发现了一个小哥的安装视频，<a href="https://www.youtube.com/watch?v=UgkuDVaU16c&ab_channel=aespa">https://www.youtube.com/watch?v=UgkuDVaU16c&ab_channel&#x3D;aespa</a></p>
<p>原来， <code>bootloader-id</code> 必须命名为 <code>boot</code>，然后 <code>.efi</code> 文件也必须从 <code>grubx64.efi</code> 手动改为 <code>bootx64.efi</code>。</p>
<p>这TM不是坑爹是啥？！</p>
]]></content>
      <tags>
        <tag>Server&amp;OS</tag>
        <tag>经验</tag>
        <tag>服务器</tag>
        <tag>TrueNas</tag>
      </tags>
  </entry>
  <entry>
    <title>解决 snapcraft 安装的 Tradingview 无法登陆的问题</title>
    <url>/2023/11/10/fix-can-not-login-tradeview-on-linux-client.html</url>
    <content><![CDATA[<p>在 Archlinux 下通过 snapcraft 安装了 Tradingview。但是登陆是通过浏览器网页登陆后，跳转回程序完成登陆。</p>
<p>而 Chrome 浏览器调用 xdg-open 打开 <code>tradingview://</code> 格式的 URI 时，提示找不到程序，无法打开。</p>
<p>解决方法就是在 <code>~/.config/mimeapps.list</code> 中，在 <code>[Default Applications]</code> 块里加入下面一行</p>
<figure class="highlight plaintext"><table><tr><td class="code"><pre><span class="line">x-scheme-handler/tradingview=tradingview_tradingview.desktop</span><br></pre></td></tr></table></figure>

<p>保存退出后，可以执行下面的命令，查看是否添加成功</p>
<figure class="highlight plaintext"><table><tr><td class="code"><pre><span class="line">xdg-mime query default x-scheme-handler/tradingview</span><br></pre></td></tr></table></figure>

<p>之后，再次登陆即可成功跳转到 Tradingview 程序。</p>
]]></content>
      <tags>
        <tag>经验</tag>
        <tag>Tradingview</tag>
        <tag>Snapcraft</tag>
      </tags>
  </entry>
  <entry>
    <title>使用 openresty 对 websocket 进行消息频次限制的尝试</title>
    <url>/2023/12/13/openresty-websocket.html</url>
    <content><![CDATA[<p>最近我的 BTS 见证人总是收到丢块报警，排查了原因，大概率是因为 API 和 出块都使用同一个程序的原因。</p>
<p>从 Abit 那里了解到，API 请求和出块并没有做线程优先级，所以在有大量 API 请求进入或者长耗时操作的时候，都会对出块造成影响。</p>
<p>对于底层的 C++ 改起来太麻烦，主要我也不会改，所以思路变换一下，那么就在入口位置进行拦截。</p>
<p>最初尝试使用 nginx 的 limit_conn 来限流，但是没有效果。</p>
<p>主要原因是 Websocket 握手建立连接后，就不会再触发规则了，而所有的请求都以 Websocket 的消息形式与后端交互了。</p>
<p>于是换成了 openresty，通过 lua 来建立一个 Websocket 的消息转发机制，符合条件的放行，不符合的拦截。</p>
<p>最终代码越写越复杂，成型的规则就是在 IP 黑名单中的，且 method 也在黑名单里，那么就限流。</p>
<p>具体的代码实现在这里：<a href="https://github.com/ety001/openresty/blob/master/scripts/lua/bts/limit_req.lua">https://github.com/ety001/openresty/blob/master/scripts/lua/bts/limit_req.lua</a>，可以作为参考。</p>
]]></content>
      <tags>
        <tag>配置</tag>
        <tag>经验</tag>
        <tag>服务器</tag>
        <tag>openresty</tag>
      </tags>
  </entry>
  <entry>
    <title>xmodmap 的替代方案 keyd</title>
    <url>/2024/05/14/xmodmap-to-keyd.html</url>
    <content><![CDATA[<p>之前尝试过好几次，使用 <code>xmodmap</code> 来修改键位，但是都是以失败告终。</p>
<p>每次都是以为懂了，结果都是失败。</p>
<p>最近在一台 Chromebook 上装了 Archlinux，再次尝试调换键位。</p>
<p>想把 Search 键和 左Control 键对换位置。</p>
<p>下面是按键对应的信息</p>
<figure class="highlight plaintext"><table><tr><td class="code"><pre><span class="line">--- xev 获取到两个按键的信息 ---</span><br><span class="line">keycode 133 (keysym 0xffeb Super_L)</span><br><span class="line">keycode  37 (keysym 0xffe3 Control_L)</span><br><span class="line"></span><br><span class="line">--- xmodmap -pke | grep Control_L 和 grep Super_L 的信息---</span><br><span class="line">keycode  37 = Control_L NoSymbol Control_L</span><br><span class="line">keycode 133 = Super_L Super_L Super_L Super_L Caps_Lock Super_L Caps_Lock</span><br><span class="line">keycode 206 = NoSymbol Super_L NoSymbol Super_L</span><br><span class="line"></span><br><span class="line">--- xmodmap -pm 的信息 ---</span><br><span class="line">shift       Shift_L (0x32),  Shift_R (0x3e)</span><br><span class="line">lock        Caps_Lock (0x42)</span><br><span class="line">control     Control_L (0x25),  Control_R (0x69)</span><br><span class="line">mod1        Alt_L (0x40),  Alt_L (0xcc),  Meta_L (0xcd)</span><br><span class="line">mod2        Num_Lock (0x4d)</span><br><span class="line">mod3        ISO_Level5_Shift (0xcb)</span><br><span class="line">mod4        Super_L (0x85),  Super_R (0x86),  Super_L (0xce),  Hyper_L (0xcf)</span><br><span class="line">mod5        ISO_Level3_Shift (0x5c)</span><br></pre></td></tr></table></figure>

<p>尝试创建了一份 <code>.Xmodmap</code> 配置如下：</p>
<figure class="highlight plaintext"><table><tr><td class="code"><pre><span class="line">remove control = Control_L</span><br><span class="line">remove mod4 = Super_L</span><br><span class="line">add mod4 = Control_L</span><br><span class="line">add control = Super_L</span><br><span class="line">keycode 37 = Super_L</span><br><span class="line">keycode 133 = Control_L</span><br></pre></td></tr></table></figure>

<p>结果失败了。</p>
<p>不过经过不懈搜索，发现了一个替代方案 – <a href="https://github.com/rvaiya/keyd">keyd</a>.</p>
<p>这个项目就是为了解决各种键盘问题的，非常感谢这个项目。</p>
<p>同时还找到了一份 <a href="https://github.com/WeirdTreeThing/cros-keyboard-map">针对 Chromebook 的 keyd 配置</a>，</p>
<p>通过下面的命令来获取一下按键的名字</p>
<figure class="highlight plaintext"><table><tr><td class="code"><pre><span class="line">sudo keyd monitor</span><br></pre></td></tr></table></figure>

<p>根据得到的键位信息，在上面的那份配置的基础上，增加下面的内容</p>
<figure class="highlight plaintext"><table><tr><td class="code"><pre><span class="line">[main]</span><br><span class="line">....</span><br><span class="line"></span><br><span class="line">leftmeta = leftcontrol</span><br><span class="line">leftcontrol = leftmeta</span><br></pre></td></tr></table></figure>

<p>重新载入一下</p>
<figure class="highlight plaintext"><table><tr><td class="code"><pre><span class="line">sudo keyd reload</span><br></pre></td></tr></table></figure>

<p>搞定！</p>
<p>咱就说，Linux 下很多东西（iptables啊，X11啊）的配置也不知道为啥搞的很反人类，明明是可以搞的这么简单的啊！</p>
]]></content>
      <tags>
        <tag>经验</tag>
      </tags>
  </entry>
  <entry>
    <title>ESM 模式导入文件的一些常识</title>
    <url>/2024/08/19/esm-knowledge.html</url>
    <content><![CDATA[<p>每次看完用完，因为别的项目又切换到非 js 语言，过段时间就又忘了，所以写下来总结一下，要不然每次都要现搜索。</p>
<h1 id="使用-import-导入的时候是否加扩展名？"><a href="#使用-import-导入的时候是否加扩展名？" class="headerlink" title="使用 import 导入的时候是否加扩展名？"></a>使用 import 导入的时候是否加扩展名？</h1><p>是的，在 ESM 模式下，使用 import 时需要包含文件的扩展名。</p>
<p>这是因为 ESM 模块解析严格遵循文件路径规范，不像 CommonJS 那样自动推断 .js、.json 或 .mjs 等扩展名。</p>
<p>假设有下面的文件结构</p>
<figure class="highlight plaintext"><table><tr><td class="code"><pre><span class="line">project/</span><br><span class="line">├── app.js</span><br><span class="line">└── utils/</span><br><span class="line">    └── helper.js</span><br></pre></td></tr></table></figure>

<p>在 app.js 中，你需要这样导入 <code>helper.js</code>：</p>
<figure class="highlight plaintext"><table><tr><td class="code"><pre><span class="line">import &#123; myHelperFunction &#125; from &#x27;./utils/helper.js&#x27;;</span><br></pre></td></tr></table></figure>

<h1 id="加-和不加-的区别"><a href="#加-和不加-的区别" class="headerlink" title="加 {} 和不加 {} 的区别"></a>加 {} 和不加 {} 的区别</h1><p>在 JavaScript 中，import 语句的语法有两种主要形式：具名导入和默认导入。</p>
<p>加 {} 和不加 {} 的区别在于你是导入模块中的一个具名导出还是默认导出。</p>
<h2 id="1-具名导入-Named-Import"><a href="#1-具名导入-Named-Import" class="headerlink" title="1. 具名导入 (Named Import)"></a>1. 具名导入 (Named Import)</h2><figure class="highlight plaintext"><table><tr><td class="code"><pre><span class="line">// utils.js</span><br><span class="line">export const myFunction = () =&gt; &#123;</span><br><span class="line">  console.log(&#x27;This is myFunction&#x27;);</span><br><span class="line">&#125;;</span><br><span class="line"></span><br><span class="line">export const anotherFunction = () =&gt; &#123;</span><br><span class="line">  console.log(&#x27;This is anotherFunction&#x27;);</span><br><span class="line">&#125;;</span><br><span class="line"></span><br><span class="line">// main.js</span><br><span class="line">import &#123; myFunction &#125; from &#x27;./utils.js&#x27;;</span><br><span class="line"></span><br><span class="line">myFunction(); // 输出: This is myFunction</span><br></pre></td></tr></table></figure>

<h2 id="2-默认导入-Default-Import"><a href="#2-默认导入-Default-Import" class="headerlink" title="2. 默认导入 (Default Import)"></a>2. 默认导入 (Default Import)</h2><figure class="highlight plaintext"><table><tr><td class="code"><pre><span class="line">// utils.js</span><br><span class="line">const myFunction = () =&gt; &#123;</span><br><span class="line">  console.log(&#x27;This is myFunction&#x27;);</span><br><span class="line">&#125;;</span><br><span class="line"></span><br><span class="line">export default myFunction;</span><br><span class="line"></span><br><span class="line">// main.js</span><br><span class="line">import myFunc from &#x27;./utils.js&#x27;;</span><br><span class="line"></span><br><span class="line">myFunc(); // 输出: This is myFunction</span><br></pre></td></tr></table></figure>

<blockquote>
<p>这里对我来说，如果不看文档，纯靠我自己的经验<br>我一直以为不加 {} 的时候，是把整个文件导出的<br>也就是按照例子的代码，我的直观感觉应该是 <code>myFunc.myFunction()</code></p>
</blockquote>
]]></content>
      <tags>
        <tag>前端</tag>
        <tag>经验</tag>
        <tag>javascript</tag>
      </tags>
  </entry>
  <entry>
    <title>如何让 jest 在 ESM 下正常工作</title>
    <url>/2024/08/25/jest-esm.html</url>
    <content><![CDATA[<p>最近在弄<a href="/steem/@ety001/start-dirty-and-hard-work">faucet 的重构工作</a>，因为要全面使用新的依赖和模式，遇到了很多问题。</p>
<p>比如最近一周一直被 jest 无法在 ESM 模式下工作的问题卡住。</p>
<p>搜索引擎 + chatgpt 多方面的尝试都没有找到有效方案。</p>
<p>直到昨天看到<a href="https://jestjs.io/docs/ecmascript-modules"> jest 官方文档里有专门的一页</a>说这个，才搞定问题。</p>
<p>解决方案就是两步。</p>
<p>第一步是用空配置 <code>&#123;&#125;</code> 替换掉之前的 <code>jest.config.js</code> 中 <code>transform</code>，即关闭 <code>transform</code>。</p>
<p>第二步增加环境变量 <code>--experimental-vm-modules</code>，以启用 node 的实验 API，因为 jest 使用的 node 的实验 API 实现的 ESM 支持，这也就意味着，可以卸载掉 <code>babel-jest</code> 插件了。</p>
<p>启用实验 API 这里， jest 官方文档只给了两个 CLI 下的使用例子，而我们的项目使用的是 <code>package.json</code> 中的 <code>scripts</code> 方式。</p>
<p>因此要想在 <code>scripts</code> 里启用，可以按照下面的格式：</p>
<figure class="highlight plaintext"><table><tr><td class="code"><pre><span class="line">&quot;scripts&quot;: &#123;</span><br><span class="line">    &quot;jest&quot;: &quot;NODE_OPTIONS=--experimental-vm-modules jest&quot;</span><br><span class="line">  &#125;,</span><br></pre></td></tr></table></figure>

]]></content>
      <tags>
        <tag>前端</tag>
        <tag>经验</tag>
        <tag>jest</tag>
      </tags>
  </entry>
  <entry>
    <title>redux ， react-redux 和 redux-saga 什么区别</title>
    <url>/2024/08/27/redux-react-redux-redux-saga.html</url>
    <content><![CDATA[<p>Redux、React-Redux 和 Redux-Saga 是前端开发中常用的状态管理和异步数据处理工具。它们各自有不同的功能和用途。</p>
<h1 id="1-Redux"><a href="#1-Redux" class="headerlink" title="1. Redux"></a>1. Redux</h1><p>Redux 是一个用于 JavaScript 应用的状态管理库。它提供了一种可预测的方式来管理应用的全局状态。</p>
<h2 id="Redux-的核心概念包括："><a href="#Redux-的核心概念包括：" class="headerlink" title="Redux 的核心概念包括："></a>Redux 的核心概念包括：</h2><ul>
<li>Store: 存储应用的状态，是唯一的数据源。</li>
<li>Actions: 是描述状态变化的普通 JavaScript 对象。</li>
<li>Reducers: 是纯函数，接收当前状态和 action，返回新的状态。</li>
<li>Dispatch: 用于触发 action，从而引发状态的改变。</li>
</ul>
<h2 id="Redux-的特点"><a href="#Redux-的特点" class="headerlink" title="Redux 的特点:"></a>Redux 的特点:</h2><ul>
<li>单一数据源: 整个应用只有一个状态树（store）。</li>
<li>状态是只读的: 不能直接修改状态，必须通过 action 来描述状态变化。</li>
<li>纯函数更新状态: Reducers 必须是纯函数，不得有副作用。</li>
</ul>
<h1 id="2-React-Redux"><a href="#2-React-Redux" class="headerlink" title="2. React-Redux"></a>2. React-Redux</h1><p>React-Redux 是官方提供的 Redux 和 React 的绑定库。它允许 React 组件与 Redux store 进行连接，使得组件能够访问 Redux 的状态并分发 actions。</p>
<h2 id="React-Redux-的特点"><a href="#React-Redux-的特点" class="headerlink" title="React-Redux 的特点:"></a>React-Redux 的特点:</h2><ul>
<li><code>&lt;Provider&gt;</code> 组件: 这个组件将 Redux store 提供给应用内所有的组件。</li>
<li>connect() 函数: 将 React 组件连接到 Redux store，允许组件从 store 中读取状态和分发 actions。</li>
<li>Hooks: useSelector 和 useDispatch 是 React-Redux 提供的 hooks，用于替代 connect()，更符合函数组件的使用方式。</li>
</ul>
<h2 id="Demo-Code"><a href="#Demo-Code" class="headerlink" title="Demo Code"></a>Demo Code</h2><figure class="highlight plaintext"><table><tr><td class="code"><pre><span class="line">import &#123; Provider &#125; from &#x27;react-redux&#x27;;</span><br><span class="line">import &#123; createStore &#125; from &#x27;redux&#x27;;</span><br><span class="line">import App from &#x27;./App&#x27;;</span><br><span class="line">import rootReducer from &#x27;./reducers&#x27;;</span><br><span class="line"></span><br><span class="line">const store = createStore(rootReducer);</span><br><span class="line"></span><br><span class="line">const Root = () =&gt; (</span><br><span class="line">  &lt;Provider store=&#123;store&#125;&gt;</span><br><span class="line">    &lt;App /&gt;</span><br><span class="line">  &lt;/Provider&gt;</span><br><span class="line">);</span><br></pre></td></tr></table></figure>

<figure class="highlight plaintext"><table><tr><td class="code"><pre><span class="line">import React from &#x27;react&#x27;;</span><br><span class="line">import &#123; useSelector, useDispatch &#125; from &#x27;react-redux&#x27;;</span><br><span class="line">import &#123; increment &#125; from &#x27;./actions&#x27;;</span><br><span class="line"></span><br><span class="line">const Counter = () =&gt; &#123;</span><br><span class="line">  const count = useSelector(state =&gt; state.count);</span><br><span class="line">  const dispatch = useDispatch();</span><br><span class="line"></span><br><span class="line">  return (</span><br><span class="line">    &lt;div&gt;</span><br><span class="line">      &lt;span&gt;&#123;count&#125;&lt;/span&gt;</span><br><span class="line">      &lt;button onClick=&#123;() =&gt; dispatch(increment())&#125;&gt;Increment&lt;/button&gt;</span><br><span class="line">    &lt;/div&gt;</span><br><span class="line">  );</span><br><span class="line">&#125;;</span><br></pre></td></tr></table></figure>

<h1 id="3-Redux-Saga"><a href="#3-Redux-Saga" class="headerlink" title="3. Redux-Saga"></a>3. Redux-Saga</h1><p>Redux-Saga 是一个用于处理 Redux 应用中的异步操作的中间件。它基于 ES6 的 Generator 函数，使得处理复杂的异步逻辑（如异步 API 请求、并发请求、失败重试等）变得更直观和可管理。</p>
<h2 id="Redux-Saga-的特点"><a href="#Redux-Saga-的特点" class="headerlink" title="Redux-Saga 的特点:"></a>Redux-Saga 的特点:</h2><ul>
<li>Sagas: Generator 函数，用于定义异步操作的逻辑。</li>
<li>Effects: Redux-Saga 提供了一系列 effects 函数（如 take, call, put 等）用于处理副作用（例如异步调用）。</li>
<li>非阻塞调用: 通过 Generator 的 yield 机制，可以使异步操作的代码写起来像同步代码。</li>
</ul>
<h2 id="Demo-Code-1"><a href="#Demo-Code-1" class="headerlink" title="Demo Code"></a>Demo Code</h2><figure class="highlight plaintext"><table><tr><td class="code"><pre><span class="line">import &#123; call, put, takeEvery &#125; from &#x27;redux-saga/effects&#x27;;</span><br><span class="line">import &#123; fetchDataSuccess, fetchDataFailure &#125; from &#x27;./actions&#x27;;</span><br><span class="line">import api from &#x27;./api&#x27;;</span><br><span class="line"></span><br><span class="line">// 定义 Saga</span><br><span class="line">function* fetchDataSaga(action) &#123;</span><br><span class="line">  try &#123;</span><br><span class="line">    const data = yield call(api.fetchData, action.payload);</span><br><span class="line">    yield put(fetchDataSuccess(data));</span><br><span class="line">  &#125; catch (error) &#123;</span><br><span class="line">    yield put(fetchDataFailure(error));</span><br><span class="line">  &#125;</span><br><span class="line">&#125;</span><br><span class="line"></span><br><span class="line">// 监听特定的 action</span><br><span class="line">function* watchFetchData() &#123;</span><br><span class="line">  yield takeEvery(&#x27;FETCH_DATA_REQUEST&#x27;, fetchDataSaga);</span><br><span class="line">&#125;</span><br><span class="line"></span><br><span class="line">export default watchFetchData;</span><br></pre></td></tr></table></figure>

<h1 id="总结"><a href="#总结" class="headerlink" title="总结"></a>总结</h1><ul>
<li>Redux: 用于管理全局状态，提供一个规范化的状态管理框架。</li>
<li>React-Redux: 是 Redux 和 React 的连接工具，让 React 组件可以访问 Redux 的状态和 actions。</li>
<li>Redux-Saga: 处理复杂的异步操作，让异步逻辑的管理更加简单和可维护。</li>
</ul>
<p>这三个工具通常配合使用，以实现复杂的状态管理和异步数据处理。</p>
<hr>
<p><strong>ET碎碎念，每周更新，欢迎订阅，点赞，转发！</strong><br><img src="https://cdn.steemitimages.com/DQmNqMmFcstxiRQqGStZSSEPEN4Z23cywF1whi91qbGTXxn/640.gif"></p>
<hr>
<h4 id="好用不贵的VPS推荐"><a href="#好用不贵的VPS推荐" class="headerlink" title="好用不贵的VPS推荐"></a>好用不贵的VPS推荐</h4><p><a href="https://1hour.win/">https://1hour.win</a></p>
]]></content>
      <tags>
        <tag>前端</tag>
        <tag>经验</tag>
        <tag>redux</tag>
      </tags>
  </entry>
  <entry>
    <title>Redux 的 createStore 在编辑器中被提示弃用</title>
    <url>/2024/08/28/redux-createstore.html</url>
    <content><![CDATA[<p>在 React 18 中，<code>createStore</code> 是 <code>Redux</code> 提供的一个函数，用于创建 <code>Redux store</code>，但从 <code>Redux Toolkit v5</code> 开始，<code>createStore</code> 已被标记为弃用，并建议使用 <code>configureStore</code> 作为替代。</p>
<p><code>configureStore</code> 是 <code>Redux Toolkit</code> 中提供的一个函数，它简化了 <code>Redux</code> 的配置过程，内置了 <code>Redux DevTools</code>、默认的中间件配置等。</p>
<p>下面是如何使用 <code>configureStore</code> 替代 <code>createStore</code> 的一个简单示例：</p>
<figure class="highlight plaintext"><table><tr><td class="code"><pre><span class="line">import &#123; configureStore &#125; from &#x27;@reduxjs/toolkit&#x27;;</span><br><span class="line">import rootReducer from &#x27;./reducers&#x27;;</span><br><span class="line"></span><br><span class="line">const store = configureStore(&#123;</span><br><span class="line">  reducer: rootReducer,</span><br><span class="line">&#125;);</span><br><span class="line"></span><br><span class="line">export default store;</span><br></pre></td></tr></table></figure>

<p>这次重构 faucet 将会替换掉 <code>createStore</code> 方法。</p>
]]></content>
      <tags>
        <tag>前端</tag>
        <tag>经验</tag>
        <tag>redux</tag>
      </tags>
  </entry>
  <entry>
    <title>redux-saga 如何与 @reduxjs/toolkit 配合使用？</title>
    <url>/2024/09/06/redux-saga-reduxjs-toolkit.html</url>
    <content><![CDATA[<h1 id="前情"><a href="#前情" class="headerlink" title="前情"></a>前情</h1><p>Steemit 的几个前端项目（<a href="https://github.com/steemit/condenser">condenser</a>, <a href="https://github.com/steemit/wallet">wallet</a>, <a href="https://github.com/steemit/faucet">faucet</a>）都使用了 redux 和 redux-saga。</p>
<p>这次升级 faucet 所有依赖库，发现新版本 redux 推荐使用官方的 <code>@reduxjs/toolkit</code> 工具集来实现 redux 的功能。</p>
<p>既然 redux 的官方推荐使用工具集，那么这次升级我们也要相对应的把原有的 redux 相关代码做改动。</p>
<p>其中，为了应对复杂的异步请求而引入的 <code>redux-saga</code>，我不是很确定是否与工具集兼容，因此投入了时间来研究了一下。</p>
<h1 id="如何将-redux-saga-与-reduxjs-toolkit-一起使用"><a href="#如何将-redux-saga-与-reduxjs-toolkit-一起使用" class="headerlink" title="如何将 redux-saga 与 @reduxjs/toolkit 一起使用"></a>如何将 <code>redux-saga</code> 与 <code>@reduxjs/toolkit</code> 一起使用</h1><ul>
<li><p>创建 Redux Store: <code>@reduxjs/toolkit</code> 提供了 <code>configureStore</code> 来简化 <code>store</code> 的创建过程。你可以将 <code>redux-saga</code> 中间件添加到 <code>store</code> 中。</p>
</li>
<li><p>创建并运行 Saga 中间件: 使用 <code>redux-saga</code> 的 <code>createSagaMiddleware</code> 来创建 <code>saga</code> 中间件，然后将其添加到 <code>configureStore</code> 中。</p>
</li>
<li><p>运行你的 <code>Saga</code>: 在 <code>configureStore</code> 创建 <code>store</code> 后，使用 <code>sagaMiddleware.run</code> 来启动你的 <code>saga</code>。</p>
</li>
</ul>
<p>下面是简单的例子。</p>
<p>store.js 文件</p>
<figure class="highlight plaintext"><table><tr><td class="code"><pre><span class="line">// store.js</span><br><span class="line">import &#123; configureStore &#125; from &#x27;@reduxjs/toolkit&#x27;;</span><br><span class="line">import createSagaMiddleware from &#x27;redux-saga&#x27;;</span><br><span class="line">import rootReducer from &#x27;./reducers&#x27;; // 你的 reducer</span><br><span class="line">import rootSaga from &#x27;./sagas&#x27;; // 你的 saga</span><br><span class="line"></span><br><span class="line">// 创建 Saga 中间件</span><br><span class="line">const sagaMiddleware = createSagaMiddleware();</span><br><span class="line"></span><br><span class="line">// 配置 store 并添加 saga 中间件</span><br><span class="line">const store = configureStore(&#123;</span><br><span class="line">  reducer: rootReducer,</span><br><span class="line">  middleware: (getDefaultMiddleware) =&gt;</span><br><span class="line">    getDefaultMiddleware().concat(sagaMiddleware), // 添加 saga 中间件</span><br><span class="line">&#125;);</span><br><span class="line"></span><br><span class="line">// 运行 rootSaga</span><br><span class="line">sagaMiddleware.run(rootSaga);</span><br><span class="line"></span><br><span class="line">export default store;</span><br></pre></td></tr></table></figure>

<p>saga.js 文件</p>
<figure class="highlight plaintext"><table><tr><td class="code"><pre><span class="line">// sagas.js</span><br><span class="line">import &#123; call, put, takeLatest &#125; from &#x27;redux-saga/effects&#x27;;</span><br><span class="line">import axios from &#x27;axios&#x27;;</span><br><span class="line"></span><br><span class="line">// worker saga</span><br><span class="line">function* fetchUser(action) &#123;</span><br><span class="line">  try &#123;</span><br><span class="line">    const response = yield call(axios.get, `/api/user/$&#123;action.payload.userId&#125;`);</span><br><span class="line">    yield put(&#123; type: &#x27;USER_FETCH_SUCCESS&#x27;, payload: response.data &#125;);</span><br><span class="line">  &#125; catch (error) &#123;</span><br><span class="line">    yield put(&#123; type: &#x27;USER_FETCH_FAILURE&#x27;, error: error.message &#125;);</span><br><span class="line">  &#125;</span><br><span class="line">&#125;</span><br><span class="line"></span><br><span class="line">// watcher saga</span><br><span class="line">function* rootSaga() &#123;</span><br><span class="line">  yield takeLatest(&#x27;USER_FETCH_REQUEST&#x27;, fetchUser);</span><br><span class="line">&#125;</span><br><span class="line"></span><br><span class="line">export default rootSaga;</span><br></pre></td></tr></table></figure>

<hr>
<p><strong>ET碎碎念，每周更新，欢迎订阅，点赞，转发！</strong><br><img src="https://cdn.steemitimages.com/DQmNqMmFcstxiRQqGStZSSEPEN4Z23cywF1whi91qbGTXxn/640.gif"></p>
<hr>
<h4 id="好用不贵的VPS推荐"><a href="#好用不贵的VPS推荐" class="headerlink" title="好用不贵的VPS推荐"></a>好用不贵的VPS推荐</h4><p><a href="https://1hour.win/">https://1hour.win</a></p>
]]></content>
      <tags>
        <tag>前端</tag>
        <tag>经验</tag>
        <tag>redux</tag>
        <tag>redux-saga</tag>
      </tags>
  </entry>
  <entry>
    <title>使用 createRoot 方法，报 React is not defined 错误</title>
    <url>/2024/08/29/createroot-react-is-not-defined.html</url>
    <content><![CDATA[<p>由于 faucet 项目全部是手动搭建的环境，所以在把 react15 升级到 react18 后，</p>
<figure class="highlight plaintext"><table><tr><td class="code"><pre><span class="line">import &#123; createRoot &#125; from &#x27;react-dom/client&#x27;;</span><br><span class="line"></span><br><span class="line">const appElement = document.getElementById(&#x27;app&#x27;);</span><br><span class="line">const root = createRoot(appElement);</span><br><span class="line">root.render(&lt;h1&gt;Hello, world&lt;/h1&gt;);</span><br></pre></td></tr></table></figure>

<p>使用上面的代码测试环境是否搭建成功的时候，报 <code>React is not defined</code> 错误。</p>
<p>原因是：在 React 18 中，虽然可以使用 <code>createRoot</code> 来渲染组件，<br>但仍然需要显式地导入 React 以支持 JSX 语法。</p>
<p>在 JSX 中，<code>&lt;h1&gt;Hello, world&lt;/h1&gt;</code> 会被编译成 <code>React.createElement(&#39;h1&#39;, null, &#39;Hello, world&#39;)</code>。<br>因此，即使你没有直接使用 React，它仍然需要被导入。</p>
<p>由于 <code>babel</code> 我也升级到最新了，在 7.9 版本后，可以使用 <code>@babel/preset-react</code> 来自动引入 JSX 转换。<br>而不用去显式的导入 React 了。</p>
<p>具体方法就是在 <code>babel.config.js</code> 中对 <code>@babel/preset-react</code> 增加配置如下：</p>
<figure class="highlight plaintext"><table><tr><td class="code"><pre><span class="line">&#123;</span><br><span class="line">  &quot;presets&quot;: [</span><br><span class="line">    [</span><br><span class="line">      &quot;@babel/preset-env&quot;,</span><br><span class="line">      &#123;</span><br><span class="line">        &quot;targets&quot;: &quot;defaults&quot;</span><br><span class="line">      &#125;</span><br><span class="line">    ],</span><br><span class="line">    [</span><br><span class="line">      &quot;@babel/preset-react&quot;,</span><br><span class="line">      &#123;</span><br><span class="line">        &quot;runtime&quot;: &quot;automatic&quot;  // 使用自动引入模式</span><br><span class="line">      &#125;</span><br><span class="line">    ]</span><br><span class="line">  ]</span><br><span class="line">&#125;</span><br></pre></td></tr></table></figure>

<p>如此设置后，再次编译执行，报错就没有了。</p>
<hr>
<p><strong>ET碎碎念，每周更新，欢迎订阅，点赞，转发！</strong><br><img src="https://cdn.steemitimages.com/DQmNqMmFcstxiRQqGStZSSEPEN4Z23cywF1whi91qbGTXxn/640.gif"></p>
<hr>
<h4 id="好用不贵的VPS推荐"><a href="#好用不贵的VPS推荐" class="headerlink" title="好用不贵的VPS推荐"></a>好用不贵的VPS推荐</h4><p><a href="https://1hour.win/">https://1hour.win</a></p>
]]></content>
      <tags>
        <tag>前端</tag>
        <tag>经验</tag>
        <tag>react</tag>
      </tags>
  </entry>
  <entry>
    <title>React 中 useEffect 的依赖项如何理解</title>
    <url>/2024/09/21/react-useeffect.html</url>
    <content><![CDATA[<p>在 React 中，useEffect 的依赖项决定了其什么时候执行。</p>
<h1 id="基本语法"><a href="#基本语法" class="headerlink" title="基本语法"></a>基本语法</h1><p>useEffect 接受两个参数：</p>
<ul>
<li>副作用函数：在组件渲染后或依赖项发生变化时执行的函数。</li>
<li>依赖项数组（可选）：决定副作用函数何时重新执行。</li>
</ul>
<figure class="highlight plaintext"><table><tr><td class="code"><pre><span class="line">useEffect(() =&gt; &#123;</span><br><span class="line">  // 副作用逻辑</span><br><span class="line">&#125;, [dependency1, dependency2, ...]);</span><br></pre></td></tr></table></figure>

<h1 id="依赖项的常见场景与解释"><a href="#依赖项的常见场景与解释" class="headerlink" title="依赖项的常见场景与解释"></a>依赖项的常见场景与解释</h1><p>1.无依赖项数组（每次渲染都会执行）： 如果不传入依赖项数组，useEffect 中的副作用函数将在每次组件渲染后都执行。</p>
<figure class="highlight plaintext"><table><tr><td class="code"><pre><span class="line">useEffect(() =&gt; &#123;</span><br><span class="line">  console.log(&#x27;This runs after every render&#x27;);</span><br><span class="line">&#125;);</span><br></pre></td></tr></table></figure>

<p>场景：这种用法不常见，通常用于希望在每次渲染时执行某些逻辑，但要注意性能开销。</p>
<p>2.空依赖项数组（只在组件挂载和卸载时执行）： 如果传入一个空数组 []，则 useEffect 只会在组件挂载时运行一次，并在组件卸载时运行清理函数（如果提供了）。</p>
<figure class="highlight plaintext"><table><tr><td class="code"><pre><span class="line">useEffect(() =&gt; &#123;</span><br><span class="line">  console.log(&#x27;This runs only on mount&#x27;);</span><br><span class="line">  return () =&gt; &#123;</span><br><span class="line">    console.log(&#x27;This runs on unmount&#x27;);</span><br><span class="line">  &#125;;</span><br><span class="line">&#125;, []);</span><br></pre></td></tr></table></figure>

<p>场景：通常用于初始化数据（例如组件挂载时的 API 请求），或在组件卸载时执行清理操作（例如清理定时器、取消订阅等）。</p>
<p>3.具有依赖项的数组（依赖项变化时执行）： 当传入特定的依赖项时，useEffect 只有在这些依赖项的值发生变化时才会重新执行。</p>
<figure class="highlight plaintext"><table><tr><td class="code"><pre><span class="line">useEffect(() =&gt; &#123;</span><br><span class="line">  console.log(&#x27;This runs when count changes&#x27;);</span><br><span class="line">&#125;, [count]); // 当 count 变化时副作用重新执行</span><br></pre></td></tr></table></figure>

<p>场景：用于根据某个特定状态或 prop 变化来执行副作用逻辑。例如，当 count 变化时，可能需要重新获取某些数据或触发其他副作用。</p>
<p>4.多个依赖项： 可以在依赖项数组中传入多个依赖项，useEffect 将会在其中任何一个依赖发生变化时重新执行。</p>
<figure class="highlight plaintext"><table><tr><td class="code"><pre><span class="line">useEffect(() =&gt; &#123;</span><br><span class="line">  console.log(&#x27;This runs when count or user changes&#x27;);</span><br><span class="line">&#125;, [count, user]);</span><br></pre></td></tr></table></figure>

<p>场景：用于当多个状态或 prop 变化时，重新执行某个逻辑。例如，可能需要在 count 或 user 变化时重新发起某个 API 请求。</p>
<h1 id="如何选择依赖项"><a href="#如何选择依赖项" class="headerlink" title="如何选择依赖项"></a>如何选择依赖项</h1><p>1.依赖项的选择要遵循以下原则：</p>
<ul>
<li>副作用函数中使用的所有外部变量：任何在 useEffect 中使用的外部变量（函数组件中的状态、props 等）都应该作为依赖项传入。这是因为这些变量在每次渲染时都可能更新，你需要确保 useEffect 在依赖的值发生变化时执行。</li>
<li>dispatch 和其他稳定函数：通常像 dispatch（来自 useDispatch）这样的函数引用是稳定的（即在多次渲染之间不会改变），所以可以安全地放入依赖项数组中。如果某个函数引用在不同渲染周期中保持不变，就可以把它作为依赖项。</li>
</ul>
<p>2.常见的误区与优化：</p>
<ul>
<li>忘记依赖项：如果 useEffect 中依赖的某些值没有包含在依赖项数组中，可能会导致副作用函数使用了过时的值（也称为“闭包陷阱”）。例如，依赖于某个 state 却没有将其加入依赖项数组，这样的结果是 useEffect 中的逻辑不会随着 state 的变化重新执行。</li>
<li>过度依赖不必要的变量：有时候不小心将不必要的变量放入依赖项数组，导致 useEffect 过于频繁地执行，浪费性能。例如，不必要地将某些稳定的变量放入依赖项。</li>
</ul>
<hr>
<p><strong>ET碎碎念，每周更新，欢迎订阅，点赞，转发！</strong><br><img src="https://cdn.steemitimages.com/DQmNqMmFcstxiRQqGStZSSEPEN4Z23cywF1whi91qbGTXxn/640.gif"></p>
<hr>
<h4 id="好用不贵的VPS推荐"><a href="#好用不贵的VPS推荐" class="headerlink" title="好用不贵的VPS推荐"></a>好用不贵的VPS推荐</h4><p><a href="https://1hour.win/">https://1hour.win</a></p>
]]></content>
      <tags>
        <tag>前端</tag>
        <tag>经验</tag>
        <tag>react</tag>
      </tags>
  </entry>
  <entry>
    <title>零碎脚本执行利器 -- 青龙面板</title>
    <url>/2024/11/20/or-a-powerful-tool-for-executing-fragmented-scripts-qinglong-panel.html</url>
    <content><![CDATA[<p>今天发现了一个有意思的工具 —— <a href="https://github.com/whyour/qinglong">青龙面板</a>。</p>
<p>平时经常会有一些零零碎碎的脚本需要运行，放在宿主机运行，就要安装 nodejs 的环境，如果放在 docker 里运行，就要写 Dockerfile ，太繁琐。</p>
<p>使用这个青龙面板，相当于直接拥有一个容器空间，自带 python, nodejs 环境。可以理解为是云服务商的那种 server less 服务。</p>
<h1 id="有这些特性很方便"><a href="#有这些特性很方便" class="headerlink" title="有这些特性很方便"></a>有这些特性很方便</h1><h3 id="1-按计划拉取指定的-repo-的指定分支。"><a href="#1-按计划拉取指定的-repo-的指定分支。" class="headerlink" title="1.按计划拉取指定的 repo 的指定分支。"></a>1.按计划拉取指定的 repo 的指定分支。</h3><p><img src="/img/2024/DQmNzrSTk6u7KoeXAE3rY5FQB2HAGinfGwnhfi47sAZSxHQ.png" alt="image.png"></p>
<p>这样我们可以把零碎的脚本放在一个独立的代码库里面，进行版本管理。</p>
<p>当然，如果你想要立即执行拉取任务，也提供了单独的运行按钮可以立即执行。</p>
<h3 id="2-共享依赖。"><a href="#2-共享依赖。" class="headerlink" title="2.共享依赖。"></a>2.共享依赖。</h3><p><img src="/img/2024/06bbe3ec9a2257829a8383ed4c432d88.jpg" alt="06bbe3ec9a2257829a8383ed4c432d88.jpg"></p>
<p>独立的依赖管理面板，可以只需要安装一次依赖，就可以所有脚本都使用。</p>
<h3 id="3-在线编辑-调试代码。"><a href="#3-在线编辑-调试代码。" class="headerlink" title="3.在线编辑&#x2F;调试代码。"></a>3.在线编辑&#x2F;调试代码。</h3><p><img src="/img/2024/DQmZePRPW5aA5yk8id71c89p7xGJ7zKoXaQEW9kLZDJPSB2.png" alt="image.png"></p>
<p>这是拉取下来的代码，可以在线编辑。</p>
<p><img src="/img/2024/DQmTCHbnWLgY7tKR68ULCvcEpJxhVyG1bMxSCFFut4UvCuF.png" alt="image.png"></p>
<p>这是调试界面，可以实时调试。</p>
<h3 id="4-核心功能——计划任务"><a href="#4-核心功能——计划任务" class="headerlink" title="4.核心功能——计划任务"></a>4.核心功能——计划任务</h3><p><img src="/img/2024/DQmTSVxe7zhGK79ah7hxYmiYZmveKnJ1KBWuY6YipGnteQv.png" alt="image.png"></p>
<p>编辑好的脚本，可以在这里设置计划任务，让脚本按计划运行。</p>
]]></content>
      <tags>
        <tag>配置</tag>
        <tag>经验</tag>
        <tag>服务器</tag>
      </tags>
  </entry>
  <entry>
    <title>Harmony Next 使用 L2TP IPSec PSK VPN</title>
    <url>/2025/08/24/harmony-next-l2tp-ipsec-psk.html</url>
    <content><![CDATA[<p>之前在我的 <a href="/2019/01/11/docker-pptp-vpn-l2tp-ipsec-vpn.html" title="用 Docker 快速部署 PPTP VPN 和 L2TP + IPSEC VPN">用 Docker 快速部署 PPTP VPN 和 L2TP + IPSEC VPN</a> 一文中，我介绍了如何使用 Docker k快速署 L2TP IPSec VPN，但是在纯血鸿蒙下一直无法成功。</p>
<p>发现是因为无法匹配通讯加密方法。</p>
<p>进入容器，如下修改一下 <code>/etc/ipsec.conf</code> 文件的通讯加密方法，</p>
<figure class="highlight plaintext"><table><tr><td class="code"><pre><span class="line">conn l2tp-psk</span><br><span class="line">    ...</span><br><span class="line">    ike=aes128-sha1-modp1024,aes256-sha1-modp1024  # 匹配客户端的AES-CBC + SHA1 + MODP1024</span><br><span class="line">    phase2alg=aes128-sha1  # 第二阶段算法也需匹配</span><br><span class="line">    ...</span><br></pre></td></tr></table></figure>

<p>之后重启服务即可，<code>service ipsec restart</code>。</p>
]]></content>
      <tags>
        <tag>经验</tag>
        <tag>服务器</tag>
      </tags>
  </entry>
  <entry>
    <title>Stellar开发中关于offer相关的总结</title>
    <url>/2018/03/19/stellar-dev-summarize.html</url>
    <content><![CDATA[<p>最近完工的 <a href="https://steemit.com/utopian-io/@ety001/stellarbot-v0-0-8-has-been-released">StellarBot v0.0.8</a> 对核心进行了重写，由于之前赶比赛进度，一直没有在offer这块搞明白。这次花了大量的时间来研究orderbook和创建offer这两部分的重要参数。这篇文章就是对于之前研究的一个总结。（是不是现在就已经开始晕了？一会order一会offer的。）</p>
<p>本文将会根据 <code>base/counter</code> 为交易单位来总结，如果对于 <code>base/counter</code> 还不明白的，请先看我之前写的 <a href="https://steemit.com/cn/@ety001/6duqmh">这篇文章</a>，里面解释了这种单位的意思是怎样的。</p>
<h1 id="Orderbook"><a href="#Orderbook" class="headerlink" title="Orderbook"></a>Orderbook</h1><figure class="highlight plaintext"><table><tr><td class="code"><pre><span class="line">GET /order_book?selling_asset_type=&#123;selling_asset_type&#125;&amp;selling_asset_code=&#123;selling_asset_code&#125;&amp;selling_asset_issuer=&#123;selling_asset_issuer&#125;&amp;buying_asset_type=&#123;buying_asset_type&#125;&amp;buying_asset_code=&#123;buying_asset_code&#125;&amp;buying_asset_issuer=&#123;buying_asset_issuer&#125;&amp;limit=&#123;limit&#125;</span><br></pre></td></tr></table></figure>

<p>上面的就是 <em>Orderbook</em> 的 <em>REST API</em>。我们可以看到这个接口有以下参数：</p>
<table>
<thead>
<tr>
<th>name</th>
<th>notes</th>
<th>description</th>
<th>example</th>
</tr>
</thead>
<tbody><tr>
<td><code>selling_asset_type</code></td>
<td>required, string</td>
<td>Type of the Asset being sold</td>
<td><code>native</code></td>
</tr>
<tr>
<td><code>selling_asset_code</code></td>
<td>optional, string</td>
<td>Code of the Asset being sold</td>
<td><code>USD</code></td>
</tr>
<tr>
<td><code>selling_asset_issuer</code></td>
<td>optional, string</td>
<td>Account ID of the issuer of the Asset being sold</td>
<td><code>GA2HGBJIJKI6O4XEM7CZWY5PS6GKSXL6D34ERAJYQSPYA6X6AI7HYW36</code></td>
</tr>
<tr>
<td><code>buying_asset_type</code></td>
<td>required, string</td>
<td>Type of the Asset being bought</td>
<td><code>credit_alphanum4</code></td>
</tr>
<tr>
<td><code>buying_asset_code</code></td>
<td>optional, string</td>
<td>Code of the Asset being bought</td>
<td><code>BTC</code></td>
</tr>
<tr>
<td><code>buying_asset_issuer</code></td>
<td>optional, string</td>
<td>Account ID of the issuer of the Asset being bought</td>
<td><code>GD6VWBXI6NY3AOOR55RLVQ4MNIDSXE5JSAVXUTF35FRRI72LYPI3WL6Z</code></td>
</tr>
<tr>
<td><code>limit</code></td>
<td>optional, string</td>
<td>Limit the number of items returned</td>
<td><code>20</code></td>
</tr>
</tbody></table>
<p>（该表格来自 <a href="https://www.stellar.org/developers/horizon/reference/endpoints/orderbook-details.html">https://www.stellar.org/developers/horizon/reference/endpoints/orderbook-details.html</a>）</p>
<p>官方给的这张表格，感觉太不好理解了，以下是我总结出来的参数和 <code>base/counter</code> 的对应关系：</p>
<p><img src="https://steemitimages.com/DQmf8dnAFZbrBHrtAEPQbkDjPKqzdTjatsnTVkDeWo9JduQ/1.png" alt="1.png"></p>
<p>再结合着实际的数据来看一下（<a href="https://horizon.stellar.org/order_book?selling_asset_type=native&buying_asset_type=credit_alphanum4&buying_asset_code=CNY&buying_asset_issuer=GAREELUB43IRHWEASCFBLKHURCGMHE5IF6XSE7EXDLACYHGRHM43RFOX&limit=2">接口</a> 返回数据与钱包数据的对应图）：</p>
<p><img src="https://steemitimages.com/DQmanWcxba8m88vtDUBHsZ3dSVUJCkHTt2LZFfaZyzE4QaM/image.png"></p>
<p><strong>注意 <em>Orderbook</em> 接口返回的数据里，买卖单的 <code>amount</code> 是不同货币的》</strong></p>
<h1 id="提交-Offer-的各种参数"><a href="#提交-Offer-的各种参数" class="headerlink" title="提交 Offer 的各种参数"></a>提交 Offer 的各种参数</h1><p>在 <em>Stellar</em> 系统里把单个订单称作 <em>offer</em>，这就跟之前的 <em>orderbook</em> 感觉跟别扭。这样的命名别扭会一直贯穿整个开发过程，所以我直接在我的代码里用了 <em>order</em> 代替 <em>offer</em>。</p>
<p>管理订单的接口文档 <a href="https://www.stellar.org/developers/horizon/reference/resources/operation.html#manage-offer">在这里</a> 可以看到，我摘录过来相关的参数表格如下：</p>
<table>
<thead>
<tr>
<th>Field</th>
<th>Type</th>
<th>Description</th>
</tr>
</thead>
<tbody><tr>
<td>offer_id</td>
<td>number</td>
<td>Offer ID.</td>
</tr>
<tr>
<td>amount</td>
<td>string</td>
<td>Amount of asset to be sold.</td>
</tr>
<tr>
<td>buying_asset_code</td>
<td>string</td>
<td>The code of asset to buy.</td>
</tr>
<tr>
<td>buying_asset_issuer</td>
<td>string</td>
<td>The issuer of asset to buy.</td>
</tr>
<tr>
<td>buying_asset_type</td>
<td>string</td>
<td>Type of asset to buy (native &#x2F; alphanum4 &#x2F; alphanum12)</td>
</tr>
<tr>
<td>price</td>
<td>string</td>
<td>Price to buy a buying_asset</td>
</tr>
<tr>
<td>price_r</td>
<td>Object</td>
<td>n: price numerator, d: price denominator</td>
</tr>
<tr>
<td>selling_asset_code</td>
<td>string</td>
<td>The code of asset to sell.</td>
</tr>
<tr>
<td>selling_asset_issuer</td>
<td>string</td>
<td>The issuer of asset to sell.</td>
</tr>
<tr>
<td>selling_asset_type</td>
<td>string</td>
<td>Type of asset to sell (native &#x2F; alphanum4 &#x2F; alphanum12)</td>
</tr>
</tbody></table>
<p><strong>这里面最需要注意的就是 <em>price</em> 的计算是不同于 <em>orderbook</em> 中的 <em>price</em> 的。</strong>，以下是我总结的参数(params)和 <em>base&#x2F;counter</em> 的对应关系：</p>
<p><img src="https://steemitimages.com/DQmRx5cHkkZN5bnLRDkFuk4YqR5C1U2PZfXDSaBRQwrNcXo/%E5%88%9B%E6%84%8F%20-%209.png" alt="创意 - 9.png"></p>
<h1 id="总结"><a href="#总结" class="headerlink" title="总结"></a>总结</h1><p>开发中，主要注意的就是各个位置的 <em>price</em> 和 <em>amount</em> 计算和其代表的意义。多对照钱包和接口返回数据看几遍，应该就可以慢慢的参透其中的奥义，也就能看明白我总结的两张图里面的意思。再开发的时候，我的这两张图就会起到类似公式一样的作用。</p>
]]></content>
      <tags>
        <tag>理论</tag>
        <tag>教程</tag>
      </tags>
  </entry>
  <entry>
    <title>hclient-cli 纯终端界面下接入懒猫网络工具</title>
    <url>/2025/02/18/hclient-cli.html</url>
    <content><![CDATA[<h1 id="简介"><a href="#简介" class="headerlink" title="简介"></a>简介</h1><p><a href="https://gitee.com/lazycatcloud/hclient-cli">hclient-cli</a> 是官方推出的一个面向无图形界面的机器的接入方案。</p>
<p>有这个工具的情况下，我们可以让我们远端的服务器接入到懒猫的网络中，访问懒猫上的数据资源。</p>
<h1 id="使用"><a href="#使用" class="headerlink" title="使用"></a>使用</h1><p>官方库文档有接口的使用说明，这里就不再阐述，我<a href="https://gitee.com/lazycatcloud/hclient-cli/pulls/2">提交了一个 PR</a>，对官方的接口简单的用 bash 脚本封装了一下，减少使用过程中的输入量。同时还包含了一个构建 Docker 镜像的方案，其实就是把 cli 程序加入到镜像中。</p>
<p>目前我的远端服务是 Docker 容器形式运行的，因此这里分享一下 Docker 使用样例。</p>
<p>这里的远端应用以我的远端服务器上的青龙面板为例。</p>
<p>首先给出一个 Docker 容器启动命令示例：</p>
<figure class="highlight plaintext"><table><tr><td class="code"><pre><span class="line">docker run -itd \</span><br><span class="line">    --privileged \</span><br><span class="line">    --name lazycat \</span><br><span class="line">    --hostname lazycat_in_docker \</span><br><span class="line">    --restart always \</span><br><span class="line">    --network lnmp \</span><br><span class="line">    --ip 172.20.0.66 \</span><br><span class="line">    -p 127.0.0.1:7777:7777 \</span><br><span class="line">    -p 127.0.0.1:61090:61090 \</span><br><span class="line">    -v /data/cfg:/app/cfg \</span><br><span class="line">    ety001/lazycat-cli:latest \</span><br><span class="line">    /app/hclient-cli \</span><br><span class="line">      -api-addr &quot;172.20.0.66:7777&quot; \</span><br><span class="line">      -http-addr &quot;172.20.0.66:61090&quot;</span><br></pre></td></tr></table></figure>

<blockquote>
<ol>
<li>请注意不要暴露你的 7777 管理端口和 61090 代理端口给全局网络</li>
<li>容器启动后，所有 lnmp 网络中的容器可以通过 <code>172.20.0.66:61090</code> 代理访问懒猫资源。</li>
<li>宿主机可以通过 <code>127.0.0.1:7777</code> 管理，通过 <code>127.0.0.1:61090</code> 代理访问。</li>
</ol>
</blockquote>
<p>在宿主机中，调用 <code>cmd.sh</code> （在我的那个 PR 中）完成懒猫网络的登陆。</p>
<figure class="highlight plaintext"><table><tr><td class="code"><pre><span class="line">./cmd.sh add_box</span><br><span class="line">./cmd.sh add_tfa</span><br><span class="line">./cmd.sh client_info</span><br></pre></td></tr></table></figure>

<p>登陆成功后，打开远端的青龙面板，安装依赖 <code>axios</code> 和 <code>https-proxy-agent</code>。之后增加环境变量配置如下：</p>
<figure class="highlight plaintext"><table><tr><td class="code"><pre><span class="line">LAZYCAT_PROXY=http://172.20.0.66:61090</span><br><span class="line">INFLUXDB_TOKEN=xxxx</span><br><span class="line">INFLUXDB_URL=http://influxdb.ecat.heiyu.space:8086</span><br></pre></td></tr></table></figure>

<p>创建一个新的测试 js 脚本如下：</p>
<figure class="highlight plaintext"><table><tr><td class="code"><pre><span class="line">const axios = require(&#x27;axios&#x27;);</span><br><span class="line">const &#123; HttpsProxyAgent &#125; = require(&#x27;https-proxy-agent&#x27;);</span><br><span class="line"></span><br><span class="line">const proxy = process.env.LAZYCAT_PROXY;</span><br><span class="line">const agent = new HttpsProxyAgent(proxy);</span><br><span class="line"></span><br><span class="line">// 自定义 HTTP 客户端，使用 axios 和代理</span><br><span class="line">const customHttpClient = axios.create(&#123;</span><br><span class="line">    httpAgent: agent,</span><br><span class="line">    httpsAgent: agent,</span><br><span class="line">&#125;);</span><br><span class="line"></span><br><span class="line">const token = process.env.INFLUXDB_TOKEN;</span><br><span class="line">const url = process.env.INFLUXDB_URL;</span><br><span class="line">const org = &#x27;default&#x27;;</span><br><span class="line">const bucket = &#x27;steem&#x27;;</span><br><span class="line"></span><br><span class="line"></span><br><span class="line">// 定义 Flux 查询</span><br><span class="line">const fluxQuery = `</span><br><span class="line">  from(bucket: &quot;$&#123;bucket&#125;&quot;)</span><br><span class="line">    |&gt; range(start: -1h)</span><br><span class="line">    |&gt; filter(fn: (r) =&gt; r._measurement == &quot;price&quot;)</span><br><span class="line">    |&gt; filter(fn: (r) =&gt; r._field == &quot;lowest_ask&quot;)</span><br><span class="line">`;</span><br><span class="line"></span><br><span class="line">// 发送查询请求</span><br><span class="line">async function queryData() &#123;</span><br><span class="line">  try &#123;</span><br><span class="line">    const response = await customHttpClient.post(</span><br><span class="line">      `$&#123;url&#125;/api/v2/query?org=$&#123;org&#125;`,</span><br><span class="line">      &#123;</span><br><span class="line">        query: fluxQuery,</span><br><span class="line">        type: &#x27;flux&#x27;,</span><br><span class="line">      &#125;,</span><br><span class="line">      &#123;</span><br><span class="line">        headers: &#123;</span><br><span class="line">          Authorization: `Token $&#123;token&#125;`,</span><br><span class="line">          &#x27;Content-Type&#x27;: &#x27;application/json&#x27;,</span><br><span class="line">        &#125;,</span><br><span class="line">      &#125;</span><br><span class="line">    );</span><br><span class="line">    console.log(&#x27;查询结果:&#x27;, response.data);</span><br><span class="line">  &#125; catch (error) &#123;</span><br><span class="line">    console.error(&#x27;查询数据时出错:&#x27;, error.response ? error.response.data : error.message);</span><br><span class="line">  &#125;</span><br><span class="line">&#125;</span><br><span class="line"></span><br><span class="line">queryData();</span><br></pre></td></tr></table></figure>

<p>调试运行，成功获取到懒猫微服上的 <code>Influxdb</code> 中的数据。</p>
<p><img src="/img/2025/286002a6-e5d5-4aaa-90d8-f99d5be5a4d3.png" alt="image.png" title="image.png"></p>
]]></content>
      <tags>
        <tag>经验</tag>
        <tag>服务器</tag>
      </tags>
  </entry>
</search>
