Akawa

ETY001的博客

好的吧,终于搞定了aria2c的开机自启动问题。No zuo no die,离开计算所后,好像很久没有这么折腾了,
一个配置的问题引发的一系列的问题。

简单说下我的环境是树莓派 + Archlinux,看着 ArchWiki 上面关于 aria2c 的相关页面
很快就安装配置ok了,不过,重启后,发现 aria2c 根本就没有启动起来。报错信息如下:

1
2
Mar 31 22:31:40 alarmpi aria2c[150]: 03/31 22:31:40 [ERROR] IPv4 RPC: failed to bind TCP port 6800
Mar 31 22:31:40 alarmpi aria2c[150]: Exception: [SocketCore.cc:293] errorCode=1 Failed to bind a socket, cause: Name or service not known

绑定失败?怎么破?

再看下 Wiki 上 /etc/systemd/system/aria2c.service 这个配置文件,貌似没啥问题,然后又手动启动了下,也失败了。
执行 systemctl status aria2c 发现程序成功返回0,systemctl显示也是正在执行,但是ps一下,没有aria2c的进程。

见鬼了!

继续看 wiki ,发现里面说到

1
Ensure your config is set to deamonize (use daemon=true).

我的配置文件没问题,已经加了daemon=true。。。恍惚了好久,在wiki上看到了systemd的页面,看到里面有这么一句话,

1
Type=forking: systemd considers the service started up once the process forks and the parent has exited. For classic daemons use this type unless you know that it is not necessary.

然后我在原来的wiki给出的那个配置的基础上加上了一行 Type=forking(也就是你们现在在wiki中看到的那样,我已经提交修改到wiki了)。

添加好以后,手动启动 systemctl start aria2c 成功!赶紧重启试试。结果还是不行,依旧报错,还是绑定的问题。

后来,就又继续看systemd的配置,尝试添加wants和requires之类的配置,但是都不管用,不过看了这么一段话,在这个页面

1
The most typical case is that the unit A requires the unit B to be running before A is started. In that case add Requires=B and After=B to the [Unit] section of A. If the dependency is optional, add Wants=B and After=B instead. Note that Wants= and Requires= do not imply After=, meaning that if After= is not specified, the two units will be started in parallel.

好吧,wiki给出的那个配置还不是很完善,我又加上了一行,最终配置如下

1
2
3
4
5
6
7
8
9
10
11
12
13
14
15
16
file path:
/etc/systemd/system/aria2c.service

file content:
[Unit]
Description=Aria2c download manager
Requires=network.target
After=network.target

[Service]
User=aria2
Type=forking
ExecStart=/usr/bin/aria2c --conf-path=/home/aria2/.aria2/aria2.daemon

[Install]
WantedBy=multi-user.target

再次重启试试,还是不行。。。继续看配置,发现 systemd 还可以配置 timer,我想,既然开机启动不成功,
而开机后手动启动可以,就证明有什么依赖的程序没有启动,系统就启动 aria2c 了,那我延时执行不久可以了么。
于是看文档学习下,写了个针对 aria2c 的 timer,代码如下:

1
2
3
4
5
6
7
8
9
10
11
12
13
file path:
/etc/systemd/system/aria2c.timer

file content:
[Unit]
Description=Run on boot

[Timer]
#10 seconds
OnBootSec=10

[Install]
WantedBy=timers.target

重启成功。这里我忽略了我测试OnBootSec的步骤,其实刚开始是1,结果有时候能启动,有时候启动不起来,才改成10的。

本来以为这就告一段落了,但是突然不知道怎么想的,脑子里闪现静态ip这个词,于是,也就顺带看看systemd的网络配置怎么搞的。
配置好静态ip后,就手贱的把这个 timer 关掉了,然后奇迹发生,aria2c 启动成功!好的吧,原来是这个地方的坑啊。。

收拾下战场,完善下 ArchWiki 的 Start aria2c on system boot 这一节的内容,顺带着去ArchBBS上把一个帖子也回复了
(我放狗搜遍网络,就这一个哥们跟我遇到了同样的问题,却没有被解决)。

就在我快要写完这篇博文的时候,收到了 ArchWiki 管理员的回复,关于daemon=true与Type=forking的这个修改接受了,
不过,对于failed to bind errors则没有接受,可能再接下来的版本会修复这个bug。(PS:庆幸我写的英文,管理员看懂了。)

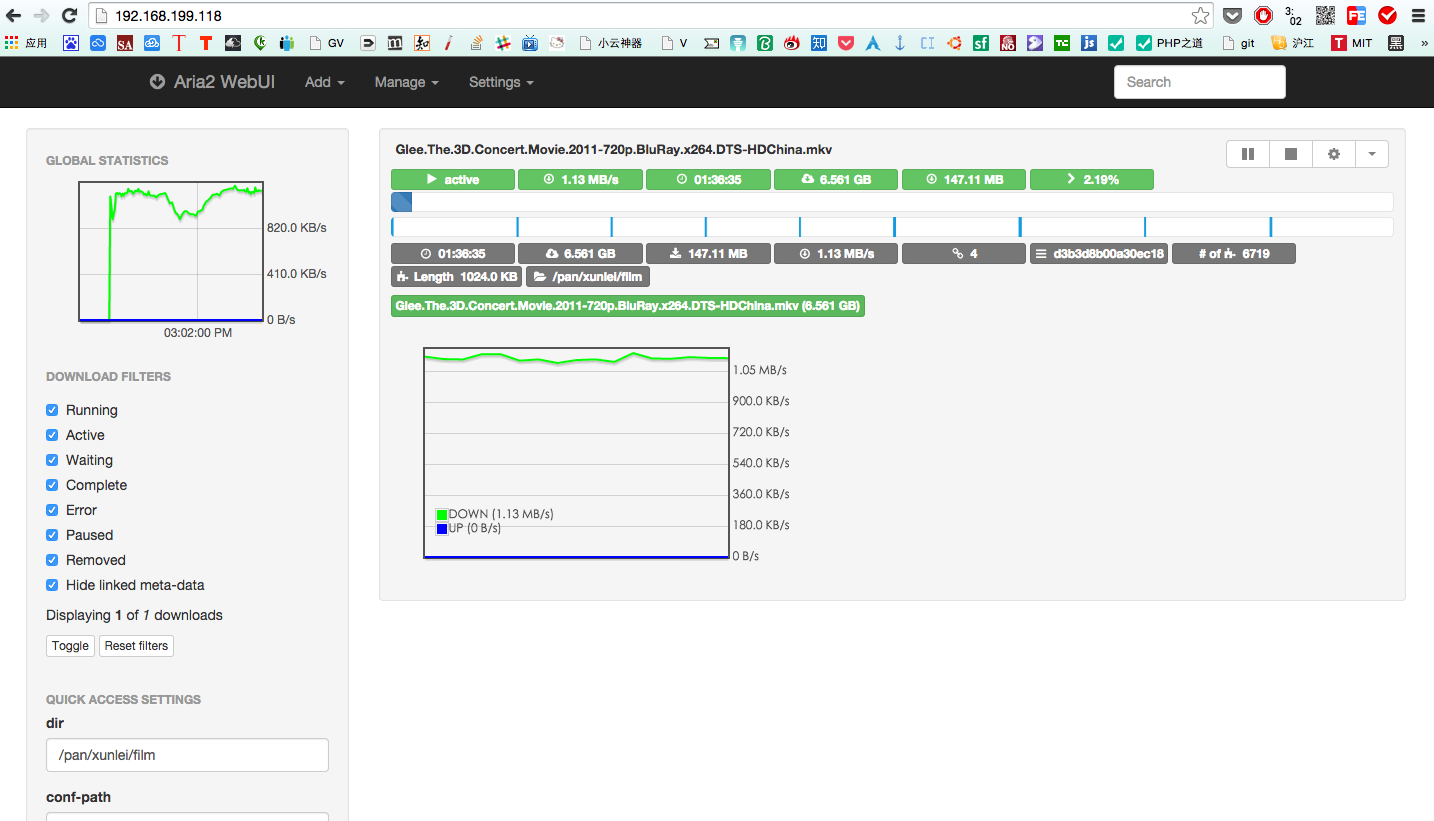
最后放出我的 aria2 的网页管理界面,终于完工了,下载个Glee 3D Concert测试下:

aria2

回到家后整理完所有的行李后,第一件事,就是把我的树莓派上电,但是系统起来后,发现分区是read-only的状态,
于是输入下面的命令,发现了错误:

1
2
3
4
5
6
7
8
9
10
11
12
13
14
15
16
17
18
19
20
21
22
23
24
25
26
27
28
29
30
31
32
33
34
35
36
37
38
39
[root@alarmpi ~]# mount
/dev/mmcblk0p2 on / type ext4 (ro,relatime,data=ordered)
devtmpfs on /dev type devtmpfs (rw,relatime,size=217368k,nr_inodes=54342,mode=755)
sysfs on /sys type sysfs (rw,nosuid,nodev,noexec,relatime)
proc on /proc type proc (rw,nosuid,nodev,noexec,relatime)
securityfs on /sys/kernel/security type securityfs (rw,nosuid,nodev,noexec,relatime)
tmpfs on /dev/shm type tmpfs (rw,nosuid,nodev)
devpts on /dev/pts type devpts (rw,nosuid,noexec,relatime,gid=5,mode=620,ptmxmode=000)
tmpfs on /run type tmpfs (rw,nosuid,nodev,mode=755)
tmpfs on /sys/fs/cgroup type tmpfs (ro,nosuid,nodev,noexec,mode=755)
cgroup on /sys/fs/cgroup/systemd type cgroup (rw,nosuid,nodev,noexec,relatime,xattr,release_agent=/usr/lib/systemd/systemd-cgroups-agent,name=systemd)
cgroup on /sys/fs/cgroup/net_cls,net_prio type cgroup (rw,nosuid,nodev,noexec,relatime,net_cls,net_prio)
cgroup on /sys/fs/cgroup/devices type cgroup (rw,nosuid,nodev,noexec,relatime,devices)
cgroup on /sys/fs/cgroup/cpu,cpuacct type cgroup (rw,nosuid,nodev,noexec,relatime,cpu,cpuacct)
cgroup on /sys/fs/cgroup/freezer type cgroup (rw,nosuid,nodev,noexec,relatime,freezer)
cgroup on /sys/fs/cgroup/perf_event type cgroup (rw,nosuid,nodev,noexec,relatime,perf_event)
cgroup on /sys/fs/cgroup/bfqio type cgroup (rw,nosuid,nodev,noexec,relatime,bfqio)
cgroup on /sys/fs/cgroup/blkio type cgroup (rw,nosuid,nodev,noexec,relatime,blkio)
cgroup on /sys/fs/cgroup/cpuset type cgroup (rw,nosuid,nodev,noexec,relatime,cpuset)
systemd-1 on /proc/sys/fs/binfmt_misc type autofs (rw,relatime,fd=22,pgrp=1,timeout=300,minproto=5,maxproto=5,direct)
tmpfs on /tmp type tmpfs (rw)
mqueue on /dev/mqueue type mqueue (rw,relatime)
debugfs on /sys/kernel/debug type debugfs (rw,relatime)
configfs on /sys/kernel/config type configfs (rw,relatime)
/dev/mmcblk0p1 on /boot type vfat (rw,relatime,fmask=0022,dmask=0022,codepage=437,iocharset=ascii,shortname=mixed,errors=remount-ro)
/dev/sda1 on /pan type ext4 (rw,relatime,data=ordered)
tmpfs on /run/user/0 type tmpfs (rw,nosuid,nodev,relatime,size=44324k,mode=700)

[root@alarmpi ~]# dmesg | tail
[ 7.324417] systemd[1]: Started udev Coldplug all Devices.
[ 8.018313] systemd[1]: Started Journal Service.
[ 8.866288] systemd-journald[95]: Received request to flush runtime journal from PID 1
[ 10.234796] random: nonblocking pool is initialized
[ 10.244188] FAT-fs (mmcblk0p1): Volume was not properly unmounted. Some data may be corrupt. Please run fsck.
[ 11.250720] EXT4-fs (sda1): mounted filesystem with ordered data mode. Opts: (null)
[ 12.784305] smsc95xx 1-1.1:1.0 eth0: hardware isn't capable of remote wakeup
[ 12.793837] IPv6: ADDRCONF(NETDEV_UP): eth0: link is not ready
[ 14.203803] smsc95xx 1-1.1:1.0 eth0: link up, 100Mbps, full-duplex, lpa 0x4DE1
[ 14.288086] IPv6: ADDRCONF(NETDEV_CHANGE): eth0: link becomes ready

发现/dev/mmcblk0p2是以ro模式挂载的,而mmcblk0p1分区可能有数据corrupt。执行下面的命令,把根目录重新挂载,
然后安装下fsck.fat,并修复/boot分区的data corrupt。

1
2
3
4
5
6
7
8
9
10
11
12
13
14
15
16
17
18
19
20
21
22
23
24
25
26
27
28
29
30
31
32
33
34
35
[root@alarmpi ~]# mount -o remount,rw /

[root@alarmpi ~]# pacman -S dosfstools
resolving dependencies...
looking for conflicting packages...

Packages (1) dosfstools-3.0.27-1

Total Download Size: 0.07 MiB
Total Installed Size: 0.24 MiB

:: Proceed with installation? [Y/n] y
:: Retrieving packages ...
dosfstools-3.0.27-1-armv6h 69.1 KiB 691K/s 00:00 [################################################################] 100%
(1/1) checking keys in keyring [################################################################] 100%
(1/1) checking package integrity [################################################################] 100%
(1/1) loading package files [################################################################] 100%
(1/1) checking for file conflicts [################################################################] 100%
(1/1) checking available disk space [################################################################] 100%
(1/1) installing dosfstools [################################################################] 100%

[root@alarmpi ~]# umount /boot

[root@alarmpi ~]fsck.fat -V /dev/mmcblk0p1
fsck.fat 3.0.27 (2014-11-12)
Starting check/repair pass.
Starting verification pass.
/dev/mmcblk0p1: 130 files, 7556/51091 clusters

[root@alarmpi ~]# fsck.fat -a /dev/mmcblk0p1
fsck.fat 3.0.27 (2014-11-12)
/dev/mmcblk0p1: 130 files, 7556/51091 clusters

[root@alarmpi ~]# mount /boot/

修复后,重启,发现/目录的挂载还是ro,于是看了下/boot/cmdline.txt

1
2
[root@alarmpi ~]# cat /boot/cmdline.txt
selinux=0 plymouth.enable=0 smsc95xx.turbo_mode=N dwc_otg.lpm_enable=0 console=ttyAMA0,115200 kgdboc=ttyAMA0,115200 console=tty1 root=/dev/mmcblk0p2 rootfstype=ext4 elevator=noop rootwait

在该文件的mmcblk0p2后面加入rw,如下

1
2
[root@alarmpi ~]# cat /boot/cmdline.txt
selinux=0 plymouth.enable=0 smsc95xx.turbo_mode=N dwc_otg.lpm_enable=0 console=ttyAMA0,115200 kgdboc=ttyAMA0,115200 console=tty1 root=/dev/mmcblk0p2 rw rootfstype=ext4 elevator=noop rootwait

重启后,一切正常了。不过这到底是啥原因导致的呢?经过google,发现是由于意外掉电频度太高,导致的数据损坏,参考这里。貌似好几篇文章都提到了,要把分区做成read-only,需要升级的时候再打开。由于现在我的树莓派内的软件还都没有完全调好,
所以就先不做成read-only了。以后做好bt下载机和家庭数据中心后,再来设置下。

今天线上遇到一个bug无法解决,于是去查Log,发现Thinkphp的Log设置的全开,很详细。
但是里面掺杂着很多无用的信息,于是需要写个脚本提取下,也为了日后高效处理日志。

脚本如下:

1
2
3
4
5
6
7
8
9
10
11
12
13
14
15
16
17
18
19
20
21
22
23
24
25
26
27
28
29
30
31
32
33
34
35
36
37
38
39
40
41
42
43
44
45
46
47
48
49
50
#!/bin/bash
read -p "Enter Filename: " filename
read -p "Enter Output Filename: " outputfilename
awk 'BEGIN{
linestart=1;
lineend=0;
iserr=0;
total=0;
}
{
arr[NR]=$0;
if($0 ~/ERR/){
iserr=1;
}
if($9 ~/^###/){
lineend=NR-1;
if(lineend!=0){
if(iserr==1){
for(i=linestart;i<=lineend;i++){
print arr[i];
delete arr[i];
}
print "";
total++;
iserr=0;
} else {
for(i=linestart;i<=lineend;i++){
delete arr[i];
}
}
linestart=NR;
}
}
}
END{
if(iserr==1){
for(i=linestart;i<=NR;i++){
print arr[i];
delete arr[i];
}
print "";
total++;
} else {
for(i=linestart;i<=NR;i++){
delete arr[i];
}
}
print "Total ERR:",total;
}' $filename > $outputfilename

样例数据:

点击这里下载样例数据

2019-11-09 补充
websocket 的反代

1
2
3
4
5
6
7
8
9
10
11
12
13
14
15
16
17
18
19
20
21
22
23
24
25
map $http_upgrade $connection_upgrade {
default upgrade;
'' close;
}

upstream websocket {
server 172.20.0.1:8090;
}

server {
listen 443 ssl;
server_name test.com;
ssl_certificate /etc/nginx/ssl/test.com.fullchain.cer;
ssl_certificate_key /etc/nginx/ssl/test.com.key;
ssl_ciphers "EECDH+AESGCM:EDH+AESGCM:AES256+EECDH:AES256+EDH";
ssl_protocols TLSv1 TLSv1.1 TLSv1.2;
ssl_prefer_server_ciphers on;
ssl_session_cache shared:SSL:10m;
location / {
proxy_pass http://websocket;
proxy_http_version 1.1;
proxy_set_header Upgrade $http_upgrade;
proxy_set_header Connection $connection_upgrade;
}
}

下面是简单的一个nginx反向代理的配置,只需要替换掉proxy_pass中的配置内容即可。

1
2
3
4
5
6
7
8
9
10
11
12
13
server
{
listen 80;
server_name fuckspam.in;
location / {
proxy_redirect off;
proxy_set_header Host $host;
proxy_set_header X-Real-IP $remote_addr;
proxy_set_header X-Forwarded-For $proxy_add_x_forwarded_for;
proxy_pass http://192.168.10.1:3000;
}
}

这算是file_put_content的高级用法了吧~

1
2
3
4
5
6
7
8
9
10
11
$params     = array(
'access_token' => $access_token
);
$options = array(
'http' => array(
'method' => 'POST',
'content' => http_build_query($params)
)
);
$context = stream_context_create($options);
$r = file_get_contents($url, false, $context);

这两天在写第三方登录的SDK,其中遇到了一个有意思的问题,就是用file_get_content去读取github的接口的时候,
发现一直是false,而浏览器访问则没有问题。经过搜索,发现需要设置下user-agent,只要在php.ini中打开user-agent,
即可正常返回数据了。

这两天在写一个python脚本,以实现把数据从多个excel导入进一个mdb中,遇到了比较纠结的问题,

下面的代码是我把问题简化后的代码:

1
2
test = u'测试'
print(str(test))

执行后的报错信息如下:

1
2
3
Traceback (most recent call last):
File "<stdin>", line 1, in <module>
UnicodeEncodeError: 'ascii' codec can't encode characters in position 0-1: ordinal not in range(128)

在python下两者的转化需要使用decode和encode,具体情况如下:

1
2
3
4
5
a = '测试' # str类型
b = u'测试' # unicode类型

a.decode() # 把str类型解码,即为unicode类型
b.encode('utf-8') # 把unicode类型编码,即为str类型

每次装完树莓派上的系统,第一件事就是要把没有利用的SD卡空间利用上,因为img镜像一般都是最小化的,所以用dd还原镜像到SD卡后,SD卡都还会有一部分未使用的空间。
之前我一直都是装完系统,把SD卡笔记本上的gparted这种图形界面的软件进行扩容操作,由于现在笔记本上没有Archlinux系统了,所以这次就直接在树莓派上操作了。

[root@alarmpi ~]# fdisk /dev/mmcblk0

Welcome to fdisk (util-linux 2.25.2).
Changes will remain in memory only, until you decide to write them.
Be careful before using the write command.


Command (m for help): p
Disk /dev/mmcblk0: 14.9 GiB, 15931539456 bytes, 31116288 sectors
Units: sectors of 1 * 512 = 512 bytes
Sector size (logical/physical): 512 bytes / 512 bytes
I/O size (minimum/optimal): 512 bytes / 512 bytes
Disklabel type: dos
Disk identifier: 0x0e8c6e83

Device         Boot  Start     End Sectors  Size Id Type
/dev/mmcblk0p1        2048  206847  204800  100M  c W95 FAT32 (LBA)
/dev/mmcblk0p2      206848 2097151 1890304  923M 83 Linux

Command (m for help): d
Partition number (1,2, default 2): 2

Partition 2 has been deleted.

注意第二个分区的Start,记录下来。然后删掉第二个分区。

Command (m for help): n
Partition type
   p   primary (1 primary, 0 extended, 3 free)
   e   extended (container for logical partitions)
Select (default p): p
Partition number (2-4, default 2): 2
First sector (206848-31116287, default 206848):
Last sector, +sectors or +size{K,M,G,T,P} (206848-31116287, default 31116287):

Created a new partition 2 of type 'Linux' and of size 14.8 GiB.

Command (m for help): p
Disk /dev/mmcblk0: 14.9 GiB, 15931539456 bytes, 31116288 sectors
Units: sectors of 1 * 512 = 512 bytes
Sector size (logical/physical): 512 bytes / 512 bytes
I/O size (minimum/optimal): 512 bytes / 512 bytes
Disklabel type: dos
Disk identifier: 0x0e8c6e83

Device         Boot  Start      End  Sectors  Size Id Type
/dev/mmcblk0p1        2048   206847   204800  100M  c W95 FAT32 (LBA)
/dev/mmcblk0p2      206848 31116287 30909440 14.8G 83 Linux

创建个新的主分区,First sector输入第一步记录下来的那个值,也就是我这里的Default的值。新建好后,输入p查看,第二个分区的size已经调整完毕。

Command (m for help): w
The partition table has been altered.
Calling ioctl() to re-read partition table.
Re-reading the partition table failed.: Device or resource busy

The kernel still uses the old table. The new table will be used at the next reboot or after you run partprobe(8) or kpartx(8).

[root@alarmpi ~]# reboot

输入w,保存分区表并退出,会提示分区表写入失败,因为设备正忙,直接重启即可。

[root@alarmpi ~]# resize2fs /dev/mmcblk0p2
resize2fs 1.42.12 (29-Aug-2014)
Filesystem at /dev/mmcblk0p2 is mounted on /; on-line resizing required
old_desc_blocks = 1, new_desc_blocks = 2
The filesystem on /dev/mmcblk0p2 is now 3863680 (4k) blocks long.

[root@alarmpi ~]# df -h
Filesystem      Size  Used Avail Use% Mounted on
/dev/root        15G  647M   14G   5% /
devtmpfs        214M     0  214M   0% /dev
tmpfs           218M     0  218M   0% /dev/shm
tmpfs           218M  260K  218M   1% /run
tmpfs           218M     0  218M   0% /sys/fs/cgroup
tmpfs           218M     0  218M   0% /tmp
/dev/mmcblk0p1  100M   17M   84M  17% /boot
tmpfs            44M     0   44M   0% /run/user/0

重启后,立即执行resize2fs命令,df查看容量,Avail已经是14G啦,搞定,收工。

码字不易,见好就分享~

CentOS mini下面是没有fat格式的,如果要是想格式化fat格式,所以需要安装下,fat在dosfstools包里面。

yum install dosfstools

今天想用树莓派的时候,发现树莓派的ArchLinux系统坏了,于是就准备重新下载安装,但是发现官网好像已经不再提供现成的镜像了,需要自己手动制作镜像。。。点击这里查看官方提供的制作方法,下载地址

由于我用的是OSX,而官方给的教程是在Linux下的操作,于是我就开我的虚拟机操作,但是发现读卡器在虚拟机里的识别有些问题,于是相当要自己做个镜像包。

####第一步 建立空的镜像文件

dd if=/dev/zero of=new.img bs=2M count=512

因为ArchLinux本身不大,所以建立个1G的镜像文件足够了。

####第二步 用fdisk对new.img进行分区操作

fdisk new.img
  • 输入n进入建立新分区
  • 输入p,选择分区为主分区
  • 回车,默认1
  • 回车,默认开始扇区位置
  • 输入 +100M (引导分区100M足够)

这时,第一个分区建立完毕,回到主目录,输入t,再输入c,设置引导分区类型为W95 FAT32(LBA)。(刚开始烧了4遍,都引导树莓派失败了,就是因为忘记这一步操作了。。

  • 再输入n进入建立新分区
  • 输入p,选择分区为主分区
  • 回车,默认2
  • 回车,默认开始扇区位置
  • 回车,默认使用剩下所有空间。

这样两个分区搞定,输入w,保存分区表,并退出fdisk。

####第三步 挂载new.img成为设备

kpartx -av new.img

之前的两步都是我会的,但是第三步,我着实的折腾了一番,只是知道可以把img挂成设备用,但是不知道怎么搞,从网上搜索的结果,第一个搜索的是用losetup命令,但是出现的问题是,losetup是可以把镜像文件挂载为/dev/loop0,但是里面的分区一直在/dev中找不到。后来搜索 如何挂载虚拟机镜像 这个关键词,才找到了这条命令。这条命令执行后,会有以下设备出现

  • /dev/loop0
  • /dev/mapper/loop0p1
  • /dev/mapper/loop0p2

####第四步 格式化,挂载,并写入文件

mkfs.vfat /dev/mapper/loop0p1
mkdir /mnt/boot
mount /dev/mapper/loop0p1 /mnt/boot
mkfs.ext4 /dev/mapper/loop0p2
mkdir /mnt/root
mount /dev/mapper/loop0p2 /mnt/root

#去官网下载ARMv6 Raspberry Pi这个包
#下载后的文件是ArchLinuxARM-rpi-latest.tar.gz

#bsdtar 可能需要自己安装,yum install bsdtar即可
bsdtar -xpf ArchLinuxARM-rpi-latest.tar.gz -C /mnt/root/

#强制缓存写入
sync

#引导文件
mv /mnt/root/boot/* /mnt/boot/

#卸载
umount /mnt/boot/ /mnt/root/
kpartx -d new.img

这样一个新镜像就做好了,把new.img从虚拟机传出来,用dd直接写入SD卡,成功启动树莓派!

附带两个国内的ArchLinux ARM 的源:

#中科大
Server = http://mirrors.ustc.edu.cn/archlinuxarm/$arch/$repo
#清华
Server = http://mirrors.tuna.tsinghua.edu.cn/archlinuxarm/$arch/$repo

参考文章:Mounting a KVM disk image without KVM

码字不易,见好就分享~

0%